
DONATION DRIVE - SUPPORT MSW - DO YOUR PART TO KEEP THIS GREAT FORUM GOING!
×


popeye the sailor
-
Posts
16,007 -
Joined
-
Last visited
Content Type
Profiles
Forums
Gallery
Events
Everything posted by popeye the sailor
-
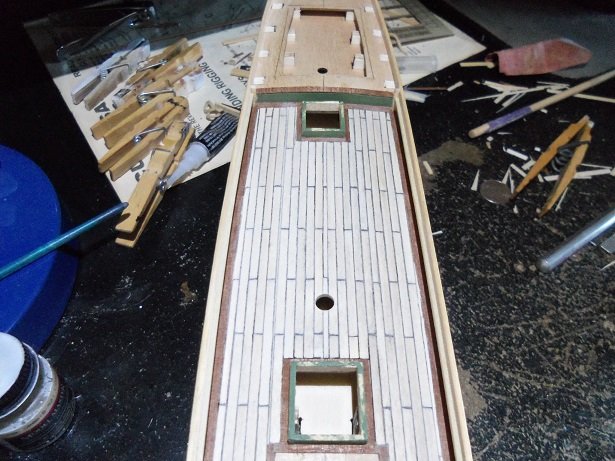
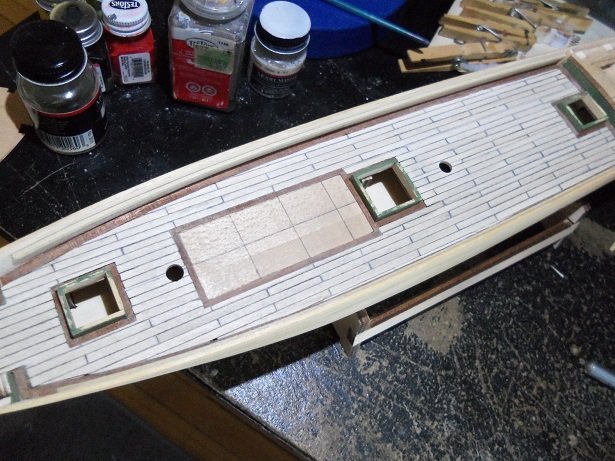
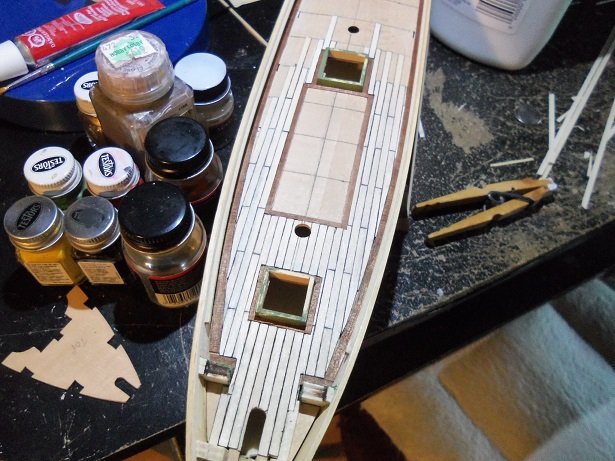
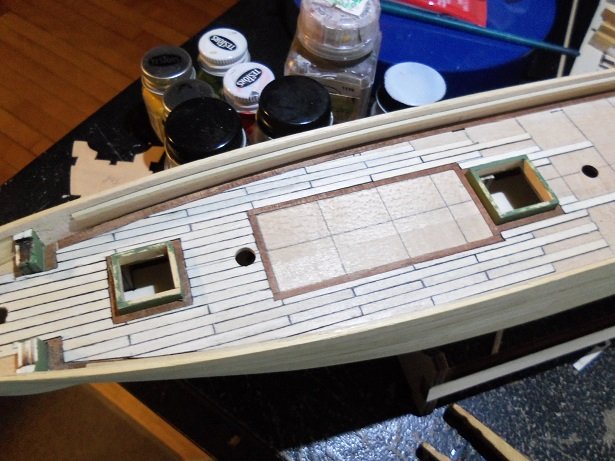
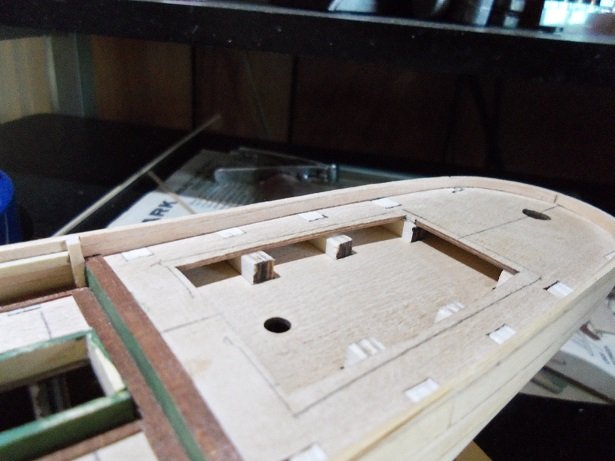
 thanks Patrick.....still more to go should look pretty good, when the layout is all put together. speaking of layout........the main deck is fully planked. one bit of advice I can give anyone who would be building this model in the future......fill in the hold and aft cabin punch outs and map them out yourself. I made a huge mistake in not mapping the deck platform out, before assembly.......I did it later, when elbow room was scarce. but I think the holds are not positioned properly, slightly off center. the fore hold could come aft a couple of mm's.........the mid ship hold could DEFINITELY come back a few, as it's position doesn't give enough room for the cabin structure. the aft hold could come forward a few mm's and get it away from the bulkhead. the holds are assembled around the openings......that's how I measured them. I left an overhang around them {seemed normal to me}, but I see that perhaps they shouldn't have had any. what spawned from all this was me having to alter the plank widths in a few rows, throughout the planking, in order to keep the rows in sync. I did redo one area......partially due to a messed up mast hole, but the outcome was the same. the mast hole came out better......that was a plus further thoughts of redoing it was shot down........if this were a larger scale, there might be more promise I also tried something I haven't done before......scraping the deck. limited due to the small spaces, but it worked well.....I finished off with sanding. I've not stained it because I still need to do the aft deck.....so no finishing will be done until the aft deck is planked. I'll do them both together. what are the rule concerning butt staggers before or after a hold....especially in the case of a short plank? should the hold frame work be centered between main beams?
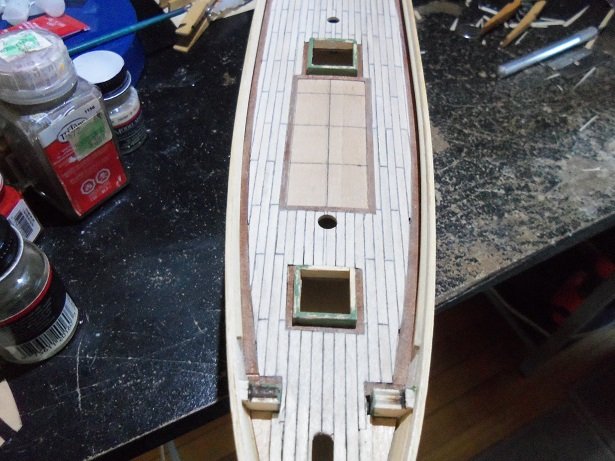
- 453 replies
-
- 13
-

-
- thermopylae
- sergal
- (and 1 more)
-
congratz Sjors! she's a beautiful ship............very well done and a great accomplishment!
- 1,616 replies
-
- 5
-
-
- caldercraft
- agamemnon
- (and 1 more)
-
Cutty Sark by NenadM
popeye the sailor replied to NenadM's topic in - Build logs for subjects built 1851 - 1900
Rhea has gotten bigger.....she's look'in good oh....and it's good to hear from you too- 4,152 replies
-
- 8
-
-
- cutty sark
- tehnodidakta
- (and 1 more)
-
thanks J........should have pictures of the entire main deck in a little while. surprisingly enough.........I got side tracked!
- 453 replies
-
- 4
-
-
- thermopylae
- sergal
- (and 1 more)
-
thanks for the good word gents....you may think otherwise when you see how the rest turned out. I'll get to that when I post the pictures thanks to all who hit the like button as well. thanks Scott and John with a scale this size........no, tree nailing is not an option thanks E.J. I'm using the mahogany to simulate teak wood. I've found that combining different woods, can have quite a bit of eye appeal. used in combination with different styles of deck planking, one can also add their own bit of decorative flare. I was looking at one build the other day, which I thought was very imaginative. thanks Pat......with what I've uncovered so far......let's just say that I'm still diligently looking for the ship in this box ....and to think.....the Syborn has taken a back seat to this one {not really, but it feels like it}. I do have to laugh......the size of this hull is nothing that I've dealt with before {oh wait!!!! I can't say that.....the Billing's AmericA}. anyway......I'm so used to laying the hull across my lap, as I work on it. I had the archive pen in my hand........I went to move and the hull began to roll off my lap! now it has a big swatch of India Ink on her port side kinda reminds me of my near damaging experience with my Epiphone bass guitar. it's shaped like a Gibson......it's called the Epiphone Les Paul for this reason. the one bad thing about this body design, is that it's prone to the strap to pop off. I was at practice one night......and in the middle of a song, it happened! it began to drop, and I grabbed it lightning quick! it has my claw marks in the fretboard to prove it.......it never hit the floor it now is equipped with strap locks. I'm almost finished with the main deck planking.......just a small area to go. that half circle of mahogany, i'm shaping is a pain.......it broke again. oh well.....>shrug< work continues
- 453 replies
-
- 7
-
-
- thermopylae
- sergal
- (and 1 more)
-
so good to see an update Hans such a fine looking vessel.
-
I know they carry basswood and balsa...........never seen thin strip though. I'll have to look. may save me an order to Billing USA.....that's where I get my planking wood.
- 453 replies
-
- 4
-
-
- thermopylae
- sergal
- (and 1 more)
-
you did a fantastic job with this build Hof. sails look great too
- 70 replies
-
- 2
-
-
- pen duick
- artesania latina
- (and 1 more)
-
nice looking model Hof. a friend of mine had a Billing's Bluenose that he couldn't finish due to illness. so I traded some hobby supplies for it.......it didn't fare too well in transit. besides the damage, I found a mistake with the instructions, with the help of a fellow member here. I ended up tearing it apart, but from it, I was able to clone two other hull frames. so it has turned into a project, that will be three schooners....the Bluenose, the Bluenose II, and the America {I had to cut out the cockpit for that hull}. should be an interesting build, once I can get it off the ground. I'll be sure to add your to the list of logs to look in on
- 21 replies
-
- 1
-
-
- bluenose ii
- artesania latina
- (and 1 more)
-
hey Don.....yea, I got a bunch of 0.5 x 25 x 550 mm strips of that mahogany. to cut it up like that can be a pain....it splinters like crazy. now I need to sand and shape it.......that will be another trilogy. I use an archive pen to do the calking. I get 'em at Hobby Lobby.....they have a huge selection. some are for calligraphy, sketching and drawing. the brand is Faber - Castell...med to fine tip.
- 453 replies
-
- 6
-
-
- thermopylae
- sergal
- (and 1 more)
-
I saw you had this build up and running Bob, and just had to join in can't wait to see more of your wonderful craftsmanship
- 682 replies
-
- 3
-
-
- halifax
- lumberyard
- (and 1 more)
-
when I called it a day, I am almost at the half way point. more will be done today
- 453 replies
-
- 14
-
-
- thermopylae
- sergal
- (and 1 more)
-
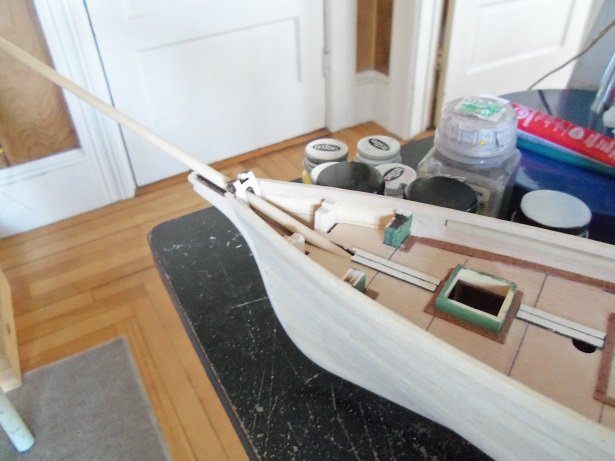
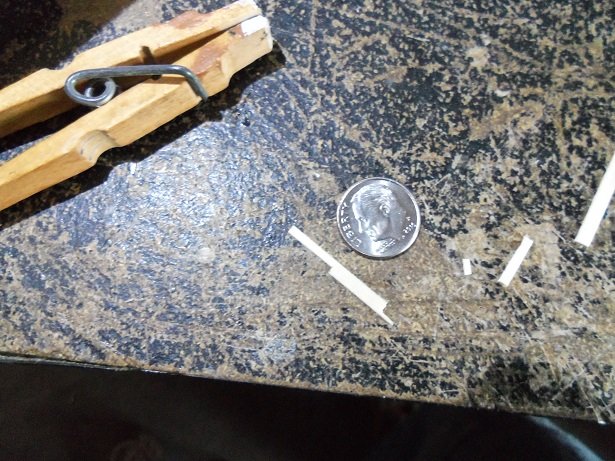
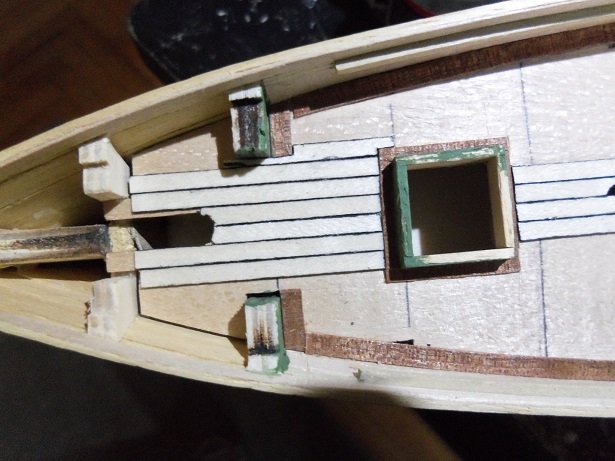
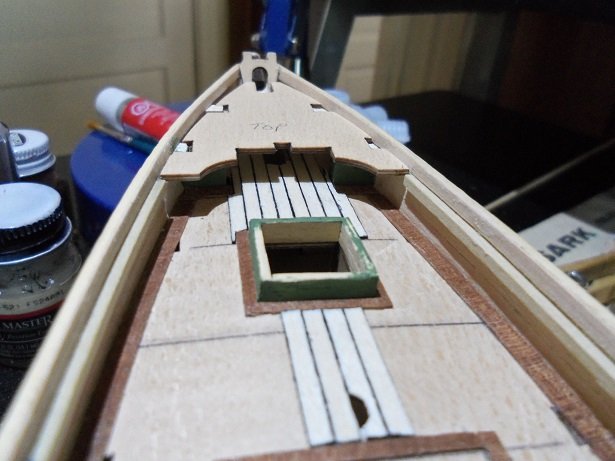
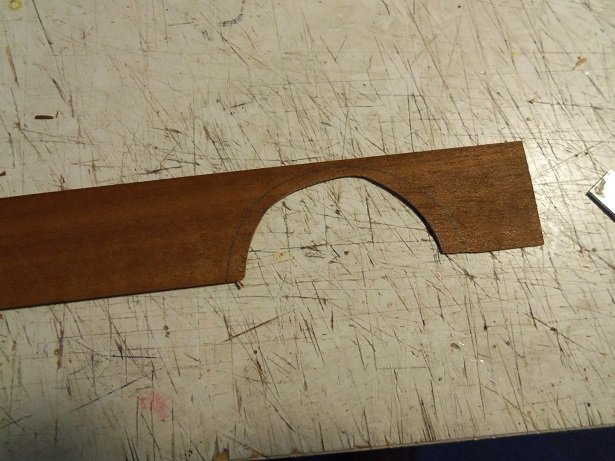
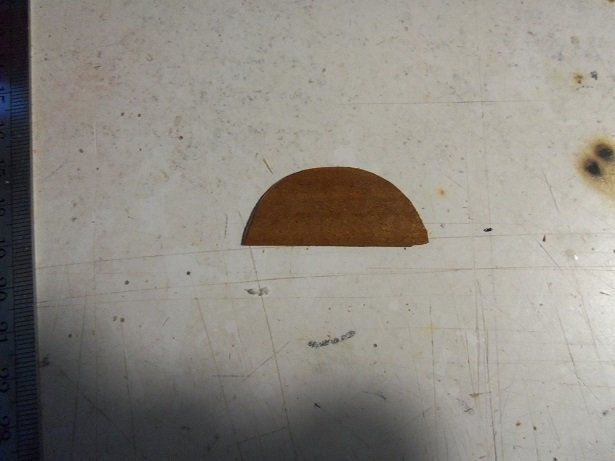
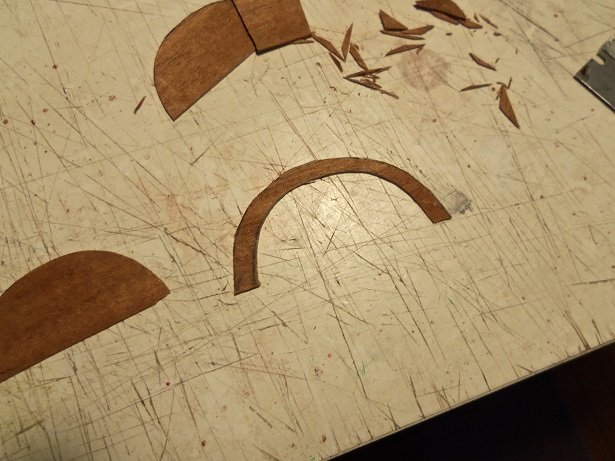
I was like paint with this ship yesterday.......I was all over it! I began planking the main deck..........starting at the bow. there is a big opening for the bow spirit......I wanted to make sure it would fit in there OK. I had to file the angle in the knight head hole, and got to see how much of it was really needed for the root. more planking ensued, filling in the area under the fore deck. I knew I'd need to be creative with some of the planks......odd cuts and shaping. here's one of the odd planks I had to make. the calking is done with an archive pen. I use the clothes pin to hold the planks as I do the calking. I had to make one for the starboard side............it's in place here. I just filled in what would be seen under the fore deck. with the windlass and pump in place, this may not be seen as much. I had filled in all around the first hold...then I had to rip it up, due to messing up the mast hole. at the other end of the ship, the aft bulwarks were getting the inner planking done. using a piece of the wide mahogany 0.5 mm flat strip, I tried making the waterway that runs around the transom. tracing the shape of the stern on the mahogany, I tried to hand draw the inner border.....I didn't do too good I took the cut out and cleaned it up. after tracing another stern outline on the mahogany, I used it to trace the inner cut out. this stuff is very brittle.......it put up a fight......broke a couple of times.........but I was able to rough out the part I need. both sides of the aft bulwarks are done.....
- 453 replies
-
- 9
-
-
- thermopylae
- sergal
- (and 1 more)
-
Hoorray!!!!!! as the three stooges once said "lady, once we get done, you won't even know the joint!" get the boys to do some cleaning........and your back on your merry way! great fix!
-
my......what a fine kettle of fish?!?!?! thanks for the conversion John..........so that would make her as large as the Revell kit........3 feet long! WOW!!!! thanks Pat. we do have an idea how small these hold covers are....right? it would be a feat to do......although it's not impossible. not only that......in the picture I showed, I have the boards running the same direction as the deck planking. I'll have to see if I can fit them to run the other way. I wasn't going to do the canvas thing........else I wouldn't have put all that time into them. yep...more thought needed....thanks again! I dunno Vossie........don't want to build the space shuttle I could make something of a jig with what I got here on the table..........but it's not really worth it. I'm about half done now......the aft deck and fore deck won't take much at all. so, for the small inconvenience, and how big the task is.....I'll just trudge on through thanks for the thought and idea though....I appreciate it! thanks Lawrence........yup, all better now, and back at it I'm chasing my own tail on this one..........but as I said.......there's a ship in this box somewhere.......I'll find it sooner or later. thanks for the good word! I just thought of an amusing idea........use a paper shredder.....to make planks!
- 453 replies
-
- 7
-
-
- thermopylae
- sergal
- (and 1 more)
-
thanks Russ at the moment I'm planking the main deck. I'm using 0.5 x 3 mm blonde {koto, obetchi, or basswood.....anyone's guess}.....and wouldn't you know it, the edges are rough. so, I'm having to sand the edges of every strip I use. fun like this should be outlawed! but all 'n all.......it's going fairly well. pictures soon. thanks for the good word so........nothing on the hold covers? I could do a test piece and show you what I want to do....see if it's OK. although....as I recall, Cyril's model had something like that on his. I'm sure his model is a larger scale than what I'm working with. I just checked, and his model is 1/8" to 1'.........not sure of the scale.
- 453 replies
-
- 6
-
-
- thermopylae
- sergal
- (and 1 more)
-
thanks John and Pat........I kinda thought the same thing......wasn't sure about the international thing. it's funny too...I was watching the Perfect Storm last night, and quite a few of their larger buoys were orange. cripes........I have plenty of orange. I could have painted them that color and been done with it. next one...........next one thanks for the good word and thanks to those who hit the like button
-
look'in good since the last time I was in I used to buy the modeler's plywood sold in craft stores.............now I buy the 3/16 half sheets from Home Depot and rip them down into 12 inch wide slices. pretty cost effective enough for me
- 420 replies
-
- 2
-
-
- captain roy
- lugger
- (and 2 more)
-
sounds like you got a good deal..........errrr, red or white? yep, that's quite a history you'll have a vintage model when your done.....that's fer sure
-
I'm thinking the lever in the center is for directional signals????? ....or is that for NOS? that is one cool wheel grant.......very well made!
- 339 replies
-
- 5
-
-
- dumas
- Chris-Craft
- (and 3 more)
-
neat idea Don.......I think the metal hardware might look more modern though. I'll keep it in mind though thanks for the idea.
- 453 replies
-
- 6
-
-
- thermopylae
- sergal
- (and 1 more)
-
I dare not put a like to that!!! it appears that you may need to do some scratch build'in. patch'in it back together may not be the way to go {is that a crack in the center?} if you are able to get some 1/16 flat stock {1/32 would be better}........insure that it will flex to the curvature that you need to obtain. I'm sure that you have some 1/16 square strip handy. bend the square stock to the desired curvature..........cut the flat stock to the size you need for the wall. what will help you here, is that the deck is likely shaped to the curvature as well........glue the parts you've cut to it. frame the wall from behind with the curved square stock {along the top edges}. with the top edge {you can frame it in more if you like} framed in, you should be able to drill the holes without splintering. I usually begin with small drills and work my way up.........finishing it off with round sanding sticks. I've been there before........I'm sure others have too. perhaps others can share a remedy to this problem. you can fix it my friend!
-
thanks for the kind comments and the likes. that's an interesting question Hof.......on clipper ships like the cutty, they are also covered with a tarp of sorts. I'm not going to do that.....I'd rather show the hold covers as they are. it would be hard pressed to find rings that small.........let alone try to attach them. but in reading your question, I seem to have come up with a cool solution. of course, they don't supply anything for this in the kit, but I do have some really small eye bolts. they are copper colored though, but I don't think it will matter in this case. all I would need to do is bend the rings over 90 degrees and drill holes to install them. four per cover should do the trick what do ya think of that? thanks Don and Patrick I think I'm starting to warm up to the kit {take my temperature.......is that possible?!?!?!?!} I'm beginning the deck planking.......first thing I looked at was how the bow spirit fit through the knight head. though this won't be seen, due to the fore deck and windlass, I wanted to make sure I ran the planking far enough under the fore deck. I'm still hesitant about cementing in the fore deck because of the hawse holes for the anchors. I've been looking at Cyril's model, and they appear to locate below the main deck platform.......inaccessible if this is true. the study continues...........and so does the deck planking thanks again to all interested
- 453 replies
-
- 7
-
-
- thermopylae
- sergal
- (and 1 more)
-
additional pictures are always worth the wait. now get that beauty in the gallery before it happens again