


popeye the sailor
-
Posts
16,007 -
Joined
-
Last visited
Content Type
Profiles
Forums
Gallery
Events
Everything posted by popeye the sailor
-
 catching up Michael.......you've made some great progress! wish I had the tools to make stanchions like that......they look really nice. it's a good thing you only have to remake a few of the davits.....imagine if you had to redo them all.........whooooo-boy! glad to see the restoration is going well. really something how damage can magnify, when you pick it apart to repair
- 749 replies
-
- 5
-

-
- albertic
- ocean liner
- (and 2 more)
-
amazing the amount of detail you've added to the funnels.........they look awesome! you mentioned trimming the vents.......with them tucked inside the model, why would you bother to do it? great job nils.....the funnels will look even better lashed down with the guy wires!
- 2,625 replies
-
- 6
-
-
- kaiser wilhelm der grosse
- passenger steamer
- (and 1 more)
-
glad to see you've started on your next masterpiece........looks like a very interesting project.
-
thank you all for the kind comments and all the likes! yes Sam......there should be tiny handles on the wheels. I may try and add something to that effect before I paint it. a lot of the detail was missing........I must study the Masters of Mini. and draw from them thanks John......with an example like that, how could I miss thanks my friend! thanks Bob thanks Patrick........yes, I'm feeling much better. the admiral can tell......I'm eating everything in sight! {forget about the losing weight part earlier........I was just pull'in my own leg! }
- 453 replies
-
- 11
-
-
- thermopylae
- sergal
- (and 1 more)
-
the movie is about the ship? a fitting tribute to your fine workmanship!
- 517 replies
-
- 1
-
-
- Endeavour
- Artesania Latina
- (and 1 more)
-
very interesting idea for the sails.....as long as you can maintain and keep the wrinkles for the sheet corners, they will look super! those wrinkles add a little extra detail
- 1,208 replies
-
- 4
-
-
- great republic
- clipper
- (and 1 more)
-
the dynamic duo! from start to finish, I have to agree that the build time was very well spent........but as I mentioned earlier, a well thought out plan and direction, will hasten a build. they were enjoyable to watch Bob........happy to see you had enough of that window film. congratz to you my friend.....you deserve every accolade for this fine pair of boats.
-
nothing short of amazing Nils............the funnels and vents look super! fantastic progress!
- 2,625 replies
-
- 6
-
-
- kaiser wilhelm der grosse
- passenger steamer
- (and 1 more)
-
awesome progress Kees.........love the detail you've put into her:) I had to show the admiral the three of them together..........I am not alone!
- 434 replies
-
- 9
-
-
- pelikaan
- beamtrawler
- (and 2 more)
-
it's amazing how your taking the plans and populating the decks..........1D to 3D! {I guess that would be correct to say}. distribution of color, pipes.....engine wells........man! your truly on your way to creating a very complex model.........and at a scale that leaves me in awe! fantastic work
-
hi all.......just a short note to let you know, I'm still bobb'in in the wake. what I thought was a stomach bug, turned out to be that my lower G.I. got washed out by the antibiotics I took. it hasn't been pleasant, but I'm on my fourth day of pro biotics, and slowly getting my house back in order. thanks for the well wish Patrick, and thanks to all who hit the like button. thanks Jesse.......I hope something will benefit you. I usually go in with an open mind.......something comes to it sooner or later.
-
as you can see by my posting on a Sunday.......I did not go to work. I'm still battling the effects of the stomach bug. I won't go into too much detail.......distasteful as it is, let's just say, that after two days, I'm back up and running again. the one good day I had did result in a bit of progress........the other day was spent at work on Saturday.......by the end of the day though.......I was hoping that the little blue pill I took, would wear off!. to dress up the pump, I ended up doing a few attempts, bending the shaft to accept the three connecting rods. I had drilled out the cylinders to give them more room. when I had one that was reasonable enough, brass eye bolts were used as connecting rods.....a little tedious to get them all in order. it still needs to be trimmed.......but at least it is now assembled. thanks for your patience.
- 453 replies
-
- 26
-
-
- thermopylae
- sergal
- (and 1 more)
-
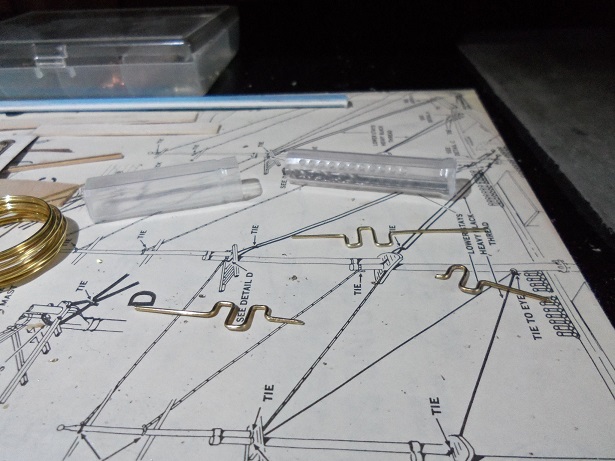
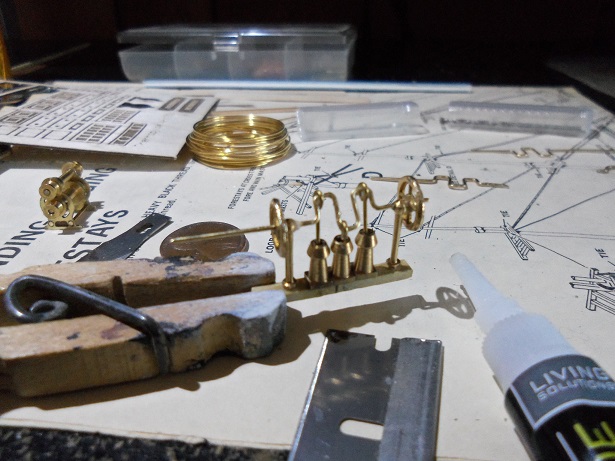
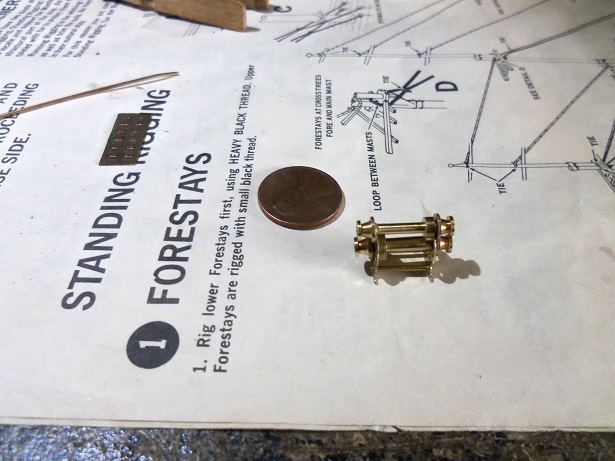
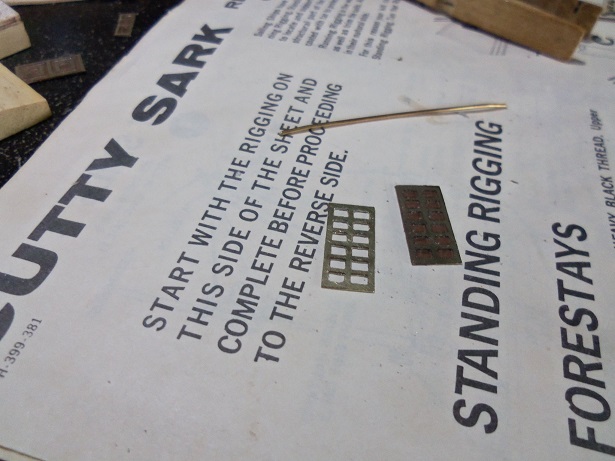
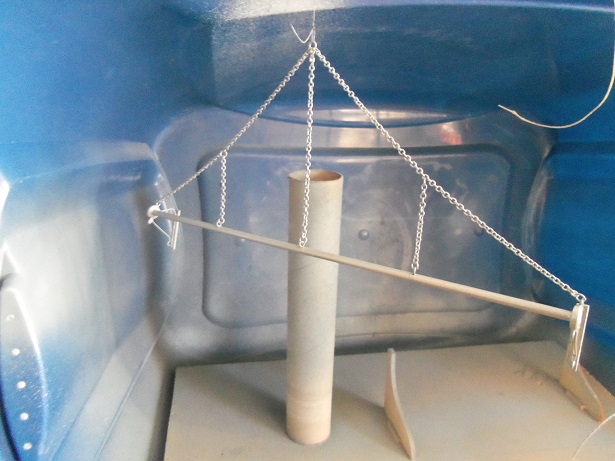
I had pictures in the camera for this build as well. I did get to dry fit the winch assembly.......and then it was assembled. I put 'er up next to a penny to show just how big it is. the idea I had carried over to the skylight roof parts. I have one of 'em done here. they are both done now. as I figured would happen, there is some minor scratches. I think a coat of lacquer will hide them though. we'll see what happens....the boxes are next, right along with the three holds. I know........I wasn't very kind in my description of the bilge pump. I'll let the diagram speak for itself..... these are the parts that will make up the pump. the first thing will be to drill out the cylinders.....they need a bit more depth and for the mouth to be a bit larger. then, I'll see what I can do about that straight line they call a shaft. ......and they rolled the brass up.......hate it when they do that. I assembled it while I was visiting here today.......fair bit of multi-tasking. I'll show you what I came up with when I get back..........now that I'm back on my feet, I'm not immune to errands anymore. "take care of those you call your own, and keep good company!" >Queen<

- 453 replies
-
- 18
-
-
- thermopylae
- sergal
- (and 1 more)
-
I did have two pictures in the camera. in this application, it's too bad there isn't a call for chrome silver.......they would have fit the bill nicely. I'm sure I can use these......hide them in paint or something. I think blackening would be hard, as I'm sure that they are coated with something. if I go back......I'll make sure I have my readers. then I can do a more complete search
-
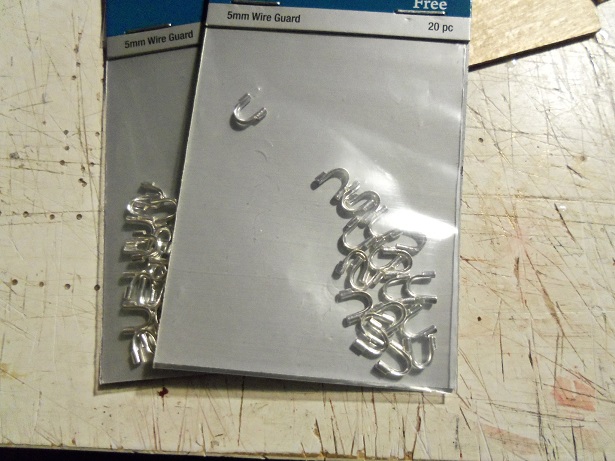
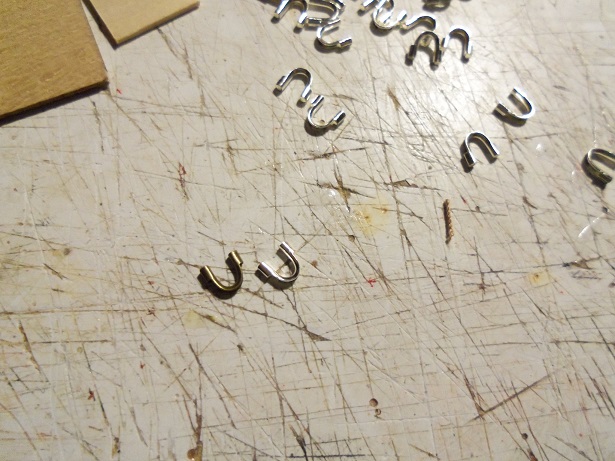
thanks Pat and Lawrence........and to those who hit the like button. things started out so well this week.......too bad it came to a screeching halt by Wednesday, with me getting a stomach bug. if anything came from it.......I hope I lost some weight I did make it to Hobby Lobby in search of some more of those shackle looking thingies....too bad I forgot my glasses and couldn't read the packages. it's a good thing the admiral was with me, yet again...........she found some. the ones I had are in antique or bronze.......the ones she found are like a chrome......or even a pearl color. no matter.....I can paint one up to match.......small consolation for not having any at all there might be a picture or two......I need to check the camera to see.....this being the first I've been at my computer, since I got hit with the bug. no Lawrence........we got hit with three bands of snow.......two little bands with the big one in the middle. we were so lucky for the month of January, until now.........February......28 days of hell. add the way I've been feeling into the mix, and it's living up to it's name in spades!
-
another point to mention, is that during the beginning of the planking, there might not be a need to taper. usually, it doesn't begin to appear, until after the third or fourth row of planking. I go by the straight line method........maintain the straight line. by test fitting planking, you'll see where the taper begins, or the deficit {for which a stealer may need to be used}. beveling the edges, as Pat suggests, will insure that the plank fits snug to the preceding one. I also bevel the tip as it fits to the bow spirit, for a flatter fit there as well. I have an adjustable jig to wet and bend planks......most of the time, I will use them damp, so I can take advantage of the extra spring the strip may have.
- 714 replies
-
- 7
-
-
- lady nelson
- victory models
- (and 1 more)
-
you've made some great progress since I last looked in! highly superior workmanship
- 2,191 replies
-
- 5
-
-
- confederacy
- Model Shipways
- (and 1 more)
-
hi Jerry..........that's not nutz! I was born and raised out in the sticks.......bumpy roads, dirt roads, and logging roads were how we got around. I miss the farm life.......very demanding and busy........but I still found time to go fishing we'd go to the town dump, where I would pick up old broken bicycles, and from the parts, I'd build my own. one fond memory was my habit of skipping out to go fishing.......I hid a bike at the bottom of the long driveway to our house. seeing my opportunity one day, I dug some worms and skipped off.........only to find that my dad had found my bike and chained it to a tree! he was waiting for me when I came back up....big 'ole smile on his face, and we commenced to digging up the water lines from the well my admiral had the same dream.......we talked about it here and there. I could transfer to a Wal-Mart DC down there, and the only thing left would be to find a place to live. it's still in the dream phase. I wish you well in finding your nirvana.......while it may be a drive to get to places of civilization, the piece of mind you'll receive and the serenity of the land, will more that compensate it I envy you two
-
I do it that way as well, although I believe you can change the font in the decal maker. I just thumb through them till I saw one I likes. the cool thing is that the font can be bent to a half round or slant, and can be manipulated any way you want. make sure the DPI is adjusted all the way up before you proceed. another way to create it, is to produce the decal using photo shop, and then import it into the decal maker....I've gotten better results getting over the transparency issue. where your placing your decal over a darker background, you may want to use white decal paper and give it a border.
- 165 replies
-
- 5
-
-
- cape cod catboat
- Finished
- (and 1 more)
-
sorry I haven't been in the last couple of days........I came down with a stomach bug. ......I guess that was the mysterious illness that's been going around up in this neck of the woods........the doctor mentioned it to me when I was down with my past illness. of course, I didn't have any of the symptoms then. I did make a little bit of progress....now that I'm back up and running, I will post it shortly you are correct John, this one is a three piston pump. when I post what I've done, I will show you what the diagram of the pump looks like. I'm glad you showed me your pictures.......the diagram doesn't show the piston connecting rods for the pump wells. thank you good sir thank you for the likes
- 453 replies
-
- 7
-
-
- thermopylae
- sergal
- (and 1 more)
-
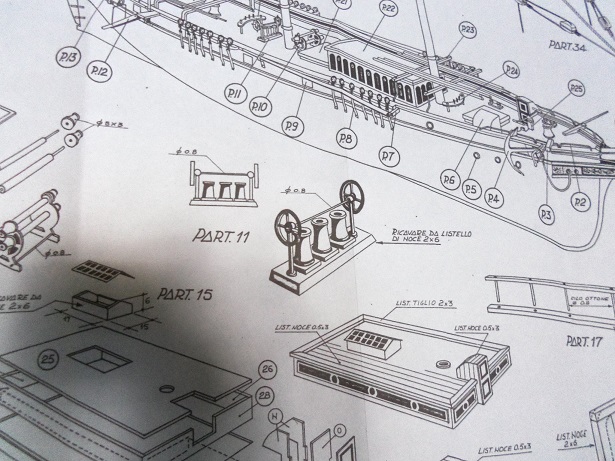
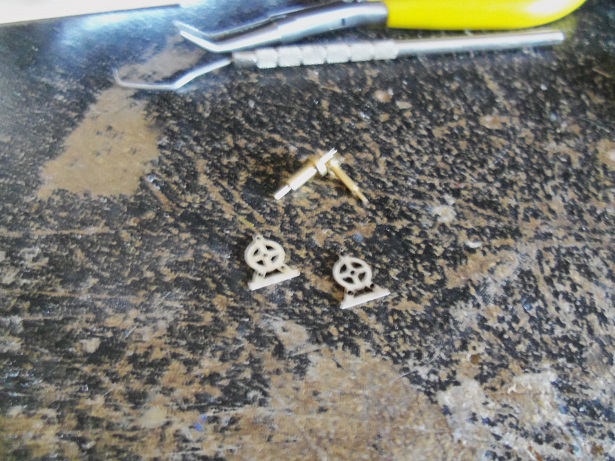
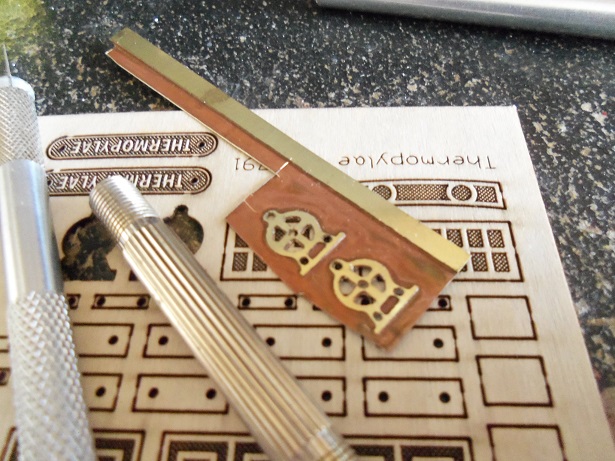
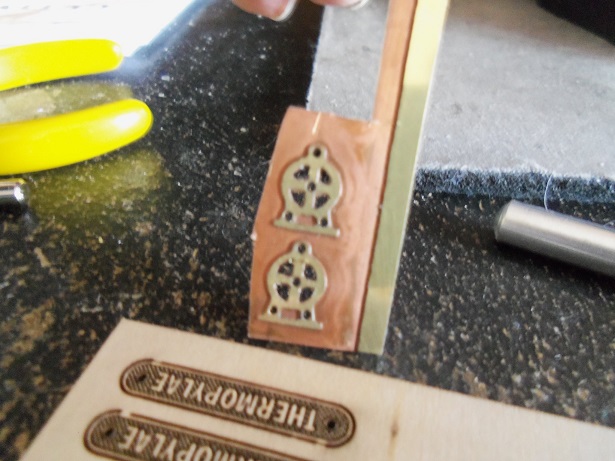
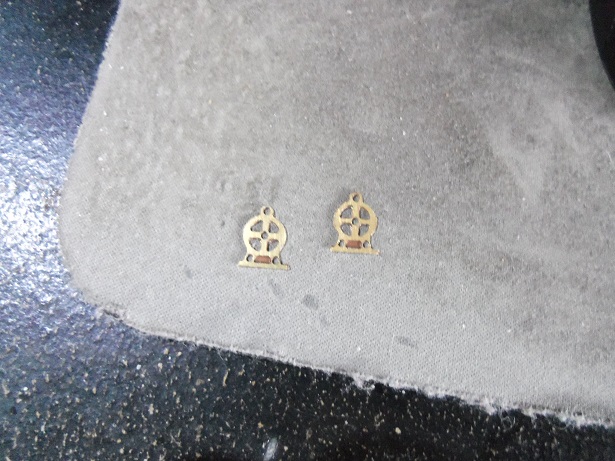
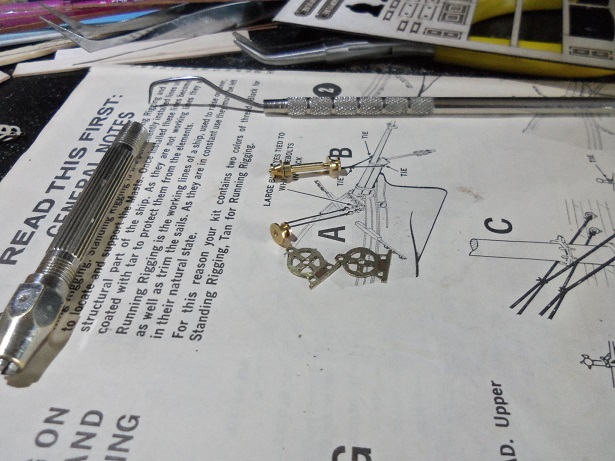
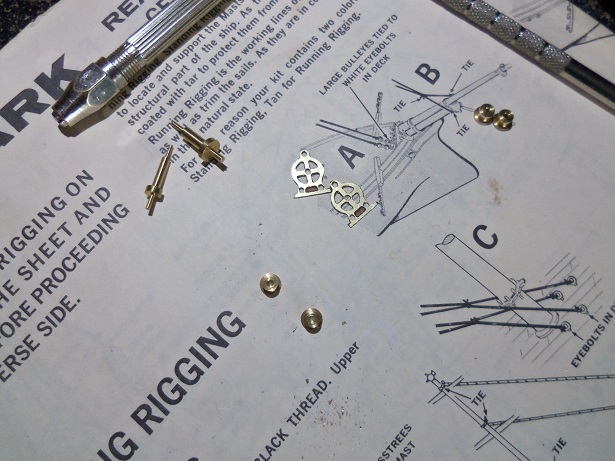
thanks for the kind comments and the likes folks.........it does help to decrease the uncertainty as I get further along with the build. as spyglass mentioned.........for those who aren't sure how large this model is.......the hull from bow stem to stern, is only 18 1/2 inches long. the parts are small....I'd even say tiny, compared to other models I've built. I'm finding out that some parts are quite delicate.......as shown here. to pass the time yesterday, I played around a bit more with some of the deck parts. the winch looked like a good place to start. I began this bit of playtime with the wooden parts for the winch. trying to assemble it as a dry fit, I found that some parts didn't fit too good, or not at all. holes needed to be drilled out larger, for the rollers to fit into the end parts........as well as the drums, not drilled out enough to fit the rollers either. then the top hole on one side of the winch end caps broke, causing me to abandon the dry fit. these parts are nicely done.......all of the punch outs are clean. I do have another sheet I can play with later, in the event that I create another hull frame. after this happened, I turned my attention to the metal sheet. all of the punch outs needed to be cut out.......punching through with a drill, and then cleaning them out with an x-actor blade. it did work out well, as metal carving goes.......having some lilliputian files would have been nice. little by little.........cut, scrape, and eyeball..........repeat, until they got to where they look halfway decent. then, it was the painstaking task of drilling out all of the drums, so they would fit on the roller pins. it was a lost cause to pinch them in my fingers, to drill them.....the bit would bind in the metal and start them spinning. I literally had to trap them in a clothes pin, and clamp them in the vise......and use my battery operated drill to ream out the holes. the first roller was done......the little guy near the top of the pict. the bottom roller had a larger diameter pin on one side, than the other {unknown reason why}, so the drum and the winch end cap for that side needed to be drill out to fit.. that process is now done........I did get to dry fit, but the fit is still poor due to the fact that both rollers are not at an equal width {concerning the center area}. when I finally assemble it, two short rods need to be added to the base, and they should square it up. I'm also looking at what I believe is called the bilge pump......basically, just a straight rod with three odd looking things in the middle. there must be some way to dress them up and make the assembly look more functional. as for the other parts I have for the winch......I don't have any more parts this size to make them, but I'm sure I can scratch something out.....we'll see now..........all this looks like more fun than a grown man can handle, but an idea arose from it. if I can do this to these parts....scalping out all the punch outs, what can that mean for the skylight parts for the galley? does this mean that the skylight plugs I have might not be needed? would I venture to make the frame for a hollow skylight? oh.........the plot thickens.....
- 453 replies
-
- 15
-
-
- thermopylae
- sergal
- (and 1 more)
-
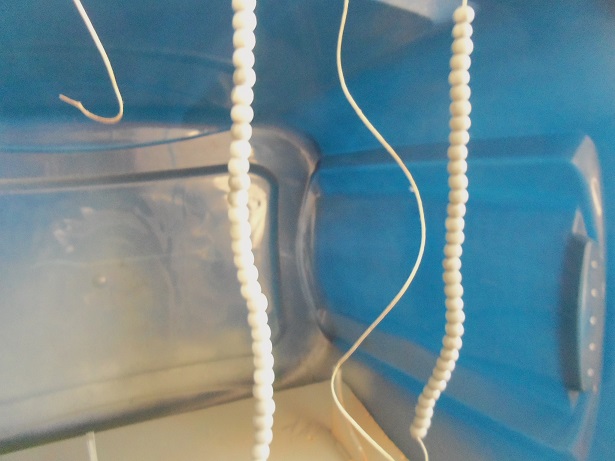
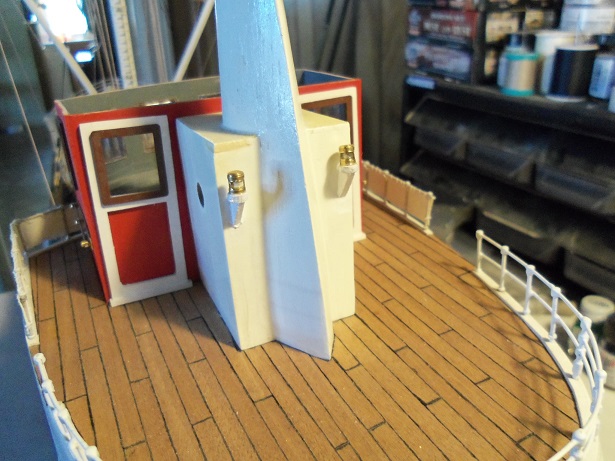
thanks for all the fine comments........and to all who hit the like button jigs and such are our way of dealing with the little nuances in our hobby........whether to better control the part that we're working on, or to create parts that would be impossible to fashion by hand. through my years here, I've seen many unique and ingenious aides.....we still haven't lost our instincts........the art of making our own tools. some can be used over and over.....while some are made out of necessity......I seem to fit the latter. I do tend to save them, hoping that another use can be found for them. I did some painting yesterday.......very exciting good thing there were other parts to add or make......or I would have gone mad. I have some form of an update........there would be more pictures, but the camera wasn't cooperating, being low on charge may have been the culprit. in this photo, one needs to look in the center........this part was very hard to get a good shot of. I mentioned the idea I had using the half round jewelry pieces, that I used on the Andrea Gail build. they will make perfect shackles. bad part is.......I only have three of them....I will have to get more. the thread is run through a channel on one side, threaded around the outside of the half loop, and run through a channel on the other side. when the net rigs are connected to them, they will be closed together and seized. the same will be done on the cone end of the net, although the line attributed to it isn't there yet....but it will be soon. this gives reason for the double block. the line has been cut, and the shackle half installed, waiting for when the rig is added to it. that's it.....dangling in the air. here are a couple of poor shots in the make shift paint booth. I made up another jig to hold the bead string, while it was painted........it didn't go so well. no matter how one tries........you can never paint the dark side of the bead while this was drying........the extra light issue was resolved. the three lights, I had made brackets for, are now in place. one will light the net winch area........there is to be a larger spotlight that will light up the rest of the main deck area. the other two were put in the aft section, to light up that deck area. almost time to begin fleshing that area out

- 747 replies
-
- 14
-