


popeye the sailor
-
Posts
16,007 -
Joined
-
Last visited
Content Type
Profiles
Forums
Gallery
Events
Everything posted by popeye the sailor
-
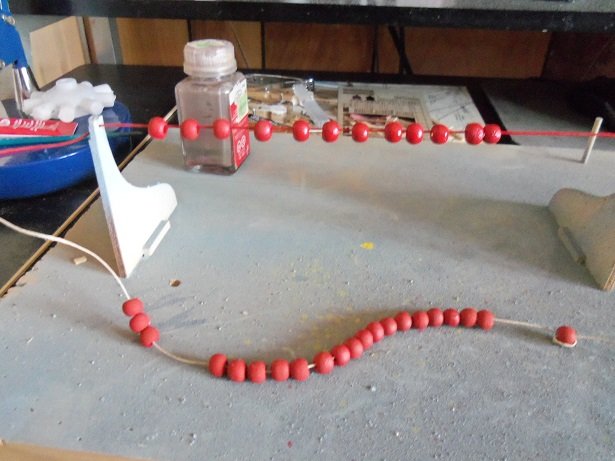
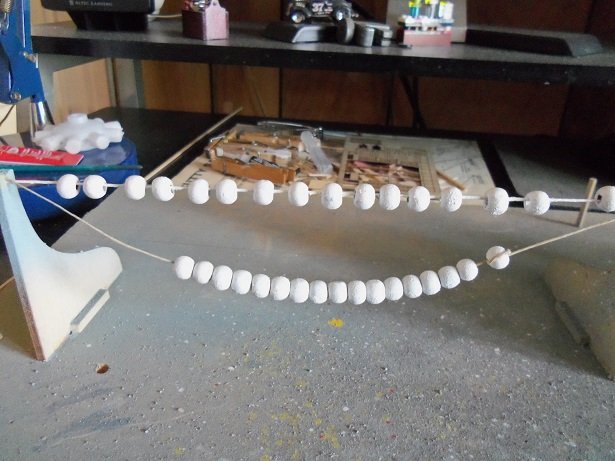
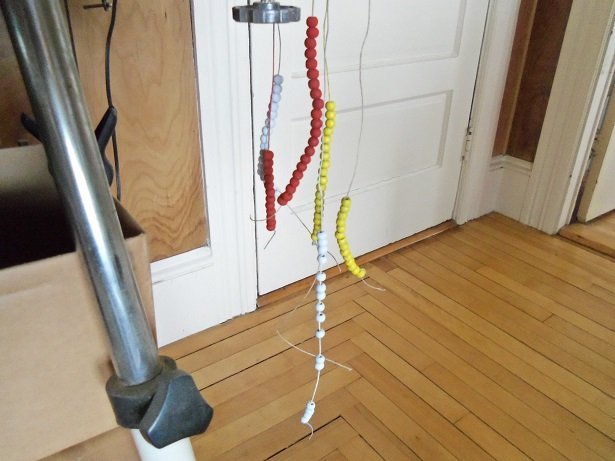
 hello all you fine folk been a short pause here....but hope to get moving on her again. today I got to finish painting all the beads. thanks Mark........oh yea.....I bought a couple of packages of them. I want to go back to Hobby Lobby........with my reading glasses, and hope I can find the antiqued ones. if I thought this model would look good with the chrome ones, I'd use them.....but I think the antique ones look better. they have them also in copper and steel {the last time I bought them}. thanks Pat........you gotta break a few eggs when experimenting. I guarantee.......these were annealed! thanks Tom........I have my good day and bad days. I know now that if they glow red, then I've gone too far anyway.........back to the beads. before I got side tracked {which is very easy for me to do}, I had painted only part of the Yellow ones. when I painted them with the primer, for whatever reason {can was too cold......not shaken enough....} they came out looking rough and oddly painted. I left them that way........I felt it would add to the overall look of them when painted with the color coat. I also allowed the ghosting, which gives them a weathered look. I did yellow ones........ then some red ones....... ...and just for giggles.......I did some white ones....... they are all done in flats. when I did the Cux 87, I did them in yellow and white. is there a rule out there concerning using three colors? I know that the colors are used for identifying whose nets or traps belong to fishermen or companies. I have some vents to make, so I will let them dry.
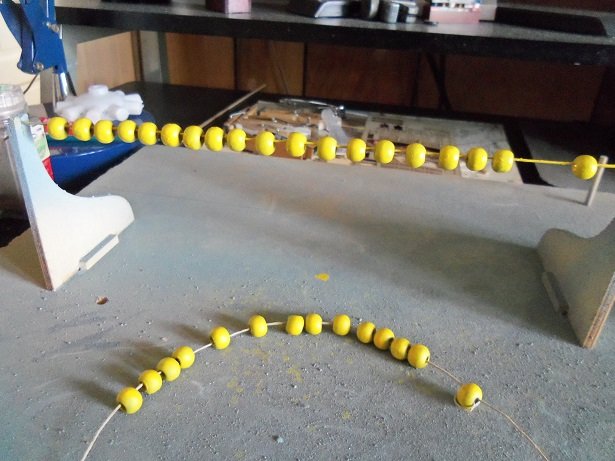
- 747 replies
-
- 10
-

-
upper structures look sweet Kees.........gonna look even sweeter perched on their hulls nice work!
- 434 replies
-
- 5
-
-
- pelikaan
- beamtrawler
- (and 2 more)
-
gee....and I thought the test guy wires looked cool..........the real ones are fantastic! awesome job Nils.........she's really looking sweet now!
- 2,625 replies
-
- 7
-
-
- kaiser wilhelm der grosse
- passenger steamer
- (and 1 more)
-
nice bit of progress Andy.......all the little deck stuff will really add to the overall layout
-
now.......that is some really cool progress Greg! you've done some very nice work the capstans looked weathered to me........quite a bit of detail.......right down to the props!
-
like it..........I love it!!!!!! no more mind melding for you! model long and prosper!
- 250 replies
-
- 5
-
-
- willie l bennett
- model shipways
- (and 1 more)
-
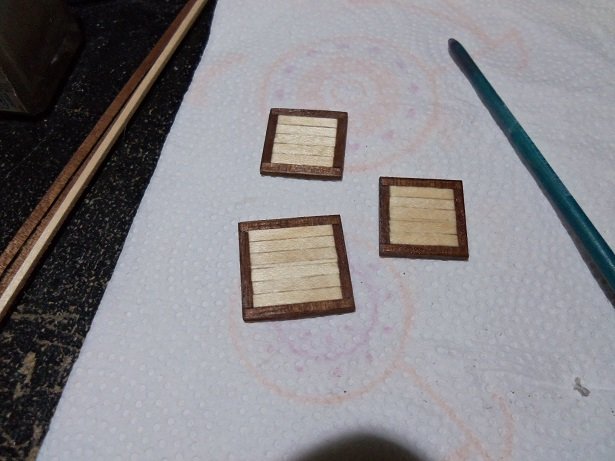
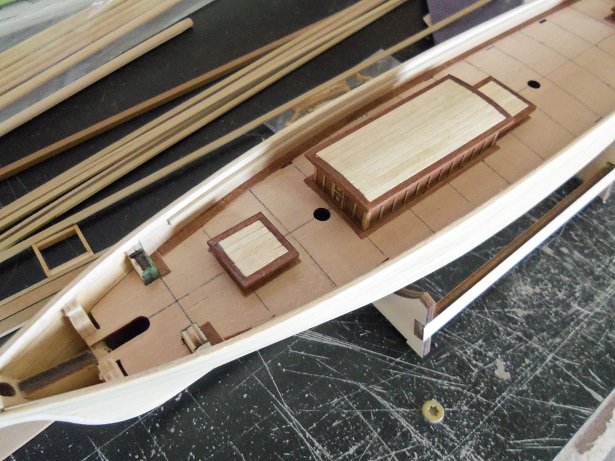
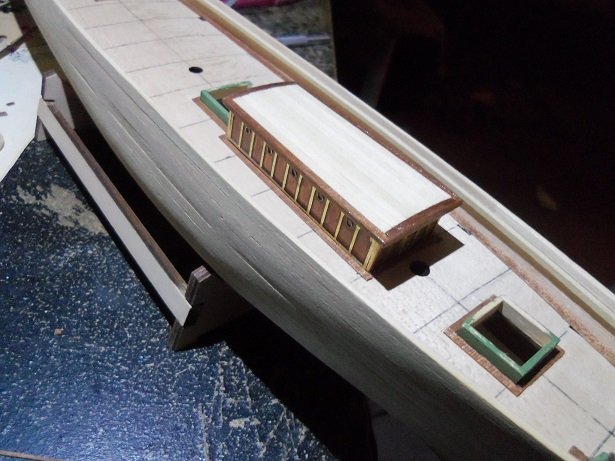
I didn't get as far as I would have liked yesterday........I was site surfing while I was making the hold covers. I got as far as getting them trimmed and planked, and then giving them the stain. this morning, I gave them the lacquer coat and set them aside to dry. FINALLY!!!!!!!!!! I was able to get back to painting the buoys for the Syborn! happy, happy, joy.....joy! when they were dry, they were dry fitted on the deck. I have a picture of the aft most hold cover, to show with the relation to the bulkhead that I painted the flat green. when the deck is finally planked and lacquered, and the outer hull is painted, I think this will be a nice blend of green. that's why I painted the flat green sparingly along the entire deck layout. I had a second though of putting the aft cabin on the deck.......instead, here is that picture. I still need to accent the aft bulwarks and deck with the annegre and mahogany.........I can't wait to try and make the piece to go around the transom. the cap rail will be the same process.

- 453 replies
-
- 19
-
-
- thermopylae
- sergal
- (and 1 more)
-
the blogger site should have the rigging answers you are looking for........even some about the netting. there are a couple of things I took from the Cux, to put into the Mary Ann.......one of them was the catch rack and trays. both of these hulls are identical......although I modified the aft deck on the Mary Ann. any ideas you can use.........be my guest!
-
gee.......I have a Guillow's 1:14 scale Dr 1 I'm building. I didn't like the plastic machine guns, so I made a pair out of scrap wood. I made the blanks so far.......scribe in the added detail later. sorry to hear of your present set back with your computer. hope your feeling better I bookmarked that site.....thanks
- 714 replies
-
- 3
-
-
- lady nelson
- victory models
- (and 1 more)
-
really nice work Tom glad to hear you made it through the storm OK. we had no snow left on the ground up here...........glad I didn't have to work very nice progress.....good to see her masted. top came out great!
- 1,348 replies
-
- 4
-
-
- constitution
- model shipways
- (and 1 more)
-
I didn't see the pictures when I read your post last bob re#556........you may have put them in later?!?! stunning looking ship........really shows how complex the rigging is. super job!
-
really?????? the anchor is molded on? didn't you get some pretty P.E. anchors? I'm only kidding........but I do find that odd. I'm sure you've had to scrape the decks and places to add the P.E. parts. nice hull work though.......lots of tiny stuff {make me cross-eyed}. progress is progress.....no matter how small it is. ya done good!
-
perhaps he was using the box as an extra parts bin........your gain ........as for the missing bits.......well,......not so good. when I was doing customer service for Tom, he referred to me a customer, whose problem was the mizzen mast and how to attach it. I believe there is a hole for it in the deck platform, but no way to cement it in firmly. I had made a platform for the shrimp cooker, and by drilling another hole in it, it gave it a better anchor. I also made a bracket to attach to the back of the pilot house. all of our snow was gone........but the blizzard we got today changed all that! now we have over a foot of snow again!
-
never gave that concept a thought Jack.........I guess it's all your own well played orange! skippy looks great perched on her stand......it will look even better now! super job my friend!
- 250 replies
-
- 4
-
-
- willie l bennett
- model shipways
- (and 1 more)
-
she's look'in super.........good to see your making some progress I enjoyed making all the little stuff on the deck.
-
I'm doing OK Pat.......last week was fun for me. it felt good to be back at it. I'm working on the hold tops {as promised}......should have them done by this evening. that bulwark issue I had {the cracked port side} is totally gone! they are as sturdy, as if they still had the posts I'm very happy about that. gotta get back to painting those buoys....only forty-something beads in two colors...how hard can that be!?!?!?! I'll get that trawler build up and moving again thanks for the good word, and thanks for asking 'bout how I am.......very thoughtful thanks to every one for the likes......still look'in for the ship in this box........I know it's in here somewhere!
- 453 replies
-
- 8
-
-
- thermopylae
- sergal
- (and 1 more)
-
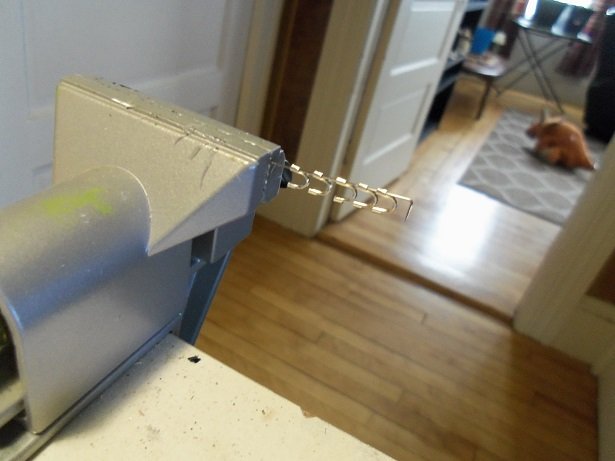
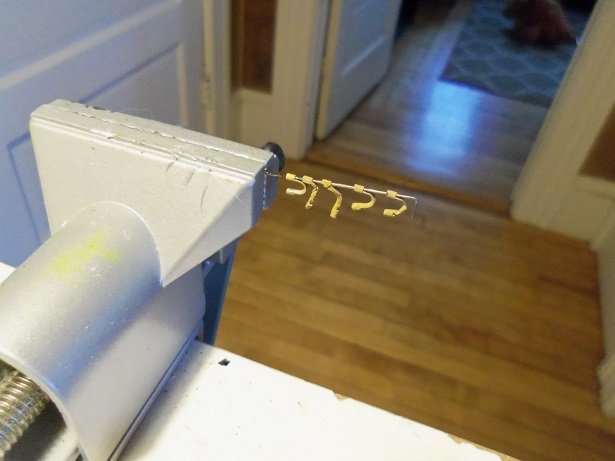
OK..........I finally went out and bought a bottle of propane! I have two nozzles........both of them look like they were made in the 50's. one of them would not work at all....the other one isn't faring out to well either, but it did work. I think I should toss these and buy a new nozzle I had threaded a few of the 'shackles' on a pin, and clamped it in the vise. then I put the heat to them........not a good idea to leave the heat on for too long.........or this happens.........
-
sorry to see your tear'in 'em up you gotta be happy with it.........that what matters!
-
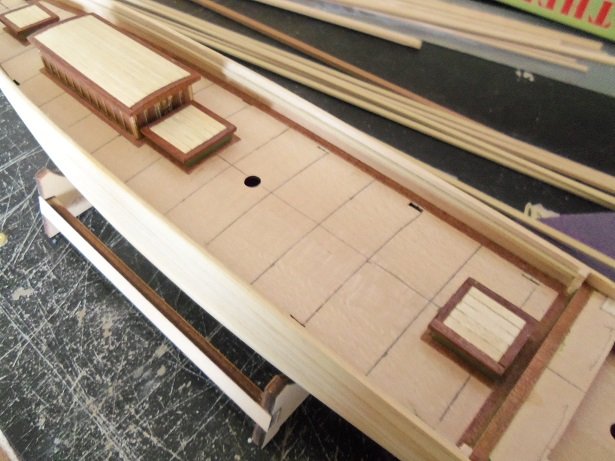
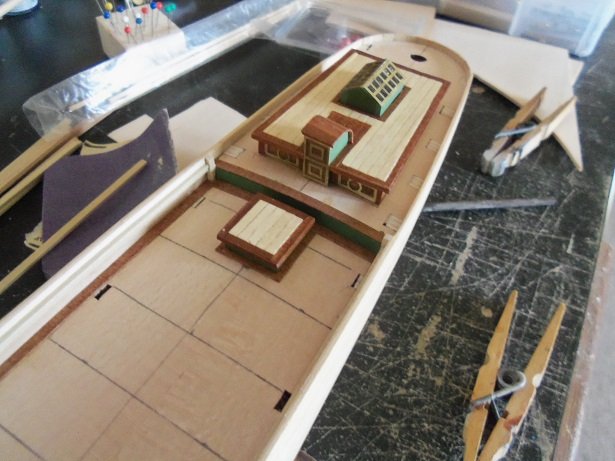
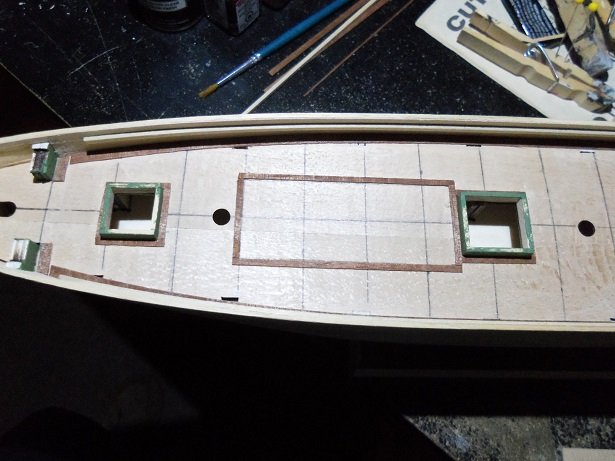
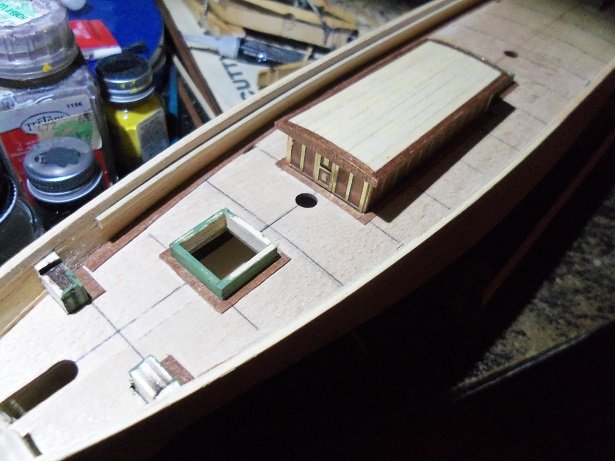
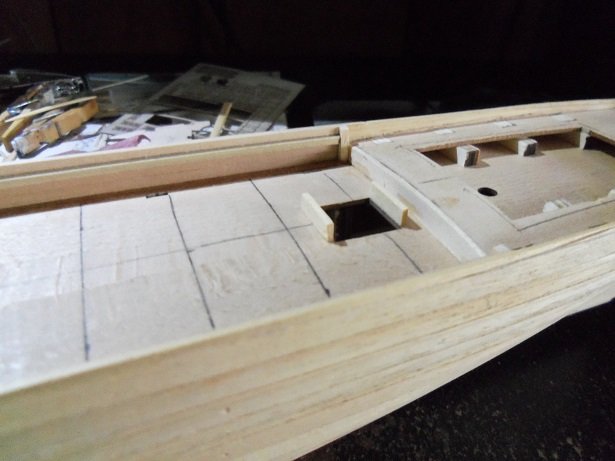
I just cleaned out the camera and there were these four pictures. I accented the holds and the bulkheads in flat green...it should go nicely with the outer hull color. the layout is outlined in mahogany, so the main deck is ready for deck planking. the fore deck and the poop deck will follow. enjoy I still need to do the hold tops........tomorrow
- 453 replies
-
- 17
-
-
- thermopylae
- sergal
- (and 1 more)
-
hello all! sorry for the silence......I just wanted to get through my work week. now that it's done and behind me, I can look forward to some extended time off......I took the upcoming weekend off. I didn't stop at the last update.......I'm sure there are a few more pictures in the camera. I'll dig them out and post them. hello Pat......a funny thing happened on the way to the trawler. I was painting the buoys........but I had the structures on my desk, and I ended up tinkering with them instead. I will get back to the Syborn very soon.........I've done everything that was bugging me about the Thermopylae. now I can plank the deck........that'll boggle my mind with all the small pieces I'll have to cut {I'll NEED a distraction}. I did get a chance to try Michael's Idea.......... thanks Patrick.......I feel the same way about the like button. thanks OC welcome aboard Dave........enjoy
- 453 replies
-
- 9
-
-
- thermopylae
- sergal
- (and 1 more)
-
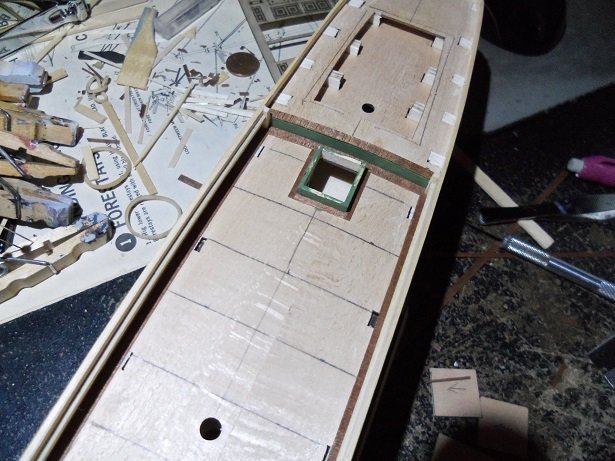
well then.......click away, my good friend! at the moment, i'm holding a piece of mahogany down with two fingers. that leaves me with one good hand........let's see if I can pull this off. the holds are done now......rather than risk them sticking to the table again, i did them right on the deck. the front and rear parts were cemented to the deck first, then the sides.


- 453 replies
-
- 9
-
-
- thermopylae
- sergal
- (and 1 more)
-
thanks Zoltan.......I hope to be planking the deck. if all goes well........I will be Dr. Per......I heard that there was a count associated with the like button before the site update. now I'm hearing that the update nulled this count and that the like button means nothing. I didn't care about rank back then.........I'm not into the count thing either. the only factor as far as reputation goes that I go by, is how one conducts themselves on the site. I don't need a quantifier to tell me that I'm just an average Joe here. the site will change from time to time, but as long as I can still value friendship, that's good enough for me
- 453 replies
-
- 9
-
-
- thermopylae
- sergal
- (and 1 more)