
HOLIDAY DONATION DRIVE - SUPPORT MSW - DO YOUR PART TO KEEP THIS GREAT FORUM GOING! (Only 72 donations so far out of 49,000 members - Can we at least get 100? C'mon guys!)
×


popeye the sailor
-
Posts
16,007 -
Joined
-
Last visited
Content Type
Profiles
Forums
Gallery
Events
Everything posted by popeye the sailor
-
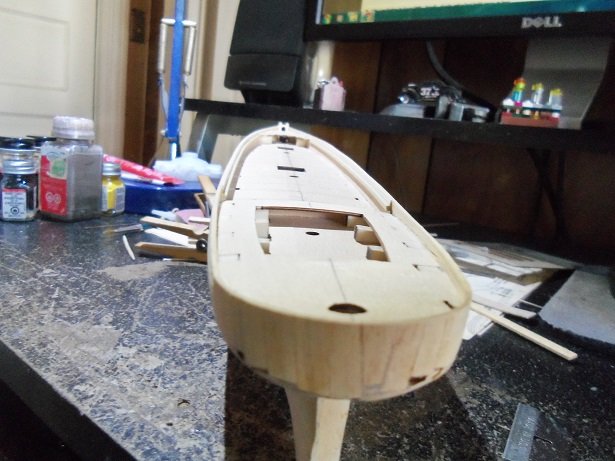
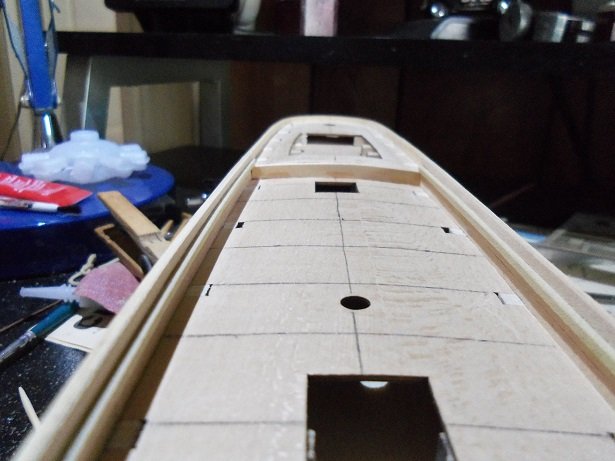
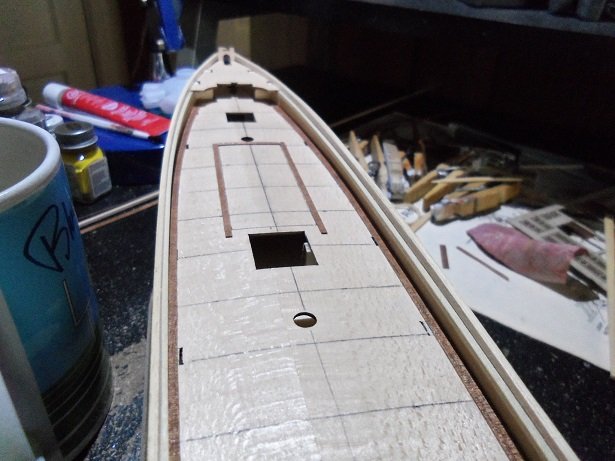
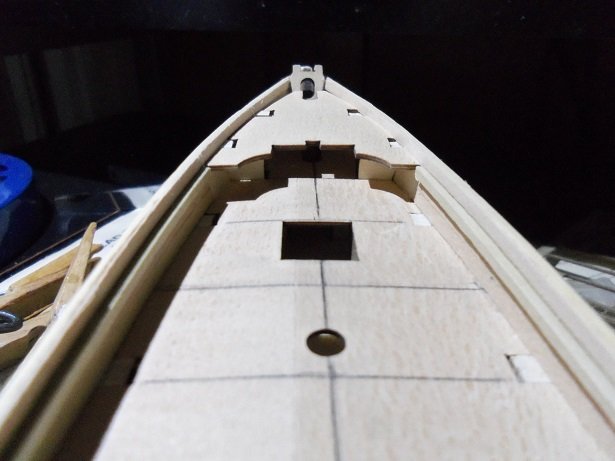
 here is the update on the aft bulwarks. they came out better than I figured they would. I was going to wait to post this, but the heck with it.........I'm working on the holds at the moment anyway. once the deficits were filled in, sanding shaped them the rest of the way. now the bulwark lines run straight back and transition to the stern bulwarks...evenly. yea......gotta fill in those stupid holes. I'll get to the external in due time.....hopefully paint at the same time I used mahogany strip to create the waterways, and started to border off where the structures are to be. more to come
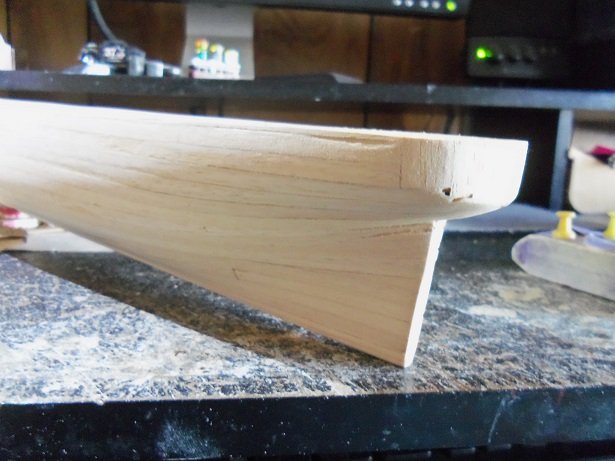
- 453 replies
-
- 9
-

-
- thermopylae
- sergal
- (and 1 more)
-
thanks Mark. I'm slowly getting used to the small parts >note to self.......must get back to a larger model< >going nutso here< thanks J I'm so used to the larger kits........this one is a test on the nerves. top it off with the problems I've come across so far, and it's........well, a thinker's model. I've seen a couple of finished models already, and to be quite frank.....I'm wondering how they managed to do it. I suppose it was "one piece at a time." the cabin assemblies are a bit different than what you had to do...I had wooden and metal plates to overlay on the structure 'plugs'. all this amounted to was an easier solution, in adding the external detail. I took a slightly different road.......having to remake the hold boxes, I decided to combine it with fleshing out the main deck. I'm still compiling pictures, so the next update will be larger. glad to have you following along thanks to all who hit the like button.....not sure what the problem is with the like button, but I appreciate all who chooses to use it
- 453 replies
-
- 11
-
-
- thermopylae
- sergal
- (and 1 more)
-
looking good Doug
-
sad to hear Andy......although not unexpected. hope you can squeeze in a little more fun time before you go
-
oh .....believe me....I agree with you. I've built mostly Billing's kits, so I'm kinda spoiled. I've gotten so used to the instruction sheets........getting into a non Billing kit is like walking through the woods in OZ..........."I'd turn back if I were you!" the admiral got me the Norden for Christmas, so that will be a cute little distraction when I get to it. seeing your Cutty brings back the memories I have, back when I was building the Nordkap. it too was a first production kit......very old and not laser cut. it was very nostalgic to assemble that kit...the fellow that gave me the kit said that it had been in his attic for over 30 years! over 90% of the original wood went into building her....I bought other wood as well, to do some of the stuff I did. I forget........how did you come by the kit? I love a model with a history
-
awesome job Sjors....such a maze of rigging! congratz on your near finish
- 1,616 replies
-
- 9
-
-
- caldercraft
- agamemnon
- (and 1 more)
-
thanks Bob.....I did some minor tweaking to the aft cabin. now that the roofs are done, they look even better. thanks for the good word
- 453 replies
-
- 7
-
-
- thermopylae
- sergal
- (and 1 more)
-
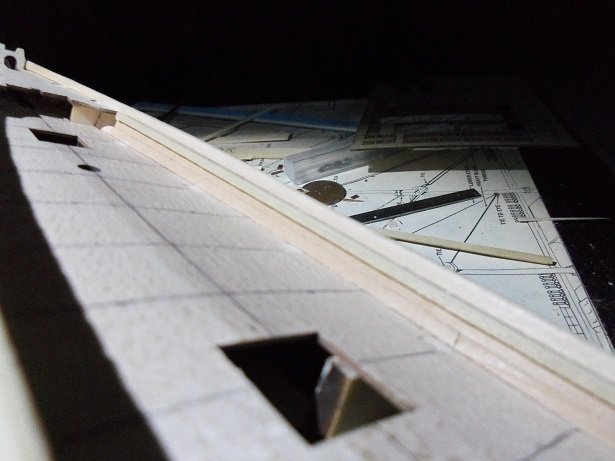
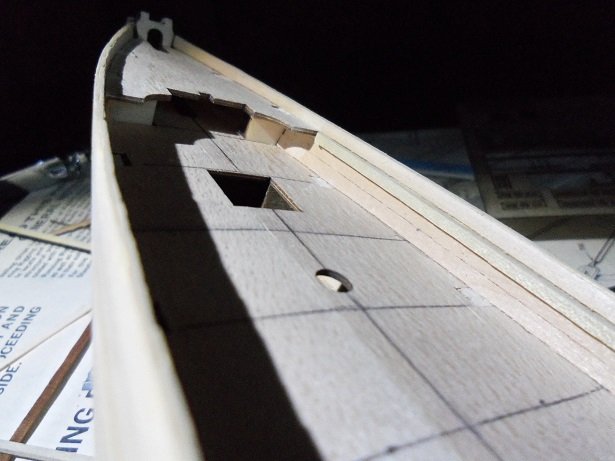
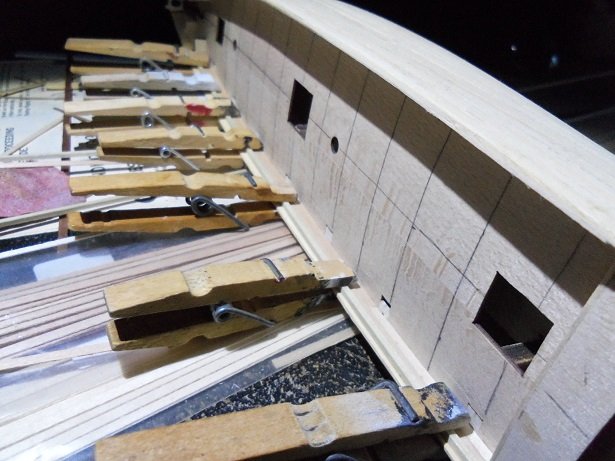
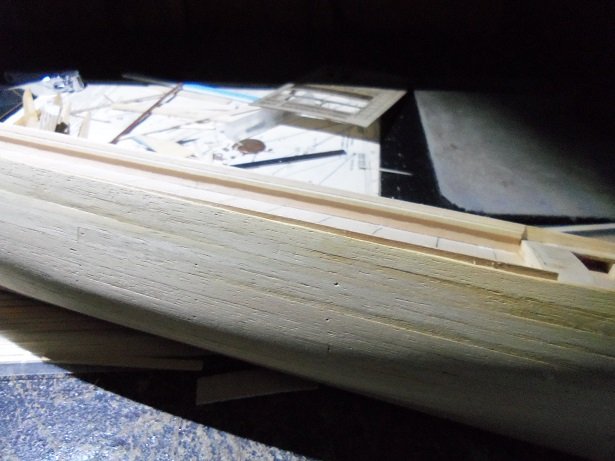
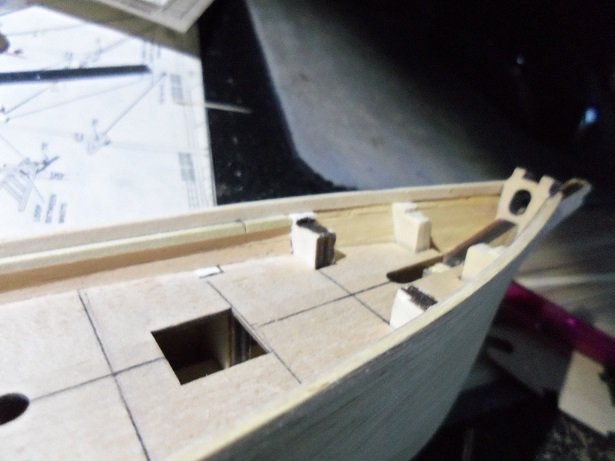
thanks E.J. and Scott......and to all who hit the like button. strange things are going on around here.........it seems my desk has become the work bench. it seems to react almost like the tide. the clutter builds and recedes with every thing I've done so far........the brass........the structures......and now with what I've turned my attention to.......the hull. I grew tired of play'in with the small stuff. all the while I planked the hull, I didn't like the bulwarks.....they weren't even or in line with the decks. to plank the inner bulwarks will change all that. using 0.5 x 2 mm strip, I rose from the deck line 2 rows.......add the pin rail strip, and then one more row for the top of the bulwark. the belaying pin racks will be added later. I wasn't keen on cutting out the bulwark posts either......I've never done it before. I always felt that they added strength to the cap rails.......but on some models, they need to be removed, and this one is no exception. it made the bulwarks weaker.....and through handling, the port side bulwark had developed a crack along the deck line, making matters worse. the starboard side was done first.......and confirming my suspicions.......had a deficit where the aft deck and main decks meet......visibly showing that there is a serious taper here. it must be built up and sanded down to create the natural curve that these clippers have. the starboard side went well, and the line was achieved. I ran the pin rail strip all the way to the #2 bulkhead, later cutting out the excess, to allow the fore deck to sit flush to it. the port side was done in the same manner........two rows of thin strip, and then the pin rail strip.......followed by the strip that will separate the cap rail from the pin rail. when the last strip was cemented in place, the taper on this side was quite evident. at the aft end....almost the entire 2 mm strip was exposed.......not good at all. I could tell though, that the weak bulwark has been repaired. both sides have become quite stiff......they do not flex anymore. working on the bow first, the same thing was done to the pin rail.......mark and cut out the excess for the fore deck. now to move on down to the aft end and fix the problem there.
- 453 replies
-
- 14
-
-
- thermopylae
- sergal
- (and 1 more)
-
it's not a problem John.....I value your input. don't you dare go anywhere! I'm sure there's a half way decent model in here somewhere I've been mess'in with these darn bulwarks for most of the afternoon. I've been wanting to do the inner planking and add the main length of pin rails to the inner bulwarks to beef them up. since I'm not used to cutting out the bulwark posts, the port side developed a crack.......every time I pick it up, it cracks again. not only that, I wasn't keen how not even they were to the stern section. this will give me a chance to level both sides out. the starboard side is done, now I'm working on the port side. it will give me the opportunity to install the waterways too. I should have an update soon thanks to all who hit the like button
- 453 replies
-
- 9
-
-
- thermopylae
- sergal
- (and 1 more)
-
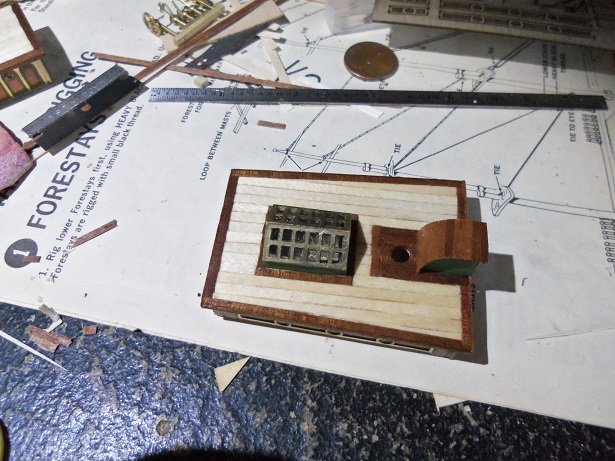
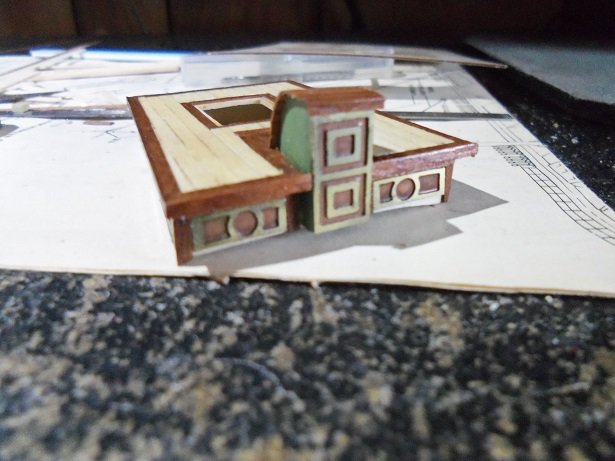
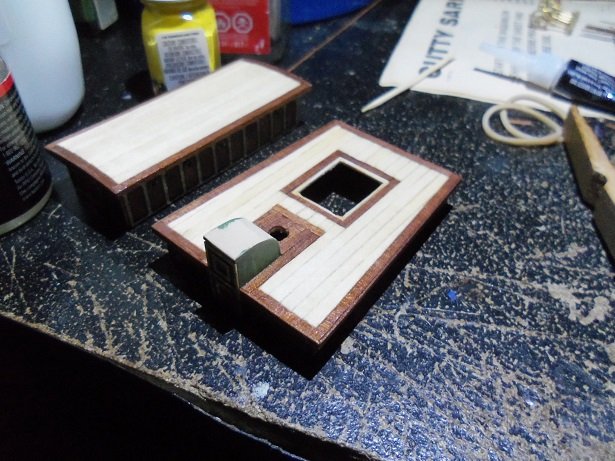
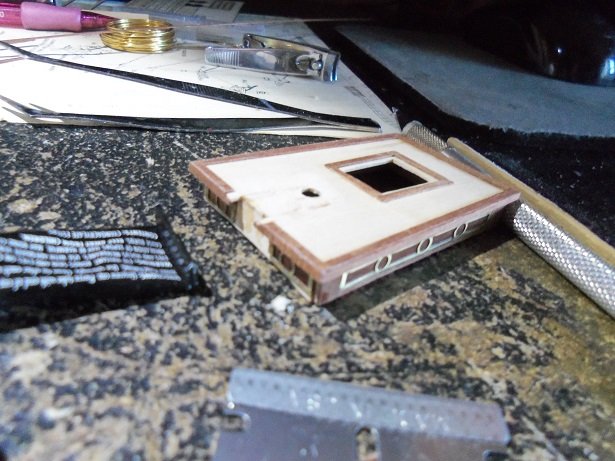
the skylight was added when it was dry enough. this is the best I can do about the scale issue. I also took care of the corner issues with the main deck cabin........it can be seen in the last picture in the upper left. the corners were filled in with thin strip mahogany and sanded square........then touched up with gold paint. the holds are the next to do........perhaps I can save what I have done so far on them....if not, then I'll have to make new boxes. as with the main deck cabin, mahogany dust got into the planking and defined the calking a little.
- 453 replies
-
- 16
-
-
- thermopylae
- sergal
- (and 1 more)
-
from this point, the aft cabin got a coat of lacquer I still need to add the bottom bits of mahogany......
- 453 replies
-
- 17
-
-
- thermopylae
- sergal
- (and 1 more)
-
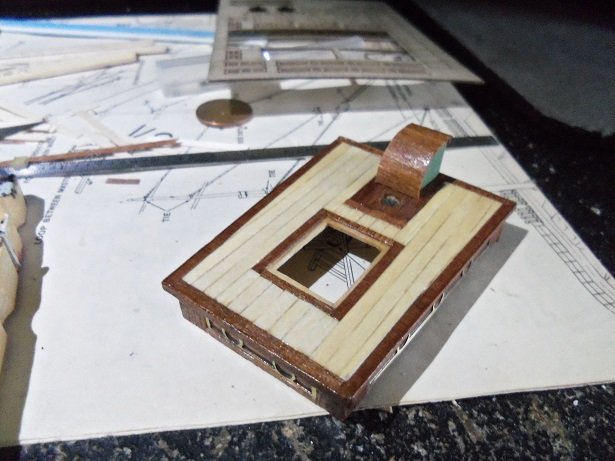
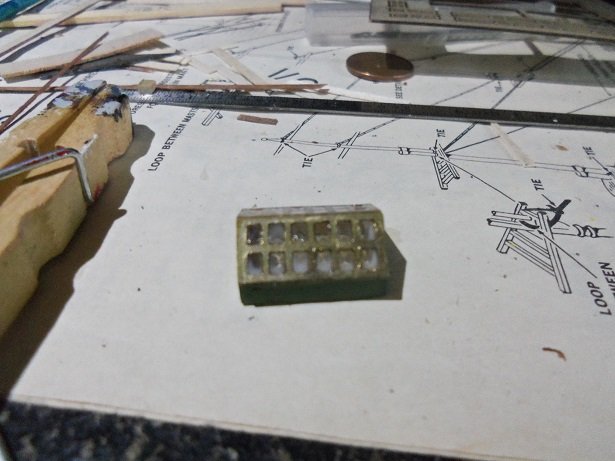
I did a bit more to the skylight this morning.......of course now....I had to wait for the windows to dry. during that time, I did the roof for the companionway. ...and a little bit later .......
- 453 replies
-
- 13
-
-
- thermopylae
- sergal
- (and 1 more)
-
awesome progress Kees! this has to be the largest mass production project, I've ever seen! simply superb!
- 434 replies
-
- 7
-
-
- pelikaan
- beamtrawler
- (and 2 more)
-
super progress since I last looked in Nils! really looks sweet!
- 2,625 replies
-
- 3
-
-
- kaiser wilhelm der grosse
- passenger steamer
- (and 1 more)
-
nicely done Peter.......I wish my Thermopylae was in this same scale
-
that's what it's all about E.J. I'm still amazed with the size of the hull.........makes for quite a planking job. {I imagine you'll be doing a second planking = double the fun}
-
she's a sweetie! congratz on a really great job.........such a pain on the paint work, but you corrected them with ease!
- 165 replies
-
- 2
-
-
- cape cod catboat
- Finished
- (and 1 more)
-
I don't think I use the word 'stupid' Bob. I'm sure you have done more to the rigging than the instructions showed well done on the rigging.....
-
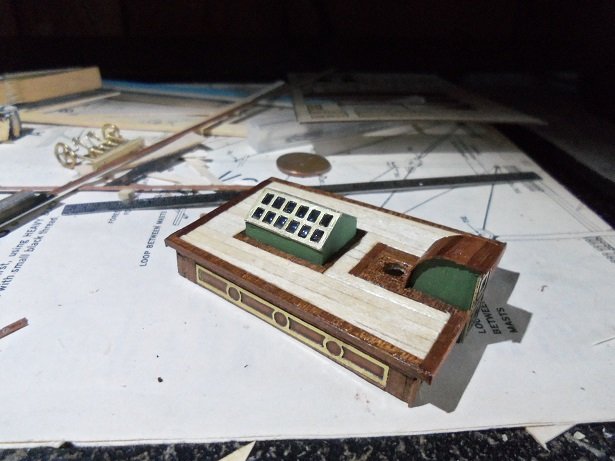
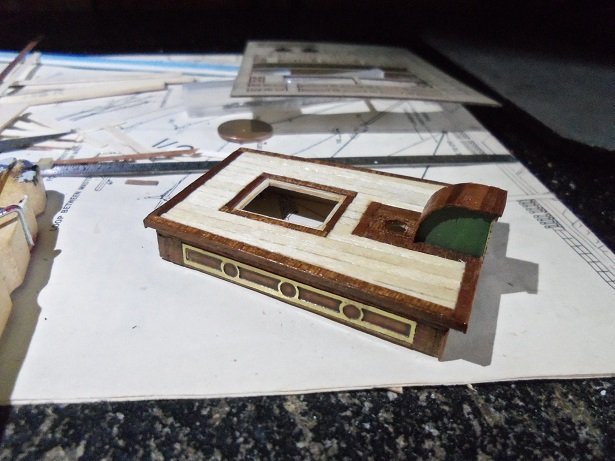
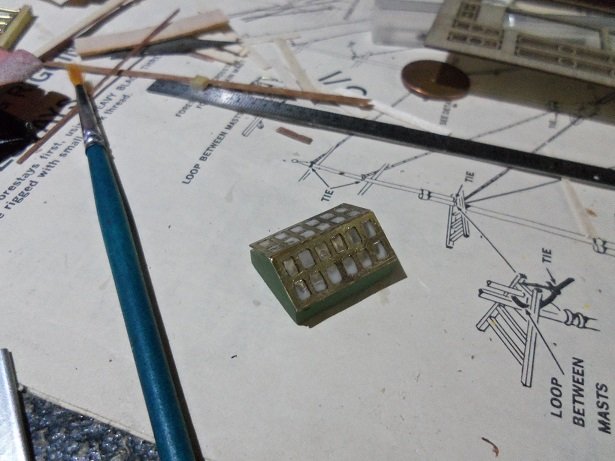
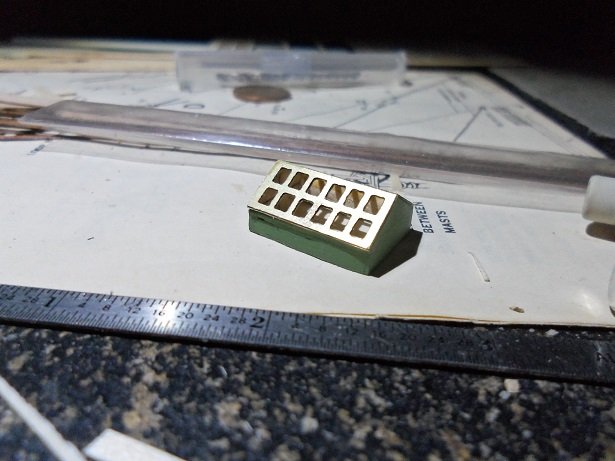
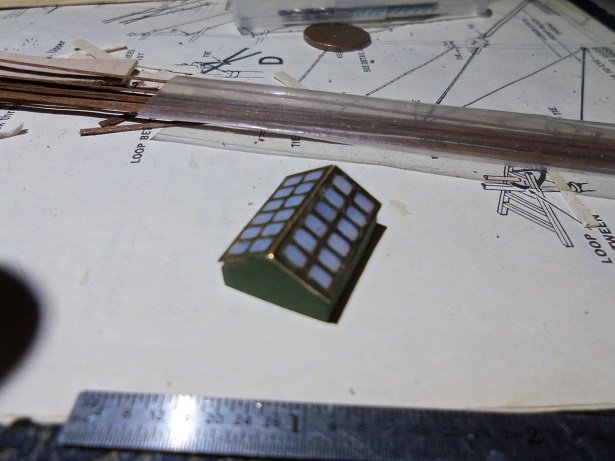
I also took a couple of progress pictures of the companionway and the aft cabin. it's all back together and the roof is done. I still need to apply the stain and do the companionway roof, but here is how it looks now. for the skylight.......once I had it sanded down to where I wanted it, I decided to give the sides a coat of med flat green. I also did the companionway the same way. I kinda fancy this color...I've used it on a couple of my past builds. combined with a compatible brown, it make for a great color scheme. I think it will work well here. once dry, the window panes were filled in with the window maker. I used a razor blade to remove the excess from the roof frames. now they need to dry, where it will become clear.
- 453 replies
-
- 14
-
-
- thermopylae
- sergal
- (and 1 more)
-
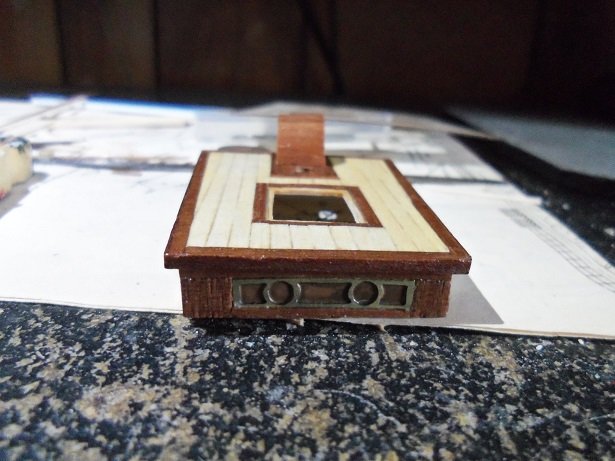
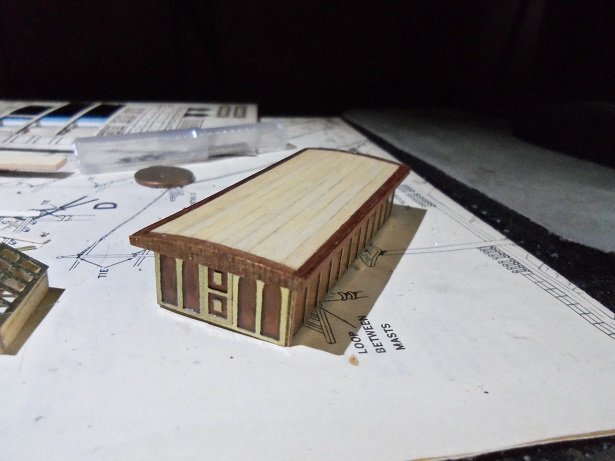
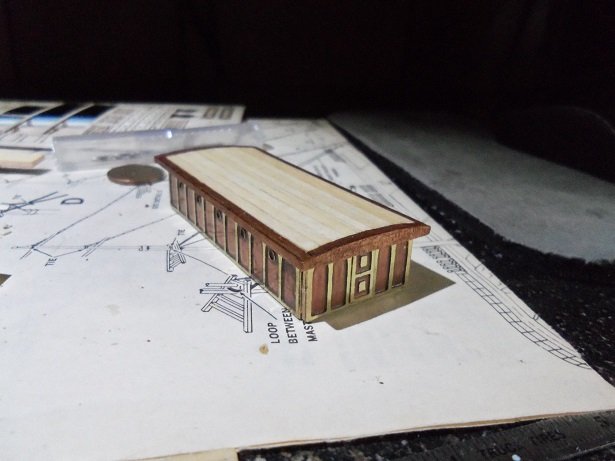
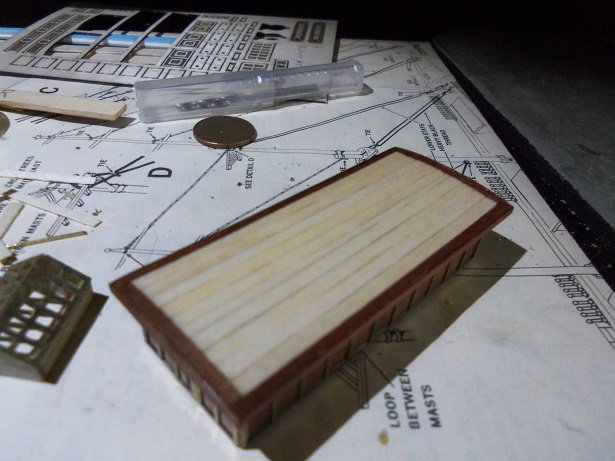
I must have been like a one armed paper hanger yesterday...........trying to catch up here, and tinkering with the structures. I decided to get the main deck cabin roof done. first, was to edge it all around with the dark mahogany.......including the outer edges. the kit supplies 0.5 x 2 mm blonde strips......I've read where the common choice for decking was yellow pine, so I went with this scheme. I was going to do calking between the planks, but figured that it might not look right, so I didn't. once the roof was planked over, it was lightly sanded and given a wash of some light stain.....I let it totally soak in. then it got a coat of semi gloss lacquer......it will get another coat later, when the first coat is dry. I also fitted the fore and aft doors on the cabin as well. the plank line do show up slightly........probably due to the slight infusion of mahogany dust. works for me
- 453 replies
-
- 15
-
-
- thermopylae
- sergal
- (and 1 more)
-
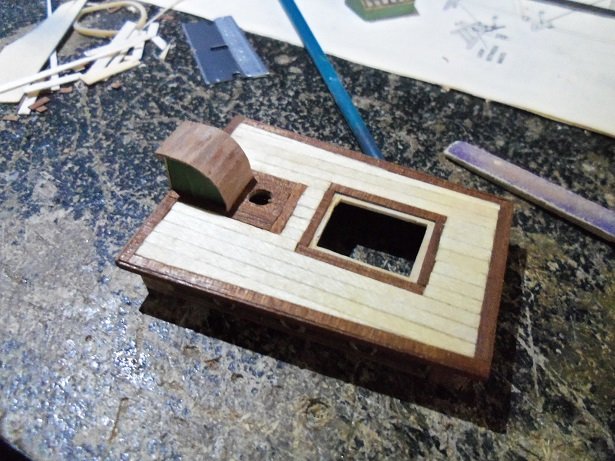
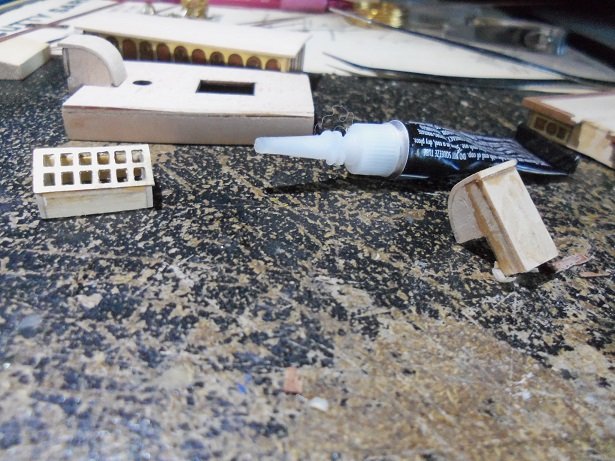
sorry 'bout that........got too keyed into what I was doing. I was supposed to see if I had any last week pictures for you........what a terrible host I am. on the bright side.......I did take a few pictures of yesterday's progress.......so I can post them too. there were a couple of pictures in the camera.........I managed to remove the companionway from the aft cabin, without damaging it. I will drop the height of the companionway and the skylight. the skylight is easy........simply sand away at the bottom and drop the height that way. the companionway is a bit different.......I'll have to drop it by sanding the nitch, where it attaches to the cabin. during that process, the unthinkable happened.........it split in half. I was able to repair it and resume. work in progress..........I'm not used to doing this redo stuff
- 453 replies
-
- 10
-
-
- thermopylae
- sergal
- (and 1 more)
-
it was like turning the crank on the jack 'n the box Carl.....bound to pop out sooner or later so good to see your progress Sam. I have to ask.........why did you paint these decks a different color? the little boats look quite at home on deck........they look good