


popeye the sailor
-
Posts
16,007 -
Joined
-
Last visited
Content Type
Profiles
Forums
Gallery
Events
Everything posted by popeye the sailor
-
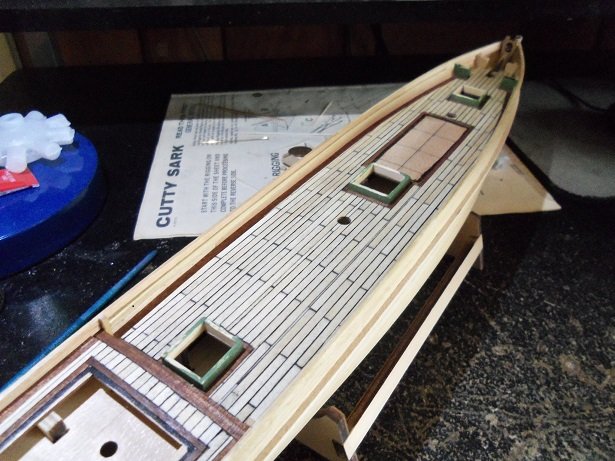
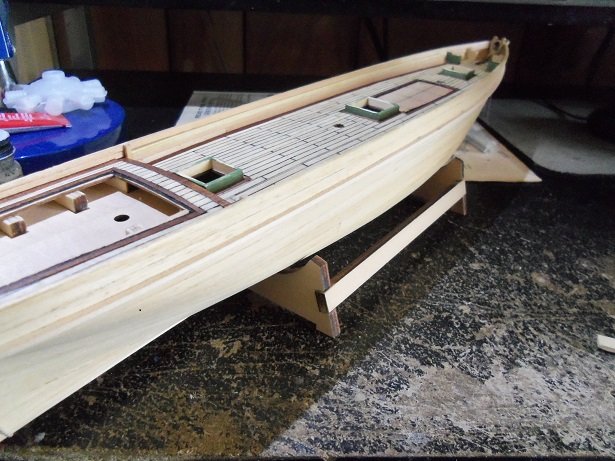
 thank you Steve, Patrick and Sam .......and those who hit the like button. the decals that make up the stripe....I made them a while ago. I was going through my bag of decals...I threw out some of them...extras from the Andrea Gail, the Susan A, and a few others.........I'll never use them again. the stripes are part of a bunch of images that I cot from a HO train site, copying images of decal sheets. I blow them up to size ans set them up in the decal maker. the same can be made in photo shop, if you have it I cemented the fore deck in place.......thinking of how to make the mahogany border. the curved piece will be tough gotta get that planked. more to come, but first.....to get through the pesky work week. more soon! thanks again all for look'in in!
- 453 replies
-
- 5
-

-
- thermopylae
- sergal
- (and 1 more)
-
now it will depend on what your going to use to fill in the glass panes. it might be good to use white glue......it will be a cloudy clear. I've come across tinted film.........the type they use on car windows. that might work in your favor as well. good progress thus far
- 258 replies
-
- 1
-
-
- harriet lane
- model shipways
- (and 1 more)
-
there ya go Tom and John.........nearest I know of is Boston.........you can be there when they come to haul me away!
-
thanks very much everyone for the comments and likes........even I wanted to see how it would look I put it half together on the table and finished it on the ship.......it worked out just as well. I'm hoping to get something done today, but it don't look promising. if you read my Thermopylae log...you know why I will try to get the other net up. it will get the other net rig from hanging off of my crane light. the clothes pin that I'm using for a counter weight hits the shade {which is metal}, and makes the sound of a ship's bell, whenever someone walks by the table. it can get annoying when it rings past three bells
-
Billing USA is a good place........Roger has done well in keeping it the way Tom did { I miss the old days....and Tom & Susan}. Ages of sail took over......done business with them as well mast looks super Doug....goose neck brackets look really good! you may want to push that tab further into the boom.......and to make it a little more decorative, get some thin brass sheeting and cut some narrow strip. fashion into a band and cement around where the goose neck is inserted. it will protect the boom from any breakage or problems in the future
-
then there's the though of joggling these plank lines together further up the contour. you'd get the combination of a joining scarf joint and creating the needed plank row.
- 714 replies
-
- 3
-
-
- lady nelson
- victory models
- (and 1 more)
-
thanks for the thumbs up, and thanks for the likes as well I do have to say that the lacquer coat dried rather fast, in both applications. for those who use Testor's or Model Master, the metallic paints tend to be soft, and prone to dings and scratches. finger prints and dulling is another problem......I'm hope'in that these problems are alleviated. thanks again for look'in in on my little build I'll try to make some more progress, but it might be hard to do....gotta run some errands and prepare to go back to work.......UGH!
- 453 replies
-
- 7
-
-
- thermopylae
- sergal
- (and 1 more)
-
I hear you about work........this is the last day of my vacation. I'm afraid of what I'll find when I get back. look'in at a week's worth of unsettled weather to boot!.....at least I was off for the big storm that hit us the other week haven't tried it before, but I don't think an acrylic would stick to P.E. very good, since it's based with water. I would suggest good 'ole enamel, or suspension based paint. looking forward in seeing your results
- 258 replies
-
- 2
-
-
- harriet lane
- model shipways
- (and 1 more)
-
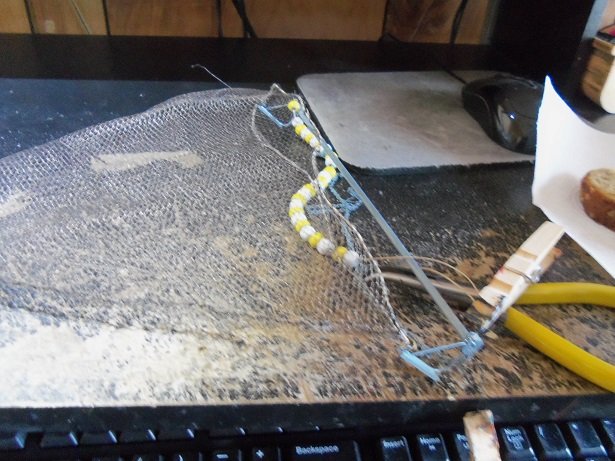
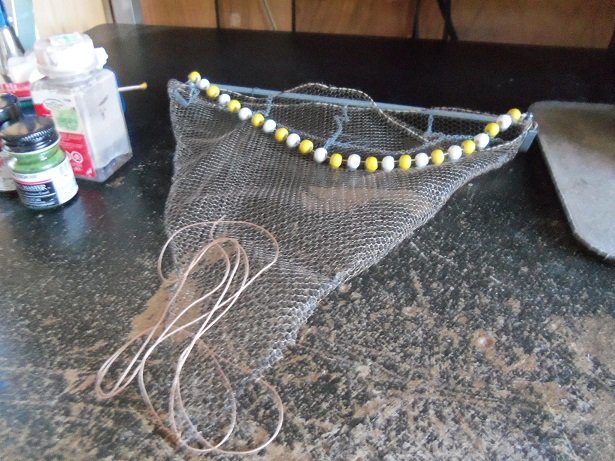
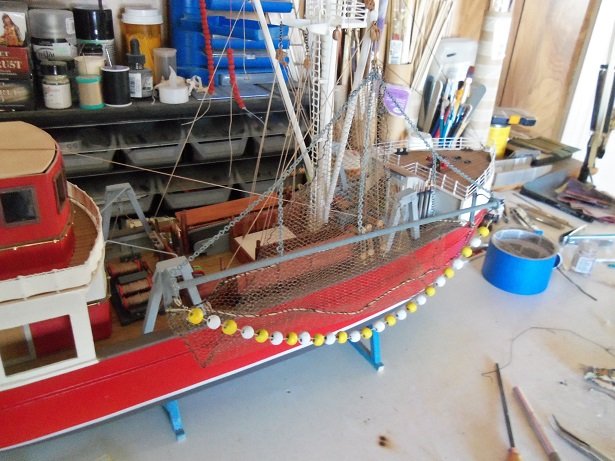
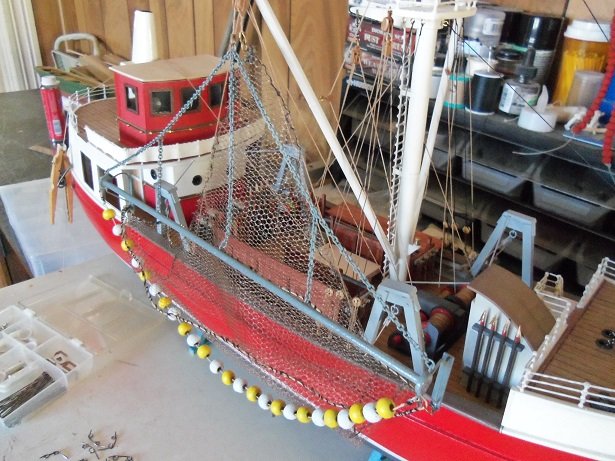
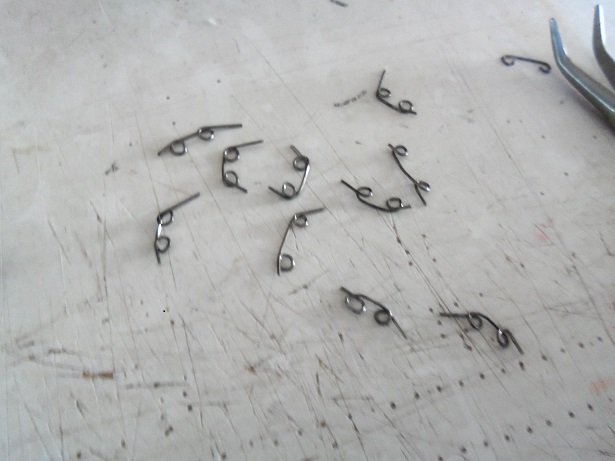
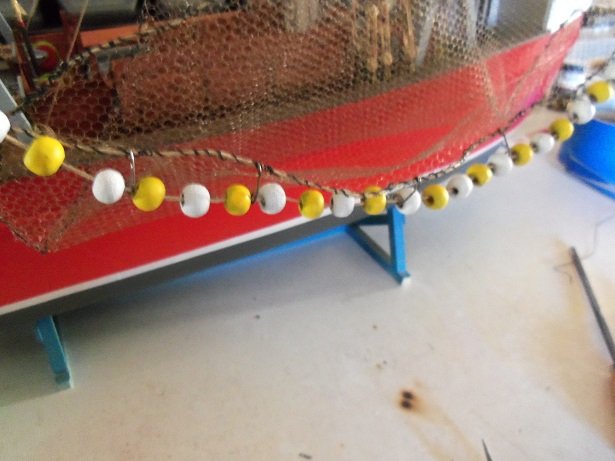
I spent a little time with this build today.......I think everyone is waiting to see this. I installed the starboard side net. it involved fastening the net to one of the trawl rigs, as the first step, using metal rings to do so. a length of hemp rope was seized to one side of the rig, and about 26 colored beads were strung on. I ended up choosing the yellow and white ones. at the other end of the net, a ring was fastened there too. a shackle was threaded on some rigging rope, and fastened to the net via the ring. it's a bit blurry, but you can see that the sides were crimped together before it was seized. all of the beads {buoys} were spaced and cemented in place on the rope.when lifted, the buoys hang natural. {I laid it out to show} the assembly was then fastened using the shackle that I had previously threaded on the net rigging. the rigging rope that is on the other end of the net, was threaded through the block {double block} and tied off to the shroud spreader and given a rope coil. I made up a bunch of these curly looking things........these need to be trimmed and shaped, and used to fasten the bottom lip of the net to the buoy string. the upper lip of the net is fastened to the center chain supports of the rig itself. the port side net is on the desk.......it will get the same treatment and installed on the ship. thanks for looking in

- 747 replies
-
- 17
-
-
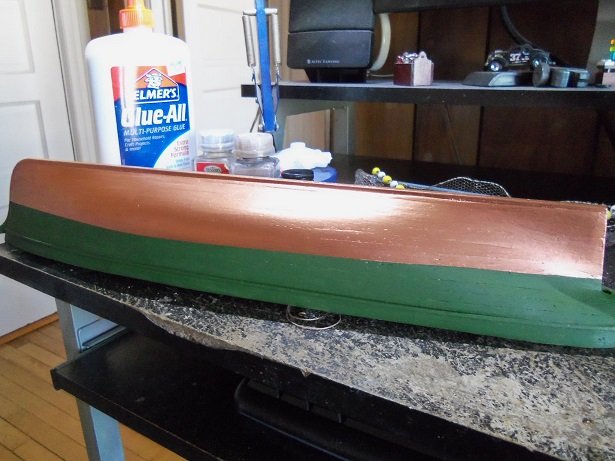
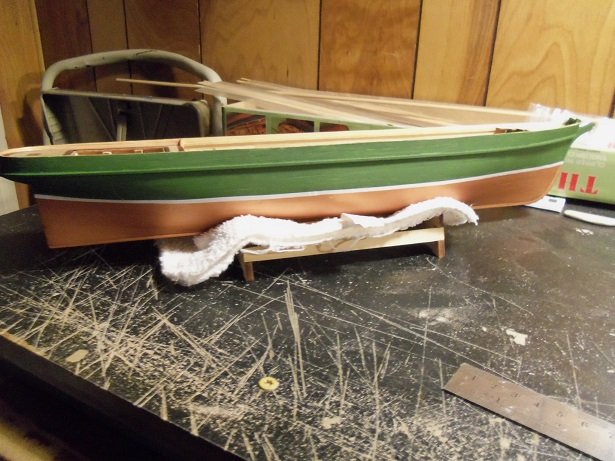
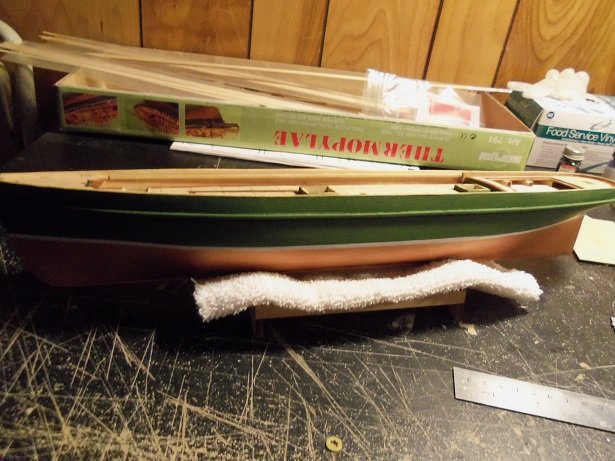
finally........done with that last bit! what a pain it was. the main goal here was to raise the waterline.......and I did so. as mentioned....the Billing's paint was a bust, as well as using the airbrush to do it. here is the Testor's paint. the difference is easy to see. I think that scrolling up will show you the Billing's copper paint pictures.........crap! it don't no matter....here is a picture of the Billing's copper bottom. big difference! from here, it got a coat of the flat lacquer. it needed more time to dry........it's a lot better than it was, I think. As an added bonus, I went through my bag of decals and got some white strips. they are actually the white decal paper, cut from other colored strips I had made. I cut them down even thinner, since they didn't need to be so wide. I will most likely need to paint the rub rail white. the waterline was such a pain.......I can imagine how bad the rails would be to line them with decal. so.....that's the big whop-t-do today....I devoted some time elsewhere

- 453 replies
-
- 16
-
-
- thermopylae
- sergal
- (and 1 more)
-
window frames look cool.........like something you'd see in a factory structure are the window panes small enough?
- 258 replies
-
- 2
-
-
- harriet lane
- model shipways
- (and 1 more)
-
progress looks good Tom....interesting jig for the dead eyes. I recently made a wire one....want to make a couple more in different sizes
-
well........it's true.......I haven't had one yet, that looked good at this stage of the game. it's when you get the hull squared away and start populating the deck, you begin to see the fruits of your labor. if you need to use a stealer, it won't be that large. you may see that you'll go another row before you'll need to do it. that will move you positions up.......if you plank from the keel up
- 714 replies
-
- 3
-
-
- lady nelson
- victory models
- (and 1 more)
-
hi J..........hang on to that thought........the update might shock ya! gotta get this one thing done first
- 453 replies
-
- 4
-
-
- thermopylae
- sergal
- (and 1 more)
-
they're like a telescope.....the more 'in focus' you get 'em, the better they look don't worry.....the ship is still in the box somewhere. it's a bit of work to find it.......and you will, I'm sure
- 714 replies
-
- 3
-
-
- lady nelson
- victory models
- (and 1 more)
-
but........I didn't use one. that's the point I'm trying to make I do have a verbal update for you fine folks though. it started out not too good. I tried to thin down the Billing's copper, but found that it had clumps in it.......it came out of the airbrush like spatter paint so I abandoned that idea, and went with the Testor's copper paint. there isn't much to do to it, but I cleaned the airbrush.......I had a window open, but it was just too much to deal with, in the house >the admiral said she didn't mind......so I went with it< I dumped the idea and just used the brush again. I had to repaint the entire bottom anyway.......plus clean off the spatter to boot. I also made an adjustment to the rudder hole and had to touch that up as well........so for that feeble reason, I gave it another coat of the flat lacquer. I hope I fixed it OK I'll show ya in a bit........I'm not done doll'in 'er up yet.
- 453 replies
-
- 3
-
-
- thermopylae
- sergal
- (and 1 more)
-
hey there Michael........this is quite a ship your building! you can't be that much of a novice, pull'in off some of the stuff I've seen here really super work.........! I haven't gone though the entire log.......but I will
-
I also wish you luck on the start of this wonderful journey........off to a good start
- 682 replies
-
- 3
-
-
- halifax
- lumberyard
- (and 1 more)
-
thanks for the good word........and to those who hit the like button I have been trying to be fair.........with just a couple more days left to my vacation, I have been trying to throw some attention to the trawler build. so close, but yet so far. 'ole Thermie has a ways to go yet thanks Zoltan! yea......making the structures is cool........but getting to the hull really has allowed me to get on with some major progress. it continues! thanks Pat it's one of the reasons why I pick and choose to paint with the brush. large areas can be a chore.....the airbrush has been a god send. you can get a consistent even coat of paint in less time. basically, that's the cause.....uneven layering of paint. it's more noticeable using a flat, than with a gloss........instead of the sheen curing to a flat appearance, thicker areas tend to retain the sheen. it's also another reason why I stick to using enamels.......it's easier to use lacquers and polyurethanes on it, than with other types of paint. it sure beats having to sand or remove paint with thinners and such..........less messy too thanks Carl. Billing's paint is a good paint. it dries to a hard finish and is fairly resistant to dings and scratches, when fully cured. the only real drawback that I can see is that storing it, it is not as resilient, than other paint types. I blame the bottling.......they have a crappy seal. although, I've had this inventory of paint for quite some time now.......you figure that I've had it since Billing USA closed........I've got maybe 20 or so bottles still......it's a crap shoot what I'll find when I open the bottle. the sheen factor between gloss and flat is good too......if your a car model buff, this is the paint for you. I've had to knock the sheen down, for cry'in out loud {granted I was working on the Michael Keaton Batmobile at the time}.....it was just TOOOOOO shiny! flat is flat.....dead sheen. John is right........the waterline on the Thermopylae {easy to spell now.......I typed it enough times} is too high.......don't know what I was thinking. I'll use the airbrush to repaint it......not hard to adapt the Testor's EZ airbrush to the Spraycraft compressor. I am having my doubts that I'll be able to adequately thin down the Billing's copper paint though.....it was pretty thick when I ended up stirring it by hand, rather than shaking it. I may have to switch over to the Testor's paint........I've had very little trouble storing Testor's paint. there is a big difference between these two paints. the Billing's copper has a dull hue, compared to the Testor's copper, which has a more vibrant hue and a higher sheen factor. I have plenty of spare bottles kick'in around......I'll try both and see what happens. it all boils down to this though...........I may sound like a poster child for Billing's paint, but trust me.......you'll fair just as well buying what you can get locally. car buffs........check this site out http://www.gravitycolors.com/us/product/porsche-pearl-silverstone/
- 453 replies
-
- 5
-
-
- thermopylae
- sergal
- (and 1 more)
-
with good reason ..........she's not loaded I'll fix it...........>famous last words<
- 453 replies
-
- 8
-
-
- thermopylae
- sergal
- (and 1 more)
-
the thought of giving this a second coat did not impress me. that's when I thought of the dull coat. I did notice another spray can in the back row that I hadn't looked at........it was a can of flat lacquer. it's put out by model master....does it matter what I use.........no, not really........hmmmmmm. setting the hull in the spray booth I set up.......all it took was three quick passes. when both sides were done, I closed the door and waited for it to dry. I checked in on it after a while and was amazed with what I saw. the hull looked much better.......the blotches were gone, as well as the problem that was plaguing the bottom paint. it needed to dry a little bit longer. when I finally brought the hull back out to the computer room, it was completely dry. where I use enamels, there were no adverse effects. I'll allow it to dry for most of the day before I do anything more.......still more deck work to go. I could do the rudder.........makes sense

- 453 replies
-
- 14
-
-
- thermopylae
- sergal
- (and 1 more)
-
thanks Michael.....welcome to the log you haven't missed too much.......still plenty to go yet. enjoy
- 453 replies
-
- 4
-
-
- thermopylae
- sergal
- (and 1 more)
-
your probably right Bob........I think you covered the way I do my hulls well enough
-
thanks Dave..........wind burned??? up here we can't seem to lose the wind........man! you ought to see it out there right now.......winds reaching up to 50 MPH!!!!! I gotta go back to work this week end, and the forecast is calling for snow flurries and rain......STINK-O!!! glad you like the build so far.......I hope you still do, once I'm done what I'm about to do wish me luck! I know I'm late.......I don't get out much, what can I say!

- 453 replies
-
- 9
-
-
- thermopylae
- sergal
- (and 1 more)
-
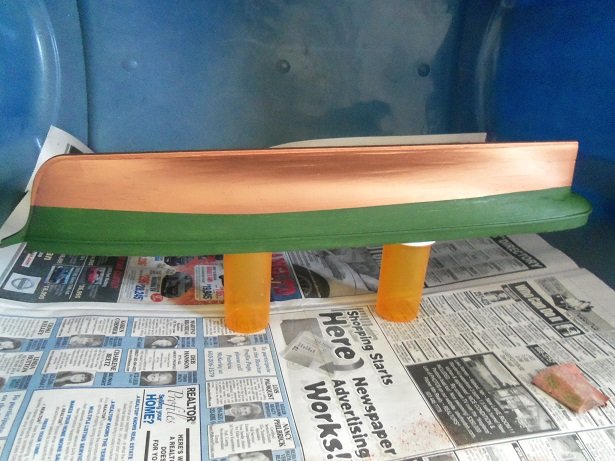
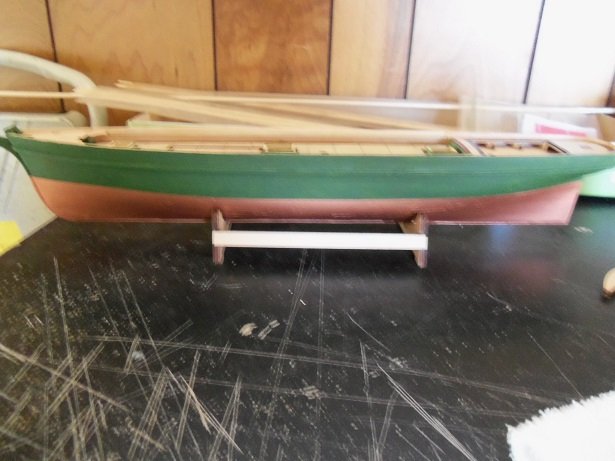
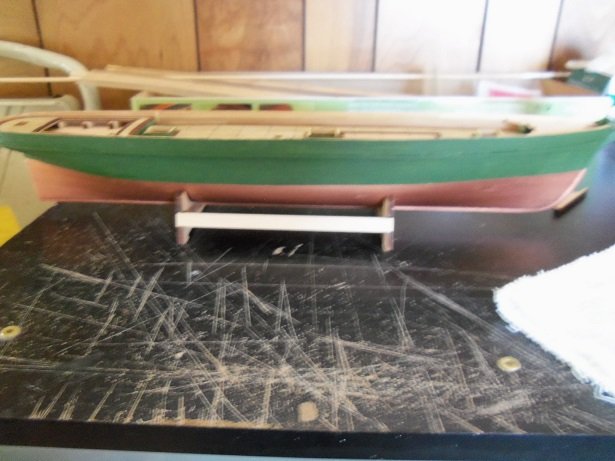
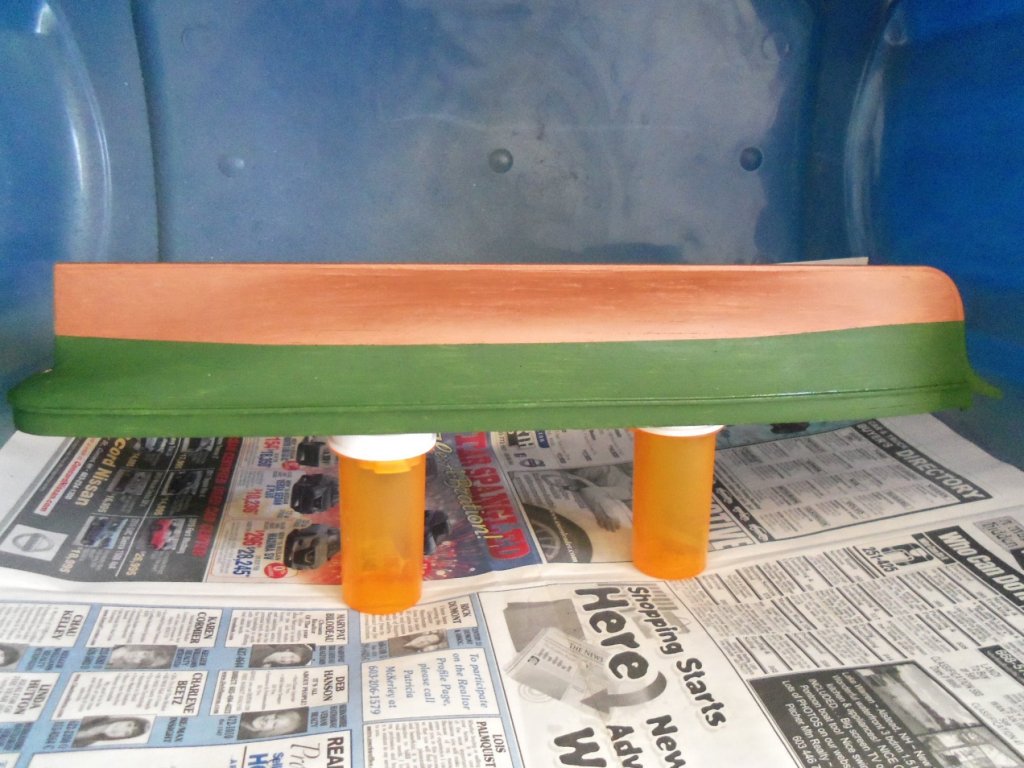
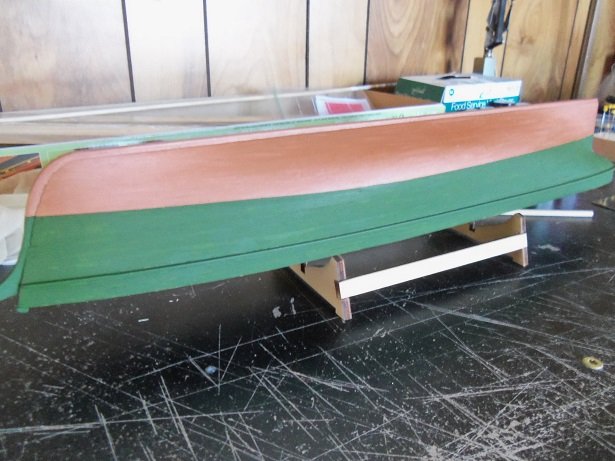
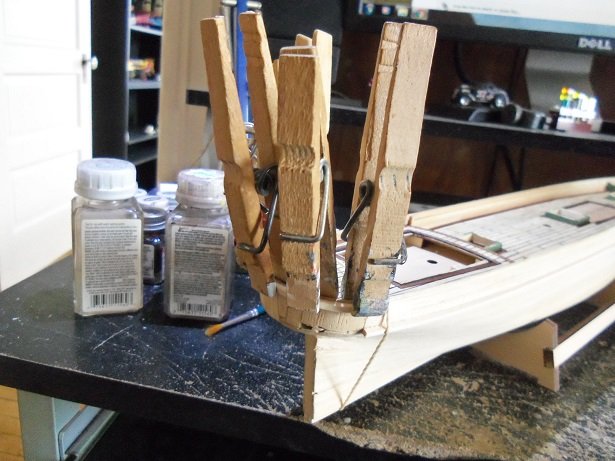
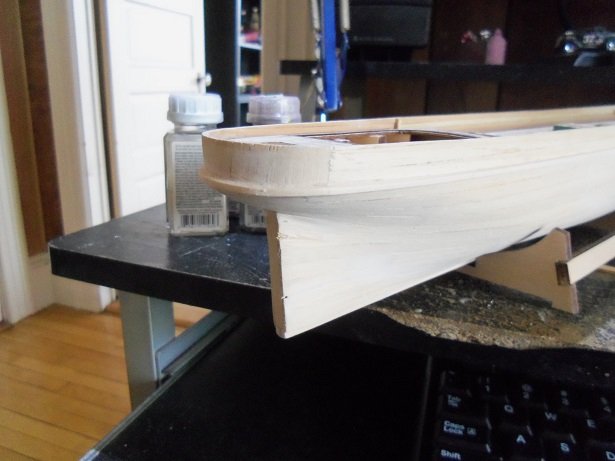
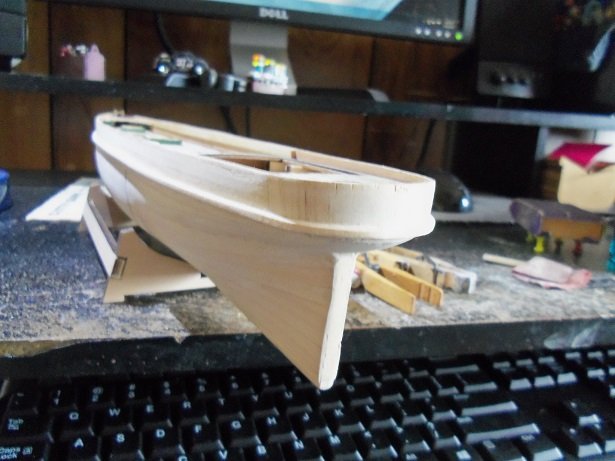
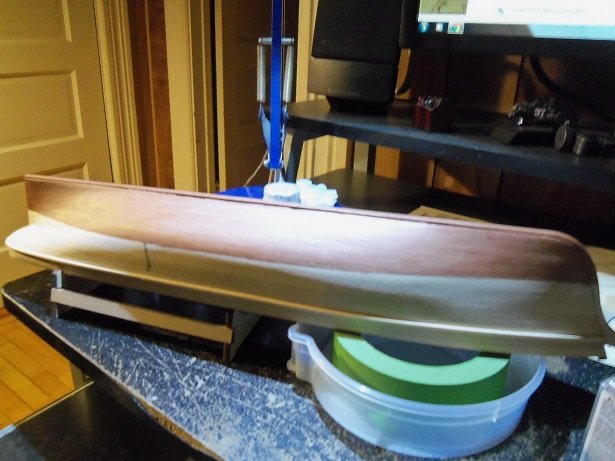
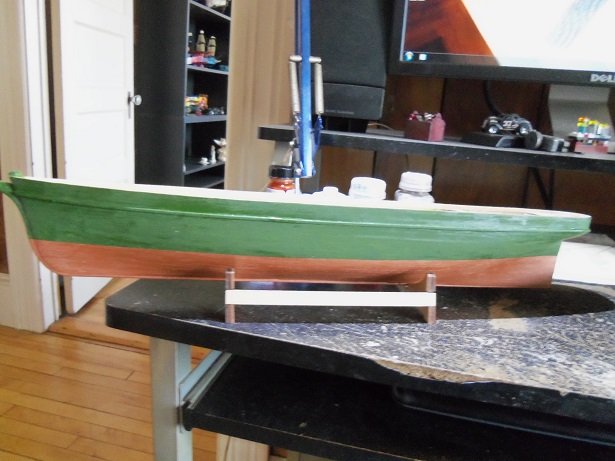
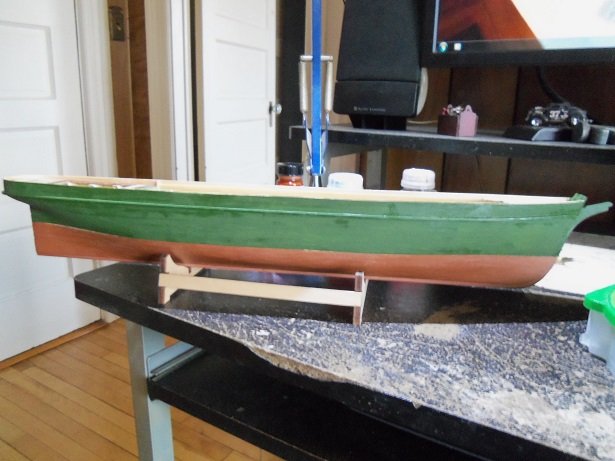
after I left here, I took a look in the camera. I have a few pictures from the other day....for cry'in out loud! I even have a picture of the deck with a coat or two of lacquer Don. I prefer the semi gloss......it tends to leave a slight sheen, but not overwhelming on the deck. decks, I feel, should be close to flat, since they see the weather. the lacquer I decanted is a flat......actually it's called dull coat {after reading what it said on the cap}. this leaves the deck dead flat........a little too flat, than what I prefer. as can be seen in this picture, the rub rails have been added. having marked them off, both sides were installed. the transom was a bit tougher to do. after soaking two pieces of strip stock, they were bent and fitted.......one didn't make it. a short time later, it was trimmed and cemented in place. that's when the filler came into play.......I went over the hull, filling in all the imperfections I could see. this included the transom, filling in all that nonsense and what gaps were in the transom rail. more sanding was done after, evening up the stern keel {you can see the bulge there}, and anywhere else that needed help. .......and then it happened! the bottom paint was added. I thought about doing the copper thing, but thinking how small the the pieces would be, I opted just to do the paint. this is the Billing's paint - copper......the same paint I used on the AmericA build. it's a different hue than the Testor's copper paint.........I have at least five or so bottles of it. back when I was doing my first United States build {back in the 90's}, I ran out of copper paint and couldn't find any anywhere. come to find out, there was a shortage of copper {so I was told}, and all copper reserves were being used to make coin.........no copper products were being produced because of it. my admiral and a friend of hers were out shopping one day, and spotted a model paint display, which had several bottles of copper paint. she called me and asked me about it......needless to say, I directed her to buy as many as she could.......I got all seven bottles. so, I've had this supply since then........and when Billing USA went out of business, Tom sent me what was left of his inventory of paint. this also had four or five bottles of copper paint.......I am lousy with copper, gold, and silver paint {meaning, I have a lot of it}. the Testor's copper paint is more vibrant in hue, than the Billing's copper........it also dries to more of a flat finish. the hull was masked of and painted. you see the blotch I did with the archive pen........actually, the tip of the pen wasn't damaged by it either.....it lives to mark another day then came the sad part....... after allowing this to dry for the rest of the day...this morning, I decided to paint the upper part of the hull. I chose a nice green....Testor's paint. I was about to add some thinner to it.......opening the cap, I noticed that the paint had solidified! I took my pick, thinking that it just might have skinned over, and tried to pull the layer off of it........wasn't happening. it was jelly underneath. oh well.......what to do, what to do.........I have nothing in the Billing's paint........unless you like Brunswick green {too dark}. the only thing I have, is a bottle of Model Master med green {FS34102}. shaking the bottle and looking at it........I liked the color better....a better hue than the Testor's green I was going to use. so......on it went! I like it...........it's still a little blotchy because it's not totally dry, but I think {I hope}, it will go away. I have a little touch up to do on the starboard side, but other than that, it looks good. I'm going to add a bit of tension here.....kinda make this a nail biter......the blotchyness did not go away. I'm thinking of what I can do to alleviate it. ....a second coat.......? I did both colors with a brush........shows how much technique I've lost, since I started to use an air brush. I wouldn't have had this problem, if I had used one in the first place!! I have the Spraycraft compressor {I have a complete outfit of this brand of air brush}.......I could have set it up and used it, instead of the compressor set up I have in the garage {it's still too cold out}. I wasn't happy with the copper either........now that it is closer to being fully cured, it seems to have taken on a faded, dusty appearance. I'll usually will do a primer coat before the color coat......I didn't in this case. am I to pay dearly for it? .....fine mess I've gotten myself into! putting on the painter's cap......I have an idea. icky-mae!
- 453 replies
-
- 14
-
-
- thermopylae
- sergal
- (and 1 more)
