


popeye the sailor
-
Posts
15,981 -
Joined
-
Last visited
Content Type
Profiles
Forums
Gallery
Events
Posts posted by popeye the sailor
-
-
hey there Mark
") just caught up with your log and very impressed with the progress. the planking looks really good and will look even better when fully planked! good to see your doing well.
just caught up with your log and very impressed with the progress. the planking looks really good and will look even better when fully planked! good to see your doing well.
- EJ_L, Old Collingwood, mtaylor and 3 others
-
 6
6
-
3 was the magic number..........the model is 33 inches long. divided by three gave me eleven sections, which I later marked off the halfway in the middle.
thanks
I can't wait to see it with a coat of paint ")
- Canute, lmagna, Old Collingwood and 2 others
-
5
-
-
I've been planking off 'n on today.........need to take breaks to give my fingers some rest. this stuff is hard to cut.......I've been using razor blades to trim it to proper lengths and the shapes I need to obtain. it's no longer mahogany.........it's Ironwood!
 the chopper is random at best, in giving me a square cut. I have made more progress.......I wanted to wait till I got both sides to the first torpedo mount. but out of habit, I did some light sanding to the bow area......for some reason, I always feel the need to sand as I plank.....can never wait till I'm done.
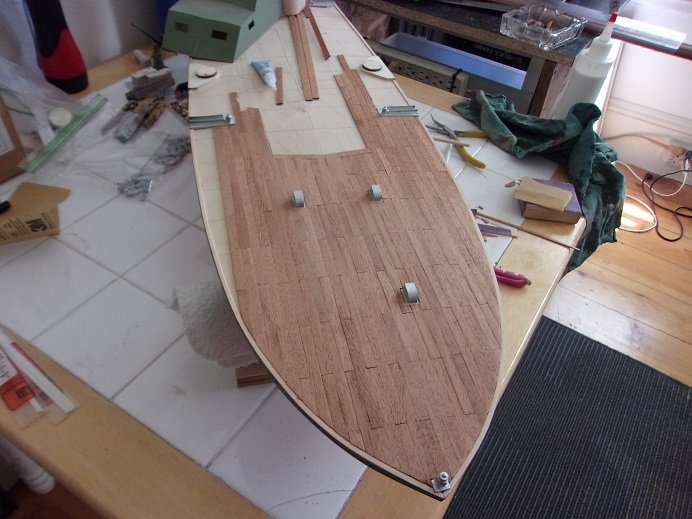
if I didn't wipe her down......you'd see the sanding dust. later, I will set up a small wood block with some sand paper, and go over it some more......but it looks pretty good with what I've done so far.....
there's still a few high spots........the block will help in leveling it out
my thoughts that there would be some gaps around the structure.....I put too much concern into it.......it didn't come out too bad. I don't have any dry fits.......I'll have to take a few to show you all. working around the structure has been interesting at best........cutting and sanding the rounded edges
along the edges at the margins was another concern, with this wood being harder to work with. cutting the filler planks, since they aren't a complete plank width....I'll have to come up with a way to rip them down. just for chuckles, I took a full strip and guided it freehand through the scroll saw. it worked reasonably well........I'll have to make some form of fence to better guide them through. I was able to fill in the port side and along the starboard side of the helm structure.

well....that's all I have for now.........back to the table I go.
- TOM G, GrandpaPhil, Kevin and 9 others
-
12
-
I think your right Lou.......I recall it was mentioned earlier in the log. scatter brained me, don'tcha know

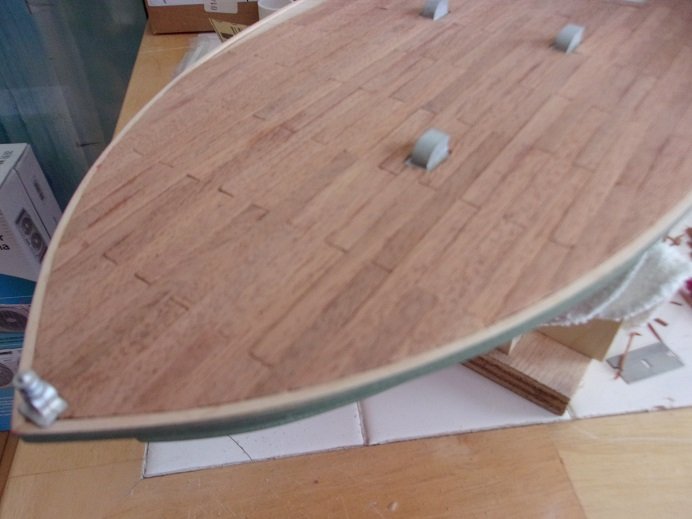
I went a little further with the planking after posting the last update. I made some fair progress.
it can be seen along the bow edge, that the planking is a little thicker { .5 mm} than the margins. sanding will take care of that, I'm sure
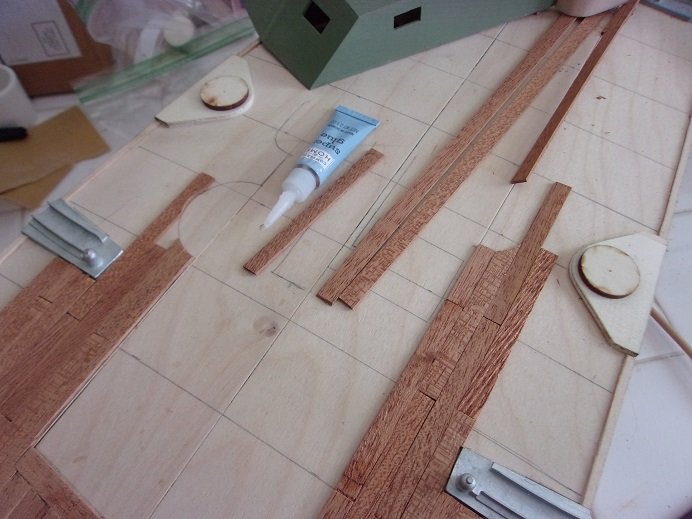
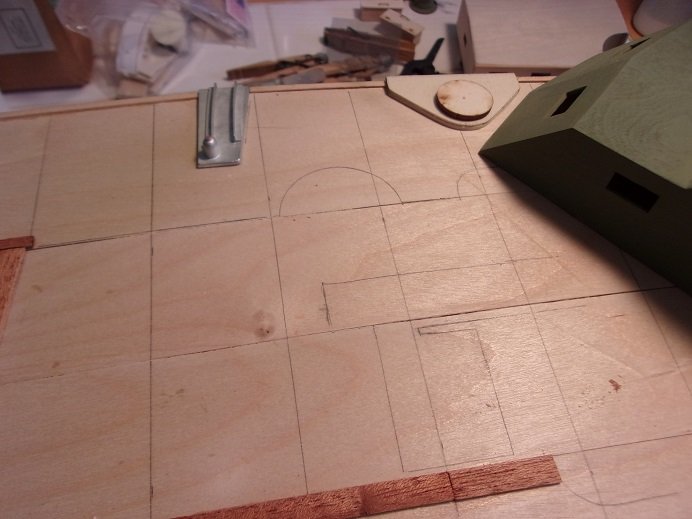
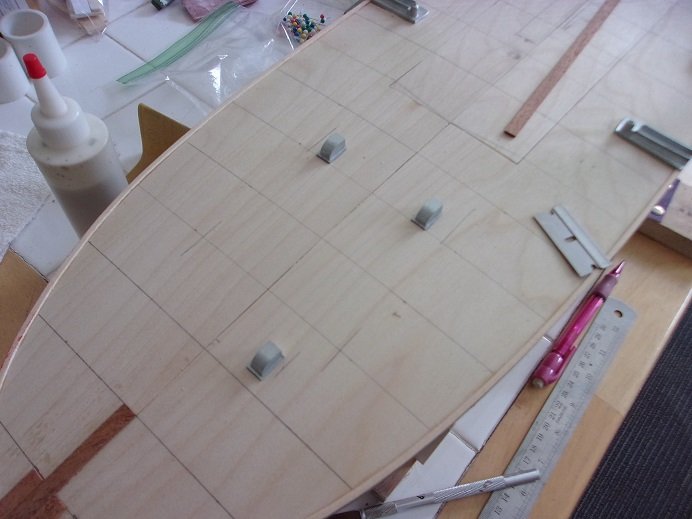
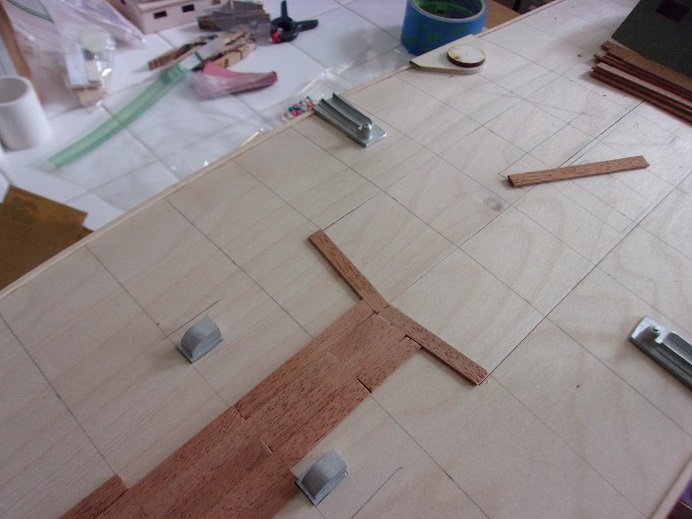
as I was lay'in plank, I though about the shields that are connected to the helm structure.......I will need to make allowance for them as well. this will add to the fancy cutting I'm doing along the bow, and what I have already on the deck. I drew them in on the platform.
the other hodge podge you see is the helm floor layout.......I'll show you what I have in mind for that soon. the planking progressed further........

to trace out the shields, I had to put the port side on the structure. I will need to add the small area between the shields, when I do the helm floor. I will also have to fix the port side.......as mentioned, this plywood that the parts were cut from, did not fare well being die cut. laser cutting is the best method......I'd put up with the char anytime!
I forgot about the turret.....I drew that in as well.........
what's that your think'in..........posting on a Monday?!?!?! I went into work Saturday, and decided to take Monday and Tuesday off
hopefully, I can get the deck completely planked, with the additional time {barring interruptions, of course}
- GrandpaPhil, Edwardkenway, mtaylor and 7 others
-
10
-
-
hello Hakan
just caught up with your log, and really like how you've progressed with her. she's an amazing looking vessel......very well done!
- Wintergreen and Nirvana
-
2
-
-
the turbos are missing........thought you put 'em on already ...... splendid looking aircraft......the paint is interesting. very nice work!
-
-
-
one thing I do notice Lou.........in the above picture you posted, the hull on the right is side planked diagonally, going aft to the stern........the one in the far left is being planked diagonally, going left towards the bow. I guess it didn't matter how they were planked. it also looks as though it was framed differently too.
- mtaylor, Edwardkenway, Egilman and 3 others
-
6
-
neat! ....a lot more framework than in the model........that's for sure
 I have the bottom picture in my file......there are others in the Navsource website:
Motor Torpedo Boat Photo Archive
so....I really wanted to get a good start on the planking this week........too much stuff got in the way. the weather has gotten so much better, but today looks like its gonna be a bit on the rainy side. I'm glad I got the outside stuff done
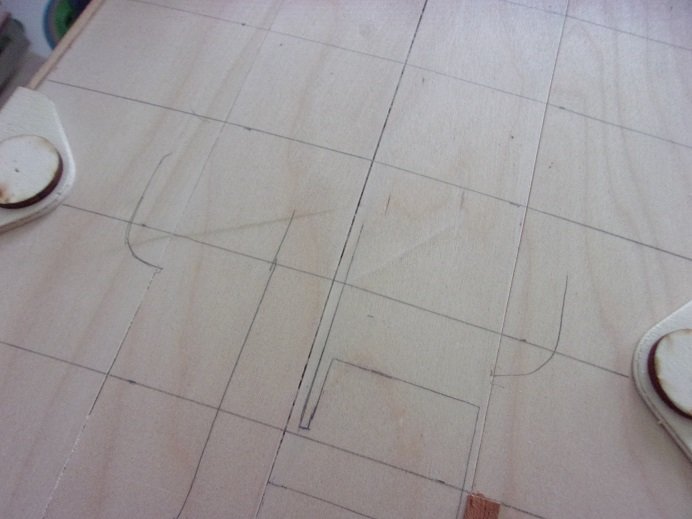
 the first thing I did was mark off the halfway lines.......as mentioned, 3 inches was perfect for this deck, 1 1/2 being the halfway. the bow light was fitted at the bow, by cutting into the margins where they meet.
the planking I was going to use was a no go........too thin for the margins, which would leave a ridge along the deck edges. using the Revell model for guidance, I saw that I would need to thicken up the planking.
going through again........what I have here, my only option is to use the mahogany planking. it's old wood to be sure......as mentioned, I got it from the other Nordkap kit I got for Christmas {and that was a few years ago}. some is warped in one way or the other, but I'll make it work. there's roughly 44 strips here.......1.5X7X880 mm...should be more than enough.
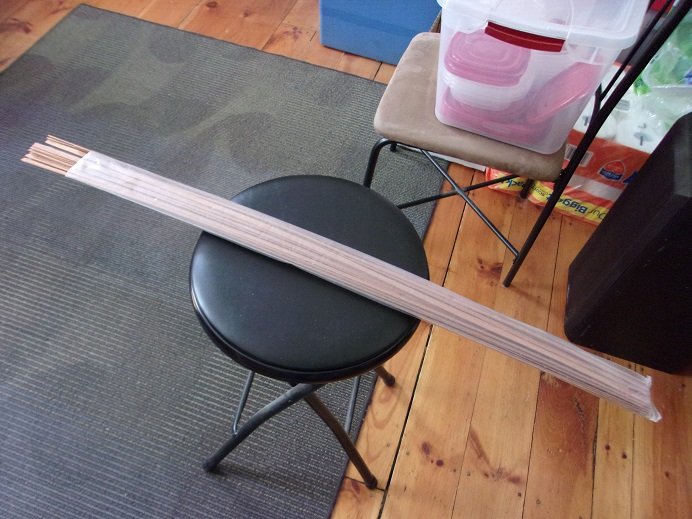
the planking begins......
I will likely need to do some extra sanding.......story of my life......ohhhhh well
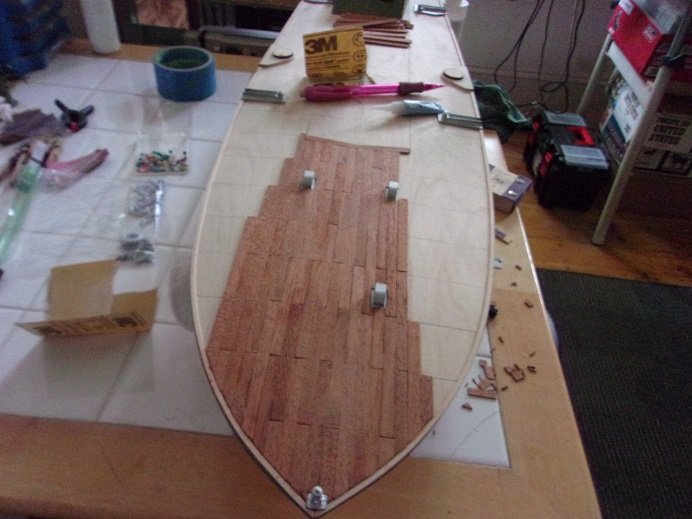
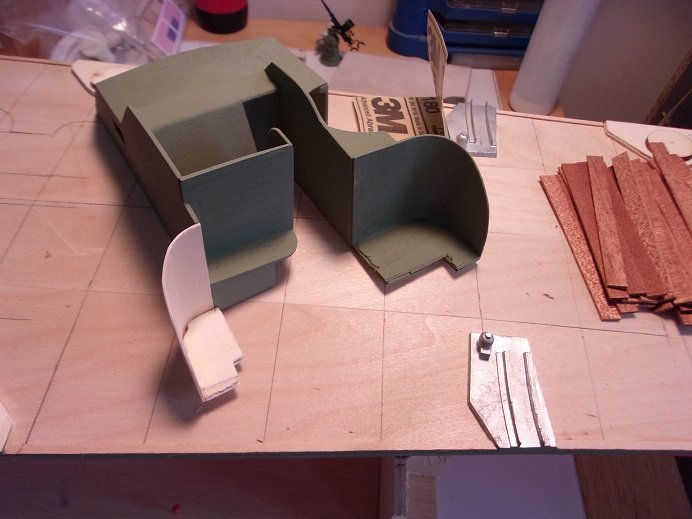
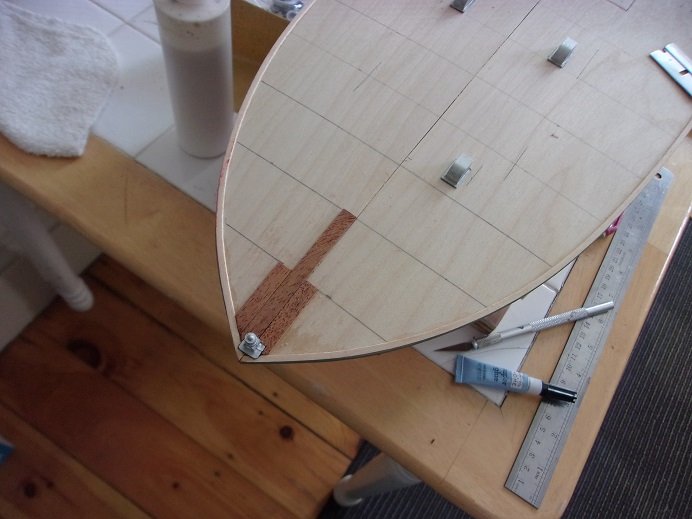
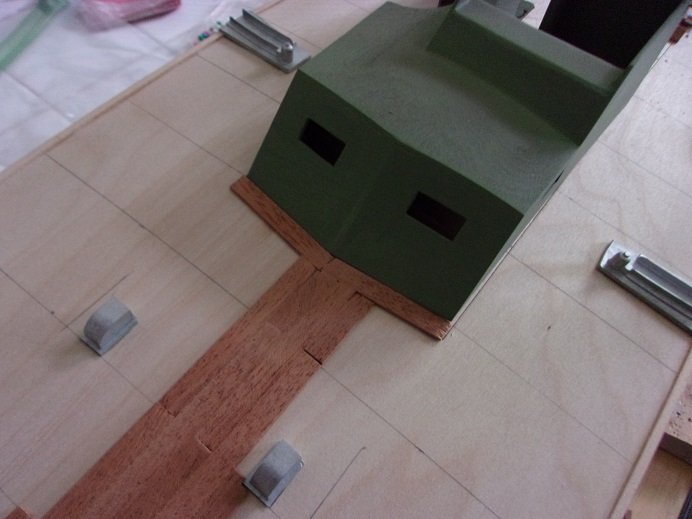
 I started to use white glue, but I found that to continue using it, would bog the process down by having to weight the warped pieces until it dried. CA will work much faster, and will thwart the warpage issue. the center line was about to reach where the helm structure will sit, and I didn't like the way the planking was going to butt up to it. so I laid down a pair of planks to act as a border for the front.

you can see why.......this stuff cuts like iron. I bought one of those 'chop boards' from micro Mark, but I'm not real happy with how it works. the blade has dug a groove in the board and the cutter wobbles, so a square cut is iffy at best. I tightened the pivot bolt, which stiffens the arm, but the cutting action causes the blade to warp...the harder the wood, the worse it is. I see spot putty in my future.
earlier, I mentioned my thoughts about assembling the helm structure........to use those center deck fillers and assemble the helm on it, as one would if they were building an R/C boat. my bad though.......I failed to see it with all the dry fitting I did. the structure is not square at the base, so when it is in place, I foresee a noticeable gap at the front along the sides. I might be reading too much into it.......but I don't think I am

we shall see.......
-
-
some really great progress Chris........looks super now that she has a coat or two of paint
I know lacquer paint has a hard finish........I believe that Urethane is a bit softer. awesome color...........concerning that first batch you never got......I hope whatever was involved with it, looks good in it
- mtaylor, Egilman, FriedClams and 5 others
-
8
-
your powering right along OC.........the figures look super
nice looking case too.......what happened with the other gent? did it come down to not being able to produce a case like that in glass, or did he decline to go further? I'm sure he lost some money having to post all those claims for damage. anyway, I'm glad you finally have a case to work with now you have a definite playing field to work with.
-
-
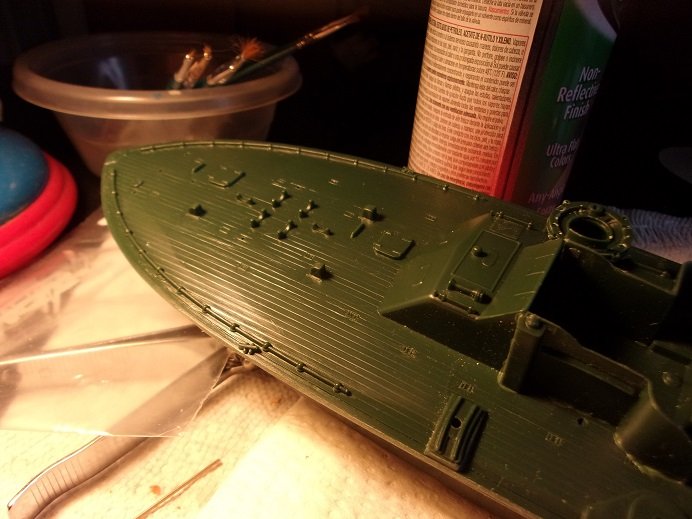
sweet looking camo......nice to see tutorials
-
I can see how far behind I am in this forum!..........sweet project I see here
pulling up a seat too!
-
-
sweet looking plane!
paint and camo is over the top!
- Old Collingwood, lmagna, mtaylor and 1 other
-
4
-
-
I see your expanding this train log Andy........I've been hoping someone would do it
I only have the one car so far.......the B&M snowplow.......still haven't finished it yet  I've seen quite a few kits on the website I frequent ....curious to see a break down to what a kit consists of. when I got the snowplow, it was partially built, so it led me to wonder. how old is this one your working on? as any railroader knows, the Ambroid kits are old...it was a lot of fun finding out about what trucks and couplers to use. I still feel like I'm in the dark about things, since I haven't totally thrown myself into the medium, but getting to the point where I am so far has been fun. I still plan on doing some sort of diorama with the snowplow.......I have the board and tracks laid down. great log......keep throwing in all the technical terms........I love your work!
- Old Collingwood, mtaylor, Egilman and 5 others
-
8
-
really great job! congratz Ed!

HMS Zulu 1942 & HMS Eskimo 1944 by RGL - FINISHED - Trumpeter - 1/350 - PLASTIC
in - Kit build logs for subjects built from 1901 - Present Day
Posted
amazing stuff Greg..........