


popeye the sailor
-
Posts
15,993 -
Joined
-
Last visited
Content Type
Profiles
Forums
Gallery
Events
Posts posted by popeye the sailor
-
-
sweet looking camo......nice to see tutorials
")
- mtaylor, Edwardkenway, Canute and 3 others
-
 6
6
-
I can see how far behind I am in this forum!..........sweet project I see here
pulling up a seat too!
- Old Collingwood, CDW, lmagna and 4 others
-
7
-
I've seen the MASH kit on old model kits.......I've also see Rambo's chopper and the Airwolf chopper too! this should be a fun project
")
- Old Collingwood, lmagna, mtaylor and 4 others
-
7
-
sweet looking plane!
paint and camo is over the top!
- mtaylor, Canute, Old Collingwood and 1 other
-
4
-
-
I see your expanding this train log Andy........I've been hoping someone would do it
I only have the one car so far.......the B&M snowplow.......still haven't finished it yet  I've seen quite a few kits on the website I frequent ....curious to see a break down to what a kit consists of. when I got the snowplow, it was partially built, so it led me to wonder. how old is this one your working on? as any railroader knows, the Ambroid kits are old...it was a lot of fun finding out about what trucks and couplers to use. I still feel like I'm in the dark about things, since I haven't totally thrown myself into the medium, but getting to the point where I am so far has been fun. I still plan on doing some sort of diorama with the snowplow.......I have the board and tracks laid down. great log......keep throwing in all the technical terms........I love your work!
- Old Collingwood, Canute, Egilman and 5 others
-
8
-
really great job! congratz Ed!
- Canute, mtaylor, Edwardkenway and 2 others
-
5
-
nice progress Chris........I think with the finished planes side by side, one would never see the difference. the only thing I see is a longer aileron surface. the wings came out really nice!
- ccoyle, mtaylor, Edwardkenway and 5 others
-
8
-
nice progress James........ great looking model! lighting will really enhance it!
- Egilman, mtaylor, Old Collingwood and 1 other
-
4
-
great job!!!.........the camo looks even over all three pieces! really should put them in a diorama
-
-
you've got a superb looking model......nice touch using brass tube for the cannon barrels
absolutely awesome!!! hope you decide to build another....love to see!
- Edwardkenway, lmagna, mtaylor and 3 others
-
6
-
sweet looking model........very nice example in using a jig
we really should see more of these projects......scratch building at it's best!
- Old Collingwood, mtaylor and Canute
-
3
-
super looking plane!........I'll keep your recommendation in mind ! nice and neatly done........:
- Egilman, Edwardkenway, Old Collingwood and 3 others
-
5
-
 1
1
-
gotta keep in mind to keep looking in here
sweet look'in box..........shows you were pay'in attention. so good in fact, that the admiral confiscated it I tend to keep the admiral in the dark with my goings on.........I get tired of seeing the whites of her eyes {makes me think there's something wrong with her, don'tcha know  }
}
very nice work........your next one will be even better {make sure you hide it next time}
-
she's in the slip Lou........ready for the topside stuff
onward and upward
-
Mark knows me too well me thinks
I'm even willing to bet that he thinks I've been contemplating cloning this model 
sadly, I can't add them to this model Kevin.......the only addition I can do is the 37 mm gun Kennedy had lashed to the bow, in place of the life raft. I'm still looking into it
Rambo........you mean, in addition to his chopper, and and I do believe that there is another kit of the chopper and a Jeep. Monogram put out the chopper model in 1:24 scale.......looks really cool.......but then again.....I thought the 'Airwolf' offering was cool too
but really......all the different ways these boats were outfitted, one could go nutz with this subject alone if I did.......I'd likely go along the lines of a assault vessel, and not follow Kennedy's idea of playing chicken with a destroyer {one has to think the outcome would not be good}.
I got a little bit more done yesterday.......I had an important errand to accomplish........get some wheels for my princess
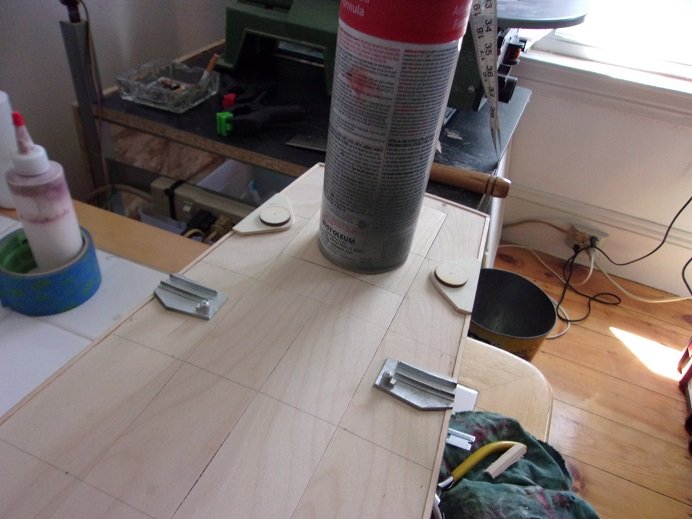
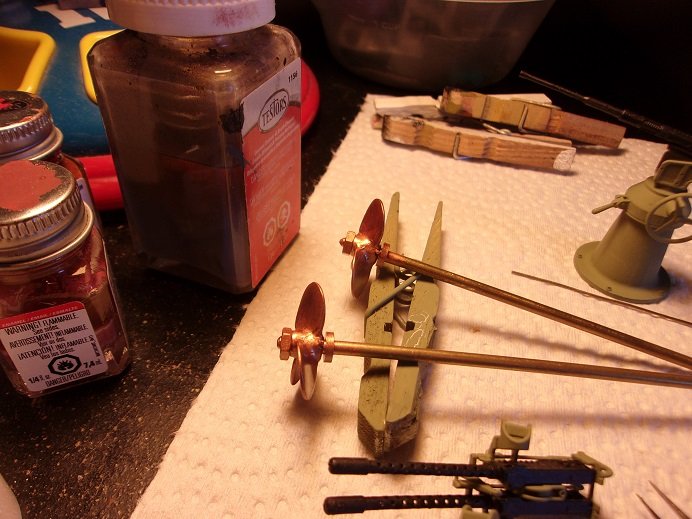
 my granddaughter needs a bike, so we got her a really cool Huffy.....even added a license plate that says 'girls rule'. we'll be delivering it this afternoon, so modeling might be scant again today {although I added the final half of 'panel' to the deck this morning}. yesterday's bit shows the installation of the props and rudders...that was fun. I ended up chopping out a segment of deck framing and altering the allen wrench, just to tighten the set screws for the rudders. sadly enough, the props didn't receive this treatment, due to the shafts being too short and not protruding out enough to add the lugs.......would have been cool to see that they spin. from all this, I give one small bit of advise........if you gonna sport twin screws, but them as a set and not separately. not only that, when I painted the bottom, the plastic strut appeared transparent, as opposed to the metal one.......I had to give it a second coat as a touch up, at the end of the initial coat. I found a couple of thinner bottles to decant the hull paints in, but I haven't done it yet.....I still need to.
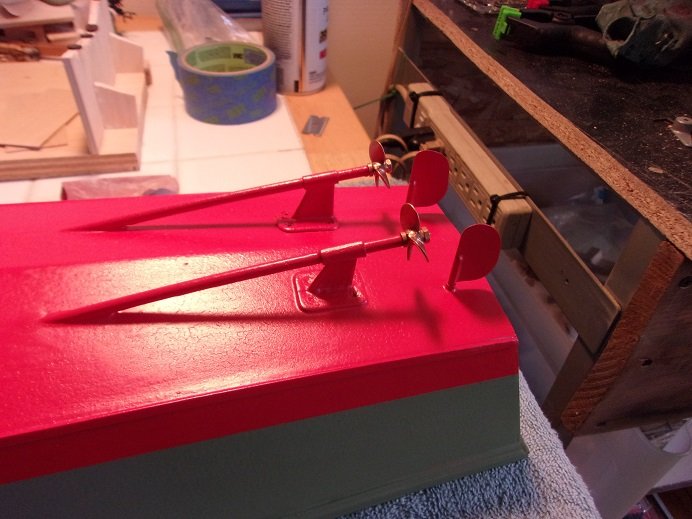
in setting the rod to synchronize the rudders, one got slightly bent........I had them propped on a piece of wood to hold them in place. it wasn't hard to straighten it......no worries.
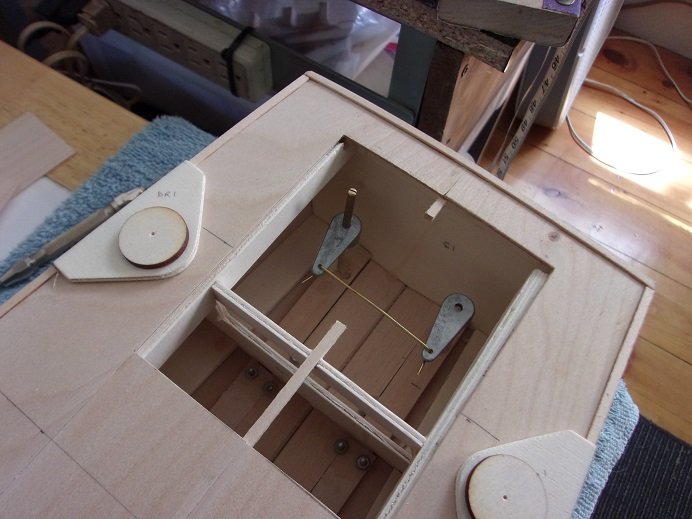
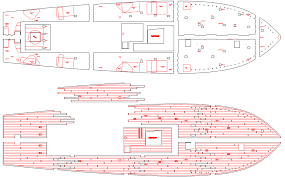
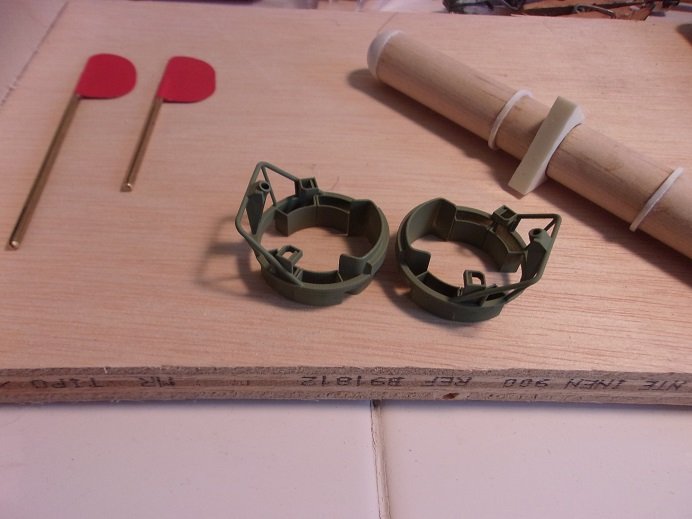
before the paint took place.........looking at the deck diagram, I saw where those three vents go. they are to be located on the bow......I decided to put them in place before the deck planking.
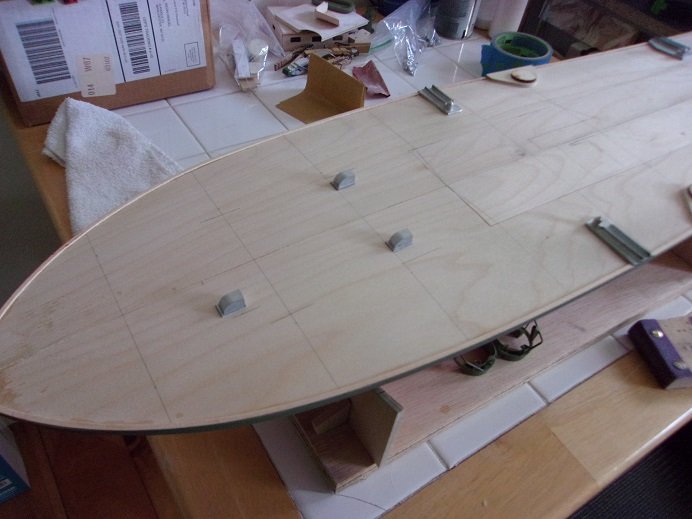
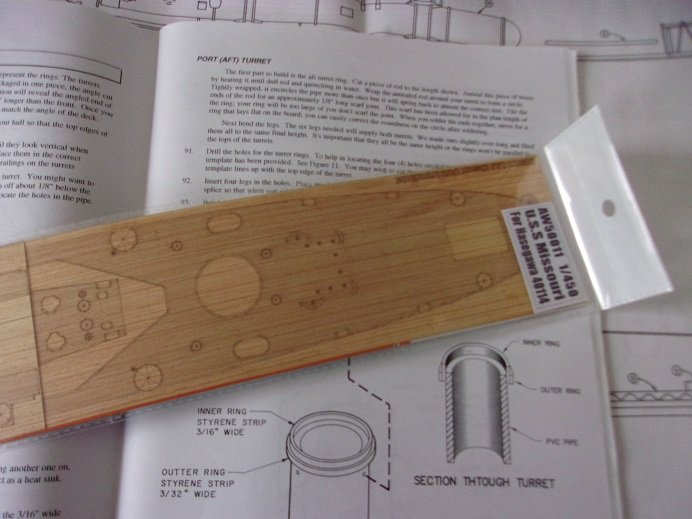
the deck marked off nicely @ 3 inches......I should add 1 1/2 inch marks too, to add to the butt shifting. apparently there is a laminated deck that can be purchased for this model.
on a different model note........I had mentioned that I ordered my first laminated deck for a model from BNA. it took a while.......and I must say, that this place has some very good service. they let me know every step of the way where my order was. when I knew that the package was near the U.S. shores, I set up the tracking with USPS and they kept me informed as well. I got the package the other day.......both of them chimed in!
I've never done one.....but looking at the kit....it will benefit from it
ohh...ohhhh.........the crystal ball has gone dark......I can't tell anymore. the future is so fickle once all that other stuff was done, I could close up the deck on the PT boat. the deck frame was put back in place, and the panel pieces were cemented in.......the starboard side was added this morning. these pieces were slightly warped.......I could clamp the port side, but for the last one, I had to resort to outside pressures.......one of the rattle cans worked nicely.
I was hoping to get into the deck planking this week.........it should be fun when I do
thanks for look'in in and thanks for the likes......as always, I really appreciate it!
-
really nice progress Tom.....the standing rigging and sails look very good
-
thanks OC........and thanks all for the likes
she's back in the saddle {so to speak}.......more soon.
- Egilman, Canute, Edwardkenway and 2 others
-
5
-
can't get any better than those! the detailing is awesome!
- Old Collingwood, mtaylor and Canute
-
3
-
in my time working with wood, varnish has been this 'soft' finish to me. when I worked in a cabinet shop back in the '70s, I worked with lacquer, and haven't turned back since. it is a hard durable finish that resists most minor dents and dings. great for me, since I probably manhandle my models more than most. it still is something to look into......experiments are kind of my thing
didn't get to the model as much as I wanted to yesterday......but while I was at my desk, I did a bit more than pay attention to the computer
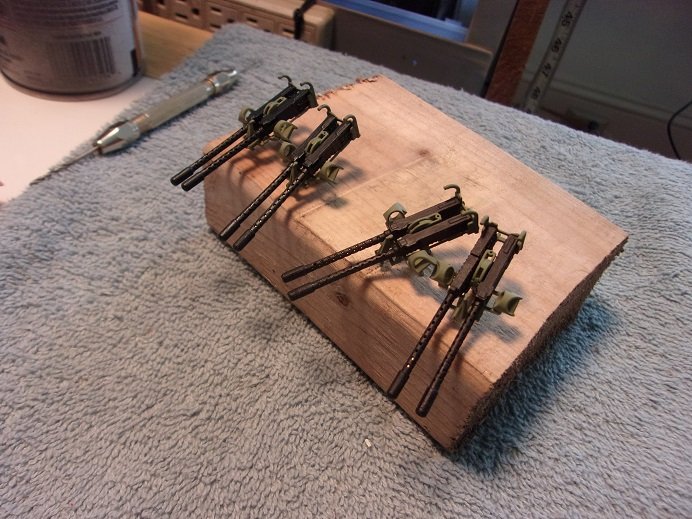
when I assembled the .50 cals, I just centered everything, using bits of brass to create a locator pin {there are holes molded into the parts}. but after painting them and setting them in the carriage, I noticed that they don't look as straight as they could be........they are good, but I think they can be better. even in the holes of the cooling shields.......you can see right through them....there is no evidence of a gun barrel  I have another set........and so, the second attempt begins. finding suitable diameter brass rod was not a problem, lengths were cut and fitted, and the cooling shields were added to the gun part.
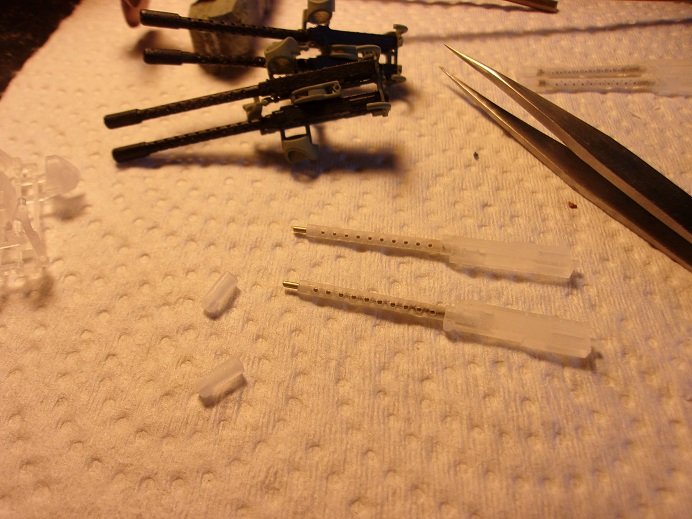
....leaving enough to put the muzzles on
when they were assembled, they were painted in Testor's Gunmetal, rather than flat black. I still will dry brush them lightly with flat steel afterwards and I painted the carriages and gun placement tubs in the Army green. the props will remain in the bronze color, but I lightly painted them with bronze to freshen them up, and to paint the nut and ring in the back.
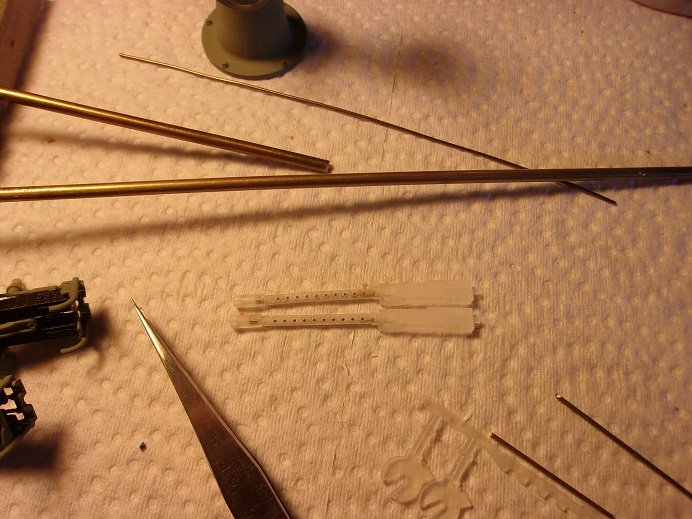
the comparison doesn't show too much of a difference.......other than the absence of daylight through the shield holes
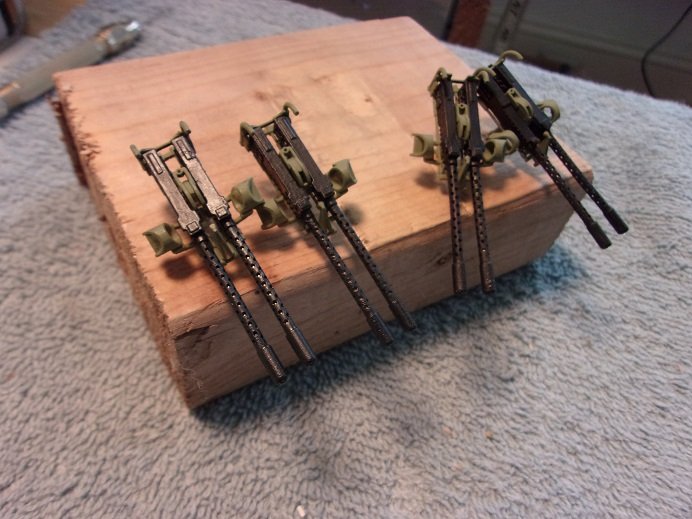
which is which? they look straighter........the cooling shields have a backbone. the test is bittersweet though........because it's too bad I can't put them all on the model
 {ohhhhh..........such an evil thought I am thinking }
-
congratz on a beautiful model.........fantastic rigging, sails, and color
 I have this kit.......after seeing your build......I see that there is no way to come close to what you have done! an awesome model!
-
your referring to a 'short hulled' ship?.........even under sail, it might have been hard to keep them moving straight in the water. not sure how far back they were used, but are you suggesting that some form of leeboard was used?
-
you certainly did not disappoint.........you've returned to us with a very interesting project!
truth be told, I've not modeled that far back......I'm not too familiar with cogs or carracks. it will be interesting to see what you do with this model. I hear you about scratch building.......I can't do a kit model without changing something very nice progress!
SB2U-1 Vindicator by Landlubber Mike - Accurate Miniatures 1:48
in Non-ship/categorised builds
Posted
really nice work on her so far Mike. fit issues happen more often than not........amazing how some get their model to look so good in the end") I have no doubt that you'll arrive with the same results! adding PE and resin doesn't help either
I have no doubt that you'll arrive with the same results! adding PE and resin doesn't help either  pulling up a chair