


popeye the sailor
-
Posts
15,993 -
Joined
-
Last visited
Content Type
Profiles
Forums
Gallery
Events
Posts posted by popeye the sailor
-
-
I have been all over that 103 site........indeed there is a lot of good info there. since the model is of the PT 109, I though I'd take a browse into John F. Kennedy while I was at it. originally, he was assigned to PT 101, squadron 14 {RON 14}, to patrol along the Panama Canal. while he languished here, PT 109 was in the process of being shipped to the Pacific theatre, aboard the U.S.S. Joseph Stanton, along with three other boats. these transport ships could only carry four at a time.

Kennedy put in for a transfer against his parents wishes, and with the Help of a Mass. congressman, found himself heading for Tulagi Island, where Squadron 2 was based. he took command of PT 109 on April 23, 1943.
two other things I found out in my browsings, was that the torpedoes weren't that great, and neither was the radar systems in these boats......half the time they were unreliable or didn't work at all. now that the hull can sit on her new stand, I can start to flesh out the deck layout. the deck platform has a punch out on each half, to enable access to the R/C works.......the entire structure can be removed. matching the punch outs to the correct side that they came from.......makes for a better fit.
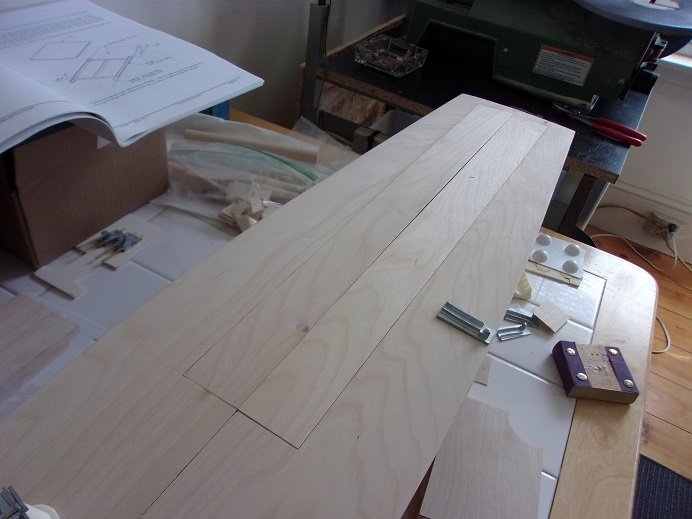
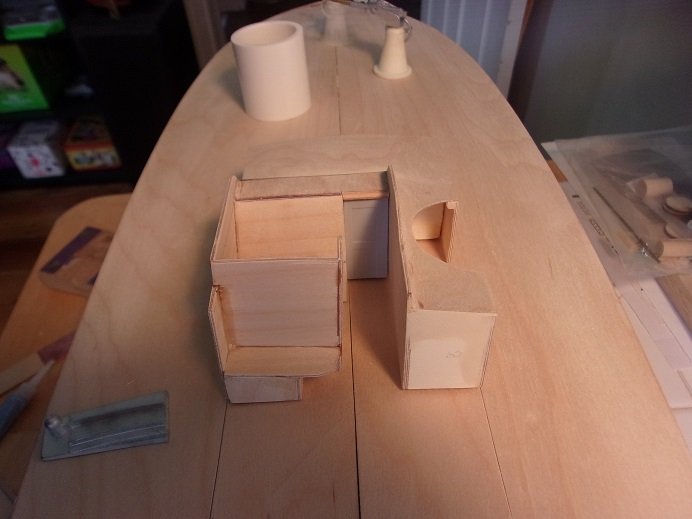
that's the new table.......a bit lower than what I had before. I'll see if the creases in the top gives me any trouble. if they do, I'll have to get something to cover it over.....Formica or the like. I wasn't sure if I wanted to trim the helm structure or the turret rook to fit.......easiest was to just trim the helm structure.
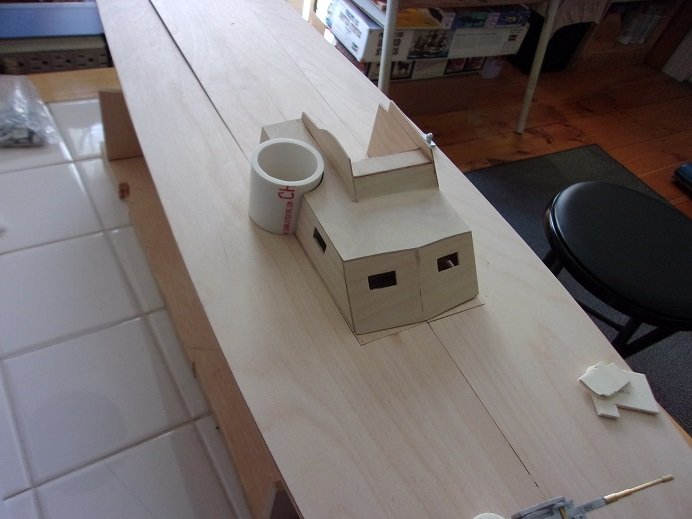
basically, this is how it will sit......to be removed along with the rest of the center structures. the structure isn't finished yet........and there's something I'm not too crazy about. the companionway entry to me seems too small.......that, and I'm still puzzled how the back wall {that little piece I made earlier} fits. so I cut it all out except for the control panel.
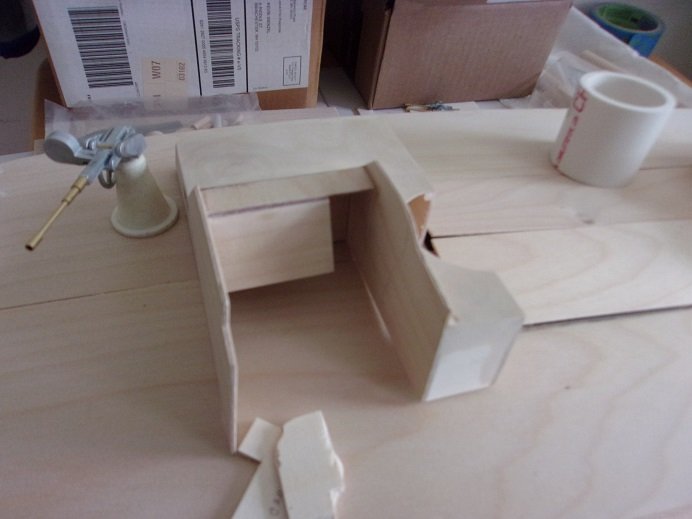
thinking it should be wider, I cut about 1/8 off of the control panel. the opening was walled off again with cast off basswood, and added a door, which was an extra from the Progress's fittings kit. those two choppy looking pieces in front are additional shields.....gotta figure how they come into play with this part of the structures. the wood is Spruce plywood.......terrible stuff to work with. as mentioned, being die cut, the parts need to be scored before they are punched out of the parts panels. as for that small section of back wall, it too was shortened by about an 1/8, and trimmed to fit the relief toward the end of the port side wall. now it has the proper configuration.
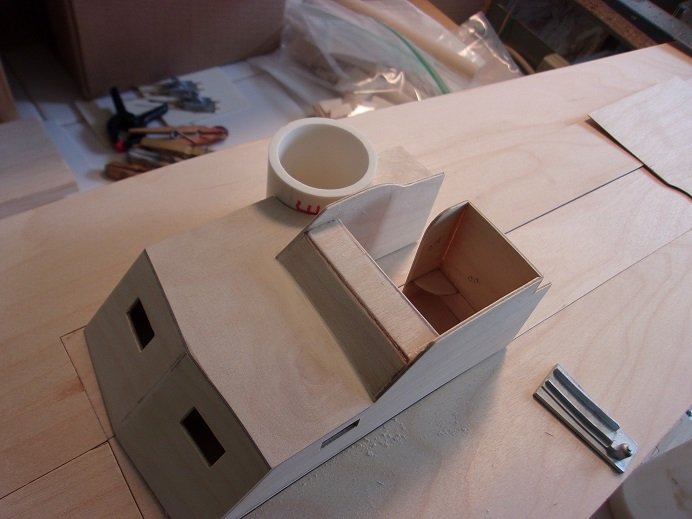
...and with the turret rook in place.....
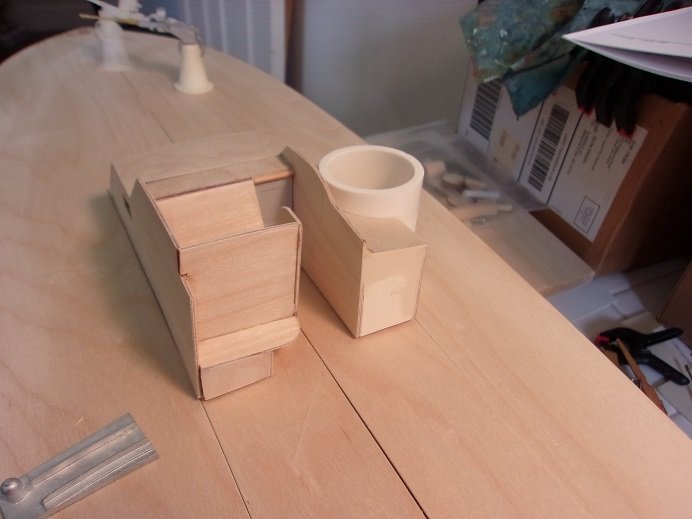
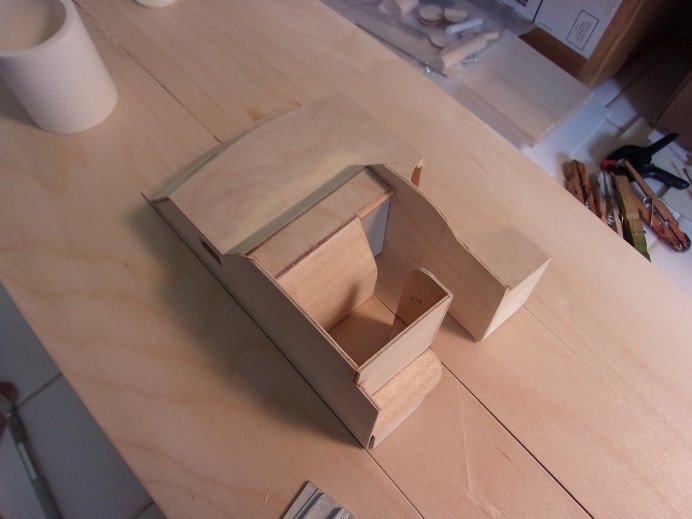
I started with the starboard side shield. here where the wood grain can help you.......cutting a piece of 1/32 basswood the height needed, I got it wet, and let it set for a few moments. patting it down damp, it was cemented {with CA} around the edge of the shield 'floor'. with a pair of scissors, it was trimmed with a curve, ending straight down where it opens to the deck. the grain when wet will be a lot more forgiving, for bending it to this degree. it was then glued to the flat surface of the starboard side 'end' box. the wood still damp, it still remembers that it was once straight, so it need to be taught that it now has the bend. the structure was clamped to the table, keeping everything flat until it dries.
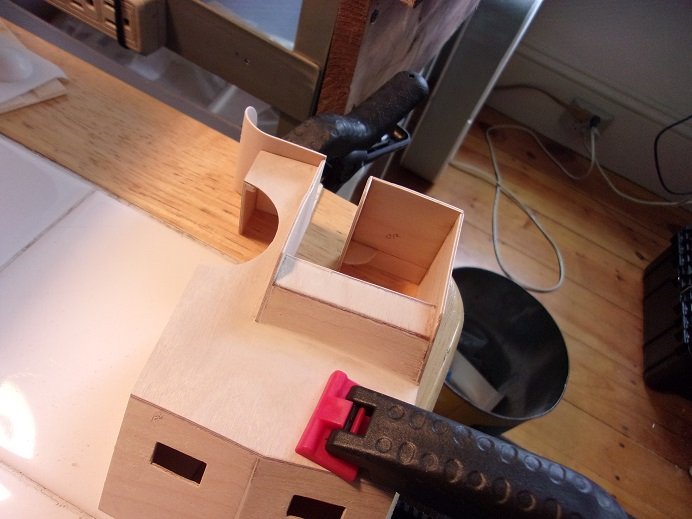
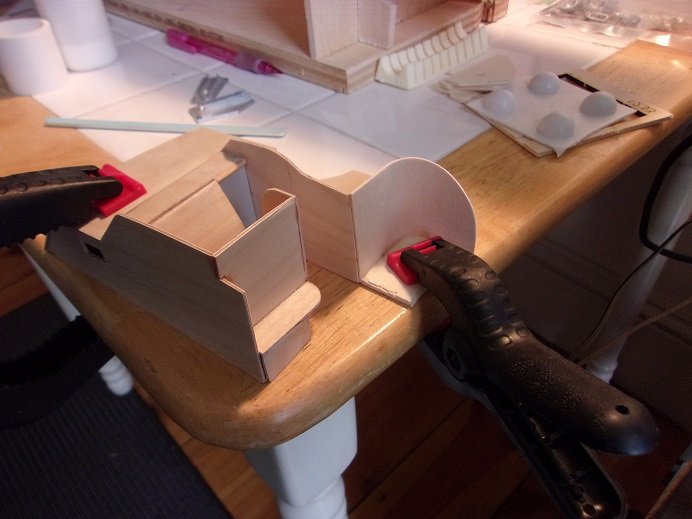
using the grain as a tool can add interest and natural curvature and contour. it beats having to round off corners. there are a few chiggers in the shield floor......there will be in the other one too. I could have simply scratch cut another pair, but I have something else in mind. I could have gone further, but I started to clean off table white....then ended up painting the pin rail parts for the Agillis while the work I did on the PT boat dries. I should have more tomorrow
")
- Canute, GrandpaPhil, gieb8688 and 9 others
-
 12
12
-
thanks everyone
the nod thing doesn't just apply to the computer, it happens when I spend too much time doing the same thing. I've done it at work too.......runn'in around all day working.......they call a meeting, and they expect you to sit through it. I've been moving all day....now they want me to sit....I call it stagnant ") this is why I don't sit at the 'drawing board' when I model.......I have to be in motion. I hardly ever draw anything out....the only thing I've ever drawn out, was the dance floor for the M&M boat. I dunno.........maybe I should look into my ancestry, to see if I'm related to Rip Van Winkle or something
this is why I don't sit at the 'drawing board' when I model.......I have to be in motion. I hardly ever draw anything out....the only thing I've ever drawn out, was the dance floor for the M&M boat. I dunno.........maybe I should look into my ancestry, to see if I'm related to Rip Van Winkle or something  second cousin to the Sandman...........Prince Valium {Spaceballs antidote}
but no......really, glad I got up the gusto to finally finish her
toys that would try to kill you......the Puppetmaster comes to mind
- mtaylor, cog, Old Collingwood and 3 others
-
6
-
-
-
hey-ho gents!.......getting caught up with the goings on here.....thanks for all the kind comments
yepper......strange events going on.......we saw snow, but you would hardly know it. the flakes were as big as dimes.........really wet stuff. it's over now I think.......haven't seen any more precip since lunch. I knew I wasn't going to get another coat on the hull.......I haven't touched it either. I did put her on the stand though, and now I'm thinking of what goes on the deck. I'm thinking of how many dead lights are on the deck......so I pulled out the Revell kit of the PT 109 and took a look. I also looked on that 103 website, but the diagram there must include the placements of different variants.......cripes, there's a bout 50 of 'em. oh......I did sand around the edge of the deck sheer....a little resin did collect. I'm thinking though that a light sanding might be all it will need......the one coat of resin is good. especially since it's going to be a static model. for anyone who might do an R/C, this is the way to go. after two coats........even without the cloth, it will more than suffice to seal the hull. Vaseline or a light grease should seal up the rudder and screw tubes. I just glad that the day came.......and to me, it was a complete success!
I did some more reno to the spare room........I have a different table now. the table I was using, was actually a shelf I built for some of my modeling stuff. I added a couple more shelves, and opened the room up some more........although I think that dream of a 'wrap around' work table has gone poof in the process
I should have a bit more to report very soon. thanks for look'in in
- Blackreed, Edwardkenway, CDW and 6 others
-
9
-
hey there OC.........superb job on the tank! love the weathering job and what you did with the tracks. you've really gone all out
- Canute, Edwardkenway, Egilman and 1 other
-
4
-
-
-
looks like an international orange........I have some
-
still a nice looking model though!
well done!
- Old Collingwood, Canute, Egilman and 1 other
-
4
-
I do apologize that I haven't gotten back.......life can be so involving. good you fixed the garboard......it looked as though you were in the process of removing it. as with all planking, it goes all the way back to the stern stem. as you notice, the bulwark strips are not the same thickness as the planking.
the planking is 1.5 mm..the thickness of the bulwark panels is about 1 mm. when I built mine, I looked at this and that is why I decided to do away with them and plank the bulwarks. sanding the planking to match the bulwarks would substantially thin the planking, and raise the concern that I would sand through...... there's no need to remove them......you can very easily use 0.5 thin strip and add to the thickness of the panels.
planking is a slow process......I like to use the time to research and look through the instructions. I'll see things that can be improved on, even things that can be done while I'm waiting for the next run. don't be concerned in using a more aggressive sandpaper either.......keep in mind as to where you are with thickness and sand consistently along the entire length of the hull. never concentrate on any particular spot....that will cause you to sand through....you don't want that. if you are planning the use sheet basswood or the like to cover over the stern transom, go with a thin sheet......and use the grain to your advantage. wet it, let it soak a short time, and work it while damp {you may want to pat some of the wetness away}. I trim as I go along fitting it.....I get a more exact fit this way.
your line looks better...your adjustments show improvement
it may look scary at the moment, but this is normal. once the hull halves are joined and sanding has been done, it will begin to look like something. it's when you can get some paint on her, that her beauty starts to show. your doing a great job
- Keith Black, Halvor and Baker
-
3
-
 ..........now that I've had time to clear my head.......
......sorry.........lost my mind for a minute there...... my sense of humor does require some getting use to
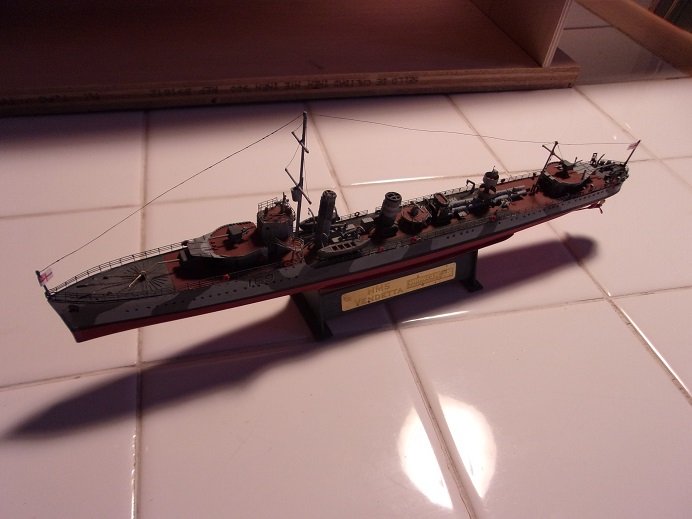
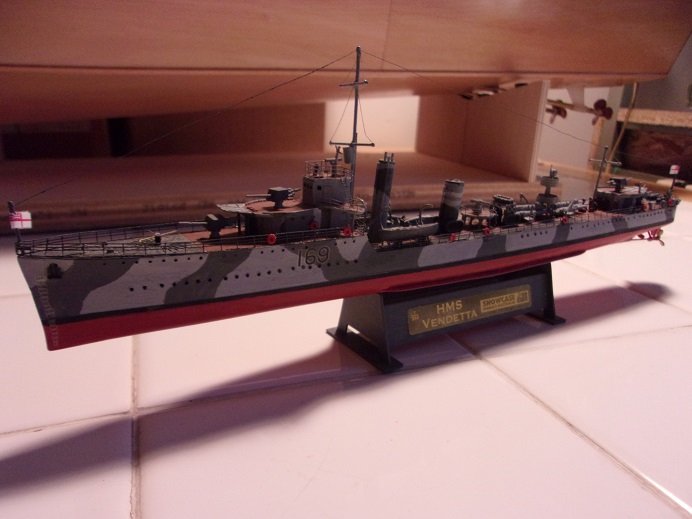
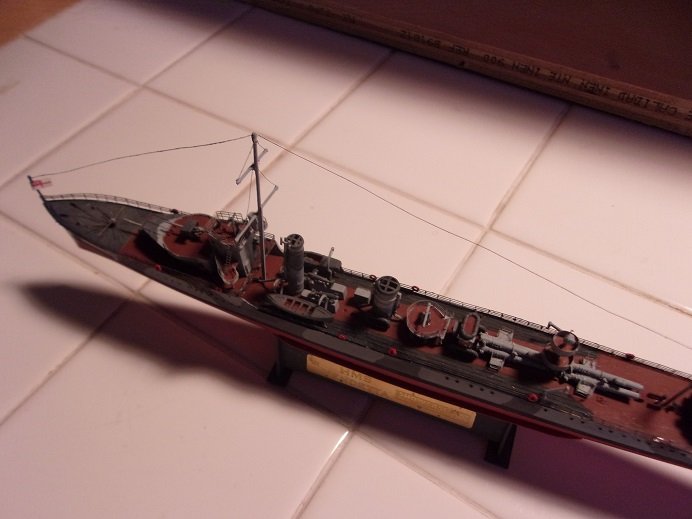
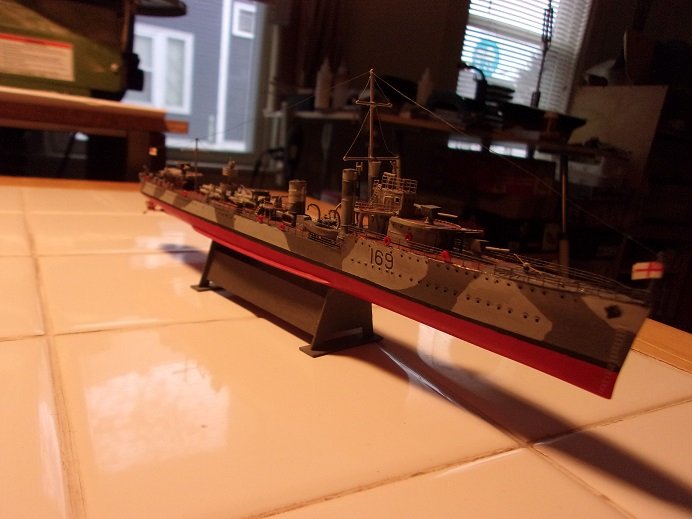
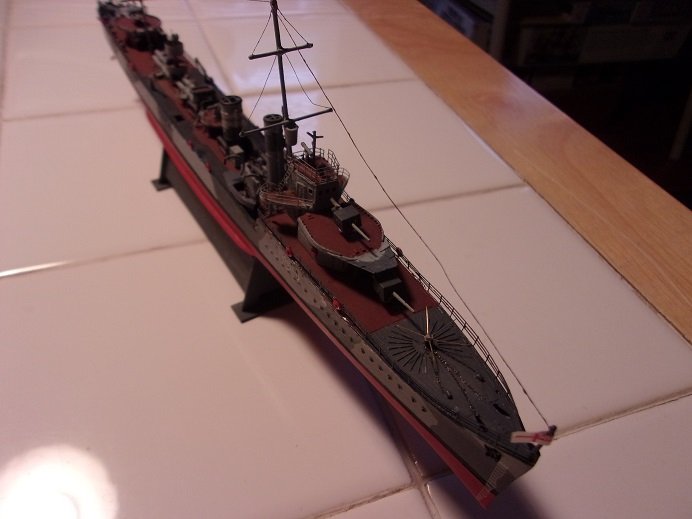
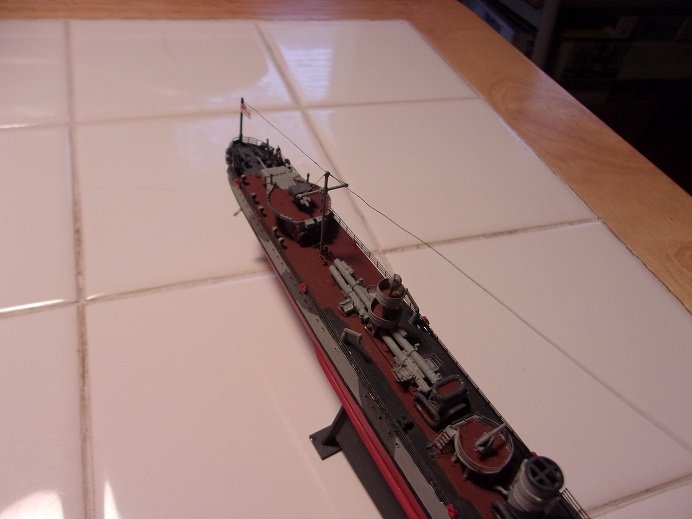
the mast had been broken before. pulling the rest of the mast out, the overall length was taken and cut from fresh rod. the yards were removed from the old one and added on, then the look out basket. I too some of that thin wire and also did the yard rigging.
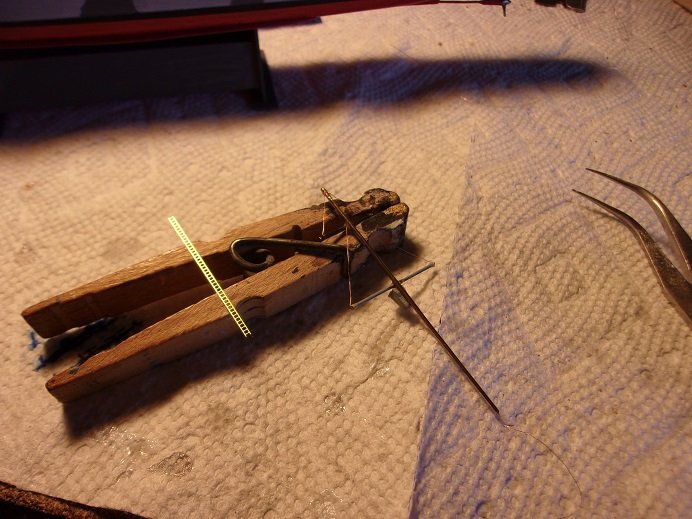
the ladder was added and then the mast was painted. I also rigged the aft mast.
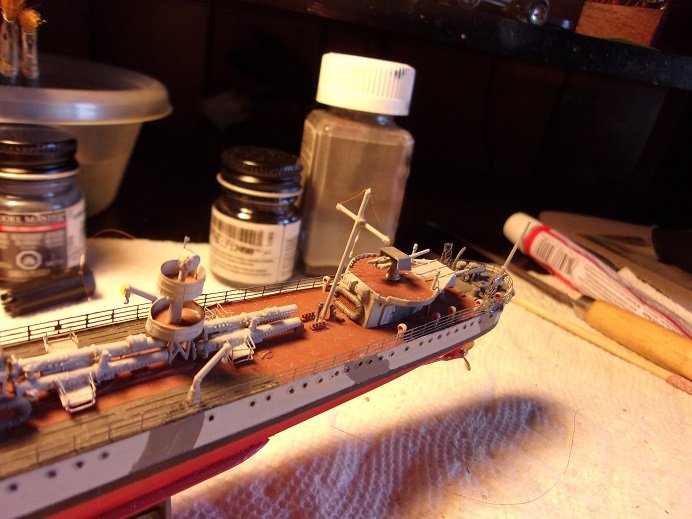
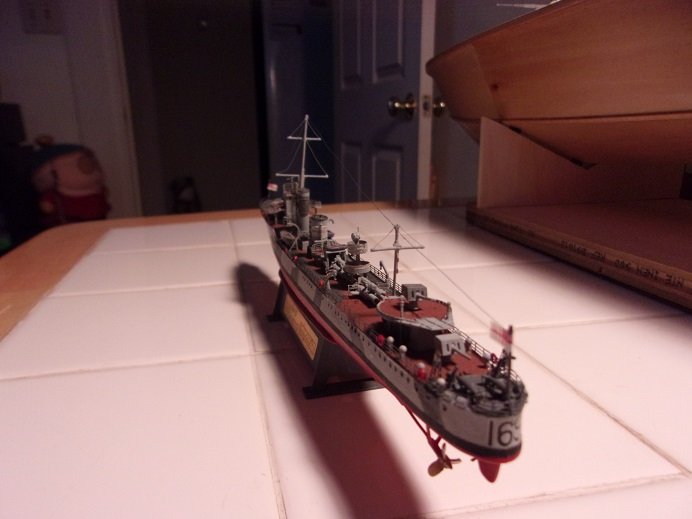
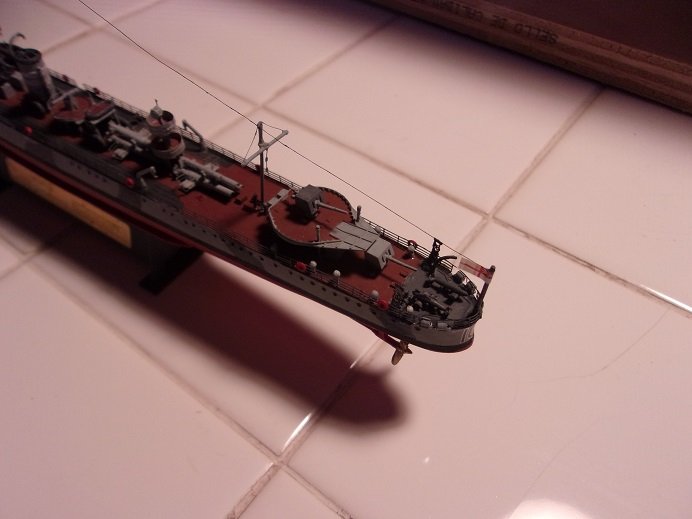
still need to do some touchups around the deck area. the mast was reinstalled and rigging was added......not sure as to how far I will go with it.
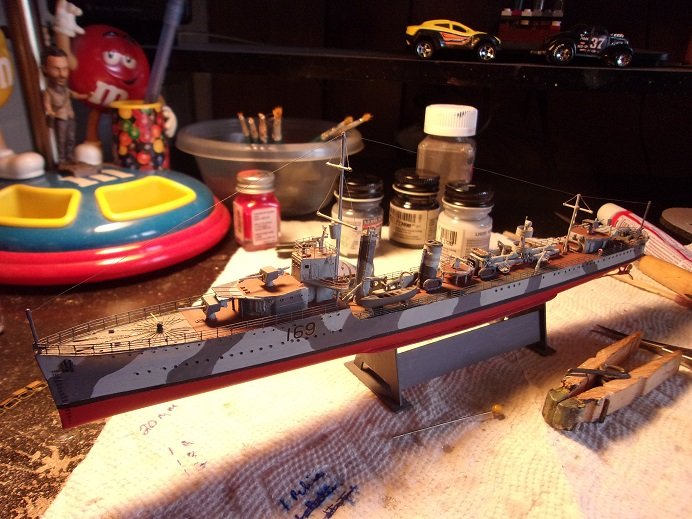
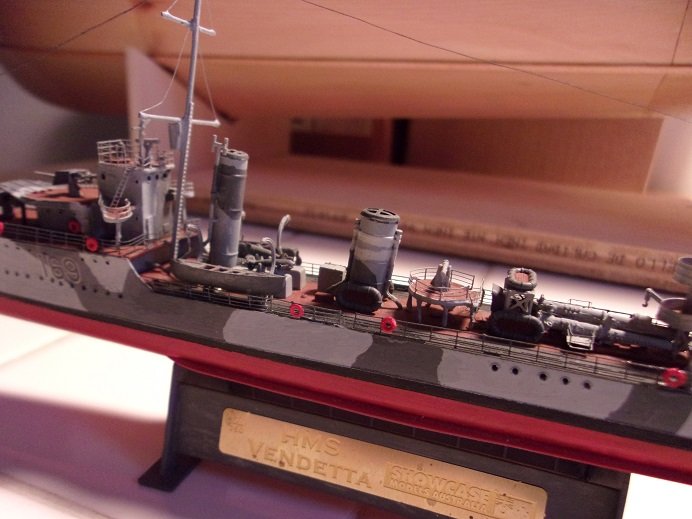
it looked a bit busy on the desk, so I went for a neutral background
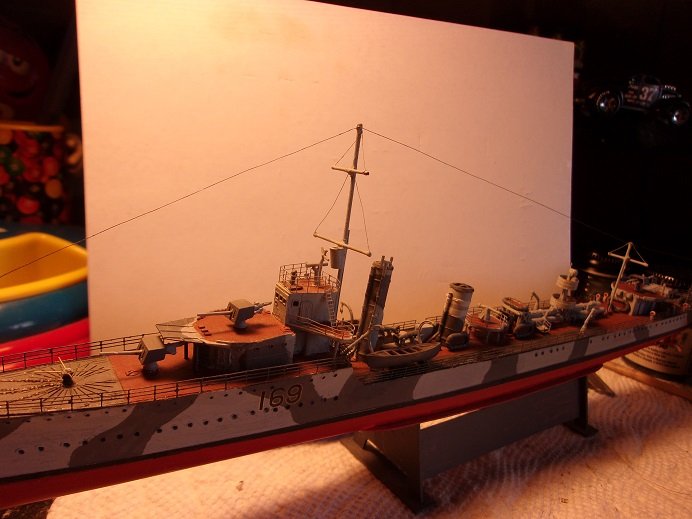
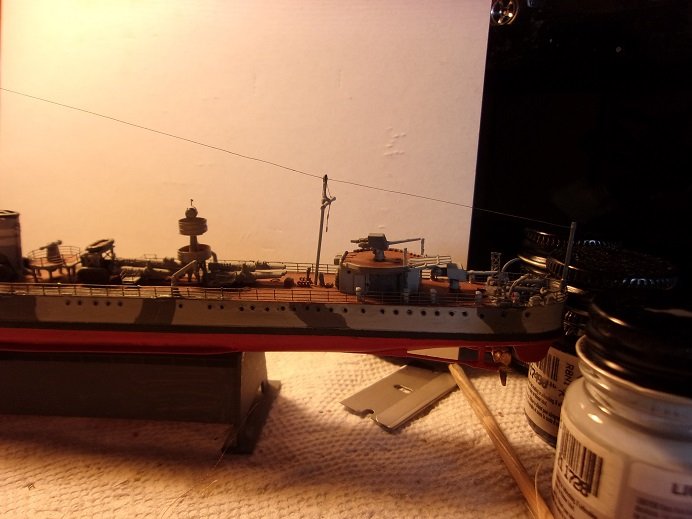
....just a tad more to go.........
-
-
chocolate?
 love Dutch chocolate! I was going to post a small update yesterday, but I got carried away.........no......not by the white coat people. more reno to the spare room........ had a small mishap with the fore mast...it's being reworked. I dozed at my computer and crunched it with my head
  of course, I had replaced it with brass rod, so it had a bit more resistance than if it were the original parts. the prick mark in the middle of my forehead has healed nicely.......I've added the ladder and painted it this morning, and should have it back on board later today. then I can put the finish to her and get her off the desk before anything else happens. gotta go cut some wood
-
quite a parts count for such a small scale........the detail must be enormous! sitting in for this one.......I brought a lawn chair
- mtaylor, Edwardkenway, lmagna and 3 others
-
6
-
the stand looks very nice........though the supplied stand seem generic from company to company, I find that they lean more to personal taste
I've used them mostly as the build stand, and made one for the display stand. nice job on the rigging so far........the use of different size rope and the shape of the blocks. the tiller is interesting too......would there be an opposite on the port side? is there a principle? superb paint.......very well done!
-
thanks all
....I'm very happy to get her to this point. of course, this next week is going to be wet, so it might put a damper on getting another coat on her. then again, if the sanding cleans her up good enough, I might forego another coat, and go right to the paint { I do like the mellow wood grain since the resin coat}. once I can get the hull the way I want it, I can then decide on a clear direction for her........there are so many choices I've done a little referencing already, but nothing in stone yet. the hull is dry to the touch now {I just had to come home and give 'er a stroke}....the admiral's loving referral to 'a man and his pet! she's even been in there look'in it over she likes it..........I know she does. I'll hit 'er up again to get more stuff.....I'll see ......
- Canute, mtaylor, Edwardkenway and 3 others
-
6
-
interesting project Zig..........I'll pull up a chair
-
thanks Mike.......was hoping to hit the finish line, but didn't get back to it. not much left to do
- RGL, Egilman, Old Collingwood and 3 others
-
6
-
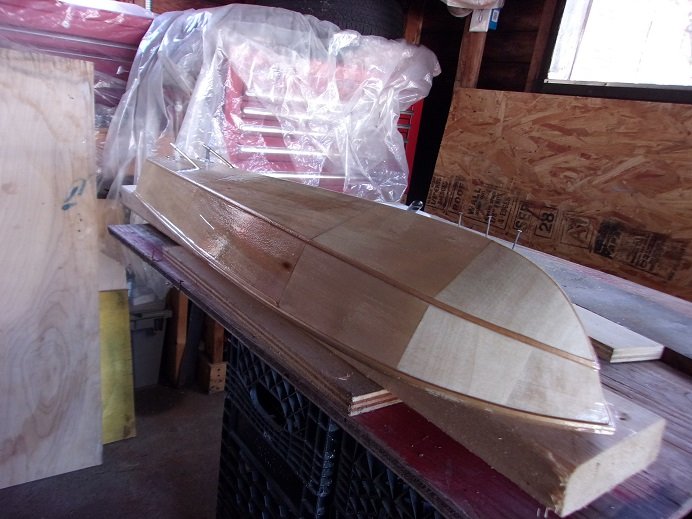
today is the big day........just waiting for the temp to warm up out there. both windows are open now........got some positive flow through
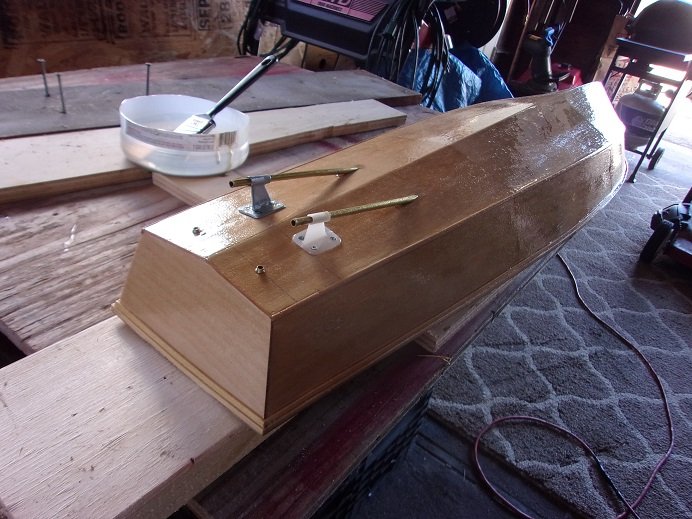
after wiping her down with a clean cloth, she got her first coat of resin
she is still wet.......gonna be really shiny

applied with a brush in loooong strokes
WHOA!!!!! what is that..........it seems a brush hair is ruining the first coat. I got a pick and removed it........went back over the offended area. my tool boxes are covered over because the roof leaks. told the landlord, but he hasn't done anything about it.

better without the hair
so as this cures, it should smooth out some. it will also perk up the wood hairs, so a light sanding will be in order. I like the way it filled in around the tubes. just as well....it's errand time anyway
........it will have plenty of time to dry.
......early evening----> I'm grill'in supper, so I brought her in the house. don't want her to take on a smoky barbeque flavor. I did take a quick look at the deck platform, and there is very little on it. I tried not to. I took these a short time ago.......as I was posting this batch of updates. she is slightly tacky to the touch, only in certain areas. she'll have four days to fully cure before I will do anything more to her.

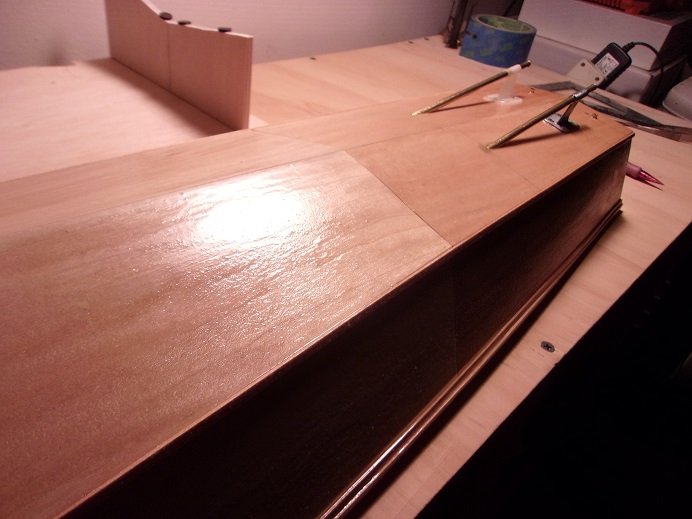
the small gaps along the gunwale filled in nicely....the finish is a little rough.

the panel joints look good.......I'll know for sure when I can get some paint on her
-
thanks for the head's up Al, but I have the instructions for the .50's as well
I forget how I found them.......likely the same way I found the one for the 20 mm. I haven't done anything with them yet........for those, I ordered two sets {perhaps a pirate fishing boat?} the sky is the limit! 
anyway.........something strange........
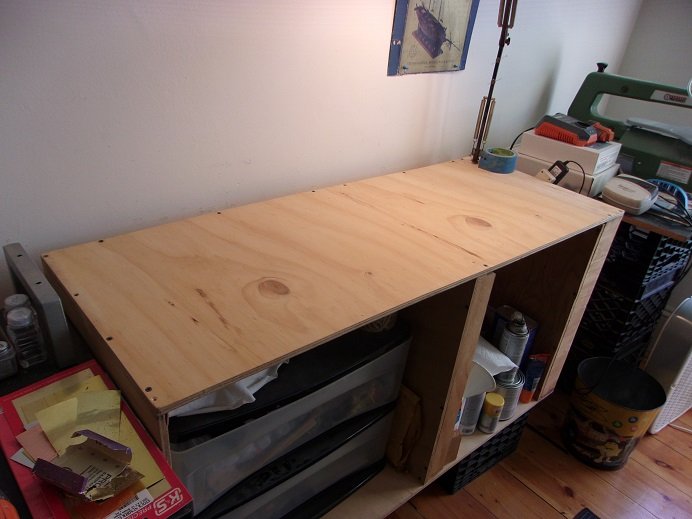
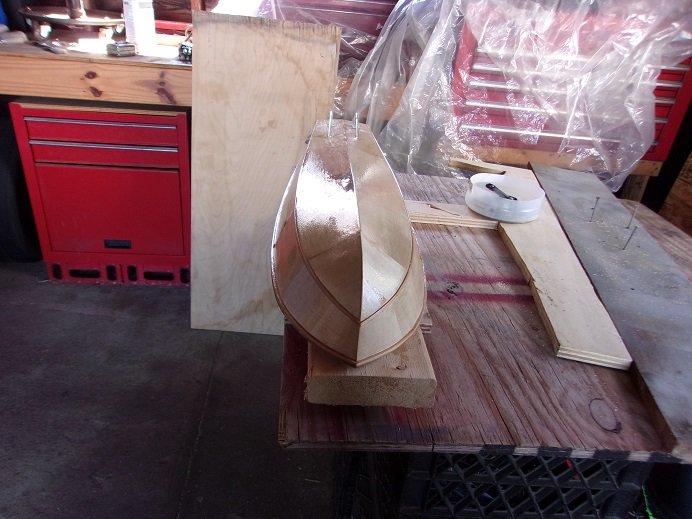
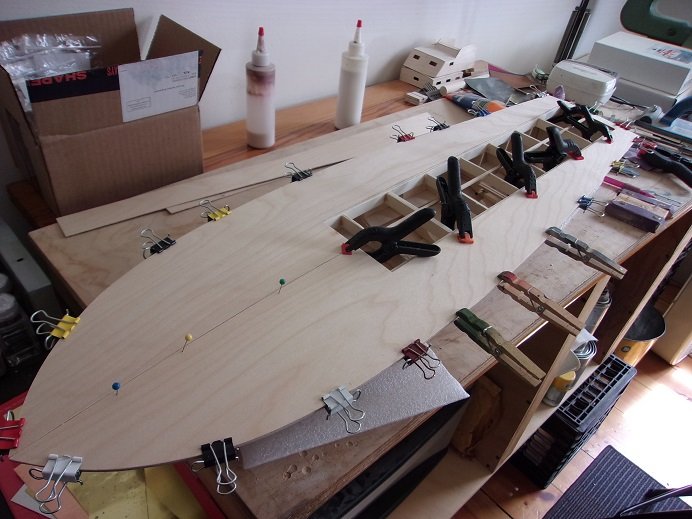
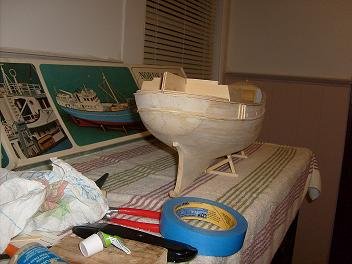
what happened to my table? the big hunk of beech plywood is gone......I don't need it anymore, since cutting the hull from it. before removing it though, I took measurements of the stern {before the tubes}, and near the bow........spaced around 15 1/2". I also spent some time tiding up the garage, and cutting a smaller slab of beech plywood 18"X8". time to make the stand that will hold her for the rest of the project.
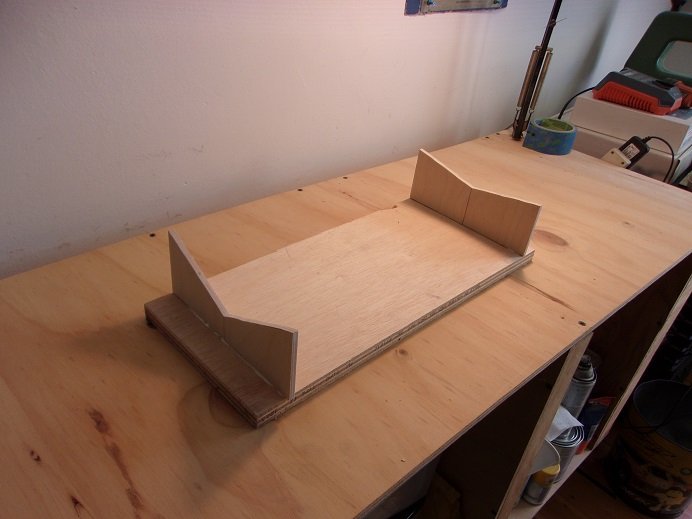
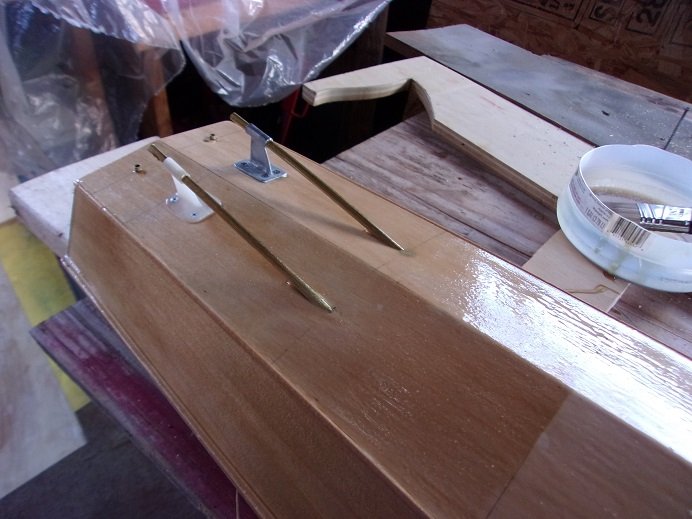
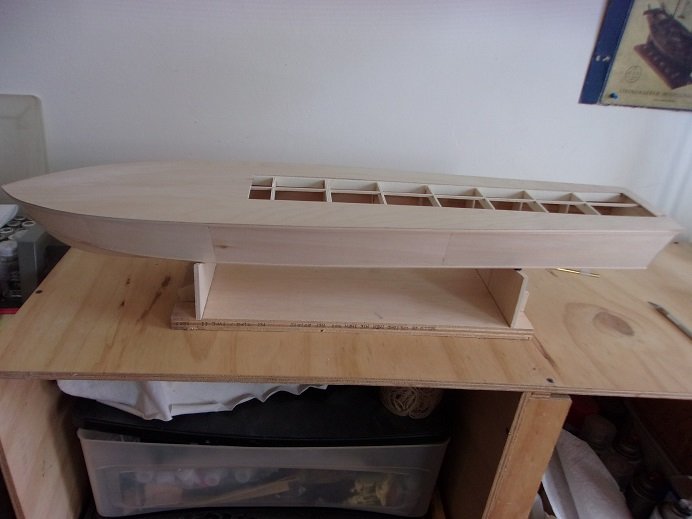
of course, it just wouldn't be cricket, if I didn't show her on her new pedestal. for the time being, I used felt buttons to keep her from getting scratched. I'll replace them when I make up some more permanent ones.
I added some brackets on the ends to help strengthen it.

now that this is done........the garage is tidy.........the temp is going to be around 70 degrees tomorrow........I think it's time
- GrandpaPhil, Blackreed, mtaylor and 5 others
-
8
-
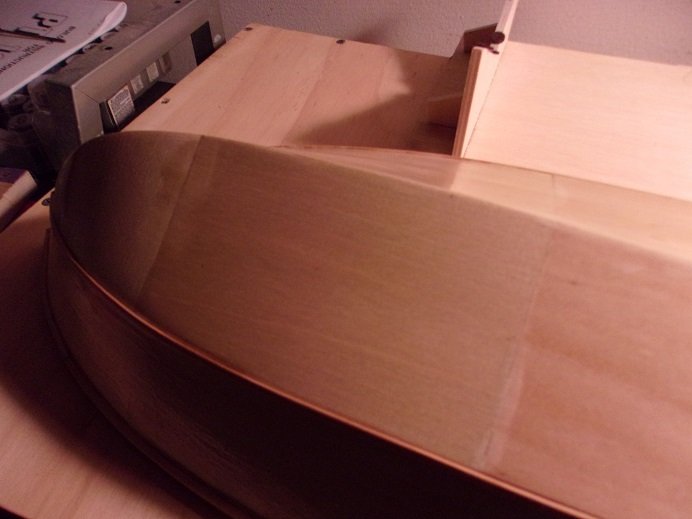
oh yesssss.....my weekend / your week {however you want to look at it}. it comes to a close, so I'd better release it from the bonds of the camera. more sanding was done.......more filling of the joints as well......prep for the big day. I run my fingers over the panel joints, and I don't feel a thing. the deck frame surface was sanded as well........looks good enough to begin laying the deck platform down. I'm just going ahead and doing it....I'll have more than enough room to assemble the rudder set up.
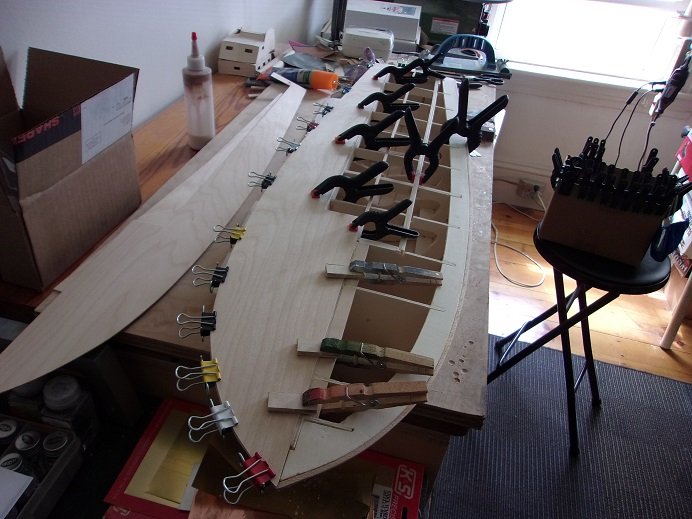
you can see that I added some short strips along the center frame.......the better to cement the deck platforms onto.........
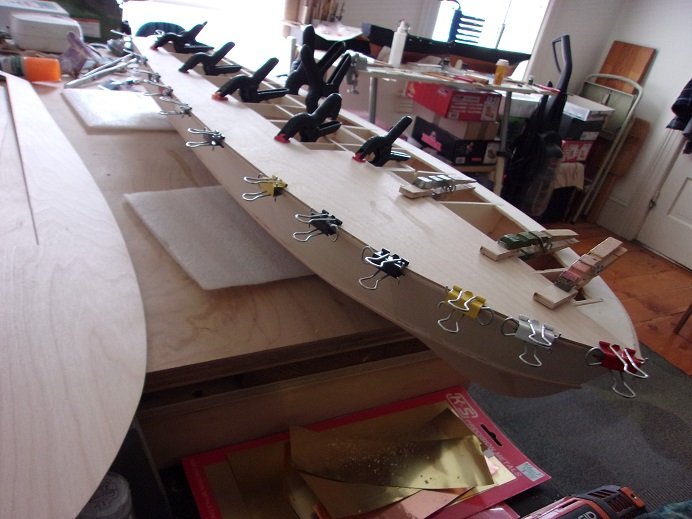
when the starboard side was dry enough, the port side was laid down.
there was an errand in there somewhere, but it was given time to dry. I did occupy my time on other things.......like assembling the 20 mm gun. the instructions stated that this is actually 1:20 / 1:24, which scared me a bit.........until I realized this was where I found the instructions in the first place..
noting the color of the plastic, is an indication that this is virgin plastic. it is a UV cured acrylic plastic. I looked into one of these machines, and wished I could own one...way out of my league. nothing I read said that it was recycled plastic.......but the color also indicates that nothing has been added to it. the milky color comes from the wax to prevent sticking...injection molding. I use to work at a facility that made automotive bushings, seals, and other products and parts for hydraulic.....caterpillar comes to mind. they also made timing belts. I used to run what they called 'hot runners' ....meaning that machine didn't stop for a second........every min and a half, it would spit out parts.....in different denominations, depending what it was set up for at the time. it would open, spit out the parts and close again.......over and over. the only pause was when I would wax and wipe........and inspect the parts to insure that there are no defects. there's a lot more to it....but it irreverent, since I don't work there no more........not for quite a long time ago........it's where I met the admiral
 as mentioned.....the parts are brittle......just like clear parts {I know you've found that out at least once in your model building existence }. I broke one part assembling it. odd, but the instructions say that regular model cement won't work on this plastic.......so I used CA.
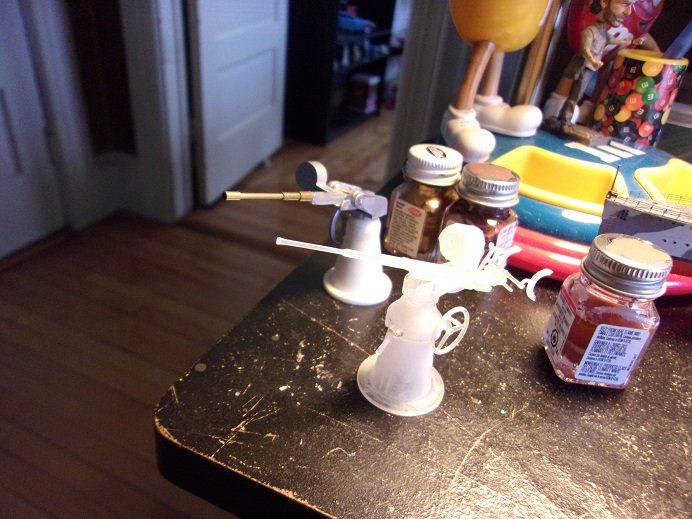
compared to the supplied gun.......what a difference! of course, I haven't added anything else to the original gun, but the detail this one has is really nice.

the instructions does list the aspects that can be added to it to make it look more realistic. I tried adding a pin in the locking lever in the front so it could be movable, but when I went to trim off the pin sticking out, it snapped part of the bracket. so, it is glued.......this dashes my hopes to put a pin so the gun would be movable. I rather not make the same mistake twice.
the rest of the day was devoted to sanding along the edge of the gunwale / deck platform, to make it flush and fill in the gaps.
- mtaylor, gieb8688, Old Collingwood and 6 others
-
9
-
yes, they will John..........virgin plastics come at a cost. #1.......they are brittle. I wish I could post the instructions for them.......there are some do's and dont's as far as painting goes too. they suggest Acrylics, but I'll try enamels on the sprues to see if the paint will stick to it. I may need to use a primer first. I'll get into this more later.........but first.................the week's update! {ominous organ sound}

-
try wetting and bending planking around a glass to get the curvature for the stern.......you may need to trim them flush at the #1 bulkhead.
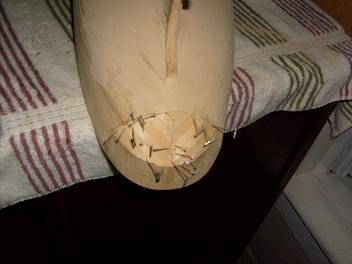
I know your just starting out......so did I when I built the Nordkap. I'd look at these kits and shy away..........I'd think to myself that I could never build one. I made mistakes.........oh boy..........did I make 'em! but one thing I did that helped me out a lot, was to think outside the box.......I scratch built what I couldn't use in the kit. now the Nordkap was an old kit....nothing was laser cut. I got it from a friend......a skeleton on a pine board. he had stopped working on it and stored it in his attic for 30 years or so. I do a lot of scratch building now...I've gotten so comfortable with it, that I can't do a kit without doing it. I ran into the same problem as you have here.....that curved stern. to taper, bend, and curve to create this counter / transom, is probably the hardest thing to do {some may not agree, but I do}. as I mentioned, the one thing to keep in mind, is holding a straight line with planking. here is a picture of the Nordkap...what I did at the bow.
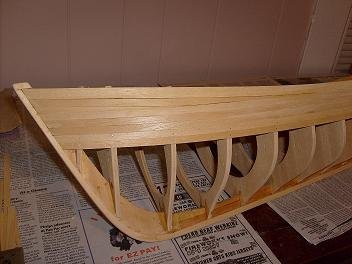
looking close, you'll see the stealers I added in there.........shouldn't do it this way {two together like this}, but as I mentioned.......what did I know
but you can see how I maintained the straight line. the stern is the other Achilles heel........I planked it, but it took a lot of effort.
done in a herringbone pattern, was the best way to plank it over.......sanded it looked like this...
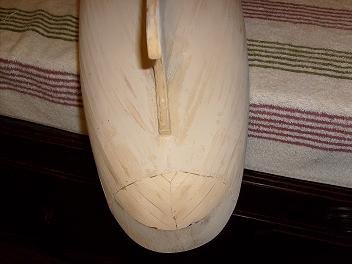
sanded and with a coat of filler, it looks like this...

I gotta take the pup out and go to the store for now.........I want to help. I hope these pictures will give you an idea or two. I'll be back
- Baker, Halvor and Keith Black
-
3


Norden by Halvor - Billing Boats - 1:30 - First build
in - Kit build logs for subjects built from 1901 - Present Day
Posted
nice........your half way there") sanding and filler is still your friend.......paint covers a lot of sin. you'll get better......the other side might come out better, it may surprise you
sanding and filler is still your friend.......paint covers a lot of sin. you'll get better......the other side might come out better, it may surprise you ") I haven't got it down pat either....... I wouldn't double plank.......filler.....sand it smooth and to contour, and paint. to me, the only reason that one would double plank a hull, is to avoid stain. cover with Walnut, mahogany, or Oak thin strip and a clear sealer [especially if that particular color of stain is unavailable}. looks fine........your on the right track. when you can get the two hull halves together, you'll see
I haven't got it down pat either....... I wouldn't double plank.......filler.....sand it smooth and to contour, and paint. to me, the only reason that one would double plank a hull, is to avoid stain. cover with Walnut, mahogany, or Oak thin strip and a clear sealer [especially if that particular color of stain is unavailable}. looks fine........your on the right track. when you can get the two hull halves together, you'll see ")