popeye the sailor
-
Posts
16,007 -
Joined
-
Last visited
Content Type
Profiles
Forums
Gallery
Events
Everything posted by popeye the sailor
-
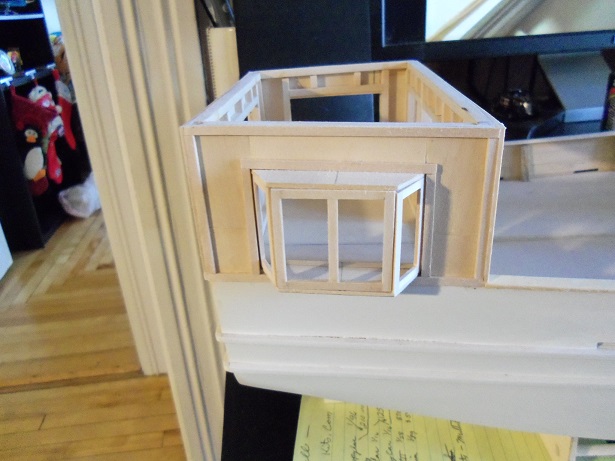
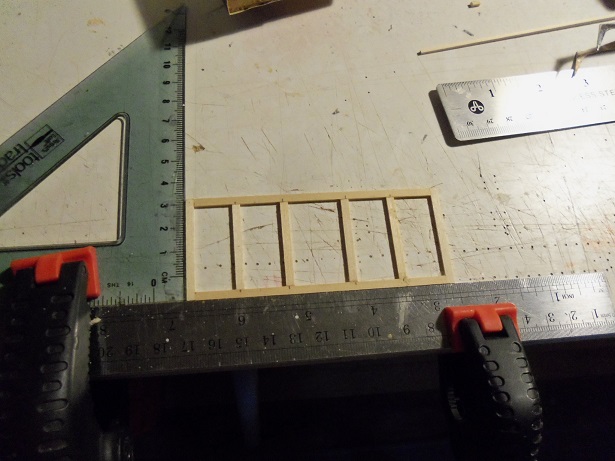
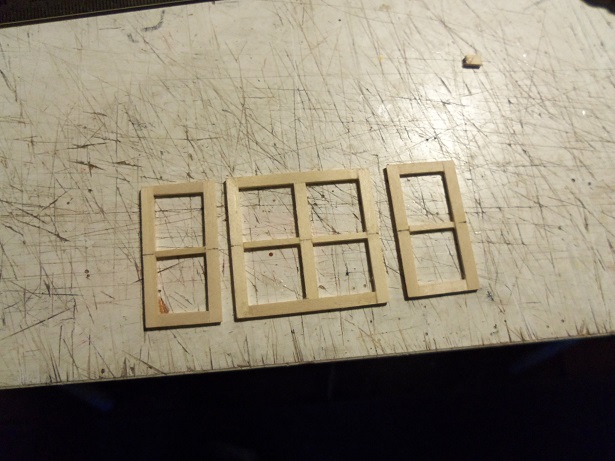
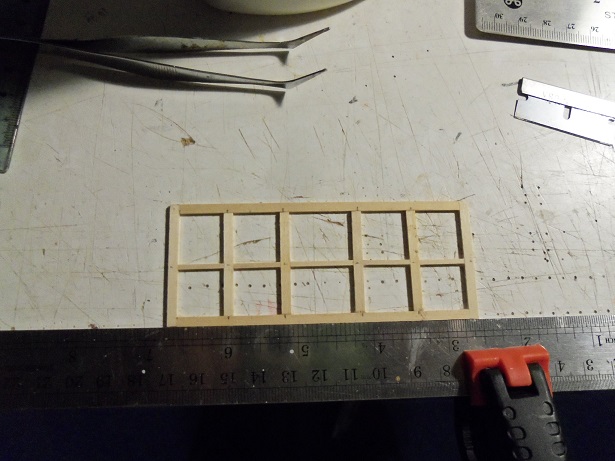
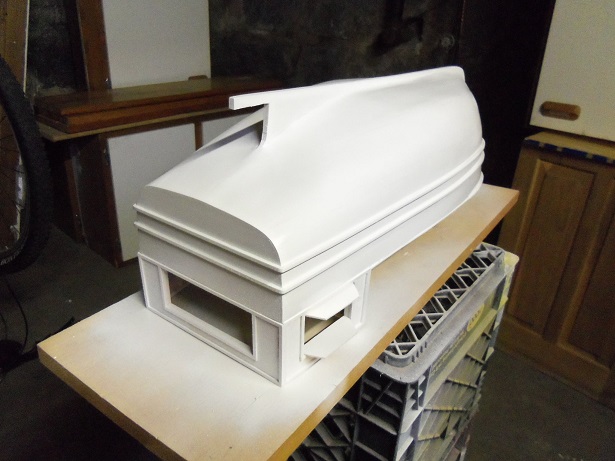
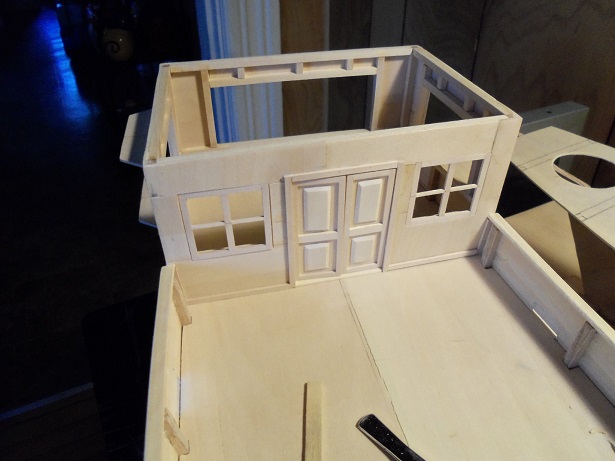
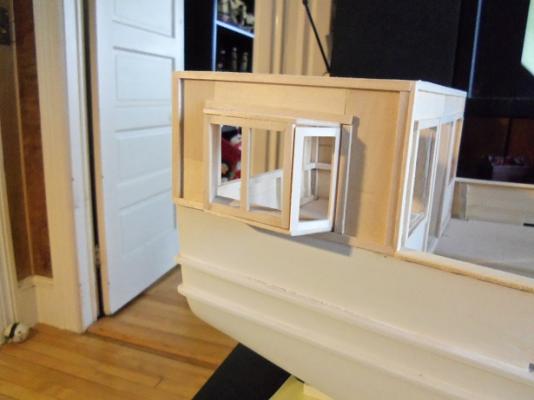
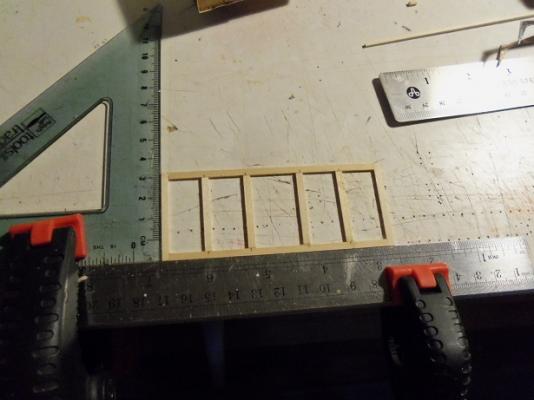
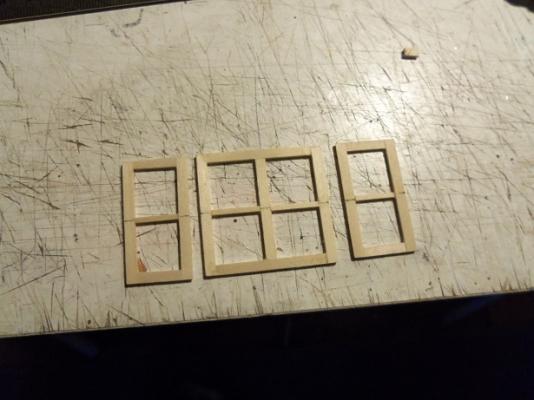
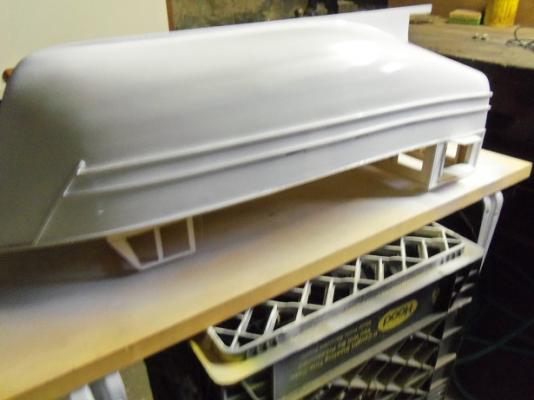
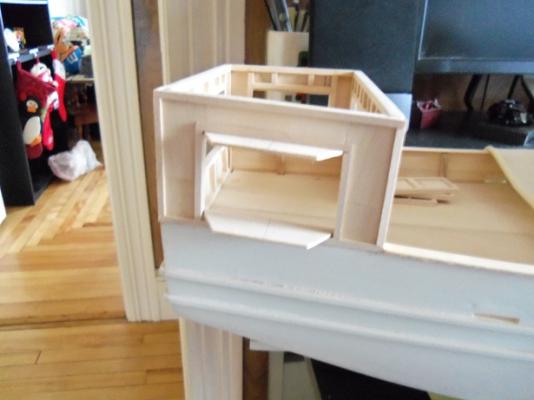
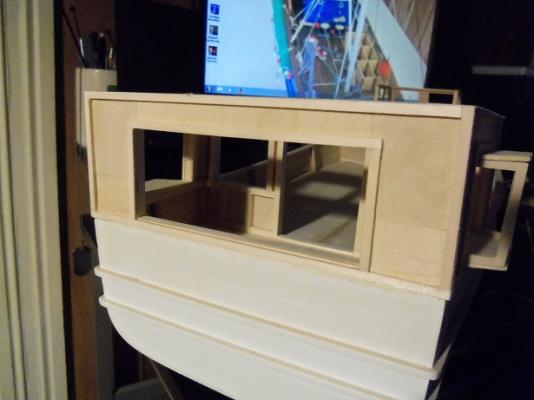
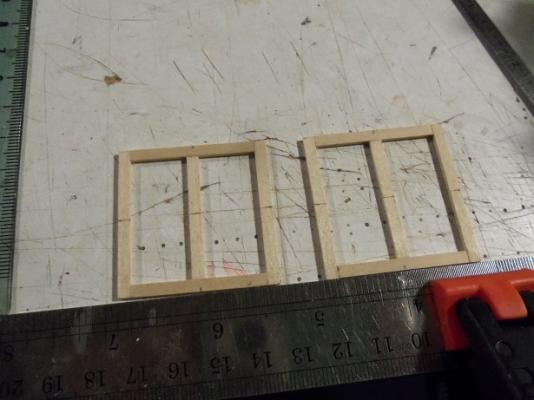
 Piet and Patrick: the subject of this particular boat can be pretty large. it's a caroler's boat, one that you might see in a parade....regatta......whatever the procession. without saying much more about what will be on the deck {'cuz I don't even know}, the structure at the aft is called a 'warming house'. carolers can go in to get warm and give their vocal cords a rest. of course there's refreshments.......hot cocoa......or whatever the barkeep might have under the counter {Hee....Hee....Hee} I wanted to give it plenty of windows.......actually, I later thought of making it like one giant cabana, but the house look stayed......I keep flopping back and fourth about the roof. Gotta keep it 'Santa safe".......don'tcha know. if you stop and thing about it.........for Santa, it would be like landing on an aircraft carrier... {he better leave Chet home for this one} thanks to you other fine folk for looking in.....your likes and comments. the Jingle Belle is not in the shop at the moment...it's down in the cellar drying...........getting the long overdue prime job. before it went down there, I made a bit more progress on the windows. the starboard windows were made complete, by making the center window frame. the next window I made was the stern window. it's a big one the partitions were added to the starboard windows ....and then to the stern window. this morning........{I had to work last night}......the Jingle Belle was taken to the cellar....and the primer job began


-
super progress John.......I too like the sliding windows! very nice build indeed!
- 745 replies
-
- 3
-

-
- francis pritt
- mission ship
- (and 1 more)
-
Cutty Sark by NenadM
popeye the sailor replied to NenadM's topic in - Build logs for subjects built 1851 - 1900
wonderful progress Nenad! skylight windows came out really looking nice..........shaping up to be one sweet look'in lady!- 4,152 replies
-
- 5
-
-
- cutty sark
- tehnodidakta
- (and 1 more)
-
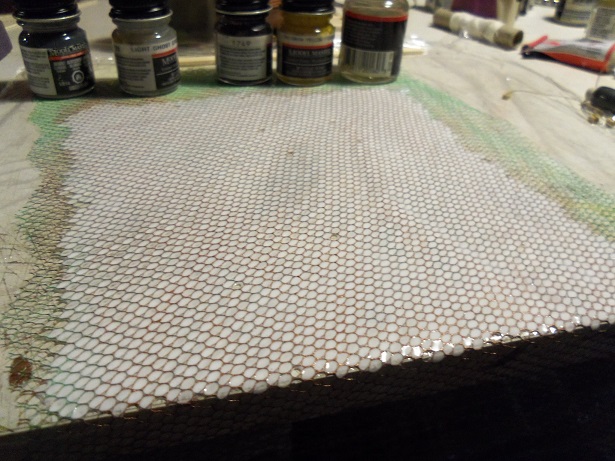
thanks Nenad........actually, I'm sort of going for a clouded look.......but I want the sheen as well. I've plenty of clear cello, in different thicknesses, but I'm thinking that brush strokes might be a problem. I do plan on tinting........first to decide on what finish the frame should be........the molding around the windows is to be white. now that it's done, I need to finish the priming, and then maybe....I can paint the hull. thanks for the ideas.........I'll give 'em a looky
-
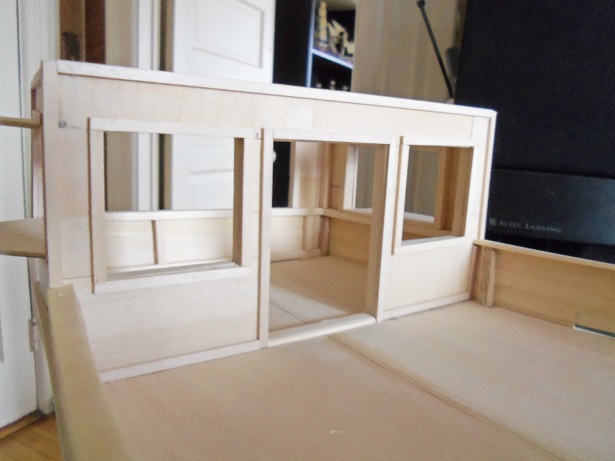
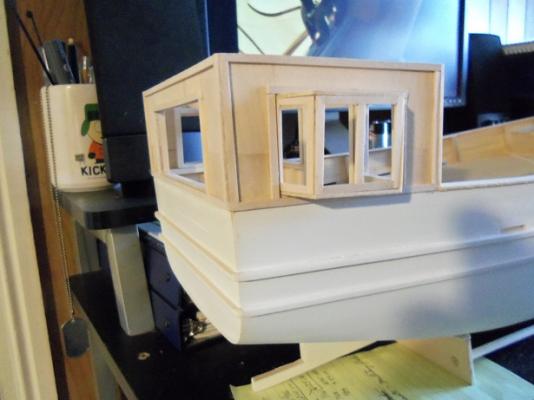
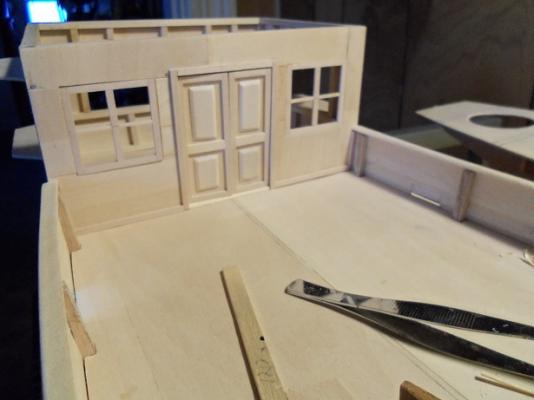
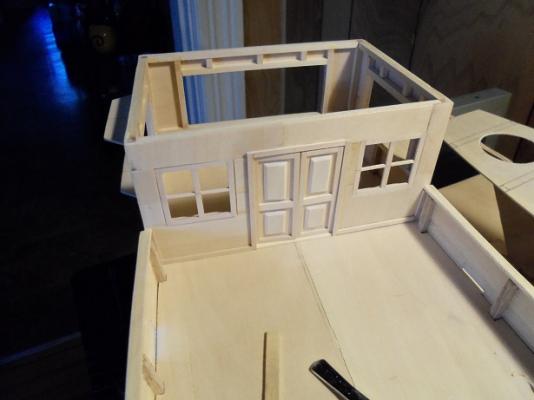
so I went a bit further with the warming house yesterday. I was able to finish off a the rest of the molding that outlines the outer walls. the starboard side the front fascia the port side and the stern {transom} fascia I also began to assemble the windows for the starboard side still more experimenting going on with the window material itself.......still not convinced that the window maker won't work.


-
super looking rigging.........the furled sails is a very nice touch!
- 274 replies
-
- 3
-
-
- Santa Maria
- Artesania Latina
- (and 2 more)
-
you've read my mind Michael........except I'm going to try and use colored markers I found out that it is flexible......it will bend to the shape of anything I put it on {not a good thing at the moment}. I put it under a flat surface with some weight on it.......perhaps it will flatten out the ripples
-
very nice progress Kees...interesting that you made two
- 434 replies
-
- 3
-
-
- pelikaan
- beamtrawler
- (and 2 more)
-
thank you all for the good word and the likes.......at the moment, I'm trying to get all the molding and windows done, so I can get some paint on the hull. I've got the window sheet in between two flat objects. hope to have an update soon
-
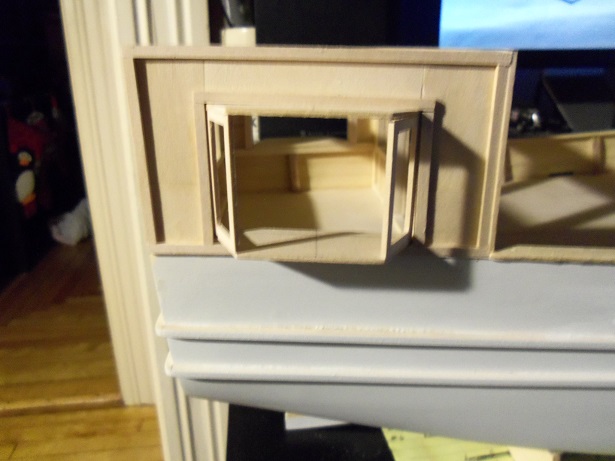
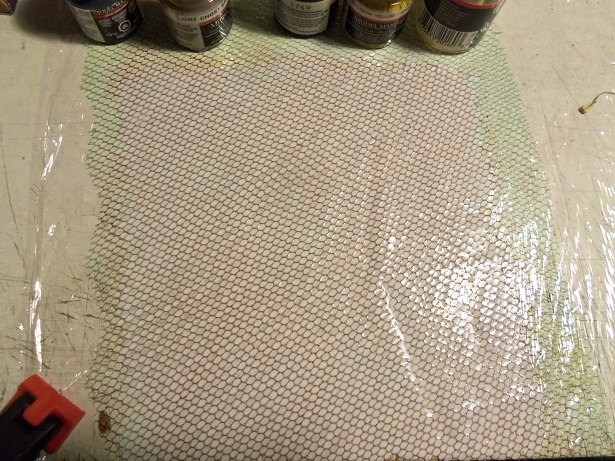
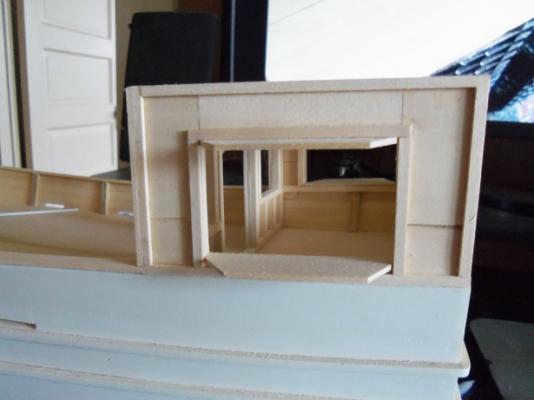
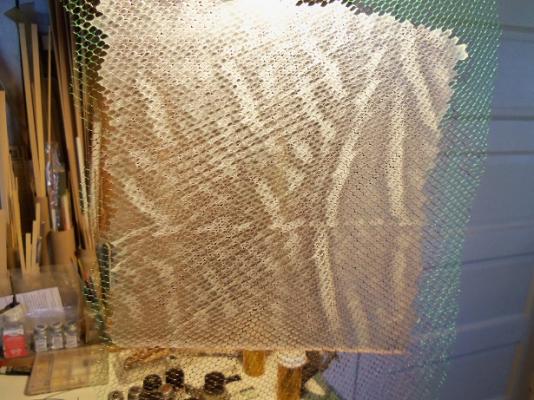
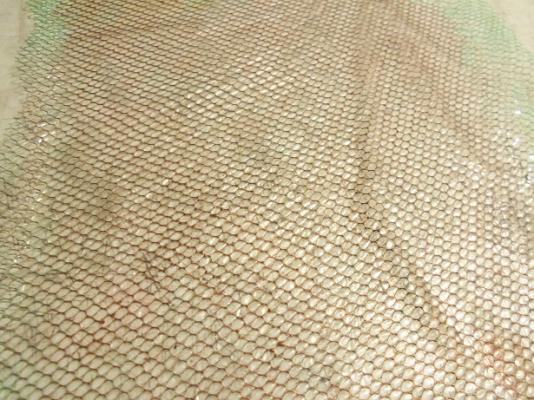
it was kinda interesting making it....but you need a backing to apply the glue. either that, or you'll be play'in with both sides of the mesh. the reason I mention the stretching out thing is because, by not doing this, there will be ripples in the mesh. it's not that the glue will be thicker in these places, but it will show where the mesh is making contact with the backing, and where it is not. here is what it looks like without the backing. as I thought, white glue will not adhere to the plastic wrap. I'll try it out to see how it looks, but I will try and do a second run to see if it comes out better. I did get to finish out the front window frames. we went to Hobby Lobby yesterday to get more of the size wood I'm using for the molding, so I can go the rest of the way around the house without fear of running out. I was also looking at the dollhouse shingles....you can purchase them in a big package {bag}. they are too large though, so I can't use them. it's OK......I have plenty of scrap wood that I can use up
-
me too..........I'm hoping it works out. so far, the only thing I can say about it, is that it dried with a rather leathery feel to it. there is no sheen that I can see. I will try another field of mesh.......but this time I will stretch everything flat.......there are a few ripples. I'll be back.......gotta take Gibbs out thanks for the good word and the likes!
-
really like the way you've shown this......looks cool! I agree with the others.......if she comes out looking like that......it will be beautiful!
-
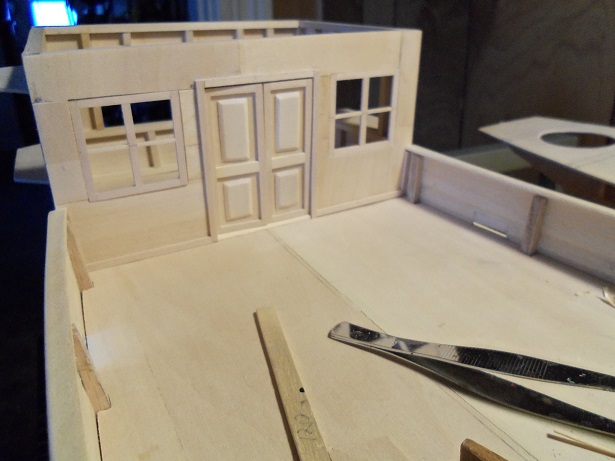
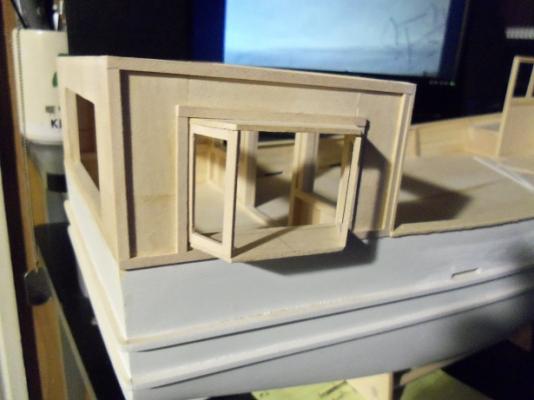
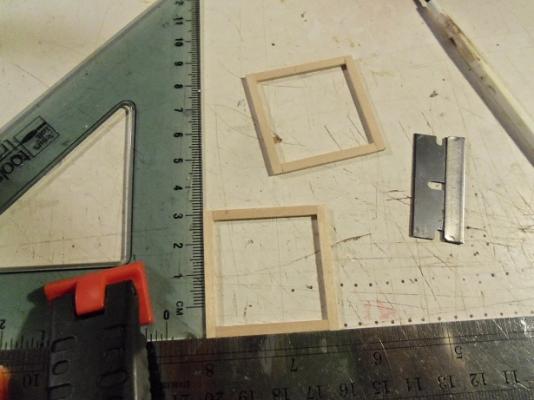
so the doors were removed to be stained, and to have some hardware put on. I'll have to alter the color of the door knockers too I showed how I had taken some netting and painted it copper.......I think I had better get a move on with the window frames. for the front, I made the outer frames. there is to be a divider down the center......not sure how I want to go with the smaller dividers. I tried the window maker on the mesh........came out looking like tapioca pudding. did not put a smile on my face.......you can be sure of that. I also didn't use any backing, so the fills would break, revealing the holes again...........I'd have to brush over them again. finally I said the heck with it...........got a piece of plastic wrap, laid the mesh over it {flat on the table}, and whipped up a small batch of diluted white glue. I made it a thicker batch than I normally do. it was brushed on, going back over at times, when the holes would show back up........ here's how easy it is to see the ones that popped I did this before I went to my part time job.............when I got home, it definitely had time to dry. tomorrow, I'll try to go further


-
great looking build Don.......love the way she turned out!
-
no......I'm not thinking of doing it.....I wouldn't have done the lighting, if i was. just a suggestion for KP's problem. On you tube, a fellow did scuttle a Titanic and did a very nice diorama of her on the ocean floor. the build will continue once I can get the deck assembly properly in place
-
AWWWWWWWW! you guessed my secret as long as I don't trash the idea........she's happy
-
these advanced beginner kits are nice.......I've built a few of them myself. they present the same amount of challenge, as far as I'm concerned, and can be dressed up to one's liking. very nice build........you've done some splendid work here.
-
you two have come a long way since I last looked in. the Bounty looks great!
-
really nice work Bug.......personal touches are sweet!
- 274 replies
-
- 3
-
-
- Santa Maria
- Artesania Latina
- (and 2 more)
-
yes it would Bob..........perhaps one day I can do some thing like that. right now though.......I'll be happy if I can just get the admiral, to stop giving me .....the look
-
I have a copy of those instructions......I was helping a fellow member with his. what I find odd about downloading these instructions, is that they are not complete......the kit also contains other sheets. side view diagrams.......deck layout diagrams......masting diagrams. all you can access is the main instruction sheets. I'm currently helping a person who is building the Mary Ann. the good thing is that I've built it before and have all the kit instructions