popeye the sailor
-
Posts
16,007 -
Joined
-
Last visited
Content Type
Profiles
Forums
Gallery
Events
Everything posted by popeye the sailor
-
 she looks fantastic Greg.........the trail boards look super I'm so glad your hooked rigging nicely done too!
- 52 replies
-
- 1
-

-
- muscongus bay lobster smack
- Midwest Products
- (and 2 more)
-
thank you very much Nigel and Frank.......and all who hit the like button. didn't get too much more done......went to Hobby Lobby yesterday. got the two car models for the boys........so I'm almost ready >evil grin< I mean really..........aren't grand parents supposed to spoil the grand kids? there is a rather wide selection of these snap tite kits out there........it will be interesting to see which one will continue one more update should wrap this up
- 44 replies
-
- 6
-
-
- black diamond
- revell
- (and 2 more)
-
yepper........a definite question here. you see, back in the time that the 1:96 Revell series was put out {the first few date back to the early 60's}, to make better use of the molds, they would do knock offs. the kits are the same, but have subtle differences added. the Thermopylae is the knock off from the Cutty.......if it weren't for the decals, you'd be building the same ship. I read an article a while back, where folks complained to Revell that they got Cutty decals in their Thermopylae kit {wish I still had the article}. I'd check with your friend.....perhaps this is a upgrade for the kit and he was going to add this in. do you have any extra cabin parts? what do the instructions say....or look like? I have the instructions for my Cutty still.....I can't recall if they say to paint the area, but I didn't......it will not be seen. I also don't see the locator slots for the cabin walls........did you fill them in? the fire buckets, if the kit is the same as the Cutty, will be lined across the aft deck railing....they sit in little holes along it's base. I looked at some images on line......I saw yours {you subscribe at finescale?}, of course, I saw nothing definitive. I have some galley pictures from my cutty: this will give you an idea of what to look for. the concern here is the raised pad that the cabin sits on......it's raised and there is no deck detail. to sand it down and scribe in the detail would be quite a task.....a bit too much work for an upgrade. the only logical thought I can think of, is this is a big goof on Revell's part to differentiate the two ships. they could have done better than that
- 87 replies
-
- 1
-
-
- thermopylae
- revell
- (and 1 more)
-
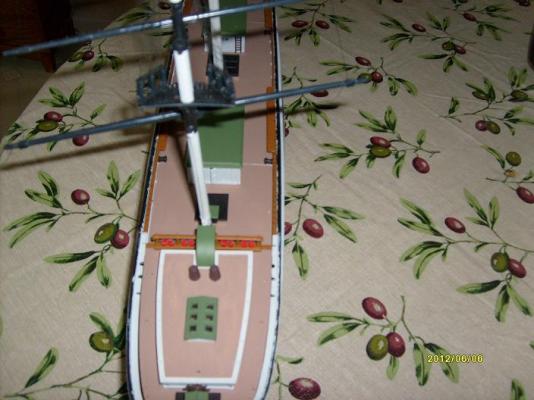
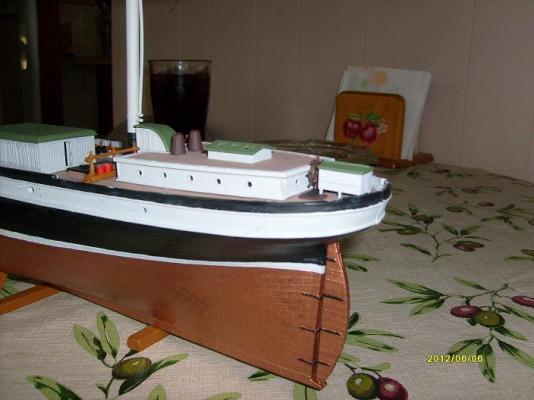
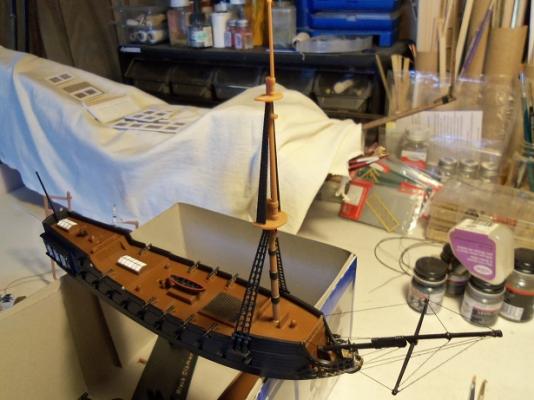
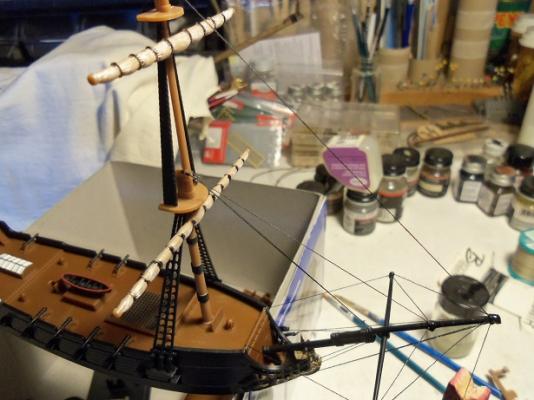
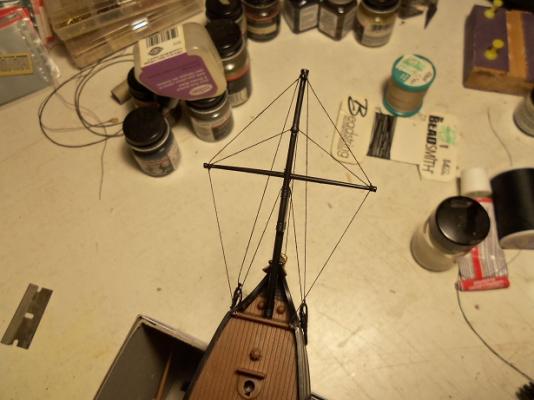
more was done yesterday.........I was in and out a lot. I hope I have time to get this all posted.......I have to work this morning, and I'm running late the sails {furled} were painted......didn't have any grays, so I stuck with flat tans and whites. since I'm not planning to work with different color threads, the rope detail was painted flat black. there is some touching up to be done.........I know here is the relation between the tan color and the second step of flat white....kinda rushing it ..... then the black accented rope treatment the fore mast was cemented in place along with it's lower ratlines. no room on the chain plates the yards were added the fore stays were added next. it's thin thread........kinda hard to show it to you. it will be the lifts next and the back stays.......how ever will be the most easier to work with.......such a small model


- 44 replies
-
- 13
-
-
- black diamond
- revell
- (and 2 more)
-
I must have missed it..........the galley structure looks as though it doesn't fit the field. if this was the Cutty, it would have sort of a triangular appearance, but this one looks to be more rectangular. is this an upgrade, or are these the kit parts? looks good, but how do you plan on masking the raised shadow? one word about the decals. I got a set for my cutty, to replace the ones I got with it {got the kit off E-Bay} when I went to use them they were micro cracked. even if they look new.......these decals are old! treat them with a product called decal bonder....it can be bought alone or can be found in the 'sure thing' decal maker kit {it's sold by Testor's}. it will coat the decals and bring them back to life........solving the micro cracking problem. it was a hard lesson for me.........I don't want it to happen to you!
-
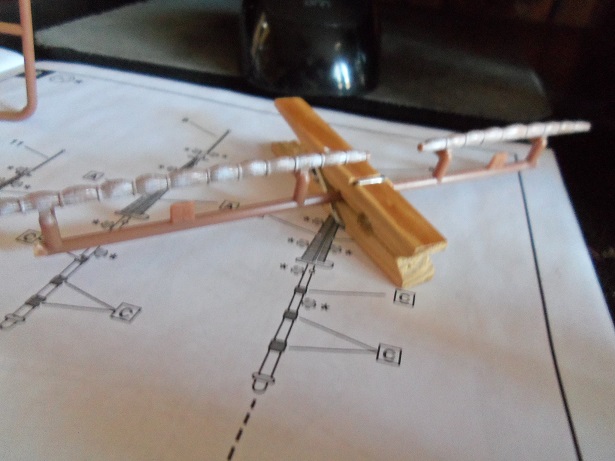
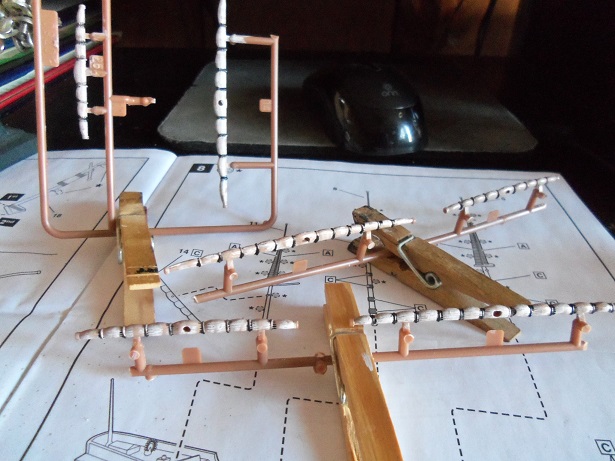
thanks for the kind comments gents..and those who hit the like button. I thought I was going to get back to some painting, but I decided to finish catching up on everyone's builds instead. it was very enjoyable now that I'm all caught up...I can continue on without guilt that I was leaving someone out Actually Patrick.......Santa was very good to me this year. I got several models. one place I like to go to and window shop is a site called 'old model kits.com. back in my plastic days, I built a lot of models.......quite a few of them, I see there I got two this year: Revell Fokker DVII - 1/28 scale - production dated in the mid 90's {molds most likely were made in the 80's or even the 70's Revell Santa Maria - no scale given, but I'm thinking it's a 1:83 scale kit - production dated in the mid to later 60's {molds were made as early as 1957} I still have a sweet tooth for those early kits.....I enjoy the nostalgia feel they give. another one I was hoping for, was the Revell Thermopylae.....they had one when I had last looked. it would have been a good companion to my Revell Cutty.......but it was not to be. it was sold by the time the admiral ordered. so she went to Ages of Sail and got me a Mantua / Sergal Thermopylae. it's a 1:128 scale kit.......very nice {yea, I looked in the box} quality......and of course, I had to look at the instruction sheet. other than figuring out Italian.....I'm good! thenI saw something that made my eyes go big.....the parts panel diagrams look to be 1:1 with the model. I haven't measured everything yet to make sure, but either the use of these diagrams, or the panels themselves, I think I can come up with a hull for a Cutty in the same scale {or any other clipper of similar design}. So, I have that to look forward to. no progress yet..........I ended up going to sleep..........had this weird dream about tying trees together
- 44 replies
-
- 8
-
-
- black diamond
- revell
- (and 2 more)
-
Cutty Sark by NenadM
popeye the sailor replied to NenadM's topic in - Build logs for subjects built 1851 - 1900
that's a very niffty idea for a stand..........holds up the ship and a secret compartment too- 4,152 replies
-
- 6
-
-
- cutty sark
- tehnodidakta
- (and 1 more)
-
then I should be thanking you but really.......your doing a super job on her. as a matter of fact, a friend of mine who lives in Barrys Bay gave me a Billing Bluenose that he couldn't finish. I'll be getting into it one of these days, and your log will be a good reference keep up the good work!
-
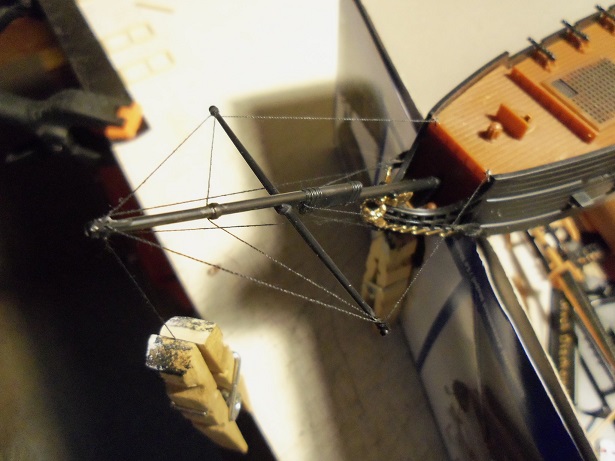
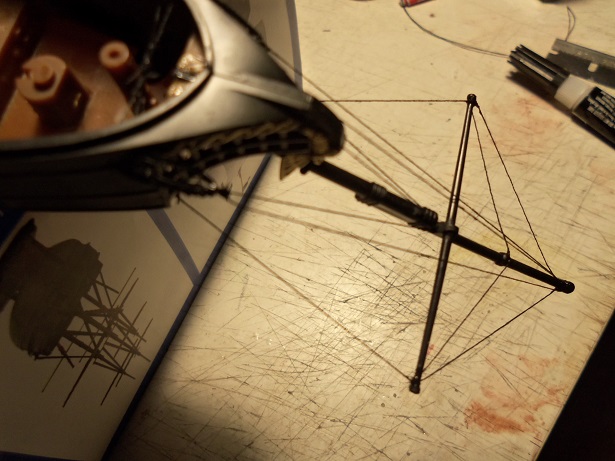
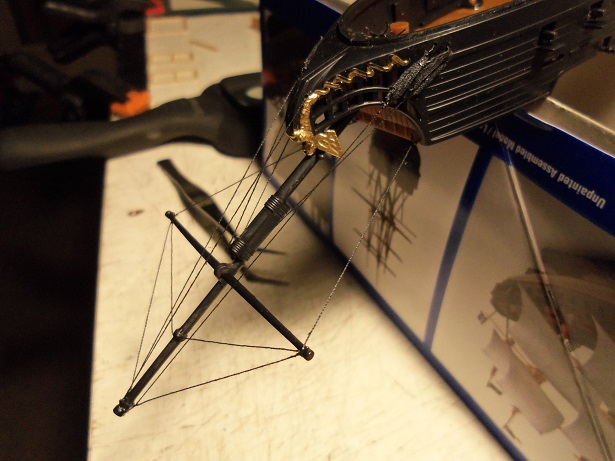
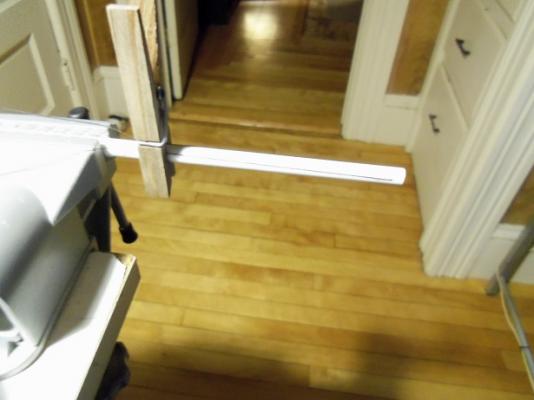
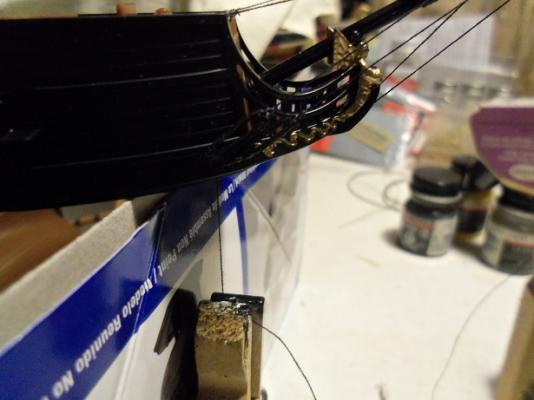
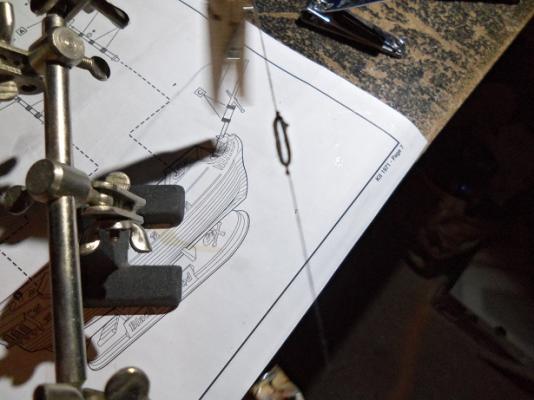
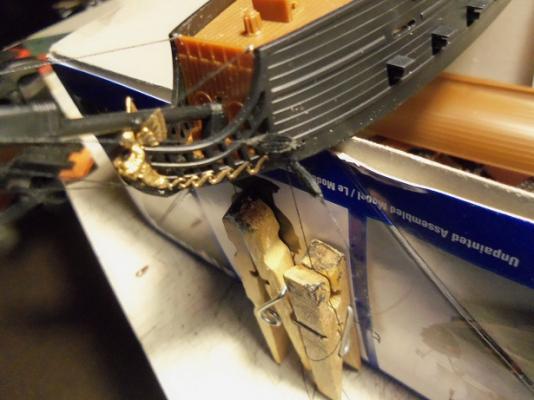
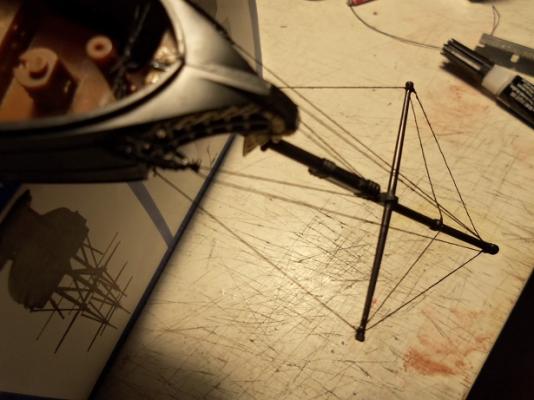
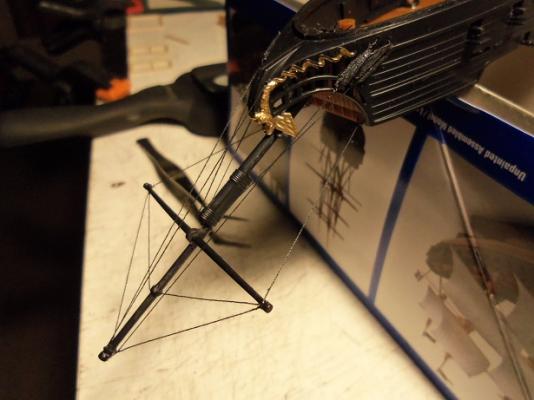
as Popeye said in one of his cartoon shorts "This is embarrass - skin.......AK-k-k-k-k-k-k-k-k-k!!! thanks for the good word everyone.......and all who hit the like button! I've been at this all night.........I think that if it goes the way it's gone so far, it will look alright. the lack of termination points is making it tougher, but I did drill some holes and it seems to be working. I also tried an idea for making dead eye assemblies made of thread. the first try didn't do so well. I wrapped some thread, tied it off and dabbed some white glue on them. taken off the ....yea, that's my x-actor in the vise........'metal dowel', they looked flat, white-ish, and just plain didn't look good. the result pictures were too fuzzy to show you, so I ditched them. the second try I did them dry. a notch was cut into the end of a plastic tube.......smaller because they were also out of scale. these might still be out of scale, but they came out a lot better some thread was fitted in the notch and pulled past the vise, making sure that it would not move. another piece of thread was wrapped around the tube and tied off. the thread that was fed into the notch was cut and tied around the bundled thread, tying it together at points opposite each other. it was then taken off the tube and clamped into the jaws of my helping hands, where it wad pulled tight enough to cause the bundle to become an elongated oval........the shape of a dead eye assembly. the knots were then glued and the excess thread trimmed off. the process kinda took me away from taking pictures for a while. I had done other bits of rigging to the bow spirit. I'll try to get a better picture of the assembly in action. it's hard since I'm dealing with black. ....still not too good....huh!?!?! here's a shot of the dead eye in the helping hands. I got fed up with the light issue........I was using my small desk lamp......I brought the whole ordeal over to the table, especially when it got down to tying all this together. and finally...........a half way decent picture of them. I was tying the last pair on the bow. turned upside down, I added a pair of bow stays. this finishes the bow..........now it's time for the fore mast to be cemented in place. I had better get the yards painted up and ready to add to it. I will need to make two more sets of these assemblies for the fore mast.........them two more sets for the main mast.........and then two more sets for the mizzen. I don't think I will make any for the lower fore stays....I'll just tie them off at a good anchor point. I'll try and go a bit further before I turn in. thanks again everyone for being so kind. I knew that one day, I would completely rig one of these vessels {so far my track record has been zippo}.............but who would have thought, it would be a model like this one


- 44 replies
-
- 13
-
-
- black diamond
- revell
- (and 2 more)
-
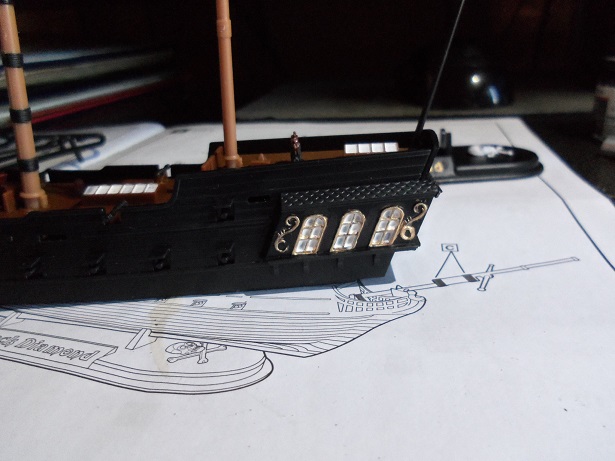
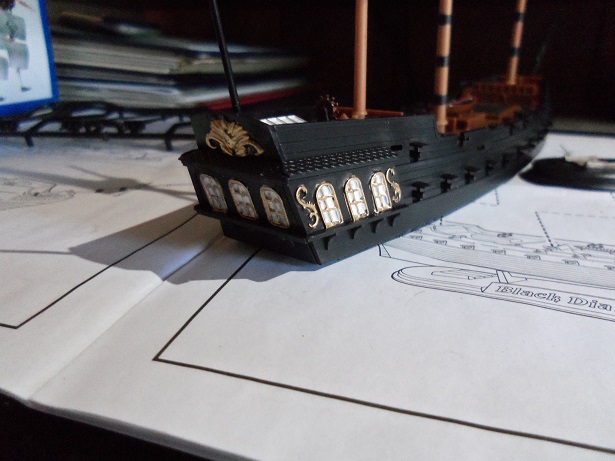
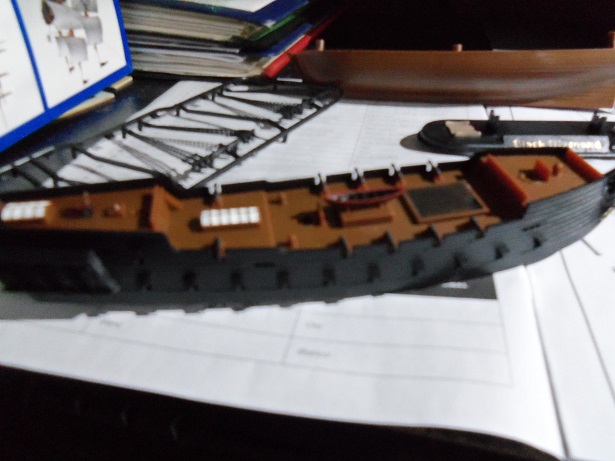
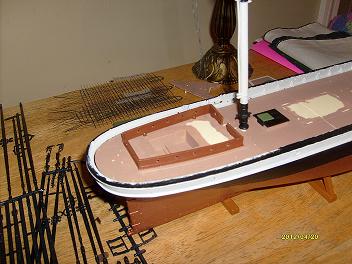
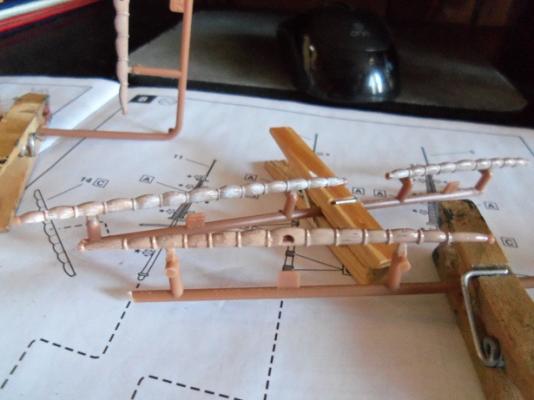
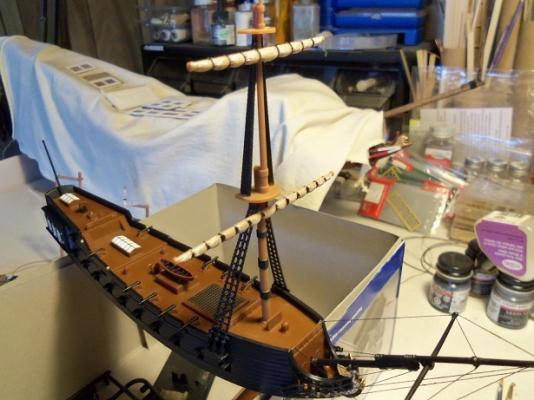
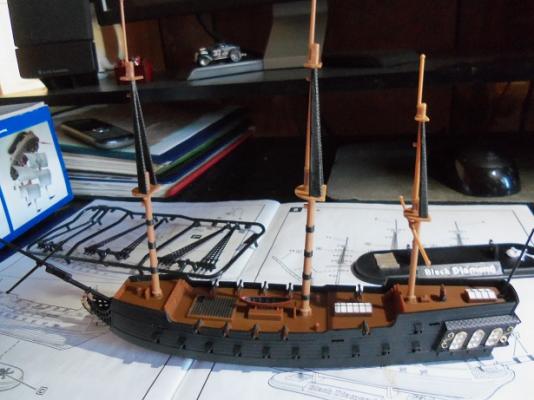
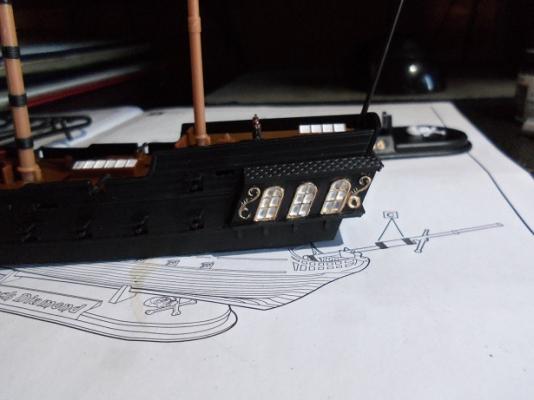
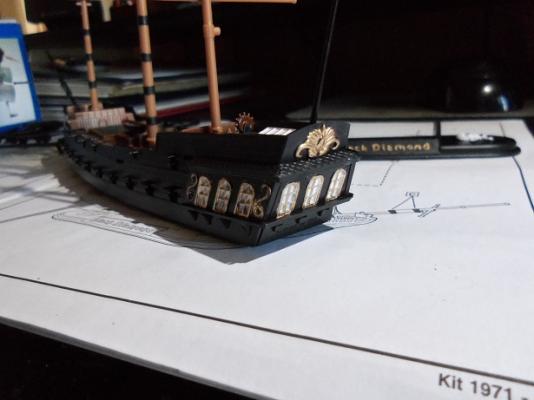
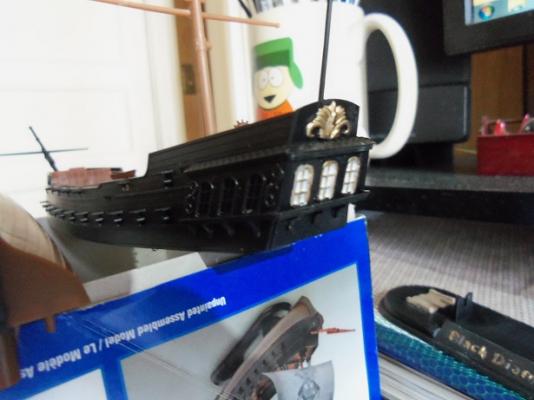
hello Nenad.........yea, sort of. Chase and Trip are the oldest of the tribe {they have a younger sister and a new baby brother}. I love them......and this kit gave me an idea. I'm going to pick up a couple of these snap together kits for when they come over. they enjoy legos.....I think there are a few basics in there somewhere. we can sit at the Kitchen table........no glue, no paint..........perfect! after all.........what are grand parents for??? well, I didn't have to do anything out of the ordinary today.........guess I can sit here at my desk and play after spending a little time on a couple of side projects, I settled back on the Black Diamond. I would have posted a picture similar to this one....but my provocative south park cup was in full view and the caption could be seen {just wanted to keep things clean around here}. the masts weren't complete anyway.......it gave me a chance to get them done, paint wise. the side stern windows are done as well......they're not perfect, but they will make a child smile.......and that's what I'm shoot'in for. the stand was touched up too.......still found it hard to stay within the lines minus the yards w/furled sails, this is what the whole model will look like. some rigging will enhance the looks quite a bit. I have a fairly good idea of what I will be able to add.......the lifts, fore stays, back stays, and braces. looking on the deck, the railings are like solid walls. hole can be drilled through them......hopefull not at the cost of them looking cheezy. the lower ratlines do not have that much of a chain plate to them. I'm thinking that the back stays can be done by drilling tiny holes in the bulwarks, just after the ratlines. braces can be done using the same method......perhaps holes through the railings, or bulwarks. I have some small scale plastic dead eye assemblies from another past kit........sure I can make them work, but I have to follow my own rules........NO EXTRA PARTS ADDED. so, I'll have to improvise. the yards have to be painted as well......the sail areas. back at it I go............


- 44 replies
-
- 12
-
-
- black diamond
- revell
- (and 2 more)
-
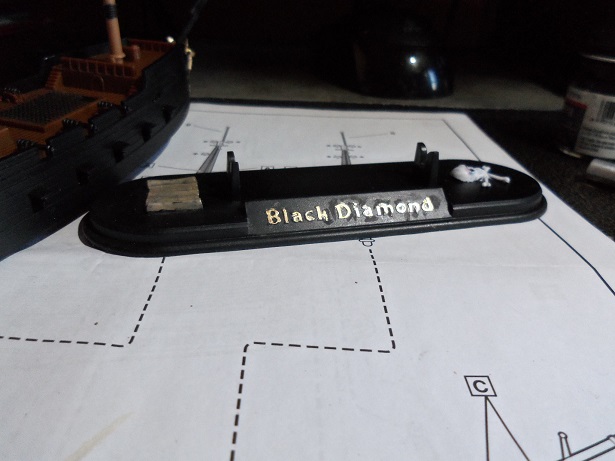
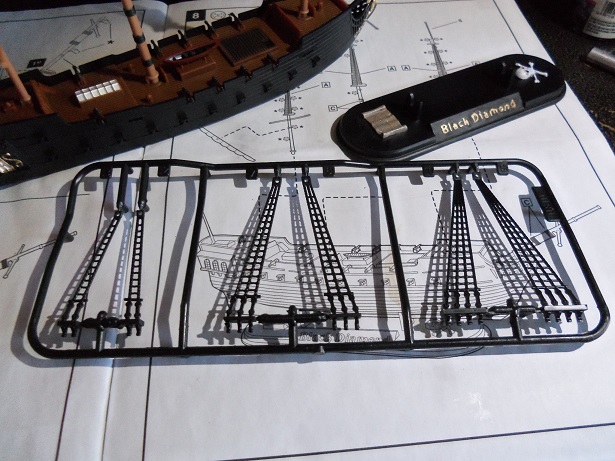
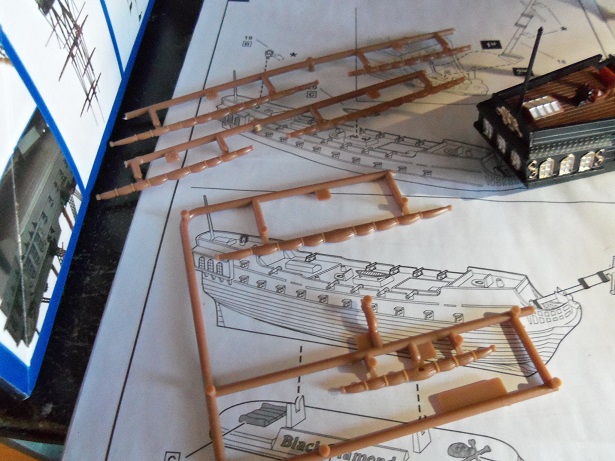
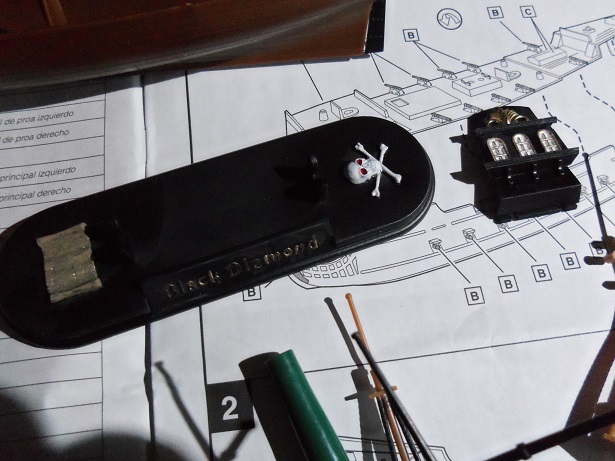
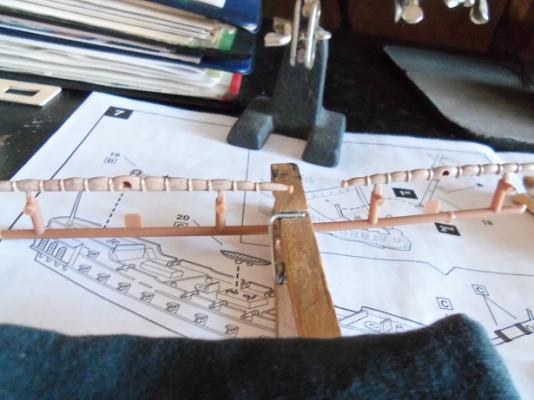
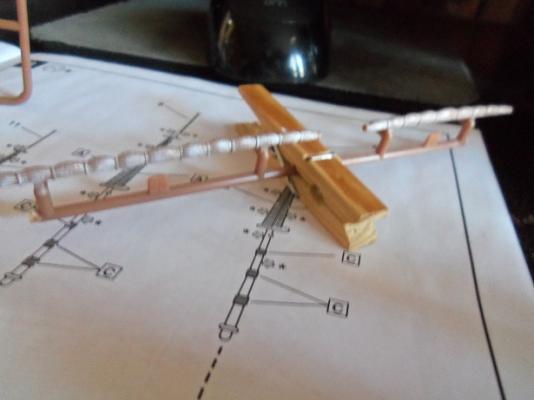
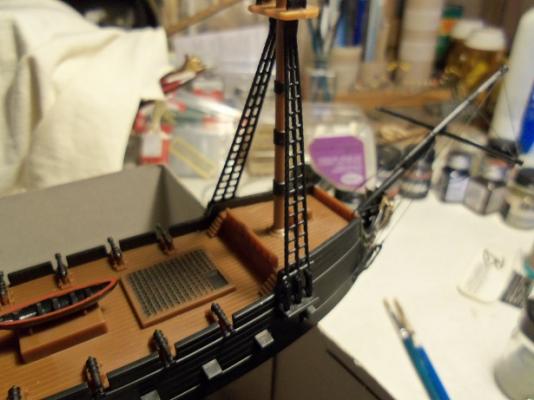
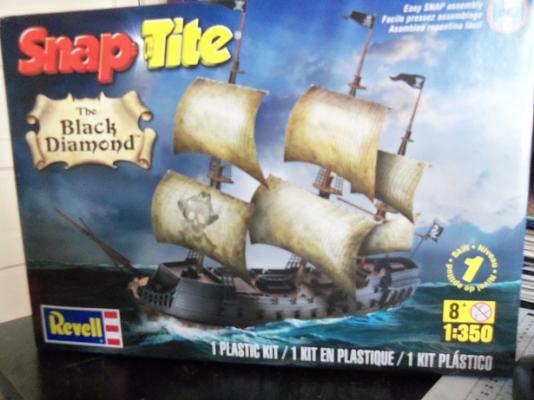
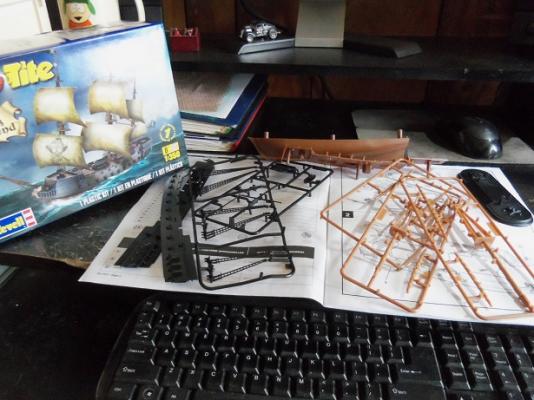
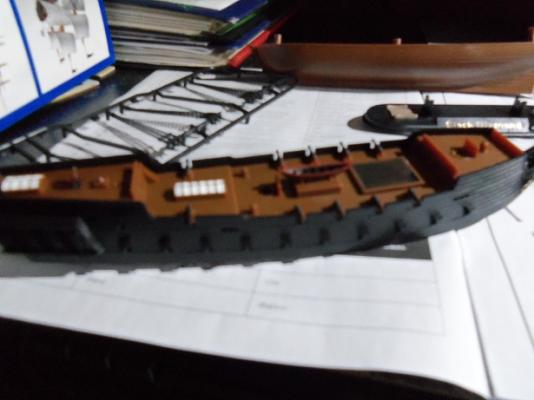
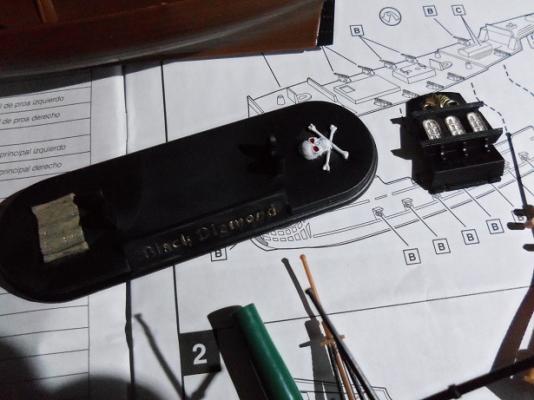
I was so on the fence about this one........such a silly little thing. but, I figure it would make the grand kids happy, and what the heck......I might as well show it. I got it for Christmas from my two oldest grand sons, Chase 8 and Tripp 6 years old. before I opened it, Brandon {their father} cautioned me that they were the ones who picked it out, so I guess that was a subtle hint to brace myself. I could have laughed.......but I kept it back........put on my surprised face, and hugged and thanked them. I got a 'grand tour' of the box.......they pointed out all the cool features I loved it......these two boys are my gems. when they come over to the house, they look at what I've got on the table......and the ships on the shelf in the living room. I allow them to handle some of the stuff {I keep a tight reign on the danger factor}....we talk about how things work. they go from one subject........and zing!........off on another quite the chatter boxes, they are! Tripp asked / told me {a combo of the two} that the next time they come over....if I build it, he'd like to see it {got a 'me too' from Chase on this one as well}. I assured them that it will be done and ready for them to see.......tiny model like this one........how long would it take? I looked in the box when we got home........ it's molded in two color plastics.......I'll just do some accent paint. plastic ratlines........the upper ones are part of the masts, so they will need to be painted. the yards have the sails furled and lashed detail, but the kit comes with paper sails that can be cut out and used. I'm going to go with the furled look. as the name implies, it is a snap together kit, but I will use glue so it doesn't start falling apart. there is no rigging at all, and there are no points where rigging can be tied. I want to add this in.......I did set a goal for myself though......no extra parts are to be added. so, it may not be totally correct.......I'll do what I can. there is a fellow on You Tube that posted what he did to the one he built......he didn't do the rigging either. the only thing I saw was that he used gloss paint on it.....I'm going to use flats. I did this during my vacation last week..........as my luck turned out, I didn't get too much quality time. kept getting pulled away......chores, taking Gibbs out, the part time job.........yea, things kept me hopping. the skylights were painted flat white......the frames were scraped lightly to remove the excess paint. the cannons on the spar deck were painted flat black....the kit wanted them painted gold. I left the gun deck in the black molded plastic, so it made sense to alter the color to match them. the grate was accented......the bow was accented. I did goof on the ship's wheel and boat......painted a gloss brown, instead of a flat. Testor's went through a short stint, where they failed to label their paints. usually, I put a dab on the cap so I can tell......oh well. the stand has a map and skull & crossbones.........I was terrible with the plaque lettering.....I'll have to touch it up. the same went for the transom windows. I'm not going to fuss too much, but I do want them to look better that this. there are more windows on the sides of the stern.......still need to do them. I did the paint on a toothpick trick, and then accented out the frames with gold. I started to paint the fore and main mast detail, but beyond that, this is where I ended. it was back to Wal-Mart and the real world. I also got the nod that I can order some of the parts that I need for my other builds {that are stalled}. builds that I've completed, some of the extra stuff added called for a borrowed part from another build. meaning to replace them at a later date proved to be harder than I thought, when I kept getting the red light from the budget director. the first wave came in the other day..........I hope to place another order in a week or two. hopefully, I can beef up my inventory as well.
- 44 replies
-
- 12
-
-
- black diamond
- revell
- (and 2 more)
-
nice to see your progress peter.......nice save with the faring issue. I've had to do that as well, at times, but mostly on my scratch built hulls. I use a drywall sander.......it covers three to four ribs at a time, depending on the scale. I know Billing, back in the day, to print the decking on the deck platform....one could stain and use, or use it as a guide to lay planking over it. the only kit that I've done, that was that old, was the Nordkap. I made the waterways and did planking that corresponded with the thickness. in the more modern kits......some supplied Mahogany.....some supplies a wood called Annegre, a lighter colored African wood. it's really not a bad wood.......I used to use crayon for calking, and sanding afterwards would blend the crayon into the wood and give it a nice hue. I've heard of the use of thread for calking, but never tried it. it looks very nice nice recovery with the stern fillers
- 207 replies
-
- 1
-
-
- billing boats
- cutty sark
- (and 1 more)
-
I like it! how will it hold up over time though? I've even had thoughts about the white glue I've been pulled away of late........holiday and such........ it's not off the table.............when I get back to her, I hope to show you something really good {you've ALL been good this year.......in my book} I really appreciate you showing me this.......joe......it looks awesome!
-
oh....my.....god John..........she looks absolutely beautiful! I'm ashamed to tell you how many pages I had to catch up on.......so many great progress pictures I like the blocks you used......they look so natural for the ship.......and they add so much detail. the whale boats add a lot as well......all the added detail congratz on the finish of this fine vessel....{I read that she was finished}...I am so happy for you now the stand.........and there had better be a case in store for her as well.......I quite agree on the preservation of her beauty. I hope the holidays turned out to be all you had hoped!
- 2,250 replies
-
- 5
-
-
- model shipways
- Charles W Morgan
- (and 1 more)
-
......and Dr. Dafi rides again!!! awesomely good work! I forgot that you have photo etch.........I ordered some from Ages of Sail. one can never have enough........as you have shown......! I have your site.
-
lucky man! I can't retire for five years yet........I can still hold out hope for early retirement though
- 517 replies
-
- 3
-
-
- Endeavour
- Artesania Latina
- (and 1 more)
-
looking very nice Julian
-
super progress O.C. catching up is hard to do really like the wood decking....gonna look sweet as your populating the deck cute puppy...
-
awesome progress since I last looked in. hope your holiday is good...........happy new year!
-
really nice progress Sjors.........good to see your finally finding time for the table Have a great new years you two!
- 1,616 replies
-
- 6
-
-
- caldercraft
- agamemnon
- (and 1 more)
-
awesome progress Charlene.....the deck layout looks super with the cannons rigged. hope you had a good Christmas.........and wish you and Jerry the best for the new year!
-
ratlines look great Pat........nice view of the ship stay safe and have a great new year........trust you had equally a good Christmas
- 517 replies
-
- 3
-
-
- Endeavour
- Artesania Latina
- (and 1 more)
-
hope you and your family had a great Christmas Frank.........hope you have as equally a good new year....may there be good things for you!
-
.......big tease! looks sharp.........love the shots of her interior. you should be proud of what you've accomplished. very nicely done indeed! have a happy new year Mark......and your admiral as well