
HOLIDAY DONATION DRIVE - SUPPORT MSW - DO YOUR PART TO KEEP THIS GREAT FORUM GOING! (Only 75 donations so far out of 49,000 members - C'mon guys!)
×


popeye the sailor
-
Posts
16,007 -
Joined
-
Last visited
Content Type
Profiles
Forums
Gallery
Events
Everything posted by popeye the sailor
-
 sounds like they cheaped out on this kit..........on lesser value kits , they supplied clear cello that had the window detail already on it. I do notice though that the stern facia has the pane dividers in the windows......a saving grace? too bad you have to do the blanks.......I have the 1:100 Gothenborg. with that kit, I retooled the stern section, so there is a room under the deck and you can see through the windows. this one has the clear cello that I spoke of. hated to let that bit of detail go to waste. looking very good so far.....your doing a great job!
 -
she's looking great Jerry! I notice a rise in the bulwark at the port bow.......is that to be used for something?
-
your second planking is coming along nicely.........really smooth looking sofa table look great as well.......very nice!
-
browse through a few build logs and you will see some of the techniques others use. tutorials can also be found here and on the web.
-
thanks Dragzz appreciate the good word! thanks Greg.......kinda reminds me of the old 'outer limits' TV show intro. depending on the subject, one can go stark raving mad with adding detail and stuff. I know I could have gone further with this subject, but this is a good place to end off. she's not too plain Jane, and not over laiden with detail.....she's just right.......balanced. it's the same way I feel as I look at her.......and still amazed with how she came out.
- 956 replies
-
- 7
-

-
- andrea gail
- trawler
- (and 1 more)
-
thank you folks for the super nice comments....and as always every one who hit the like button! so many inspiring people here......it's impossible not to learn something along the way. thanks Marty.....I starting the Titanic build......and god knows what else. I'll settle into one of my other builds thanks Lawrence.......it was a good subject to work with.......it was fun to do. thanks Piet......I hope you get into another project that has a lot of metal work.......I want to learn more. I have to think outside the box......they won't let me in thanks John.....always a pleasure to have you looking in whatever happens concerning a case, I'll post it here
- 956 replies
-
- 4
-
-
- andrea gail
- trawler
- (and 1 more)
-
glad to have you looking on John! unusual is right.........I feel like an alien! can't remember when I had this much plastic on the table! I'll try and do right by it though. I did have to laugh......while I was looking it over, the admiral was sitting at her computer shaking her head. she still can't come to grips, that SHE.......the person who doesn't want me to build plastic anymore.......got me the kit. every now and then......I'll run the hull past my nose and say "ahhhhh......the sweet smell of plastic!" I hope you enjoy
-
WOW! you two are fast! well......welcome! no....no master.......please.......I haven't touched any REAL plastic since 2009! I've just begun to pick at it a little....already found a few areas that I can play with. so make yourselves at home and I hope I can make it interesting enough for you. I did do one more thing, beyond what I've done so far. I painted all the deck areas that will show. I used a flat deck tan for this......I'd try to texture it, but the way the bow and stern panels look, I might be too afraid to botch it up {gathering in the edges and stuff}. I'll get to do more once I get settled in
- 573 replies
-
- 17
-
-
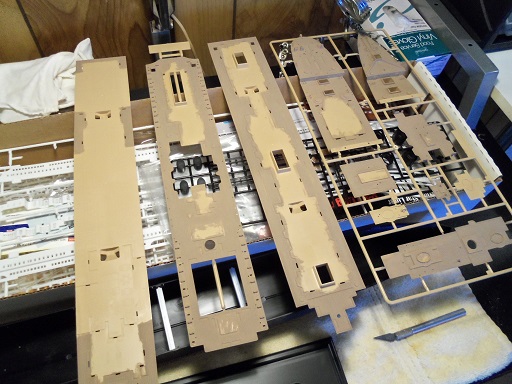
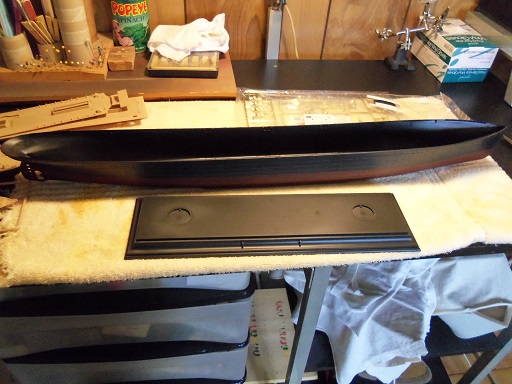
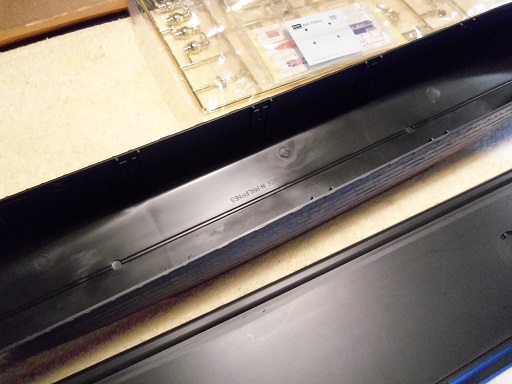
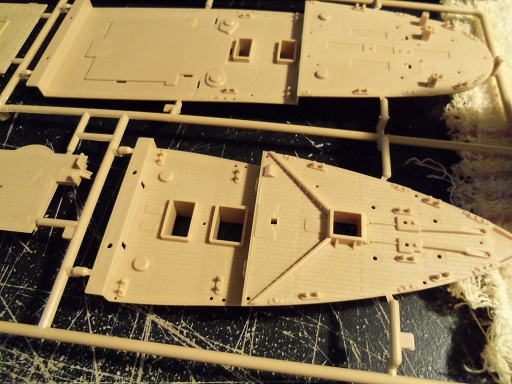
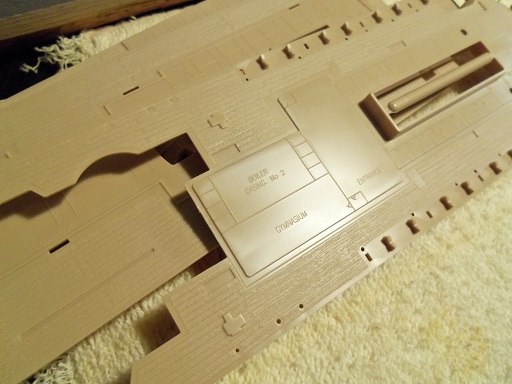
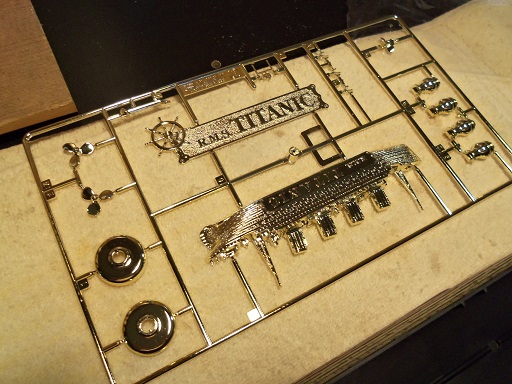
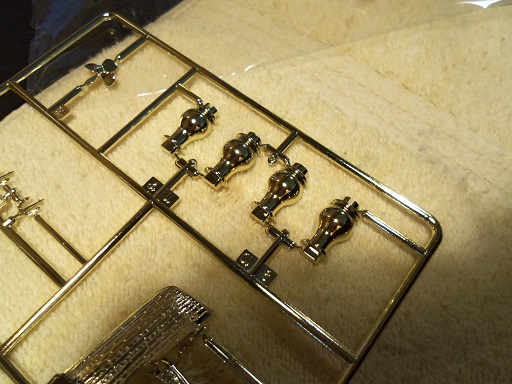
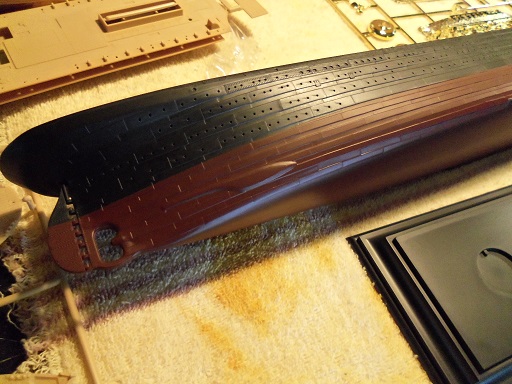
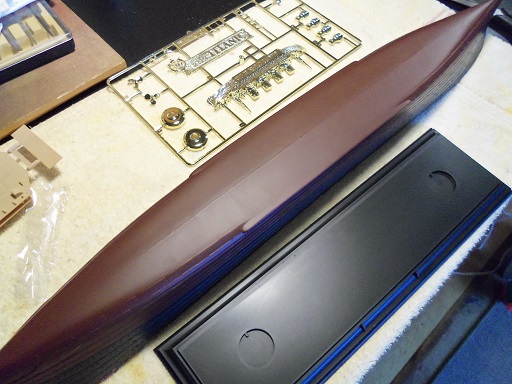
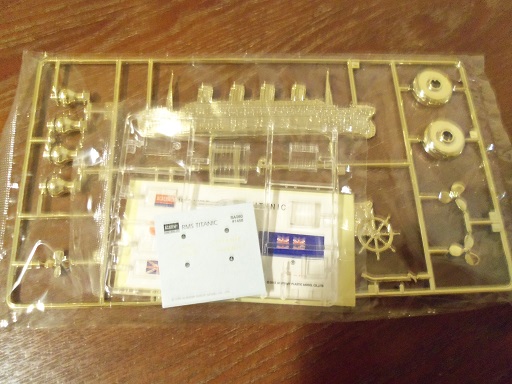
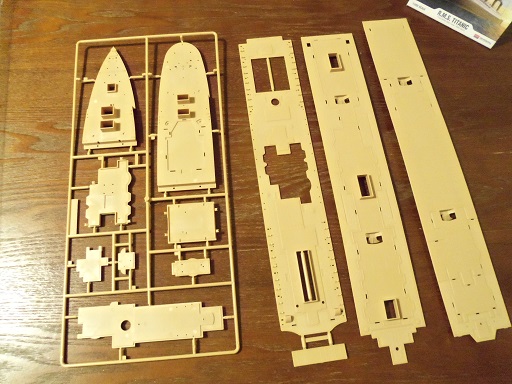
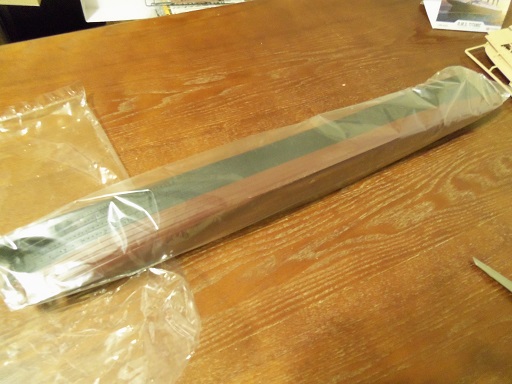
my smaller table was cleaned off........and THAT'S where it is to be assembled. I told myself that.......the main table is for the wood builds........I really need to get back into that habit. as you can see, the stand is a pillar type stand. there are recessed circles that can be drilled out in the hull bottom. one thing I might elect to do, is to attempt to light it. I have the stand and hull figured out.......it's the upper deck areas that I'll need to figure out. I'll know more as I go along. the bow and stern panels are shown here.......right side up. you can see the detail that they molded into them......it's really nice. they even embossed the names of the sections on the deck areas. it's great for knowledge, but none of this will ever be seen. still cool though. a firm rule is that paint will not adhere to chrome, so all of this will be stripped. the name plate is quite intricate.....even the pillars are in halves, and will need to be cemented together, and will leave nasty lines. stripped, I can sand them smooth and paint them. I have the Testor's gold and the Billing's gold......I'll be sure to give them a clear coat to resist finger prints. it's kinda sad actually that they painted the waterline and bottom. the two prop housings that need to be cemented on are unpainted......black colored plastic. they tell you what colors are required to mix and achieve the color, but it can be a hit or miss thing. I also have to sand and do a small repair to the bottom.......there is a visible mold line and ripped out sprue marks. I match up a color close to that and redo it.......no preblemo! I began the build, by cementing the spacer bars in place, in the hull. there are slots along each one of these to accept the port and starboard bulwarks, once the bulwark and decks are assembled. there are also a pair of bow and stern bulwarks, that will be added once those panels are in place. I am a bit concerned, since all the decks {except for the bridge deck panel} appear to be a tiny bit wider than the hull, even with the spacers installed. I hope they are right.

- 573 replies
-
- 19
-
-
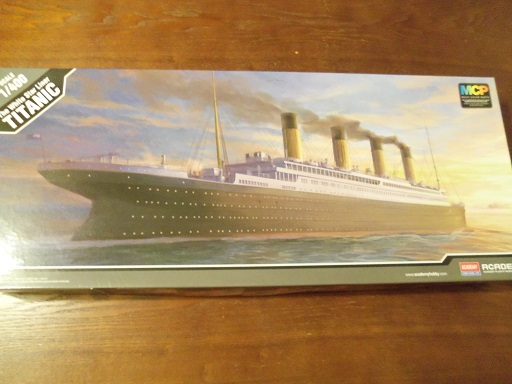
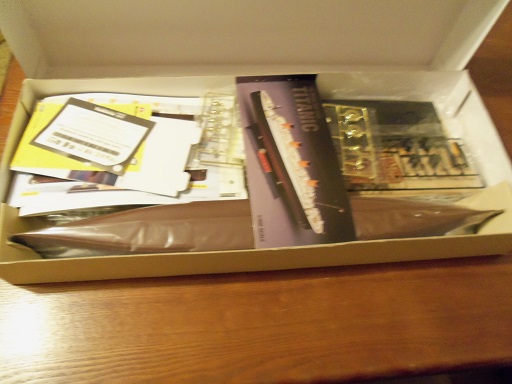
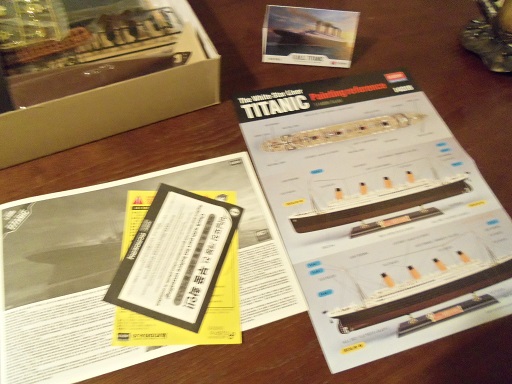
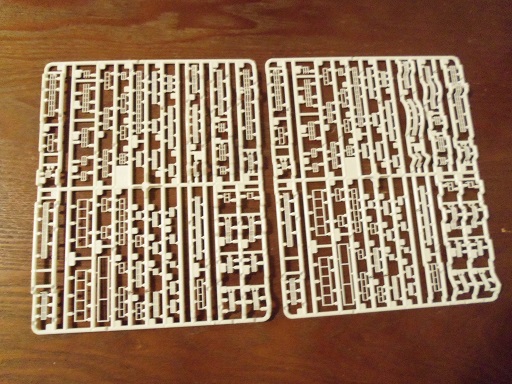
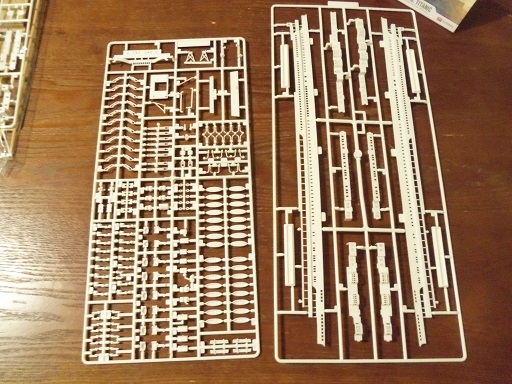
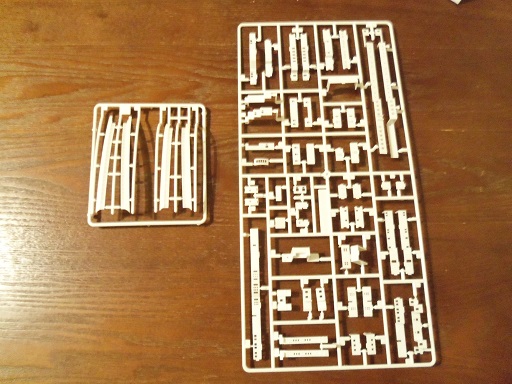
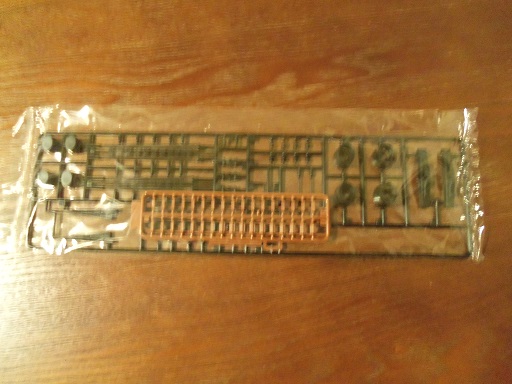
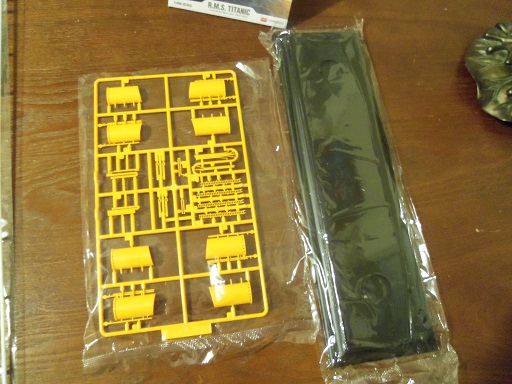
I received this kit for Christmas from my admiral......she was so bummed out, that it wasn't the Billing's Titanic. I have never built an academy kit before......I was impressed with how the kit looks. there is quite a bit of detail to it, and I really like the size......the hull is 26 1/2 inches long. I have to be brief....I am to grill supper. it has been an off the wall busy day! I will start with an overall view of the parts......there are so many small parts.......I really have been away from plastic for quite a while. I had to do this on the dining room table, so there may be some bad lighting issues. the instructions don't look too bad, but since I plan to do some painting, I think it best to hold off on the rigging until the painting is done. {I'm sure they mean well} I'm not too keen on the chrome....a few of the parts pertain to the stand, but the name plaque, props, and anchors will need to be stripped. I use brake fluid for the process and a good stiff brush. there are a few water slide decals.......jury's still out on the flags.......they are peel and stick. I neglected to mention that the parts are done in colored plastic. for those who don't do much painting, this kit would be ideal........reminds me of the larger scale Revell kit from the past. here are all the white sprues. the deck parts and sprue is done in a tan color....the deck areas will need to be painted a flat tan. sorry.....I have the sprue panel upside down. there is a black sprue panel, a couple brown sprue panels, and the funnel parts are done in an orange / yellow color. there is a pack of rigging thread tucked in the sleeve of the stand base. there are plastic ratlines in the kit as well....I may do away with them, as well as throw another size rigging thread in the mix. I'm pretty sure that not all the rigging is the same size. the hull is an interesting part........the bottom paint has already been done. I'll go into it more in my next post. as the build progresses, you'll see the detail that is molded into this kit. it is a pretty nice kit......but it's going to be a nightmare to paint the detail on the bow and stern panels. personally, they might have done better to increase the part count, instead of molding the detail into these parts. that of course would alter the skill level.......and the market span as well. I just hope I haven't lost my knack in painting small detail
- 573 replies
-
- 18
-
-
hello Mark! thanks for the good word. remember, I started the hobby with the Nordkap. I have a couple......well, three sailing ships in my roster, but the fishing vessel will always be a foundation for me. I like them.......there is a much more open playing field.....I can go rampant with enhancements, as long as I stay in the subject parameters. the Lobsie twin build taught me that. I think there is a beauty in all ships and boats.......especially the ones less noted. I was so amazed that this boat had so little information and pictures......but I didn't check out the Gloucester harbor where she hailed from. I relied mostly on online images and the Billing's instructions. we build what we know, my friend.......but if you ever want to try a build off your beaten path, look around....there are kit out there......Dumas has a few. I just hope the Licorne doesn't get jealous
- 956 replies
-
- 5
-
-
- andrea gail
- trawler
- (and 1 more)
-
OMG!!! thank you all for the kind comments, and to those of you who hit the like button as well. yes Augie, I am very pleased with how she came out. I will probably still look over to the table, expecting to see her, when she's off the table finally. I have been in and out for most of the day, so I haven't made much progress on anything. I do have a correction to make........I mentioned several months.......it's actually nine months. I started snapp'in pictures the first of September, 2014. during the time period, roughly 824 pictures were taken of her progress. my Word Press build log on her is the largest log I've done to date......93 entries.......94 when I add in the gallery {I hate the term 'blog'.......it sounds so........'preppie' it's amazing what an idea looks like in the flesh..........assembling the Boulogne hull, and working on the Holiday Harbor boats..... they kept me thinking about Andrea and it gave me time to think of what would need to be done to make it happen. when I finally started.....it was very hard to turn off. good question......what's next. well.....I decided to start the Academy Titanic build. nothing big at the moment.......I did a tiny bit of assembly and am currently making observations on a couple of ideas, but I'm thinking of doing a mostly 'out of the box' build. I still have some research to do as well. I'm still looking toward dwindling down my back logs......I may bounce around a couple of builds while the Titanic is going on......perhaps I'll settle in and finish another one {I hope}. got to get wood and stuff before I can go completely nuts again........got to replen the parts I stole from the other builds, so my choices are narrowed down at the moment. but I'll be back on track very soon again, I thank you for your kind comments, and following along on this crazy journey. I'm very glad you all enjoyed this tangent I went on. I know I did!
- 956 replies
-
- 8
-
-
- andrea gail
- trawler
- (and 1 more)
-
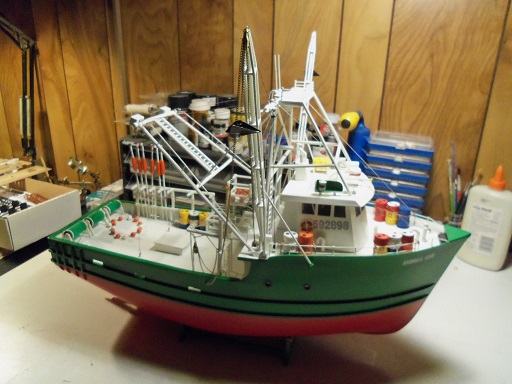
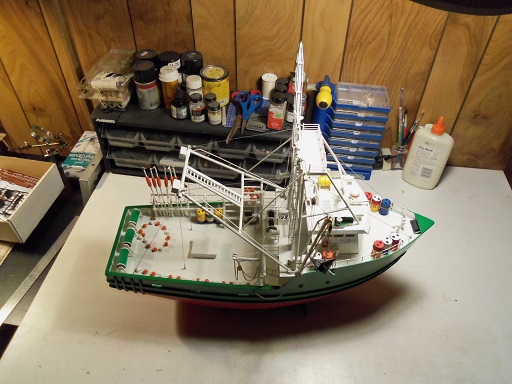
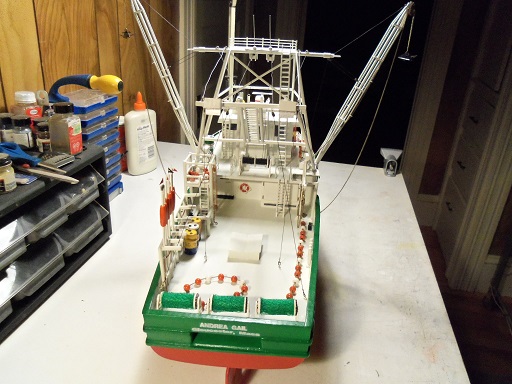
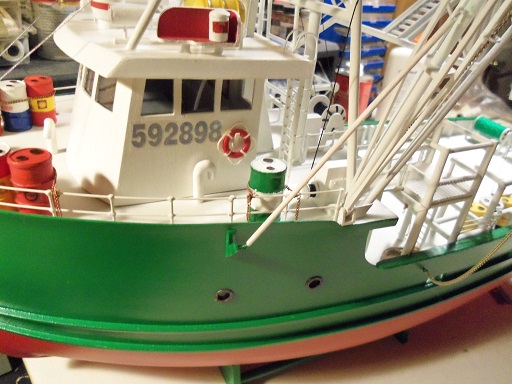
thank you Sal, Carl, and all you fine folks who hit the like button. the clean table......yea, there's a reason for doing it. in putting the last few pieces in place, I feel this would be the best time to call this build finished. oh, I'm sure that there are a few more aspects I could add, but confinement of space is beginning to be a problem. some of the aspects I've added, and some that I still had in mind, would have been better done, if the trawl rig wasn't in place. I did some modifications that wasn't on the actual boat, but they are minor, considering how close this build looks compared to the kit build. I'm pretty amazed how close I got. it's too bad I couldn't find the rigging directions for her....I could have gotten closer to that as well. what the heck........I muddled through Frank......if your looking in......I tried.......I really did. I guess George Clooney is too busy I got the addresses for his agent and publisher, and sent them a letter along with pictures. I haven't heard back thus far. I'm still holding the candle though, perhaps I may hear something down the road......if I do, I'll post it these are just a few pictures of the finished boat. I will do some more for the gallery.......even some of the Lobsie twins.....they're about a year overdue. I'm so very glad that you folks enjoyed the build.......I had an absolute blast in doing it! should I add any more to her, I will be sure to post it as well. thanks for looking in and showing your support and suggestions!
- 956 replies
-
- 28
-
-
- andrea gail
- trawler
- (and 1 more)
-
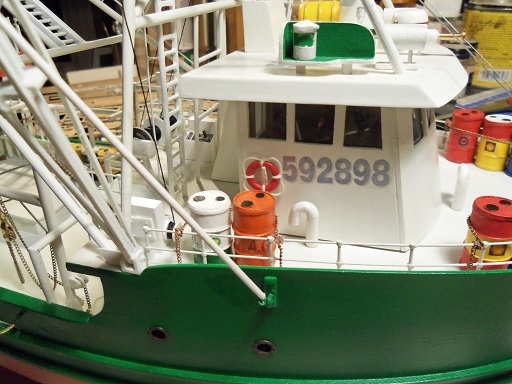
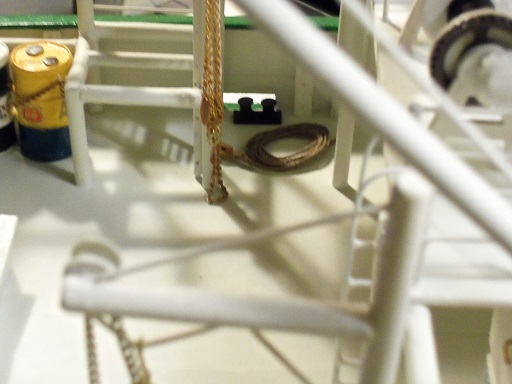
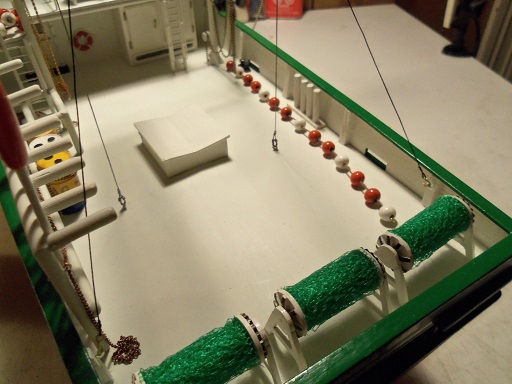
thanks Augie........as Mark wrote.......the times that try men's souls. mine is 'nuth'in to get hung about........' so anyway........the preservers were set aside for a short time.......and then cemented in place. as I mentioned, the one with the minor defect {really minor} was put on the bulkhead wall. the holder for this one was painted flat white. I had one more plastic single block left over. since the bead string is done, I cut the excess off and seized the block to it. it was then wound up in a coil and cemented with white glue to keep the coil together. it was then cemented on the main deck under the podium. then......something amazing happened.......all the clutter disappeared! the several months of dust and stuff......gone! the buoy string was cut into three sections. the first section had a stub of rope sticking out.........white glue was squeezed into the hole, and the stubble was tucked in to create a rope eye loop. this one was to be placed in the top of the podium. the other two were of equal length. for the ends of these two, I did something a bit different. trimming the rope stubbles off, metal eye bolts were cemented in. the first one was laid lengthwise along the starboard side. the other one was laid down however it wanted to..........


- 956 replies
-
- 27
-
-
- andrea gail
- trawler
- (and 1 more)
-
thanks for all the kind comments and the likes! Nenad........I don't know what it was.....but it's better to find a solution, than to get frustrated thanks John......what can I say..........YOU taught me Greg.........yes they do. when I did the Mary Ann, I made decals for them......think I did it on another build too. these are too small.......I could have, but I may do just as well to scribble some black paint on them wait till you see the ones for the Boulogne Etaples.......now these are large enough to have fun with Wayne..........some do. I think it would depend on how low in the water the ship sits. on the higher hulled ships, I would think just keeping the man overboard buoyant, would be their first priority. I just can't see someone running to the side with a preserver, and an armload of rope. then to think that in the early days.....it would be time consuming to tie a rope on there........but today, it's much easier due to the use of lanyard hooks {snap hooks}. yea, I thought about it too........figured to just keep it simple Patrick........the stand she's on already is it. I like the pillared look, but have never done it. I usually used the stand that comes with the kit. the dilemma that I'm really concerned with is a case.........darn thing is going to have to look like a square box! I'll post some dimensions later
- 956 replies
-
- 5
-
-
- andrea gail
- trawler
- (and 1 more)
-
Cutty Sark by NenadM
popeye the sailor replied to NenadM's topic in - Build logs for subjects built 1851 - 1900
hope things work out Nenad...glad to hear your mother made it through the operation Ok. thoughts are with you my friend- 4,152 replies
-
- 5
-
-
- cutty sark
- tehnodidakta
- (and 1 more)
-
I think the majority of model builders finish their models, and then later see thing that they've could have done things differently. some go back and make the changes........some don't. I've done the same........but I've resisted, thinking of not upsetting the apple cart. models are infinite......there is so much that can be seen by the naked eye. they are a collection of our thoughts.......the combination of sight and mind is quite evident in the 019...there is so much detail. you've done a spectacular job on her Piet.......if you never went back and did what you propose, I would think no less. but, if you do.......I hope to get a seat a bit closer
-
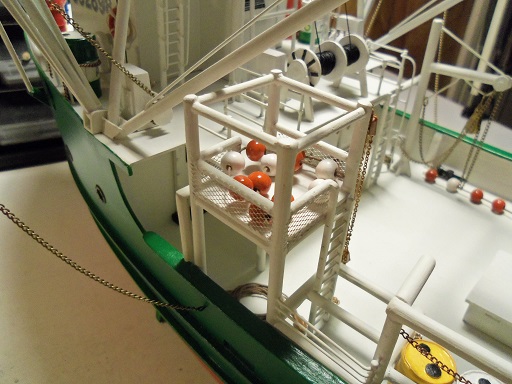
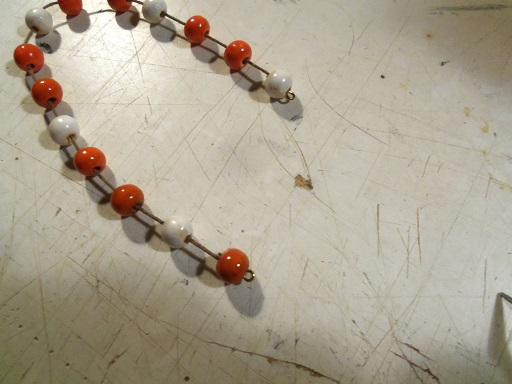
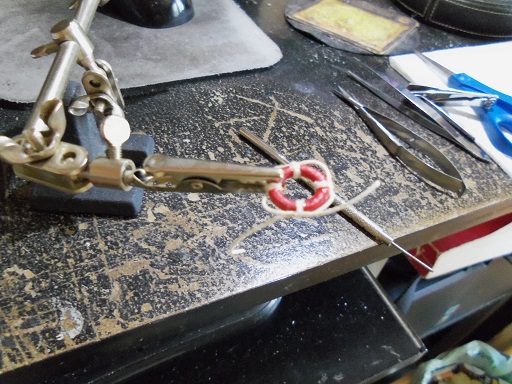
it's 1 Am........been quite a day. actually......the last couple days have been busy...but.........I managed to get some table time in..........here's what I did Tuesday { I'll do the rest tomorrow......or later on today, whichever way you want to look at it} the rest of the beads were cemented in place on the rope {string......thread......imaginative descriptions} while I was milling about, I caught this view of her..........had to snap a picture. now.......for some strange reason, the ca wouldn't stick, as I attempted to put the rope on the preservers. tried a few times, but heck no....... rather than get frustrated, I thought up a different method. taking smaller thread, the rope was tied to the preserver {no knot}.....kind of like the first binding when you tie your shoe. the thread was wrapped around one more time, and the same tie was done {no knot}. this allows the thread to lay flat on the preserver, and not become too thick. the rope being tied on, was then adjusted, and a tiny bit of CA was applied to the tie. I had just enough time to make a last adjustment, if needed. it also helped to have the 'helping hands'........don't know how I got along before without it great little tool! this is the first one I did......in finishing it, I pulled too much and pulled the rope out. rather than redo it, I just fixed it and left it at that. I'll make sure this one goes on the bulkhead wall. the other two came out good......actually have some nice loops. this method looks better too....the rope bindings make it look a bit more real. I don't think I'll be slapp'in 'em together any more the way I used to.


- 956 replies
-
- 18
-
-
- andrea gail
- trawler
- (and 1 more)
-
holy cow Augie.....she looking really sweet! love the color of the decking! your workmanship is just amazing I'll have to try and do a time log.......so far I only count the months!
- 2,191 replies
-
- 4
-
-
- confederacy
- Model Shipways
- (and 1 more)
-
you know Patrick........the idea of the Bat Boat has been one of my thoughts for quite a while now. yea........I know........leave it up to me it's not the type of hull to do it to........so your safe actually, it's not a bad idea to give it a shot of paint. it will help in filling in the tiny pits and minute lines......so when you give it the color coat, you'll get a smoother finish. I like to use primer. she looking very sweet!
-
thanks Dragzz...appreciate the sentiment you should post the progress on the Vic, so we can see
- 956 replies
-
- 3
-
-
- andrea gail
- trawler
- (and 1 more)
-
she looks superb Mobbsie........it went very quickly sails and rigging look great as well. perhaps there will be another in the near future
- 62 replies
-
- 2
-
-
- harwich bawley
- fishing boat
- (and 2 more)
-
do you have Maria in the water yet?
-
perhaps she's waiting till school lets out.