


popeye the sailor
-
Posts
16,007 -
Joined
-
Last visited
Content Type
Profiles
Forums
Gallery
Events
Everything posted by popeye the sailor
-

Cutty Sark by NenadM
popeye the sailor replied to NenadM's topic in - Build logs for subjects built 1851 - 1900
I wish you and the admiral the best.......I hope it's something that can be taken care of easily. fingers crossed!- 4,152 replies
-
- 4
-

-
- cutty sark
- tehnodidakta
- (and 1 more)
-
thanks very much for the kind words and the likes! what I was looking for, by making them from metal, is the weight factor. I was looking at both of the instructions I have on this vessel, they are made of wood. on the # 608 static version of this vessel, chain is not used, and the lack of weight made the rigging look limp, with no tension at all. they might be a tad over scale, but comparing them in place, they fit OK.......so I'm not complaining thanks for the picture Piet {I envy the heck out of you right now}. don't be angry with me........but I wrote about you in my Word Press log: https://gundalowdrydock.wordpress.com/2015/04/21/the-andrea-gail-120-scale-part-81/ I looked at Dave's Blogger site, hoping he posted pictures of the gala....I would have posted it as well. again......what Dave and you achieved there, is to be commended, and if there's any way I can spread the word, I'd do it in a heartbeat! I hope I can attend one in the near future...I don't see this as a 'one time event'! models done out of the box can be just as good, but it does show just how generic kits can be. it is as I've always said....they make the kit......and when that kit crosses your threshold, it becomes your kit...you are the builder. imagination goes a long way at this point......and I don't think ability has anything to do with it. to see what is shown...to research what certain aspects do...even a newbie can expand on the subject and surpass what the kit supplies. I'm not talking from a swelled head........I'm just a regular guy.....not an expert by any stretch. I would try and add the extra detail to plastic kits, but it wasn't till I did my first wooden kit, that I felt the freedom, that these kit offer. I've seen some very interesting and beautiful models created here, and I guess you can say I learned something from all of them. I'll probably never learn everything there is to learn.......but I'm sure going to have fun trying I thank you folks for your kind comments.......and giving me the sense that I've raised the bar. I don't think I have, really.......I'm doing just as I always do.......this particular build simply made it easier for me to reach out a bit more. I'm sure the next build will put me right back where I was....and I'll be just as happy. keep on thinking free
- 956 replies
-
- 8
-
-
- andrea gail
- trawler
- (and 1 more)
-
that must have been an absolute pain to do! I don't envy you on the clean up...but when you do, it's gonna look great! I use a black archive pen for the calking.....India Ink doesn't seep into the wood as much. I used to use crayon.....works well, but scraping needs to be done due to the crumbs and cast off rubbings. looking at all those nooks and crannies......you did an absolutely spectacular job. are you going to use a clear poly? I use semi gloss lacquer, but I've never use it on plastic......I think it would be OK, if you chose to use it super job!
- 205 replies
-
- 2
-
-
- kw49 antje
- trawler
- (and 1 more)
-
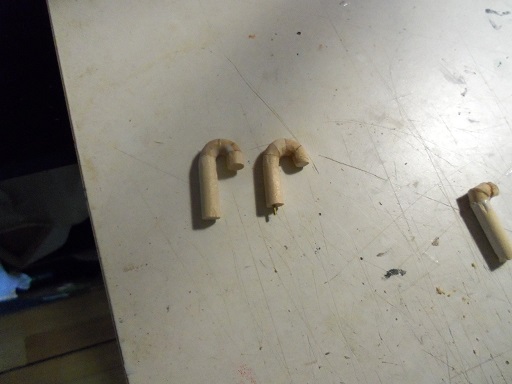
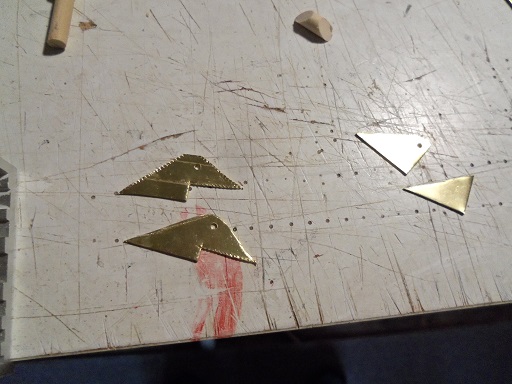
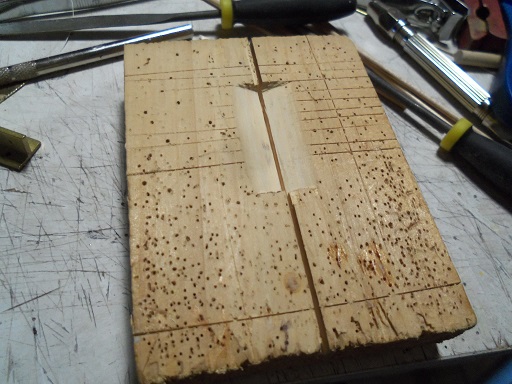
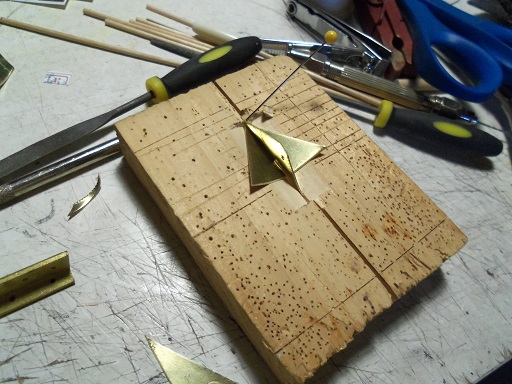
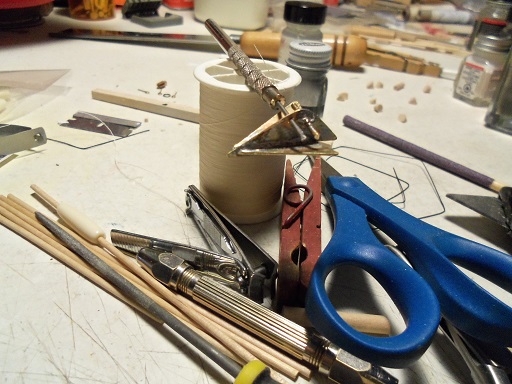
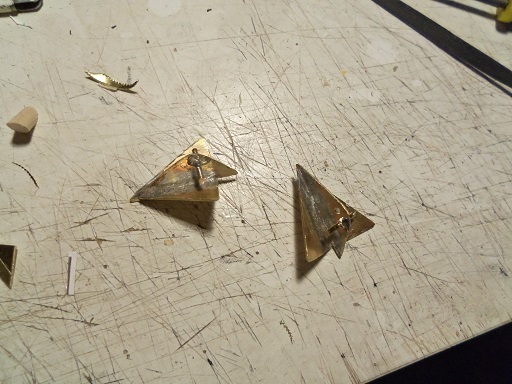
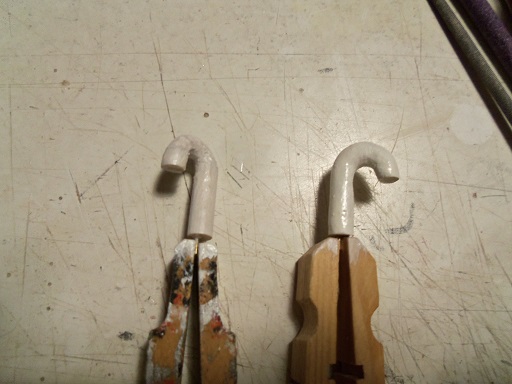
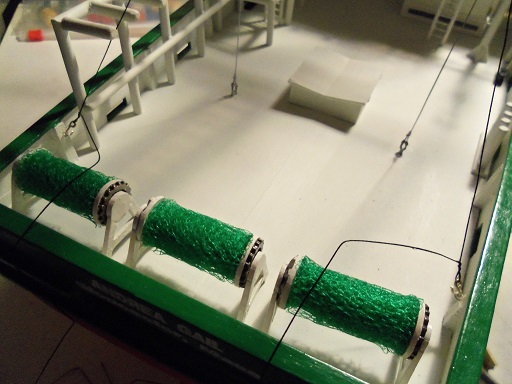
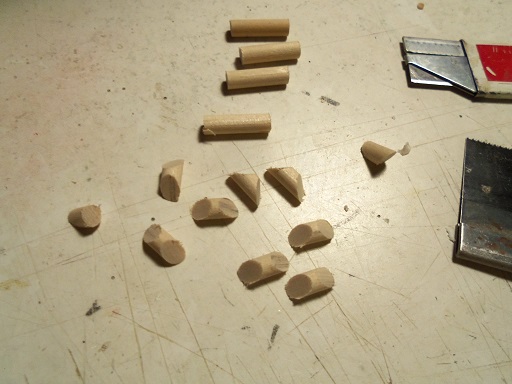
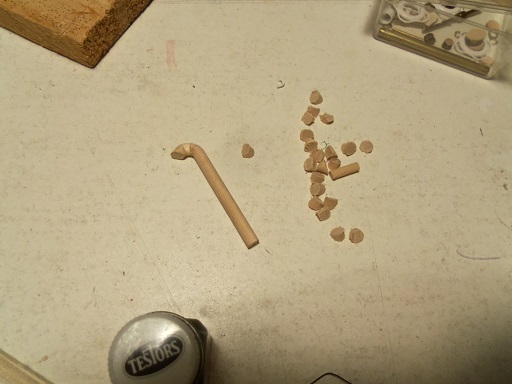
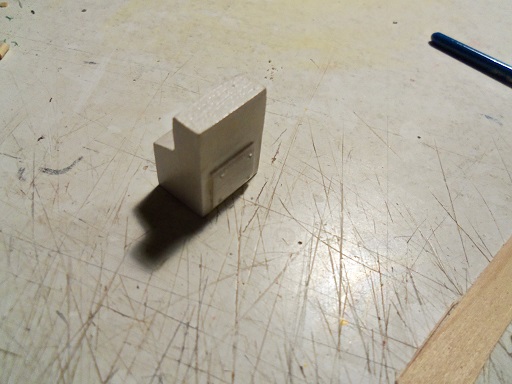
no.....I promised......she won't leave the table, until she's finished. although, there was a time today, I wanted to remove the cover off the Boulogne {she's on the other table, along with the Syborn}, and do some work on her too. but........I was a good boy........I didn't. .....or maybe finish the funnel work on the Syborn.......NO! ......got to stay on track! rest assured Augie....... .......which brings me to what I DID do today. I did find out that cutting those larger diagonal pieces of round stock, really wasn't working for me. I went back to my earlier attempt, and I made it work. I managed to come up with two, of the four that I will need. one looks longer......and that will get cut down to match. once they are sanded to shape, I'm suing white glue as filler for the tiny cracks and gaps. since I'm not a big fan of watching glue dry either, I thought I'd do some checking, for the diagrams of the parts panels. since I found that the counter weights were made of wood, I pulled up the PDF's for both of Billing's instructions, for the two versions of this vessel. both were made of wood......but I got to see what the parts look like I made some adjustments on my tin snips......got them working much better....and I cut out the main parts. there are the two center parts and four wing parts. shaping them was a bit dangerous.......I cut one of them in half, so I had to make another. I had also drilled the ring hole . I needed a jig.......cut a slot down the middle for the center piece, which needed to be set in place at an angle......and sculpt out an angled area to meet it. the parts were set in place, matching them up, so it all looked even it still ended up being a little wobbly.....helped a bit after I anchored the board to the table with a clamp, but still had to use tweezers to keep the pieces in line. what came of this was these. now comes all the filing.......removing the excess solder and round off the sharp edges.......smooth out all the cutter marks, and it was time to balance them. I had a hunch they would hang weird on the chain. now, it's a good thing I drilled those holes, because the diagrams of the weights show that they have what I would refer to, as a balance bar running through them. using one of my picks, I ran it through the hole and let it hang.......the front dropped down.....not good. drilling another hole 2-3 mm beside the hole, and adding this bar, made the difference here's a better picture I don't know folks can take pictures of their fingers.......the one hand camera thing........is not my thing here is the other one after I balanced it so, here are the counter weights, ready for paint. I did it Piet! I did it! the two vents got their brass locator tabs fitted and a paint job I drilled three of the holes in the fore deck already.........just need to do the one on the port side, by the pilot house.
- 956 replies
-
- 16
-
-
- andrea gail
- trawler
- (and 1 more)
-
looking good John........can't believe it's that time again. can't wait to see those whale boats too
- 2,250 replies
-
- 3
-
-
- model shipways
- Charles W Morgan
- (and 1 more)
-
looks really sweet Phil!
-
sorry to hear about the damage Pat.......I hope the repair goes smoothly
- 517 replies
-
- 1
-
-
- Endeavour
- Artesania Latina
- (and 1 more)
-
WOW! well..again Greg, Very glad you made it through alright. sounds like there will be a lot of clean up to be done. sad when you hear of lost lives. the world is going through such changes, that all we can do now, is batten down the hatches and hope for the best. yea, it's something Patrick........but it's not the end just yet. there are four more aspects that I need to make...I think that's all.......and then what I can do with the added stuff. I have others on the roster, that I need to get back onto....boy......I'll be glad when I can get caught up. I can see myself doing another fishing vessel........I have the Boulogne Etaples still.....and the Syborn {their on the roster}. the Andrea Gail is still on the table......and it isn't coming off until it is finished. more to come soon!
- 956 replies
-
- 4
-
-
- andrea gail
- trawler
- (and 1 more)
-
thanks for the kind comments and likes! did a bit more after my last update, but it's small at the moment. I was looking at how the counter weight looks in the instructions, and I see that it is made from three parts. strange I thought, so I got the part numbers and checked out the inventory list. I can't say that I was surprised to find that they are made of wood. there can't be a lot of weight to them, if they are made of wood. gee Greg......don't know if I should have put a like to your post.......but I'm glad you made it through OK. I remember the October storm we had a few years ago........we were out for about a week. I tried to build in the day time, and at night by candles {many of them}....but neither one was very fruitful. hope there was no damage left by the storm.......clean up is always the pits! thanks John........still unsure about the fish boxes.......not even a crab cage. I'm still looking around though. thanks Kees.........the extra bits I'll do at the end, will fill in the gaps. but, it won't even come close to the detail you put into your builds. simply awesome work, my friend I'll try to stretch it out Carl......can't say for how long.....she coming together at her own rate now. so......I'm going to try and make the counter weights out of brass. the stock I bought earlier has no size on it......but it looks to be around 1 mm thick and 10 mm wide. I have some bigger cutters....short of using a hack saw, and I will see what I can come up with. I was going to use the top parts of the gallows, that I disassembled.....but they are too thick to solder anything to them to look good, and there are the pre drilled holes that are too far in, to use rings that would be to scale. way too much prep. so, thanks again to you all for the comments and likes. the build may be close to the end.......but it's been an amazing journey, and I'm glad that you folks enjoyed the log.
- 956 replies
-
- 5
-
-
- andrea gail
- trawler
- (and 1 more)
-
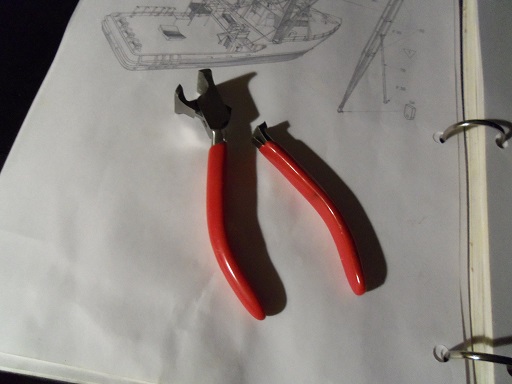
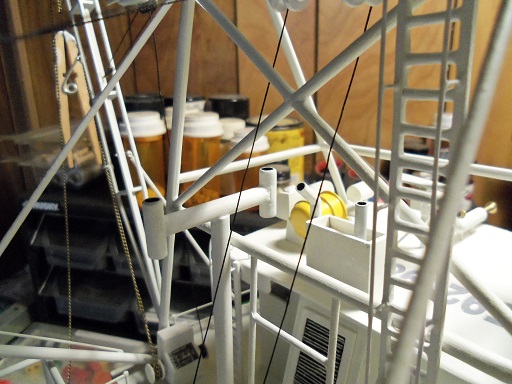
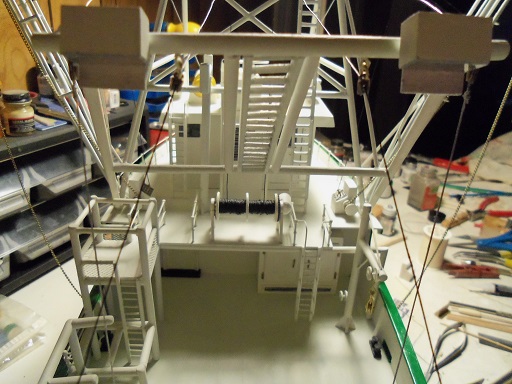
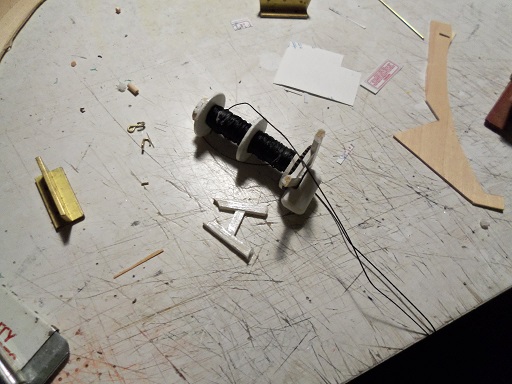
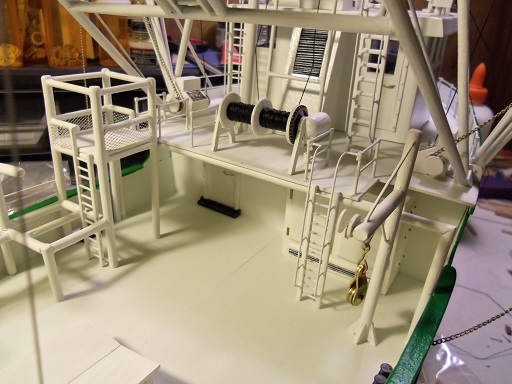
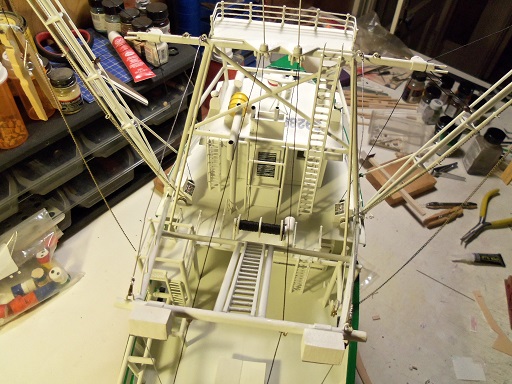
Carl.......sorry......I am sooooooooo late with this! I guess it was my day to break things. a little while ago, I broke my favorite pair of nippers! all I was trying to do was cut a piece of brass *note to self:......the right hand tool works better, you know!* anyway.......the reel came off......not without some breakage though. it was an easy fix, and after re-spooling the reel, it was back in place.......just like it never left. after it was dry, the reel was re-rigged. it had to pass through above the bottom bars of the 'X', but I was very happy to see that the lines do not touch them. they are close.......but there is a gap.......and that's allI wanted to see! I had made some hooks for terminating the lines, hooked to the eye bolts of the bulwark posts. I also tightened up the starboard side cable, between the two sections......I still have to do the port side cable. it's not as bad, but I'll do it anyway. the two single blocks suspended under the aft bar. my focus at this point are the counter weights and those vents. I'm hoping that I can produce weights that are just heavy enough to keep the rigging assemblies taught. as for the vents, I cut some wider stuff, but the curve is a bit too wide, so I may have to combine the two different sizes of wedges. I need four of them. it's going to be interesting, I can tell ya that!

- 956 replies
-
- 15
-
-
- andrea gail
- trawler
- (and 1 more)
-
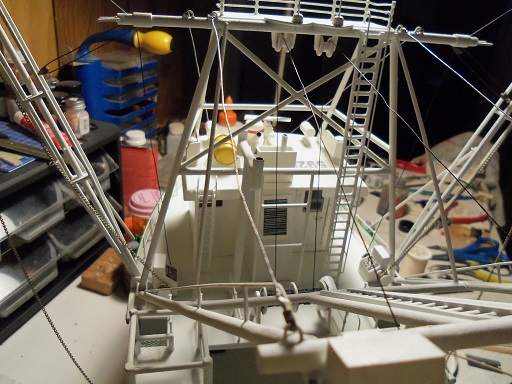
gee......I'd better get this update posted......and pronto! thank you all for the super nice comments...can't tell you how much I appreciate it. Ben: quite a comment.....I'm a bit humbled. I'm glad you enjoy the log. there are quite an array of these kits out there {I'd like to check out a Dumas kit}. build what you like...you'll have more fun with it.....save the challenging kits for later . not sure about the time frame......but there isn't that much left to go, and Andrea will be finished. I have a couple more on the roster, but I haven't decided which one is next. thanks for following along, I really appreciate it! Wayne: thanks a lot for the kind word......but I'm just a novice, no swelled head here just a regular joe.........>click heels three times<......just a regular joe
- 956 replies
-
- 1
-
-
- andrea gail
- trawler
- (and 1 more)
-
looks very nice Peter
-
hi there! just checking in for an update hope all is well.
-
the steel ruler I have, has smaller increments for a short length, at the beginning. I see no problem using the one you have. I also agree with the others on the future of this build. sure.......buy another one and use this one as you test subject......should it come down to it. if this is your first build, it will enable you to experiment and see what will work for you. I've had plenty of kits in the past, that were absolutely dreadful to build.......I've gave up on only one, my entire life should you come across another ruler in your travels that you like.....snap it up! I have three or four of them
-
Obie Wan: "this is not the ship your looking for......." thanks Grant...working with plastic kits most of my life, I never worried too much about scale. but now that I've been working with wood, I'm finding I really need to fill in the gaps I agree with mobbsie........you stay right here! sorry if I kicked up any dust Mobbsie.......search suspended
- 62 replies
-
- 3
-
-
- harwich bawley
- fishing boat
- (and 2 more)
-
you may very well be correct Patrick......I never thought of that looks as though I may have to adjust the two top cables.....try not to hit them, but it's very hard not to. shouldn't be too tough to do........or I'll restring new ones thanks for the good words. yea.....I couldn't leave them like that. turned out to be a minor problem though.......the repair was very easy. I'll get the lines terminated with the hooks I made, and post a bit later. got to go.....Gibbs beckons! pictures coming
- 956 replies
-
- 4
-
-
- andrea gail
- trawler
- (and 1 more)
-
all ready did...........done...........and back on the deck! the reel was re-spooled as well. I ended up still having to pass it over the lower bars of the 'X' but now it doesn't rub any of the other bars. it looks close though, but it's better than it was. now I go to bed a happy camper
- 956 replies
-
- 7
-
-
- andrea gail
- trawler
- (and 1 more)
-
going back to the table....this time I cupped it with two fingers. it popped off.......with a slightly undesirable effect. minor damage........easy to repair! now to reverse the runout!
- 956 replies
-
- 11
-
-
- andrea gail
- trawler
- (and 1 more)
-
tried doing a search for SMW........came up with a lot of hogwash......guns mostly. scale can be confusing........the use of scale with model cars and planes - the small the number, the larger.........but the scale with boats seem the other way around. it depends on the actual size of the subject, as I have been led to believe.
- 62 replies
-
- 1
-
-
- harwich bawley
- fishing boat
- (and 2 more)
-
I'll look forward in seeing your come back Mario. it will be good to see your work again thanks George. I'm not happy with the fore deck reel........the lines still rub on the trawl frame. I tried a light approach in removing it already. I only used white glue on it..........and it would not budge! I don't want to cause any damage........I don't do too many redoes. I wish I could simply rewind them......but there is so much on there, that it would take forever. ....calling Dr. Howard, Dr. Fine, Dr. Howard! .........calling Dr. Howard, Dr. Fine, Dr. Howard!
- 956 replies
-
- 4
-
-
- andrea gail
- trawler
- (and 1 more)
-
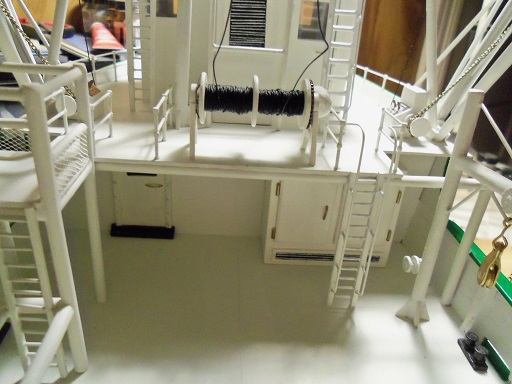
thanks Sjors........don't know what the IRL stands for.......but I hope it's good here's just a small update from yesterday....I was hoping to post it earlier, but I got side tracked I put a couple coats on the control panel, before I realized that I didn't put an access panel on the back. the lines for the fore deck reel was left all night with clothes pins hanging to get the memory out of the thread. it was cemented in place in the AM. I ran into problems with the lines rubbing on the trawl frame......tried different ways to adjust it. I settled on the lines passing behind the bottom frame, and then through the top pulleys under the gangway. moving the other two blocks to the aft top bar was a good idea. to really change this around, I would have to remove the reel......and to be honest, I'm not too keen on seeing what the outcome would be. I made up a couple of hooks to terminate these lines on the eye bolts on the aft sides of the stern bulwarks. I hope to have more to report tomorrow


- 956 replies
-
- 14
-
-
- andrea gail
- trawler
- (and 1 more)
-
I wonder how he's going to do the cat, Bob? scratch kitty..........scratch! :D
- 434 replies
-
- 2
-
-
- pelikaan
- beamtrawler
- (and 2 more)
-
Cutty Sark by NenadM
popeye the sailor replied to NenadM's topic in - Build logs for subjects built 1851 - 1900
the drilling was done before the fore deck was put in place. I would imagine the airfix version is 1:150.......the chain gates would be molded onto the deck, I'm thinking.......if it is that scale, use smaller chain......and be relieved if you didn't glue the fore deck on already PM me with pictures if you can. Nenad........the windlass looks great! did you fix the molding along the edge of the fore deck? you must have....... unless you have lungs like the big bad wolf........whatever is removable....remove and use a vac if not......can you buy cans of compressed air? can't get over it.........I like how it looks! looks like I'll be tearing down the fore deck of my cutty and doing some scratch work!- 4,152 replies
-
- 4
-
-
- cutty sark
- tehnodidakta
- (and 1 more)