


popeye the sailor
-
Posts
16,007 -
Joined
-
Last visited
Content Type
Profiles
Forums
Gallery
Events
Everything posted by popeye the sailor
-
 atta boy Wayne! nice to see progress again.........and very nice progress too!
 -
not really. I'm not used to seeing PVA.......you mean white glue. white glue is water based....it works best when gluing to porous surfaces. plastic is not porous....neither is P.E. brass. it may hold well at first, but after being jarred a few times, it will tend to lose it's bond. it may be better to try plastic model cement. I know you don't like using it, but the best overall would be CA. .......all you have is 2%........is that 'cuz you think I'm fat? {Napoleon Dynamite}
-
looking very nice Frank......the deck is really coming along! it's hard to say whether kit manufacturers maintain scale throughout the development of their kits. ...and of course, most of us aren't going to sit there with calipers and slide rules, checking each aspect or structure, to insure that they are. I guess if you really wanted to get a person down there.......just tell 'em that they're serving rum
-
I'll reserve that scene to something along the lines of Idle daydream, Nenad I couldn't have guessed any better Nigel.....I measured those two pieces, and they are exactly 1 inch! the railings are going to be a task.......they are in tiny sections! I guess I can feel lucky that they molded quite a bit of detail into the deck parts.........I'd need more that my optivisor to cement them in place! I'm glad you like the deck color......very glad I did the 'about face' and changed it well Ben......I thank you anyway I've seen so many pictures already. I'm not a big Titanic junkie, but I find the history and the story about her very interesting. should I ever get the chance to build a larger scale model of her......I'll be sure to look that book up! if you find any other points that might be doable, give me a holler I'll see if I can comply
-
super progress KP! shrouds look awesome....they really add to the overall looks!
-
thank you VERY much Ben! I knew there had to be a pair of chain gates somewhere! looks like I have some modifying to do. I'll see what I have in my scrap pile I really appreciate the help
-
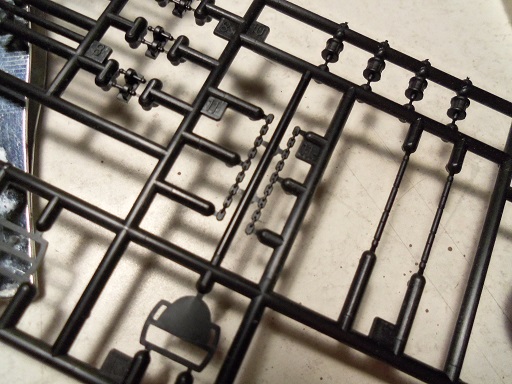
thanks Augie, Mark, and George. I'm finding it quite a challenge to enhance this kit. with all challenges, there is a solution. I will try thank you! thanks Sam......Have you ever had a kit where the plastic seemed soft.....or peel off in layers when you tried to shape the parts? raw styrene is actually tough to bend......breaks before you can get any kind of bend in it. any addition to the mix will cause it to lose it's brittleness and become more flexible. for this kit, there are probably 6 to 8 molds to make all the sprue panels. I'm sure that the planning for the sprues is done by computer.....logic has nothing to do with it. in the instance of wood kits, looking at the arrangement of the parts panels in the instructions........but the actual parts panels have a different arrangement. I have seen this with Billing's kits. all I can say is........at least I have the parts thank you Ben.......I have not seen that picture. before I even got this kit, I watched just about every you tube vid on the Titanic and her sinking. that is my question.....comes through the hawse holes.....runs back along the guides, to the capstans.......but where does it go from there? I'll show you what I have to work with.....very sad. the chain supplied in the kit is two plastic parts, about an inch or so long.... I have the two outer capstans in place at the moment.....there are two smaller ones that will sit on those square platforms that the guides lead up to. if those capstans were in place, the chain would wrap around it from the inside, and out towards the bow again. I wonder if there was a sort of chain gate that they went into, leading below the foredeck we happen to have the movie.......I can't believe you said that Nenad.........ignore all that gooey, kissy face stuff! why...... it's the spice! there has been some debate though about how the ship was 'on set'.....mostly concerning color, believe it or not! even historians and experts have been baffled as to what the correct colors were...."White Star Buff" is the most controversial color. I appreciate the help Ben....if you do come across some pictures, I'd love to see them. as for you Nenad........I have Monday and the rest of the week off, this coming week. we'll set our watches, make some popcorn.......and watch the movie together. first one that cries........buys lunch! is that a deal? I didn't get anything done today.....got tied up with 'home work'. I'm going to go review some you tube vids. I'll have an update soon. thanks for the kind words and to those who looked in
- 573 replies
-
- 12
-

-
as long as you have a plan.......I'll wait and look forward in seeing the results carry on OC!
-
the outside world does take it's toll. doesn't it. not to worry my friend...it will always be here when you get back. I have found that the kit color scheme isn't totally correct. this kit has some really nice detail.........with the trove of information out there, I see no reason not to define the colors for the next person who builds this kit. although just a tad smaller, I'm sure that the Revell kit would benefit from this as well. I still wish that some of the molded detail {bollards, hold walls, etc.} wasn't molded onto the parts. it would be easier to do texture work to the decks...with the way they are molded, I'd be concerned with creating paint piling in the corners and such. thanks for the good word, my friend
-
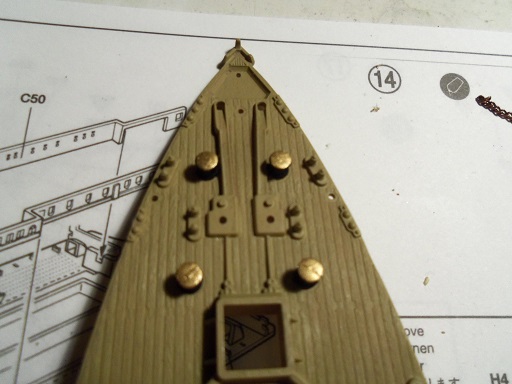
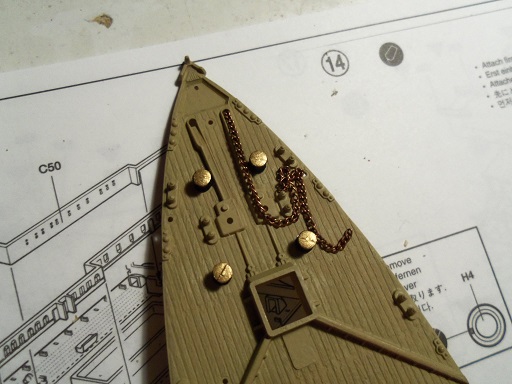
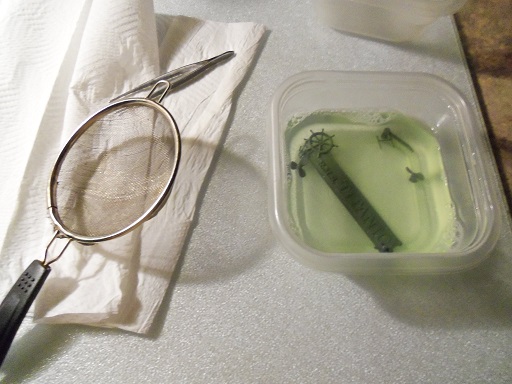
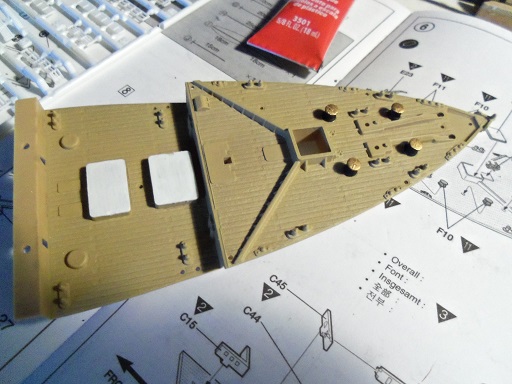
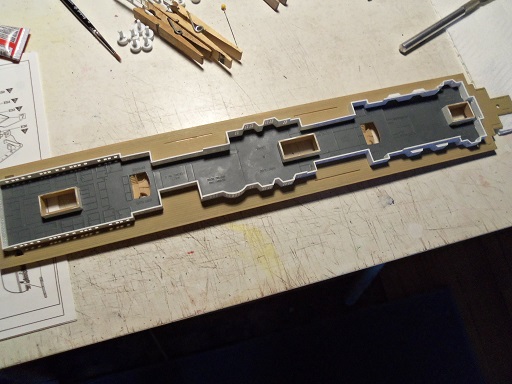
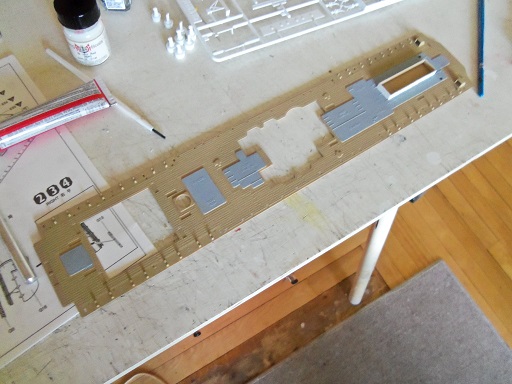
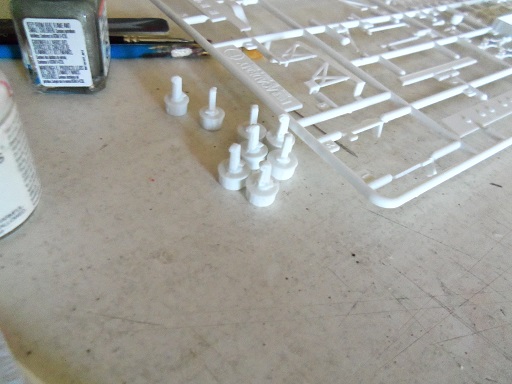
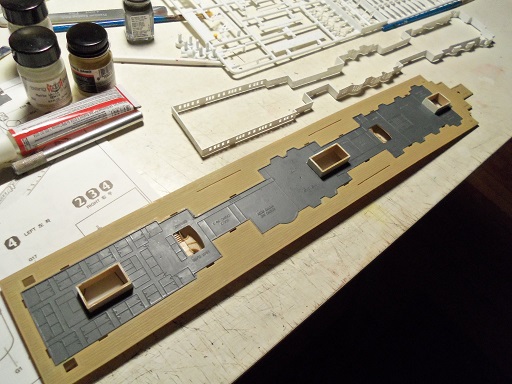
ohhhhh wait.....what about those chrome parts I've been soaking? well.....I checked them, and they look ready. so, I brought them all to the kitchen counter and set up the plastic bags again. pulling them out one by one and scrubbing them with the stiff brush, they cleaned off well enough to be thrown in the tub of soapy water. when I was done, everything was triple bagged and thrown in the trash. the parts are tiny......I used a strainer to rinse them off after washing. when they were dried off.....this is what they look like now. I used a dime for reference. the A deck when I turned it over......... some assembly was done to the fore deck......four of the capstans and two of the hold covers. I'm kinda miffed about the hold covers. clear parts are nothing but pure styrene......the hardness hasn't been compromised by the addition of color pigment or additives. even though I took care to get them off the sprue, marks can still be seen. ...and of course, the A deck with all the clamps off of it there are some small part to go on there yet........then I can get going on the boat deck. I will continue with the fore deck, and begin work on the stern. the fore deck has two lengths of chain {plastic} that needs to go on there........I want to sub in a couple pieces of actual chain. I have been looking for a good picture of the chain routing.........if anyone has one, I'd be pleased to see it.......can't find one out there, anywhere! {so far....anyway}

- 573 replies
-
- 19
-
-
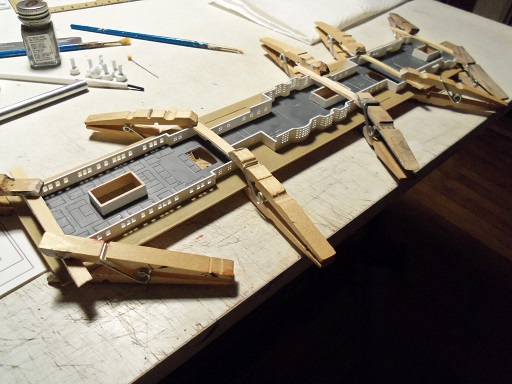
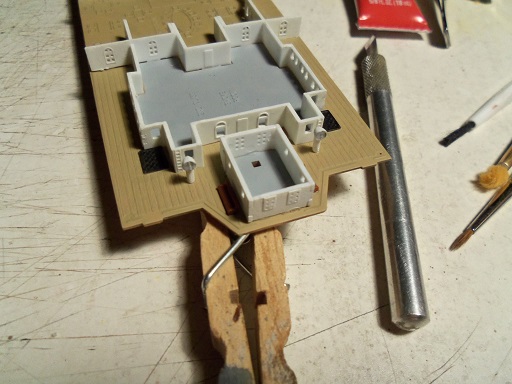
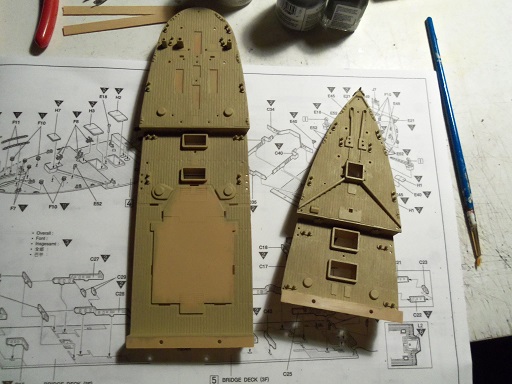
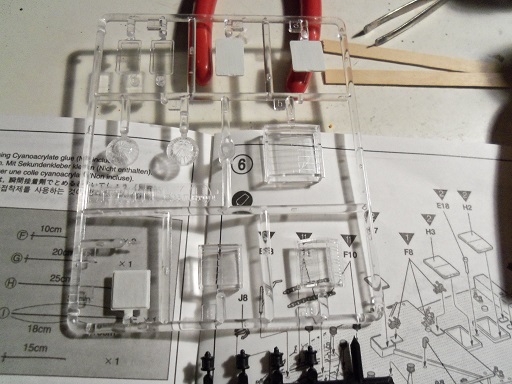
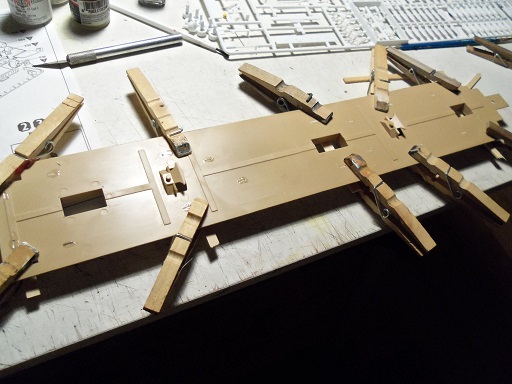
so......as far as the railings are concerned, they have been set aside for the moment. I had to fix a couple repairs while cutting out the rungs, and I want them to dry totally before I start fidgeting with them again. I went back to the bridge deck and added a couple more parts....some benches and a pair of vents. the fore deck and the stern section were repainted. the sand color that didn't come off did make these parts look a tiny bit darker, but it's OK........these decks were planked with pitch pine and will appear darker anyway. I was looking for the hold covers for the foredeck........I found them in the last place I would expect to look. they were on the clear plastic sprue! this is a bit strange, since they are to be painted flat white. what a waste! I already painted them here. I painted the inner structure areas on the boat deck......let these dry. ...and I began to assembly the cranes. note that I painted the inner wall structure on the front section of the boat deck.........I did the same thing with the A deck, which has three of them. not that anyone will ever truly see through the windows, I painted these areas.....I went darker with this deck. I want to put all these decks together, to see if the stairways need to be done. I'm thinking no.......but I will if I need to.....not a problem. the outer wall structure has been painted flat white. it was clamped in place and all the tabs were fitted in their slots. I dabbed these slots from underneath with cement.......makes for a much neater job.
-
the plug alone looks like it would be quite handy. is there any places where they might be available?
-
whoa.........74 inches!!! must be the Warrior that's 51 inches. one of these days Gary......I hope to attempt a build that size. glad to hear you have that site to work from I hope to do something like that with the handrails.......they are like that throughout the entire ship. there's quite a bit too! I like the color of the decks. the sand that is still on there does give it some different hues. I did the fore deck and the stern.......came out pretty good. these two deck should be slightly darker due to the different woods used. spotty progress today, but I did get something done. I'll post the progress soon. at the moment, everyone's clammering for food...........better go man the grill
-
nice work area Nils.........you definitely have more toys than me
- 2,625 replies
-
- 1
-
-
- kaiser wilhelm der grosse
- passenger steamer
- (and 1 more)
-
looking good John....nibbing at the bow and stern is a really nice touch
- 745 replies
-
- 3
-
-
- francis pritt
- mission ship
- (and 1 more)
-
super video Kees .........really sums up the amount of work you've put into this build! you have quite the masterpiece here.......two thumbs up!
- 205 replies
-
- 3
-
-
- kw49 antje
- trawler
- (and 1 more)
-
thank you gentlemen.......I thought it was better to try working with the supplied parts, rather than try and order the P.E. {would be interesting to see how that would go over with them} I felt like I was spinning my wheels there for a moment......nice to be moving in a positive direction. I had to make a couple repairs on the railings, so I'll let them set for the time being and allow the cement to fully cure, before I attempt to clean them up the rest of the way. thanks Gary.......actually, I'd rather be building the Billing's kit along side you.....I am sooooo jealous! this is only 26 1/2 inches........compared to your whopping 51 inch build. I hope you can find a remedy for your problem with the kit. if you haven't seen the TRMA site, have a gander. they don't have all the answers, but they cover quite a bit and the articles are pretty good thanks also to all who hit the like button
-
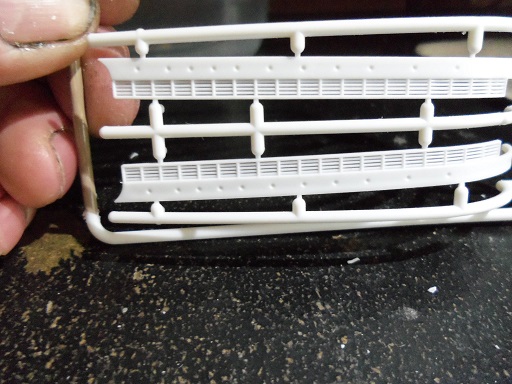
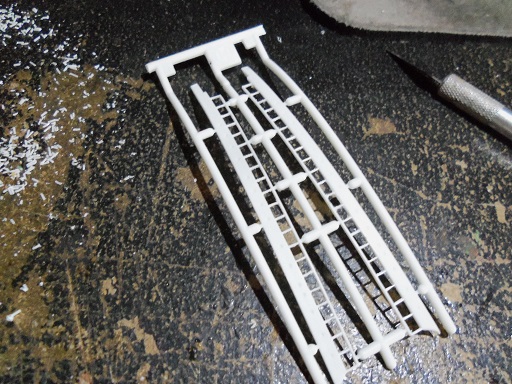
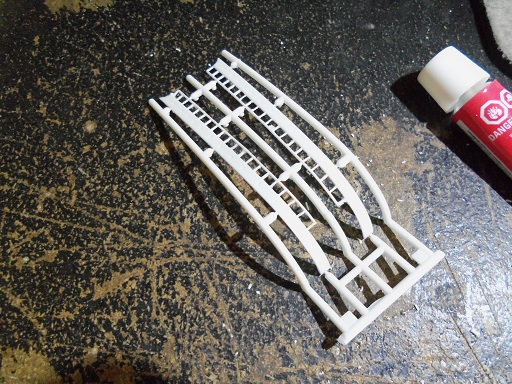
more of the structures were cemented on the bridge deck there are a few small features that still need to be added. I saw this picture and had to take a second look......the center portion looks to be unpainted. it has been painted with the A&M sand......it's just the angle. I kept thinking about those railings.......how was I going to make them look better? these seem to be the only real problem with the kit. it's a mixture of flash and mal-tooling of the molds. I decided that I would try and save the frame work and go from there. the bow railings came out pretty good........some fine tuning will be needed. the stern railings gave me some fits though.......I will need to do a bit more to make them right. the stanchions are very small......too small to drill. I may try to use thread of thin wire to restring them. I need to do four rows.......but if I get three, it may just pass muster........depending how much grief they give me.


- 573 replies
-
- 15
-
-
sorry to hear of your dilemma...truly stinks when things just don't go right. if you saw my airbrush set up, you'd laugh. it a Testor's "Amazing Air Airbrush kit, adapted to a 25 gal compressor. this kit cost me $30.00......set up to be used with a compressed air can. darn thing is all plastic.........I bought a second one on clearance. someone tried it and made a mess of it.......and then returned it {paid like half price for it}. very easy to use, clean up is minimal, and it's a siphon feed. I hope you find a solution......you may have to strip the paint off and start over. here are a couple sites for you to browse through. there are cheaper alternatives in air brushes that work just as good. Testors » Airbrushes » Airbrushes Testors
-
I'm surprised that the kit didn't supply stanchions with pre drilled holes.......I use them all the time. would have saved you a boat load of grief. you did a great job of it though....looks very nice
-
build's coming along great Jerry...`````sail and rigging looks super
-
I know folks that have a good control over the 'strokes', can come up with a very nice paint job. I didn't get back to air brushing until I got got back into wood ships. we all have our methods