
HOLIDAY DONATION DRIVE - SUPPORT MSW - DO YOUR PART TO KEEP THIS GREAT FORUM GOING!
×


popeye the sailor
-
Posts
16,007 -
Joined
-
Last visited
Content Type
Profiles
Forums
Gallery
Events
Everything posted by popeye the sailor
-
 very nice pictures Evan......must have been a great trip for you
- 446 replies
-
- 1
-

-
- Revell
- Constitution
- (and 1 more)
-
a good method is to wrap the thread around the block, and with another piece of thread, wrap the two together. go about 1/8 up the line it's attached to, and then trim off the excess. what you did looks good.....just beef up the attachment point at the block.
-
hello there Jerry......caught your build by surprise.........the surprise being how far your gone! your moving like wildfire........looks awesome!
-
Piet, it's been a pleasure and a pure joy to watch this model come together. the wealth of information and technique, coupled with your amazing talent, will be a benefit to anyone taking on a build such as this. tribute to your father, and a testament to your talent.........and such a great build!
-
thanks for the kind comments.......I had to skid-daddle off to work, so no time to comment thanks John........getting them to look better is fine with me I'll have to take the advanced 'droopy' class. thanks Patrick......since John suggested this to me......I don't recall a single build, where I didn't do it. sadly....all builds eventually come to an end. there will be another one to take it's place....one I've already started......or even something new. I'll do my best to make it just as interesting Ben......thanks for the info. it probably could be done, if it was a larger scale. I'm only going to add a bit more, and this build will be finished. I do appreciate the suggestion though. take your time Larry......thanks for the good word!
- 956 replies
-
- 5
-
-
- andrea gail
- trawler
- (and 1 more)
-
thanks Patrick..........goes back when I did my first build. I was going to used them.....had 'em painted and everything. the suggestion was to replace them with real rope {thread}. done it this way ever since your too kind George.........ideas and over imagination..............almost as bad as giving an infant a chocolate cookie {my mother {god rest her soul}......never forgave me for that}
- 956 replies
-
- 4
-
-
- andrea gail
- trawler
- (and 1 more)
-
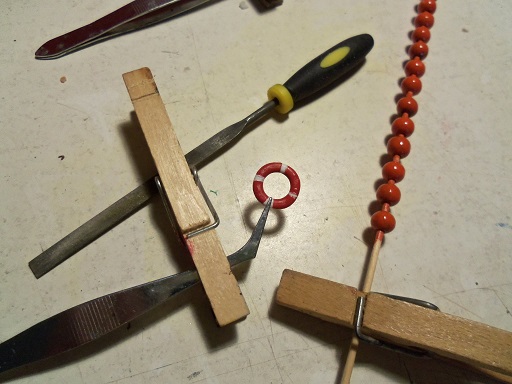
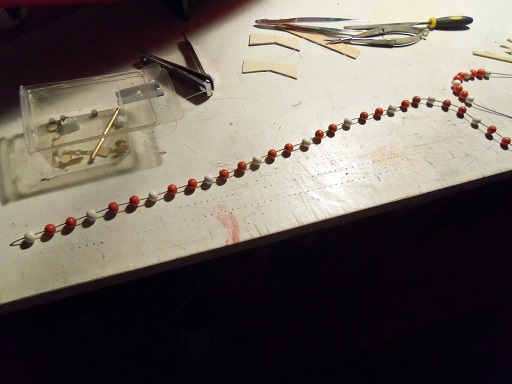
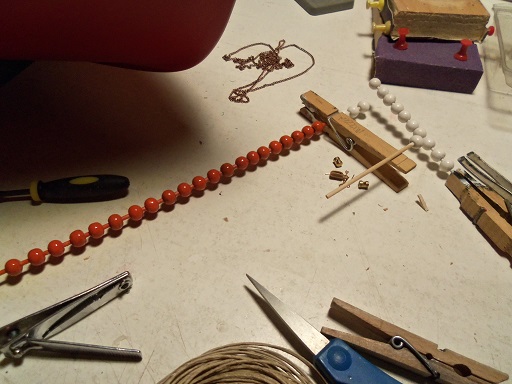
I have to laugh..........I love the way that hemp thread spills from one picture to the other.........that wasn't planned, I assure you! :D no sooner get to the table..........and then another distraction.........I can't even get a thought in edgewise! in the middle of painting the preservers...........oh.....we gotta go to the store. never tell them that the store is temperature controlled, and things will keep..........she learned her mother's 'death stare' quite well........ during another stint at the table, I managed to make the 'hanger' pegs for the preservers. one will be on each side of the pilot house......... ......and the third one will be on the main deck... I had taken a length of Billing's thread and wiped it down with some tan paint.........that will keep the 'fuzzies' at bay. the beads were threaded on and cemented in place. there's still more to do with this........it may appear long, but it will be cut into sections later on. I had to paint up more beads for this to finish the pattern. I may need to redo it though......they look a bit too large, now that they are all together in a row. I will see better, when I can dry fit it. the preservers are still a work in progress too. more to come soon.........work has now become my present interruption.
- 956 replies
-
- 16
-
-
- andrea gail
- trawler
- (and 1 more)
-
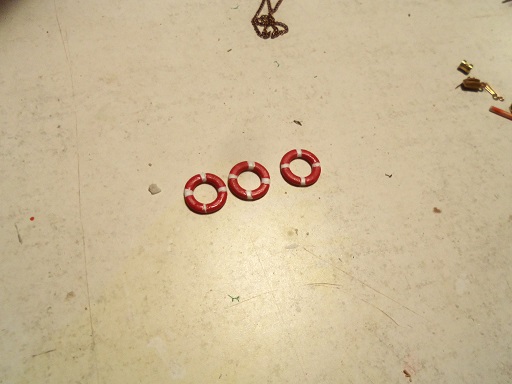
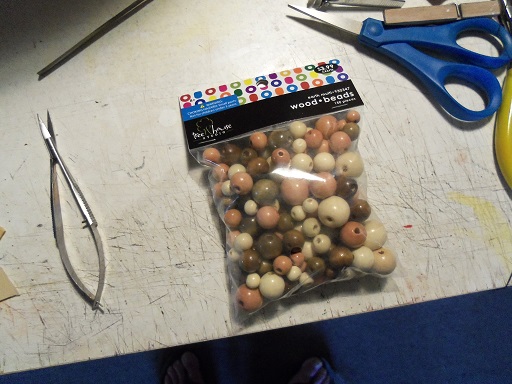
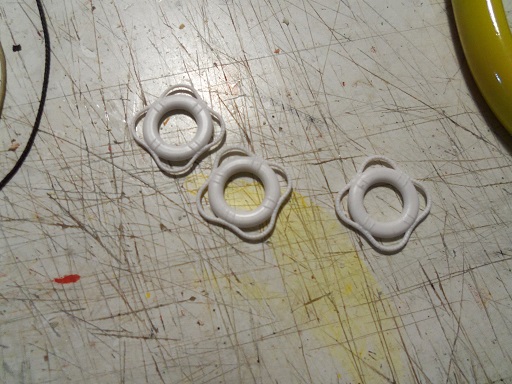
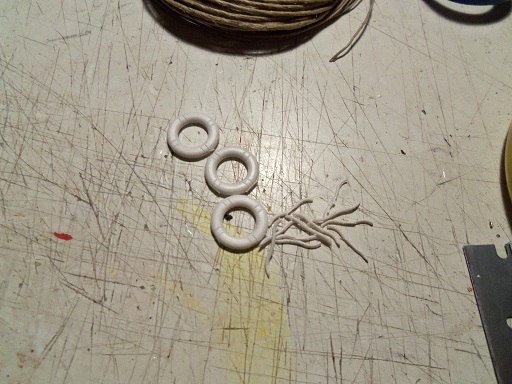
this past week was a bit of a let down.........I thought I would have made more progress than this. I'm beginning to thing these last bits......are going to be like pulling teeth .....OUCH! well......I did get the beads for the net floats..... the other aspect I want to add was laid out as well. I decided on three of them the beads were selected....these by the way, are wooden beads. I didn't want metal ones, or any with a metallic finish. the paint wouldn't stick well ........I think. augment pattern and color...should be good. those tidbits on the table........they're nothing......they meant nothing to me! {just more sick ideas}. there's a thing about the life preservers....I learned this early, from a gentleman here, whom I have come to look up to as a mentor. I have met others, who {in the past} have given me some very neat ideas. I keep them in my mental book, ready to use when the need arises. those plastic ropes.......they gotta go!
- 956 replies
-
- 15
-
-
- andrea gail
- trawler
- (and 1 more)
-
wonderful use of color Kees.......she's come together in a big way! spot lights look way too cool!
- 205 replies
-
- 3
-
-
- kw49 antje
- trawler
- (and 1 more)
-
awesome build ........very colorful!
-
thank you for the kind word Kees..........having to drag my feet a bit. but it's not all that bad.......when I get back to the table, the last bits should move rather quickly. that's a good question.......between the Holiday build and the A.G. build, I used up most of my wood supply. hated to do it, but I robbed some parts from the two fishing vessels as well........I can do some stuff on them, but their liable to stall until I can replenish. I really haven't thought much beyond the negatives. instead of bee - bopp'in off somewhere.......I'll let cha know. ohhhh, but if I could do what I really wanted to do.........>devilish grin<
- 956 replies
-
- 5
-
-
- andrea gail
- trawler
- (and 1 more)
-
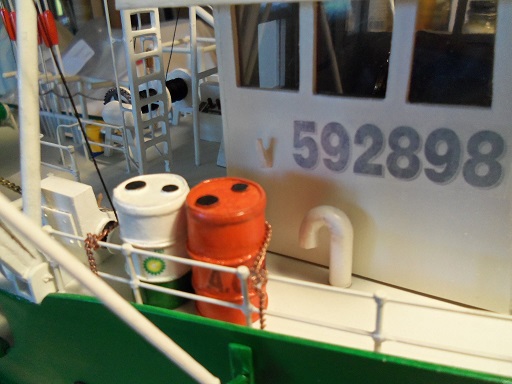
thanks for the good word every one......didn't get a lot done today, but the two last kit aspects are in the works. then it will be just a few minor things to add, and that will finish the build. sure bet it won't be this week........if I keep getting pulled away you got it Jack.......you should have seen the look on the mail person's face when I showed him what it was. it was even double boxed. how I made the drums is back a ways in the log.......dowel cut to size, with copper {I'll die if was the real stuff} rings glued on. thanks Mark.......as mentioned, it's a lot of color, but it's better than the bland drums they show you in the instructions thanks Marty I'm glad your kidding Piet.......the admiral would never let it stay in the house! I'm working on the other thing......can't say right now......I'm waiting. cryptic I know........but that's me to a 'T'
- 956 replies
-
- 4
-
-
- andrea gail
- trawler
- (and 1 more)
-
you could give it a waterline, by painting the bottom paint. could be just this particular kit............if it were me, I would have planked the entire hull.....the heck with that noise of a solid panel bottom. as for the question you PM'd me about........did you get a full sheet with a 1:1 drawing of the deck layout.......anything that shows you where certain parts go? I was looking at the instructions on the Billing USA site...they might as well done it in braille.
-
thanks Carl.....heard it all the way over here! part of the fishing gear Ben........the netting doesn't have any on them at the moment, being stowed away on the reels. I'm guessing that when they are deployed, the floatation lines are attached to them, to keep them from sinking too low in the water. as a matter of fact.......the admiral and I were talking this morning....end result was that I was able to pick up a small package of beads. I can make them now.......it will all be clear when I do thanks for the question........I'm not sure of the name of them either.......>shrug<
- 956 replies
-
- 5
-
-
- andrea gail
- trawler
- (and 1 more)
-
thanks Izzy.......I'm relieved that you didn't take my comments as criticism........in no way would I ever do that I've only been involved with the medium since 2009, so even if I did throw stones, they'd hit the ground before they ever hit the target but I am familiar with Billing's kits and their construction, so I may be able to help in some small way. as with the instructions, it won't matter much if you were to follow the old or revised copy.......the big differences will be that the kit isn't laser cut and some of the part numbers will have changed. this reminds me of when I began the medium with my first build, the Nordkap. it wasn't laser cut either.......I downloaded the revised copy of the instructions, even though I had the original ones. I'll look forward in seeing the finished hull
-
that's OK Greg.......I answered your post already thanks Sjors.........your kidding......right?! {I know you are}....unless you enjoy getting a box of wood in the mail I learned my lesson when I sent the Cux to Wisconsin through UPS. it would have made it there in one piece, if it didn't get jammed on the conveyor belt when it got there. thanks for the good word! thanks Wayne!
- 956 replies
-
- 4
-
-
- andrea gail
- trawler
- (and 1 more)