


popeye the sailor
-
Posts
16,007 -
Joined
-
Last visited
Content Type
Profiles
Forums
Gallery
Events
Everything posted by popeye the sailor
-
 thanks Mark, Greg and Wayne for your comments earlier..........I'm not old Wayne.....I'm "middle age, falling over on the other side, in crisis" {I'm only 58........going on 59 ->George Carlin<- too funny thanks for the additional info Jack........I'll have to look them up to see what they look like. thanks for the good word and the likes.......jury's still out on the flags. so far.......they pass muster.....I can leave 'em. not too tough to change them if they are wrong.
- 956 replies
-
- 5
-

-
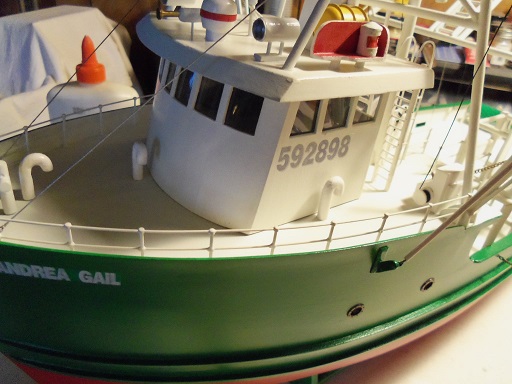
- andrea gail
- trawler
- (and 1 more)
-
whoaaaaa.....wait! Mark........where did you get the popcorn? SJORS!!!!!!!! we need you over here!
-
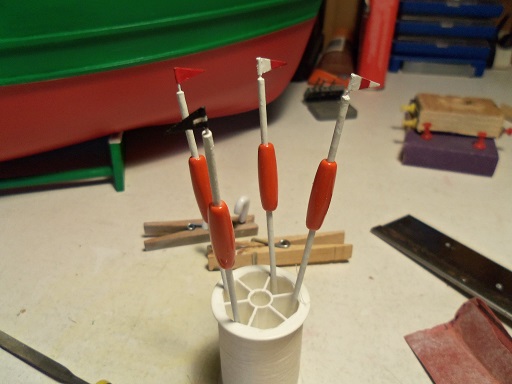
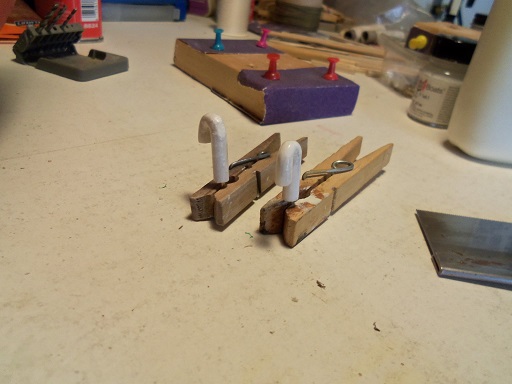
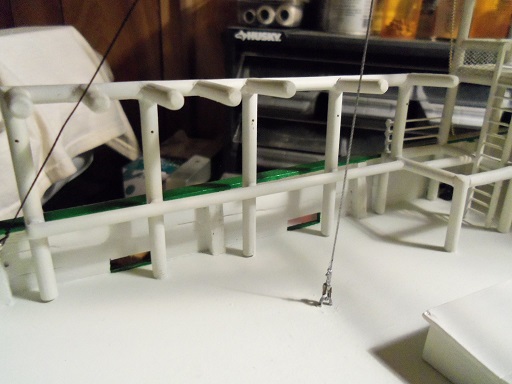
so to fill in the blanks with the other buoy poles, I used flags instead. I'm not too sure if this is right or not......so any suggestions pointing to the fact would be appreciated. first, was to drill holes and insert the flag poles......one is missing because it's on the table being fitted. they were a bit yellowed, so I touched them up with paint the vents got the 'black hole' detail {the one lying down shows what I mean} after supper, the vents were cemented in place. ...and the buoys are in place now too I'm down to two more aspects and whatever detail I'll add in addition........I already thought of something else that would be neat......has to do with drilling a hole at the top of the podium post. hopefully, I can get it done, so I can post a picture.
- 956 replies
-
- 16
-
-
- andrea gail
- trawler
- (and 1 more)
-
thanks for the info Jack..........I've always known them as just buoys. i'll see if I can show what they look like now.....just a moment
- 956 replies
-
- 1
-
-
- andrea gail
- trawler
- (and 1 more)
-
commitment to the build is paramount! your doing some seriously nice work to the bow keel......the superstructure is coming along nicely as well. it's progress Hank........the main thing is that your satisfied with your concept of the build
- 187 replies
-
- 2
-
-
- new jersey
- trumpeter
- (and 2 more)
-
fore deck looks awesome Kees....really like the colors and layout. flats always work well in making aspects stand out. no worries about not being finished, this is progress! did you try to add filler to the deck? it might be a pain to do, since the deck is populated somewhat, but perhaps a medium stain or wash will darken it up. for some plastic kits, aftermarket wooden decks is done as a sheet, that can be laid down. it may have benefited you better, if a template was made and assembled it that way {lot of extra work though}. then it could have been sanded and sealed at that time. for this reason {besides others}, is why I opted to do wooden deck for my United States, rather than try planking over the plastic ones. I like what you did here, but it might take some effort, if your still unhappy with it.
- 205 replies
-
- 3
-
-
- kw49 antje
- trawler
- (and 1 more)
-
no worries George.........this build was moving way too fast during that time thanks Augie.......you and Callie can take a nap.........that is of course, right after you fix the sprinkler problem! thanks Sjors..........dobbers huh.........what would you call the little buoys.........dobbettes? just kidding my friend glad that you like the progress......still a bit more to do
- 956 replies
-
- 2
-
-
- andrea gail
- trawler
- (and 1 more)
-
thanks Jack...still a bit more to do on the buoys. I have enough stuff to make more if need be thanks Greg.......oh, there's more that can be done.......some of it I won't bother, since that kind of microscopy should have happened while she was being built.......it's hard enough adding what I want to, with the rigging that's in place. it depends how far a modeler wants to take the build. I thought I was to finish it this week.......but I guess that was a pipe dream....there's always next week thanks George.....I already have antennas on the gangway, shown as they are in the Billing's instructions. no plans for a whip antenna.....sorry thanks for the good word!
- 956 replies
-
- 4
-
-
- andrea gail
- trawler
- (and 1 more)
-
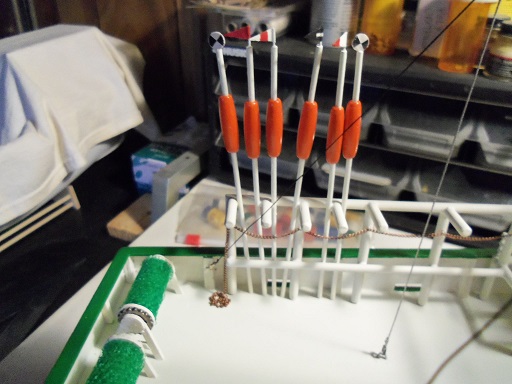
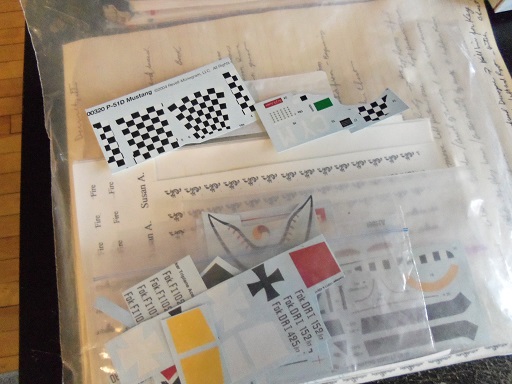
thanks Crackers for the good word and thanks to those who hit the like button. a bit more was done this morning. the decal work was done on the two buoys......given how they punched out and the shape they were in, I didn't follow a set pattern. I did make sure though, that both sides matched. I'm unsure what to do with the others, but I have some triangular flags from past builds, that I may sort through {solid colors for the most part}. they were arranged in the rack......no rhyme or reason.......depends if changes are made. the other vent was sanded and shaped......pits were filled on the other. both got a coat of paint. they will probably need another coat......then the 'black hole' detail.......and then they will complete the foursome. there is one other bit of detail that I must add, aside from small things here and there. there are three of them, but I may add a fourth one.....I'll see how it works out.
- 956 replies
-
- 16
-
-
- andrea gail
- trawler
- (and 1 more)
-
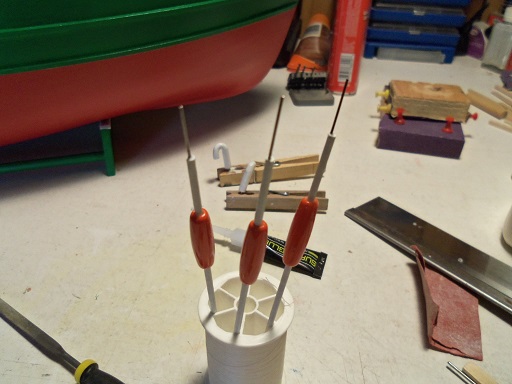
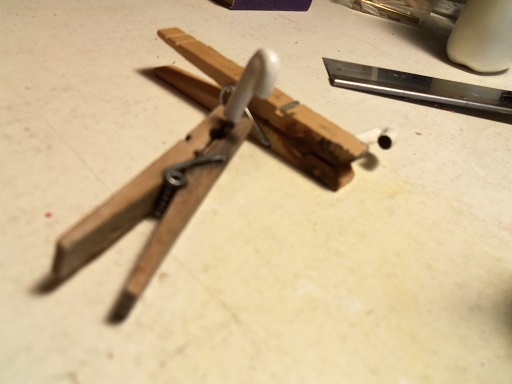
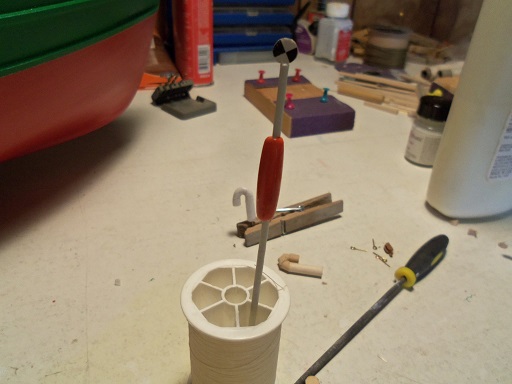
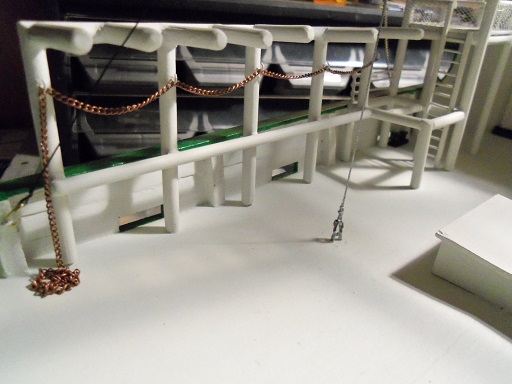
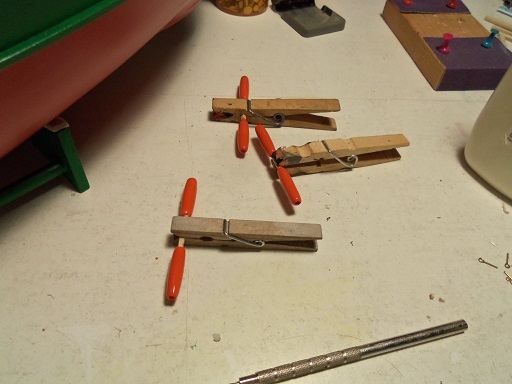
this brings the build to what I did yesterday. the idea I have in mind, is to also add flags to the buoys. seeing many types of buoys, gives me a lot of lee - way, as to how I go with them. on two of them, I added these round tabs to the tops.....on these tabs, I will add some design. I save all the decals that I get in kits......and even the ones I made for previous builds. for the design, I chose the checkerboard decals from a P-51 Mustang. using a paper punch, I'll center the black and white, to create round decals. the round tabs, and the reason why there are only two, is that they come from the round punch outs from other kits. mast holes and such.......cut in half or quartered, to make them look thinner. the bad part is that I only had one of this particular size........the size that the paper punch will produce. I did find out however, is that I really need to get a new one. this one was from when the boys were kids.......it's gone through some wear and tear. that's what it did to the decal punch outs, but there were some that were useable. I had to trim them a little during the process, so it worked out. I'm getting ahead of myself here. on the rack, the copper chain that I had bought earlier was used.......nice to throw a different size chain into the mix. buying this chain in bulk {as it were} was another good idea the admiral had.....I have more than enough to do this build. the buoy beads were cemented on the poles, making sure they are all at the same height.......I've done most of this by eye. as for those last two vents.........the first one got a coat of paint. the second one is almost finished, and then it's off for sanding and shaping. any pitting and gaps will be touched up as I go along. this has worked out better than I thought....I actually this is better than trying to bend hollow round tubing. I shudder to think how much trial and error, would be involved with doing that.....it's such a tight bend
- 956 replies
-
- 10
-
-
- andrea gail
- trawler
- (and 1 more)
-
oh heavens! don't do that Augie........you'll be all - bleary eyed, and your admiral will blame me! if folks do Greg.......I'd even prouder..........that's what I hope this log will do. I've learned a little from every log I've read so far
- 956 replies
-
- 5
-
-
- andrea gail
- trawler
- (and 1 more)
-
very nice progress David.........very clean and well done.
-
she looks super Larry......and as George said, a lot of detail! very very nice indeed!
-
count me in! .........sounds like a wicked good time!
- 1,306 replies
-
- 4
-
-
- syren
- model shipways
- (and 1 more)
-
thanks George........gee......I don't even have the rest of the aspects on there yet. very kind of you to say thanks Greg.........I hope not. this subject encompasses so many different types of vessels......different eras. they are actually fun to do....and even more fun if one adds in the little extras. t'would be a sad day if that happened. appreciate the good word! thank you as well for the likes
- 956 replies
-
- 7
-
-
- andrea gail
- trawler
- (and 1 more)
-
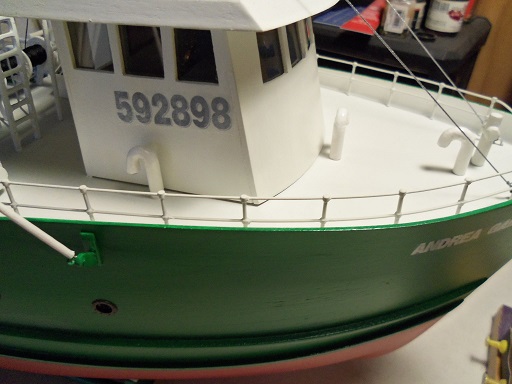
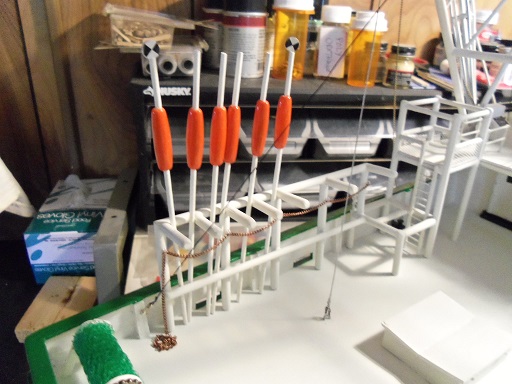
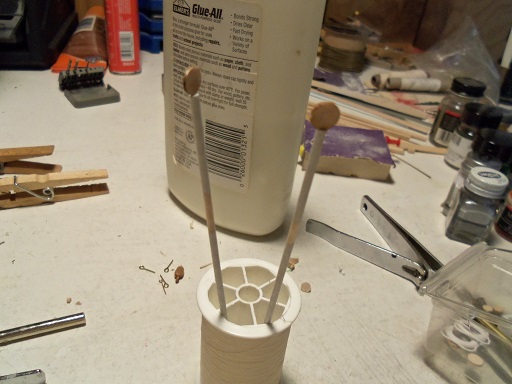
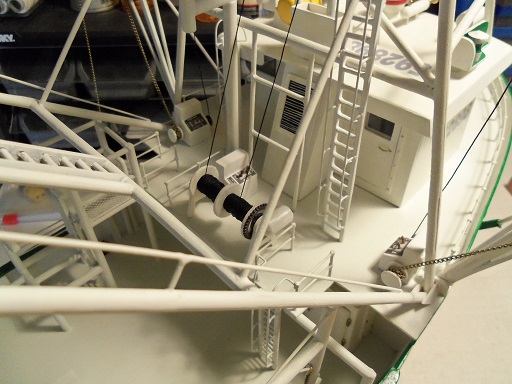
thanks Lawrence........been kind of a slow week for me. been away from the table, but I've found time here and there. there's still a bit more to go...here is what I did in the past couple days...... the fore deck reel control panel is finished....added the decals, levers and paint. the buoy poles were painted and set aside to dry. the parts are assembled here on the table. I was going to try and shorted the beads, but I didn't want to ruin them. I'd have gone out to get them instead, but the admiral picked them out.....she was rather proud of herself for finding them. I had the shorter one in my hand at the time......these do look better....not as fat. for the buoys to go in the rack, they will need a hold down system. to install it, holes needed to be drilled. I have the larger brass colored eye bolts, but I also have copper colored smaller ones. these were opened up to form a hook and cemented in the holes. the control panel is now in place on the deck the buoy beads are painted and set aside to dry. I really need to do one of those ship like Andy is doing.......I have more than enough orange for it. I have something I want to try, with these buoys. I'm in the middle of it at the moment. when I come up with the finished product, I'll show you then. you can let me know what you think

- 956 replies
-
- 14
-
-
- andrea gail
- trawler
- (and 1 more)
-
the wheels must be indented, so the races act much like a track. predetermined moves......
-
the prep before planking can be a slow process.........just take your time and don't push it. shaping is very important. your doing great!
-
Cutty Sark by NenadM
popeye the sailor replied to NenadM's topic in - Build logs for subjects built 1851 - 1900
even here in the states, with the system we have..........some still have to wait. it's a sad state of affairs I wish you luck, and hope that it's not serious.- 4,152 replies
-
- 4
-
-
- cutty sark
- tehnodidakta
- (and 1 more)
-
thanks Dragzz not too much done yesterday.........just some painted buoy poles, work on the last two vents, and finishing off the third control panel. should I make more progress today, I'll post it then.........thanks for looking in
- 956 replies
-
- 5
-
-
- andrea gail
- trawler
- (and 1 more)
-
I wouldn't count out the SIB folks....they do phenomenal small scale in wood. but I do agree...this is a really good 'kit quality' scratch build. I'm an old plastic builder myself.......nothing I've done in the past even comes close to what Steve's doing here. very nice work!
- 45 replies
-
- 2
-
-
- saratoga
- aircraft carrier
- (and 1 more)
-
looking really good Tim!