


popeye the sailor
-
Posts
16,007 -
Joined
-
Last visited
Content Type
Profiles
Forums
Gallery
Events
Everything posted by popeye the sailor
-
 any progress is a good thing Clare......I should know I cut up a bunch of my old tee shirts to drape over them, so they don't get too dusty. cost is no object for our 'children'....after all, we want them to look good!
 -
good to see your still working on this one........looks pretty good
-
nice looking tops Danny
-
Cutty Sark by NenadM
popeye the sailor replied to NenadM's topic in - Build logs for subjects built 1851 - 1900
my condolences as well Nenad. -
do they supply trim parts for the portholes? if the kit doesn't, look in my Holiday Harbor build......I have a little thing in there about eyelets that you might find interesting. I also show the panels for the Danmark kit. they have a porthole arrangement is is somewhat similar to what your doing. looking good my friend!
-
very nice progress.......super deck shot
-
wonderful pictures Daniel...stunning looking builds there. they all get a positive review in my book
-
very interesting process so far Michael. having worked around cars and engines most of my life.......it's really something to see one being made from scratch super job so far!
-
glad to see your still working on her.........look forward in seeing more
-
Cutty Sark by NenadM
popeye the sailor replied to NenadM's topic in - Build logs for subjects built 1851 - 1900
you nailed it Nenad! the stern decoration came out awesome! well done!- 4,152 replies
-
- 1
-

-
- cutty sark
- tehnodidakta
- (and 1 more)
-
thanks Piet........I will need to thin them down just a tiny bit. the wood I used is standard measurement......and apparently the bow caps for the Boulogne must be metric. don't think I have any planking that thick either......most likely cut metric as well. not a big deal. I had good intentions to get to the table today {thanksgiving}.......but after a big meal, all I was lucky to do was get to my recliner! glad I could make you smile......I thought I'd see pockets where cement didn't get to.....but it looks like I did a good job of spreading it out. thanks for the likes everyone who chimed in
-
very nice start on the sails and rigging Nils......judging from that drawing, you've been doing quite a bit of homework!
-
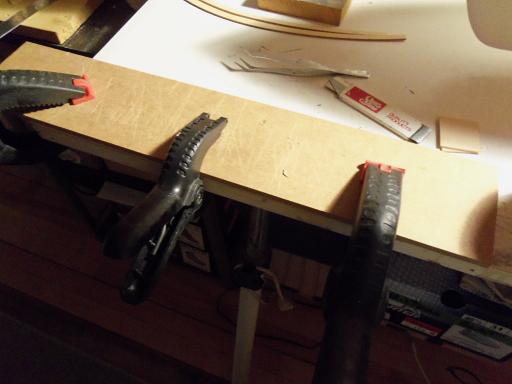
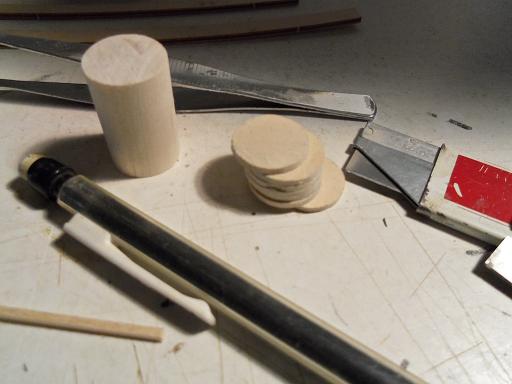
the dilemma over wood thickness is over........it's not much of a picture, but I ended up gluing two pieces of flat stock together, to get the blank I needed. it was left this way for a few days. while I was working on the reels for the Andrea Gail, I did this at the same time. the parts were traced out. rather than try to use the scroll saw {which is out in the garage........and the truck is stuffed in there because of the snow storm}..........I used my trusty box cutter to cut them out. they turned out a little rougher than I would have liked, but with a little clean up, they should be OK to use. if not......I still have enough to make another set. I have the first one sanded. I got three more to go....... clutter..............gotta love it!

-
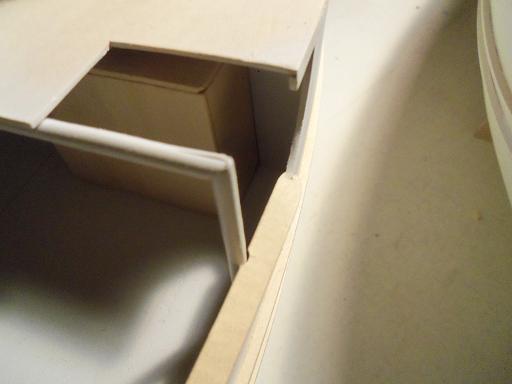
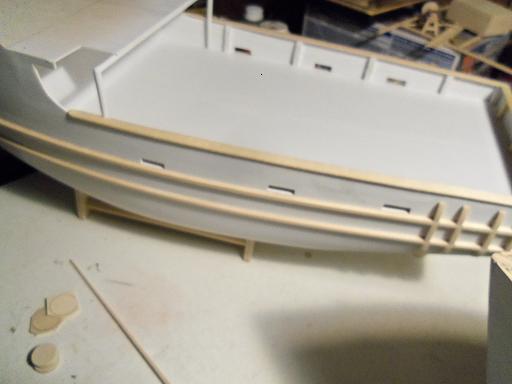
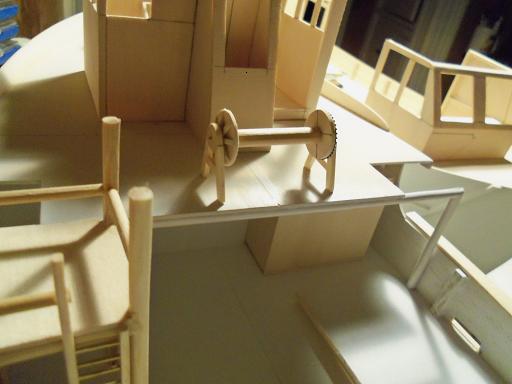
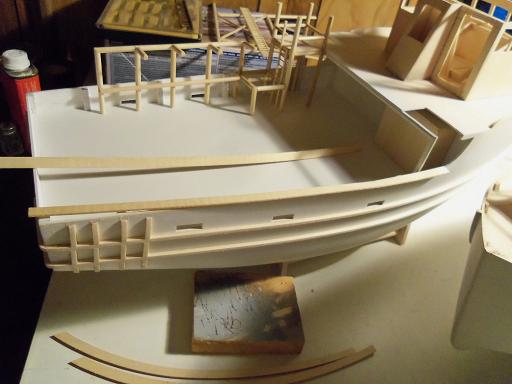
jee.......I didn't even get to the good part I was going to show it, but Gibbs had other ideas......he wanted to go in the living room. I told him it was after 10:00 PM.........he might as well go back and lay with Kevin, but he wouldn't have it. you really ought to see him......it would make you laugh. I ended up feeding his Frankenstein. so here it is......... safe to say that I have broken away from the Holiday build......but it doesn't mean I didn't do anything with it { I have a small update for that build too}. after I was finished doing the rough draft on the reel, I looked at the cap rails......yup.....I need to get them on the build. the fore end of the starboard side rail was rounded off and slotted to fit over the extension I had fitted in the fore deck overhang. I had also notched where it would run by the stanchion. filler was used to take care of the imperfection at the tip. I had to fix it at the stern, because it ended up inwards too far. I did the port side the same way. after adding three bulwark posts to the transom bulwark, the rail was cemented in place. then it was trimmed, and rounded to mimic the rest of the rail work so........now it just the portholes that is holding back the paint work. soon......my friends......very soon! thanks to all of you who hit the like button.......And to those who commented!

- 956 replies
-
- 13
-
-
- andrea gail
- trawler
- (and 1 more)
-
thanks Augie......hope you enjoyed how this came out. once they're adjusted, painted and assembled, they'll look better thanks Mark.......I thought they would give a nice touch. I think it would be even cooler to show the mechanism, required in which they operate......of course, kits show nothing. I'm going to look around and see if I can get an idea on this. don't think I can top how Kees does it, but it's worth a try thanks Michael.....gears.....you ain't kidding. looking at what your doing right now, makes my head spin. with all the figuring, fidgeting, and frustration we go through, it's what we see on the other end that makes us smile.
- 956 replies
-
- 2
-
-
- andrea gail
- trawler
- (and 1 more)
-
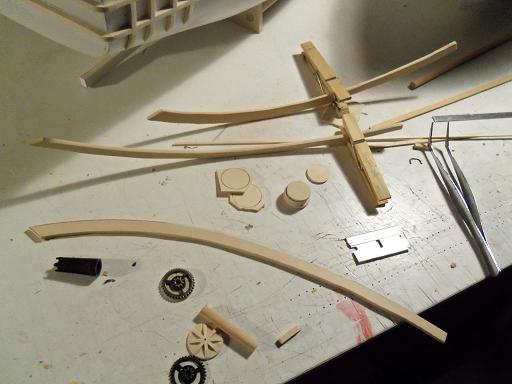
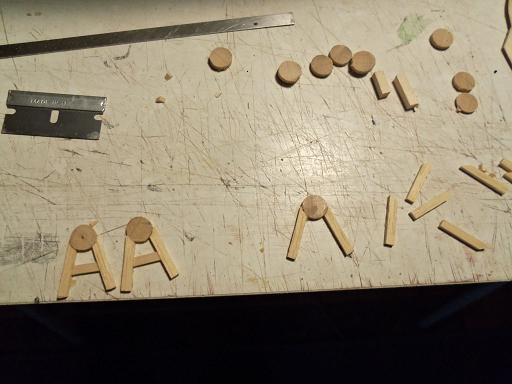
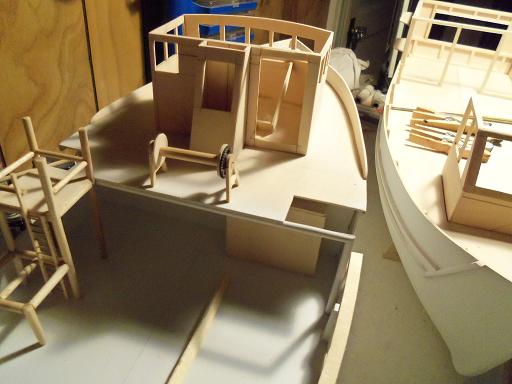
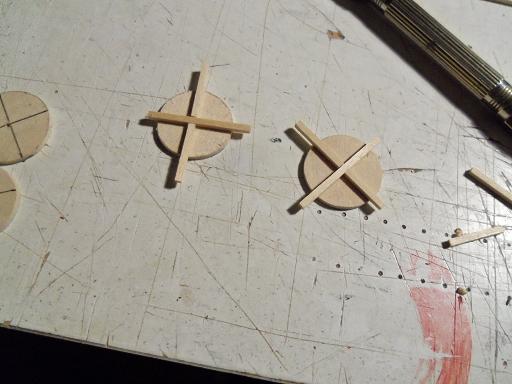
today, I put all these bit and pieces I've been playing with....in the works. I made up the first bracket, with the feeling I didn't put enough spread on the legs. thinking that way.....I made a few more, but with a wider spread. I made a matching one.....I'll use it as a test build. still not sure about the gear thing.....that's why I made two of the other side. I sanded them a bit more using my white glue and sawdust method for blending in the joint lines. the reel was assembled at this time. the parts were then dry fitted together and set on the fore deck, behind the pilot house. one is to go here, and three more are to go along the transom. it looks a bit off......it's not cemented together, it's my only excuse. it might be good to trim the height down as well.
- 956 replies
-
- 11
-
-
- andrea gail
- trawler
- (and 1 more)
-
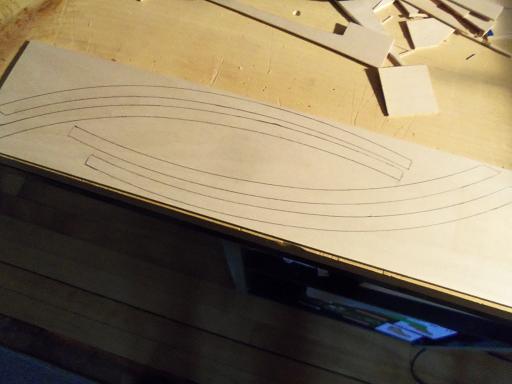
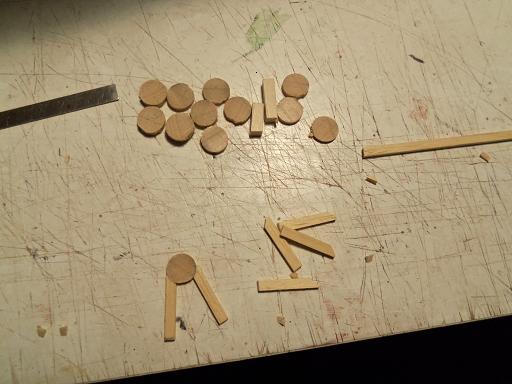
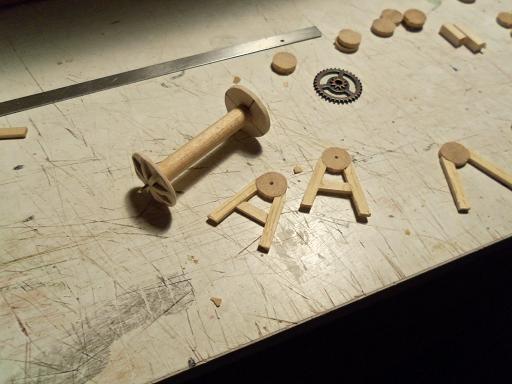
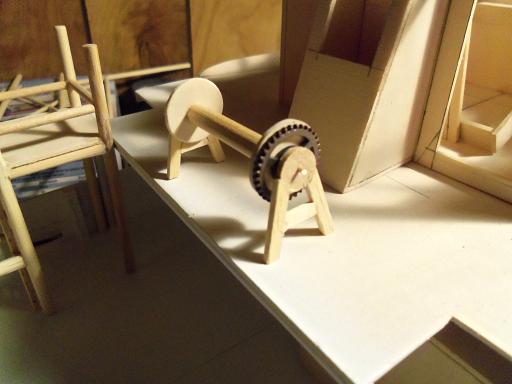
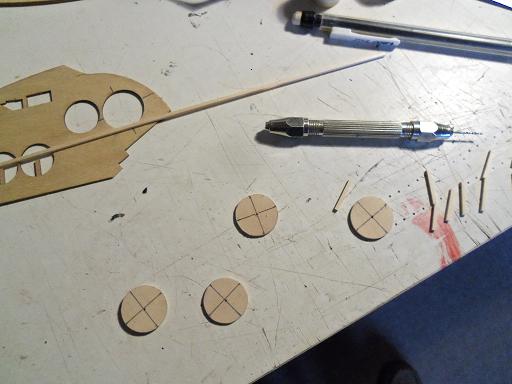
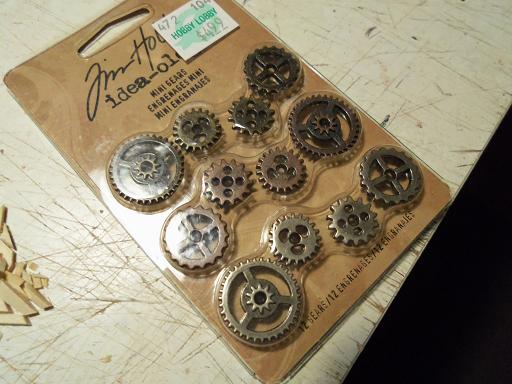
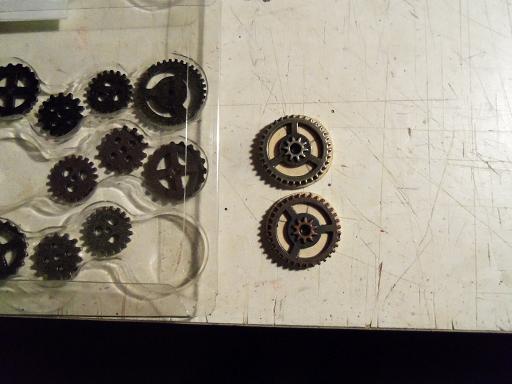
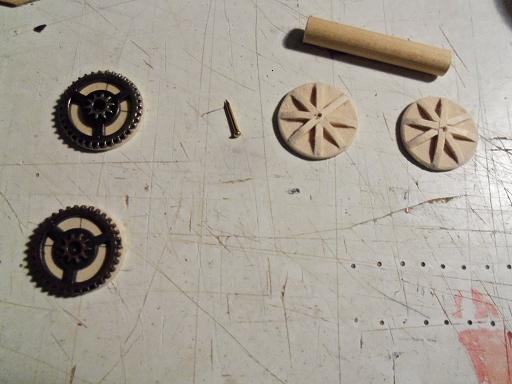
circles......all I see....are circles. time to get 'round to show you what I'm going to do with them. I stacked them in a bunch and sanded them.......as round as my eye could see. I even laid them back into the template.....to see how round they are. I put a set of cross hairs on the template, so I could factor in the centers. I bought these a short time ago......I thought they looked cool. there is a larger set in the dept where I got them. some of those would be suitable to use as ship's wheels. you can buy the parts to make a plaque of a wall clock.....must really be cool when your done with it. I thought I'd try them out to see what it would look like. the other side, I'm going to do as the kit says to do I was surprised to see that the larger gears are the same size as the bigger circles. they fit quite well. ....and then with the other side of the reel sanded and ready.....both sides look like this I did this on tuesday.......in between making the last preparations for our first snow storm.
- 956 replies
-
- 8
-
-
- andrea gail
- trawler
- (and 1 more)
-
nice looking hull frame John....very well done!
-
really starting to move right along there, Adriaan. very nice progress indeed!
-
I've heard sad tales of folks having a hard time in getting the transom fascia to fit properly.......glad to see that you hardly had any trouble at all looking great Sjors!
- 1,616 replies
-
- 1
-
-
- caldercraft
- agamemnon
- (and 1 more)
-
she looks great in her place of prominence....really nice case for her too. again, congrats Mobbsie on a very beautiful build!
- 1,279 replies
-
- 1
-
-
- agamemnon
- caldercraft
- (and 1 more)
-
very well done Omega.........you are the master of tiny! truly amazing!
- 120 replies
-
- 1
-
-
- mystic
- motor yacht
- (and 2 more)
-
thanks to all for the kind comments and the likes....commented earlier, but I guess I forgot to hit the post button. I should have an update soon
- 956 replies
-
- 6
-
-
- andrea gail
- trawler
- (and 1 more)
-
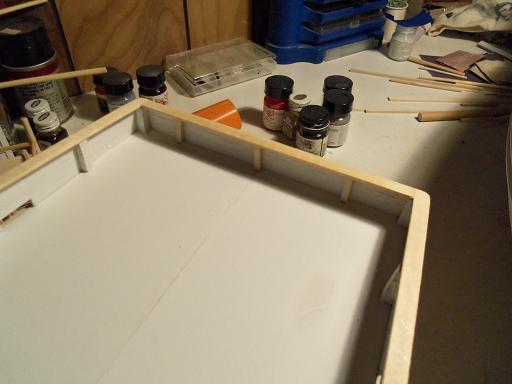
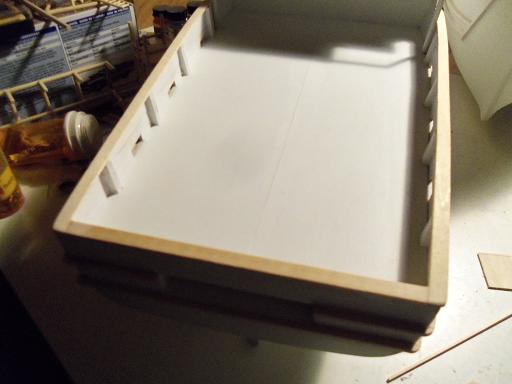
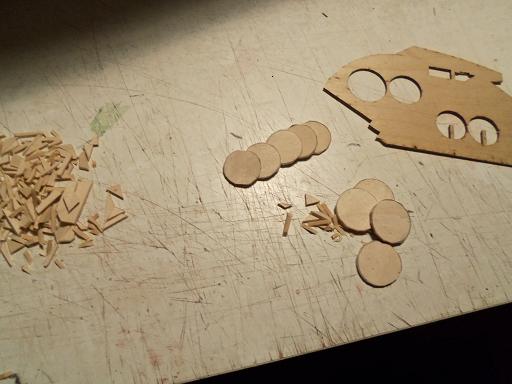
I was in and out most of the day today. I did manage to do something with this today......hopefully more this evening. circles........I think I found a suitable circle template to use this template comes from the Mary Ann......I forget what purpose they served in the build. I like to keep some of these shapes. you never know when they will come in handy. then there are the port and starboard cap rails. they need to be trimmed and shaped to fit the bulwarks, and then a transom rail can be fitted. there are two portholes that will be located in the hull for the bow cabin below the fore deck, that I still need to drill. with these two obstacles out of the way, then maybe I can get on with the pain of masking this bad girl, and do some paint
- 956 replies
-
- 10
-
-
- andrea gail
- trawler
- (and 1 more)