


popeye the sailor
-
Posts
16,007 -
Joined
-
Last visited
Content Type
Profiles
Forums
Gallery
Events
Everything posted by popeye the sailor
-
 it might be your phone.....all the pictures are here. the beginning to this build are over in the Holiday Harbor log........that where I made the decision to do it. when it got too hot and heavy, I created the log for it. all the good stuff will happen here. I appreciate your looking out for me thanks to all who hit the like button wish I had more to report
- 956 replies
-
- 1
-

-
- andrea gail
- trawler
- (and 1 more)
-
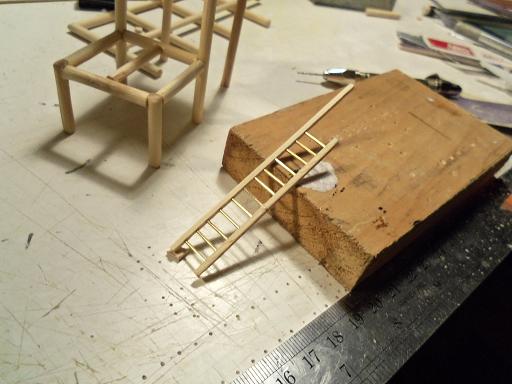
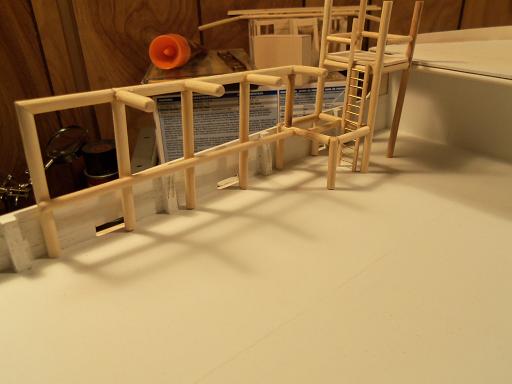
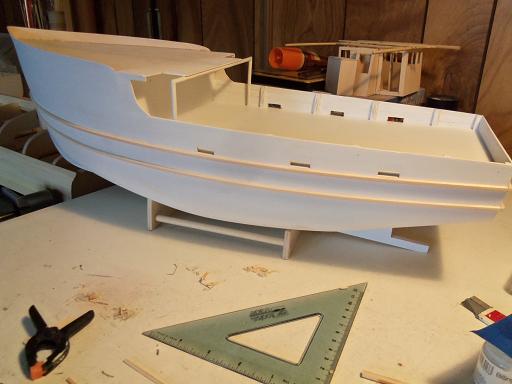
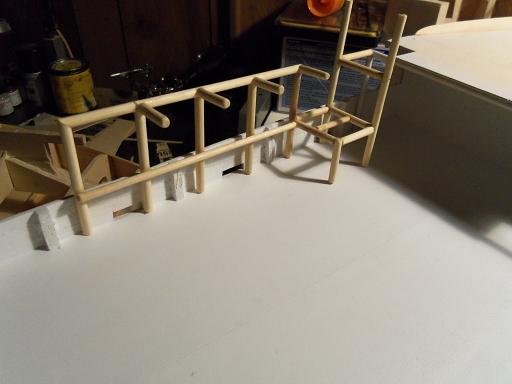
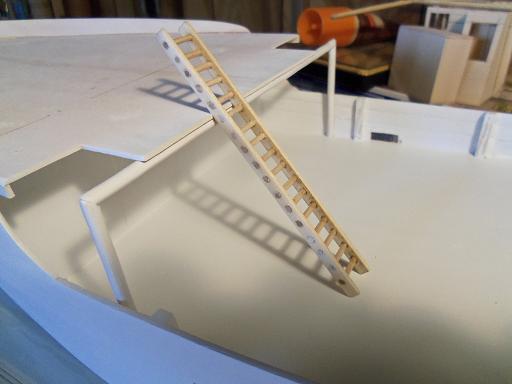
OK........like Dr. Dafi, I've gotten the urge to dystroy..........y.......because it's a dysfunctional thing. the necromantic view of the rack and podium is wrong. the appendage is in the wrong place........I will cut it off and reposition it. HA.....Ha..to rip...to cut! it's all good! finding the right place......the deed was done. I was going to join the side support bars to the foredeck stanchion, and negate the front uprights, but after looking at the plans, I see that they are there.......makes it all the better! the podium floor was cut, fitted, trimmed, and filler was added around the uprights. in place on the deck puts it right where I want it. to get up there from the main deck, it needs a ladder {oh no......not again!}. I had another idea for it that I wanted to try. using the same idea as the staple ladder, holes were drilled.....one side of the uprights will be longer than the other. you can see that I'm using the improved method for drilling to scale down the rungs a bit more, I did as I mentioned earlier......I used brass. after sanding the uprights to a rounded shape, along with smoothing out the sides, the ladder looked good enough to use in the Billing's plans, the ladder does not touch the main deck.........I may also put some flooring on half of the lower level....it's a thought.......I think it would look better as well. it was time to locate the rack back in place. with it on the deck, I was able to see the proper place. I failed to take into account for the flooring.......there is a bit of a step up from the foredeck. I think I will cut that bar and make an entrance for this side too......I can always add a small piece of square stock to clean it up......there are railings there already {in the plans}. there is still a little more to add....then to clean up all the joints and get some paint on it. I can deal with the foredeck later, when the assembly is cemented in place. this will happen, after the hull gets painted.

- 956 replies
-
- 13
-
-
- andrea gail
- trawler
- (and 1 more)
-
thanks Augie, Carl, Omega, Appreciate the kind word! thanks Ed........I think its wonderful when admirals enjoy the medium as much as we do. pleased to have you two following along thank Piet.......when I found that the marks I made on the stern were wrong........I simply used them in the opposite fashion. I used the scuppers as the line for the others sad to think that I allowed that I let another inconsistency slip through, but it doesn't affect the overall build......I'm really happy how it came out. white glue and sanding........the most natural filler you can get I am very glad you chose to follow along......as I have mentioned a while ago, I'm going to try and do as much as I can from scratch. I hope that I can show you {and Nils as well} that I at least learned........something
- 956 replies
-
- 2
-
-
- andrea gail
- trawler
- (and 1 more)
-
Cutty Sark by NenadM
popeye the sailor replied to NenadM's topic in - Build logs for subjects built 1851 - 1900
well done Nenad! -
ours gave up last year........near the end of winter....snow still on the ground. we had an oil burner that the landlord had been nurse maiding........took the guys a day to get the new gas burner up and running. I wish you well in taking care of your situation
-
mine is the same way Anon......the barrel slides into the pusher, while a rod inside drives the brad. I like it a lot......the only thing is that you can only use one size brad 7 mm - looks like a finishing nail with a small head 10 mm - larger brad with a flanged head. I don't use them too much because they are too large. I use them for levers and riveting simulation looks like you used the 10 mm Michael......don't believe there is a tool for them out there...I haven't seen one. do you plan to pull them out afterwards? I have something though........a tool that is part of a mechanic's kit, for the installation of front and rear engine seals. all it is really, is a 1/8th metal rod with a handle on it, but it works well........found it when I first started this medium. now that I've done a few builds, I do like Ross suggests and use push pins. there are many different varieties out there....I use the short ones with a round ball for a head. sure beats the fun I used to have, pulling them all out........never liked the feeling and the sound of sandpaper on metal
-
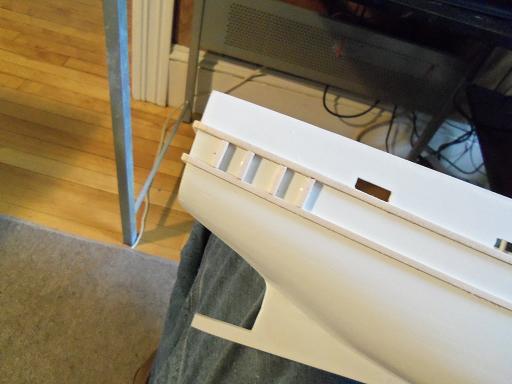
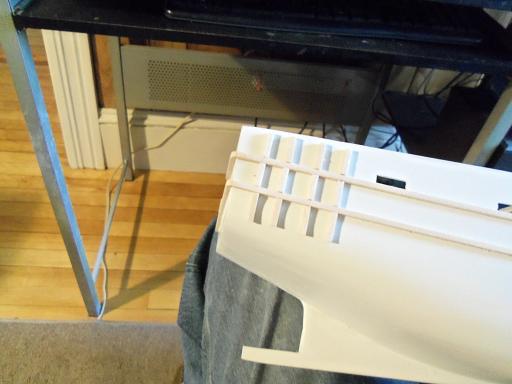
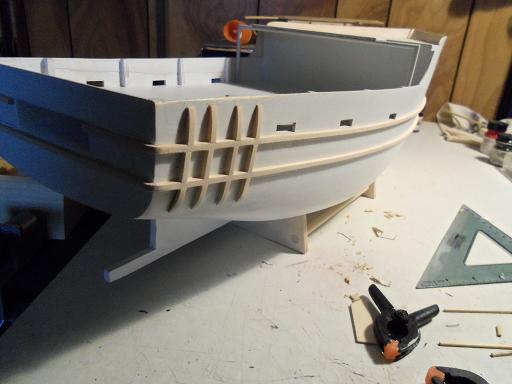
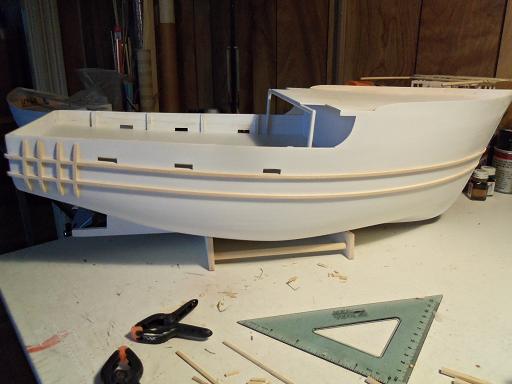
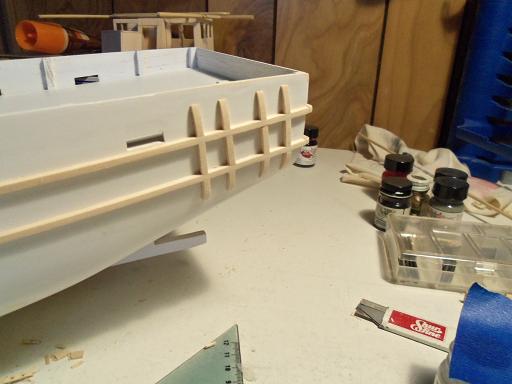
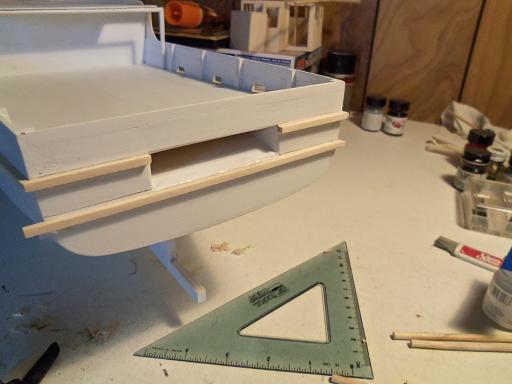
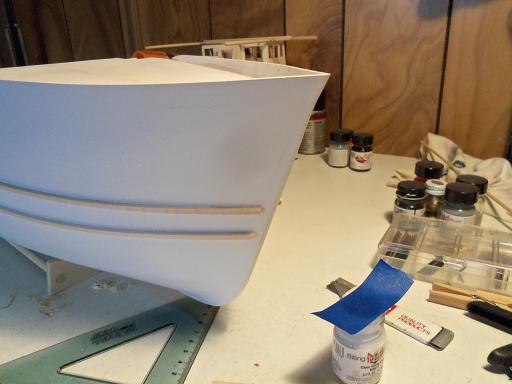
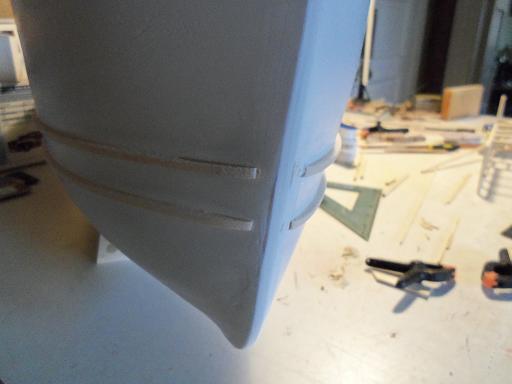
the stern has some vertical rails. they taper at the top and bottom. first, the filler rails were added in then the upper and lower rails were added the little cracks and gaps were dabbed with white glue. after allowing it to set for a min or so, it was sanded to blend them together and the upper and lower rails were tapered. they come out looking like this. the port side was done son after

- 956 replies
-
- 13
-
-
- andrea gail
- trawler
- (and 1 more)
-
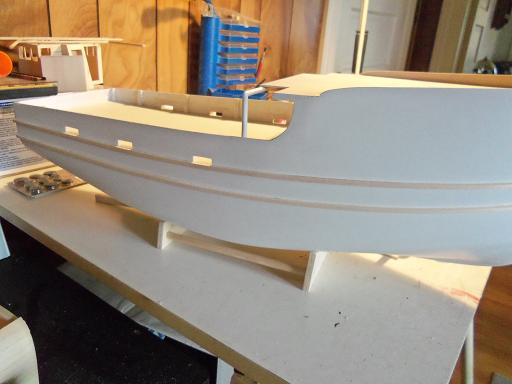
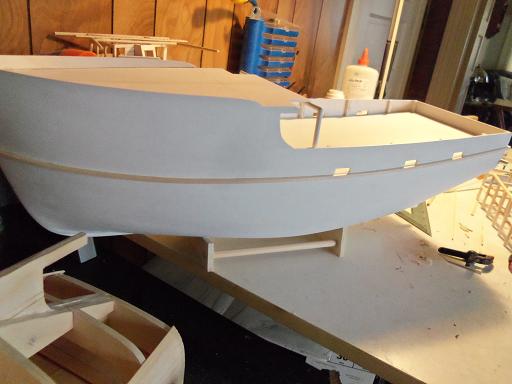
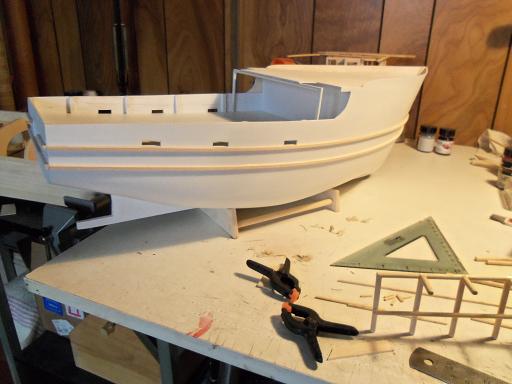
this......I did this morning. I have an on and off relationship with rub rails. there are time where, with hardly no effort at all, they come out nice........and other time, no matter how much I measure, they come out badly. it didn't start out too good.......again, I think it is because of the tapered stern. for all who wondered why I left the slight non-conformity in there...........to correct it, I would have had to chop off at least two ribs worth of stern off and make larger bulkheads {ribs}. then, replank and square it off from there.......too much work, in my view. then again, it could be because I have the chute at deck level, instead of dropping it about 1/8 of an inch.........it began at the stern. this is how it should look, but to line up the top rub rails to it, they fall just below it. so, in order to make this work, I changed the stern rails to this. the top rub rail was laid on the port side. it stops just before the bow the starboard side was done, along with the lower one........the lower one stops, following the bow line the port side was done soon after. this made the stern look better, even though it is not it should be. the corners were rounded, and the bow ends were evened out and tapered. I did the port side a little more after the picture was taken.
- 956 replies
-
- 11
-
-
- andrea gail
- trawler
- (and 1 more)
-
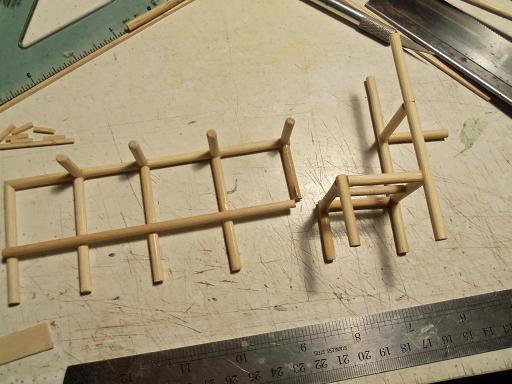
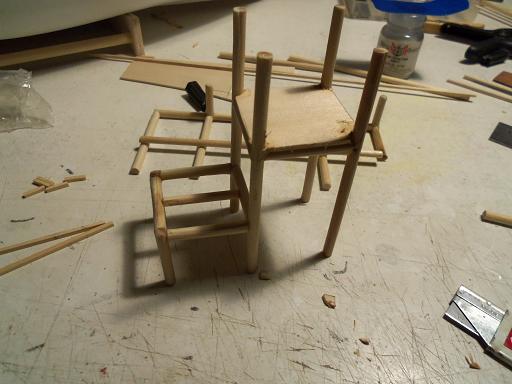
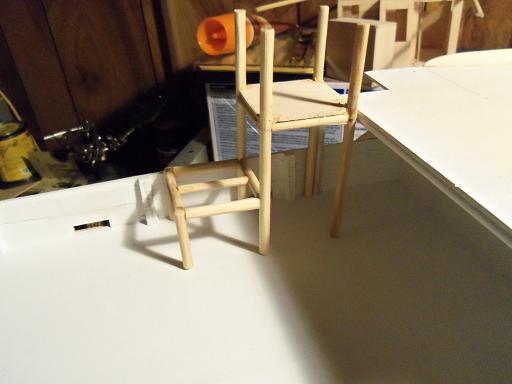
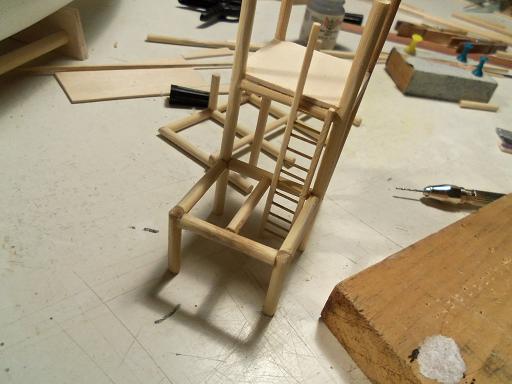
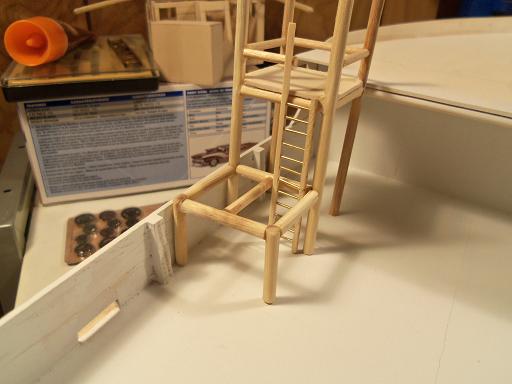
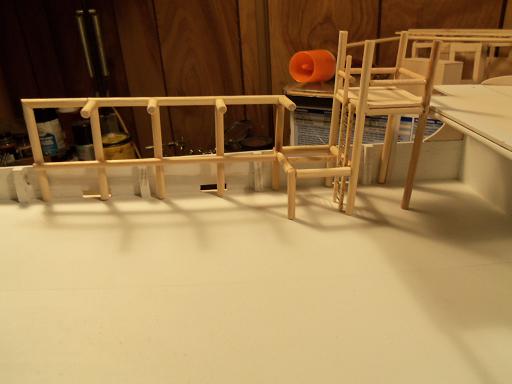
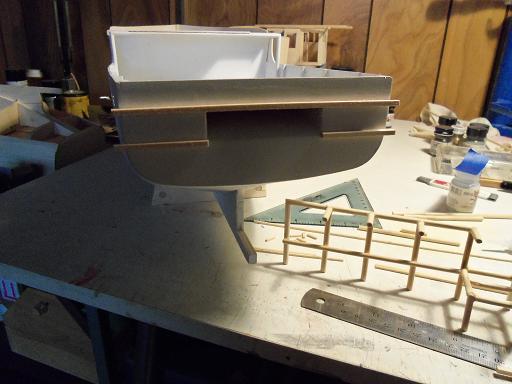
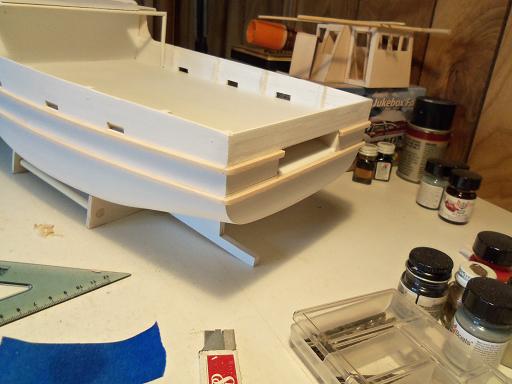
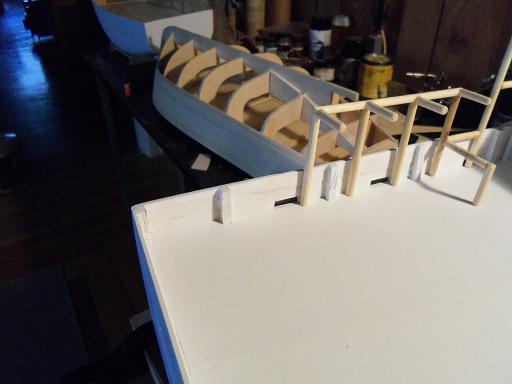
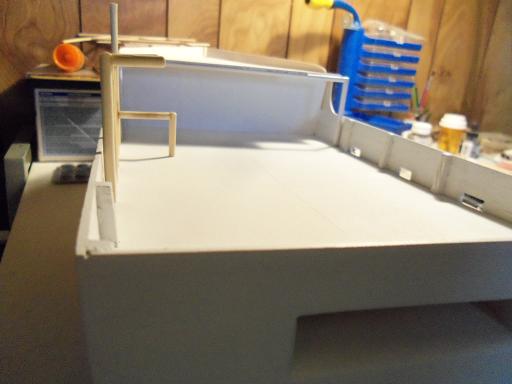
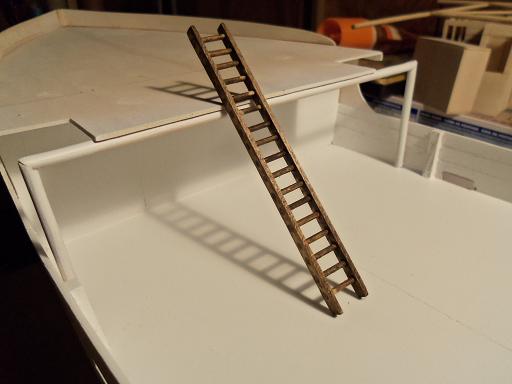
I've never heard of that........there's one for the books I can imagine the smell value wasn't too good as promised, I have the pictures of the rack and podium assembly. I saw this problem early, but I thought I'd add to it while I was thinking about it. probably not one of my better plans, but perhaps I'd think of a low impact solution. so, I added the first podium post, and the support leg for the lower level. it too short at the rack end of it still.........I thought it would make it longer. I will add another section to this. there is a slight slant to it, which is not too much of a problem, the legs still need to be sanded and adjusted, so they all touch the deck. the outer podium post with the cross bars........to be cemented to the assembly. the addition to the rack was added, along with a cross bar at rail level. odd that the plans say to install it this way........but OK! and....here is the problem at hand........due to the taper of the stern / bulwarks, the podium floor is not going to be square. the only real thing to do to remedy the problem, would be to offset it at the connection of the rack and the lower level. I think I figured out where I need to make the cuts, since this is crucial connection point. I ended the evening with it looking like this.
- 956 replies
-
- 9
-
-
- andrea gail
- trawler
- (and 1 more)
-
I'm not a hand stitcher either Nils.......and I always try to hide the pleat lines with near colored thread. but I really like the colors you've chosen.......very nice indeed!
-
thanks for the good comments gents........the ladder has been fun to play with. as I have arrived at the ultimate solution in making the type that will look the best, I have run across another small problem. it's not a real biggie, but it's enough to slow me down and make me put on the 'ole thinking cap. the hull has a tapered stern....not real dramatic and won't impact the finished build, but wants to interfere with the way the rack and podiums are created. I'll have an update soon to think of the ladders Keith, it just like the movies. you see a really cool film......then later you are treated to a short clip about all the bloopers that occurred in making it. some even put then at the end of the movie. here, the bloopers are built in I have no problem in showing them.......I think it puts the 'real life - real time' into the creation of the model. I enjoy every minute I spend at the table......I guess you could compare this to a comedy then......I guess.........the bloopers ARE the comedy I hope Ed's admiral got a laugh out of it {it's OK my dear.......you can laugh..........I surely did! }
- 956 replies
-
- 4
-
-
- andrea gail
- trawler
- (and 1 more)
-
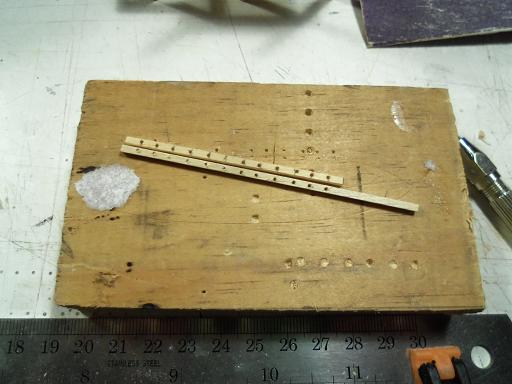
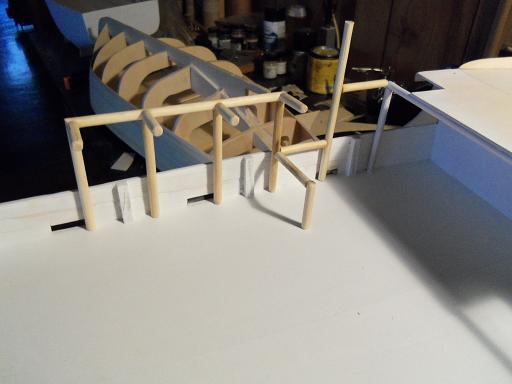
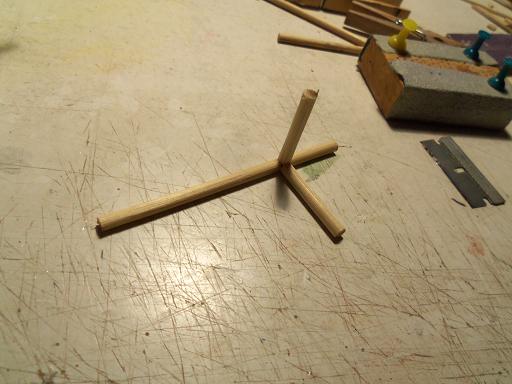
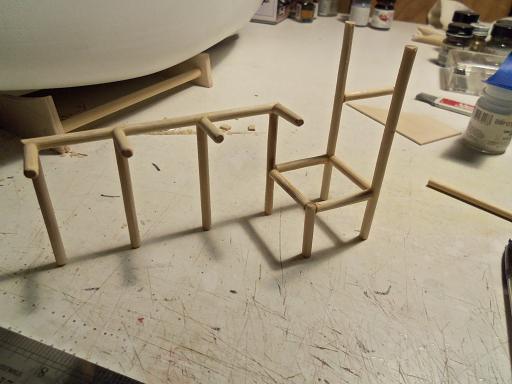
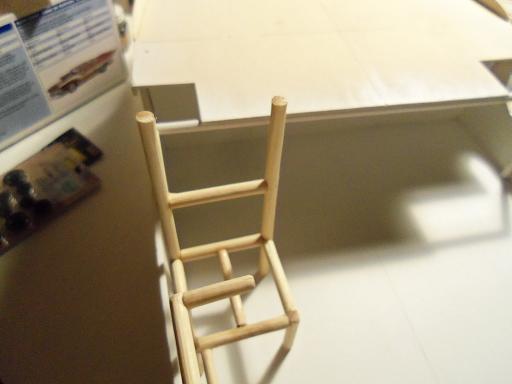
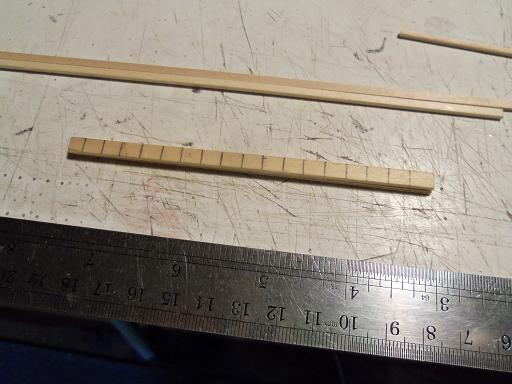
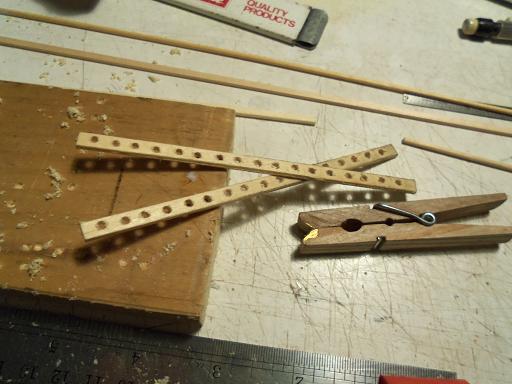
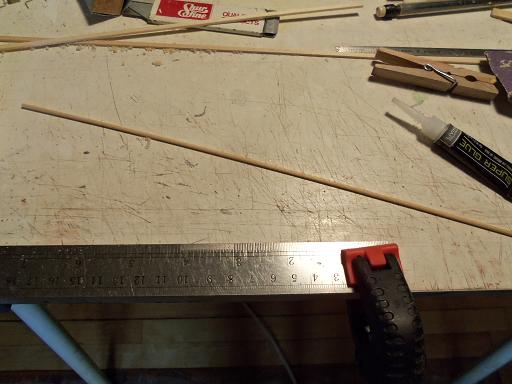
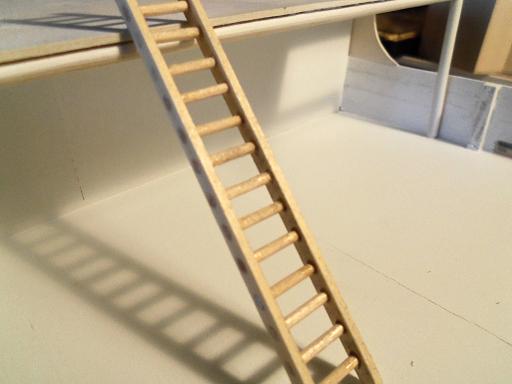
then you would have liked to be in the same isle as we were, when we were picking out stuff at Hobby Lobby I think you would have laughed out loud, when I was there, tell her about scale and a modeler's view of it. I enjoy having her with me.......she is the essential 'other side' of the medium...the one that would say "I could never do that". I'm able to look through, and get an idea of what a regular person would see. I take it as a gift.........and I feel sadness for those, whose admirals and friends scoff at what they do. I think that we as modelers, have a special gift, of imagination and vision....and it's even more rewarding, when your surrounded by folks who enjoy and support what you do. I am truly blessed, my friend when she saw me pull out the plastic ladder.......you'd have thought I betrayed the medium. thanks for the comment Michael, we are BOTH blessed in that respect {from what I see of your work} well........anyway......I did promise you a look at another style of ladder.......didn't I?!?! I wasn't happy about the rungs. I has shown the first ladder to the admiral.....she thought it was neat. I should know better than to critique my work in front of her. she is a great sounding board.....but she got a bit vexed at what I said about the rungs....."it looks FINE.......what the heck are you looking for anyway?" the conversation continued well into me making the staple ladder. she saw the progress of that one, and commented that she could never model like that.......she thought it was neat as well. she had no words about the outcome though......she didn't have to. I tried.......the method was a bit off........but I liked how it looked. I haven't tried to modify it yet......but I will this third style is neat as well. given the size dowel I used, I had to increase the width of the uprights, marked off in 1/4 inch increments. then to drill the holes for the rungs. it's the same method as the staple ladder.......seen here is the modification to the method. the wood looks a bit dirty.......just metal tarnish from the pin vise....it just shows you how long it's been since I last used it....way too long. here is the dowel I have on hand. I'm not sure of the diameter measurement, but it's just shy of 3/32 in basswood. it is a little rough.....to sand it smooth would probably bring it down to 1/16. I tried to find something smaller, but for that, I could substitute brass. put it all together, and you come up with this. I used CA for this. I suppose if you were careful how it was assembled, it could be stained with no trouble. I wasn't that lucky.....but I'm happy with the results. my efforts here will not go to waste........I'm thinking of adding it to one of the Holiday Harbor builds. I put this here, since I'm working on this part at the moment. short of soldering a ladder together, this method would do quite well.
- 956 replies
-
- 16
-
-
- andrea gail
- trawler
- (and 1 more)
-
nice progress Matti, very nice shroud work. I'll look forward to your next update......sounds like your really busy!
-
wonderful work on the antenna Piet! man! I really like the full view shots of her! simply an outstanding build........I'm in awe of your talent!
-
Cutty Sark by NenadM
popeye the sailor replied to NenadM's topic in - Build logs for subjects built 1851 - 1900
so true about instructions Nenad.......they are simplified. some detail has been omitted......it's up to the modeler, if they want to put it on their build. makes for a more interesting model, in my opinion for the portholes and windows.......have you looked in the sewing section of craft stores.....or even hardware stores? I have these eyelets for shoes, belts {and other things}. they come in all sizes, but I only have two sizes that would work well with it. a few weeks ago, I was down in the cellar, looking through the cabinets the landlord stores his supplies. I found a nice sconce light to replace the one in our laundry room...........and I ran across a box full of eyelets........all different sizes! they would do well for hawse holes, port holes, sheave holes.......god knows what else! what you did to make them is pretty cool.......it worked quite well, and really adds to the hull's beauty. for the glass, I use Testor's 'window maker and cement' for plastic canopys. it dries clear, and is almost 100% see through. at that size, you could also use white glue.......it will dry to a smoky window finish. not see through, but it will give you the look.- 4,152 replies
-
- 1
-
-
- cutty sark
- tehnodidakta
- (and 1 more)
-
thanks Mobbsie not to worry about the ladder.......not even considered a set back, really. I've given it a bit of thought, and that type of ladder can be done. folks like the original ladder {even the admiral}.......so I'll just make the rest of them like that one. I do have another style to make.......sounds easy enough....I'll make one and post it for others to try on their own. done with my work week.......I'll see about getting more done
-
I had no idea you were still working on the beauty had no idea why I haven't seen any updates, until I realized it wasn't in my watch list. you in there now...........by golly! very nice work in laying the keel so far, and I'll be very interested on how you build the engine. have you given thought as to how you will do the fuel / spark deliveries? too bad a lawn mower engine is too large a scale.....you could scoff the magneto and carburation systems, and make life easier
-
thanks Omega.......haven't done anything with R/C as of yet....these are going to be static builds. more for the admiral than anything else. thanks Lawrence........it's going to be a fun subject.......I'm seeing so much stuff out there that can be used {I've already started my scavenger hunt} the M&M boat was a lot of fun to do........this is the first thing that came to mind, that would be equally as challenging. still too soon though.......they are still pretty bare boned. it will get even more interesting when the hulls are painted and finished out glad to have you follow along
-
thanks Omega.......that style of ladder would be seen on navel ships, but it is also used on commercial fishing vessels. if I had done that using white glue, I wouldn't have had that problem. if I had also used a metal backing, the drill wouldn't have gone into the Formica {it didn't go in too far.......most just nicked the surface. I'll do it again...be sure of it....it is kind of a cool idea. thanks Piet and Frank.........I will be using the ladder.......I have a couple more to make. I was out with the admiral at hobby Lobby yesterday......got some more small dowels, and something that will add some neat detail to the reels. they used to carry a 'grab bag' of metal and brass parts...odds and ends. I couldn't find it {I have a few other places I can look}. anyway, the admiral asked me if I wanted to take a look in HobbyTown.......it's in the same mall. didn't find it there either, although I did buy some different size brass sheeting and a few other things. I took a look in the Plastruct and evergreen displays, to see if I could use anything from there. a lot of this stuff applies to HO scale.........I showed her the ladders. she got visibly upset.......and even called me a cheater! "you can make the ladders.......you don't need to go buying that stuff!" I got a good giggle out of it thanks for posting Lextin.......glad to have you follow along. best I can say is 'that's the cinema for you'....there is a lot of articles out there on their story.....I'm also sure that the relatives and families would rather know and have their story told, that to have folks speculate in the guise of gossip and lore. it miffs me more to read folks critiquing the movie, pointing out every thing that was wrong with it.
- 956 replies
-
- 3
-
-
- andrea gail
- trawler
- (and 1 more)
-
congratz you two..........sounds like a lot of fun!
-
your getting there Frank....that's what counts. it'll be smooth sailing when you get 'er where you want her. keep smiling Frank.......she's look'in real good!