popeye the sailor
-
Posts
16,007 -
Joined
-
Last visited
Content Type
Profiles
Forums
Gallery
Events
Everything posted by popeye the sailor
-
 they have dioramas like that on you tube.........they are so amazing! if you take a stroll....check out the airport diorama....you won't believe it! I'm building an old Ambroid kit of the B&M snow plow........I have a diorama layout set up for it {I just have to find my way back to it}. looking at your signature.........it appears you'll be busy for quite a while
 -
you'd have more control with an airbrush. another good hint is never to spray directly at the masking......spray at a slight angle upward over the masking. it will reduce the 'welling' at the mask line and won't leave a visible line when the tape is removed. light coats.....let dry, then another light coat. spray cans only have one setting.............spray!
-
swell job on the cannon Augie. they should look real good on that deck.........very nice!
- 2,191 replies
-
- 1
-

-
- confederacy
- Model Shipways
- (and 1 more)
-
I'll see if I can get some of that into MY thick head....... really good info!
-
looking good Sjors..........not much further, I gather
- 1,873 replies
-
- 1
-
-
- occre
- san ildefonso
- (and 1 more)
-
hi there Peter........so glad to see you've started another build! I just saw this same kit on E-Bay........no fittings shown. my Nordkap was in the same packaging, so I take it, it is not laser cut {?} I've been watching 'the boys' build theirs........I'd be pleased as punch to add yours to my watch list. if I wasn't so bogged down with other builds..................
-
super detail in a very small scale....almost looks like she's ready to sail {No......I promised I wouldn't } I must ask though, what do you do for windows? for a scale that small, especially if you want them to look clear, I might suggest Testor's window maker & cement. I used it extensively in my plastic models.......bombers and large aircraft. great for tiny windows and for gluing the canopies in place. I use it in this medium for gluing in the windows and for portholes. the bottle that it comes in is designed to be the perfect applicator
- 120 replies
-
- 1
-
-
- mystic
- motor yacht
- (and 2 more)
-
quite agree.....well done!
-
looks awesome Danny!
-
looking very nice Walter....sounds like you've got a good game plan going on there. that's gonna give you a glassy smooth hull
-
thanks Lawrence.......the layout for the Jingle Belle is really starting to take shape! now, if I can only get some paint on her I'll be glad to get what I need for the tree boat, so I can get her up to speed. thanks for the good word! now I had better get that helm in shape, before I break off those window frames! almost did it there, a couple of times!
-
thanks Omega {I saw your post} if I only had another build like that one >daydream.......< the entire concept was thought up from the very beginning.......there was no deviation in the build process.........and the only addition to the build was the brilliant nudge to include windshield wipers {thanks to Andy} the Holiday harbor is the second set of my original experiment....using parts panels from existing kits, to create hulls...just the hulls. they can be outfitted to model other ships and boats. the trawler Syborn is the other half of the first experiment. I have saved some of the panels...these are from the Billing's kit Mary Ann. this would be good for folks who aren't too good at CAD, or are on a tight budget. I believe so Augie. the build was started in May of 2012, and finished in October of 2012. I forget when it was.....but we had that second glitch. at least it still can be seen in the gallery I'd put it back in. thanks Mobbsie! yup.......that's what happens when you decide to take the quantum leap! a lot of measuring, cutting, and agonizing but your going to have fun...and that's what counts! your going to enjoy the control you'll have, instead of looking at parts, and weighing out whether they are good enough or not to use. I have a concept for the Harbor boats, but that's all......the only one that I'm following instructions for is the Andrea Gail. all I'm using it for, is for parts and what they look like, so I can make them from scratch. there is a difference though...freedom. it depends greatly on the subject your modeling. frequency aside.........always glad when you pop in for a looky
-
this one is the Jingle Belle Sjors...the caroler's boat. sadly the other one is waiting to be wired in.....then I have to finish planking the hull. when I'm ready, I'll work on the Christmas tree boat and get her to the same point as the Jingle belle. I wish I could do it to them both. hello John.........all this sawdust......I was wondering where you were I thought I would power through some of this build for a while. you probably noticed that this has turned into a dual build. the hull dubbed Larry is no more.........it has left the fleet to become the Andrea Gail. I think you'll find the modifications interesting glad your back........I missed you thanks Omega.......to look for the M&M Fun Ship shouldn't be too hard.......I did a build log on her. it can also be seen in the completed scratch gallery. http://modelshipworld.com/index.php/gallery/album/104-mm-fun-ship-by-popeye-the-sailor/ the build log seems to have disappeared......might have happened during the last glitch...........>sad< here is the build log that I did on Word Press The M&M fun ship – {part 1} « M&M 'fun' ship – a 1:33 scale semi scracth build thanks for the kind comments and to those who hit the like button.....more coming soon!
-
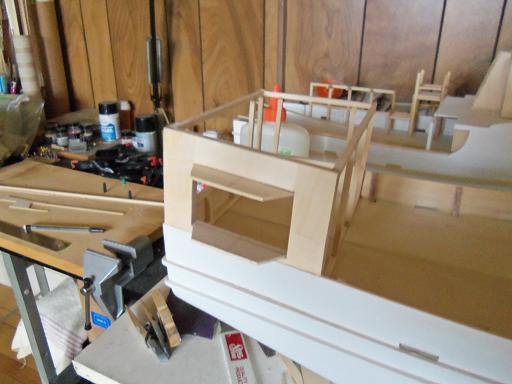
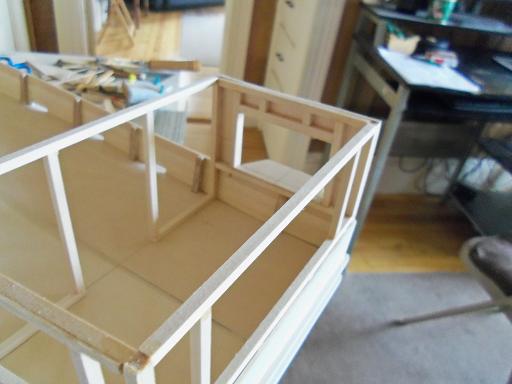
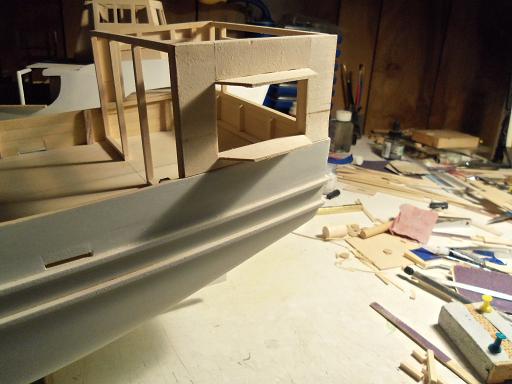
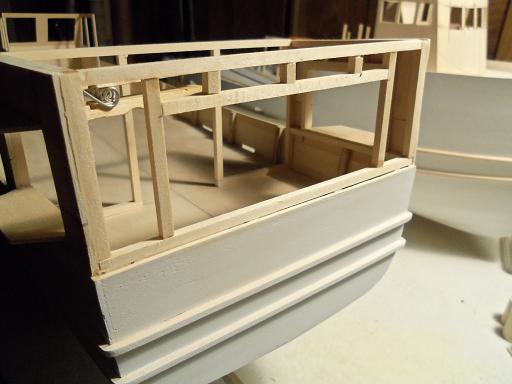
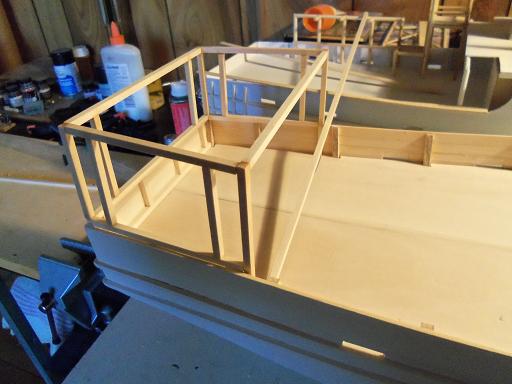
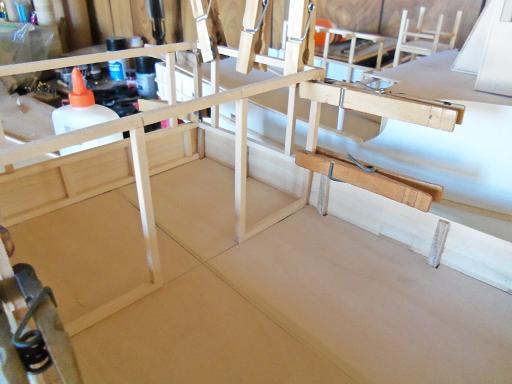
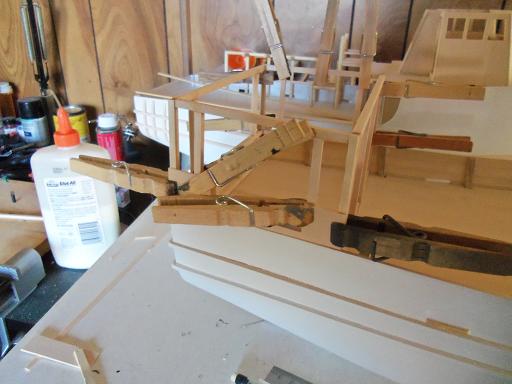
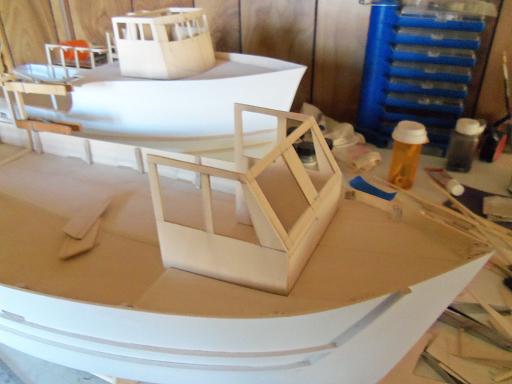
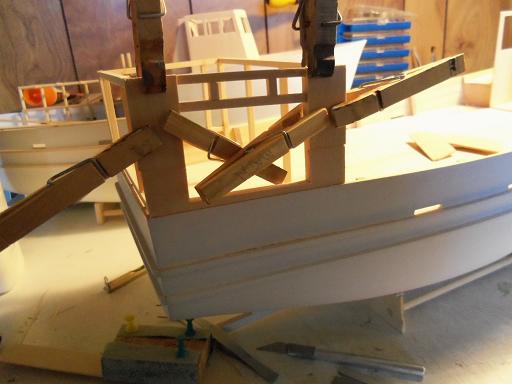
so, with the upper and lower badge profiles in place, it now looks like this ...and a view from the inside. it will be how the windows come out, is whether or not the interior will need to be fleshed out. as I mentioned earlier, the port side needed to be shimmed, due to the bulwark splay. the starboard side wasn't that bad. I had stripped out some planking earlier for the life boats {that I need to get back to} for the trawler Syborn build. it came in handy here. then the covering and framing the top of the window. with the profiles cemented in place, it now looks like this now comes the big question.........what is to come with the transom wall? the window is framed in.

-
Hey there Mobbsie.......knew I'd find you sooner or later! I see your making fine use of all the new power tools did you make the jig from plans?
- 255 replies
-
- 1
-
-
- granado
- bomb ketch
- (and 2 more)
-
OK........first off, you need to do a larger scale. that detail would be awesome! such a sweet job in a small scale. I especially like that picture you have in the beginning.....it shows exactly what I'm talking about. similar hull construction, but fitted out differently sorry........just me thinking aloud you have such detail packed into that 3" hull........really super job! I started this after looking at the first page.........then I realized that there was yet another page to browse. man........didn't this page open my eyes! she looks great!
- 120 replies
-
- 1
-
-
- mystic
- motor yacht
- (and 2 more)
-
I'm just sitting back.........just amazing metal work. you know........with all the metal filings your kicking up, have you given any though towards getting into smelting?
-
Cutty Sark by NenadM
popeye the sailor replied to NenadM's topic in - Build logs for subjects built 1851 - 1900
great looking boomkin Nenad...........once rigged, it won't be moveable anyway. just chimed in to let you know what a sweet job you did now comes the hard part........there is only a fore and aft set, I believe........but they all need to be made to look alike! that's a challenge in itself! -
Gwen and Phyllis {my admiral} sound like two peas in a pod.............Phyl thinks the same of me.....too critical of my work my recent notice of a flaw in the build I am working on set her to part some words of wisdom.............it wouldn't look good if it was too perfect. it's what gives it, it's individuality. I think she was stammering when she said it....don't quote me.........PLEASE!!!
-
thanks Frank it's a good thing that each build has their own personality........I'd be lost too! thanks for the good word!
-
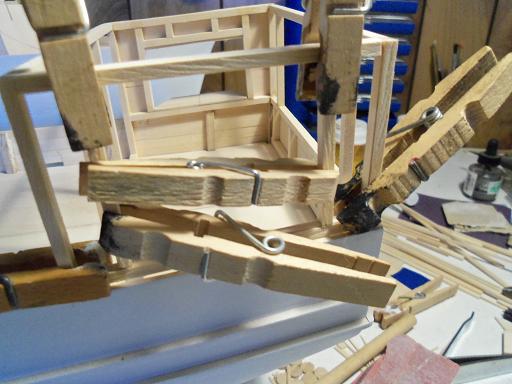
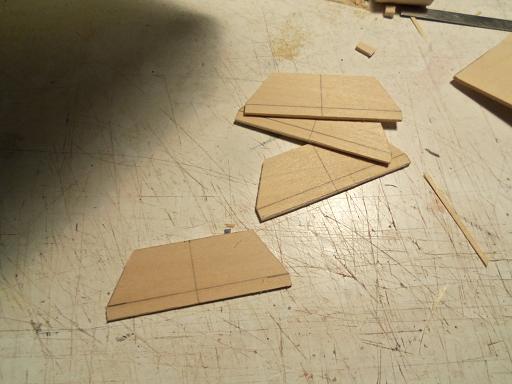
I like the badge idea.......two side windows with two fascia windows in the center. framing out the walls is not a huge deal either. I have a lot of the cut offs from the flat stock, I keep them in a plastic bag.....I'll be able to use some of it up. I also plan on doing shingles for the outside, and that will use up even more. I made a discovery as well.......the starboard wall is a bit off. I measured every which way, when I saw it, and it boils down to the conclusion that the stern has twisted. the hull has been around for so long without sealer.........I'm sure the temp and humidity had caused this. anyway I look at it, it would be a major job to fix it. if I fix it by adjusting the wall, it will show there...the wall mass will be uneven. if I remove the structure and adjust the bulwark, it will not only throw the transom wall off, but the hull rails as well. the only resolve I can see, will be in how I do the roof. I have no choice......it will have to be a pitched roof. well.....I'll cross that bridge when I get to it.......I'm not going back. the admiral told me not to. so I started by tracing out the profile for the badges. then I made the other three the studs were installed...also to center the doorway for the front wall....I'm thinking double doors. to make the outer wall flush to the bulwark, I'm shimming the port side wall. in looking at the front wall, it can be seen that the wall problem doesn't show here at all. it's because the problem lies with the starboard transom post since the bulwark height is enough, the fire stop can serve as the bottom window frame. the top will need to be framed in though the windshield panel was made and cemented in place more of the outer covering was added to the starboard side.......it also show the upper framing now to finish the outer covering and cement the profiles in place.

-
oh......I almost forgot ! I was really impressed with what I saw of the doll house lighting kit Lawrence........I think I will go in that direction. it runs on normal household current.....a transformer plug in. the connectors are what really swayed me.......as I mentioned, if I fit one in the lower part of the hull, when I want to light it, I can simply plug it in. they are really small lights.......I believe they are LED......my initial inspection of the kit was looking up at it and day dreaming of what I could do with it . I knew if I took it down from the wall peg, it would end up at the check out............and I didn't have the cash for it. I have my budget director working on it.......I should get the green light very soon. then I can tell you much more. I can tell you though, that they do not appear to be heat generating lighting.....so that is a big plus.
-
there you go!!!! piet has the right idea! sorry Mark......the hot tub was removed for the holiday season. it will be re-installed towards the end of spring, so it can do the "midnight rendezvous" tours for the summer XXX ..........>sizzle<...........too hot! no.....no music Nenad........I just listen to what comes out of my son's room...that's scary enough. Highway star.....is that the Deep Purple version? one of my favorite groups! I'm a bit of a metal head, but I also listen to country and some classical. anything that sounds interesting, I will try and practice my bass to. I also found out that bass and CA don't mix {damn.......I lose more strings that-a way!} Joe?.........no Joe here.........just me an' Chester, Omega {besides that, I'm a Curly fan....errrr, with a touch of Steve Martin and Chevy Chase } thank for the kind comment, and glad that you can now see the pictures ....and to the rest of you fine folks....an big thanks for following along. I know it's a slow process.......and yes, they won't be done for the holidays this year {due in part to my clepto - builditis}, but I'm hoping that by next year, I'll be popping them off like the octo - mom! {which is funny, because that's about how many I have on the roster} I should have an update soon! Denis
-
nice work with the beginnings of the masts I like the full shots........looks really sweet!
- 2,250 replies
-
- 1
-
-
- model shipways
- Charles W Morgan
- (and 1 more)