


popeye the sailor
-
Posts
16,007 -
Joined
-
Last visited
Content Type
Profiles
Forums
Gallery
Events
Everything posted by popeye the sailor
-
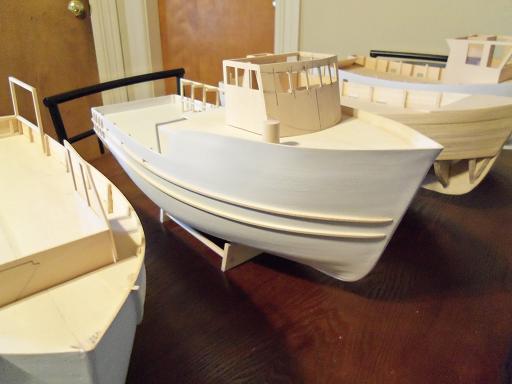
 thanks Nils.......a very interesting way of putting it. the Andrea Gail spin off from this build, is more of an expansion of what I've already learned. I started bashing these kits, from the very first one......which was an old kit to start with, not even laser cut. there are a lot of folks that have built from kits, later to turn to scratch builds, which are more challenging and thought provoking. having built so many car models {plastic}, I saw how many spin offs one can make using a particular car body, and wondered if this could be applied to this medium as well. there are some kits out there, that other ships can be made, beside the intended subject.......some even supply the parts to do so. it made me look at the concept of 'the kit'......which led to the parts panels, in which to recreate other hulls. the hull is the basis needed in which to start with. it can then be fitted out the way you want to, to build the ship you intend it to be. the fantasy builds are nice........but the Andrea Gail pushes the envelope a bit further, because I'm using the instruction sheets for the model, in which to build it. when I stood back, after finishing the planking of the Boulogne Etaples, the Andrea Gail was the first boat that I thought of.....in terms of the hull construction. the only flaw was the stern......it needed to be a little longer, and squared {not tapered}. I was going to create another hull, making these changes, but things being what they were....and the pull to do it being too strong, I just took the third hull and started on it. it's not perfect, but I think I achieved what I set out to do I think you'll like this Nils.......I've been wanting to do this for a while now. here they are all together......the Boulogne Etaples, the two Holiday Harbor builds, and the Andrea Gail. to replicate just the hull and go in the fantasy direction, one can let their imagination go wild. but, to create a known ship, the direction changes to a more focused build. personally, I don't think the focus changes all that much, it's more the scope of the build. it's bash 'n scratch at a whole new level the Jingle Belle, Andrea Gail, tree boat, and the Boulogne Etaples the Boulogne Etaples......... .....to the Andrea Gail......a dramatic change fro the original kit. I still have a ways to go in acquiring the level that the more experienced modelers have.....I have doubts that I ever will. I will assure you though, that I'm having a lot of fun trying
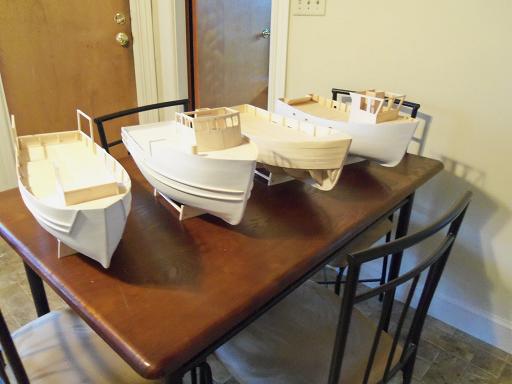
-
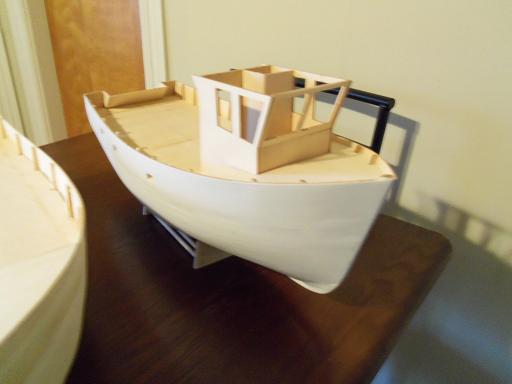
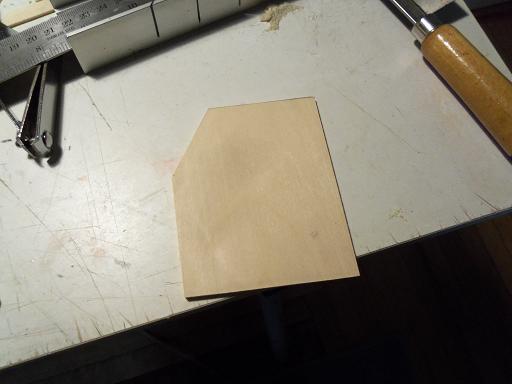
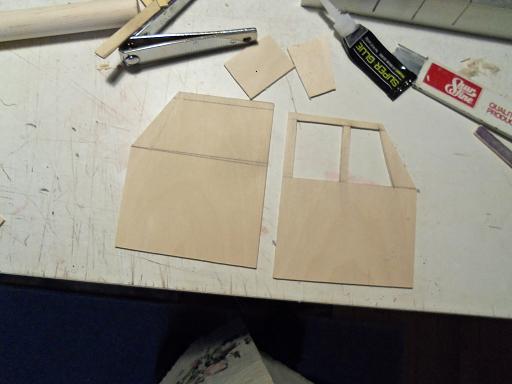
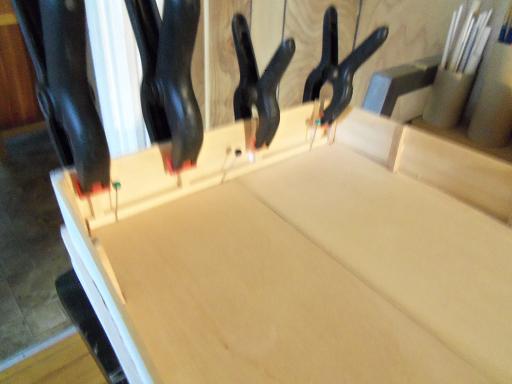
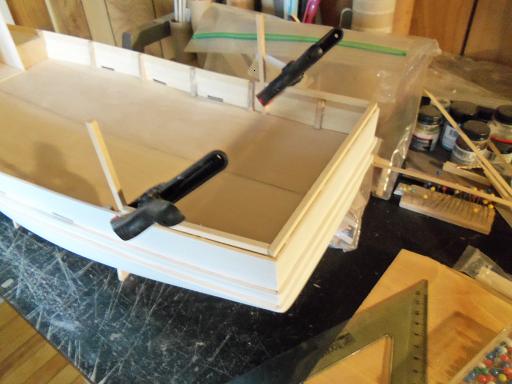
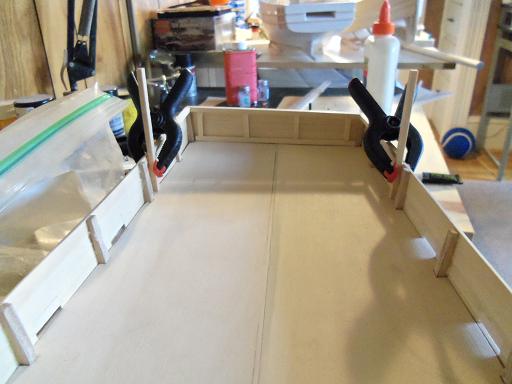
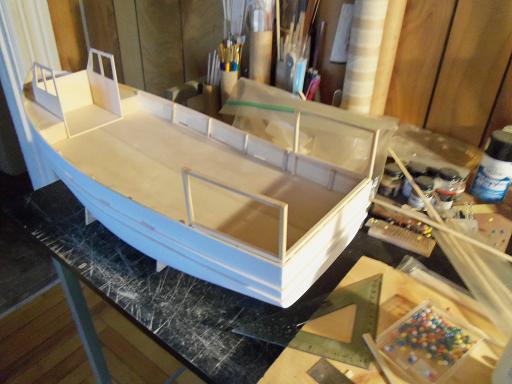
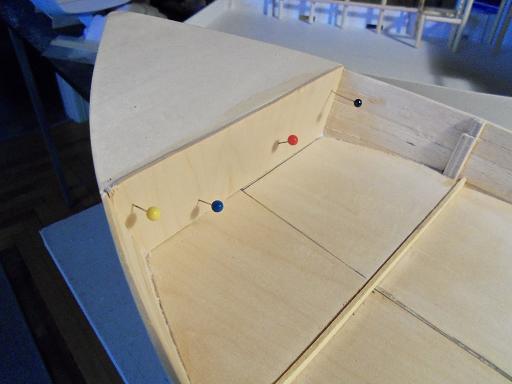
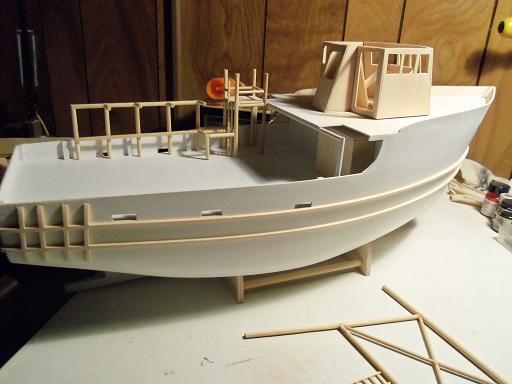
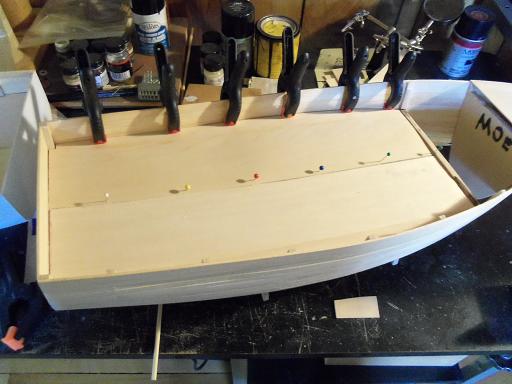
it took a couple of days to get through the last bit of progress........quite a bit of thought and "what if I" going on there when the Jingle Belle was dry and I could put it back into the stand, the progress continued. yea........painting will have to wait now.......right now, it would be too fragile to do any masking to her. the helm side wall panels were given the rest of their shape. the windows were cut out to mirror one another at the stern, the frame for the "warming house" began. supports are cemented along the transom bulwark. for all you fire officials out there......yes, there will be 'fire stops' in the walls. they will be built into the base of the wall panels, just above the bulwarks. shimming the front wall beams make them more perpendicular, than to follow the bulwarks. the difference will be hidden in the design. with the side wall windows cut out, they were cemented in place. a front panel was also added, and the comical name was also removed. I'm kinda liking how those capping rails compliment how this is looking.......I hope I can keep them this way. meanwhile, back at the 'warming house', the box is taking shape. due to the shape of the stern, it won't be a square box, but it won't be off by much. the main table has been allotted for progress on the A.G. and the tree boat. this is all the space I have to work in on this table. keen to note that on such a crappy table, I decide to use a cutting board....but if you look close at the board, you'll see some strips I'm bending for the cap rails of the A.G.
-
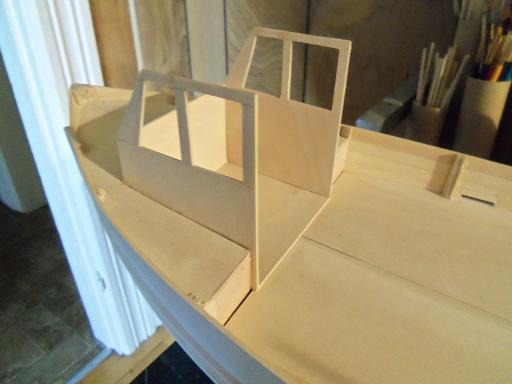
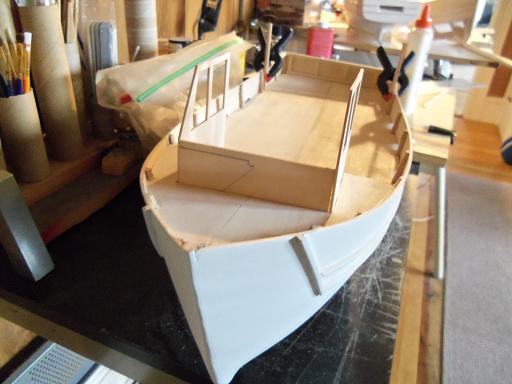
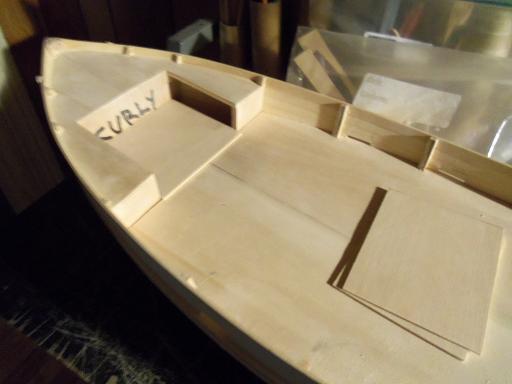
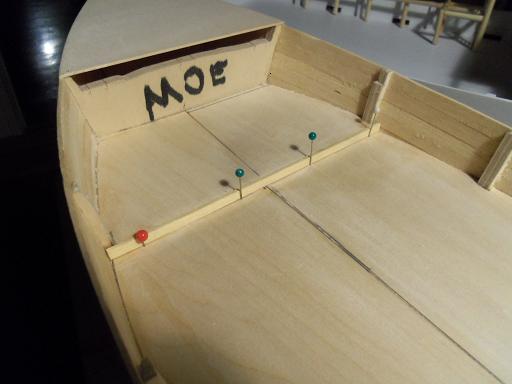
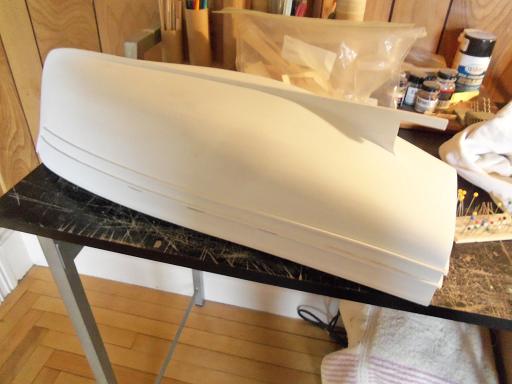
Yes John..........I know! I was hoping to have something a bit more productive.......but I was waiting for thinner, and moved most of my airbrush equipment down to the cellar {the landlord doesn't know it yet} a belated thank you to all who posted and commented...I really appreciate the interest. I'm glad that the recent change didn't make anyone think that this build was doomed, or might not go full circle. I'm sure everyone knows..........."an idea is a thought process, that when put into motion, usually moves rather swiftly." this isn't one of them it was later in the afternoon, the other day, that I got my thinner I'm still not in the position yet to do any painting..........so I said "damn the torpedoes" and went ahead with what I have in mind......it will just call for some creative masking later. I had laid a across the opening to the helm floor on the J.B. it was ripped up, and a full floor platform is going to be installed. the side wall panels have also been cut out, ready to be shaped. on the tree boat, I had mentioned molding along the step - down.........that has been installed. it's about time to close up the abomination at the bow bulkhead......time to close up that gap, and rid the graffiti that was comically put on there. an idea for the helm walls is coming to mind. this is all prep for what is to come. I spent the time on the tree boat, because the Jingle Belle is a little busy at the moment, getting a second coat of primer on the hull and rails. I later found that I didn't do as good a job in getting coverage on the top edges of the rails. no matter, I can touch them up later, when I get the deck area to that certain point that I'm looking for.
-
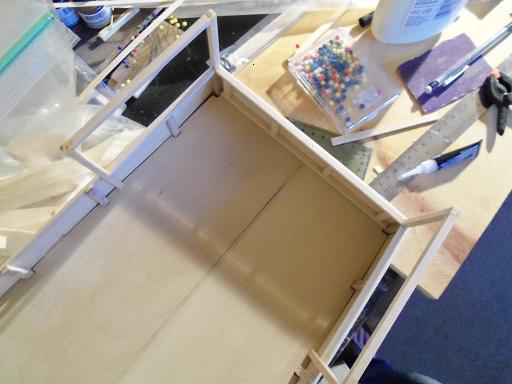
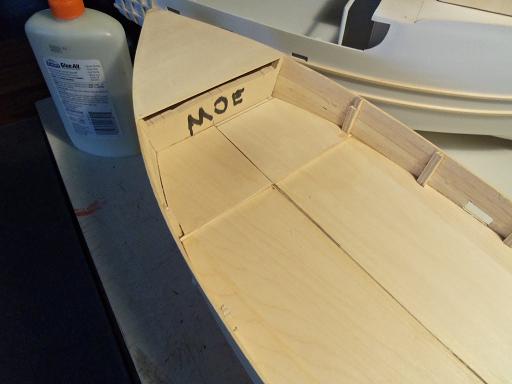
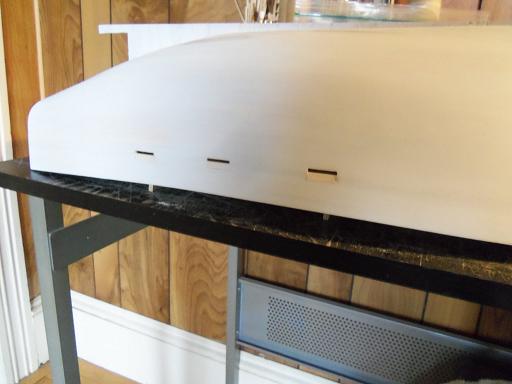
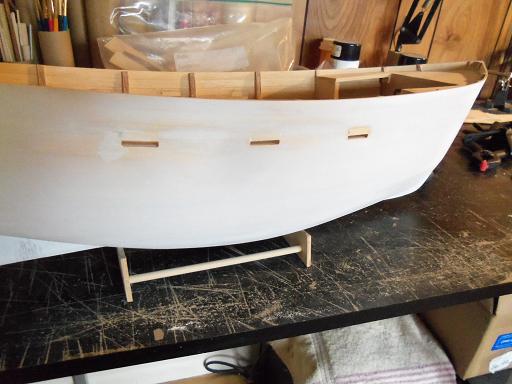
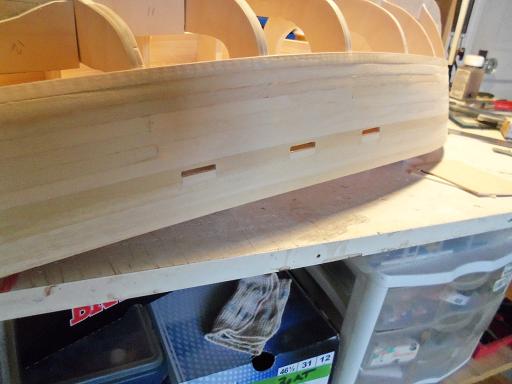
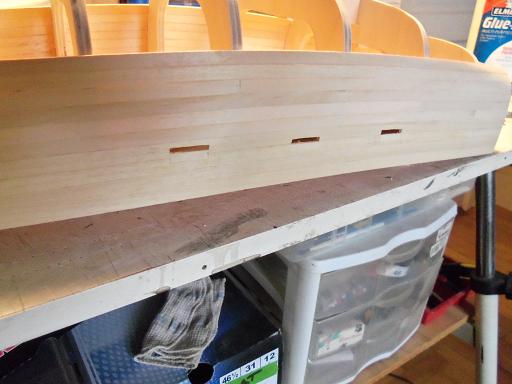
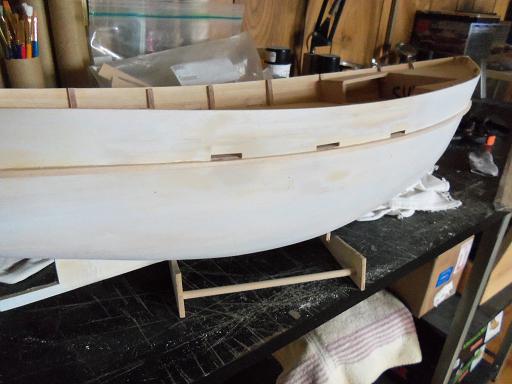
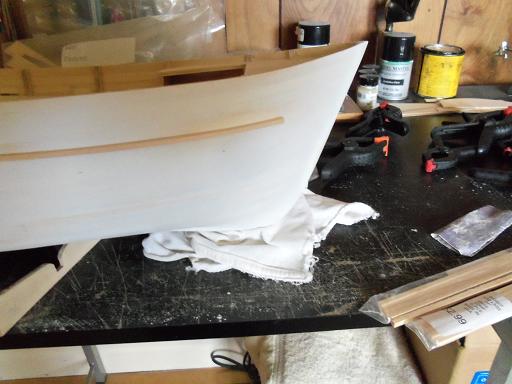
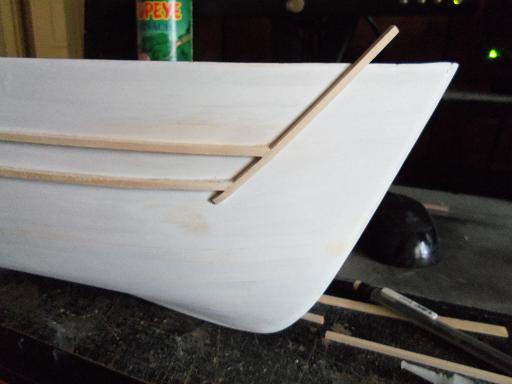
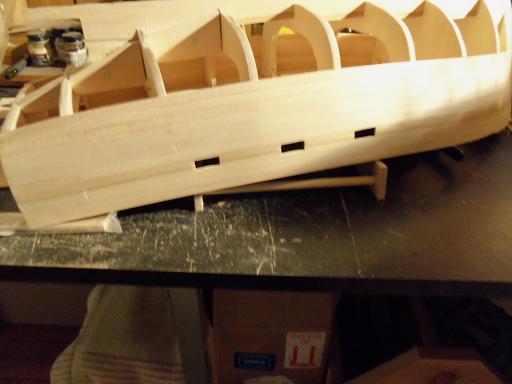
this unfinished hull is really starting to bug me.........the Jingle Belle is starting to look like a boat, while the tree boat looks like a half eaten carp! not only that......if one of the ribs isn't resting on one of the stand ends, it even flops around like one... there are aspects I'm still looking into, but it's getting to the point where I'll move on and deal with it later. to complete the deck area, the floor platform for the helm area was completed. a locator tab was cemented on rib #2, so the platform would sit level. it's now roughed in.... then......I looked at the scuppers again......and gave a big sigh. why did I make them ALL too big? at this point, it's more of a problem with the Jingle Belle, than the tree boat, since the J.B. already has had a filler treatment. we can fix this though. doing the same that I did with the Andrea Gail, small pieces of wood were fitted in, making them smaller. first was the J.B. ....and then the tree boat they were then dabbed over with white glue and sanded......the J.B. was especially interesting, because it introduced primer dust into the repair, creating a milky hue in places. with this hull, I'm also using lighter grit paper, so I'm now beginning to get a smooth hull. I was pleased with my earlier attempt with the rub rails. the Andrea Gail looks much better for it........I used 1/8 square stock for them, since they appear to be a dominant feature of the hull. here, I plan to used the 1/8 as well. I stopped further back from the bow stem, and even more so on the lower rail. I left a 1/2 inch gap between the two ...and left the same spacing along the side I put this to cap off the rails at the bow. what I do for the bulwark cap rails will decide how these will terminate.......whether they will butt to the rail, or shorted them and round them off. I would have had a picture of the port side, but I found that I didn't have the correct angle, and I needed to correct it. I'm going to add additional vertical rails, but I want to see what I do with the bulwark rails before I install them. I plan to do something a little different with the tree boat, to give them their own character.


-
that's where I am John........if I'm not at the table for any length of time, the admiral starts asking questions. I'm looking forward to the day, when she would have to pry me away from it again it used to bug the heck out of her.......but I guess I'm seeing the other end of the spectrum. I don't know about that Ed........I think doing something like that would put me too far over the edge. best to leave my thoughts.......'scaled down'
-
you won't have too long a wait John.......I do have a bit of progress to report......hold on bud........ OK......where was I? oh, yes........everythings in the camera at the moment....gotta get'em out. as for the star thing, to be honest, I really don't pay attention........I look at quite a few builds here it's not about rank.......it's about all the wonderful eye candy I see........yours is no exception I'll look forward in seeing your progress as well
-
very nice!.............I like the stand look forward in seeing more!
-
such beautiful work Gil...........glad to see you back!
-
you would have to take into account for the framing........that might take up some thickness.
- 2,191 replies
-
- 1
-

-
- confederacy
- Model Shipways
- (and 1 more)
-
in the world of scratch, one thing is for certain.........anything can happen you have a remedy for it, that's what matters
-
Cutty Sark by Keith B
popeye the sailor replied to Keith B's topic in - Build logs for subjects built 1851 - 1900
nice looking build Keith.......good method for coppering as well! -
it's good to see you back at the table very nice work indeed!
- 2,191 replies
-
- 1
-
-
- confederacy
- Model Shipways
- (and 1 more)
-
I'm glad as well to see the third member of the 'Cutty Crew' back at it she looks great. hope to see more progress soon!
-
glad to hear your doing better
-
wonderful progress Sjors...filling out nicely with full sail such a beautiful ship!
- 1,873 replies
-
- 1
-
-
- occre
- san ildefonso
- (and 1 more)
-
looking very nice Piet...........I've not used the plug method either. makes it harder to do, but it works
-
wonderful progress Mark........it can't be easy plotting all the ports and you think I'm the creative one....super job on the hull framing!
-
Cutty Sark by NenadM
popeye the sailor replied to NenadM's topic in - Build logs for subjects built 1851 - 1900
she looks great Nenad...........no mistakes that I can see you've done a great job! -
thanks Dragzz........appreciate the good word! thanks Carl........the rack is for buoys......they have long poles. there is still more to do to it. I also need to get some larger dowel, so I can make 55 gal drums....quite a few of them. the big thing now is the hull paint......I need to drill some holes for portholes. cap rails too! still more to do........thank to all who hit the like button
- 956 replies
-
- 1
-
-
- andrea gail
- trawler
- (and 1 more)
-
nice start on the dingy as kit builds go, these are considered mini builds. gonna look great when you get it all together.
-
sadly John.......they won't be ready till next year. the admiral was sad when I told her.....but she's seen them on the table, and that has perked her up a little. We've been out on a couple scavenger hunts.......gotten a few ideas. the way I'm looking at it......the more I do now.....the less I'll have to do later. the hulls come first glad you liked the video Frank.........the Christmas tree boat they are using now is a Coast Guard ship......kind of like a freighter. if you look it up, you will find it. any hull configuration could be used, but I chose this one for it's wide deck. they are not much right now, but like the M&M boat, once the hull is done, the rest will be fun to watch {at least, I hope so} I won't let it go that long Sjors........although it's a bit over five years away I wanted to show more progress.......perhaps this week
-
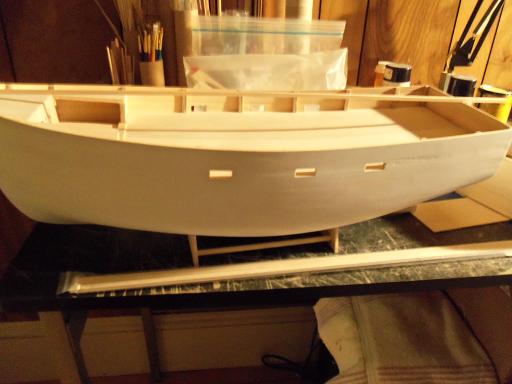
I was messing around on the table this evening......I thought I'd give you a peak at the dry fit of what the build is so far. one more work day to go......then I'm back at the table
- 956 replies
-
- 16
-
-
- andrea gail
- trawler
- (and 1 more)
-
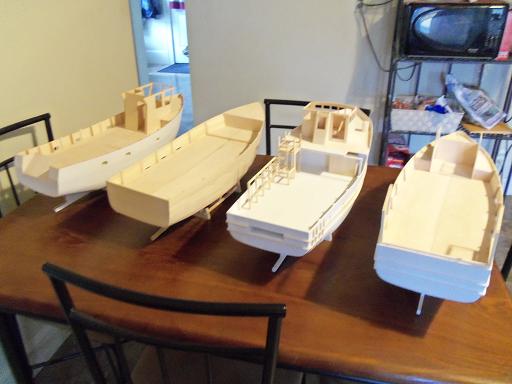
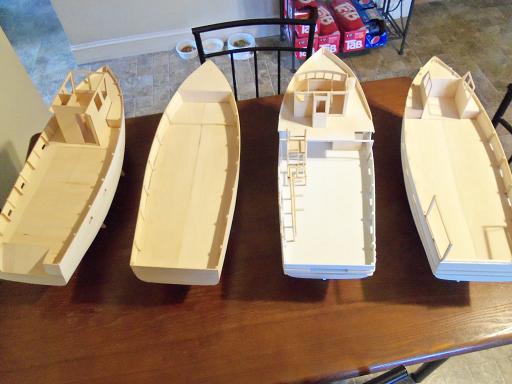
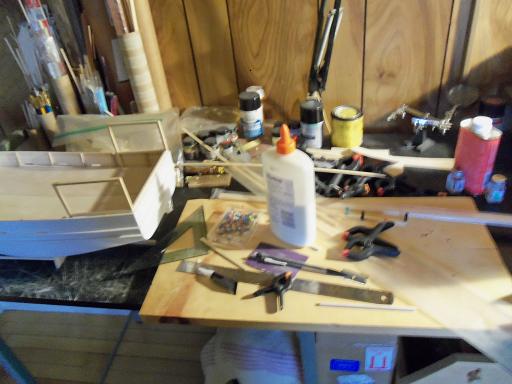
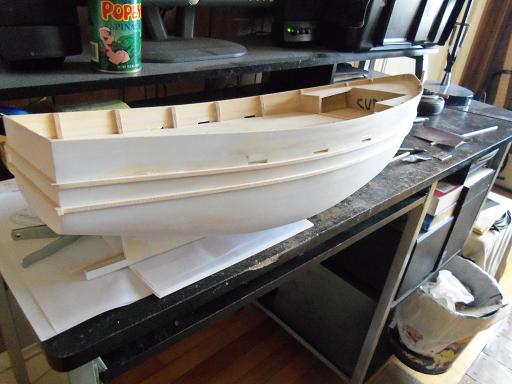
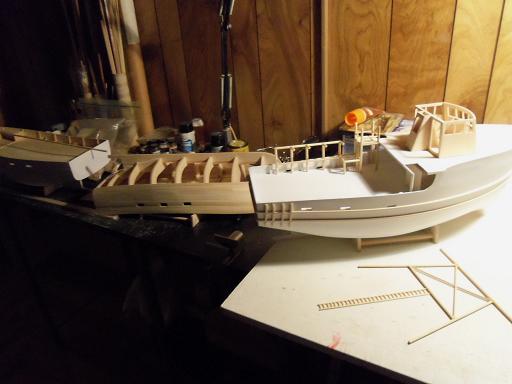
awww.....shucks guys.......... I don't know what to say.........except a big thank you, and to those who hit the like button as well. I hope that what I show will give ideas for those who aren't {like me} familiar with CAD.......and with the use of parts panels from other kits, can create hulls for compatible ship builds. to tell you how I do it.......I'd need Rod Sterling's help I thought I posted this picture of the tree boat.......the other half of the deck platform is in place. this was done over a week ago. I also managed a couple of pictures of the scuppers. since the waterline will be low, I really don't need them this big......I'm going to size them down. here is the Christmas tree boat ....and the Jingle Belle all three of the hulls are on the tables at the moment......there was an amazing amount of clutter...I almost haven't the room to work. it's too bad Mark.........I had cleaned the main table on Friday....I wish I could have gotten you a complete picture of the conditions here at the Wharf. it's a wonder the admiral hasn't gone through the roof yet......I had wood chips all over the floor around my tables. we are in a good world.........a place where builders from all levels, come together to enjoy, inspire, and learn. yes........though it seem like I've gone off the deep end with the builds......I accept it. in my wildest dreams did I think, that a medium that I once thought was so daunting, would turn out to be so enjoyable and creative. all it took, was a fellow named Harold, to show me just how fun this medium could be Kudos to you all for showing me more
-
is that a split deck? I'm looking at it wondering how you got it in there she looks good.......REALLY big lady!
-
well........I would have had some progress to report here........the afternoon was kinda broken up...a little here....a little there. I cut the scuppers for both boats, but I made them large. to be honest.......I don't like them. so I will size them down a bit and perhaps do the rub rails for the Jingle Belle.....then I can finish up on the hull and get her ready for paint. it's just too bad the Tree boat wasn't at the same step. perhaps I should lean more to the right