


popeye the sailor
-
Posts
16,007 -
Joined
-
Last visited
Content Type
Profiles
Forums
Gallery
Events
Everything posted by popeye the sailor
-
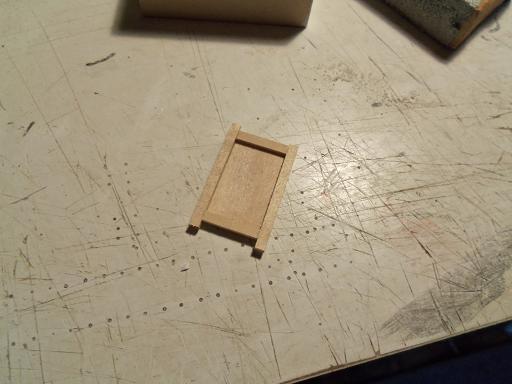
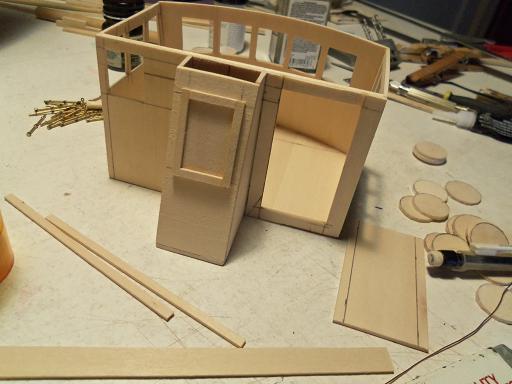
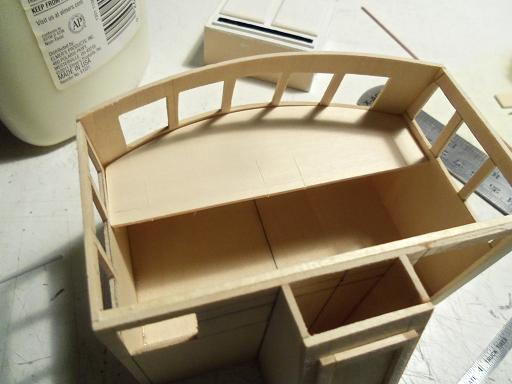
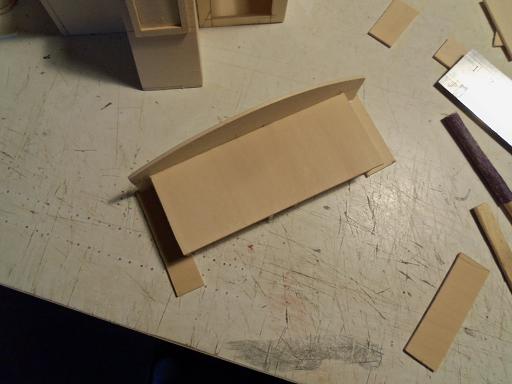
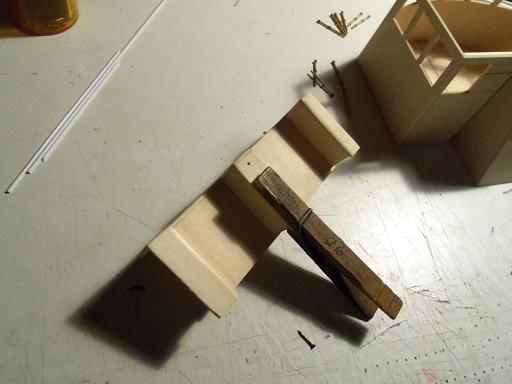
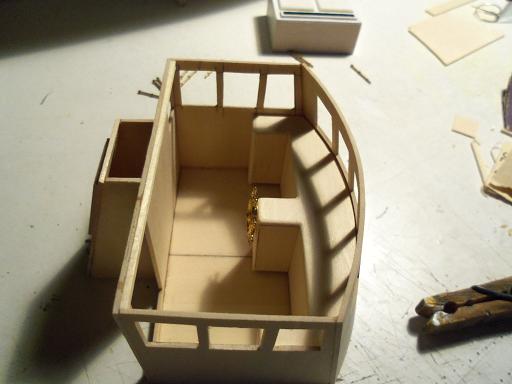
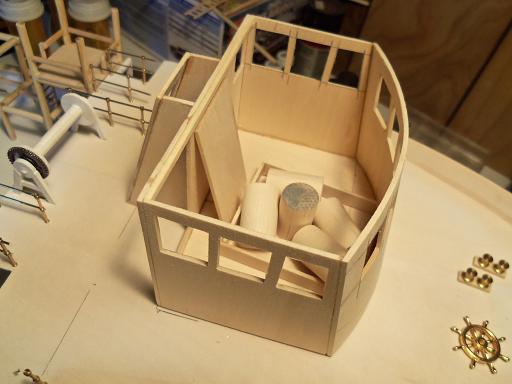
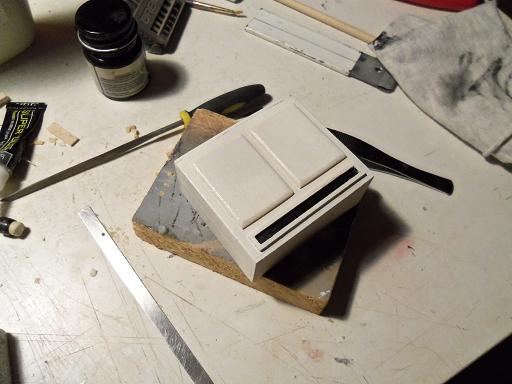
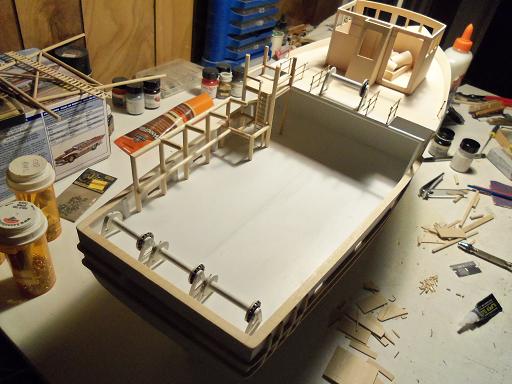
 these are just a few of the drums........the book idea didn't do as well as I hoped. it was abandoned and the vise became the method used. those that weren't too bad, I just cemented the tops and bottoms on and left it at that. I'll make a few extra at any rate the blank was framed in and later trimmed. it was fitted in place to check how it will look. now that the junk has been removed from the pilot house, I can do a bit of work in there. the Billings plans shows a top and front......not much else. I don't have any pictures that show the interior either....bummer! I've already resigned myself, that the small windows are not going to allow much to be seen. I could simply blank out the windows, but that's not me. ....no reason to short change the build on such a small technicality so it begins with this top blank.........yea.......looks kinda big, but I think we can make good use of the space. cut out a little here........put on a backing there.......... .......do a little sanding to shape and round the edges............add extra material for where the ship's wheel goes.......drill a hole....... .......and it turns into a dandy of a dash
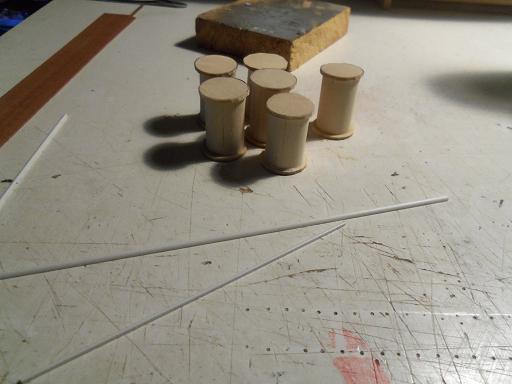

- 956 replies
-
- 9
-

-
- andrea gail
- trawler
- (and 1 more)
-
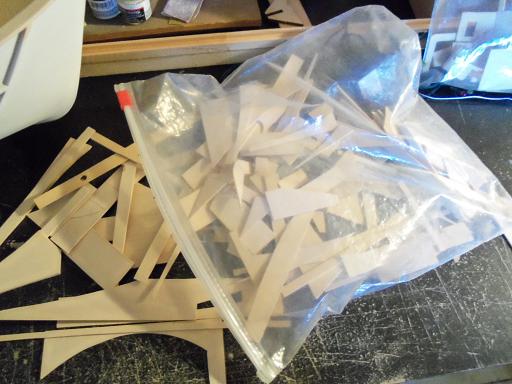
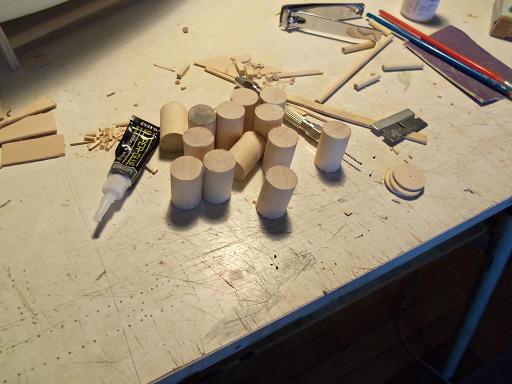
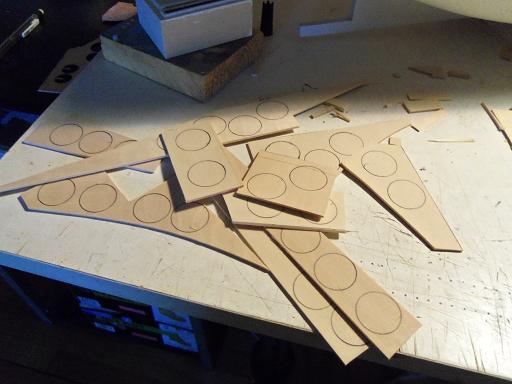
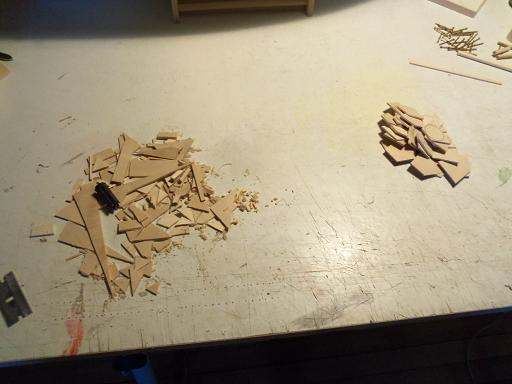
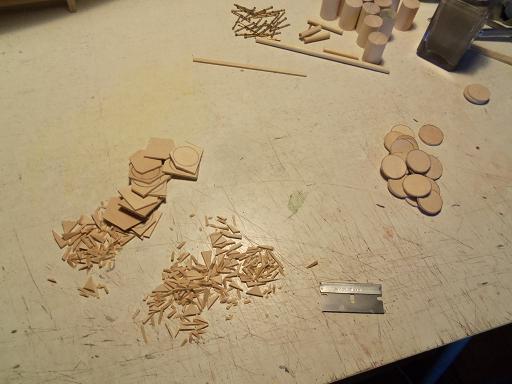
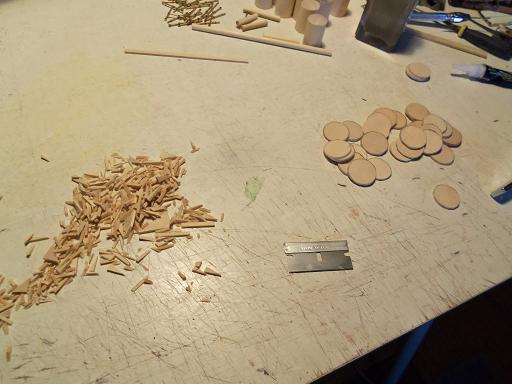
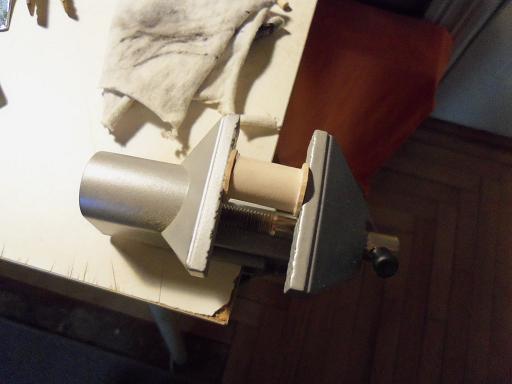
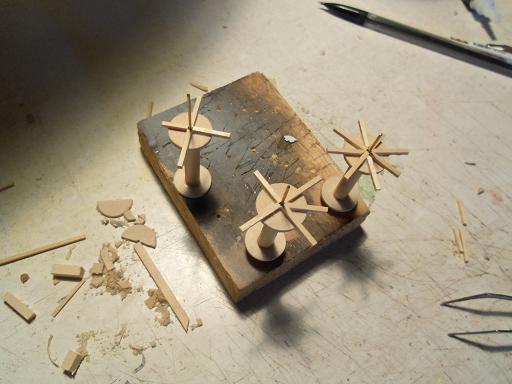
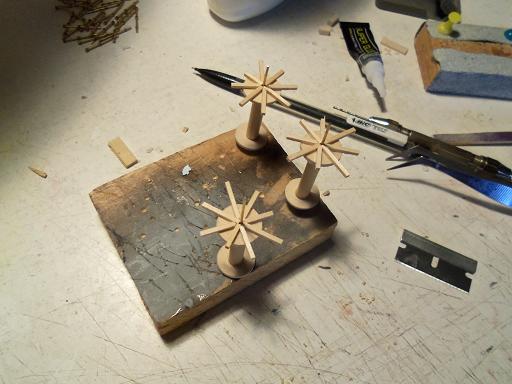
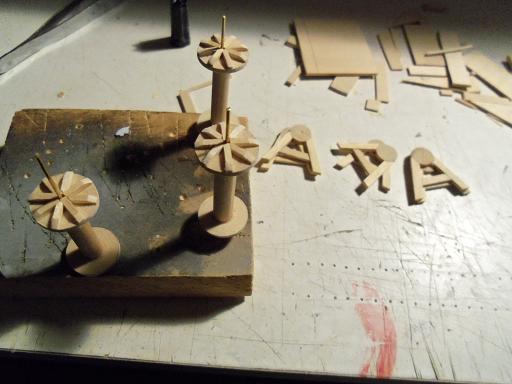
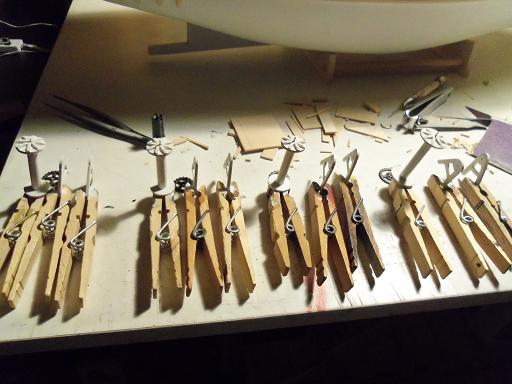
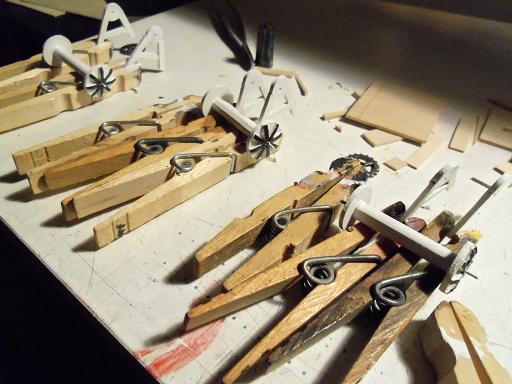
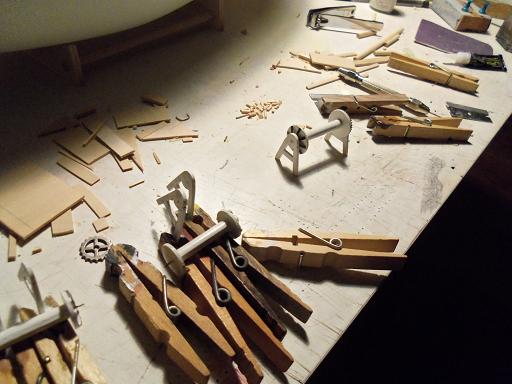
I was going to do the second coat on the ice maker........but I saw a couple of spots I missed with the flat black.....so I touched them up. I'll add the louvers and then I can do the second coat while I was thinking about this.......I remembered about the louvered blank that will fit in the hole of the pilot house. darn thing........now where is it....... so......this is where the guys have been stowing all the junk! they gotta get this crap out of here......we gotta work in here soon! watching them haul all that crap out, I didn't see the blank. they didn't know where it was either, but there was a hint, that it may have been thrown in 'the pile'. NO.........not the PILE!!! I will never find it now! I keep all the larger pieces of flat stock in this bag...if it fits, it's in here. I have a bin as well, that I keep wood in.......but it's looking so picked over, only small bits and pieces are left. there's even wood that dates all the way back to the Nordkap. with a sigh, I just took a suitable piece and cut it to size. there was more cutting done with the 5/8 dowel too........I need at least 13 fuel drums. I don't have a way to cut them square, so some of them are a bit off. when I cement on the top and bottoms, I'll try to do something creative to compensate. taking some of the larger pieces of cast off, more circles were traced they were trimmed to the smaller component and separated. they will be trimmed to shape with a razor blade. the ends of the dowel pieces were sanded to counter some of the unevenness. the first idea I had was to use the vise.......capturing them in the center to level them up the others that didn't look too bad were done in another way.......bent more towards mass production. there are four under there........I may make some extra ones in the event that I find any rejects......but I may be able to use the slants of the decks to counter the ill effect. we shall see

- 956 replies
-
- 8
-
-
- andrea gail
- trawler
- (and 1 more)
-
looking really sweet Mark! the added pictures confirm, that she's gonna look great in her new skin
-
Cutty Sark by NenadM
popeye the sailor replied to NenadM's topic in - Build logs for subjects built 1851 - 1900
Heaven forbid!!!!!!!!! I would never wish my affliction on anyone I'm an undeniable certifiable- 4,152 replies
-
- 3
-
-
- cutty sark
- tehnodidakta
- (and 1 more)
-
beautiful work on your launch Gil......so clean with some really great detail! sorry to hear about your computer woes..........wishing you and your admiral a super New year!
-
what I see of the hull planking looks pretty sweet Den.........any pictures of the overall build?
-
Cutty Sark by NenadM
popeye the sailor replied to NenadM's topic in - Build logs for subjects built 1851 - 1900
the kit can still be found.......even though it's been out of production fore some time now. I think Revell is missing the boat for not producing that series of kits. there were several in the series, all at 1:96 scale. only the Connie, is the only one produced at this time.- 4,152 replies
-
- 2
-
-
- cutty sark
- tehnodidakta
- (and 1 more)
-
you've done a super job with this build. the size alone boggles my mind! your talent is amazing.......waiting to see what's next in 2015! congrats!
- 120 replies
-
- 1
-
-
- mystic
- motor yacht
- (and 2 more)
-
I have to apologize Omega.........I lost sight of her actually I'm surprised that I didn't make a single comment.....that would have put this little gem in my watch list. I had to look through the entire build all over again....just as enjoyable the second time around {think I lost track on the twelfth page} she turned out super........your imagination and skill shined throughout the build.......such a great looking build! congrats my friend........you've done a superb job!
-
they'll look better with paint Russ........nice! the bolts give a detail you don't usually see. looking good!
-
hello Aldo! good to see you.........guess I didn't catch the news that you had been ill.........I hope your feeling much better. oh yes....same old me........just a bit more crazier with build like this......all this early stuff is text book.....nothing much is going on. when I start to fit these two out........that's when the joint 'L start hopping. I hope your well enough to stay for a while......perhaps continue on one of your builds......I miss seeing your work may the New Year bring better days and good health to you!
- 956 replies
-
- 2
-
-
- andrea gail
- trawler
- (and 1 more)
-
Cutty Sark by NenadM
popeye the sailor replied to NenadM's topic in - Build logs for subjects built 1851 - 1900
glad to hear you got to spend the Holiday with your whole family.........kids can make you shake your head at times, but they are always at an arms embrace I have in my hallway......the second Revell Cutty I've built. she waits for me.......a survivor of a move across the city, for me to repair her rigging and add the rest of it. like the first one I did, I will add the studding sails, and make her just as grand as the first one. I plan to do the same with the United States.........they add so much more 'body' to the ship. the weight of plastic sails is really no different that cloth ones {plastic kit as opposed to a wood build}. I think wood is a bit more sturdy that plastic though.......I think the yards will hold up better. as long as the rigging is kept as close to 'zero' as possible, you should have little trouble. 35 sails Nenad..........think of the fun you will have!- 4,152 replies
-
- 3
-
-
- cutty sark
- tehnodidakta
- (and 1 more)
-
there's no question about that.......I can agree how manufacturers can be so generic with their supplied parts. my experience with Billing kits has shown this many times with the degree of detail that you've put into your vasa, I can see why you chose to scratch these parts you've truly captured the original!
-
sounds like a great place to berth her! does she have any ties to the history of the fort? can the public visit and see her? I hope so! congrats to you Mobbsie and your beautiful ship! I hope the New year brings you much more!
- 1,279 replies
-
- 2
-
-
- agamemnon
- caldercraft
- (and 1 more)
-
I'm working from the Billing's instructions for the vessel Bob. combining the BB608 and BB526 plans for her, I can get details that either one fails to add. the only crappy thing about the instructions, is that they have no clear direction concerning the rigging. I have some pictures of her {and the vessel they used for the movie}, but even they are pretty vague. I'm still looking around though......I still have time before I get to that point. when she's painted and the trawl rig is in place, it will make sense..........I promise no.....no......no heavy alcohol for me Carl. I'm crazy enough as it is although, for Christmas Eve, we spend a quiet evening at home, playing a board game called "Christmas Monopoly".....my son found it a couple of years ago. I made my 'Taco scoops' {medium heat}, so I knocked back a few beers......snacking, and played the game 'ad nauseam'.......and then we watched a sappy Christmas movie. there's no paint on the hull yet....just primer, I'm afraid. I painted the reels with a brush. thanks John and Piet........Carl got me thinking of those scoops........so I made up a small batch for myself. I skipped the meat filler and used mild salsa.......so bland! {gotta get to the store tomorrow!}
- 956 replies
-
- 2
-
-
- andrea gail
- trawler
- (and 1 more)
-
R.O.F.L.!!!! the admiral is shaking her head!
-
thanks Augie ............thanks Sjors
-
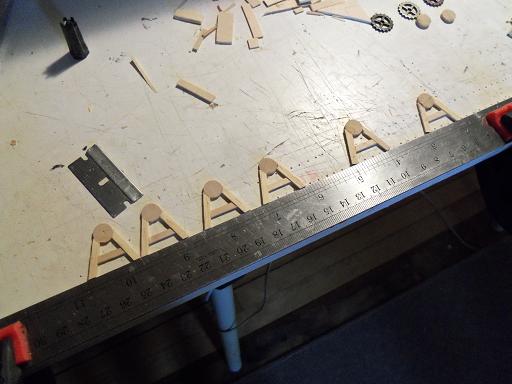
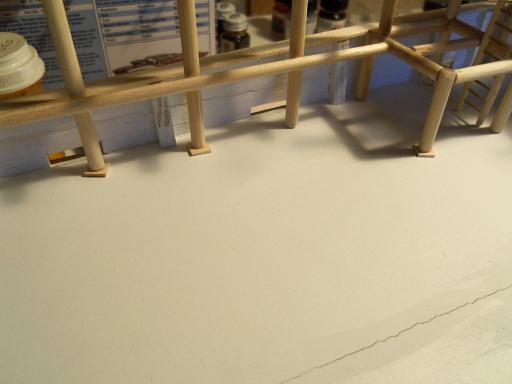
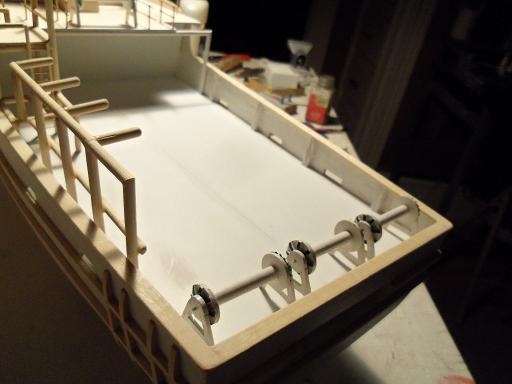
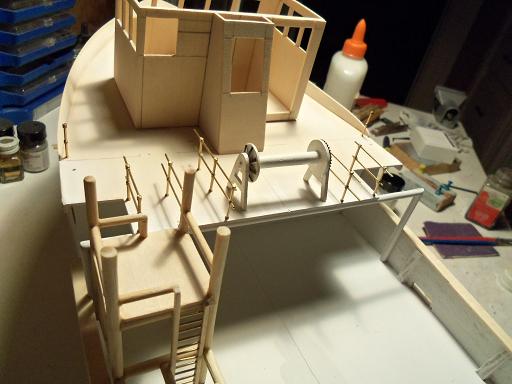
thank you Lawrence....I guess one of the reasons why I chose this boat, is the fact that the detail is mostly outside where it can be seen....and of course, the similarity of the hulls. if I were ever asked, I would suggest the A.G. kit #BB608........I think it would make for a great build. the instructions aren't too bad, even though they are somewhat vague. I did make a bit more progress on the stern reels. it does kind of bum me out a bit.....everything on deck is white. I will try and accent here and there to break up the monotony one side of the reel spools was done the same as the fore deck spool......splined all around. I needed to make one more pair of uprights, and then the cross supports while these were drying, bits of wood were added to some of the shorter legs of the rack / podium, so they will touch the deck. with everything trimmed, cut and sanded to shape, all the reel parts were brought together for paint. while I had the paint out, the ice maker got a coat. flat black was painted into the grate opening as a backing color for the louvers the gear will be on one side.....I accented the other. they were too flimsy to show as a dry fit.......so I got them to the point of touch up to show you. I may have to adjust the height as well.
- 956 replies
-
- 9
-
-
- andrea gail
- trawler
- (and 1 more)
-
Sjors.......your making me wish I had gotten an Aggie for Christmas! but, I probably wouldn't have the gusto to do as you have!
- 1,616 replies
-
- 2
-
-
- caldercraft
- agamemnon
- (and 1 more)
-
....and this coming from a guy that flies what he builds you've opened the door here and there......you just haven't realized it yet ......just wait till you forget to close it...........Imagine!
- 2,191 replies
-
- 3
-
-
- confederacy
- Model Shipways
- (and 1 more)
-
you have been busy J.........really super! in postings throughout the site, I've made reference to what I've learned about rigging. there are threads that are pre stretched and those that have some residual left in it. what I've found is that there is a point where the line is taught, but has little to no pull....that's I refer to as absolute zero. taking a piece of thread in your fingers...pull it tight. by slowly relaxing it, you can see when the thread begins to slacken. pulling it tight again, and slowly relaxing it, you'll get a better idea with how much tension to put on it when your rigging. rigging looks great......what your doing is working out for you quite well very nice!
-
they look really good Matti........you can see the imaginative thought you put into them. the stocks look like they were hewn, as I'm sure they were shaved to shape back in those days. being of plastic, were they both the same size? very well done I hope your doing better my friend!
-
very nice progress Frank! love the way you finished out the cabin structure! weathering is surely your artistic talent.......you do it quite well like that picture of the planks on the deck........if it were stacked, I'd swear you had helpers super job all the way around Frank!
-
you must be smiling from ear to ear......your filling out the gun deck! I see your spending your snow days quite well......the stove really looks great! .......and you give ME kudos for furnishings ........Capstan looks sweet as well. super job Augie!
- 2,191 replies
-
- 2
-
-
- confederacy
- Model Shipways
- (and 1 more)
-
never a dull moment Omega......I'm waiting for repercussions the admiral got me the Lindberg Jolly Rogers a while ago.......a few weeks ago, she was quizzing me about why I haven't started it yet. I'll expect to hear something pretty quick with the Titanic there are a lot of you tube vids on her history and some neat vids about her resting place......I've already watched quite a few of them. I'll hold off as long as I can......I'm trying to be logical about this Happy Modeling into 2015 everyone!
- 956 replies
-
- 1
-
-
- andrea gail
- trawler
- (and 1 more)