popeye the sailor
-
Posts
16,007 -
Joined
-
Last visited
Content Type
Profiles
Forums
Gallery
Events
Everything posted by popeye the sailor
-
 yup.........uh-huh.....you should have taped it ;}.......oh....and I like the color too
- 170 replies
-
- 1
-

-
- thames barge
- billing boats
- (and 1 more)
-
that's what you get for keeping one eye on the Aggie box :D
- 1,873 replies
-
- 1
-
-
- occre
- san ildefonso
- (and 1 more)
-
thanks Mark
-
that's quite a ship Andy........I notice your using Tenex........careful with that stuff. I read the cautions on the side of the bottle, and I quickly put it back on the shelf. resin dust has nothing on that stuff. great job on the wheel house roof.....you handle styrene like you've done it before! can't wait to see how you detail the inside
- 382 replies
-
- 1
-
-
- stadacona
- sylvan scale models
- (and 1 more)
-
I know Gill......two different ships.....but the basic is the same principle. you've done some awesome rigging there......
-
thanks John....I still need to stain them......then I can get'em in place and move on
-
ohhhhhhhh........what your dooooiiiiinnnnngggg. I thought I could hear a thud behind me.......off in the darkness the base looks good.......are you going to be standing the bricks on their sides now? what are you going to use to simulate the mortar?
- 2,250 replies
-
- 2
-
-
- model shipways
- Charles W Morgan
- (and 1 more)
-
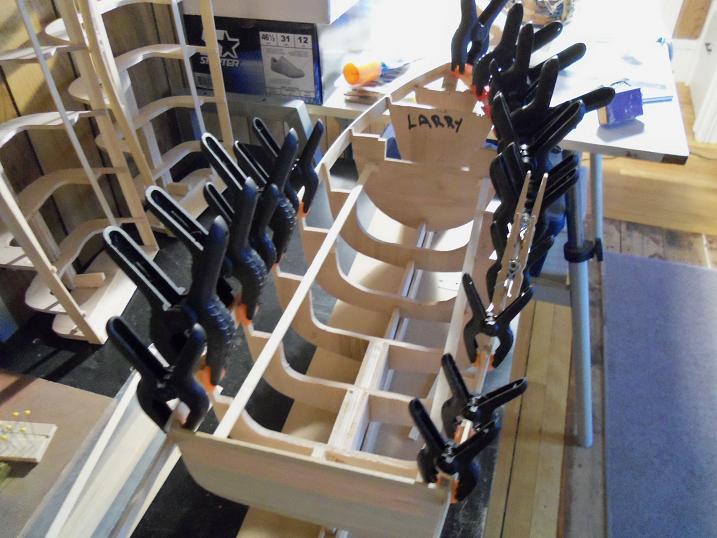
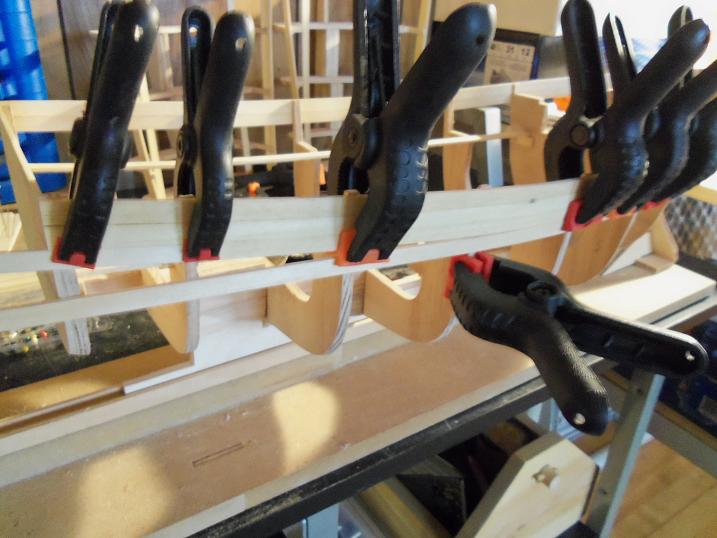
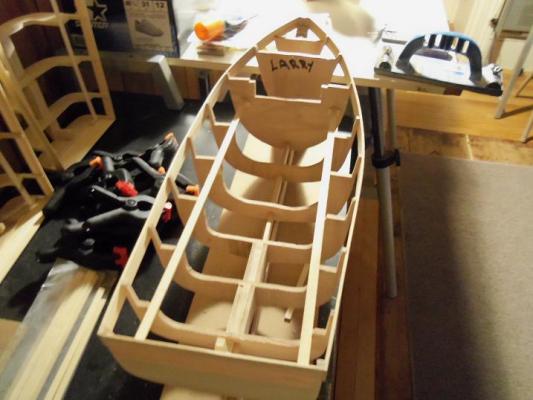
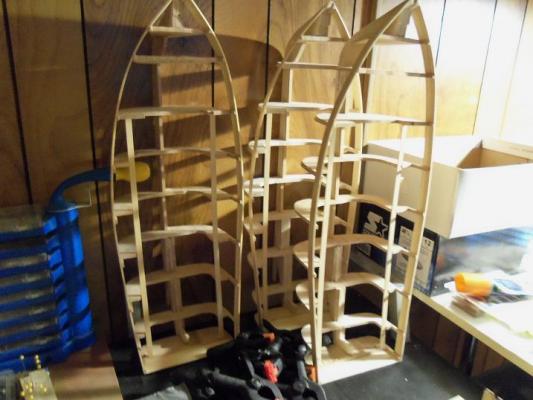
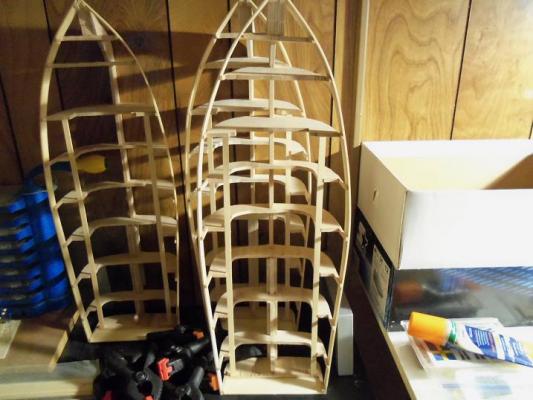
I went ahead and finished the second row of planking on the frame dubbed Larry. where to broken post is, the second plank sits on the rib, so I just clamped it to the first row in that area......it follows the shape just fine......I'll fix it later. these aren't all the pictures.......just enough so you can see how this looks. now they all are at the same point of progress......except that I sanded down the plank nubs at Larry's stern....the others I haven't touched yet. since I had this frame on the slip, I went a bit further and did the third and fourth row of planking on the starboard side. you can't see it, but there is a butt joint in the third row


-
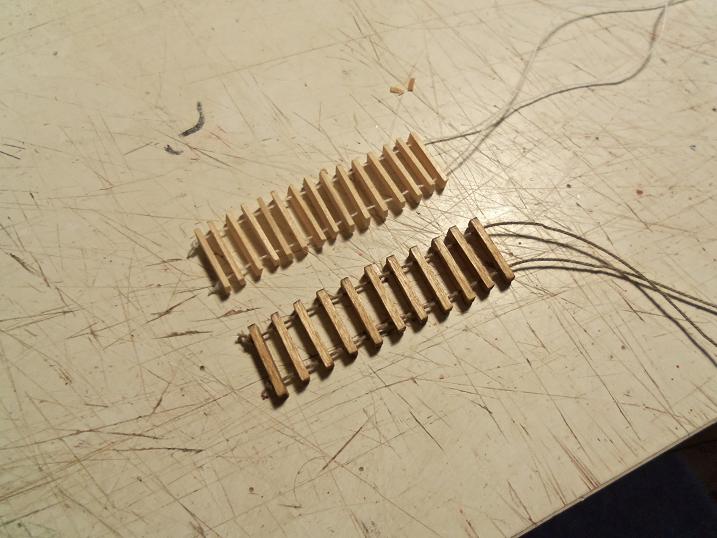
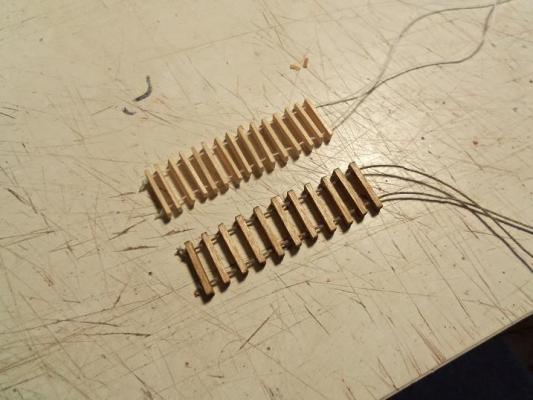
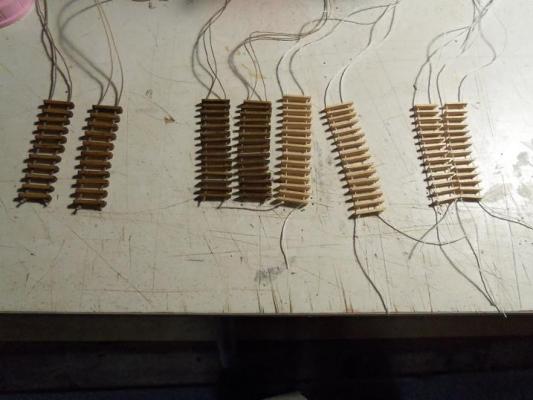
I arrived at a higher plateau with the ladder dilemma. I finally think I have them in correct proportion. I made the first ones.....the rungs were too thick, so I made another pair. there was another aspect that I didn't see till later.....they were also too wide. they spanned the whole gap of the gun port lids. I needed to narrow them down. so I made a third pair.....but they came out pretty much the same way. I didn't do them the same way either, changing the rung count.....adding, when I should have been subtracting. the fourth set is the charm....they are narrower and the rung count has been reduced to 14 now I can clean them up and stain them, so I can continue with what I was doing
-
I very well could ..........I'll keep it in mind Bob
-
I have 10mm brads that I use.....sometimes I don't even bother cutting them if they won't be seen. they work just fine. for a long styled handle, I just bend brass rod.......sometimes with a curvature, and cut off to scale.
-
kind of a duck egg blue...........looks very nice!
- 170 replies
-
- 1
-
-
- thames barge
- billing boats
- (and 1 more)
-
super anchor! now the fun topside.........just getting better and better!
-
yepper........I have plenty of wood scrap.......I throw nothing away. even the parts panels have a use........either I trace the parts for another build from them, or I save them in the event I need some 'like wood' from them. I'm going to try once more....these, the third set, are still a bit too wide.......looks like they would interfere with the gun port lids. I was sure I got the right measurements. I'm going to have a good supply of ladders for future builds......GOOD GRIEF!
-
thanks John........that brick is going to be tough to mimic. look in model train layout supplies to see if they have anything like this....either a paper or wood texture. look forward seeing this develop
- 2,250 replies
-
- 1
-
-
- model shipways
- Charles W Morgan
- (and 1 more)
-
ohhhhh......right! the 'hell hath no fury' thing. :D mine has the 'Hairy Eye' .....similar to Medusa's stare......but it melts you instead of turns you to stone. her mother had it......and she trained the admiral well. I will wait to see dome update photos...love to see them..........I have to get on the ball here and make the correct ladders for the Goth.....I'm on my third set. enough to drive a guy bonkers!
- 555 replies
-
- 1
-
-
- sovereign of the seas
- mantua
- (and 1 more)
-
good to see you back to rigging the Vic Gil........beautiful work! I notice the rigging for the bow's 'whisker boom'...I have added it into my Gothenborg build....still not quite sure where it originates and terminates. I will have to look back in your log to see.....it is similar between the two. though they are different scales.....if it's added in, it should be done right thanks for all the rigging techniques I've come away with
-
railings look good .........nice to hear you have a replacement mast. keep going Bud!
-
wonderful progress John........interested to see what the tryworks is all about
-
Bismarck by NBP - 1:100
popeye the sailor replied to NBP's topic in - Build logs for subjects built 1901 - Present Day
very nice work..........the hull looks great! -
thanks Bob........at the moment, I have a 50 year old babbling child annoying the heck out of me. I had better get the lights in the tree before she drives me up a wall :D still at work on the ladders.........I made some new ones, but they look too wide.....made another one....and it still looks too wide.........I'm ready to call a ladder co. and tell THEM what I want....I can just hear the laughter now!
-
awesome work Andy..........the pilot house came out very nice!
- 382 replies
-
- 1
-
-
- stadacona
- sylvan scale models
- (and 1 more)
-
super job on the anchor Piet.........looks very good! you will need to be careful around the housing though....paint chipping is going to be a problem. looks real good though......shows a lot of thought went into it .......for sure!
-
I think there was "Holiday in Vermont" and "Holiday in Connecticut "..........."Holiday Harbor"......Hmmmmmmm, sounds like a good movie for John Wayne, but there's no 15 mm guns and no horses......so he would be standing there, bowlegged in the snow :D I would like to see multi colored lights Mark.......I haven't gone scavenger hunting yet. I still need to come up with a wiring diagram for them, probably two of them will be lit. with the flasher, I'm not sure how many lights it can handle........still not sure if it works, but I'm sure Dan wouldn't have sent it to me, if it didn't. a lot of this is still in the planning stage.......I'm one of those eccentric builders.....hardly even write anything down. the broken bow post.......{a small update}.......I cemented in the second plank and clamped it to the first one. the second one rests on the bow rib, so it's pulling the first one out to the bulwark shape. I'll cement in a piece later. thanks for the good words gentlemen.......I hope to have some sort of an update soon