popeye the sailor
-
Posts
16,007 -
Joined
-
Last visited
Content Type
Profiles
Forums
Gallery
Events
Everything posted by popeye the sailor
-
 if you still have areas to be unpainted.........if areas are to be painted, sub in some other type of wood........it won't matter, because it will be painted. then you can save the good wood for better things
 -
we'll see those lights on soon enough........looks as though your moving rather quickly to the finish. looks really sweet! you must be eating your spinach........good boy!!! :D :D
-
what a beautiful ship to enjoy a morning coffee over..........you have done so much fantastic work! everyone has their taste in how much of a kit, they don't like........your bashing of these 'undesirable' parts is to be commended......the ways in which you accomplished these tasks, will serve as a learning curve for many. I do apologize for not looking in earlier........my "builds that I've commented in" is quite large, ....and in the scratch forum as well. I see so many builds....I marvel at the talented modelers we have here......I am so happy that this very comment, will add you to that list .......can't wait to see an update. splendid work!
-
don't have enough deck planking? does it not tell you to do that? I'm sure you wouldn't be satisfied by not planking all the decks. how much scrap did you have left? sometimes it's best to include the butt joints......I know you drew them in, but by cutting the planking to scale planks, you could have better utilized your planking and stretched it further. what you might have to do now, is look up the planking in the parts listing {for the size you'll need}. you could try hobby or craft stores for it, or contact the company to see if you can get more. I hope you have some on hand
-
as I coin what someone has already said.......you don't waste any time! very nice deck work! looks wonderful.......will enjoy following along!
-
back on the shrouds........aye Sjors.........your going to have two ships done, before I even get one....nice work!
- 1,873 replies
-
- 1
-

-
- occre
- san ildefonso
- (and 1 more)
-
that would be something Popjack......since I've started a holiday themed build the ropes would be a cool idea, but I think they would 'clash' with the lights! :D your doing very well on the structures, they look great! keep going on Woody......he has the making's of a fine sailor
-
minor adjustment Dragzz........minor adjustment
-
coming together nicely Andrieke.....the stacks look great! looks like your almost at the finish line!
-
the worse thing about airbrushing, is matching the 'speed' of the stroke, with the volume that the brush puts out......your practice served you well. is that a lighter gray, along with the darker gray? looks very good you'll never be afraid of large surface areas again!
-
.......and the admiral keeps wondering why I buy extra dowels looking very good Andrieke
- 1,038 replies
-
- 1
-
-
- King of the Mississippi
- Artesania Latina
- (and 1 more)
-
fantastic work Michael
-
I almost forgot..........last evening, I got to see the movie about the Andria Gail again. I started to think of the boulogne hull.....you know, with a few modifications, this hull could be altered to look like her........just a thought {that's usually what gets me into these messes if the first place}
-
looking good Andy.......I with you on that.......making the structures are always the most fun. you did well with the shape....very nice
-
hey Bob.......just something I want to try......besides, I mentioned it to the admiral, and she loves the idea. it will make the scavenger hunt that much more interesting thanks for looking in...wish I had a big update for ya, but I'm back at work for another three days....that is, unless I take Monday off might just do it........last Sunday, the transmission crapped out on the SUV......so, until it is fixed, my son and I are sharing one car......his hours are so crazy, he's bringing me to work, and I have to find a way home. it sucks! thank you to all who've hit the like button........glad you like it
-
thanks gentlemen.......so far.......A.....O.K. {I just wish it was moving a bit faster} :D
-
gee.....that table look awfully clean nice looking serving machine too !
- 1,873 replies
-
- 2
-
-
- occre
- san ildefonso
- (and 1 more)
-
the stand looks neat Adrieke.......it will look nice when stained. was that on both sides? a fluke, perhaps?
-
I'll go get the WD 40 John.........I thought it was mice! :D no.....not eight boxes Sjors........only four {for now} thanks for the good word
-
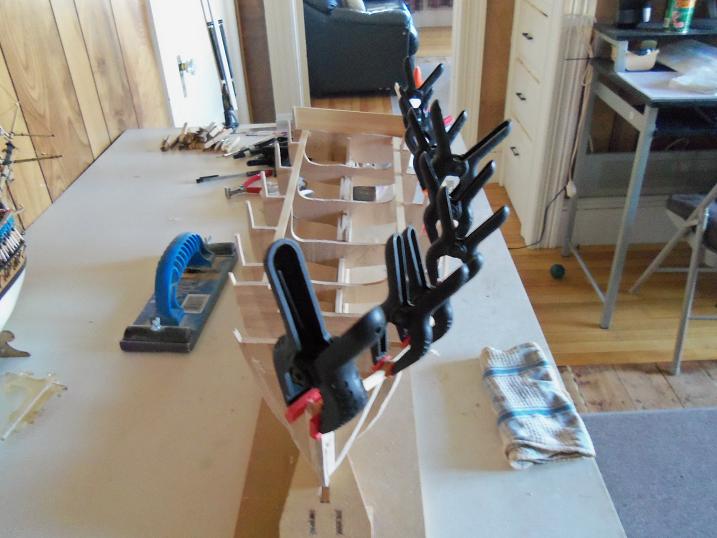
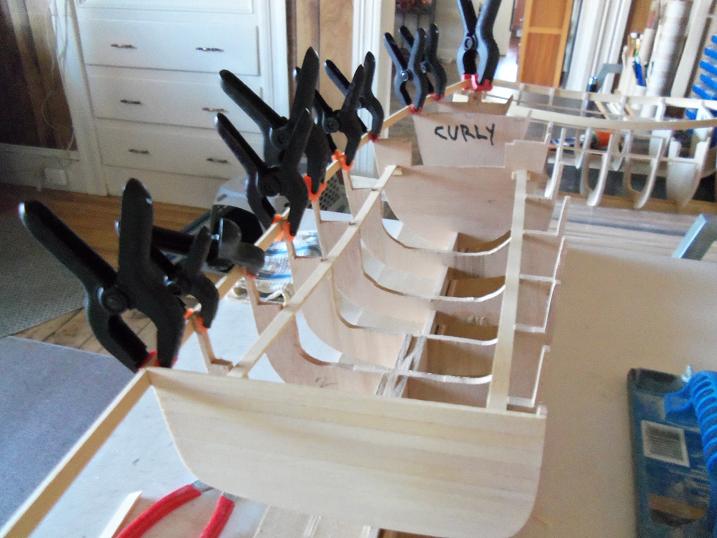
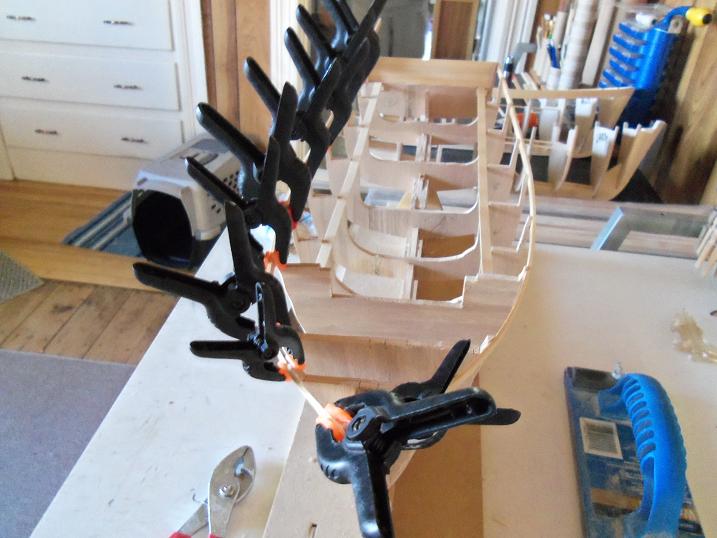
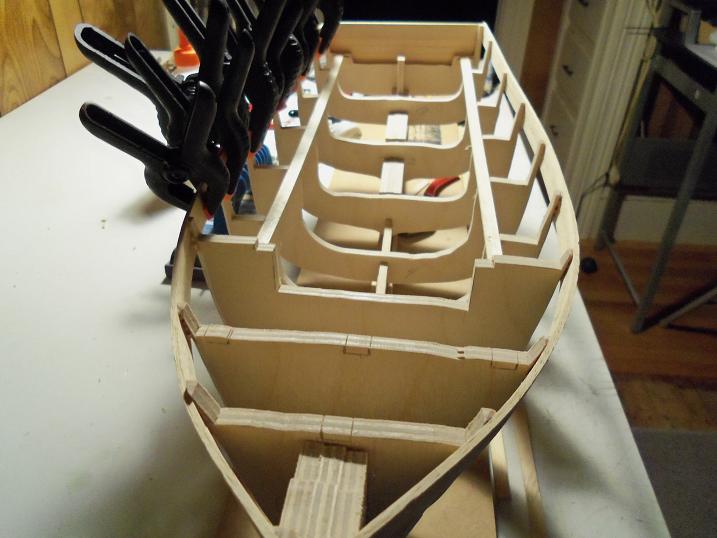
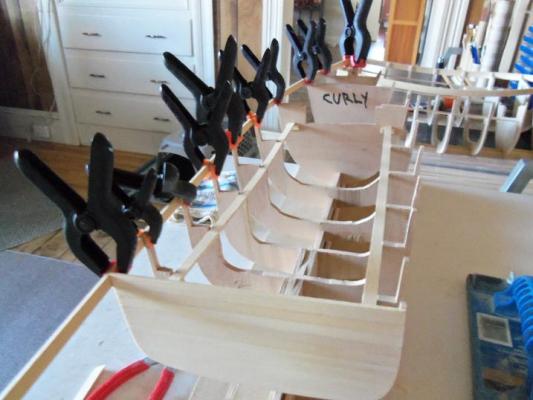
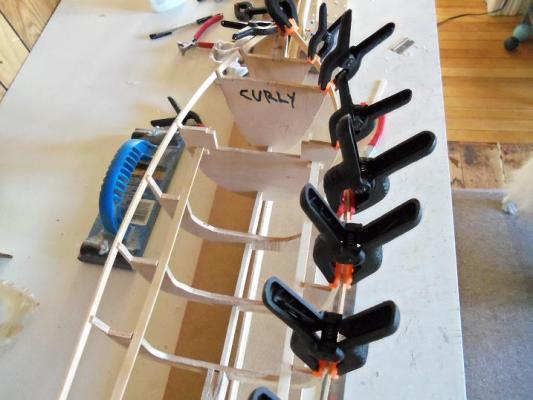
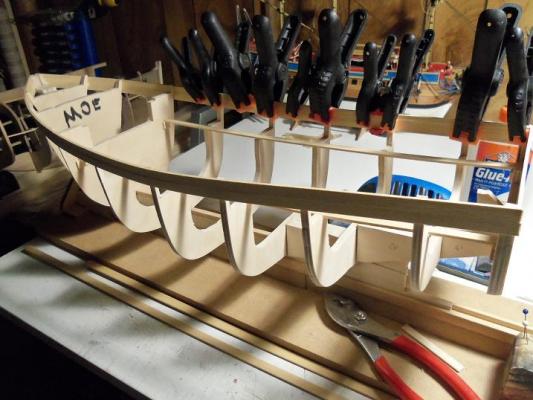
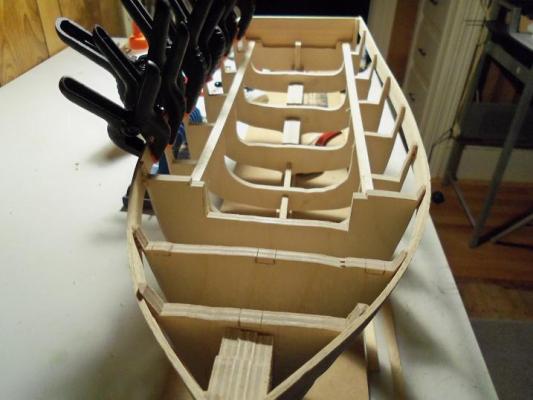
I also got a bit of a start on the hull frame that I dubbed Curly. it's not much, but things are moving along. these are full length planking strips, primarily to stabilize the entire frame. I wanted to do all of the bulwarks with this 1.8 x 8 x 720mm planking.......I took a count......I figure four per side. that equates to 24 strips......I won't have enough. so one per side will have to be done with the 1.8 x 8 x 550mm strips that I have on hand. as long as I have a full strip along the scupper line, It'll be alright. the reason why I'm concerned with this, is because I don't want the scuppers to be near a butt joint. I did a twist test with the frame I dubbed Moe, and with two rows of planking, it seems pretty sturdy. so, here is the progress I've done on this one. ok.........now I go to bring the Christmas stuff up from down in the cellar. who knows what I'll find....last year's fruitcake......maybe

-
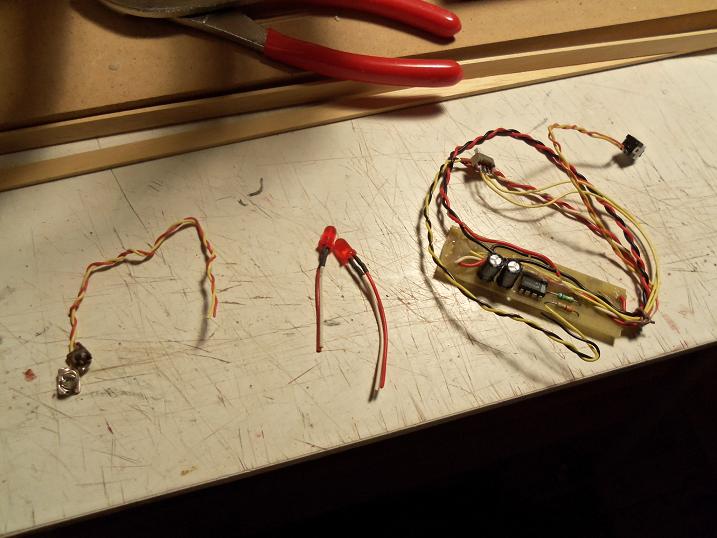
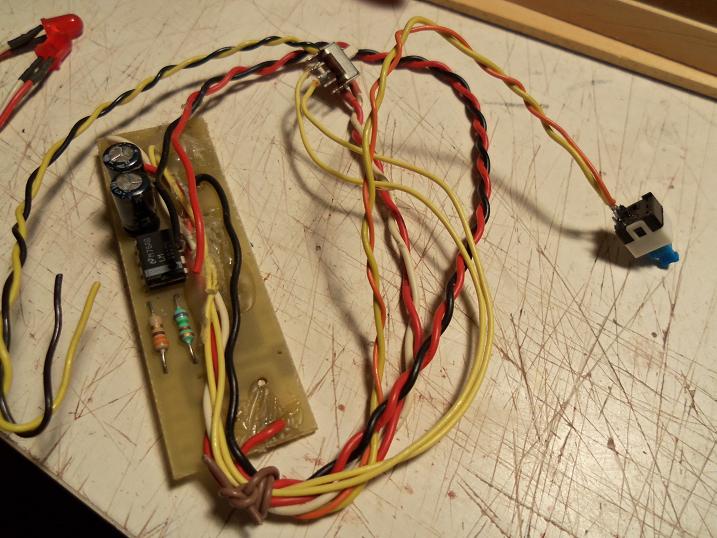
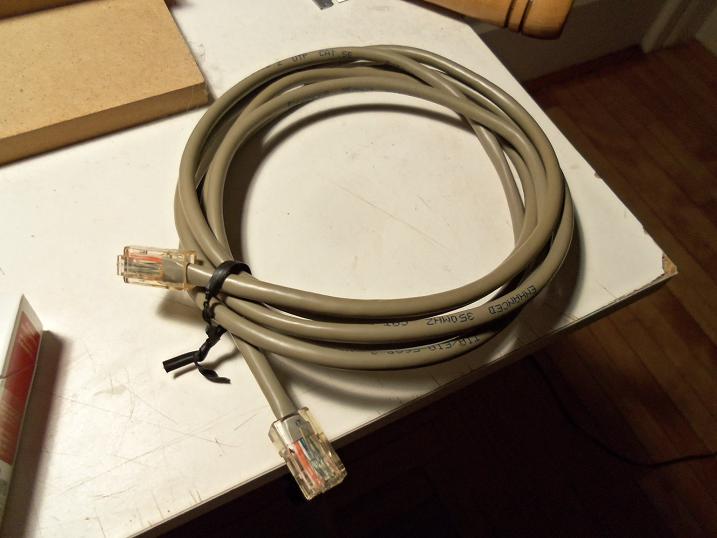
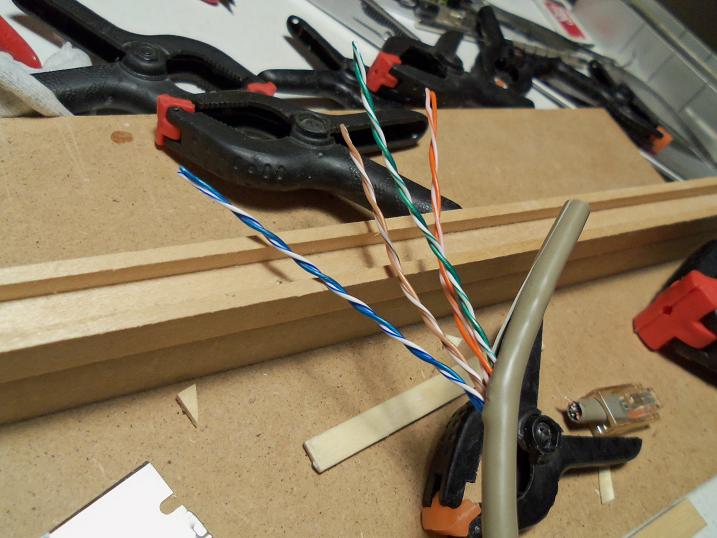
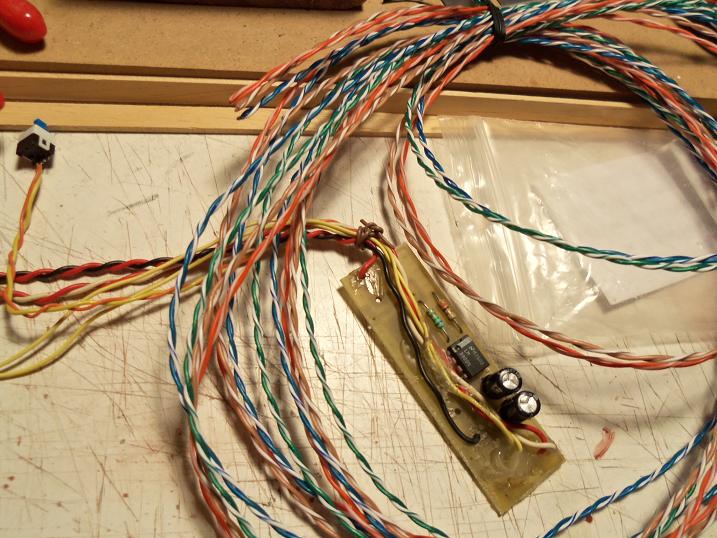
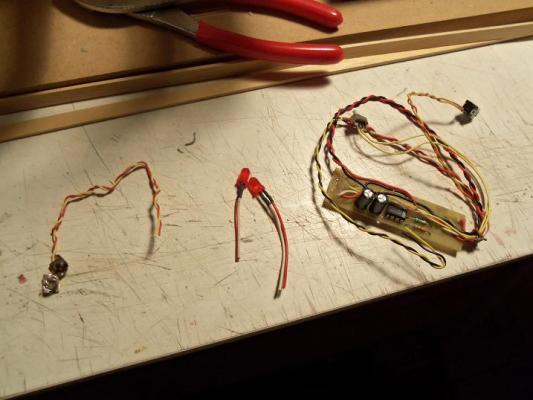
I mentioned LED lighting.........this is something totally new to me. I mean.....I've messed with Christmas lighting and all that........but lighting like this..........well......... A friend of mine in Canada sent me a flasher unit a while ago....he dabbled quite a bit with trains, and he thought I might find a use for it. it comes complete with an on / off switch.......and I believe the other one switches from flash to steady lighting. looking at the size of the wiring, I had a thought. the admiral and I used to make cat 5 cables for a woman who used to be our landlord. for those who aren't into computers and communication, these are internet cables. we used to make {and test.....ugh} about 1,200 a day. we have a bunch of these on hand. I took one of the shorter ones, and stripped out the wires. I forget what gauge they are....but they are the same size as the flasher when I was done, I had four sets......all color coded, quite easy to map out the positive and negative. I don't recall if this is solid core or strand wire....I'd have to strip some out to see. I don't believe it will matter though. I had mentioned about doing the LED thing.......my {our} good friend Mobbsie offered me some that he had, if I could use them........I can't thank you enough! I'll watch the mailbox,I owe you one! this will let you know that my gears are turning over here as well, I'm on the look - out!


-
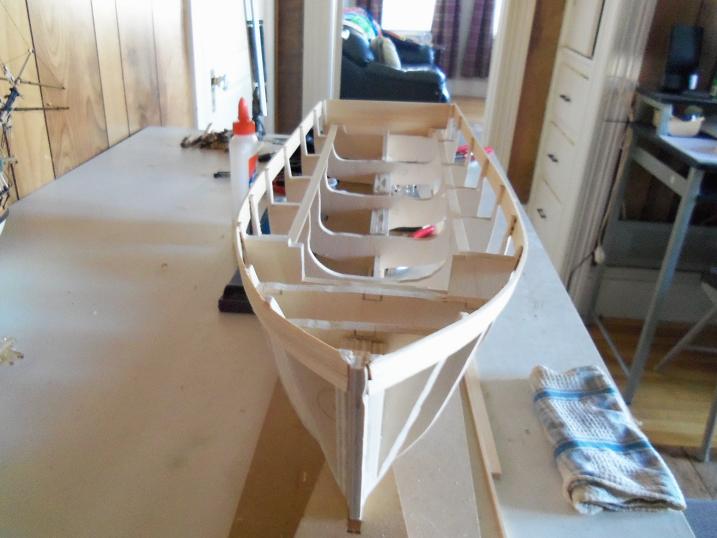
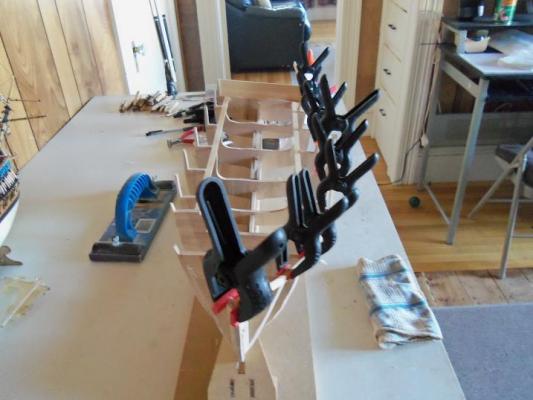
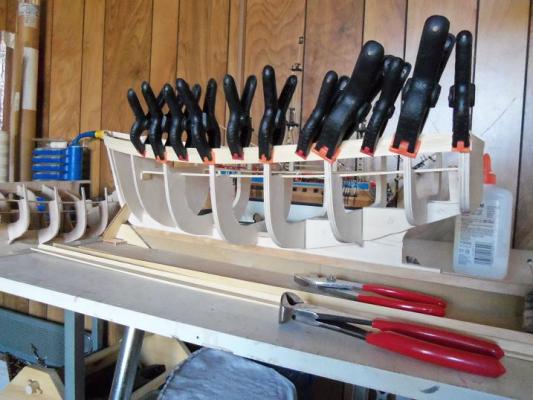
we had to run out for a birthday party Sjors.....sorry I had to cut you short. .....getting confused.....well, no not really......not when you have lots of boot boxes I get new boots every year it seems.....I save the boxes {they have a flip top lid}. I used to keep the kit boxes around.......but they are quite bulky and take up a lot of room. I just punch out all the parts and bag them according to step...long parts go in a planking bag {I have a lot of them from all the planking I've gotten already}, and I label them. once everything's in the boot box, I label that as well. the parts panels get bagged and saved in a special box I have for them. the boxes get stacked in the closet, and the bags get put in one of the tubes in my organizer.....that's what two of the big tubes in the back are for {just the right height}. every kit is now compact and set up is easy. that's also the beauty with scratch built models......there aren't any parts! I do have the trawler, that I have already bought parts for....that build has a box. when I start acquiring parts for the H.H. Fleet, then I will set them up with a box. now......if I only had a system for my tools I have a little more to report on the hull frame that I dubbed 'Moe'. I have the second row of planking on the bulwarks. a few more rows, and it might start to look like something the one thing I am really happy about, is the shape


-
you should have just answered him........F......antastic! :D
- 745 replies
-
- 1
-
-
- francis pritt
- mission ship
- (and 1 more)
-
super update Augie.....the planking looks great. you recovered quite nicely
- 2,191 replies
-
- 1
-
-
- confederacy
- Model Shipways
- (and 1 more)
-
WHAT!?!?!? you finish a ship the likes of this.........and only a few pictures!?!?!?!? <just kidding> beautifully done Sjors! the hull looks great.....and the rigging is very well done! .....and no butter stains! {from the popcorn} now, you need to get the S.I. back on the table, before glue even touches the Aggie! great job, my friend..........is there a case for her in the future?