popeye the sailor
-
Posts
16,007 -
Joined
-
Last visited
Content Type
Profiles
Forums
Gallery
Events
Everything posted by popeye the sailor
-
 hey Mick, gee....I wished I had seen your build earlier.....I have a good suggestion for the bulwark dilemma. my first build was the Nordkap by Billing's. having never built one before, I ran into the same problem. it was a printed deck, so I traced out the waterways and made a pair for it.....worked very well. I was just real careful how the cuts at the posts were......lots of fitting. if you have the panel that the deck platforms came from, you could have done the same. painting the deck was not a hard rule.......I believe it to be the desire of the Captain, although I have seen quite a few that were painted. you would have to find out more info on the W.E. to see what it had. I airbrush quite a bit........I got back into it after seeing how large these hulls were I have a simple Testor's airbrush system. I adapted it to run off my large compressor....run it just once, and I have enough air to do the entire job. the Testor's airbrush is not fancy, so I make up for it, with how i mix my paints. thin paint is good......light coats delivered in sessions, but for thicker paint, I up the air a little, and it does well with that {it's a siphon system}. I use enamels only.......model master for flats, and Testor's and Billing's for gloss. I've tried others, but they don't have the gloss quality and suspension. the billing's paint gives a nice hard finish, very hard to nick or dent I couldn't agree more on the fitting choices..........I have quite an inventory of those plastic blocks. I'm making a scratch built trawler, so I can use them up what I don't like in plastic, I make out of wood.........sounds like you have a direction that your going to go. they are a nice kit though......with a little tweaking, they look even better! I'll enjoy watching your build.....building what 'seems' to be a beginner's kit. coupled with those instructions.......there's nothing beginner about it......heck, they'd confuse anybody! :D but, that I think is why I like the Billing's kits....they are quite challenging
- 170 replies
-
- 2
-

-
- thames barge
- billing boats
- (and 1 more)
-
your finished?!?!?!?! Whoaaaaaaa........you really can't wait to start Aggie, can you! now is not the time to get professional on us.....pictures please!!!!!
-
guess we don't have to worry about you Piet, if the world goes to crap.......you can fashion your own weapons! :D they need you on 'walking dead'!
- 2,250 replies
-
- 6
-
-
- model shipways
- Charles W Morgan
- (and 1 more)
-
ohhh, I didn't sand outside.........I did it in the front porch! I had a good time in spite of it all. thanks Augie....hope you had a good day as well........plenty of turkey! for now Bob......it's just the bulwarks......but it will get hot and heavy real soon! crap! it sounds like a Vin Diesel movie! :D I'll answer you later Sjors..........but I think it's eight! don't say that though.........or I'll get confused too ! :D
-
I think you did a super job Denis........there really isn't any rule as to how the masting is done..... the only problem I see here, is it's going to be a feat to do the shrouds. but I'm sure you have a plan for this, and I'm intrigued.......the masting looks great! the sails came out really REALLY good. you have most of your lines marked, so you don't seen lost or anything. as I always say......every modeler has a method for their madness! I'd say you fit right in with the rest of us! :D
- 555 replies
-
- 1
-
-
- sovereign of the seas
- mantua
- (and 1 more)
-
only two cuts.........must be a record for that somewhere.............geeze, I got a small cut on my thumb ..don't know when it happened. your putting some super detail into her.........looking soooooooo sweet!
-
it does in the beginning, Michael.........the planking is going to be quite a job. but once the hulls are done, and the work is confined to the deck and fittings, I can branch out and work on them.....one on one. some of the fittings will be identical, but i also want to give them their own character. this will give me a chance to see what process works quicker than others.......in the event I show these around, and they seem.........."lucrative" I expect the problems John.........it would be a fool's errand, if I didn't. but I like the idea and concept......it's a wide open field. this is probably going to be the hardest part. after this, it will all be creativity and gravy!
-
I wished I worked like that.........my table always looks like ground zero! :D what I meant Michael, is are there to be stops for the hatch cover rails......to keep it from sliding too far backwards and forwards.
-
looking very nice Steve......those rabbits are really cool! once planked, hopefully you won't have to drill through a rib structure to do the prop tubes.......there isn't much room to work with.
-
Cutty Sark by NenadM
popeye the sailor replied to NenadM's topic in - Build logs for subjects built 1851 - 1900
that's what scratch building is all about you mold and shape {sometimes repeatedly} until your satisfied with what your creating. to think of what the early scratch builders did, your doing something that, back in the 40's and 50's, used to be the norm. it is an art form, gentlemen, to be able to see your subject, and copy it through the use of your hands. to perfect it, takes time......but when your done, the mere fact that you made it from nothing, is a feat, unmatched. keep up the good work!- 4,152 replies
-
- 3
-
-
- cutty sark
- tehnodidakta
- (and 1 more)
-
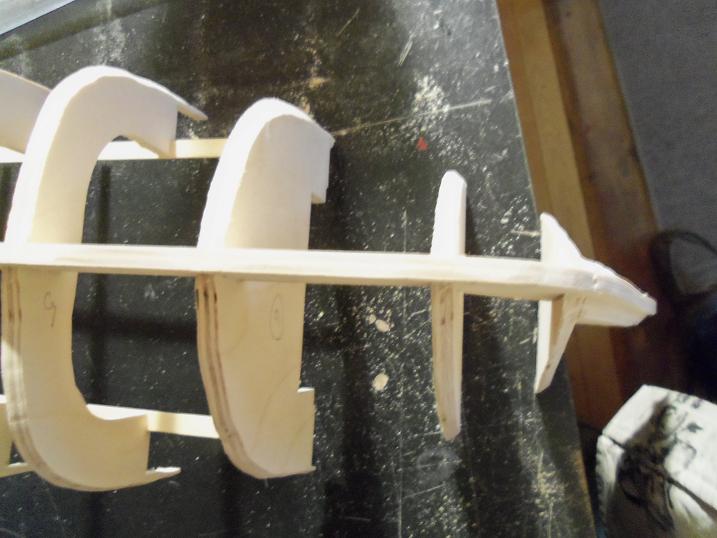
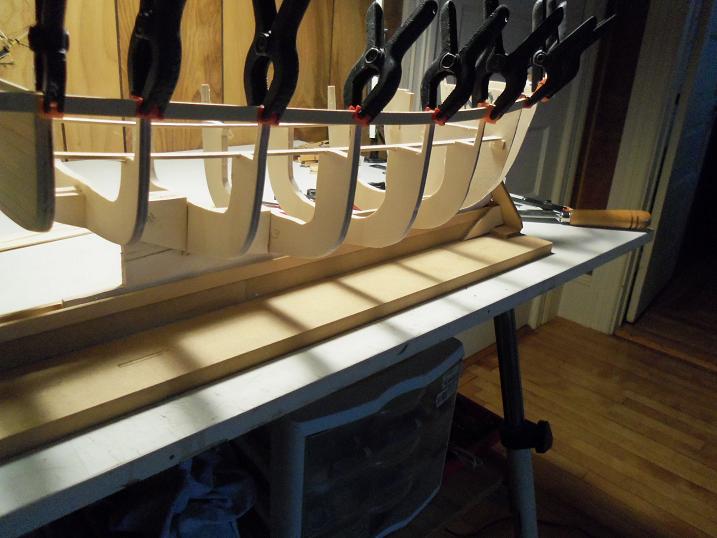
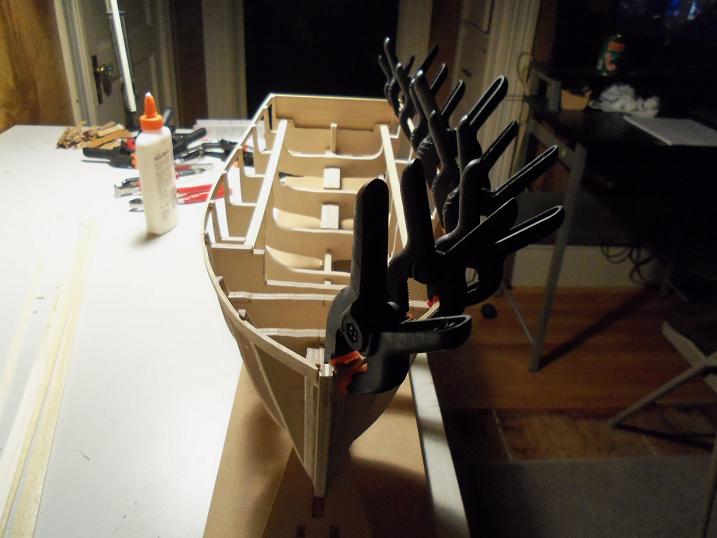
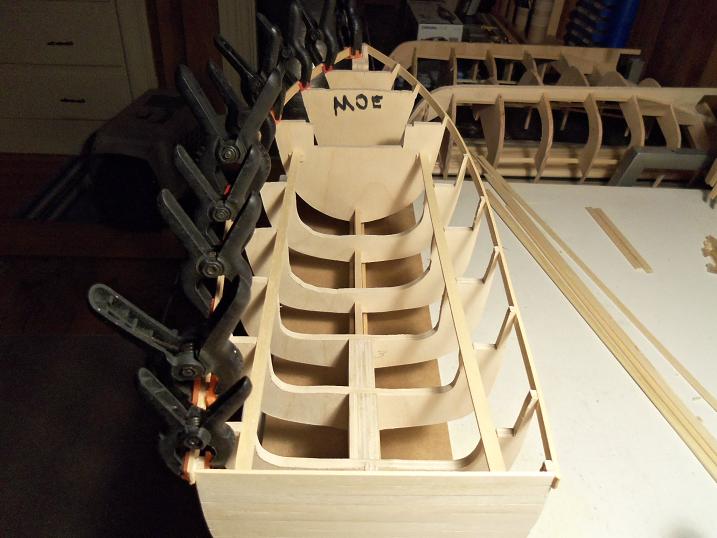
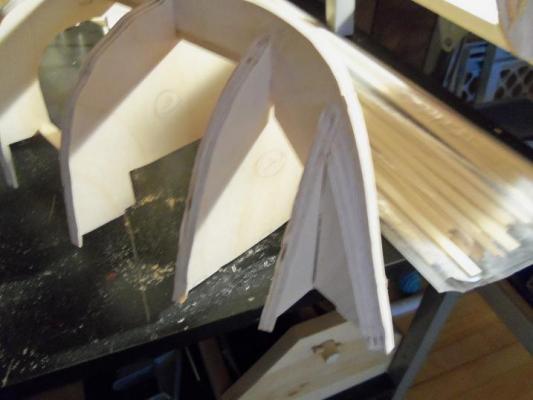
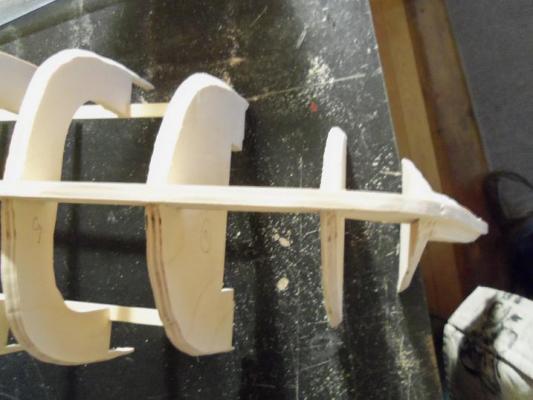
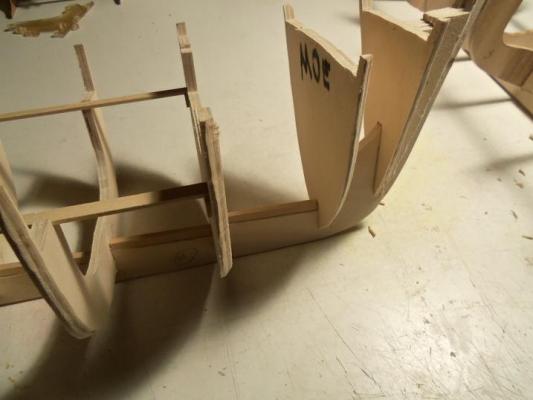
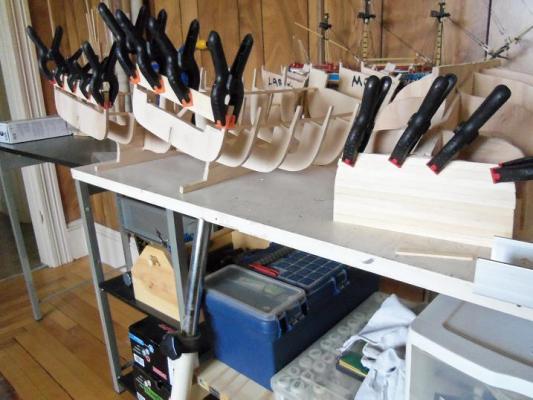
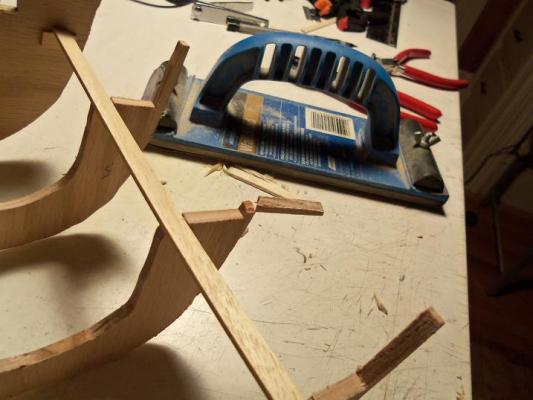
more progress made on the H H trio. today was bow faring day........this was done out on the front porch. the first to get the trim job, was Moe, since he is made totally of the 1/4 inch plywood. as the bow was fared, I went over a few of the high spots and cut imperfections. after that, it was sanded with the block, to smooth everything out and clean it up........especially at the bulwarks {I can continue to adjust them as I go along}. these first pictures didn't come out as good as I wanted them to, but I think you'll see the shaping well enough when I felt it had the right shaping........I was a little too steep with the Dremel, but it gave me a good reference for the other two. I made sure that there was a good sill for the planks to sit on. time for Moe to get on the table. the first bulwark planks will be full length, since these will also serve as a stabilizer for the frames. I have other planking for the lower portions. the first one is cemented in place. during the time this one dried, I had fared the other frames and readied them for the sanding. I did break away from time to time, to help with the prep for the Thanksgiving feast. later on, the other side was cemented in place. unfortunately, the sanding of the other two was put on hold for a bit. when I cut the ribs for Curly, I had one that encountered a void in the plywood. I was going to fill it in earlier, but I forgot. I did it before the sanding got too far......the sanding started to tear away the outer laminates. with that done, I began to sand Larry, being very careful of the bulwark posts {I didn't fix the one that broke....I just re-cemented it}. I had it lying on my leg.....and I was sanding away at her.......and then I heard a resounding crack! whether it was the stern post that gave me trouble....I didn't bother to check, but it had broken on one side. I glued it back together, and splinted it with a piece of wood. I'll be so glad when this phase is over.............another thing I can say about this oak plywood, is that it didn't react well to the Dremel......kept wanting to gouge. the regular plywood was much better in this respect.......it behaved much better, and I could get a much better curve. I look forward to the time when the hulls are planked, and I won't have to deal with manipulating it anymore. like I stated earlier, never again


-
Cutty Sark by NenadM
popeye the sailor replied to NenadM's topic in - Build logs for subjects built 1851 - 1900
looking great Nenad........the curve looks much better- 4,152 replies
-
- 1
-
-
- cutty sark
- tehnodidakta
- (and 1 more)
-
mighty tall order you got going on here........with school and stuff on top of that, you must not have any free time. if you need Billing's info...you'll be able to get it all from the site, as well as Dumas products Dumas Products - Dumas Products Estore Billing Boats Official Website 2012
-
you never know how much detail you can put into her......until you try with what you've done so far........I think your on the right path! Happy Thanksgiving my friend! I can't wait till our turkey is in the oven.........I long for the smell!
- 2,250 replies
-
- 1
-
-
- model shipways
- Charles W Morgan
- (and 1 more)
-
she looks very nice......well done...the deck and bulwarks look great. yea, you could do it out of the box......but it shouldn't stop you from putting your own personal touches to her.........I experienced the same thing with the Billing's AmericA. just by a few simple tweakings.....I'm sure you can improve on the fittings, and make them into something you can be happy with. with how this build is working out for you.........I see no problem at all! keep going.....your doing great!
-
thanks for the suggestion Ed.......I did that on the bow spirit of the Gothenborg {it hit the floor}. I could simply graft a new piece in there, but I want to see if I can do it without too much fan - fare. I'll be sure to document the repair.........I just checked it, and it didn't dry straight overnight. if anything else....this will be a good log, in how to think by the seat of your pants
-
very nice work Michael.........did you consider using rope calking? the slide rails look awesome.....are you to add stops on them as well? gonna look sweet when done
-
thanks John for the vote of confidence.........true that the post in question, really isn't going to see that much tension from the planking. I can do a slight bend to them, but I shouldn't have to wet them at all......I didn't do it for the boulogne. I'll just have to fit a plank and see how it reacts. thanks for looking in........I was wishing I could have more to show.
-
yes......that's Dr. Dafi on the right.......I'd know that face anywhere!.......even with no distortion :D
-
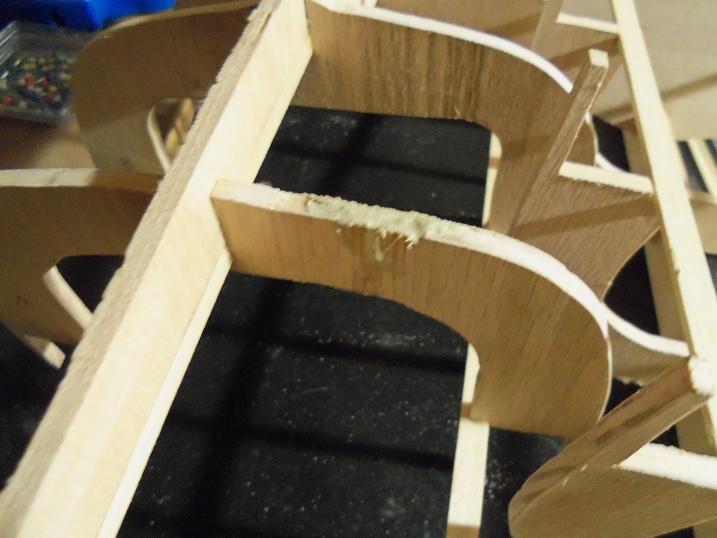
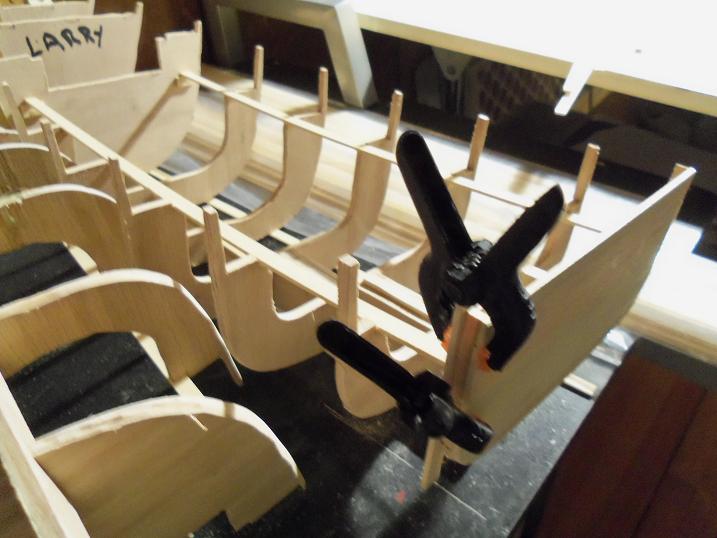
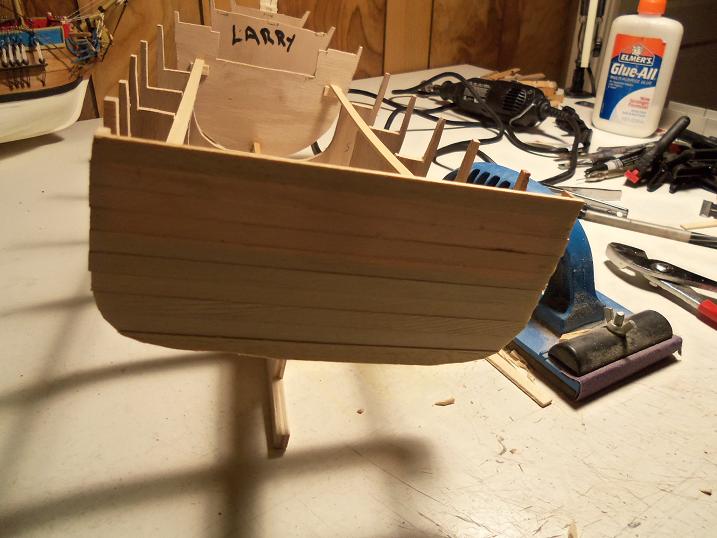
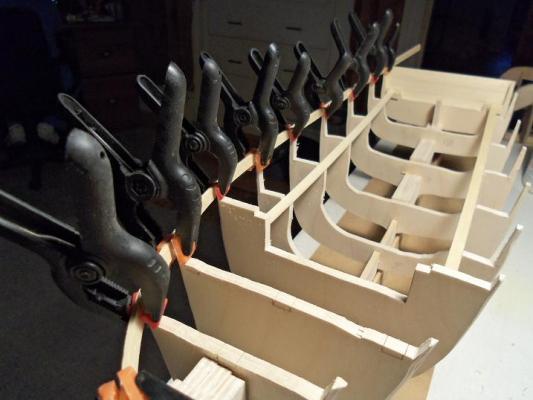
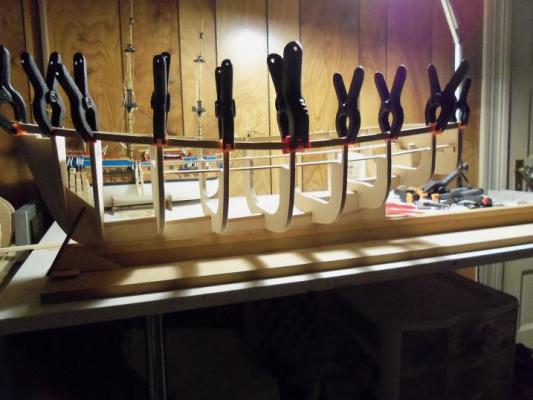
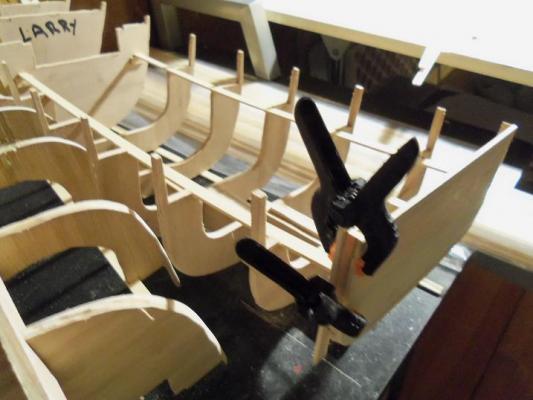
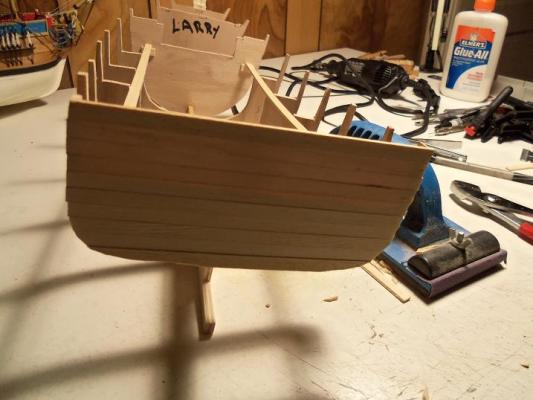
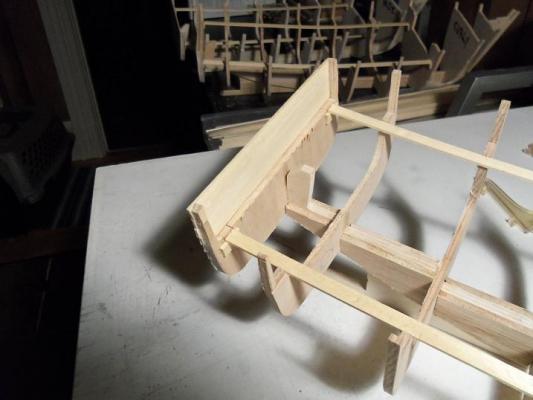
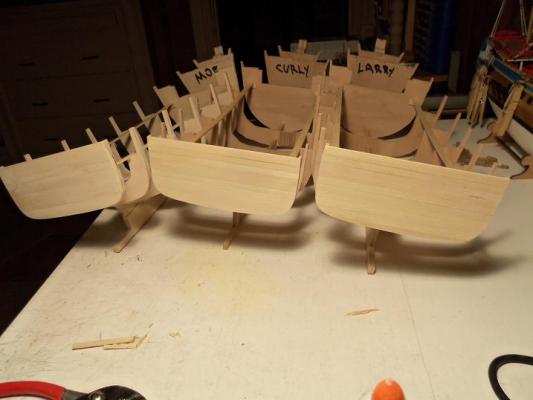
that's what I like about builds like these Mobbsie.........the M&M fun ship was a lot of fun to do. it was really cool how the process went......from the idea given to me by the admiral......to the completed build. I don't think there will be too much of a stink........by the time I get them to their on their real subject paths, everyone will be pretty sick of the three knuckleheads....just me throwing a bit of humor in, for good measure. I appreciate your saying so though. you talk about problems.....yea, there is a couple, but nothing major..........but I'll show you a good reason why I want to get the bulwarks done so quickly. I wanted to show this process of the stern and bulwarks done all in the same step, but I think I had better get this up, so you can see why. I have two of them that have that oak plywood......tough stuff you might think, but....errrrrrrrr, not so much. I pretty much had Curly's stern planked up, when you last saw them. I want the hull planking to lap over this planking, just as I did with the Boulogne. now they are all getting their stern's planked........symo - planking! Larry is done here.......I'm going to do a bit of faring and shaping to the aft section, and along the bulwark posts. I notice that it's a bit uneven at the bottom, but once fared, I will take care of that. the other two have already gotten a bit of sanding, Larry's the last one. ........and now .......for the reason. these posts are thin...........and the oak aspect doesn't help it out at all. there is a lesson in all of this....never skimp on the framework.....I will never cut corners like this again! so I had to stop on the shaping on Larry's aft for the time being. I am going to beef these up a little, but I wanted to wait till I get the deck platforms in place, before I did it. I also wanted to add a few more, like the Boulogne plans instruct. I may have to do it beforehand. so.....anyway, here is where they are at at the moment. I still have to shape the bow section, before the bulwarks are planked. that is still the next step of the process........and then move on
-
oh.....you need to drill a hole above the bow stem..........that explains a lot. plankings coming along great looking very good.
-
nice over view John...the deck layout is looking really sweet!
- 2,250 replies
-
- 1
-
-
- model shipways
- Charles W Morgan
- (and 1 more)
-
hello Max. I think you'll find that there are little idiosyncrasies with most kits.......no matter. some have extra material that needs to be sanded for the shaping of parts. I tend to look at them, as 'wiggle room' , left for the modeler to mold and fashion. this hobby, I feel, wouldn't be fun, if kits were so 'exact'. most of us were old plastic folks in our day, so your in good company your off to a good start with your build......I'm build the Billing's kit of this fine ship. so far, I'm finding 'bash' is the way to go........the kit is not a complete kit anyway, so I'll be scratch making some of the parts. if the hull is to be second planked, then work on the shape.....it don't need to be pretty. are you going to use thin strip {.5 mm} for the second planking? this would be good, so the planking doesn't add thickness to the hull....I did this to my Gothenborg......they really 'behave' quite well. I like the idea of the gun port cutouts.....the inset lids are really going to add a nice look to the ship I'll look forward in seeing more on your fine build
-
WOW!!! very nice.........your moving right along! so, there is to be a roof over all that...huh very well done!
- 2,250 replies
-
- 2
-
-
- model shipways
- Charles W Morgan
- (and 1 more)
-
all I can say .......is congrats Daniel! you've recreated something that many have wondered so much about............imagine if all the cannons were in operation........thick in the heat of battle. that deck would be swarming with people! very nice work!