popeye the sailor
-
Posts
16,007 -
Joined
-
Last visited
Content Type
Profiles
Forums
Gallery
Events
Everything posted by popeye the sailor
-
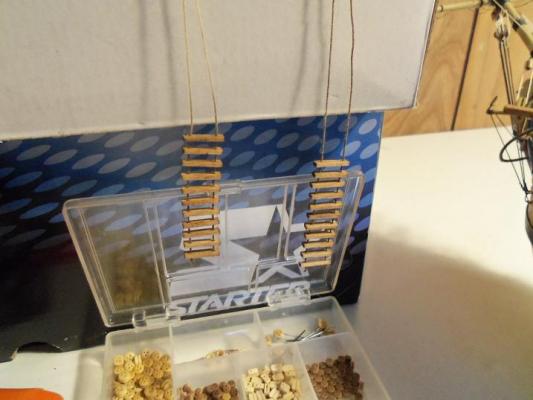
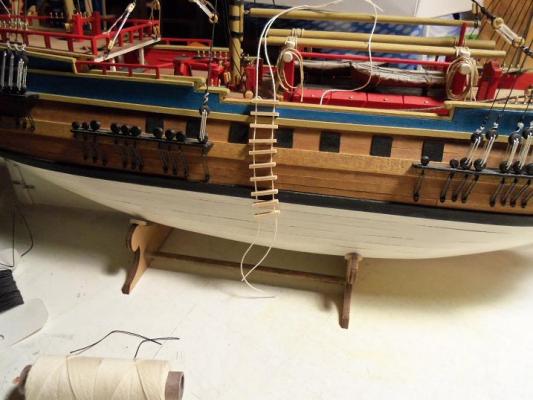
 I just looked at the re-finished ladders.........go to hold them up against the hull.....and they're too wide! oh well........back to the drawing board!
 -
lots of folks have good luck with the Tamiya tape for masking............I use the Frog tape {green}. painting it with a brush is bad......paint is forced under the tape {in my experience}. I haven't tried airbrush though.........I suppose light coats, letting it dry a bit between coats, might work........spray dead on, with no angle.
-
I've heard of this happening........Sjors had a heck of a time with this. I even had a bit of a problem with the upper shrouds on the gothenborg, but that was due to the wrong size dead eyes. it boils down to bad dead eye hole positions. as I have learned..... sometimes a bit too late as well........dry fitting is important. not that I don't dry fit my parts, but it's easy to feel safe in cementing parts on when you see the pre drilled holes. the only thing I can suggest, is if you want to correct this, you may have to re-drill some of the holes, or scratch produce new chain plates, drilling the hole yourself. perhaps other folks may have an idea for you that is less intrusive, but it's all I got. I'll have to look, but I think Sjor's Mirage is from Mantua. thanks for the congrats any updated pictures of your build? love to see your progress
-
that's funny Andy........I thought that as well, when I read the question.....can you imagine having to don a safety rope, tethering it all the way aft on deck. bad weather......waves crashing on the deck........I sure wouldn't want to be topside
- 382 replies
-
- 1
-

-
- stadacona
- sylvan scale models
- (and 1 more)
-
.....just let me know when the bar is set up.........OK _______________________________________________________________________________________________________________ FINISH LINE
-
thanks John......figured I had better get going on her ........all the crap that went on and all. refreshing to be doing something that is normal.
-
well.....thank you all for the congrats.........I hope I can continue to keep you all entertained. but, don't get too comfy with the boys, I hope to be able to change all that soon enough I haven't done too much with them since the other day........but if I continue to have trouble with the Larry frame........you'll be looking at Abbot & Costello, and the Larry frame WILL go on to become the Andria Gail :D .......I'm beginning to like that Idea {since I saw the movie} :D nawwww..........just a small problem.......nothing that can't be fixed once I get the hulls planked......I can get a handle on the deck layouts........and all will become clearer. I'll be on the 'light' side for a bit for now........I'm going to try doing some bouncy stuff........thank you all for the good word and the well wishes
-
awesome work Mobbsie.........so your going to be doing shrouds now.......Great! even with the scale that I'm working with, I'm still tying on blocks...........I thought I tied on all I would need.........the great fallacy! the tops look so good......she's going to look great. I kinda wish I had done my masts like that......hope you get your serving machine back in order
- 1,279 replies
-
- 1
-
-
- agamemnon
- caldercraft
- (and 1 more)
-
the box has made it that far Sjors..........you might as well............
-
very good info to keep in mind.......thank you very much. feel free to make suggestions........I could use the help.....thanks again!
-
looking really really good John.........I should get myself one of those draw plates, one of these days. it's in my wish list
- 2,250 replies
-
- 1
-
-
- model shipways
- Charles W Morgan
- (and 1 more)
-
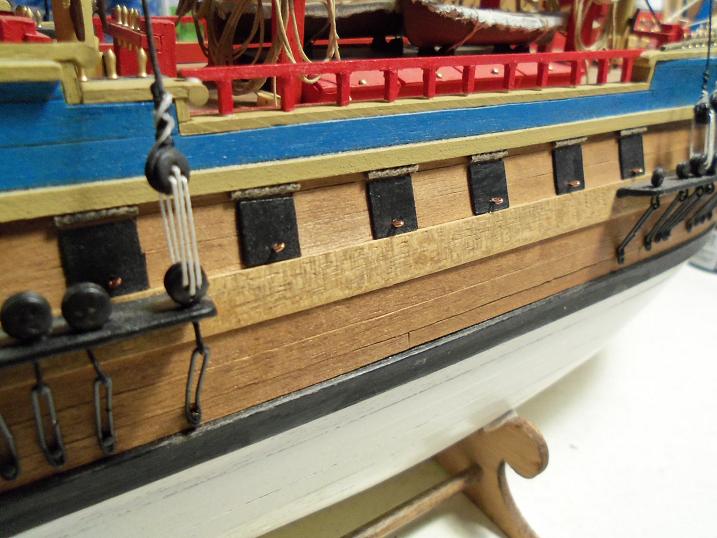
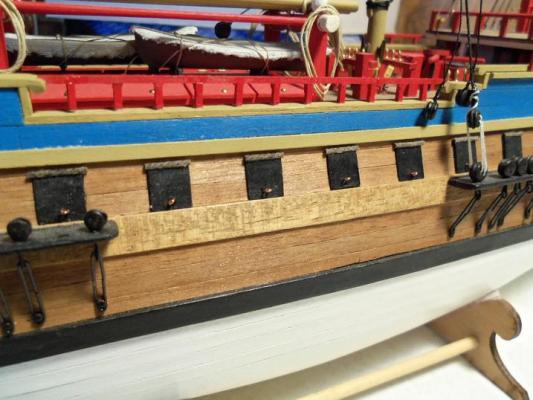
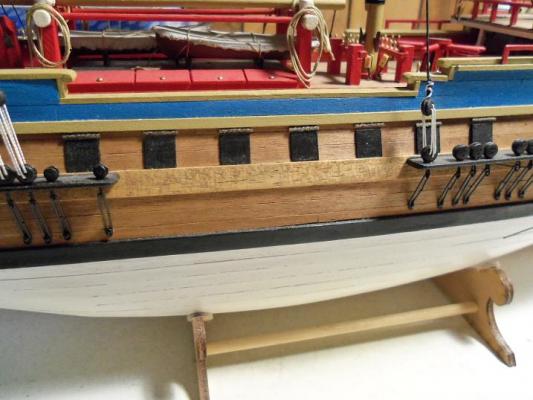
it is amazing how the rigging changed .......through wars and capturing enemy ships.....and even venturing and studying cultures. one might think perhaps, that this was an early form of camo.......a British sailor looking through a spyglass, might see her rigged as a British ship, and make the fatal mistake. this being my first wooden sailing ship......I'm finding it a whole lot different than plastic. but I'm armed with a slew of pictures of the actual ship, one of the best ways to see how a ship is rigged. sounds like your in for a fun project......the ornamentation alone will boggle your mind. I'm sure you'll have a good time with it.....you'll have to let me know when you begin.....definite must see! do be careful with the multiple build bug......they replicate like crazy!!!! hey there Mobbsie........no problem about the ladders. the original ones are 11 rung.......I'll have to add some at this new thickness......not a problem. I did notice one problem......I finished my latest update, and I looked over at the Goth to see that I had missed the mark. just above the gun port lids, there is a slight gap in the second planking, and you can see the underlying planking. looking at the above pictures, you can barely make it out........but I saw it......in spades! I ripped them all out and redid them. now they all look like this.......touching the lids, and not up against the rail above it. with a little more work, I can get to the main shrouds.........and then I can get to that 'fun' that your talking about
-
very nice Andrieke.....closer to the big finish......
- 1,038 replies
-
- 1
-
-
- King of the Mississippi
- Artesania Latina
- (and 1 more)
-
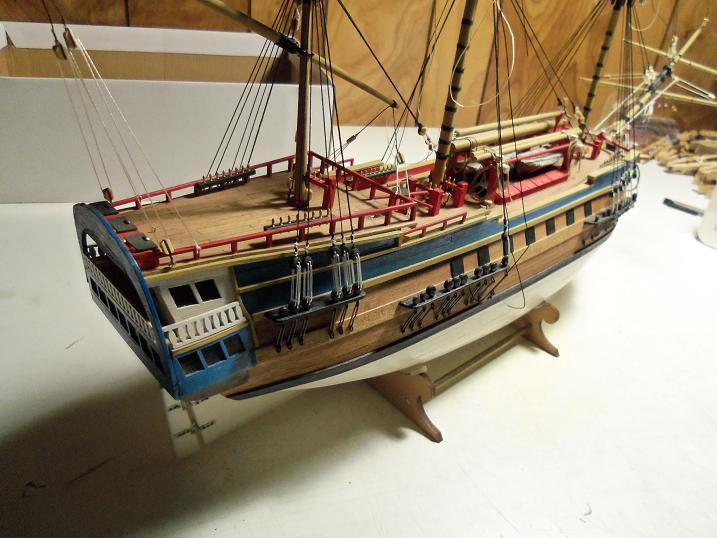
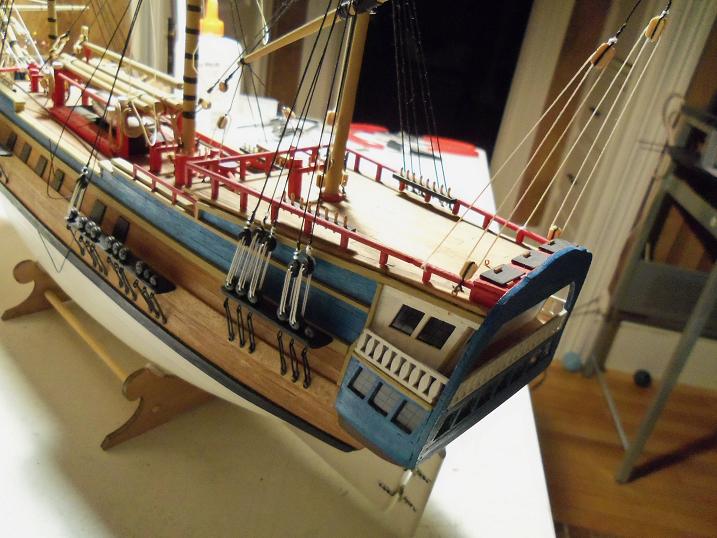
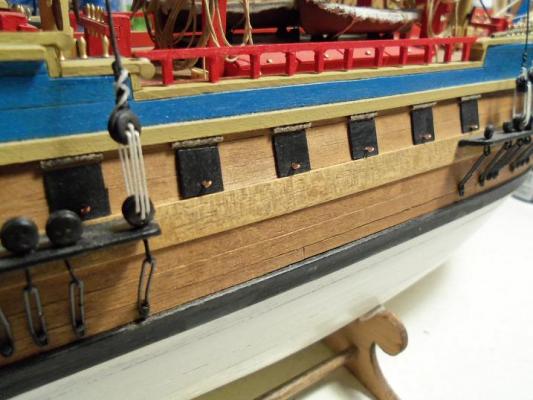
hello there Keith!........nice you want to follow, but you need to keep in mind that this is a Swedish ship.........the rigging may be somewhat different. the terminology might be a little different as well......just watch other folks who are doing ships like your Swift. too bad about Randy......don't know what happened to him. he was all over the news for a while there.......now he's probably sitting in a Canadian jail, all because of that crazy woman he hooked up with I got the Movie from a company Christmas party.....Yankee Swap......it's a staple in our house too........right along with Scrooged :D yea......Dr. Dafi's correct Ferit........just something I overlooked. I've stripped out some 1/32 flat stock from my junk bin..........a tiny bit more narrow, and I'll use some thinner rope. I'll just save these two for something else. I don't need them right now......so this will give me time to make new ones. in the meantime, I did as I was going to do.....cut some of the anchor ropes and make the gaskets for the gun port lids. I also painted the railings and cemented them in place........I'm happy with how they came out. the last thing I got to do before we took off to get the tree, was the eye bolts for the lids. I'll see what I get 'roped' into today


-
well Dave....the lucky recipient of the flasher will have blinking lights.....hopefully I can find colored lights. I hope to light the decks and hopefully the pilot house, and other structures I may have on deck. if you have any pointers.......I'd love to hear them......I've never done this before. I haven't had the chance to look at some of the builds that are doing it......but I will be when I have the planking under control.
-
my bad........then you are like I was......in a bit of a slump. I can understand. got spinach?
-
your procrastinating, aren't you............aren't mini builds fun
- 2,250 replies
-
- 1
-
-
- model shipways
- Charles W Morgan
- (and 1 more)
-
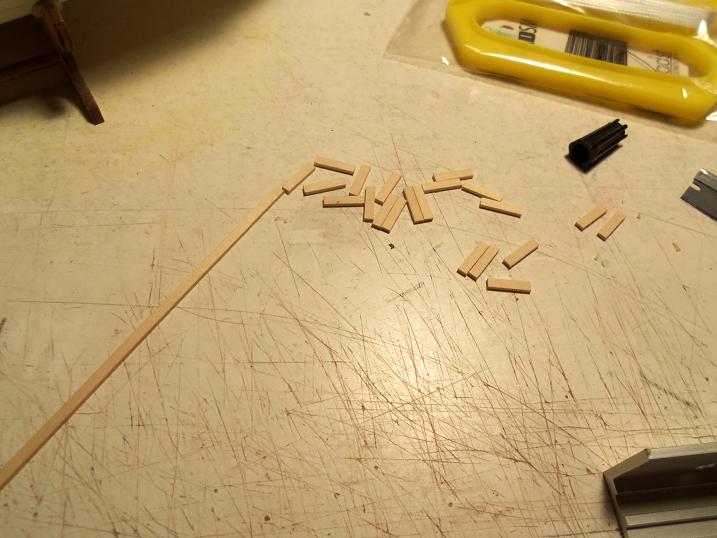
absolutely Mark! I'm going to try and bounce around the builds and do some of the sub assemblies, while I work on the planking. you seen one.........you've seen three I don't have any thinner stock for the ladders, so, I'm going to have to cut some....I have some flat stock I can strip out......1/16.......1/32......I need to look. I made more progress......still in the camera though. we went out this afternoon and got our tree.........I kinda goofed on the height {can you say Griswold} :D no problem.....a little trimming, and it'll work {I made sure there were no squirrels} thanks for the good word........another update soon!
-
looking good Robert!........inside and out
-
thanks John.......yea, they're moving along. if I can just get through this step, I might be able to move a bit faster thanks for the likes gentlemen!
-
sorry to hear your having an ongoing problem.........I wish you well.
-
thanks for the good word Augie 'n Frank. yepper.....gett'in back with the program you might be right Dr. Dafi.........I just stained them too.........hmmmmmmmm. don't take much to make a new pair.......I'll see if I have anything thinner......I had to dig into my 'bits & piece' box to get this wood. I might have something left from the lobster traps thanks for the good word and the keen observation..........did I tell you that sometimes I can be like a bull in a china shop :D
-
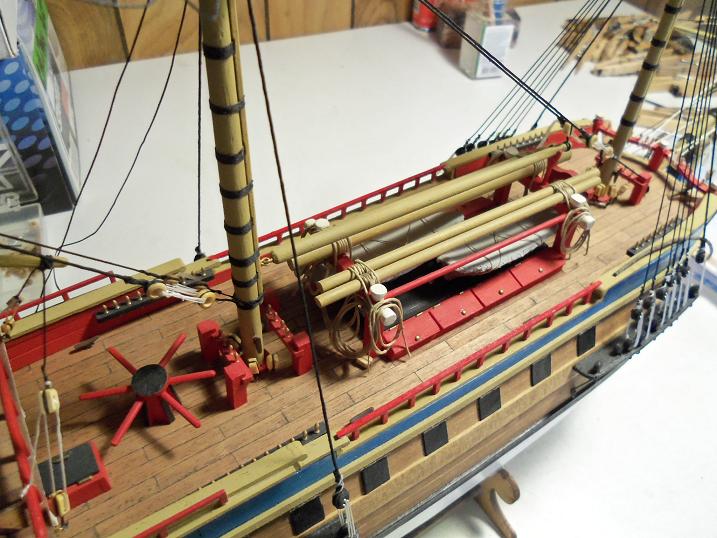
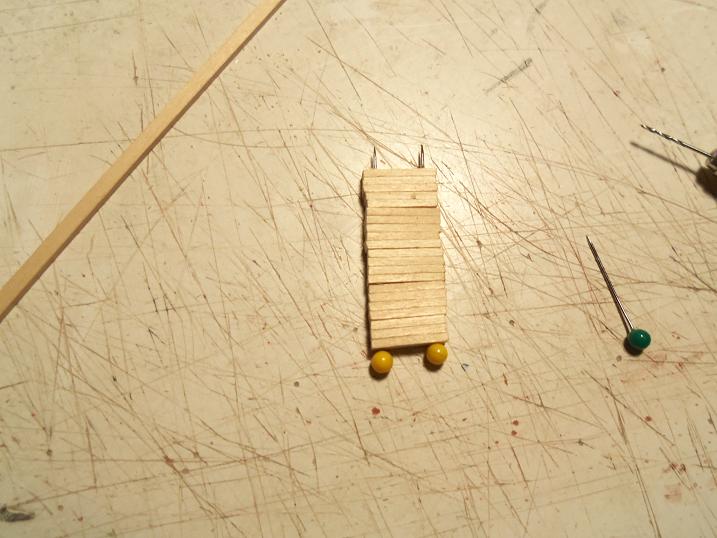
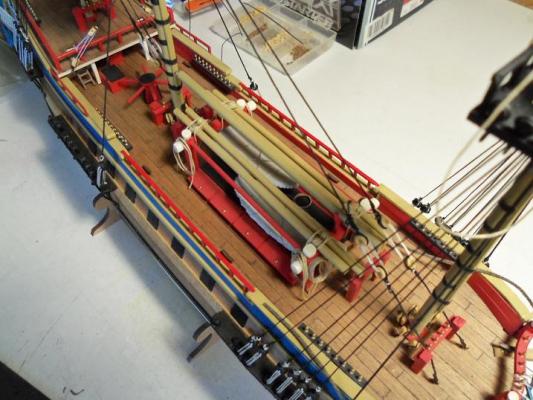
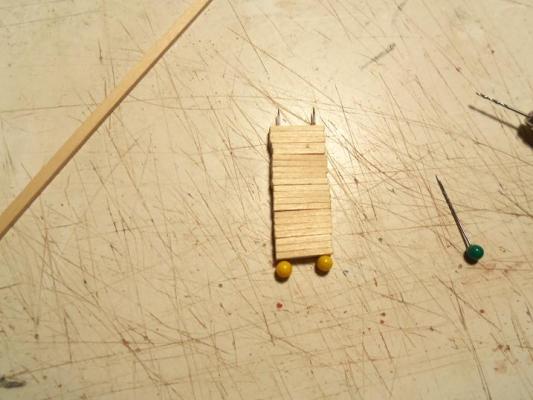
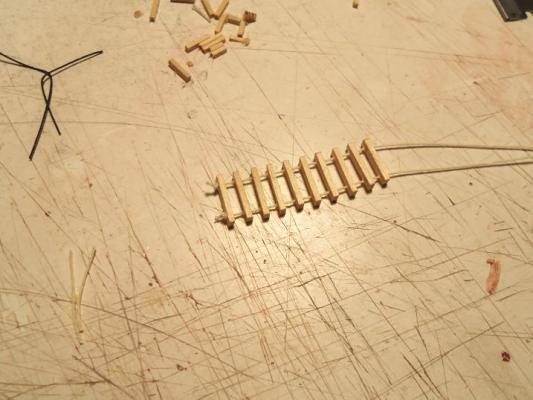
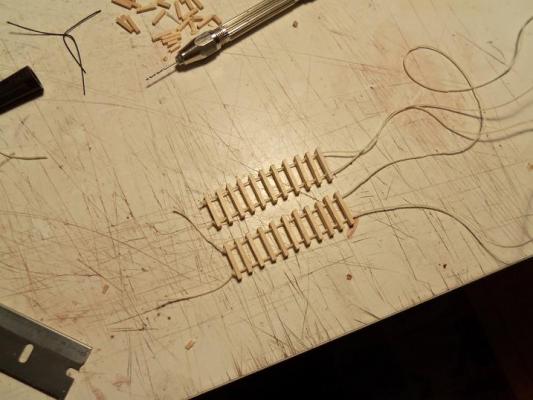
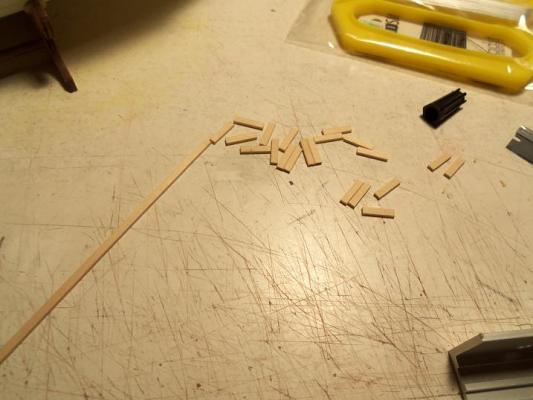
.......and other builds....I do. the past B.S. that has been going on.....coupled with my slump in building, is getting very dry. I gotta liven up my build table. so, the first thing I did, was tie off all the ropes on the mizzen shrouds, and trim them. I need to do the main mast shrouds......but there are a few thing I need to do still. I decided to chop some wood.......about 22 of them. then......drill some holes......they need to be all the same. I used long pins to sand and square off the ends. then thread some string, and I came up with this. I had made up these railings a while ago......this is where they are to go. the rungs were cemented on the strings with real tiny drops of white glue. they will be stained later on, and the rails will be painted red. over the tops of the gun port lids, there is a thin gap. I intend to take some string, stain it brown, cut it to size, and cement them in the gaps. I don't think I'm going to anything with the hinges, but I am going to cement in some eye bolts and rig them with ropes. I went with ten rungs.......but I had the two extra {no mistakes}.......so I used them. ohhhhhhh! wait! I just had an after thought.....or a before thought, seeing as I haven't done anything yet! I really don't need all that anchor rope.....I'll just use some of that for the gun port lids! sorry for thinking out loud........it's nice to know the stooges haven't fried ALL of my brain cells see you at the next update.


-
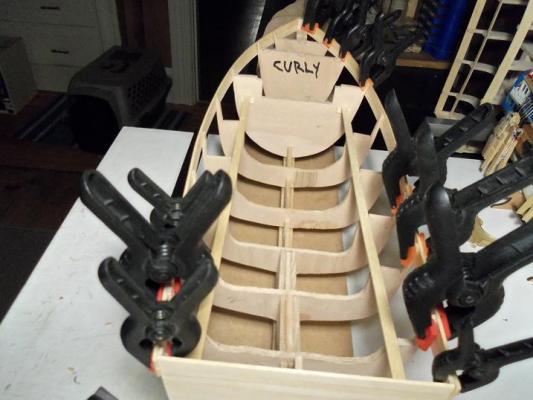
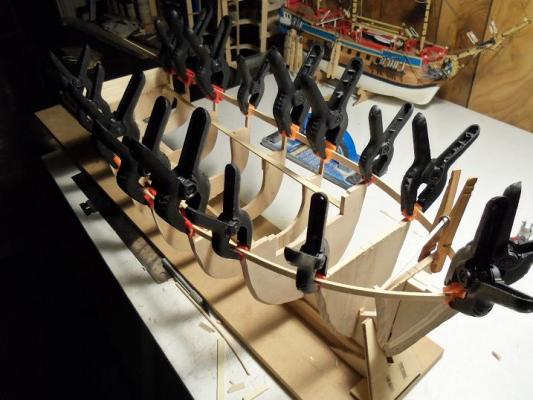
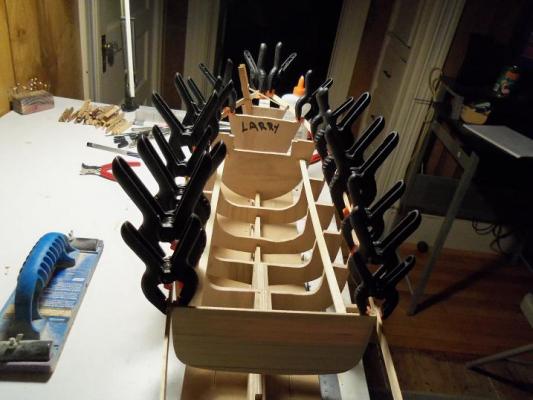
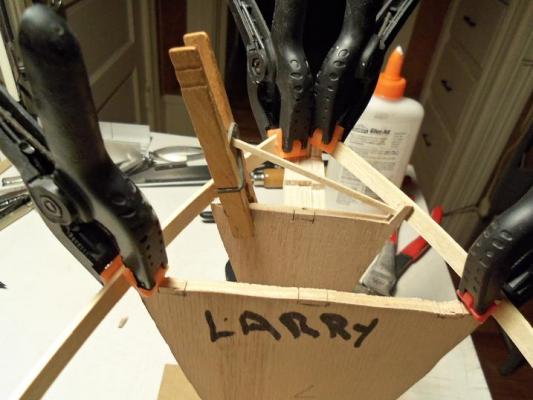
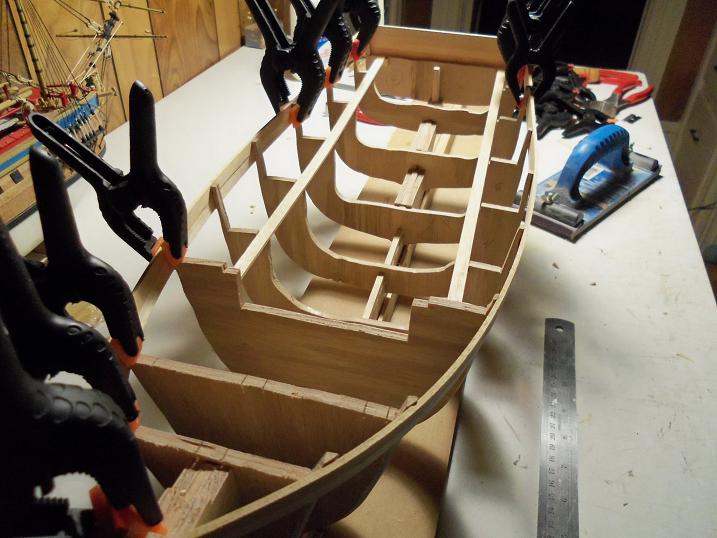
I did more to the hull I dubbed Curly......installing the second row planking for the bulwark. the hull I dubbed Larry has had it's share of problems. I needed to pick up the pace on 'em and start the planking process. it all started out so well.........I got the bulwark post sanded enough to accept the planking {I'll get to the rest later}. the port side was almost set in place, when I heard the snap......the bow post had broken off. well........no time to stop now! I propped up the broken post, and did the starboard side......I'll fix it later! it's funny........the one I was so worried about.......was no trouble at all well, this has all been fun and games..........and languishing on this project has been fun........but this isn't getting anything done on my other builds. so, I will go and get into something a little more entertaining........in the meantime, I will fix my problems and go further with this project a bit later.........I'll update when I hit some kind of milestone....or something. I moved them to the other table.......to save space, I found a neat way to store the other two.