popeye the sailor
-
Posts
16,007 -
Joined
-
Last visited
Content Type
Profiles
Forums
Gallery
Events
Everything posted by popeye the sailor
-
 are there bulwarks to go along the fore castle deck? good you got the plank to make that curvature around it....is there a cradle for the bow spirit? so many questions........I intrigued!
 -
I'm doing something similar with my U.S.S.United States {revell}. love the detail he put into his build......I know I'll never get to that level, but it will be fun trying
-
you'll pick back up with no problem........I'm sure of it
-
super!! by keeping the line of new planking as straight as you can.......you'll see what you'll need to change at the bow, with the other line of planking. glad to hear it! Kudos to Chuck!
-
I have the red label...I like it quite a bit, but I use the tubes mostly. I remember the non-toxic stuff from long ago......smelled like lemons :D
-
where the bow stem starts from the keel, is a good rule of thumb. it's not designed to take up any space at the stem. the idea here is to create the straight line and work your way to the chine. I usually work my way down the bulwarks to the chine {or the turn}, and then lay the garboard, and work form there to meet where I left off. planks can be fashioned quite easily to close it. how you use stealers and Joggers, Joe, depends how the planks want to lay. test fitting will be the guide
-
looking great Kevin.......if you hadn't mentioned the pho-par.......I never would notice it. as a matter of fact, I don't see it
-
http://modelshipworld.com/index.php?/topic/76-hms-victory-by-dafi-to-victory-and-beyond/ your in for a treat
- 601 replies
-
- 1
-

-
- constitution
- revell
- (and 1 more)
-
sorry for not posting it..........I was going to add it to the AmericA build. I don't have any pictures of it, so I didn't bother. it's alright now..........a little repair work and she's good as new. thanks for your concerns gentlemen, but the damage was very minor
-
she looks great Dave........are you taking lessons from Dr. Dafi?
-
yup...lessening the bow is a good idea.....but I think you might want to try using joggers at the bow, instead of stealers. the idea is to keep as straight a line as you can. following two planks from the mid ship, to about the third rib from the bow......taper them and fit in a single plank, run to the bow stem. essentially, it merges these two planks together, into one. after a couple of those, that curve at the bow should almost be gone.......the rest can be eliminated with tapering other planks. stealers are used when the planking want to divide from each other joggers are used when the planks want to merge with each other this is how I've come to understand how these two work.......hope it helps out. the stern looks fine.......you'll be able to fit the garboards with no trouble at all. looking good my friend........glad to see an update on this fine build.
-
good to see your progress......depending on how the planking starts...it can be quite enjoyable. such a nice fit of the gun port panels.
-
OMG Andy!!! this is one cool looking build........I've never done resin before. I'll be watching with great interest!!! hope all is well with you and your family...glad your back!
- 382 replies
-
- 1
-
-
- stadacona
- sylvan scale models
- (and 1 more)
-
thank you John.........now don't get used to those names.....now I'm trying to get them to where I can name them properly.
-
I noticed this little gem in passing.......I love how you planked her I will have some good reading tonight......I see that I'm not too late for the finish.......very nice work!
-
I have to repair her........I had her in front of a window. it was a warm one and I had the window open. a good gust of wind hit her broadside and sent her on the floor! the only damage she got, was a block broke free and the bow spirit and winch popped off. I did a bit more to the hull frames and I fixed her this evening. while I'm working on the frames for the next update, I plan on getting back to the Goth. I gotta get motivated.........the admiral is beginning to notice. the AmericA is all better now! thanks for noticing Augie.......and thanks for the good word
-
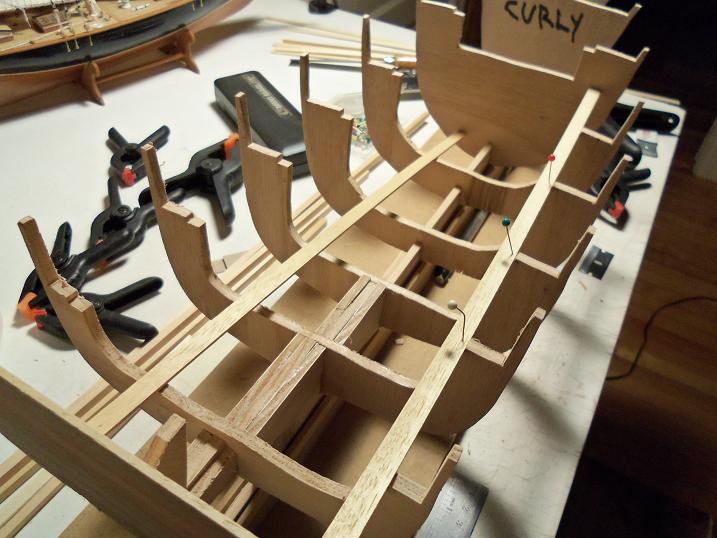
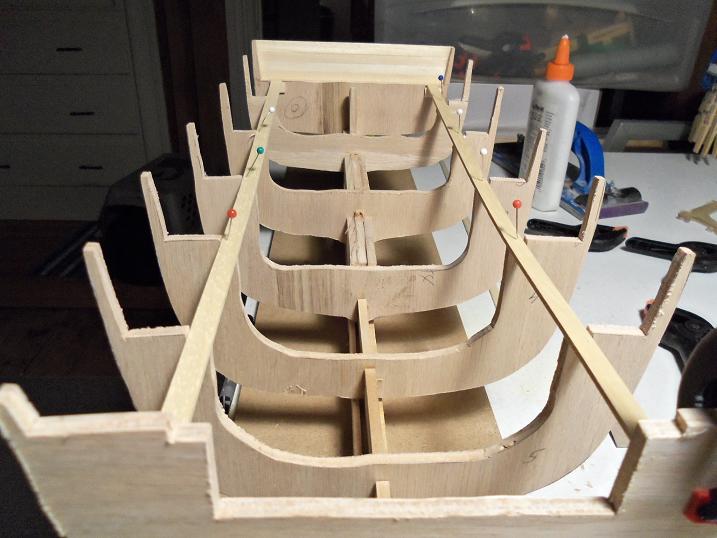
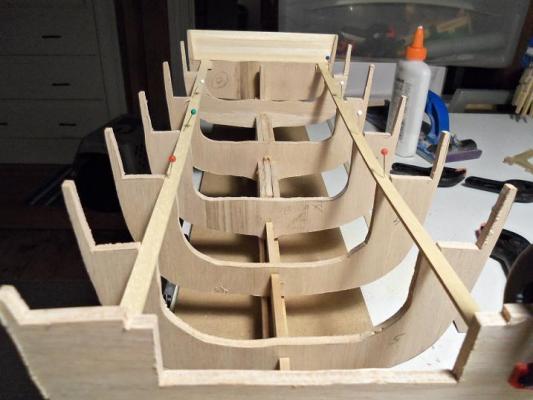
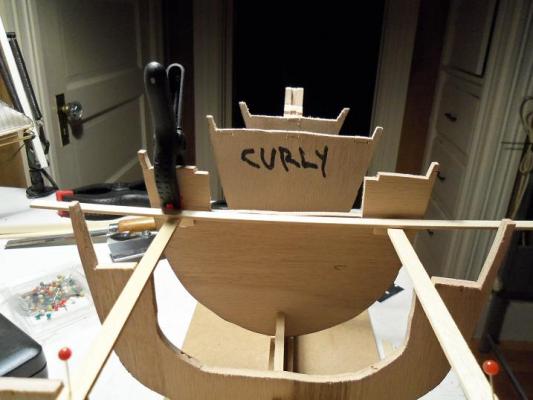
I figured that I would update you on the progress of the hull frame that I have dubbed Curly. as mentioned, I did reuse the broken stern rib. I also found that narrowing the stern rib, and ribs #4 & #5, I can further eliminate the gap problem, noticed with the jig. I had the jig strips on the posts, when I glued in the starboard side deck beam. this oak plywood is pretty flimsy, so I removed them after the glue was dry. I had to trim a couple of ribs on the port side, in order to get the beam to follow the same curve as the starboard side, but in the end, it worked out. I leveled the beams at rib #6 with the cut - away. one side is a little high.....I need to square it off. the planking of the stern was just as well........I'm going to be doing it to the other frames anyway, before I do the bulwark planking. hopefully I can have all three done for the update.

-
great rigging progress Sjors........nice shaping on the pulley assemblies the string art begins..............
-
she looks great JP........I'm not as familiar with this build as others are, but I'm sure that in doing the other side, you'll come up with a good remedy for your problem. even if left this way, you have a fine looking build there.
-
masting looks great Mobbsie.......so, your going to do them one step at a time? it's going to make it easier to do the shrouds...of course, if I was doing a ship of that size, I might have done my build the same way. very nice!
- 1,279 replies
-
- 2
-
-
- agamemnon
- caldercraft
- (and 1 more)
-
sorry to hear of the mishap.......I'm sure you will post when the problem is cleared up.
- 2,191 replies
-
- 1
-
-
- confederacy
- Model Shipways
- (and 1 more)
-
understood........all I really need to do, is remove most of the taper to create the shape of the bow.......I can use a sanding block to get the rest of the shape down to where it needs to be. the rabbit at the stem is going to be the worst part. I promise to be very careful. I will keep an eye on my mailbox........I forgot to tell you........I have a flasher! a friend on mine in Canada sent it to me. I haven't dug it out yet, but I think it also has a built-in switch thanks again for being so generous........I really appreciate it!
-
to be honest Tom.......I think it came out quite well. once painted, you would never be able to tell them apart
-
very nice P.E. work Kevin........really makes the detail stand out
-
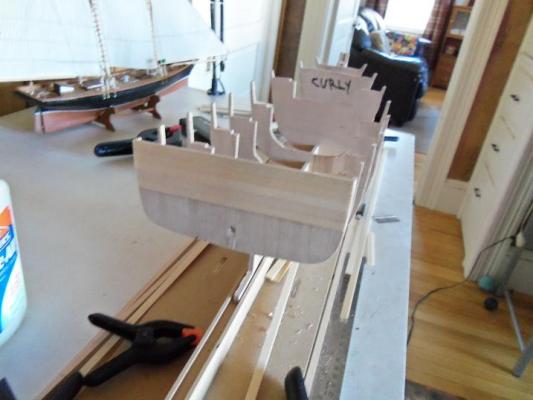
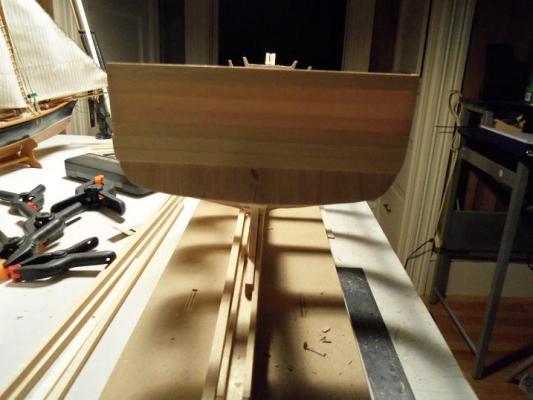
just a small update.........I did end up planking the stern rib and reused it. I've also been doing some faring to the aft sections.....an effort to smooth out some of the imperfections. I'll need the dremel to do the bow sections...there a lot to remove there. I'll use the bulwarks to align the bow with the main section, since I'm electing to do this alignment in two quadrants, you'll get a better idea of what I'm doing with the next update. thanks for looking in.