popeye the sailor
-
Posts
16,007 -
Joined
-
Last visited
Content Type
Profiles
Forums
Gallery
Events
Everything posted by popeye the sailor
-
 I'll look forward in seeing it Sarah
 -
such beautiful work Gil.......I enjoy seeing your work.......so clean and well done
-
I'm glad you decided to continue.......I respect your position and your experience as a modeler. if I in any way, added to your woe, I give my apology to you, and will moderate myself in the future. that is the best anyone can do to help the situation.......the rest is to just let it dissipate, and get back to what we enjoy the most.
- 2,191 replies
-
- 4
-

-
- confederacy
- Model Shipways
- (and 1 more)
-
perhaps a bit of a tutorial here would be a good thing........I recently downloaded Draftsight, and I'm still a newbie with it. there is a sad note here.......windows XP will no longer receive any more updates for it soon *sigh*.........another great system pushed by the wayside.
-
is that the anchor I see in the bow?......below the bulge of the dive fin
-
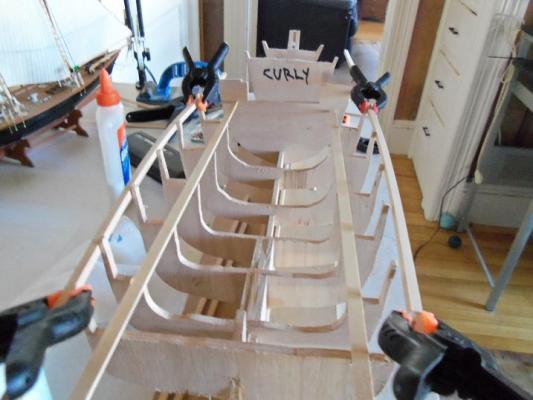
for the moment Michael, that is what I'm calling them.......they have no subject at this time. I simply named them, so it would be easier to tell which hull I am working with. the names will disappear when they branch off into their intended subjects.........hopefully, it won't take long to get them to that point. as I mentioned, Curly has been giving me a fit........it appears that #2 & #1 ribs are not wide enough. it was late, so I ended my work on it, and figured I'd continue on it after my work week was over. well, I did........and I found that the post on #0 {the stern rib} had cracked, causing it to go 'wide'. rather than try to fix it and cause a weak point, I might just make another part and replace it. another thought I realized, is that the stern will be planked anyway.......why not just lay a few planks on it and use the part........at this point, it will be secure. I will fix it and reinstall it ....guess it wasn't that big of a problem......now......was it

-
awwwwww.....I was only kidding! it was great to meet you and the admiral if I ever get a chance to travel......I know right where to go on the ship front.......there's still more to go. the ribs that make up the main deck aren't going to take much, but the bow section is going to give my dremel a good workout! Curly's giving me a fit.......but I'll have that update up soon. thanks for the good word......can't wait to see an update on your build
-
I had a post here.......must be the wrong button syndrome again..........nice work Adrieke! keep up the good work.
-
I don't think you have much to worry about........with the planking you have left to do. just limit how many times you glue your fingers to the planks, and you'll be OK
-
I don't know Kevin.......could get dicey. don't get discouraged with all these 'super detailed' pictures.. you also need to be careful for the pictures that show detail that wasn't there in the period your modeling the ship after. keep the good stuff coming
-
sometimes, depending on the scale, you can adjust the plank width a little. one good thing in using narrower planking, is that it conforms to the hull curvature much better. on painted hulls, there's no worries at all.
-
beautiful progress Danny.........the cannons and rigging looks great! your wood working skills are super......nice work!
-
yes we are Augie........now to get the other table operational will do Craig on the computer, it can be done from your name box, in the upper left hand corner, in the heading. never used an I-pad my friend.......hope you can get it sorted out
-
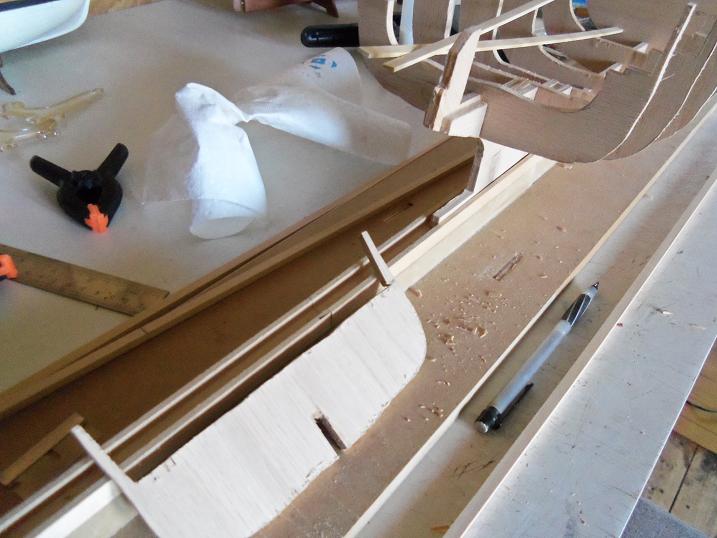
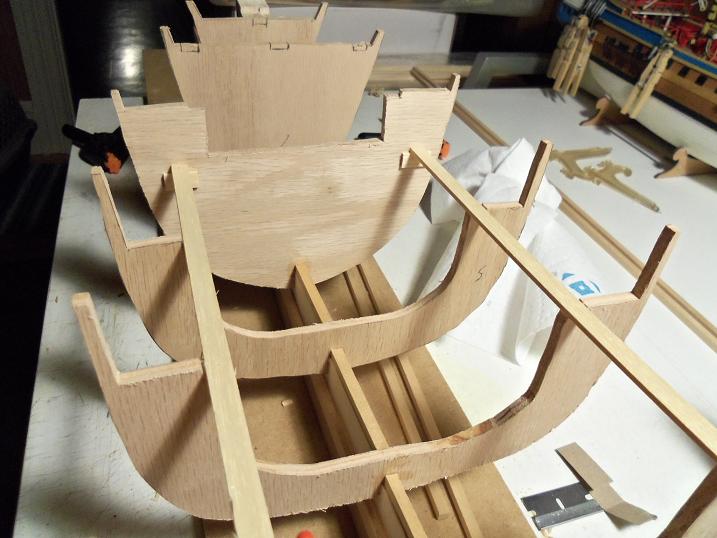
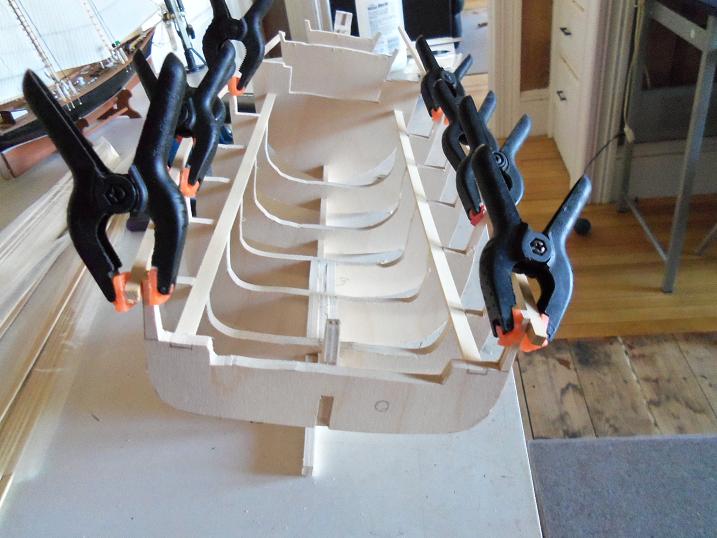
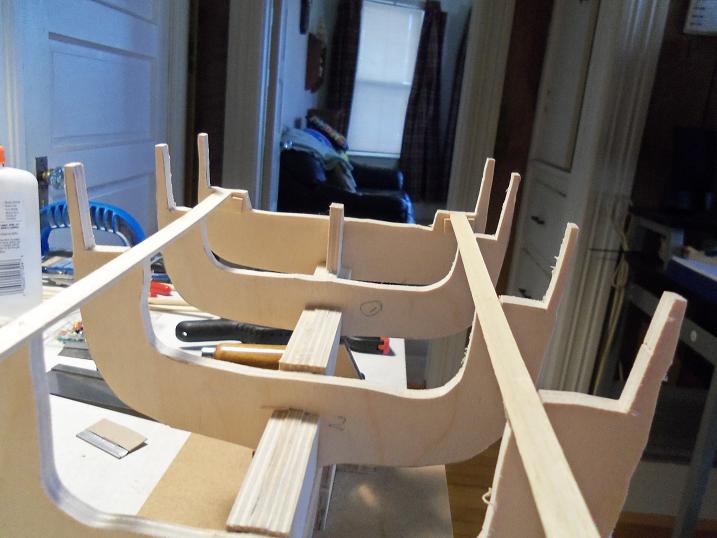
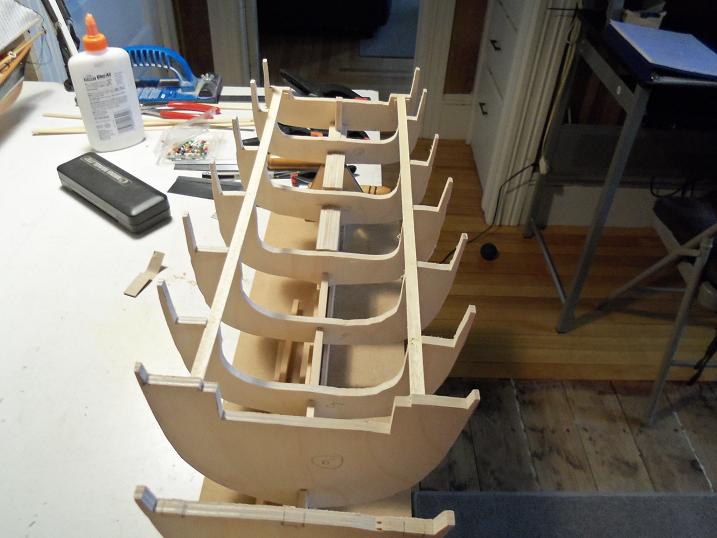
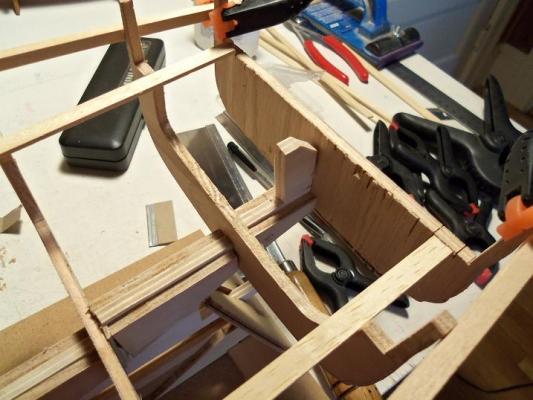
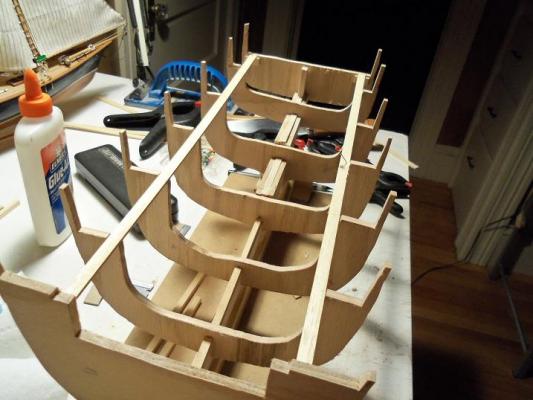
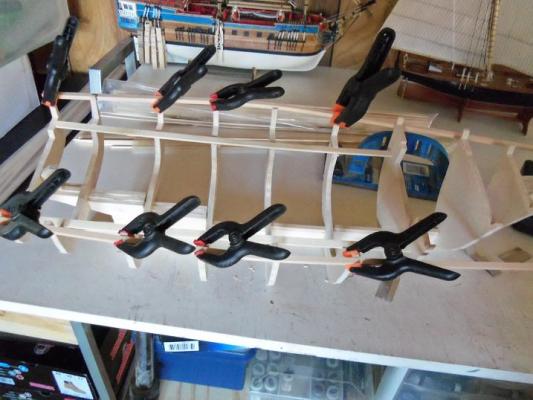
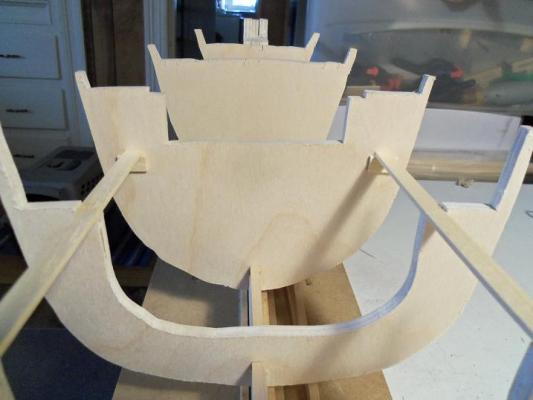
Larry was a bit different........the frame was in better shape. there weren't too many adjustments I had to make........just the slots for the deck beams. the port side beam was right in the ballpark, so it was cemented in place.........the starboard side though, I had to do some adjustments it was a bit off the line with the cut outs {I didn't remove them} for the beams, at the stern. I need to move it more inward, so it will fall into place with the cut out. the forward deck beams were good....... what needed to be done here, was to adjust the slots for rib #2 & #1, so the curvature on the starboard side, would match the port side. once the adjustment was done, the beams were supported at the stern. there still needed to be a little more, I found.........I made these adjustments after it had dried. then the re-cement. the forward beams were supported........I did have to look at it in disbelief....it looks a bit off. the reason is that the port side is a bit wavy in the cut......after I sand and fare, this will be taken care of. this hull design is a really cool design to play with. what I am doing here, is the alignment of the main deck first, and the bow deck second. the cool part is.......there isn't much faring to do with the upper part of the main deck, it runs fairly uniform. all of the faring pertains to the bow.....and it's quite pronounce. I can even change it, so the 'V' hull has more curve, as it reaches the bow stem. the stern will run smooth......curve at the turn, with another to blend in the shoe. here is the picture I should have shown you with Moe........the curve of the deck. it will need some sanding, I'm sure.......but with that, I can add or subtract how much there is, depending on the subject. I do intend to build up the posts, as well as add some in, but I will do that once the deck is in place. I should have an update on Curly soon........I had to laugh {I did it to myself, so the admiral wouldn't think I was going loony}. I was looking at them.......I know I won't get confused with which one is which {for now}.....but I don't want you folks to get confused. so, for now, I wrote their names on the frames, so you would be able to tell them apart. I do it as such: Moe: totally made up of the 1/4 blonde plywood Larry: 3/16 oak plywood ribs with the 1/4 blonde plywood keel Curly: totally made up of the 3/16 oak plywood with that said........I'd better get back to work.......yes........it feels good to be on the move again!


-
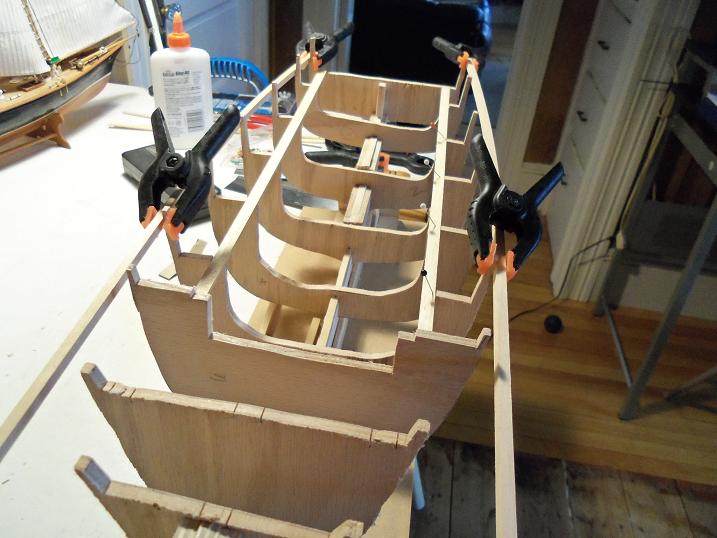
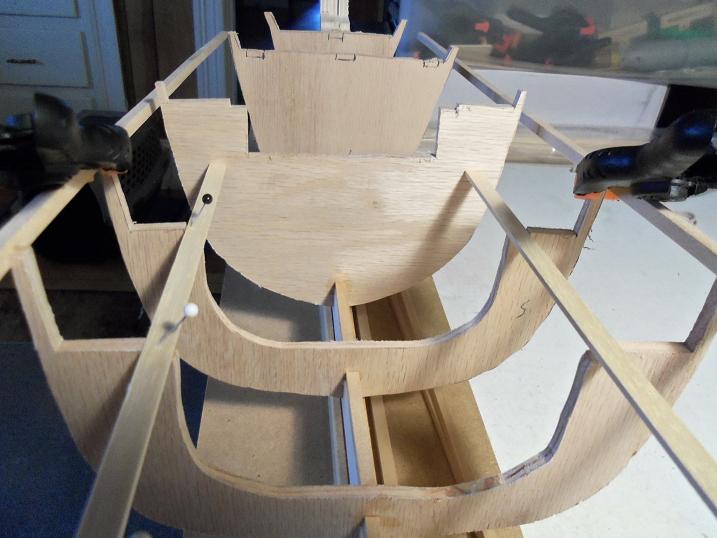
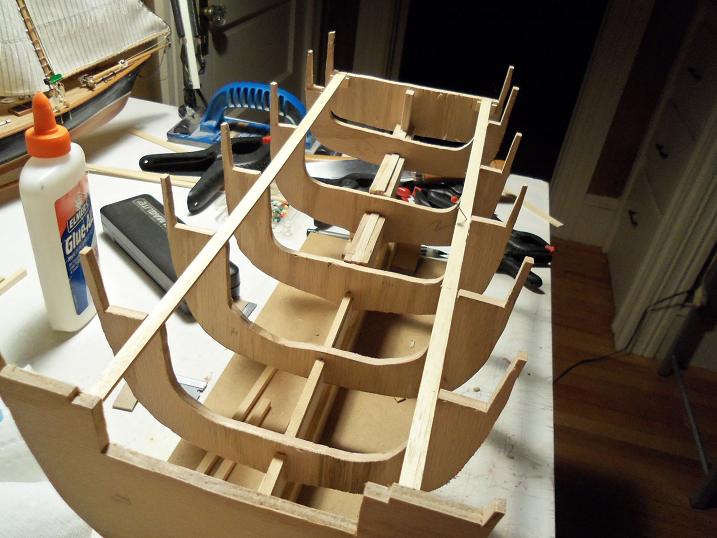
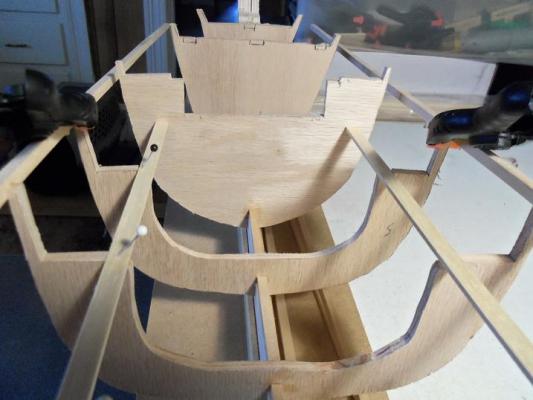
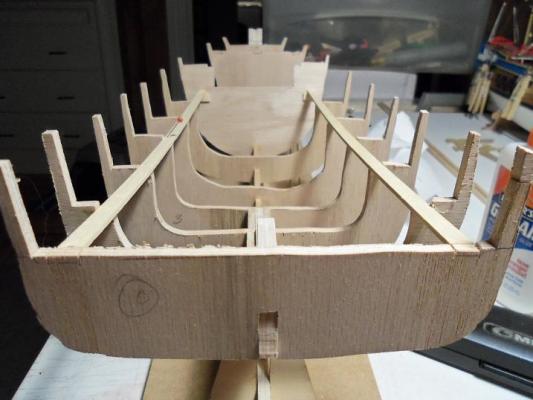
I think 'freedom' would be a better term Augie........'cuz when you out there.....the real world is left behind.....utter PEACE! yes Mark........suspense.........but I hope to make you laugh as well I read your comment on your log Bob.......I am almost back to normal {or a reasonable facsimile, thereof} I thank you good sir for the thought can't touch me copper...........I have a get out of jail free card {I got them from an old monopoly game I threw away} I have something for you Sjors thank you Paul for the good word. this should be a fun ride.......it's a very wide range subject OK.........OK.......John, no more holding out if I do real good on these.......does this mean you'll come visit me again? {just a thought.......>giggle<} OK........well, I have the first two hull's deck beams in place........Curly want to be a bit difficult. Here is Moe. he needed a bit of surgery in the beginning......a couple of ribs were a little out of line. it's hard to see here....but #3 & #5 were a little out. I had to crack them free and align them with the handy alignment tools I have here......two 1/4 square strips. inside is how I would like them to look. with the ribs adjusted, the strips were cemented into place. I did have to make adjustments in the slots as well, to run them as straight as possible. I used pins to hold the strips in place as they dried. I was not that good with cutting the parts out.......that will all be sanded away later. the cut away in rib #6 presents an interesting question.....what to do with it. since I am not going to be following the Billing's design, I can do a number of things. this is the cut out for the pilot house. the pilot house can be of any design......one of them, I might even try to go for the 'lobster boat' design, open on one side. most pilot houses are located in the center, keeping with the 'balance' of the hull.......ie.......weight distribution. what if I were to install one, say.........centered to the port side? the cut away at the stern is of no consequence......the other two doesn't have it. the stern will be built up with a bulwark, and may also have a cabin 'office' {i know the first one 'Moe' will have one}. the deck beams now has support, by the added small piece of wood under them. on this one, I may elect to cut out the extra wood and add the 1/4 inch to the deck....I think it might look better. but, on the other hand, if I do have an 'office' back there, I can fit the walls into it, and this will never show. {gee, I'm so glad I have you folks to talk to.......you make me see reason } the same support is done at rib #6. so far, I've found the same measurement here with Larry, as I did with Moe........1 1/4 inch from the deck line to the fore deck. again, it's going to depend on the pilot house, as for whether or not I will need to install stairs at the entrance.......or inside, for that matter. this isn't a good picture, as for how level the deck beams are........or even how I kept with the curvature of the deck. I'll get a better one later. I might have given it too much of a curve, but it's the same amount that the Boulogne Etaples has.......I might even sand some of it out. I still need to add in the rest of the deck beams, since in the Boulogne kit......there is a large hole in the middle of the deck. this will be filled in.......I'll need all the deck I can get! I'll do a hold, or a companionway......some sort of access to below deck. for now though, the focus is to get the bulwarks in place, scuppers cut, waterways and decking done {for the scuppers}. the faring comes first though.......gonna be hard though.......this is some tough plywood


-
Cutty Sark by NenadM
popeye the sailor replied to NenadM's topic in - Build logs for subjects built 1851 - 1900
she looks great Nenad.........if the concern is what I think I see, I wouldn't worry about it. just make sure the cap rails are even with each other, and it should mask it quite nicely you've done a very good job- 4,152 replies
-
- 2
-
-
- cutty sark
- tehnodidakta
- (and 1 more)
-
holy cow! that's some really nice progress! .......the model looks good too :D superb work Piet!
-
super nice job!........Larry. it looks very smooth and well thought out!
-
nice to see the yards up Gil..........super ........simply supper!
-
it's probably just 'ghosting' popjack......best thing to do in this case is to let it dry for a day or so, and then hit it with another coat of white. don't thin it out as much, and you should be fine. white is a terrible color to paint
-
very nice first attempt on the skylight. with how good that one looks....when you figure it all out, it's gonna look even sweeter!
- 2,250 replies
-
- 1
-
-
- model shipways
- Charles W Morgan
- (and 1 more)
-
thanks Mobbsie.......I'm doing better... almost done with my update. I want to get all three done before I show you folks thanks for the good word! you'll have to post me a link to your build log Craig.......very interested to see what your up to. no contest......you'll get used to us guys....we tend to grow on people :D :D
-
careful Bob........don't get sucked in....or you'll end up like me! :D :D super job on the tug......looking real sweet!