


glbarlow
-
Posts
3,851 -
Joined
-
Last visited
Content Type
Profiles
Forums
Gallery
Events
Posts posted by glbarlow
-
-
52 minutes ago, Steve20 said:
lot of detail in the rudder
Thank you. It is by far the most detailed rudder I’ve ever made for sure.
-
1 hour ago, Rustyj said:
bang the rudder and knock it off.
Thank you Rusty and excellent advice. I was able to have working pintles and can easily remove the rudder. It is now off the ship and sitting on padded shelf. I am quite confident of my ability to knock things off and dent the nice cedar, so I made sure I could park the rudder in a safe place.
I’m glad to know I’m not the only counter of things. 😊
- Rustyj, KentM and FrankWouts
-
 3
3
-
I have no interest in watching videos of a model, why?
As a photographer, and how I manage my photography website, it is an essential truth that the result of posting a large number of photos to a gallery is a sure fire way for none of those photos to be seen. Less is more, every time. I see this happen with Facebook posts, if I see +72 photos I don’t look at the first one. I see it in some build logs with a large number of photos showing pretty much the same thing, I skim right on by, especially if it’s photos not supported with text (the reverse is also true, text not supported by photos).
My experience for a gallery is 12 images enough to generate interests an over 20 loses the audience. This doesn’t apply to a build log where there is a running narrative and progress photos, the difference between a gallery and a log.
-
48 minutes ago, Chuck said:
It all
looks as it should.
Thank you Chuck. I appreciate the replacement parts, they were put to good use.
- Dave_E and FrankWouts
-
2
-
55 minutes ago, VTHokiEE said:
Well worth all the attempts.
Thank you, I never regret the attempts after I'm done, I know I'd regret it if I didn't.
- FrankWouts, Dave_E and VTHokiEE
-
3
-
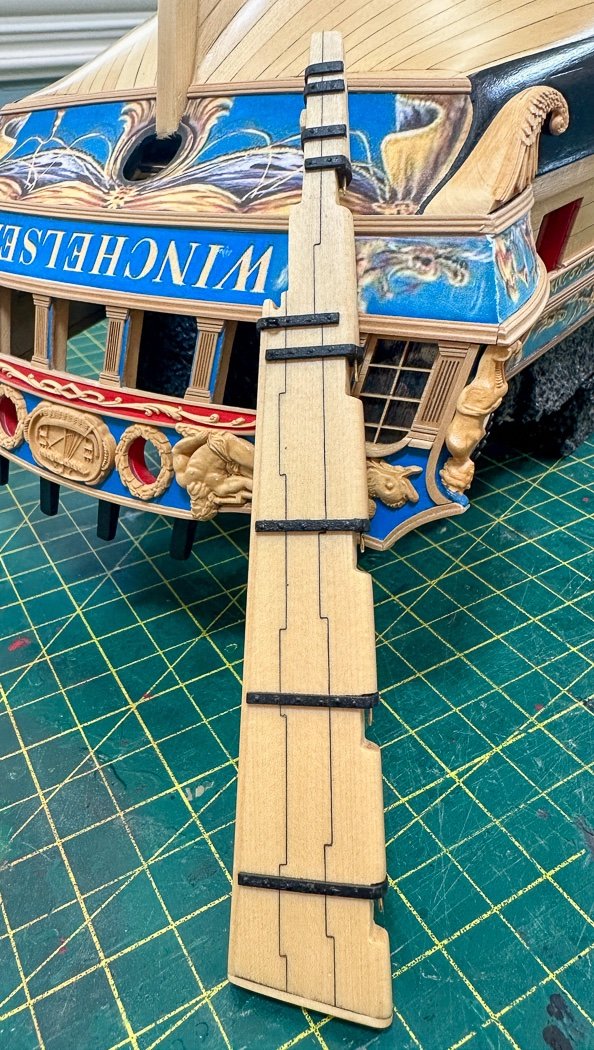
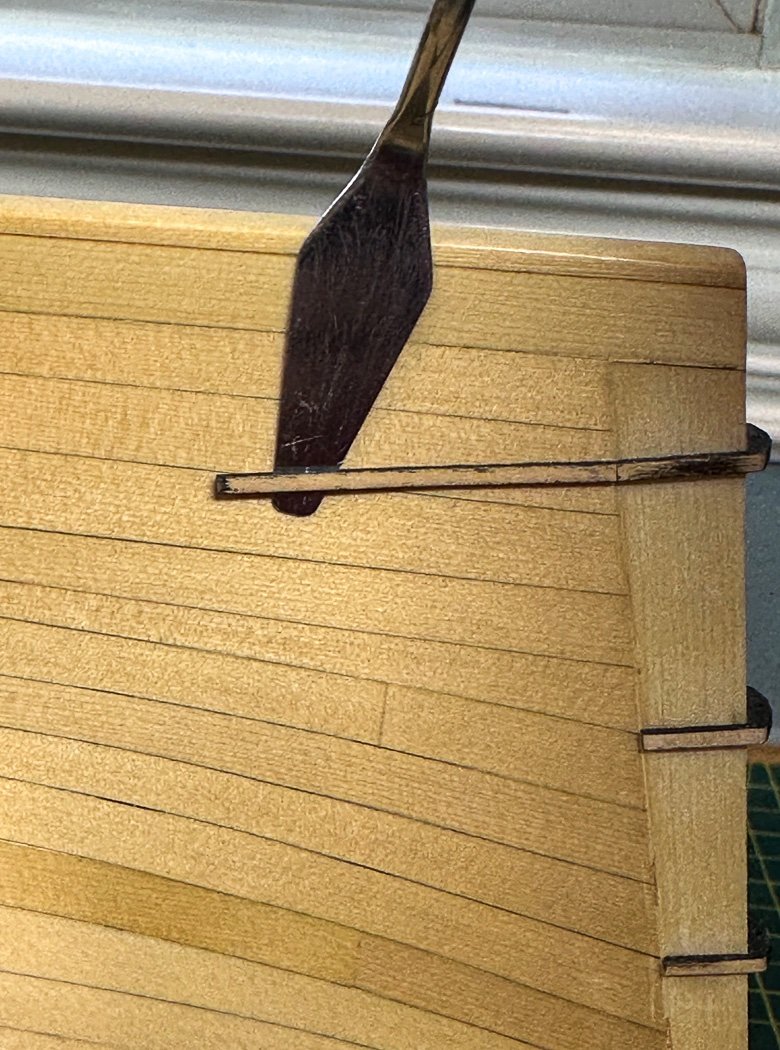
The Rudder
By my count I’ve made and installed 12 rudders up to this point, unsurprisingly Winchelesea’s rudder is next level. Couple this fact with my inevitable way of making what might seem easy into something much more challenging given the annoying fact I can’t let go if I don't like what I've done no matter how many times I have to do it over. Anyway…
The rudder starts off nice right from the start, not simply a piece of wood but three laser cut pieces, the caulk being an opportunity not to remove char where they connect - of course there's plenty of char to remove on the outside edges. Then the addition of two thin strips on the aft on keel edges. I kind of enjoy the next step of shaping the rudder with the the aft side thinner growing more so towards the keel then rounding the fore edge. Who doesn't like to sand stuff.
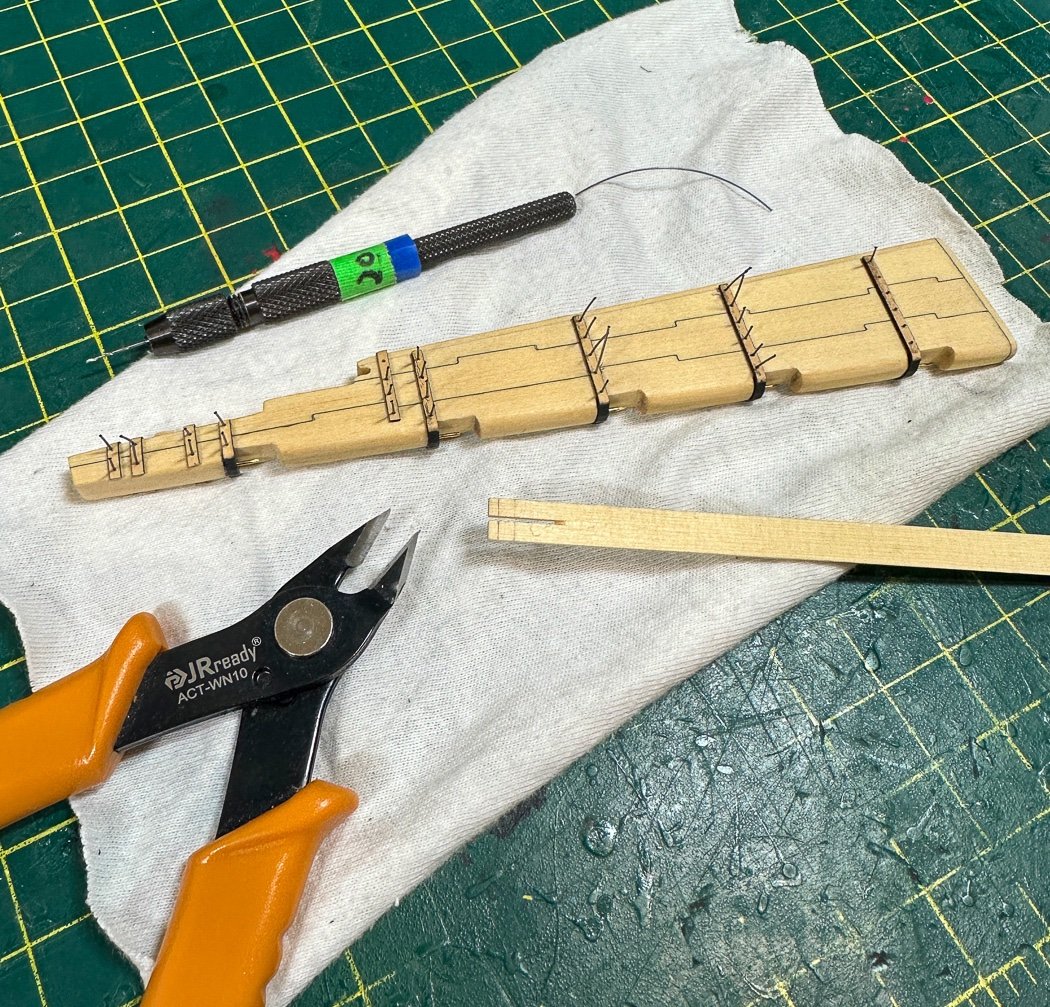
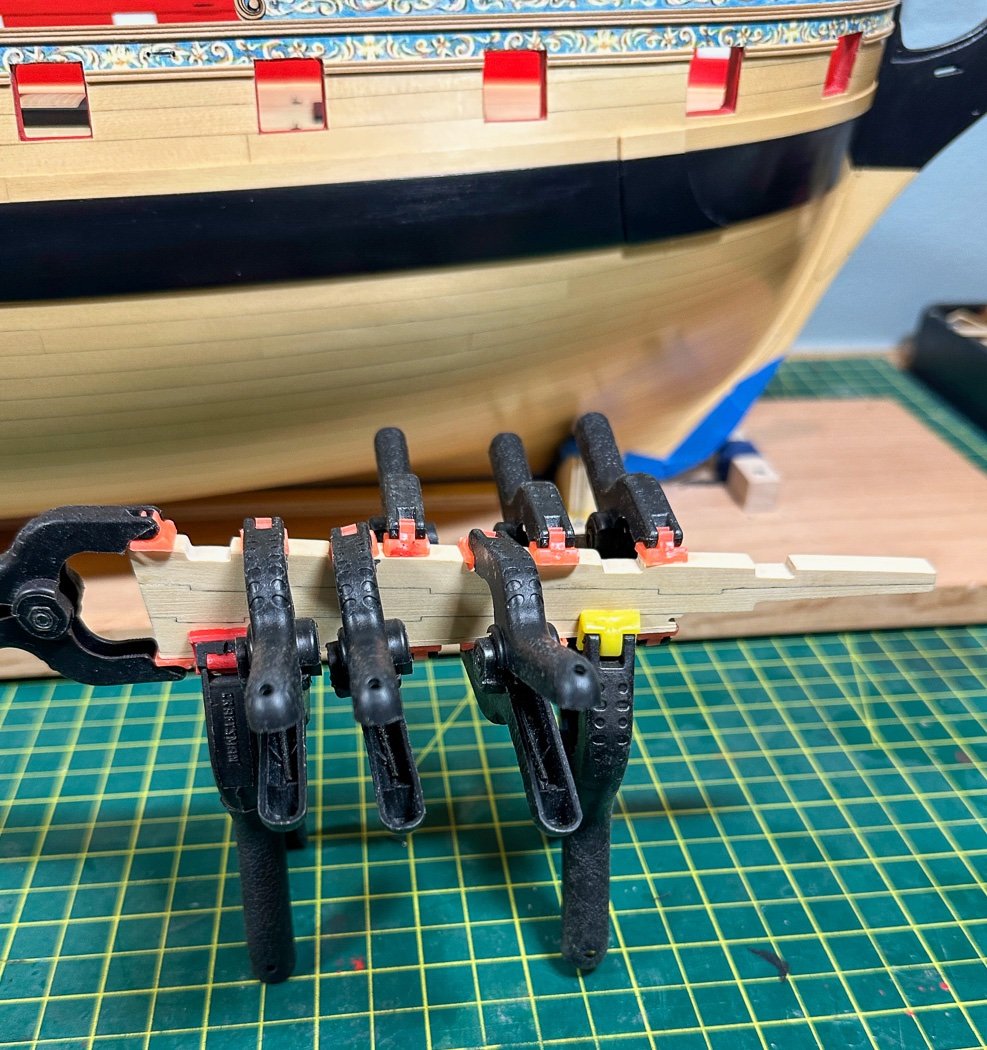
Next up the pintles, fragile laser cut “U’s with the addition of straps from 1/32 wood. These are thinned further, bolt holes drilled, and the bolts, 20lb black mono-filament fishing line, inserted, glued and trimmed. My simple jig allowed me to evenly space the bolts based on the plans. I used blackened little brass nails for the pins, the point of which allowed me to more easily steer the rudder home to the gudgeons later. I remove most of the point and place them to just be visible below the gudgeon.
Add a few more straps and a small slice of 1/8 wood to stimulate the tiller, all detailed by the monograph and the plans. This was all fun and straightforward. The description of which having bored all the Winchelsea builders that have gone before and wondering how Glenn can turn the rudder into a ten photo post.
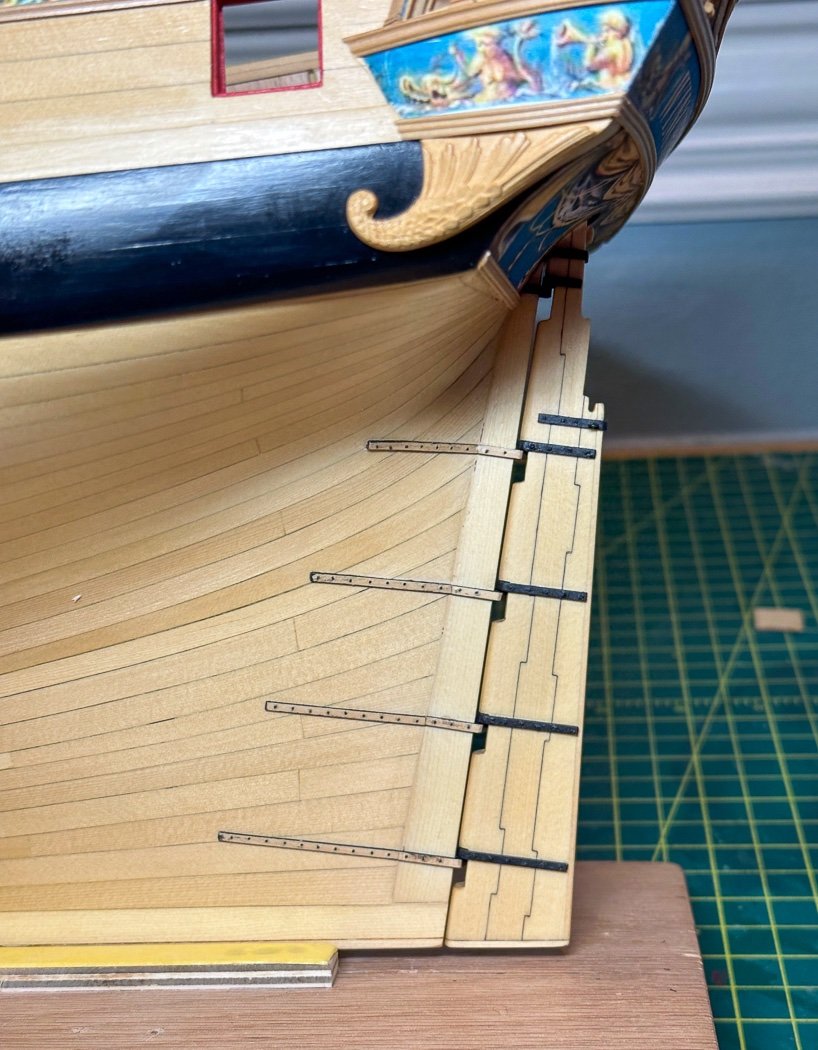
The next part, not so fun. As I slide the first U gudgeon on the stern post, they having slide on the rudder so easily, it immediately broke. I sorted out that my sternpost was, this is true, 17/64th. Not sure how or why, but the ¼ gudgeon wasn’t going on even that small difference. After experimenting with options, none of which I liked, I was faced with reducing the very nicely finished stern post by 1/64th for the gudgeon to fit.
I really didn’t want to do that. The thing I said about sanding, not so much here, there are no photos recording this ugly process. Suffice it to say it takes a lot more than you might think to evenly reduce a piece of wood on both sides by total of 1/64th especially when that piece of wood connects to a bunch of planks I didn't want to reduce or damage their finish.
With the gudgeons finally fitted (so easy now to say that in five words) I added the straps using CA along with clamped on guides. My thin putty blade tool again came in handy to apply the CA as it did with the planking so long ago.
Then followed more drilling for more bolts, more gluing, more trimming. After painting I applied more coats of WOP with more sanding between, a slow careful process to not damage anything and to get it all back even in color as I could. The word 'more' in this case meaning tedious amounts of time taken on repetitive tasks.
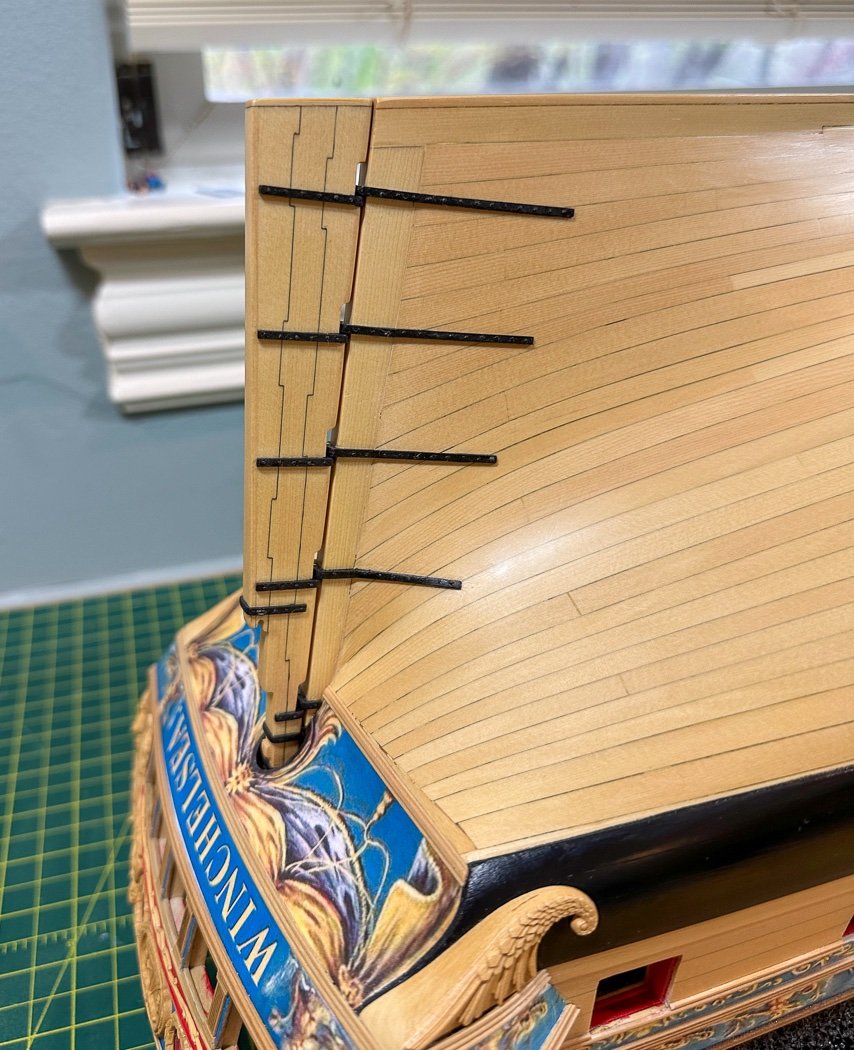
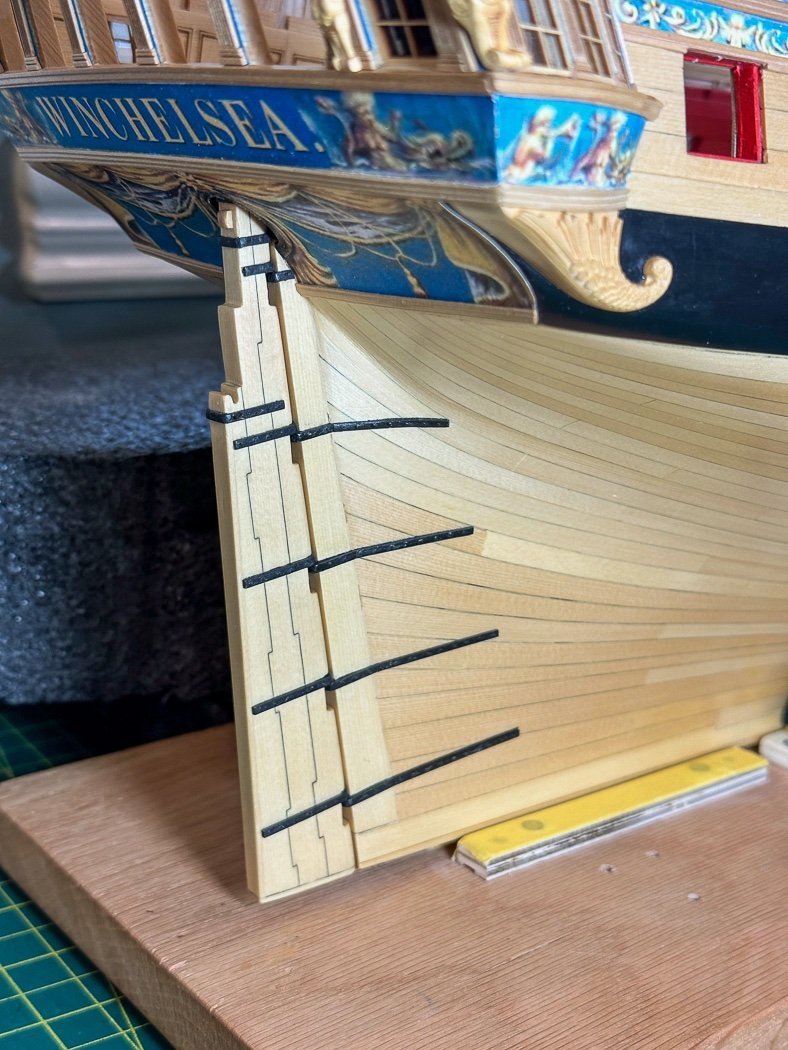
In the end, after taking about as long as all 12 of those previous rudders put together, it all turned out ok. I don’t know why I do these things but I counted it all. The rudder, including all the small parts to make up the various straps is 26 pieces, plus 17 more on the stern. I hand-drilled 156 holes for the black filament bolts, each of those glued, inserted, and trimmed.
All together, it is a well designed rudder consistent with the detail of Winchelsea and certainly worth the time spent. No matter how I might sound above, it's all good...now.
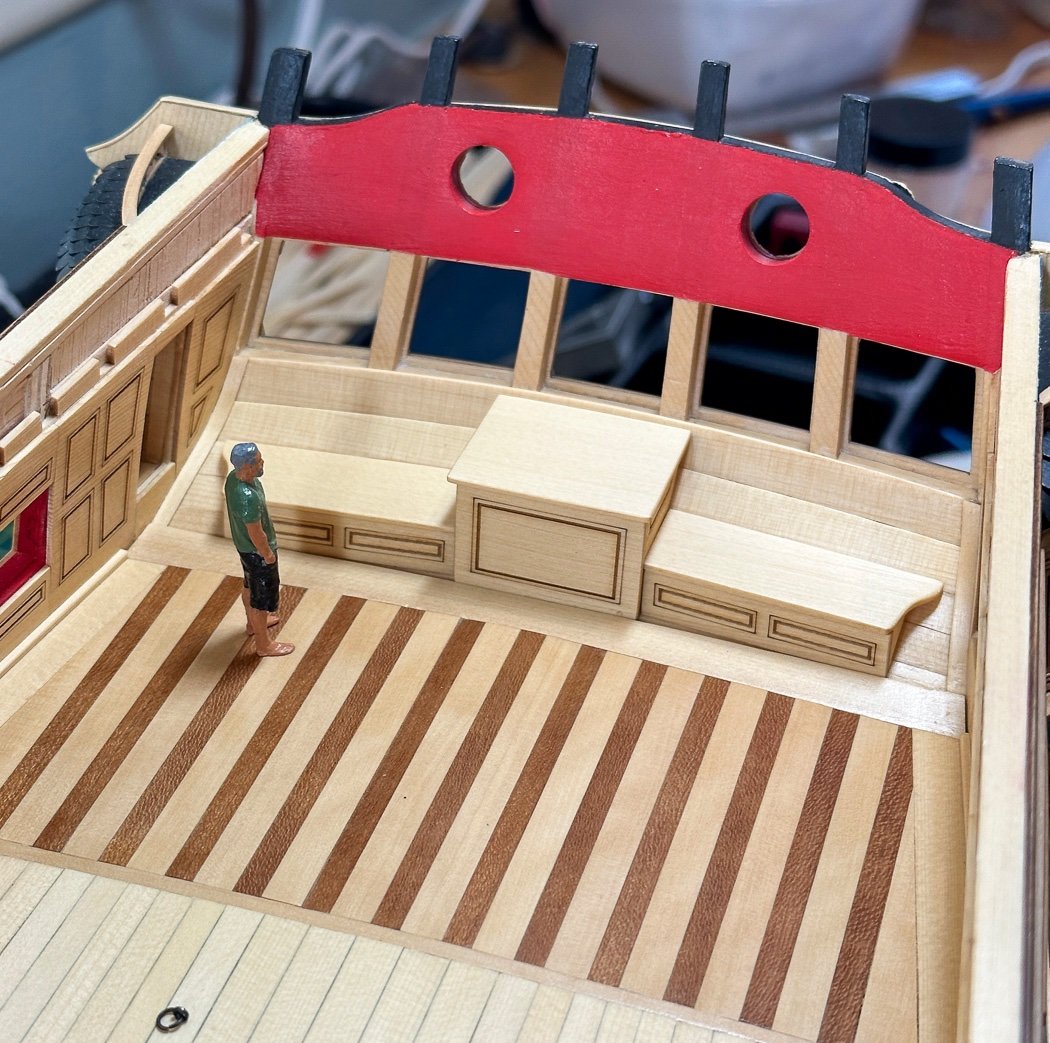
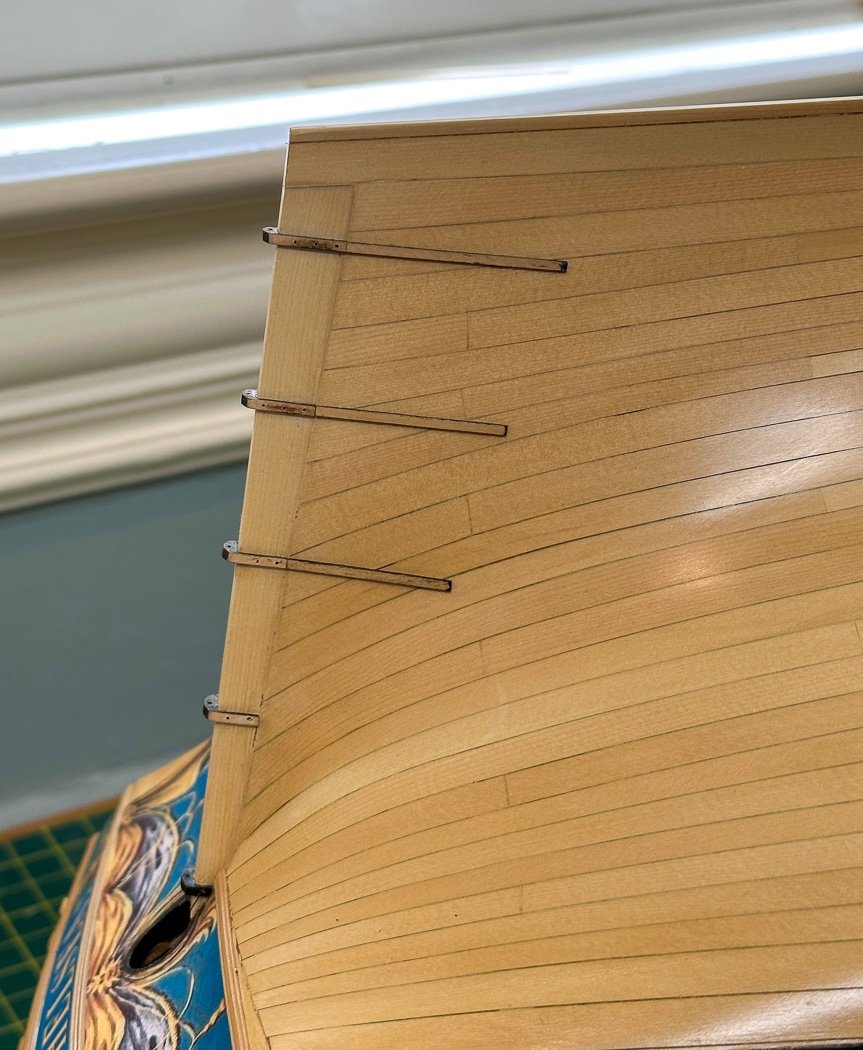
The final touch is the rudder trunk and benches in the Captain’s cabin. All straight forward laser cut pieces. A little work to get the angles to fit and match my particular counter but not overly so. Mini-me stopped by to check it all out.
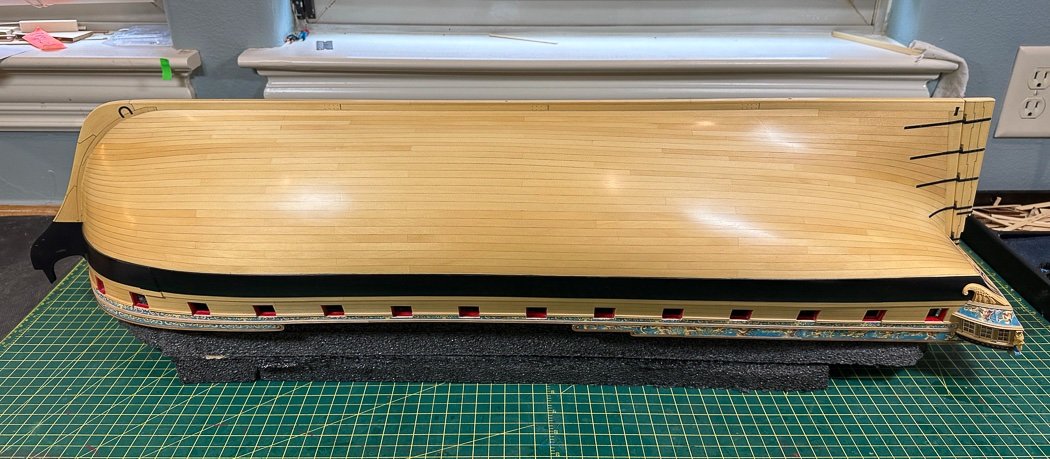
Finally, before I installed the trunk and benches I took a long look at my Winchelsea upside down for the last time. The deck gets more crowded from here on in, upside down it will be no more.
Thank you for stopping by and for your likes and comments. After a pause for non-modeling work I’ll move on the the remainder of Chapter 5. Then after that I get to make lots of cannon, lots of eyelets, lots of split rings, So much fun awaits.
- Stuntflyer, Dave_E, Ryland Craze and 23 others
-
20
-
 6
6
-
That’s a really fine looking model. Excellent tricks for mounting and making things fit correctly, and for taking the time for small details. Thanks for sharing them. Your forecastle planking will be my reference if I ever get there. Well done!
-
-
Excellent work, well done!
- Matt D and FrankWouts
-
2
-
Very nice work on the bollards. I’m a big fan of my Proxxon mill, though clearly you know how to make better use of it than I do.
- scrubbyj427 and FrankWouts
-
1
-
 1
1
-
Your Cheerful is really well done, work to surely be proud of. Winnie awaits your return!
-
-
Unlike a double planked hull (and this is why they are double planked) you can’t correct uneven fairing by sanding that first planking. With a single planked hull you have no more than the thickness of a 3/64th plank. It’s understandable to want to call it done and move on, but it is essential to have the fairing as near perfect as you can get it. Don’t just pin the batten, slide it up and down, top to bottom with your fingers at multiple sections, you can feel the imperfections if there are any, it should feel smooth and flow evenly. The infrastructure is of course the basis of every thing else you do, it’s worth taking the time to do it right. There is some opportunity to so a little shim work as you plank, but not much.
I said it in jest, there is though a bit of zen at the stage. From what I can tell you’re doing a great job of this.
- CaptnBirdseye, Toolmaker and BobG
-
3
-
7 hours ago, Freebird said:
amidship and work towards the stem and stern?
Front to back with multiple passes and use of the prescribed battens is my approach.
Sometimes, even often shims are a better fix than more sanding, the battens don’t lie. Keep in mind the bow is the first three to four bulkheads, do them as a unit. Your bulkhead B problem could be created two bulkheads away. Fair slowly, be one with the wood. It will show you the way.
Ok, that last sentence lost the plot 🤣🤣
-
6 hours ago, jfhealey said:
Does it have adhesive qualities
I use it on seizings instead of CA.
-
Your Cheerful looks great Fred, congratulations! Amongst many other fine features I do like Chuck's new blocks, wish I'd had them for mine. You've done a really fine job and should be justly proud. Everything is so nice and crisp. I think we can both agree Cheerful is a great build.
I noted your comment about seizings and CA. Try Matte Medium Clear Acrylic (I use Liquitex) instead of the CA on the seizings, it dries clear, easier to apply, and looks more natural. I made the switch when I build Cheerful, it works great.
- Ryland Craze, Saburo and JpR62
-
3
-
4 hours ago, Freebird said:
Now I need an opinion,
Buy them from Crafty Sailor, the 6mm size if I recall, maybe 8mm. They make nickels scaled wooden ones, unlike most of the commercial crap. Yours are a bit fat, sorry you asked. 😊
Now you can start making eyelets and ring bolts. My last Winchelsea post was my effort to explain one way how if you’re interested.
- Gregory, Freebird and Ryland Craze
-
3
-
Nice start, looks ready for those port sills. Well done!
- James G and FrankWouts
-
1
-
 1
1
-
-
Always instructive and enjoy watching my ready reference source make such nice progress. I say this often, your cherry/pear version really looks great!
-
You’ll enjoy Cheerful. It’s a great model, i had a great time building mine. I recommend adding hyperlinks to your signature ,one so we can find your different logs.
- Ryland Craze and Freebird
-
2
-
Can’t get much better
- AJohnson, Edwardkenway, FriedClams and 2 others
-
4
-
1
-
Looking good!
- Saburo, Matt D and FrankWouts
-
3
-
Great scarf joints, send me some🤣
- Edwardkenway and FrankWouts
-
1
-
1
HMS Winchelsea 1764 by glbarlow - 1:48
in Member Build logs for the HMS Winchelsea
Posted
Thank you, I hope the log does prove helpful.