


glbarlow
-
Posts
4,126 -
Joined
-
Last visited
Content Type
Profiles
Forums
Gallery
Events
Everything posted by glbarlow
-
 Keeping in mind the wind and weather was always coming from aft quarters my best guess is to keep some of that from hitting food being prepared or fueling the fires on the stove, nothing more than a wind break. I’m with BE though, while I appreciate Chris being true to the design I’ll leave it off because it obscures a view below the forecastle I’d have spent time building. No one is cooking anything on my models.
 -
I recommend a Byrnes sander, there are many more angle cuts in our future. The planing is a great approach, I just don’t have enough experience in using one, I’d take out half a bulkhead😳🤣
-
I really wish Chris had those boats when I built four of them the old hard way for Vanguard, Chris is making it easy for us. I agree that setting up right is a much better look and no problem fitting out for someone with your skills. The masts look nice, making them from anything other than kit walnut dowels is a big step up. I plan to do the same again with Flirt in boxwood when I get back to her. Meanwhile it’s one plank at a time for me.
- 542 replies
-
- 2
-

-
- Sphinx
- Vanguard Models
- (and 3 more)
-
Great choice, I’m a fan of Admiralty Paints version, I prefer it over gold (and white), seems more realistic, to me anyway. Your stern is looking great, creative and just bold enough.
- 857 replies
-
- 3
-
-
- Sphinx
- Vanguard Models
- (and 1 more)
-
Left the black card behind a long time ago. The shrink wrap tubing works well, I have a selection of sizes but it can be challenging to heat it just the right amount, clearly BE has that down. These days I prefer black masking tape, more of an iron look that artist tape and easy to fit and then paint to complete the look.
- 857 replies
-
- 6
-
-
- Sphinx
- Vanguard Models
- (and 1 more)
-
Well done, I’m always impressed with your creativity. And I agree, attention to small things as you do sum together into a great model.
- 345 replies
-
- 1
-

-
- Duchess Of Kingston
- Vanguard Models
- (and 1 more)
-
Well done, impressive work. I enjoy following your progress.
-
Congratulations on finishing your Cheerful. It looks great.
-
I believe the boats are always sitting up to make them faster and easier to launch, but i could be wrong. The leather dye is an interesting choice, but I recall from using it back in my time the army as being a total mess to work with. No matter how careful I was it wound up in places I didn’t want it and near impossible to remove. Still a nice effects, you seem to have kept it in control.
- 542 replies
-
- 2
-
-
- Sphinx
- Vanguard Models
- (and 3 more)
-
Excellent start.
-
Thanks for defining “huge,” I knew we could count on you😂🤣
-
A really good point to remember for some that want to point to a book and deem themselves as purveyors of truth and historical accuracy. My answer is more simple, the dark brown looks better on the model than black, and is my personal preference. On another note, the guy that climbs that rope ladder along the mast is braver than me, and just how huge are those deadeyes and the rope making up the shrouds. 😳
- 345 replies
-
- 1
-
-
- Duchess Of Kingston
- Vanguard Models
- (and 1 more)
-
There are instructions for the stove on the Syren website. I suggest reading those.
-
How did you attach the graphics to the wood? Nice that you have the Winchelsea set modifies for use on Sphinx. I matched my to Winsor & Newsome cerulean blue with maybe a touch of Mars Black. Yourclor match looks great.
- 857 replies
-
- 2
-
-
- Sphinx
- Vanguard Models
- (and 1 more)
-
I wonder how many broken ankles came from nighttime strolls on the quarterdeck.😊
- 345 replies
-
- 4
-

-
-
- Duchess Of Kingston
- Vanguard Models
- (and 1 more)
-
Quality work, bothe the beams and ring bolts. It’s the small things that make for a great model like yours.
- 642 replies
-
- 5
-
-
- winchelsea
- Syren Ship Model Company
- (and 1 more)
-
Well, you’re not that far behind me. Enjoy seeing your full scale woodworking tools in action. It seems with your skillls making the bollards out of wood doesn’t seem to be a stretch.
-
She looks really great, impressive work.
-
Thank you all for the likes and comments!
- 840 replies
-
- 1
-
-
- winchelsea
- Syren Ship Model Company
- (and 1 more)
-
Thank you, the time spent on fairing paid off.
- 840 replies
-
- 4
-
-
- winchelsea
- Syren Ship Model Company
- (and 1 more)
-
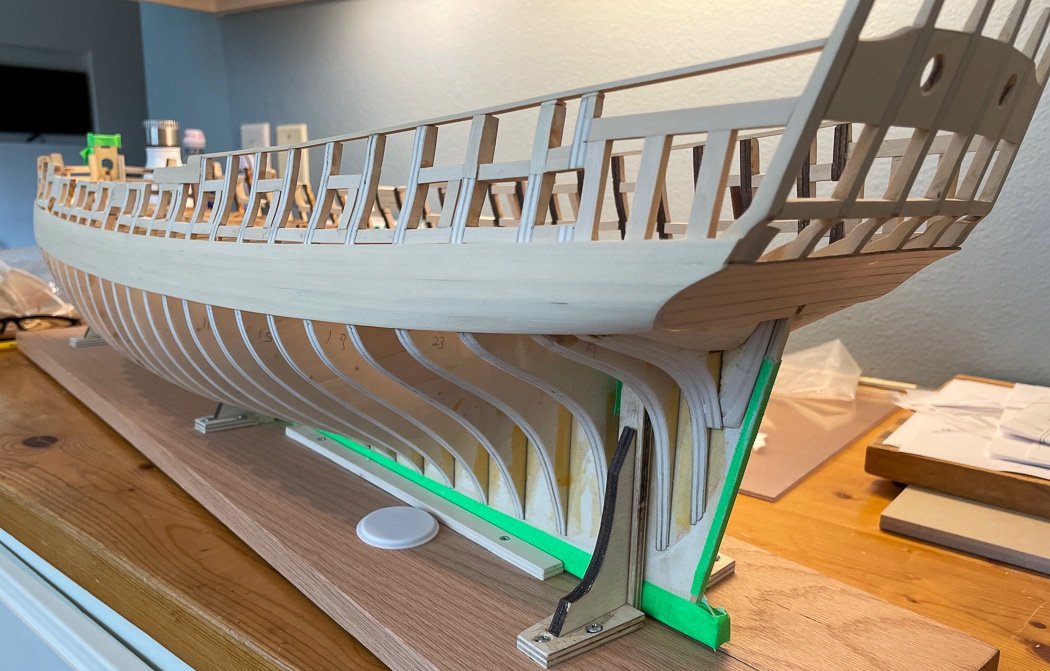
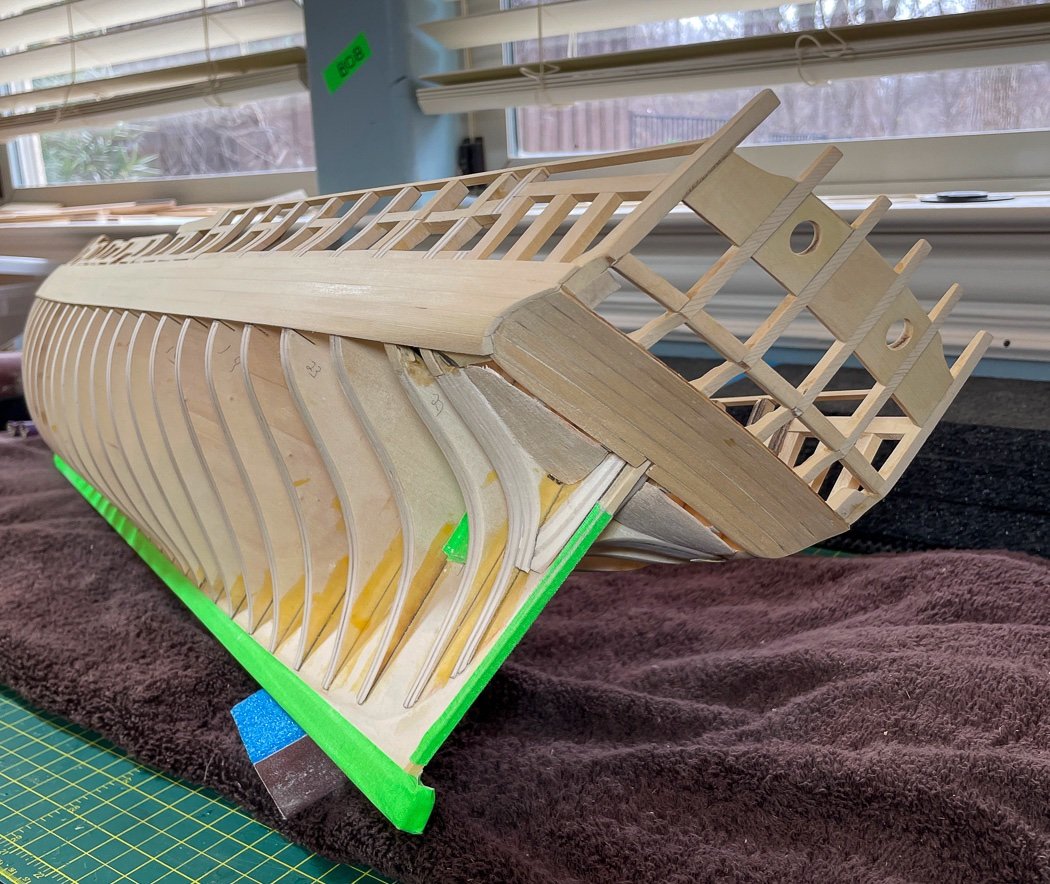
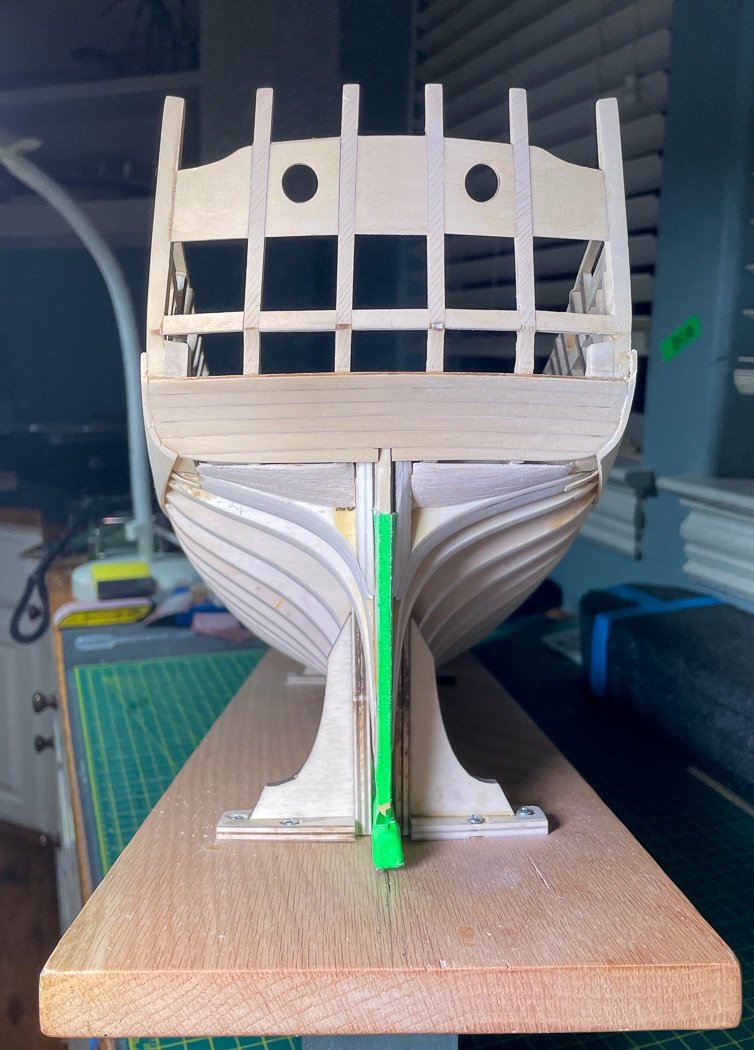
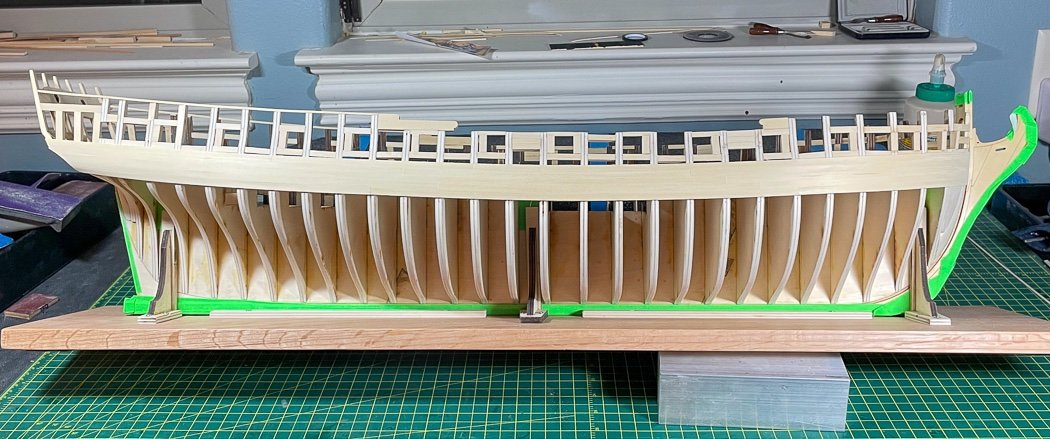
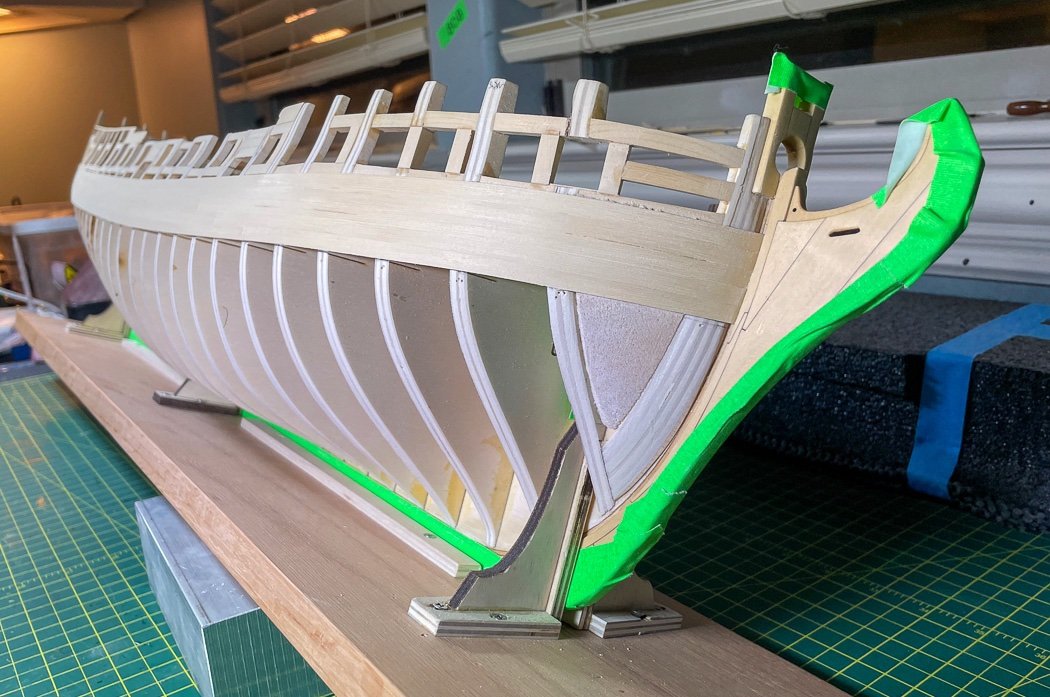
Wales, First Layer I completed the first layer of the wales. I usually try to make my logs either entertaining or informative, this time here’s a few photos for reporting purposes. I’ve only done rough sanding, I’ll wait until I complete more planking above and below to do more, I’ll also even up the sides as visible from the stern then. I did not follow a butt shift plan for this under-layer except to not to place them at the same place for the plan’s pattern I’ll use on the top layer. Obviously no reason to pencil between planks either.
- 840 replies
-
- 24
-
-

-
- winchelsea
- Syren Ship Model Company
- (and 1 more)
-
I make my own rope. I just fill out this form, supply some money and my rope arrives made. I appreciate the talent, but there are just some things I have no interest doing. No rope rocket for me.
- 345 replies
-
- 2
-
-
- Duchess Of Kingston
- Vanguard Models
- (and 1 more)
-
I did, only it’s Glenn, not Gene😁 btw drilling out blocks is a common requirement, as long as you don’t go to big.