


glbarlow
-
Posts
4,056 -
Joined
-
Last visited
Content Type
Profiles
Forums
Gallery
Events
Posts posted by glbarlow
-
-
On 3/29/2021 at 8:35 AM, HardeeHarHar said:
Any words of wisdom would be appreciated....
I planked the quarterdeck bulwarks, same as the main deck, and painted red ochre.
Your model looks great, you’re doing fine. There is no reason to overthink thinks or feel apologetic about your work. This is a hobby with vast differences between skill levels and experience, all supporting each other. Have fun, enjoy, make a mess, break things then fix them. Cannons are a bit of a pain, no reason to expect identical coils, they wouldn’t have been on a real ship. I intentionally made mine a little messy on Cheerful.
-
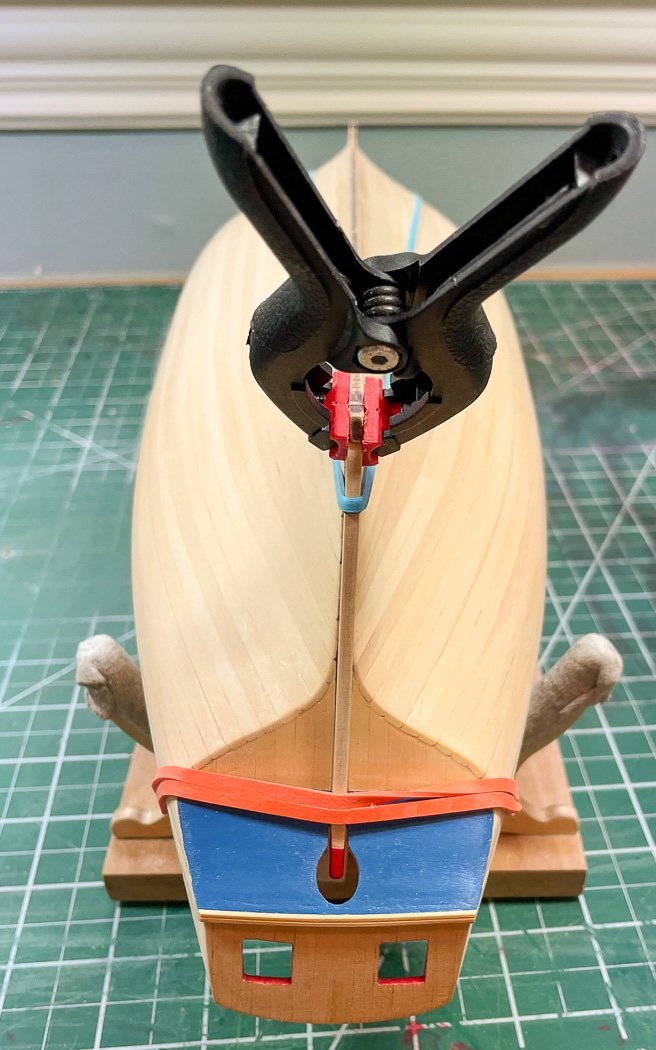
So, per the instructions the stem isn’t installed until after the planking is completed.
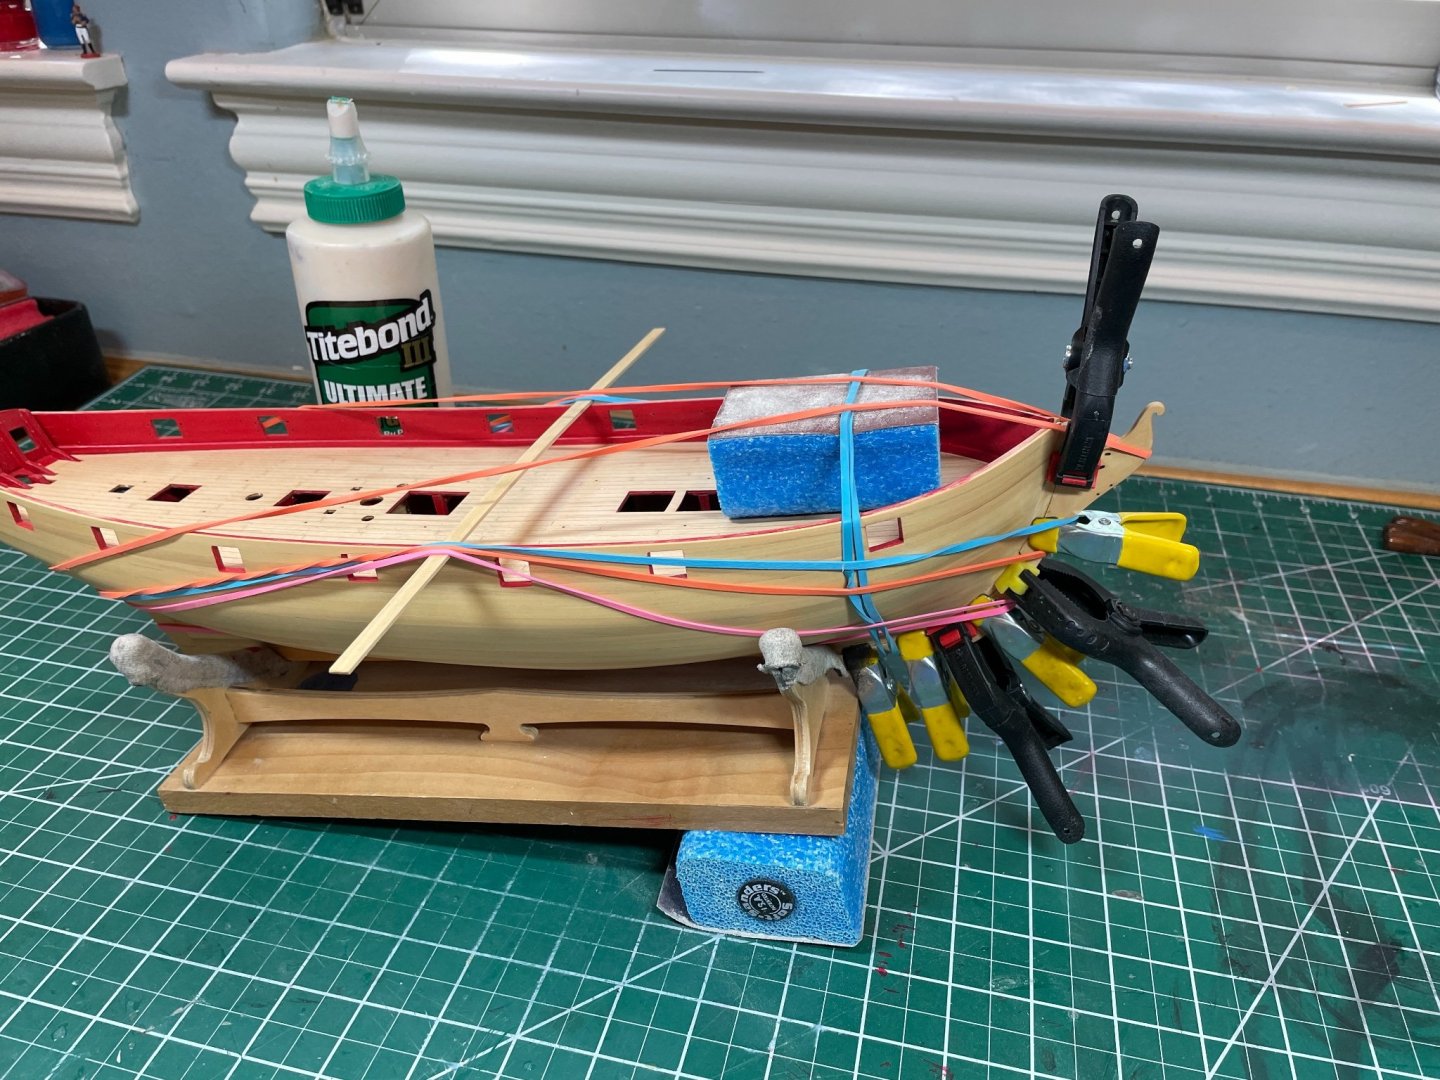
I, as it turns out unfortunately, installed it much earlier than that. I actually had to in order to correct a slight warp in the frame, I needed the keel installed straight for planking, that part worked.
The stem however has broken off 4 times now. This last time I got serious about it, once again gluing it back on with Titebond and a tight clamping process, hopefully for the last time now that all planking is complete.
Following the build order for this model probably a good idea. Modeling is as much overcoming problems as it is building.
- DelF, GrandpaPhil, JpR62 and 5 others
-
 8
8
-
19 hours ago, DaveBaxt said:
how I get on with acertone
All I do is an acetone bath followed by a distilled water rinse then into the blackening solution back in a final distilled water rinse. I set up the them all up in a row and move the brass (with tweezers or tongs) from one to the next.
-
-
-
-
You can’t pre-sand bulkheads other than a rudimentary start. Fairing the hull requires being able to run a plank smoothly from bow to stern, the bulkheads have to be installed to fair the hull properly. As I recall the MDF in this kit is very soft, so go slow. Leave the back edge of the char on bulkheads forward of midships and the front edge of those aft of midships. I think the aft most bulkhead requires a lot of up angle so plan it out.
If you could get a new keel I would, but I doubt Amati would be all that responsive. Between the keel and stern post hopefully you can sort it all out. We all make mistakes, half the fun of modeling is overcoming them
- CiscoH and dmalcolm72
-
2
-
I’m satisfied with the etched deck for Flirt, it’s natural enough for a simple and small deck. However for Sphinx I will definitely plank it, even if I don’t do so expansive a challenge as you’re taking on.
Enjoying your talents as always.
- mtaylor, BobG and Blue Ensign
-
3
-
-
-
-
30 minutes ago, DelF said:
would you recommend them for use on second planking?
Thanks for the comments Derek, always appreciated.
Absolutely! The assorted shapes and adhesive sandpaper in multiple grits are a game changer for me probably especially for the second planking. I just have to watch I don’t take too much. Very easy to use and there is a shape for every curve. Highly recommend.
The laser etched deck is fine for this model as I’d guess it is for the duchess. The maple has a nice color.
-
On 9/9/2021 at 6:28 PM, EKE said:
come anywhere close to the lovely job you've done.
Thank you for the comment. I'm sure you'll do great - hopefully you'll try the same Chuck plank bending method I employ - that and a good deal of patience are the keys to good planking (there are of course other worthy methods, this one works well for me).
-
2 hours ago, Jasseji said:
did exactly the same thing
Always a good practice many of us follow to move up a couple from the bottom then meet those coming down. As my UK Glenn friend notes, it allows for any corrections on the area of the hull that won't be seen once mounted. and as he also notes It also allows the garboard to more easily set the distance between wales and keel for planking widths.
-
On 8/12/2021 at 10:53 AM, EKE said:
door is visible through the the open hatch in the finished deck, I should perhaps paint the bulkhead a nice vintage color
It is barely visible and via a hatch opening not a companionway. I painted this bulwarks and all the lower deck "pillars" red in the hopes of catching just a glimpse from above. Looking forward to your progress as we both move along with this build!
-
Planking Continues
Work on the hull continues, not super exciting stuff but progress nonetheless.
With the adjoining planking completed and after lots, and lots, of test fitting, adjustments, and sanding it was time to mount the stern post. This is something that seems so simple but getting a good fit takes time and patience along with a light touch with the sanding tools.
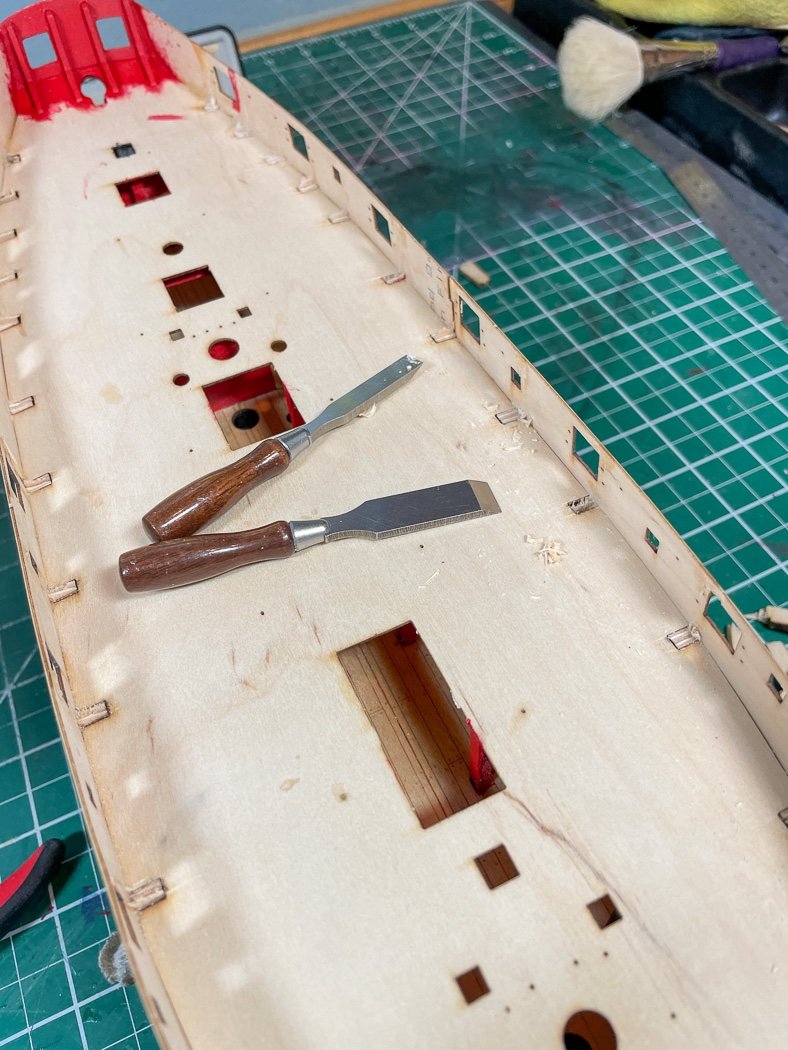
Time to break off those bulkhead tabs on the deck. I mentioned at the beginning I lightly score these with razor saw on two sides before planking begins. It isn’t completely necessary but helps for a cleaner break which I completed with small pliers. Then back to my ever handy and now always sharp Veritas mini-chisels for cleanup.
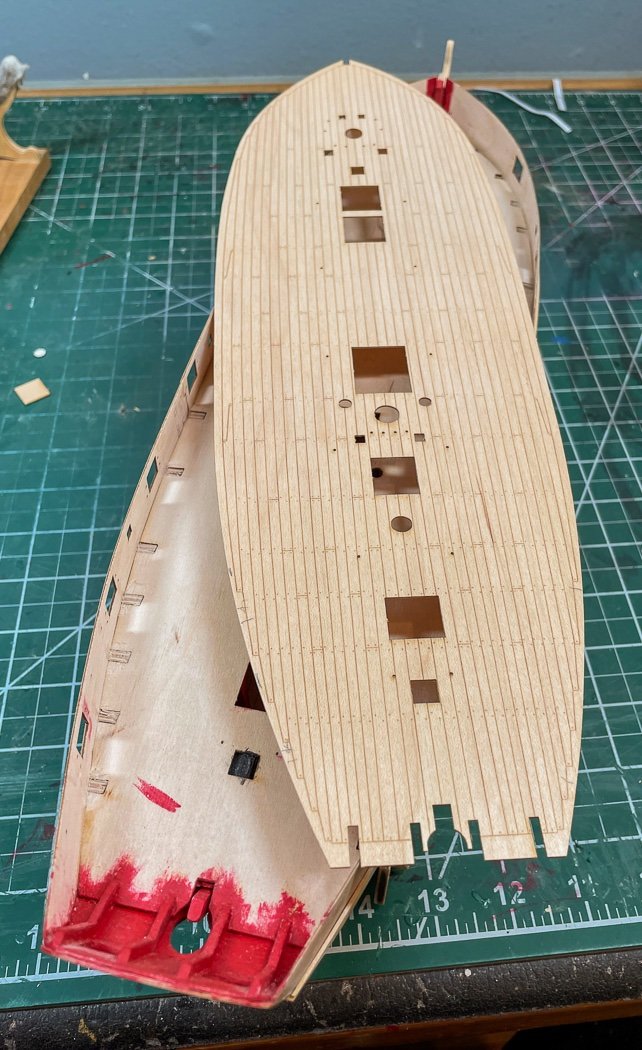
I committed to using @chris watton laser etched deck on this model and so I did. I’ve planked plenty of decks, this time I chose the nice maple deck Chris provides with the kit. I know all the debate about “real planking” and normally I agree, in this case though after 3 coats of WOP with light 400 grit sanding between I’m quite satisfied with the look. I think Chris heard us on earlier versions and made this one simpler without a lot of extra stuff, just planks in a proper shift pattern. I had to do some minor edge sanding for a fit, which is good, I’d rather it be slightly large than even a little bit too small.
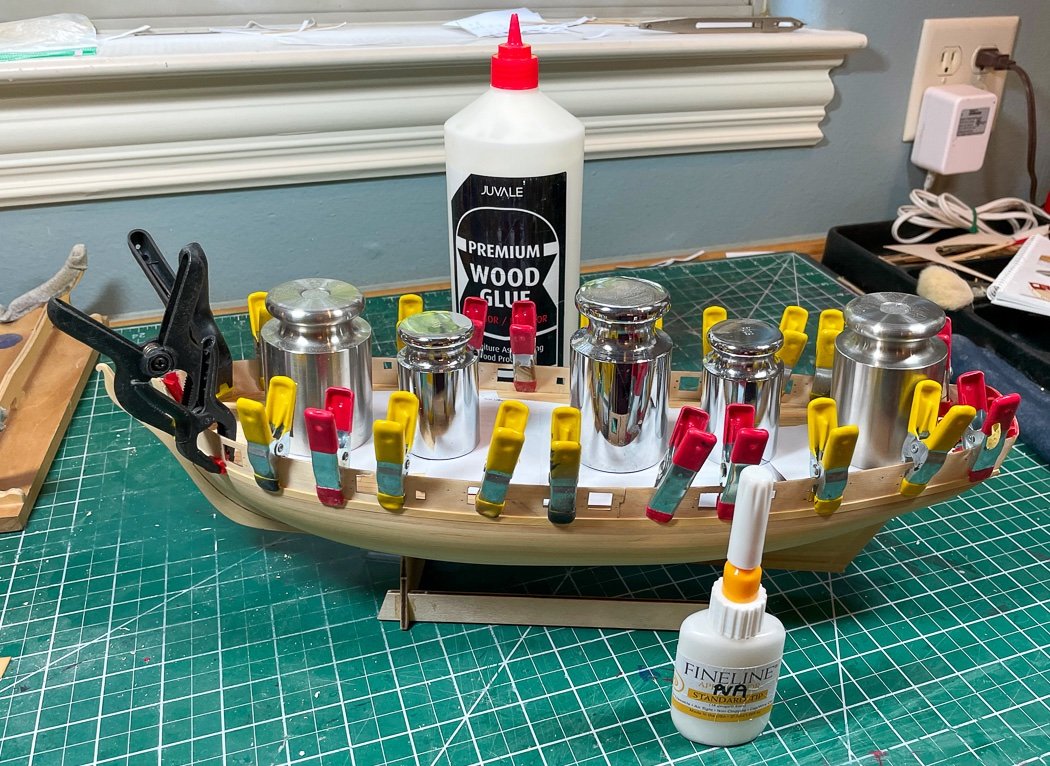
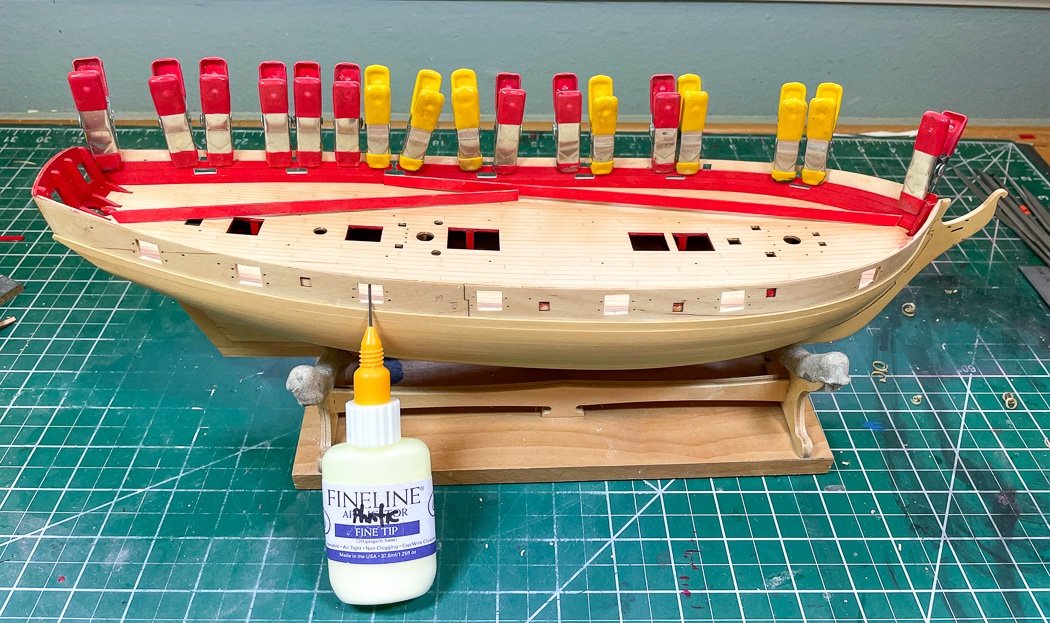
Some white PVA glue, some clamps, some weights, deck complete. Note I’m a new advocate for @Delf Fineline applicators though I prefer the standard 18 gauge tip. I now have one for PVA and one for Super ‘Phatic glue. There is a rule of modeling, whenever you think you have enough clamps, buy more clamps.
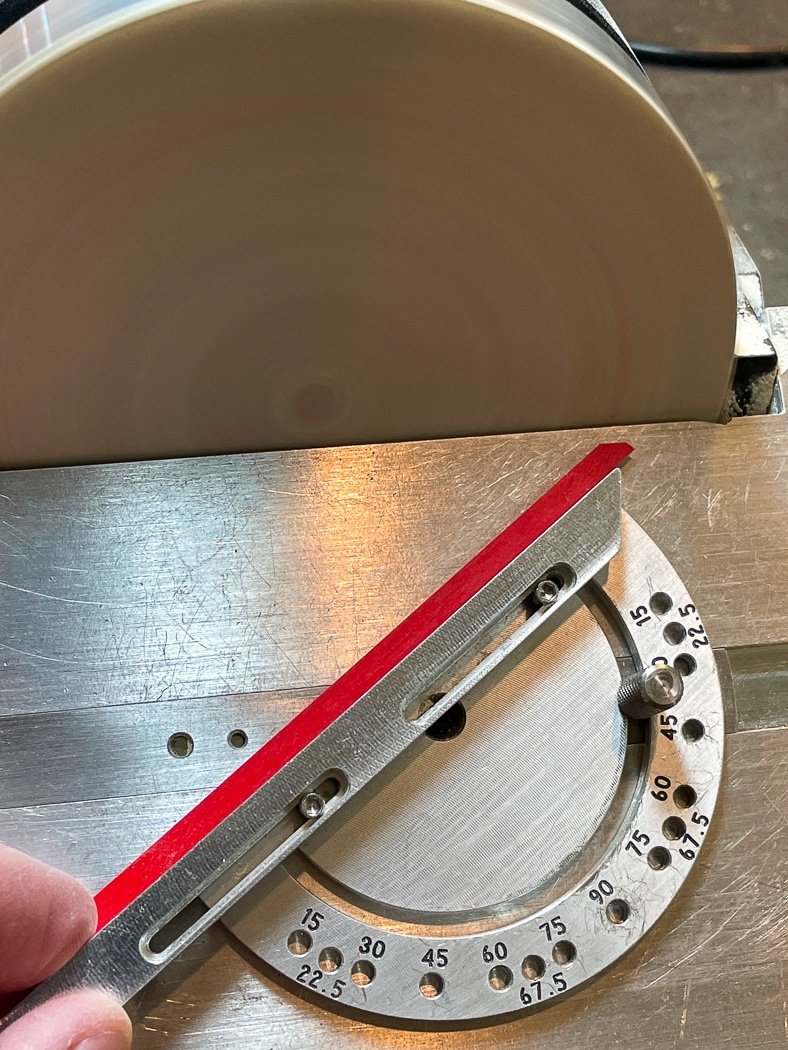
One more advertisement for the Byrnes Sander. Shaping tight fits for the bulwarks planking is so much easier with the tilting table for various beveling (actual bevels, or maybe they’re chamfered who knows) and the miter gauge for angles.
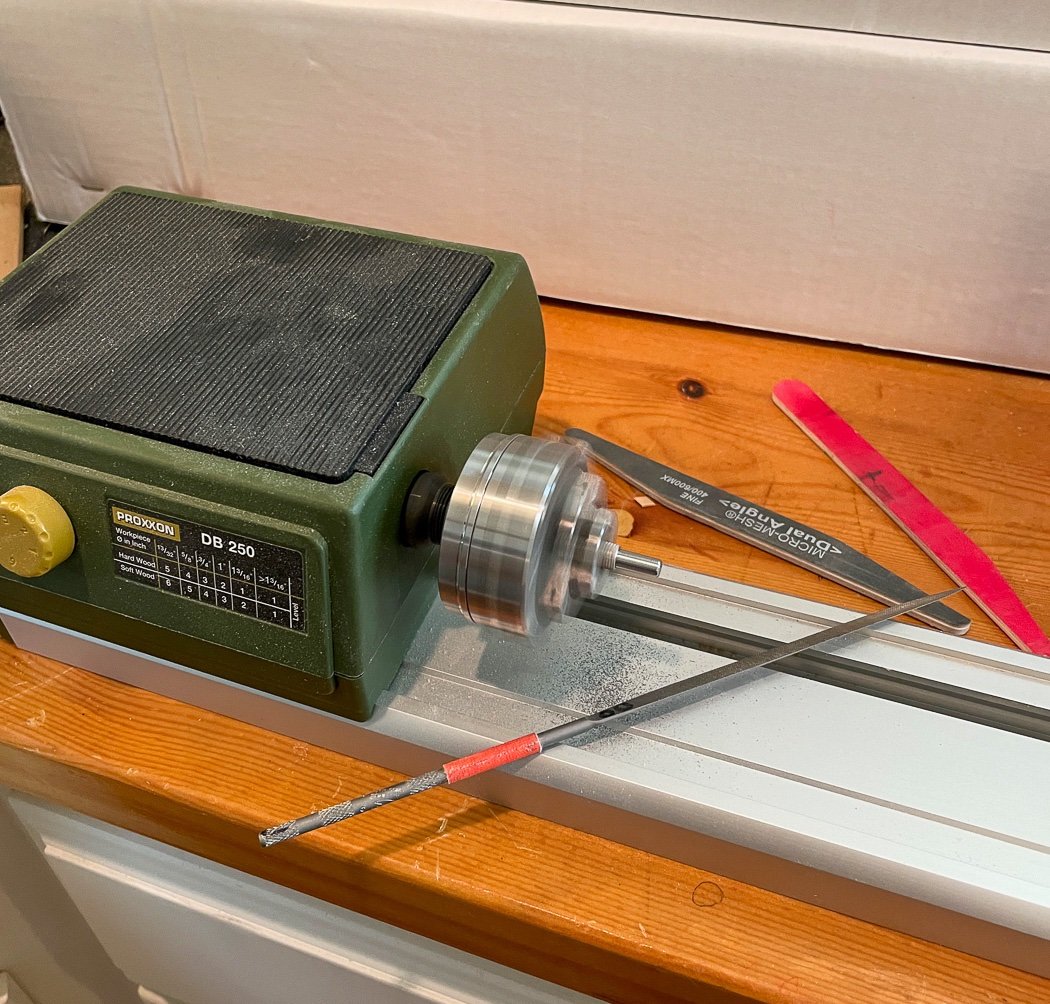
Side note: The tilt table pin on my sander has always been a bit of a rough fit, I was changing it so often during the bulwark planking I said to myself, self you have a lathe, use it. So I put the pin in the lathe, grabbed a file and some sanding sticks and a few spins later I had a nice smooth easy to insert pin. Why did I wait so long to do this.
I pre-painted the bulwark planking. Turns out that was a silly thing to do other than for the bottom most plank. Once I finished it I ended up sanding most of it off and painting it again. There are no short cuts. I did want a “rougher” fit for these planks to show a little definition between them. Unlike my obsessive need for a smooth hull, I wanted the bulwark to stand proud here and there for affect.
Most know I’m a CA advocate, but as I noted in my Cheerful log I use the glue I think best for the job. I like all of them, Titebond, White PVA, CA and here I chose Super ‘Phatic for the bulwark planking along with lots and lots of clamps. It is quicker setting the PVA, but not so quick that I can’t make and adjustment or two before clamping it down.
I was concerned at one point about the holding power of 'Phatic when used ona cleat on Cheerful came loose with a rope attached, so I glued two pieces of wood together with each glue to see which was stronger or weaker. After letting them dry overnight I tried pulling each apart...and failed to do so on all of them short of splitting the wood itself. They all work fine.
For whatever reason on my model four of the included planks were not enough to cover the bulwarks, five would result in a narrow strip at the top once cut to meet the top edge. So out came the 6mm stock, it was a near perfect fit at the top as the fourth row and it happens to be a nice look.
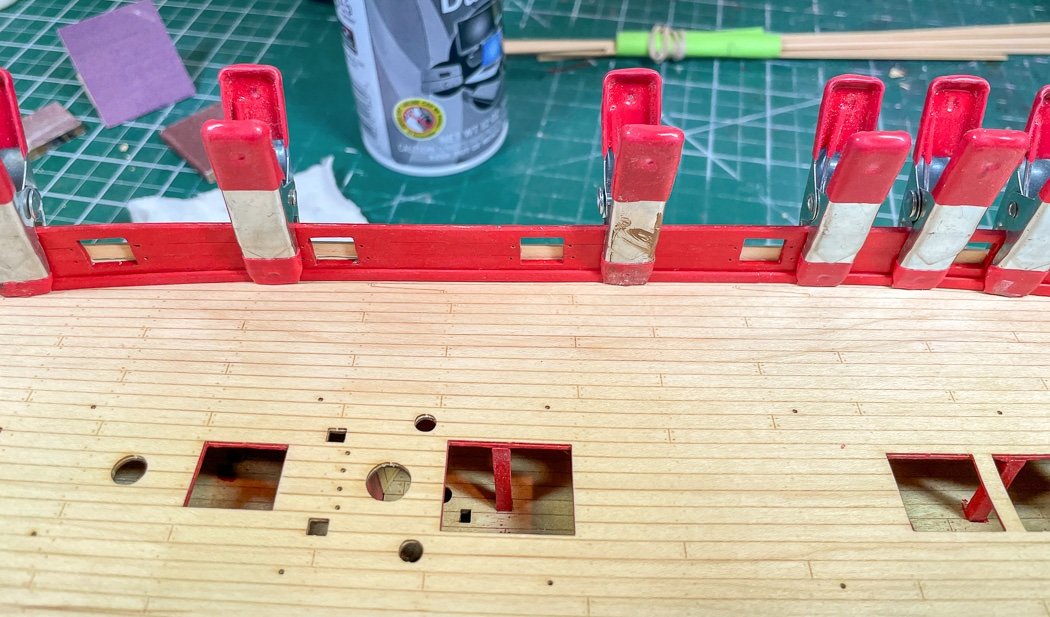
Though not included with the kit or in the instructions I chose to add spirketting by rounding off a strip of 3mm strip and adding it to the base of the bulwark planking. I think it makes for a cleaner look mating the deck to the bulwarks. I could have also used a 4mm strip, but the 3mm fit cleanly beneath all the gun ports so I went with it. I did pass on also adding a strip for waterway, I thought that might push the small Flirt cannon back too far.
Chris' design includes drilled holes on the gunport pattern, so before put-on on the top rows on the outside and after the bulwarks are done I drilled all the gun tackle pin holes from the outside in...now that was handy...
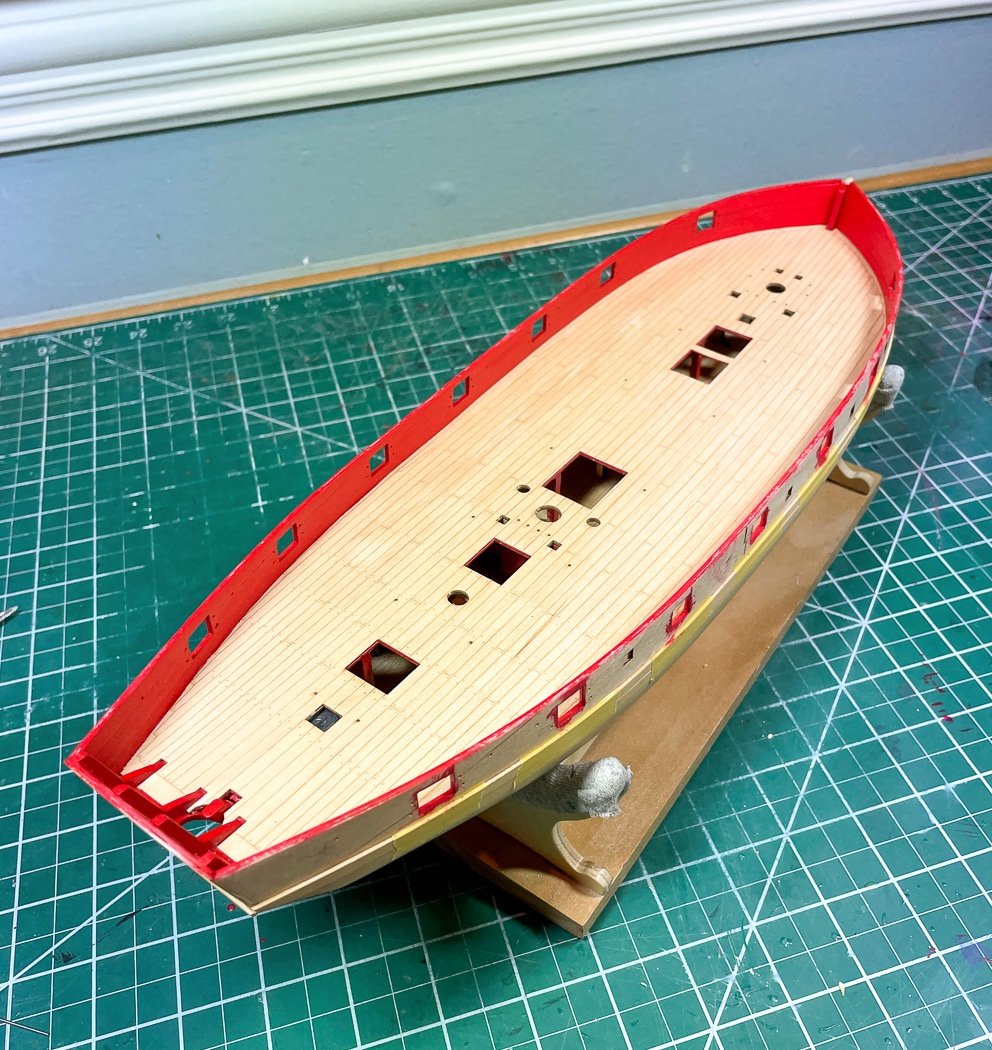
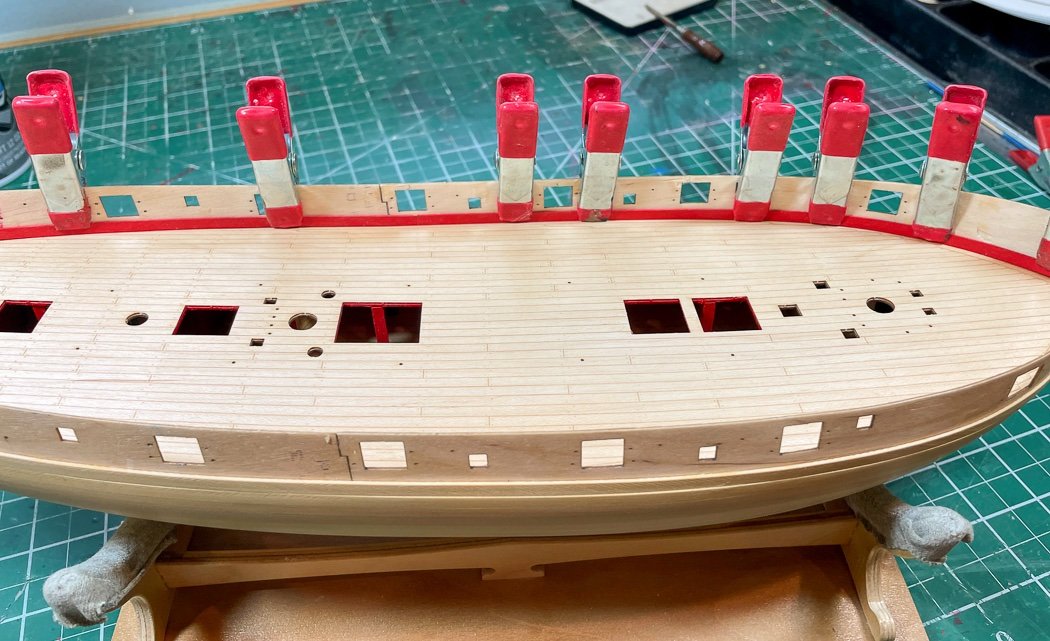
With that the deck and bulwarks are complete. I really like my Crimson Red, don’t care how “accurate” it may be, it looks bright and sharp and will adorn the decks of the Winchelsea in the future. There are some light spots on the deck where I had to scrape off some careless paint brush strokes. The nice thing about having three coats of WOP is that’s what I’m scraping off, not the wood. It’s been since touched up again. You might note the pillars, beams, and openings below the main deck have all been painted red as well. I’m hoping I can leave a hatch or two open enough to get just a glimpse below, nothing elaborate, just a sense of dimension.
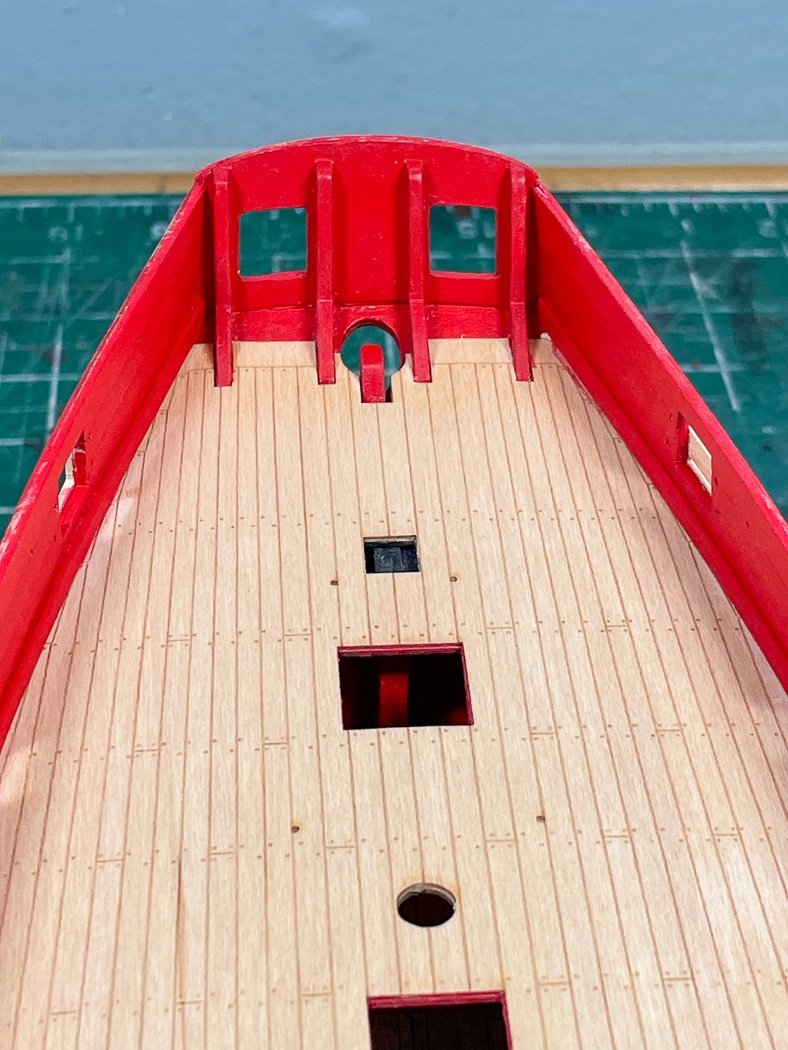
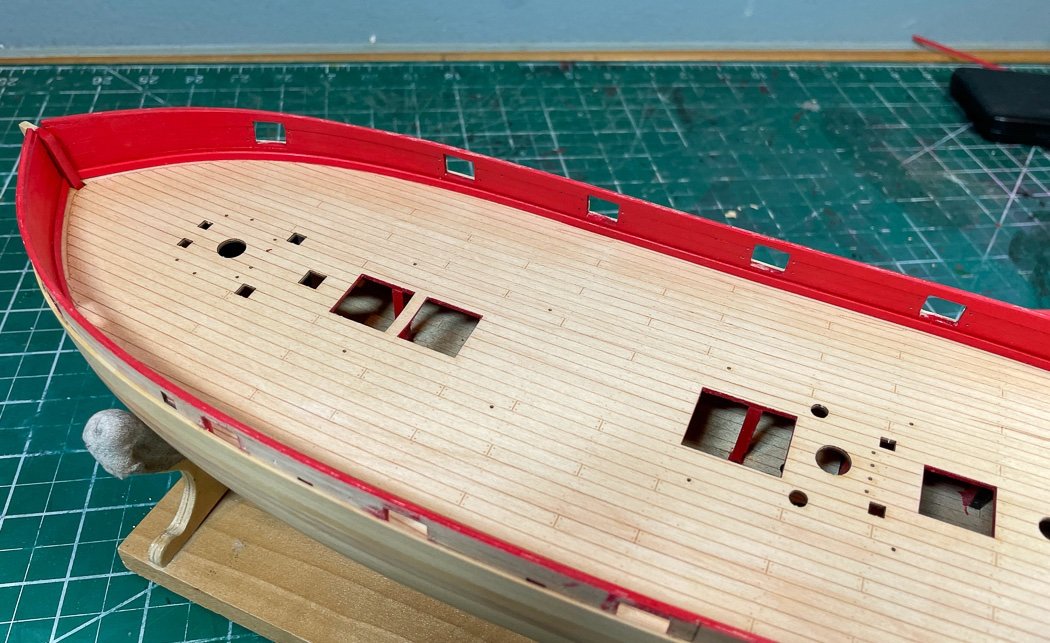
It is my opinion…this stern shot shows that the laser etched maple deck, while not true planking, is an excellent choice and looks quite nice installed. I recall how hard (and how proud) I worked on Cheerful’s intricate curved planking and finely cut margin planks. With all that’s now on that deck between furniture, guns, ropes I can barely see all that work. Of course “I know it’s there” is important and I wouldn’t do anything different on Cheerful but for this model and for those of us that may need a break from planking the etched maple deck @chris watton provides is an excellent choice, realistic enough to pass my muster.
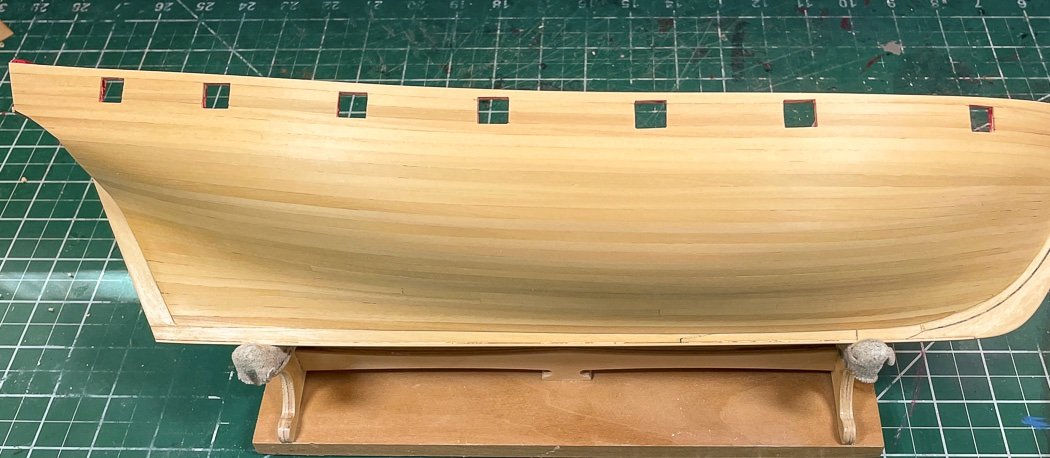
With the deck and bulwarks finished I completed the hull planking above the wales. My next task is to touch up the gun ports, I wanted to have a dry coat of WOP on the hull first. Note the stern post and the strip for the false keel (I think that’s what its called) are in place. I did my best to match up the best strips of boxwood, the WOP though seems to find a whole other color in some of the strips. Though it seems no two planks are the same shade It’s still a nice warm look of and definitely has grown on me.
I plan to follow the paint scheme and hull ornamentation provided with the kit so this might be the last clean look at the hull I’ll have.
As always thank you for following the build and for your likes and comments. They are always appreciated.
-
-
You’ll definitely have to sort out the keel back to square. I’m not sure what to suggest, but it won’t work as it is. Maybe running the first planking out and gluing the insides together after attaching the keel?
-
-
An architect at work, one bold move after another!
- Blue Ensign, TBlack, mtaylor and 1 other
-
4
-
Well done, such nice lines with the planking.
- Trussben, druxey and FrankWouts
-
3
-
Your bearding line is fine, it can be half that following the same curve you’ve drawn. Don’t overthink it, it’s only purpose as far as this model goes is for the frame and finished two layers of planking be equal to the width of the stern post. That’s accomplished by thinning this deadwood area, not covering it with the first planking, or a combination of both. Just need to plan that out.
-
Very interesting approach and your usual thorough description, I don’t think I could manage the tools to taper that way, very skillful. No doubt you’ll end up with a wonderful planking.
I appreciate the description of the garboard, I always struggle with it. I hope the SI CA continues to work for you.
Well done!
-
Enjoying the creative approach, it will be fun to watch it unfold.
- mtaylor and Blue Ensign
-
2


HMS Granado by HardeeHarHar - Caldercraft - 1:64 - Bomb Vessel
in - Kit build logs for subjects built from 1501 - 1750
Posted
Unfortunately I built it over ten years ago, I don’t recall. I’m sure I did it the same as the quarterdeck.