


DelF
-
Posts
1,398 -
Joined
-
Last visited
Content Type
Profiles
Forums
Gallery
Events
Posts posted by DelF
-
-
-
Thanks guys. I'm still a bit daunted by the amount of work involved in fully rigging the guns (I think I'll be well over Chris's estimate of 50 - 70 hours for the build!) but at least I now know it's possible, and hopefully worth the effort.
11 hours ago, glbarlow said:I like that the cannon jig has its own stand
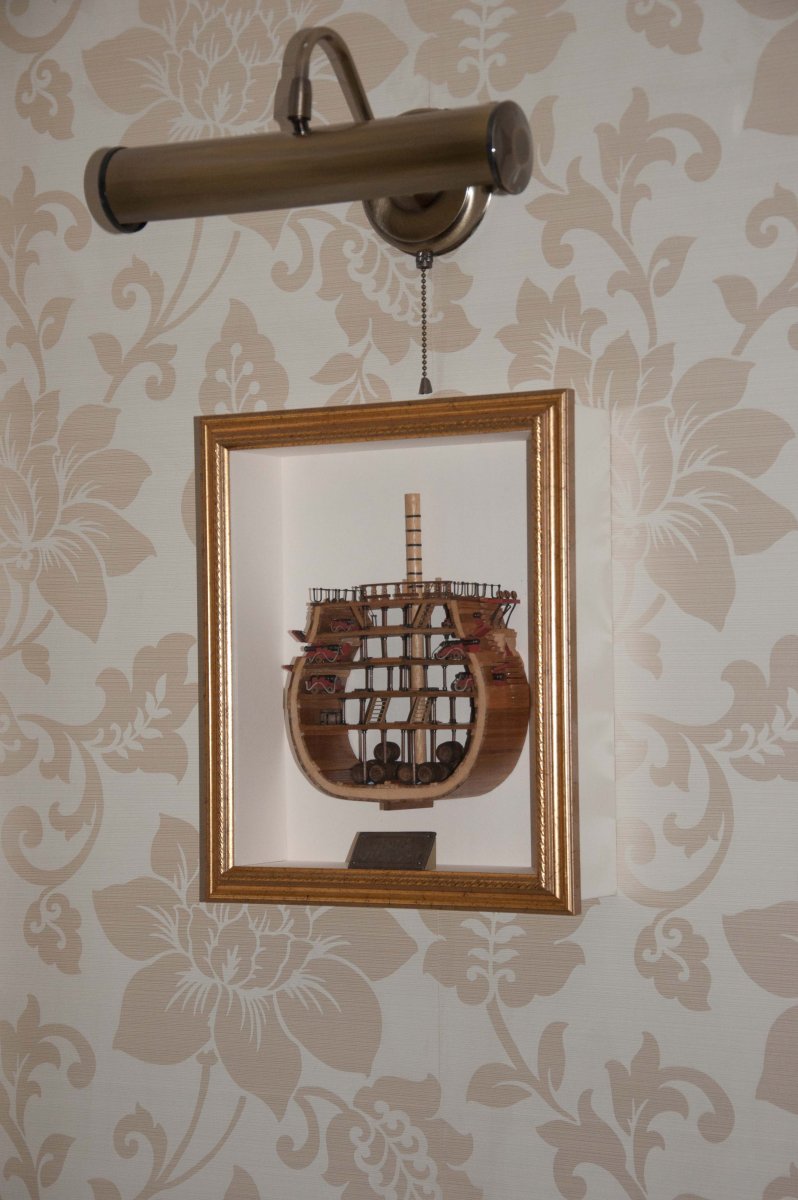
My jigs are not usually that posh! The stand was lying around unused from a previous build - a Victory cross section that I built a picture frame for instead.
Derek
-
First attempts at cannon rigging
Thanks (?!) everyone for encouraging me to fully rig all Speedy's 14 four-pounders.
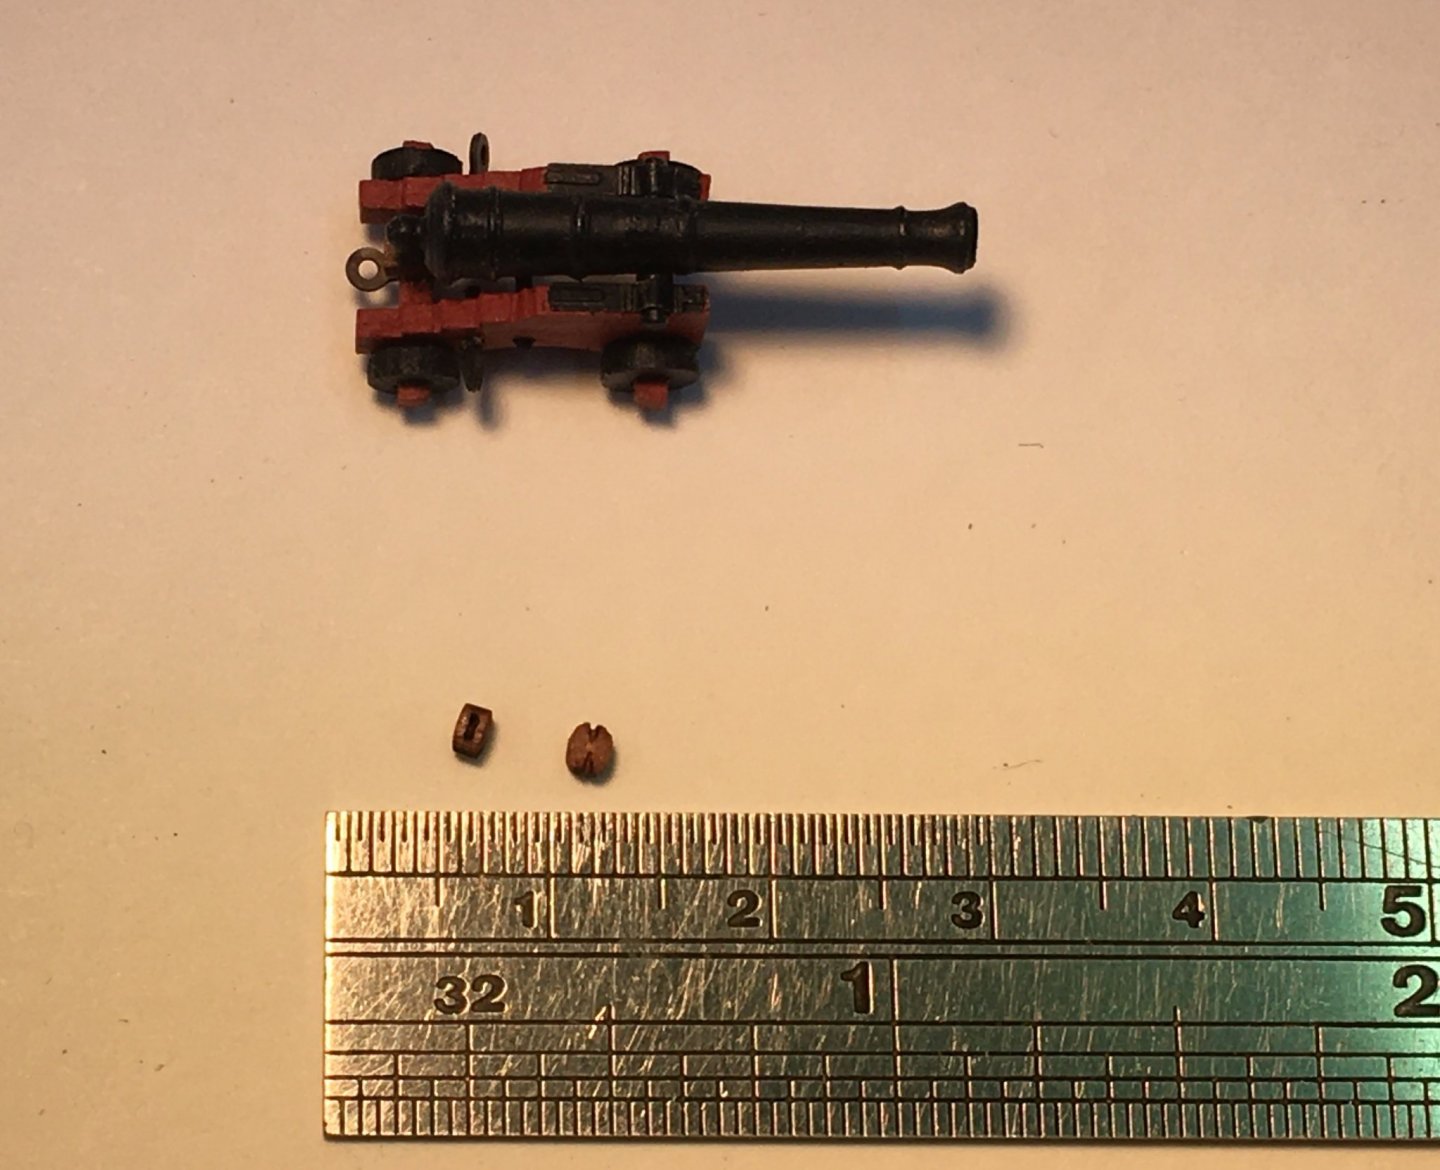
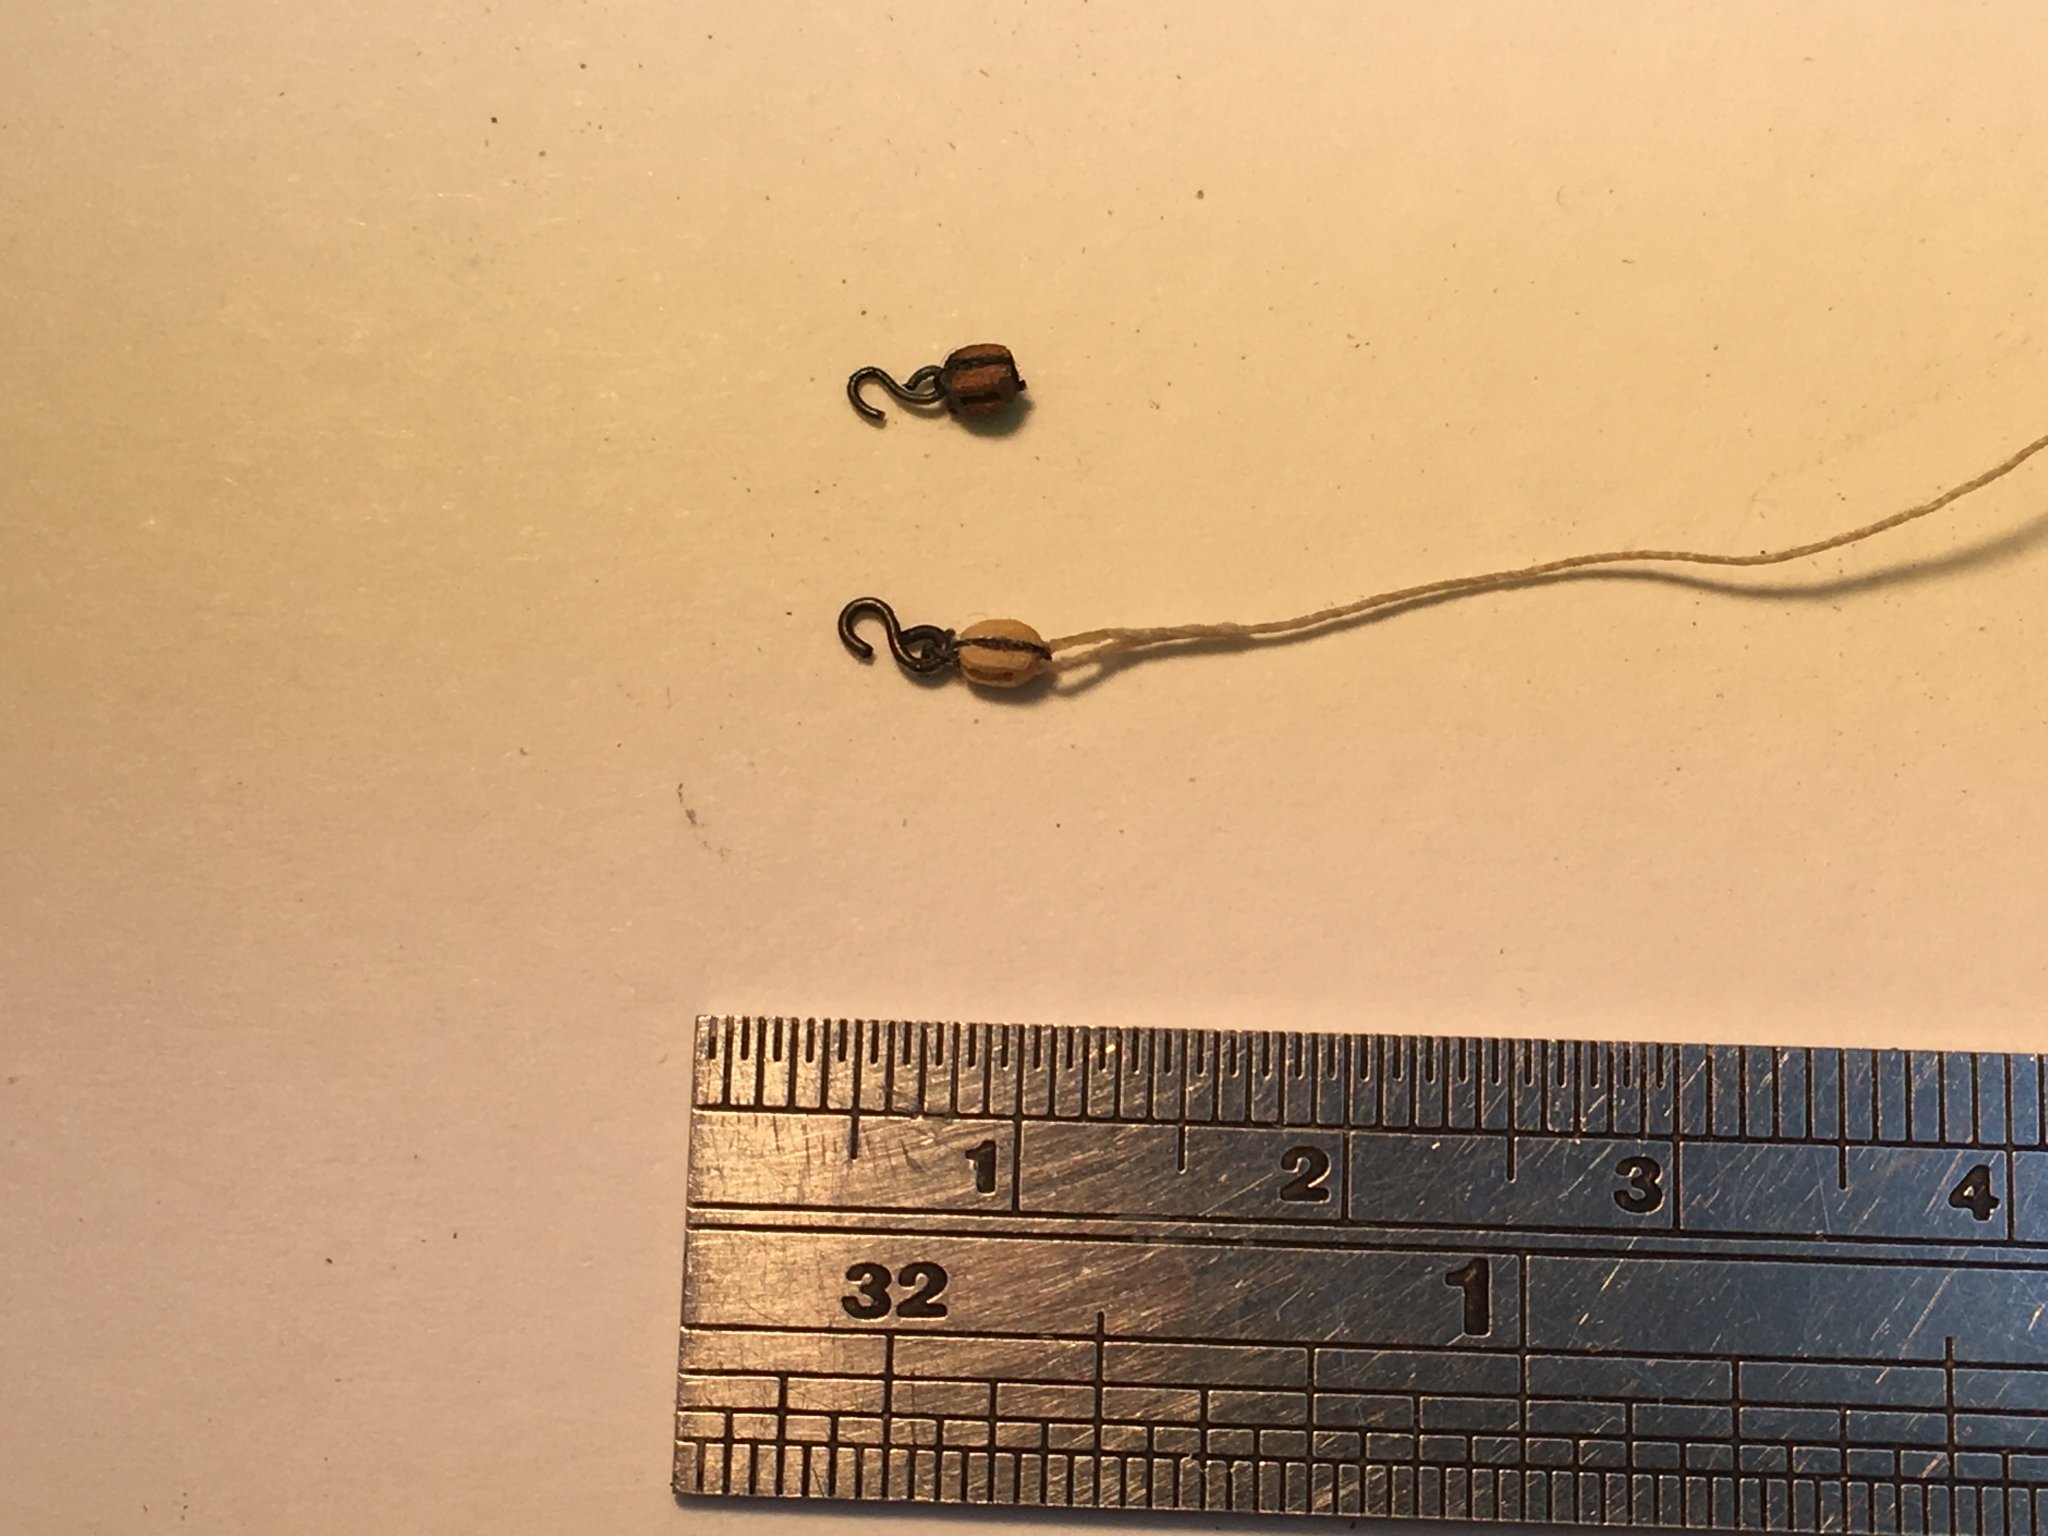
I wanted to have another go at making my own blocks. However I haven't been able to make anything acceptable at the required size, the smallest I can manage being about 2.75mm. Here it is with a Syren 2.0mm block for comparison:
Syren blocks aren't available at the moment but I was able to order some from Vanguard and they arrived today. I'm very happy with the quality:
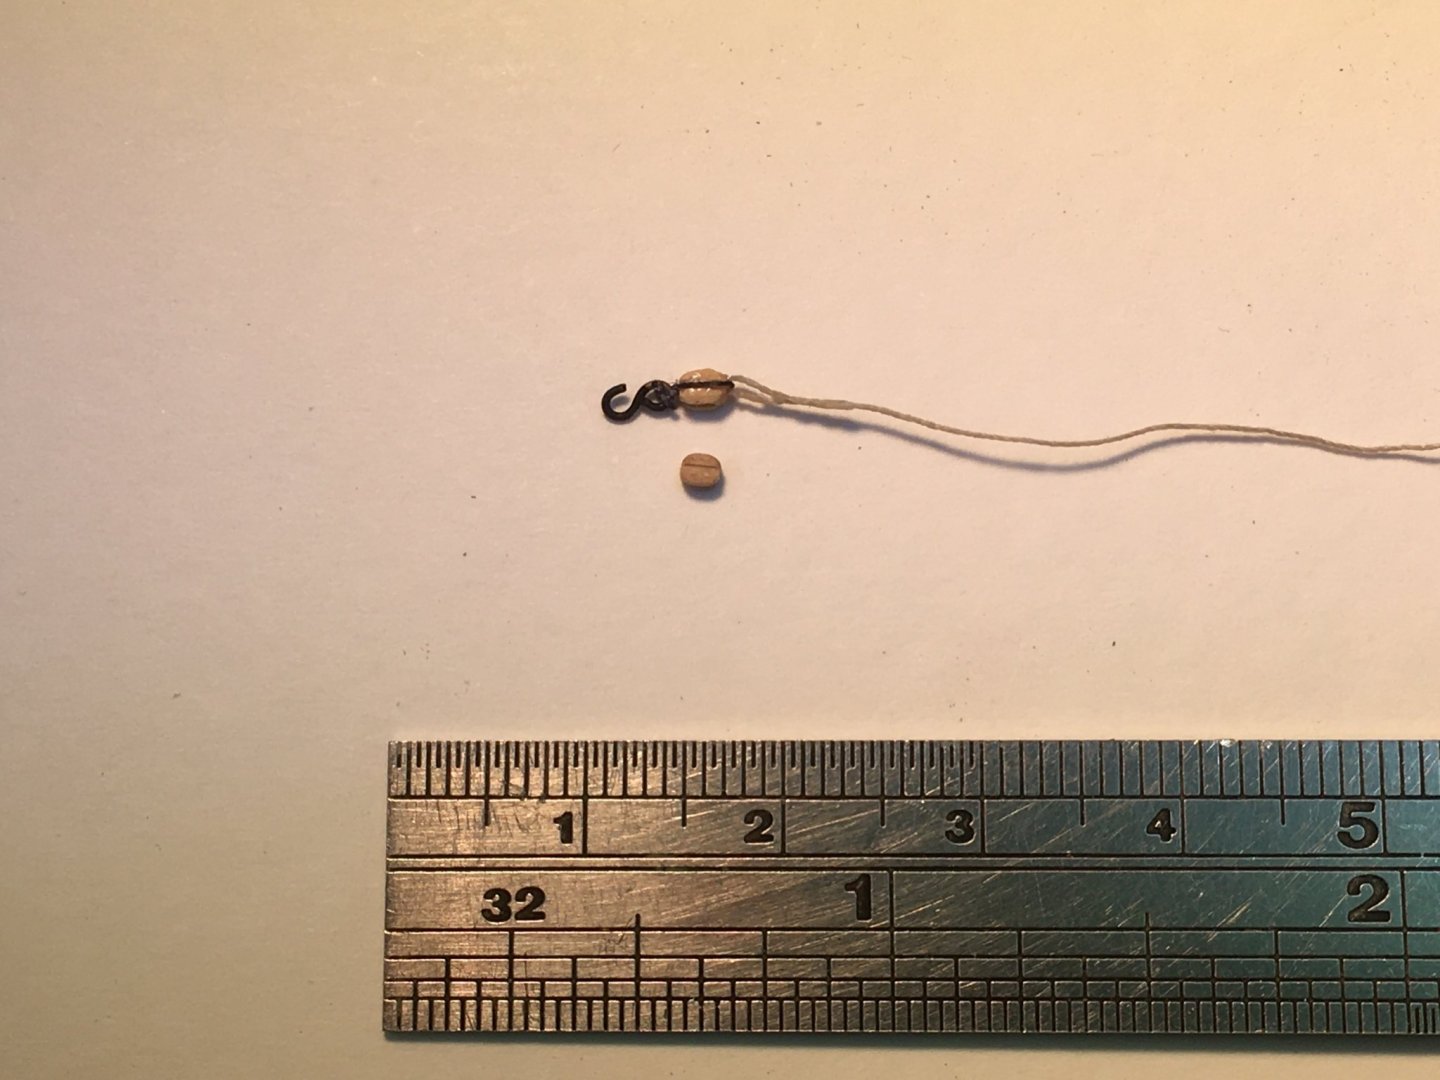
...nicely shaped, with good grooves for the strop. Here's my first go at adding a strop and hook:

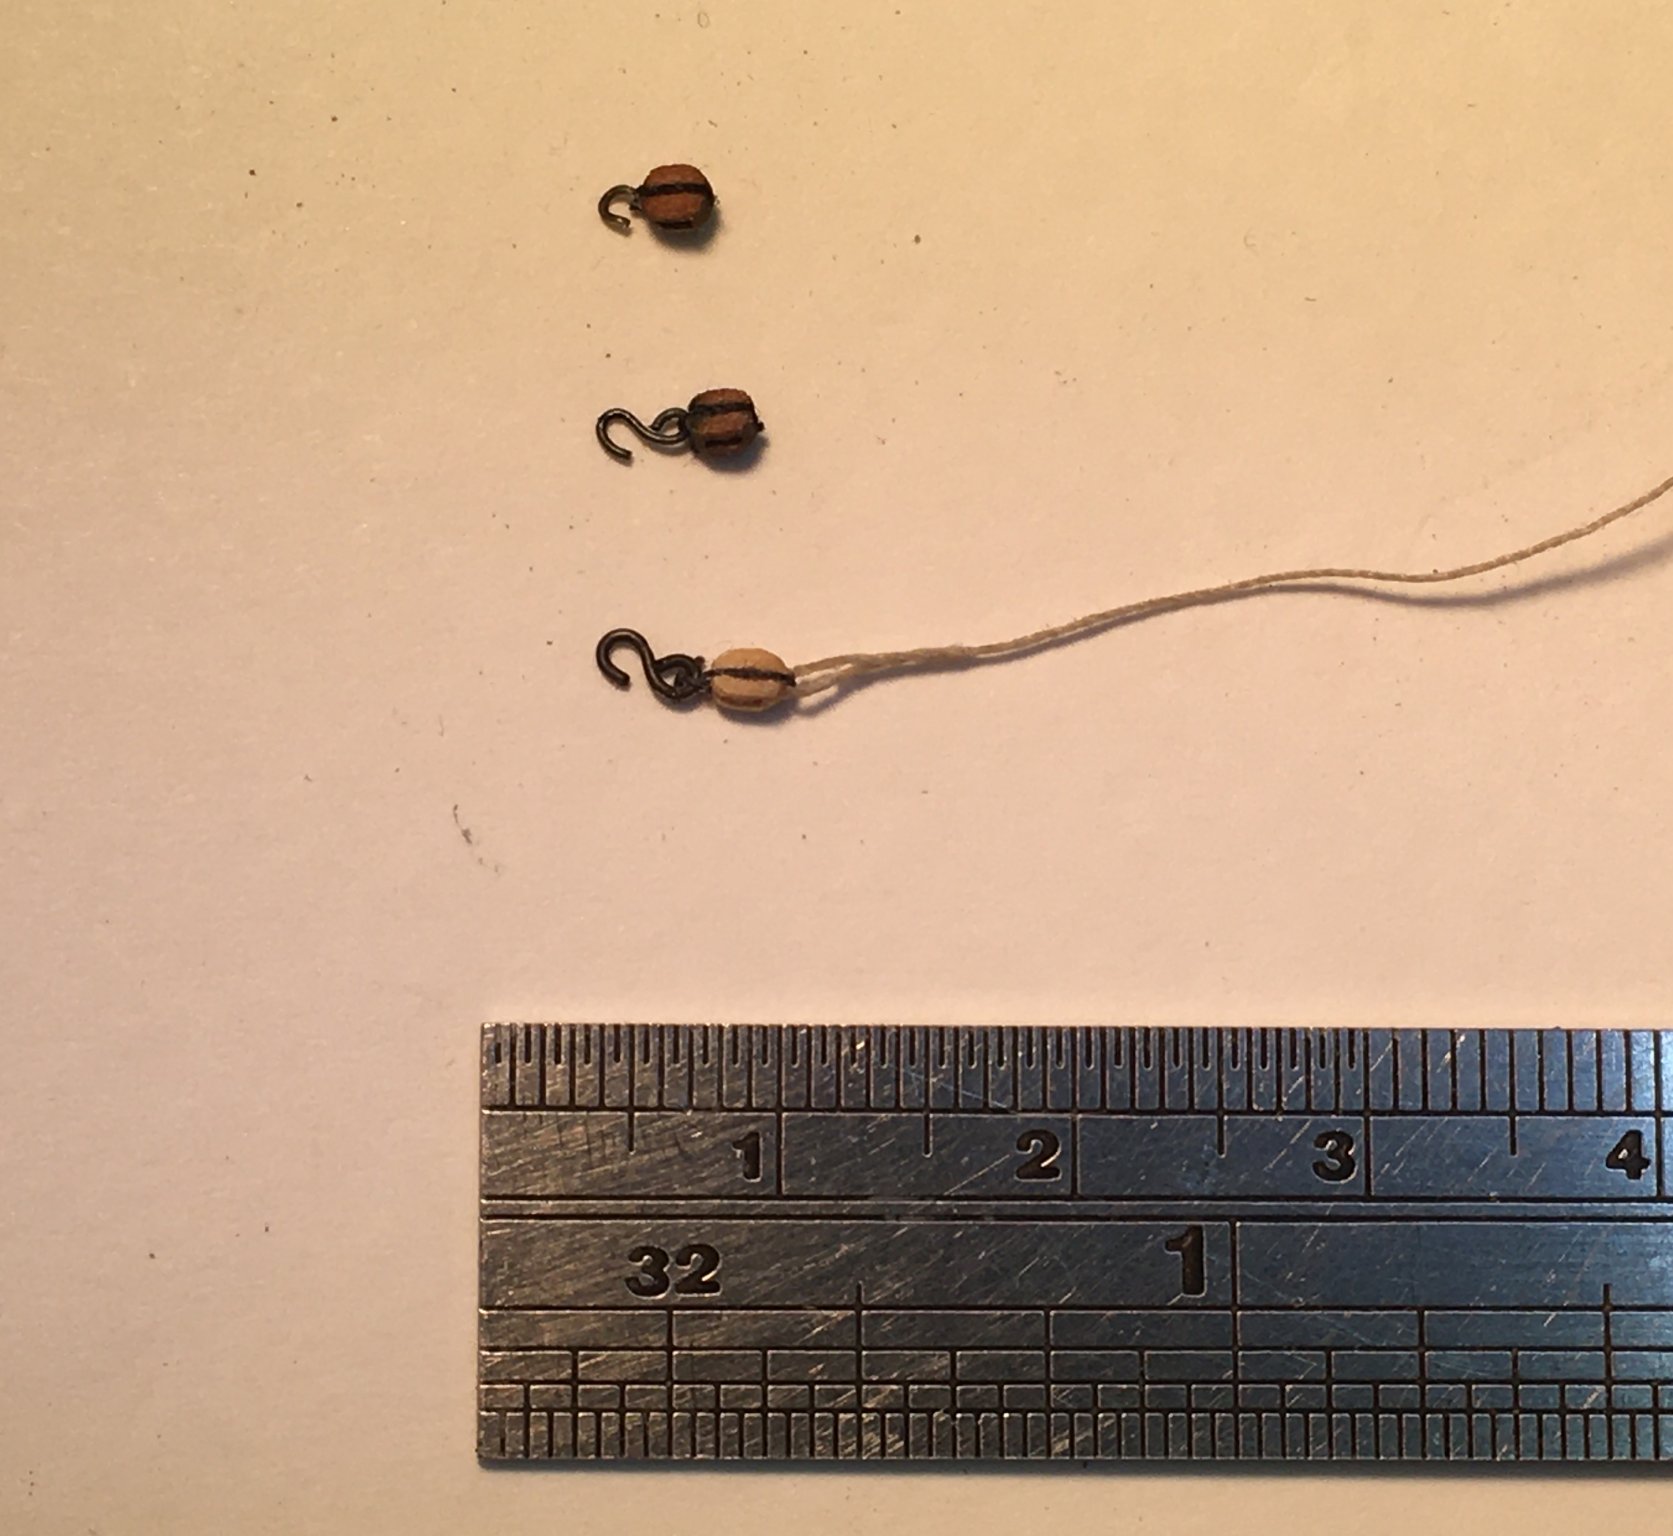
In both cases I made the hooks from brass wire, using the thinnest I have (0.33mm) for the new Vanguard block. Apart from my difficulty in achieving a consistent shape, I can't get them small enough to look right, so I had a re-think. Eventually I found I could drill a #80 hole in the end of a block, which is just right for the thinner wire. First, I pushed a short length of wire through the top sheave hole to prevent the shaft of the hook from interfering with the rigging line, then drilled through the top of the block until I hit the wire. Keeping the wire in place, I put a minute drop of CA on the hook and inserted the shaft in the block. No-one could have been more surprised than me when the glue held the hook, in what must be a truly tiny amount of wood. I've tried this before with tiny blocks and they've just crumbled under the drill, so it says a lot for the quality of Vanguard's pearwood.
Here's the new hooked block alongside the previous attempts:
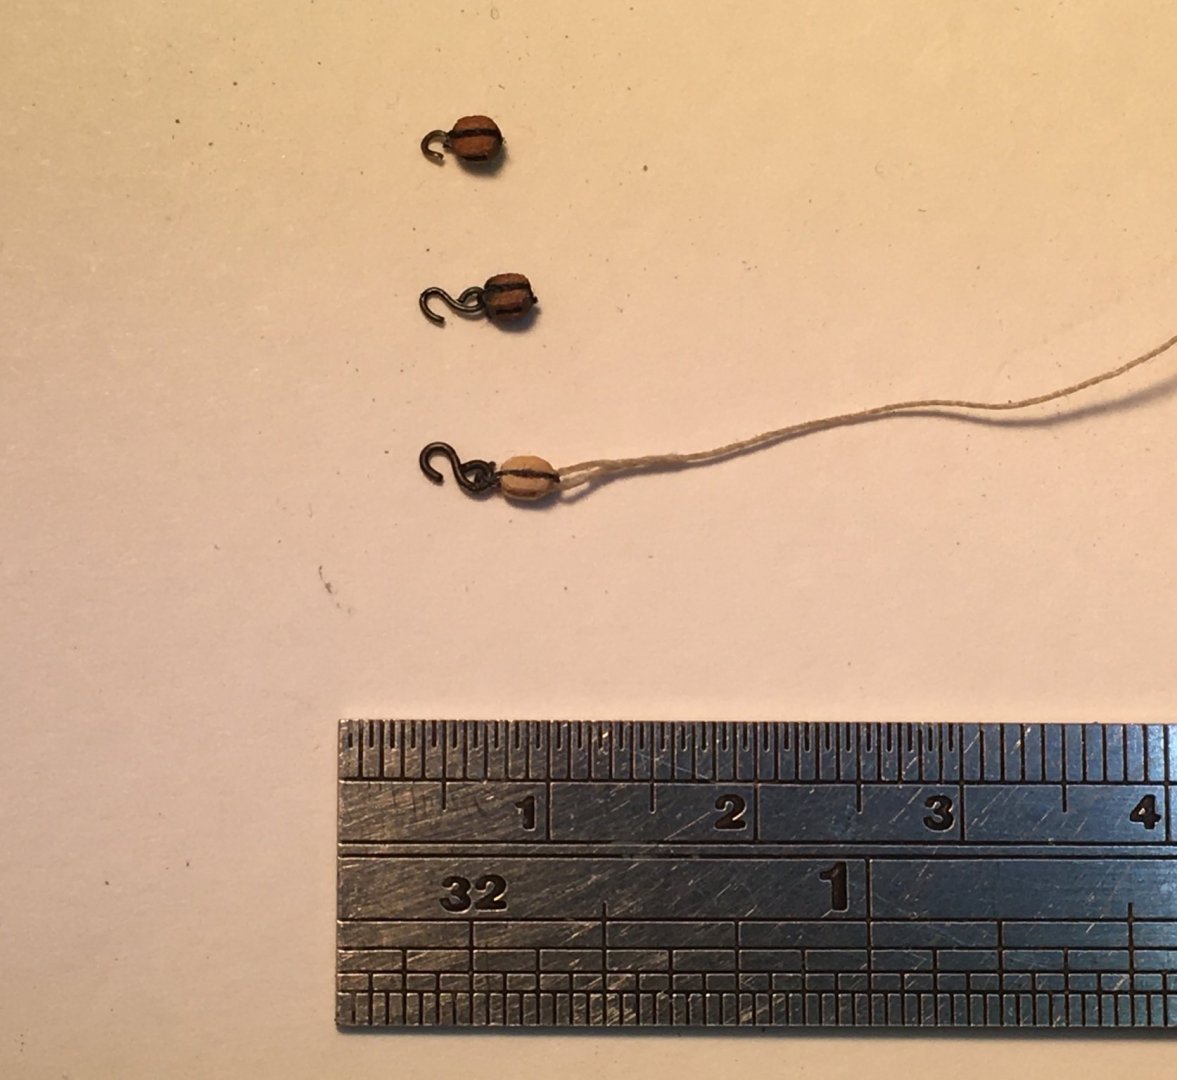
The hook isn't perfect and I should be able to improve it, although at this scale I'm not sure how much it will show.
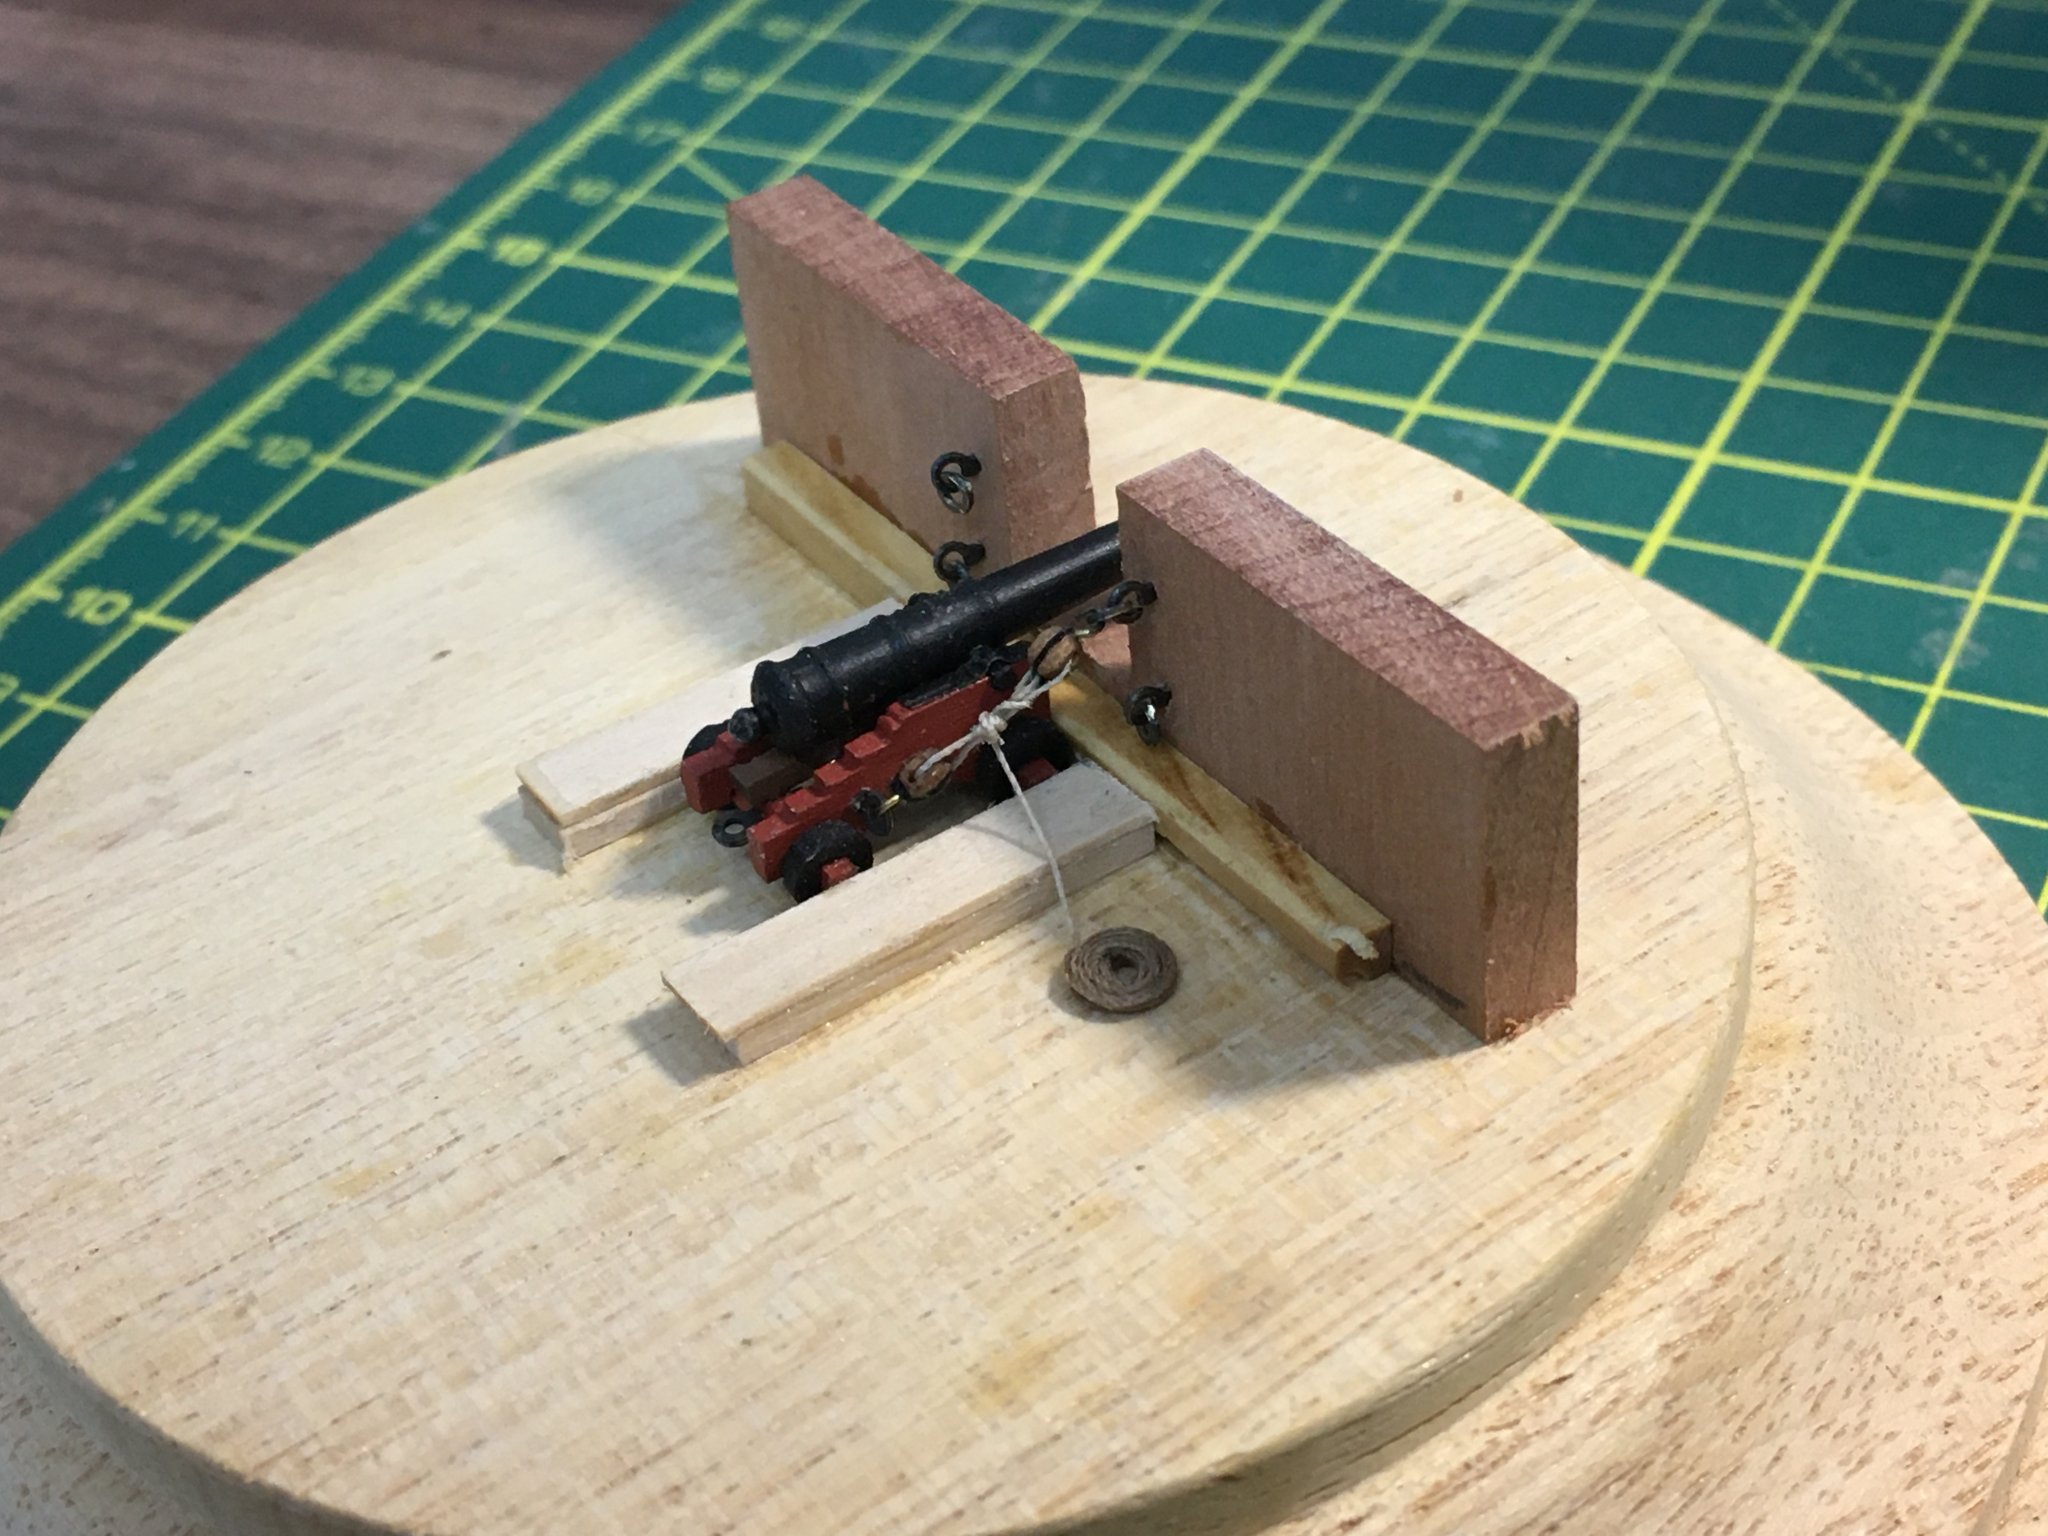
I took Glenn and Blue Ensign's advice and made a little jig from scrap wood to rig the tackle off the model:
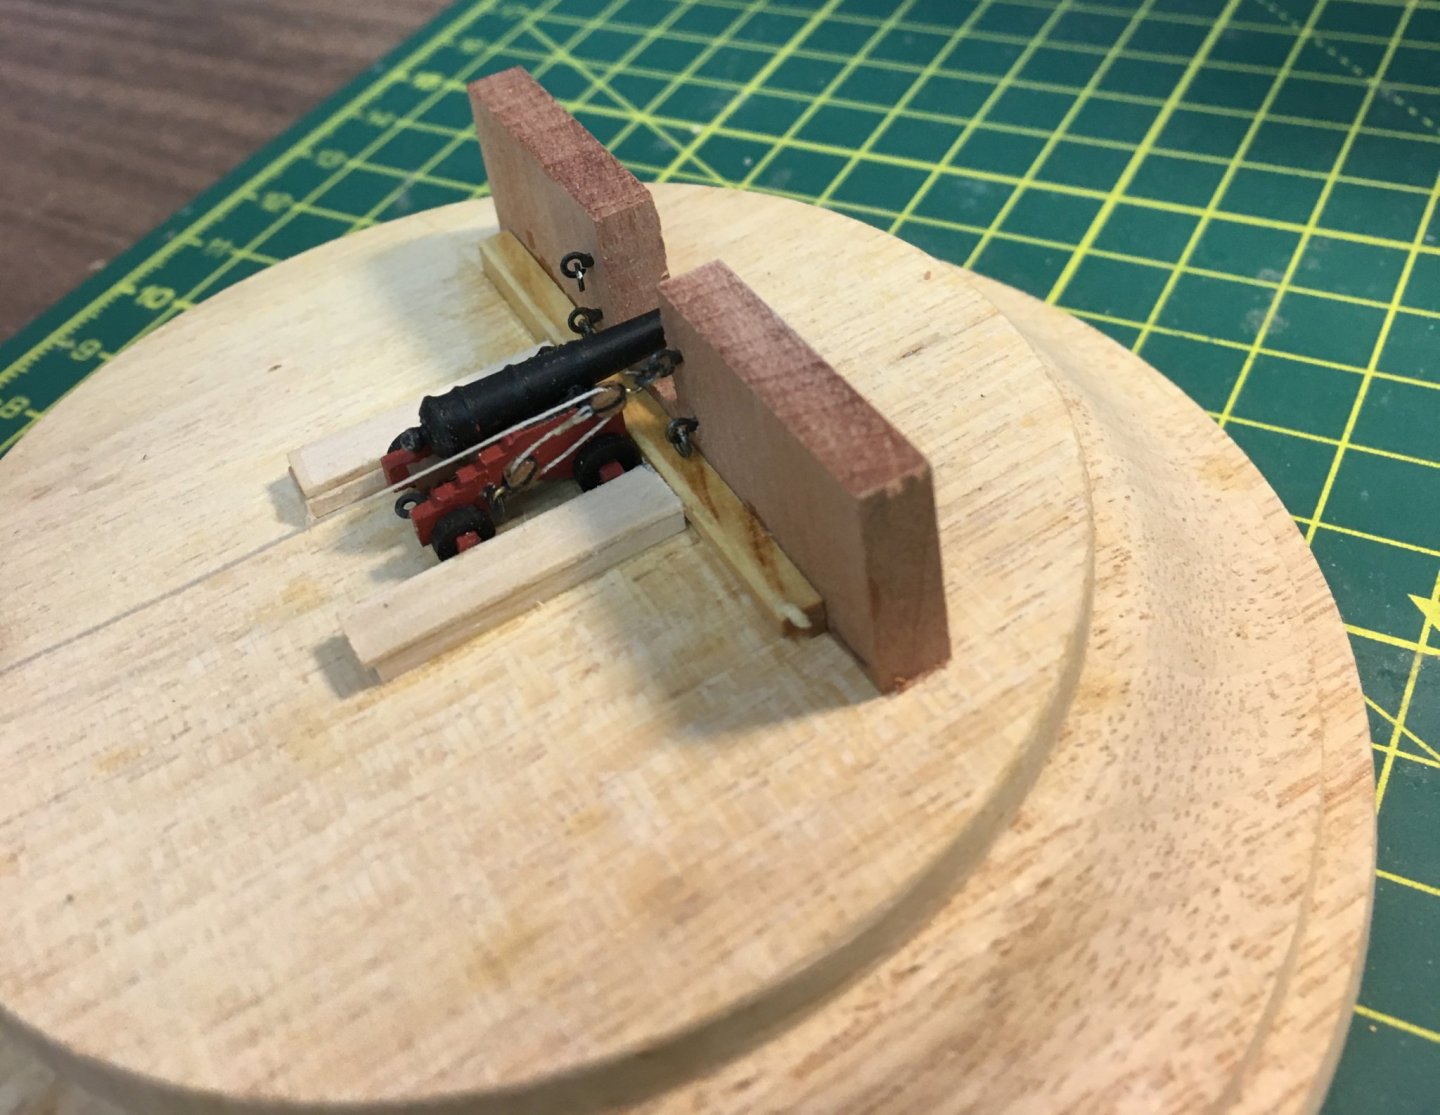
This is just a test for the side tackle so I've not blackened the hooks and I'm just using some spare 0.1mm line. I'll probably dye it a bit darker for the real thing. This is my first go at frapping:

Could do better, as my school reports often said!
However I'm quite pleased with the scale and overall appearance of the tackle, and that's what I was most concerned about. As I said previously, if I couldn't have managed something small enough and neat enough I'd rather just leave the guns un-rigged.
Onwards and upwards then.
Derek
-
Thanks B.E., very helpful advice. I must admit I’ve been struggling to work out how to manage hooks that size.
Derek
-
-
-
OK, I can see I'm not going to get away without at least trying to rig the guns.
Glenn - I think even 2.5mm blocks would be over-scale for 4-pounders. They'd be over 6 inches. Chris suggests 2.0mm which equates to almost exactly 5 inches. Not a huge difference, but I think it would show on such small cannon. I normally like to make my own blocks and I've previously tried 2mm but with very limited success. I've therefore ordered some 2mm pearwood blocks from Chris and I'll experiment.
I'll blame you and VTH if I'm still struggling and cursing in a month's time😀.
Derek
- egkb, Edwardkenway and VTHokiEE
-
 3
3
-
I suspect I got the terminology wrong, so the apology is mine.
When I referred to training tackle I meant the rigging Blue Ensign calls side tackle. There's a very good review of cannon rigging here, in which the side tackle is called the outhaul tackle (because it is used to haul the gun outwards through the gunport) and also the gun tackle. The tackle used to haul the gun inboard is variously called the inhaul tackle and the training tackle.
I think my confusion was caused because the gun/outhaul tackle can also be used to train (i.e. traverse) the gun. Confusing? Just a bit!
Looking at Blue Ensign's Alert makes me tempted to try full rigging. On the other hand, Speedy has 14 4-pounders which will present an even greater challenge than Alert's 10 6-pounders. Decisions, decisions.
Derek
- Edwardkenway and VTHokiEE
-
2
-
For me, one of the benefits of airbrushing is that it lays such a thin coat of paint that it doesn't mask details, especially on small, fine parts. Using primer, I'd be worried that I'd lose some of that detail.
I've only used primer once in the (very!) short time I've been airbrushing. I didn't find I needed it on photo etched parts provided they were properly prepared, either by chemical etching or light rubbing with a very fine sanding stick or steel wool. I didn't use it on Speedy's swivel guns either, where the airbrush covered the plastic barrels and brass mounts very well. As for wood, I tend to use sanding sealer which gives a very smooth finish for hand brushing and seemed to work equally well for airbrushing when I painted the channels. The only time I used primer was on Speedy's anchors which were bright white metal, which I felt might need a base coat. But I wasn't so concerned about detail in that instance.
The common feature in all these cases where I didn't use primer is that they all involved small components that wouldn't be subject to much handling after painting. I imagine it would be very different if you were dealing with a whole ship's hull, for example.
Obviously there are vastly more experienced people on the forum who can give much more information than I can. I just wanted to report my early experience which is that primer is not necessary in every situation.
Derek
-
Lovely deck B.E.
I believe it was you that put me on to the Swann Morton micro chisels some time ago, and they certainly earn their keep on a job like this - very neat work.
Derek
-
11 hours ago, VTHokiEE said:
I think I’m going to regret my decision to rig the guns, that is until they are rigged and done then I’ll be really glad that I did 🙂.
Do you plan to fully rig your guns on Alert? I'll certainly do the breeching but I'm not sure about the training tackle, especially at 1:64 scale. I might experiment a bit, but I suspect I'll struggle to get the tackle to look right at that scale, and if I don't I think it could detract from the model. What do you think?
Derek
-
Thank you Don and Bill - much appreciated, and thanks as always for all the likes.
I got on with the channels, deadeyes and chainplates today.
The laser-cut channels were easy to fit, being perfectly matched to the curve of the hull. I followed the advice in the instructions and drilled holes for short pins in the back edges of the channels to make them extra secure. The chainplates came as photo etch parts and I decided to use blackening solution rather than paint, as described in an earlier post:

The method I used was to rub the PE with a fine sanding stick followed by a cloth dipped in isopropyl alcohol, before applying Brass Black. After a minute or so I rinsed the PE in cold water, separated the chainplates from the sheet, rubbed them gently with a dry cloth to remove any loose surface blackening and dipped them in Brass Black again for a minute before final rinsing.
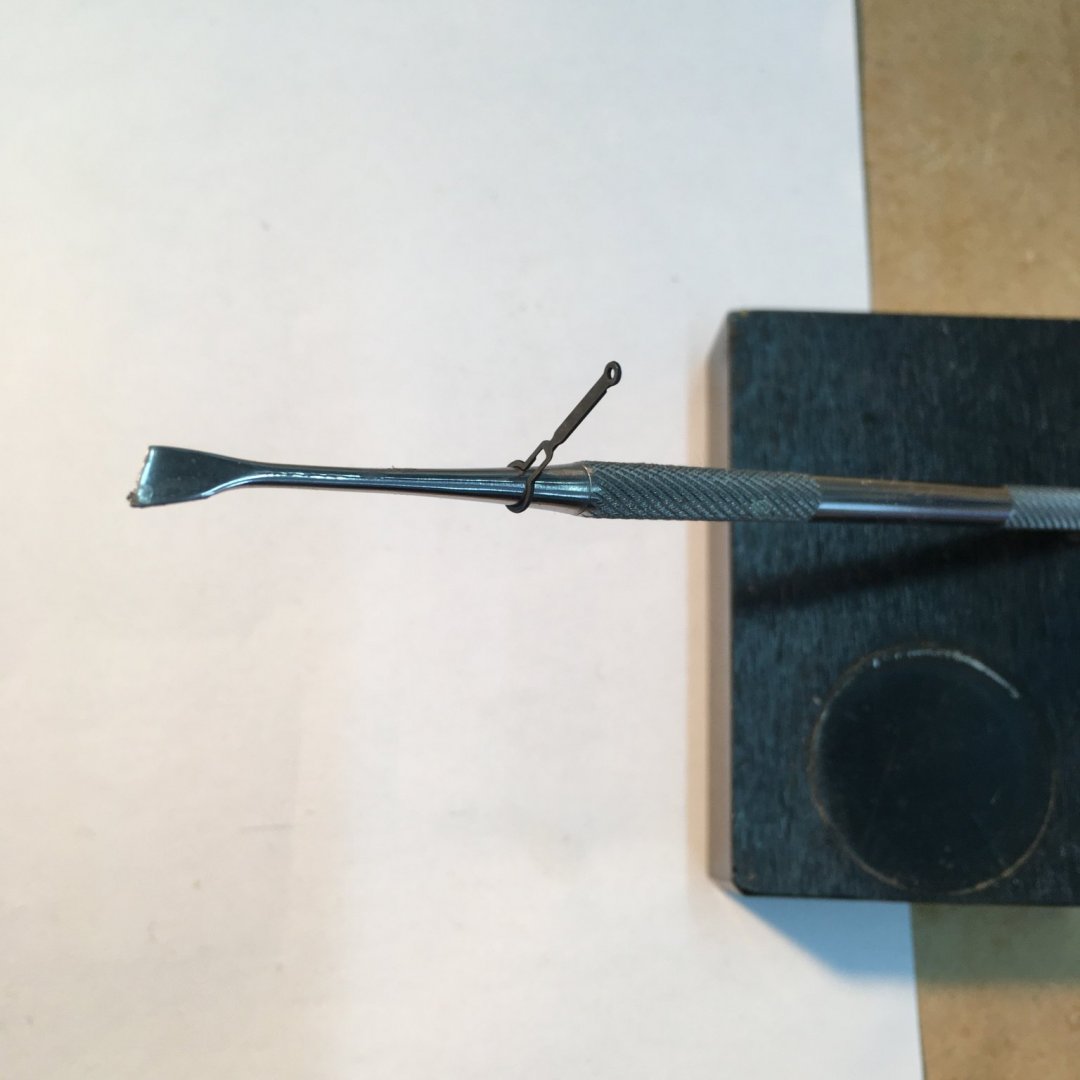
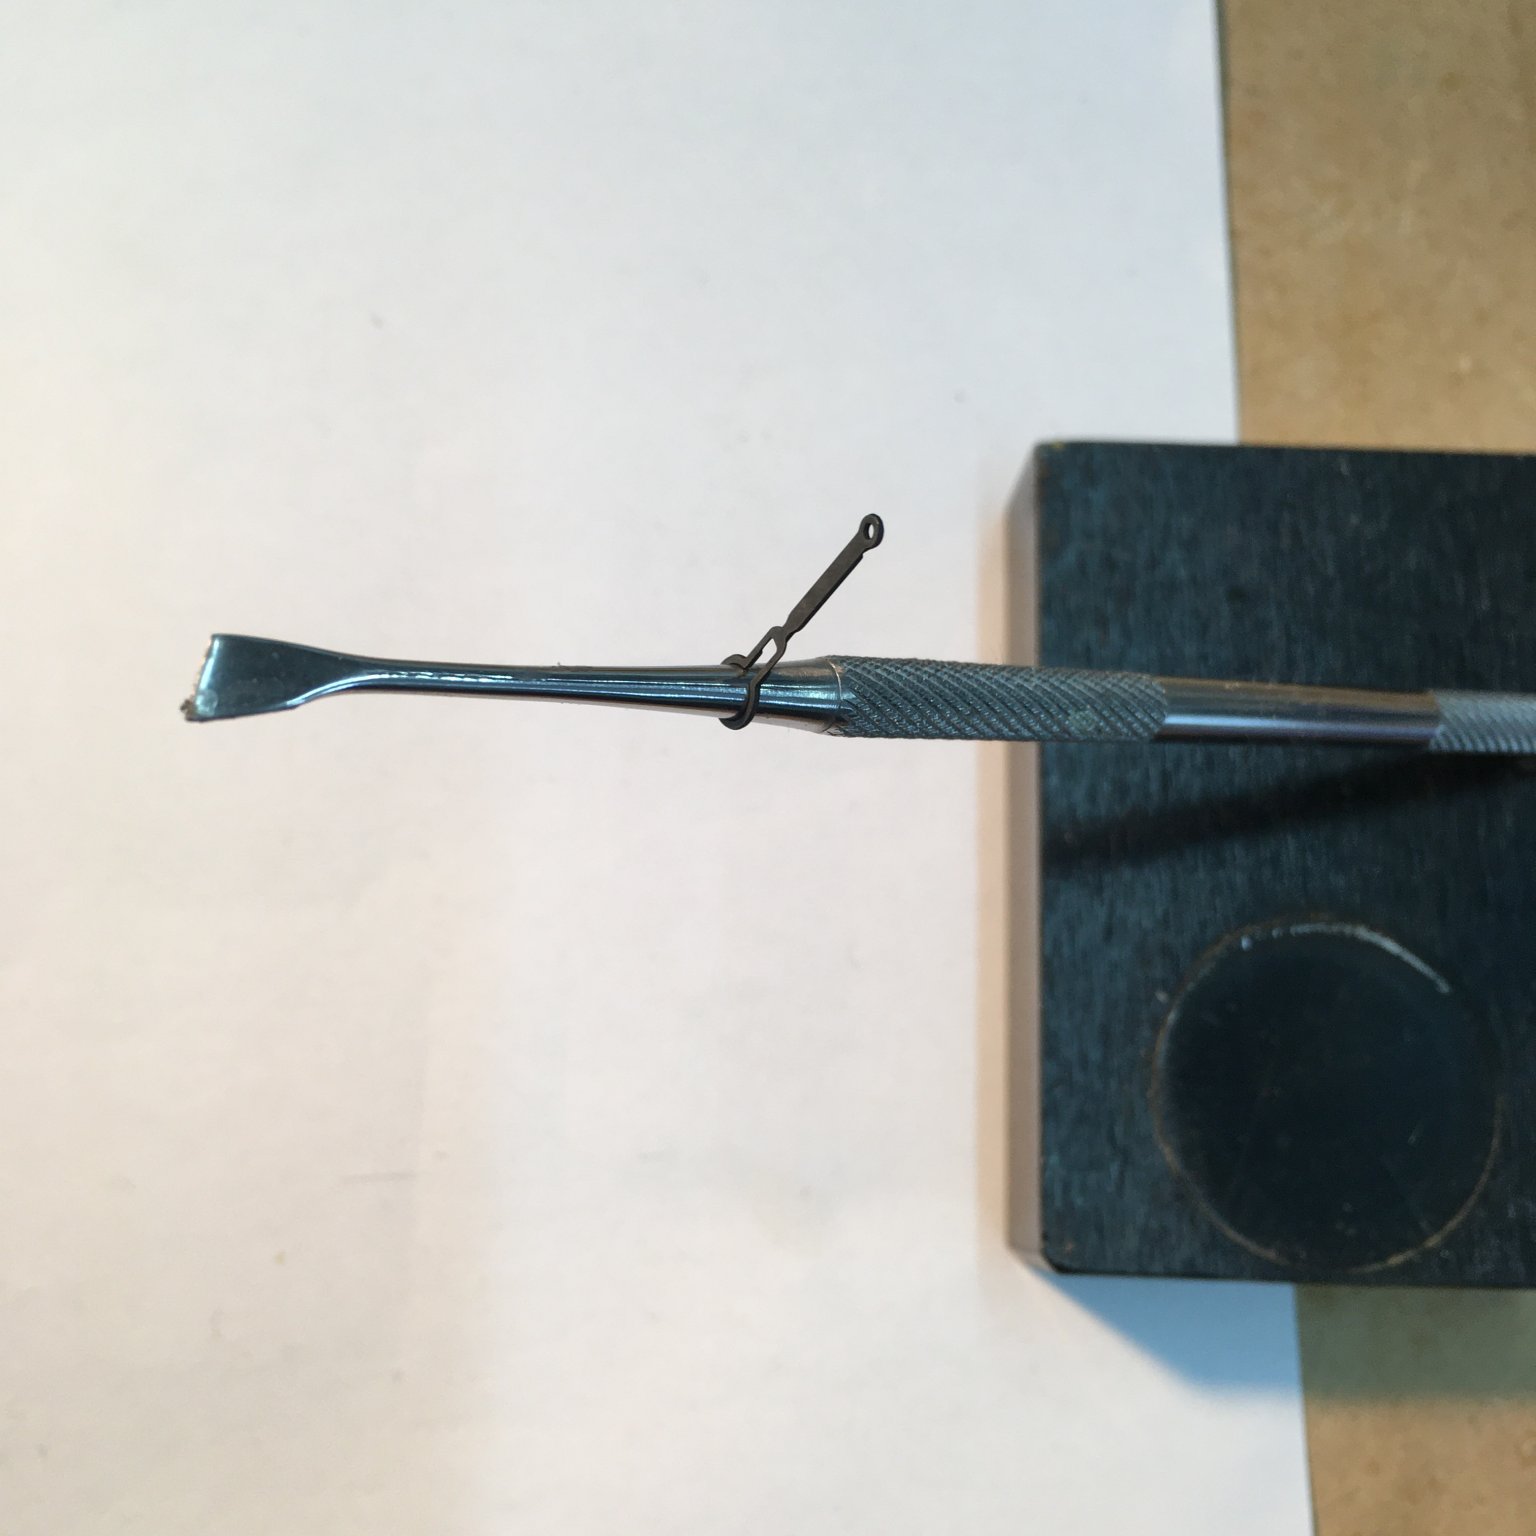
To insert deadeyes you have to widen the loops in the deadeyes. I found the best way to do this was by slipping the chainplate over a tapered metal rod and pressing it down until the loop was wide enough. In this photo I'm using Glenn's doggy dental tool (again!):
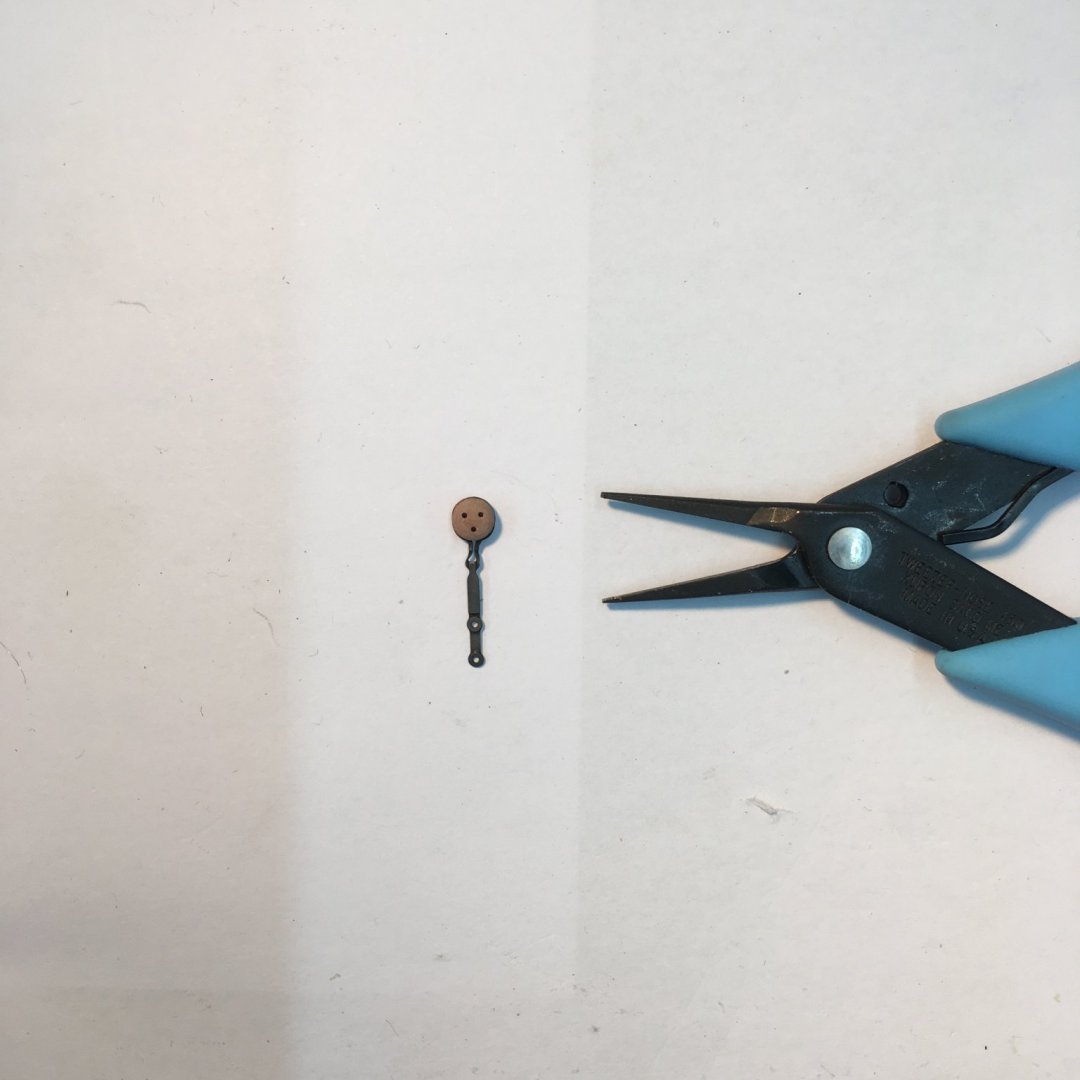
Once the deadeye was in place I use my fine-nose pliers to pinch the loop back up:
Here's the port side in place. I've not nailed the chainplates in position - once I've completed the starboard side I'll fit the masts temporarily so I can line the chainplates properly up with the shrouds.

I must say I'm impressed with the quality of the deadeyes and rigging blocks that come with Speedy - much better than other kits I've had. Btw, you can see in the photo that I've started the long and laborious process of fitting all the ironwork associated with the cannon - four rings in the bulwarks and one in the deck for each gun - ie ten pieces of photo etch for each of the 14 cannon. These I airbrushed for speed, which seemed to work very well.
Derek
- Blue Ensign, Jonny 007, Dubz and 11 others
-
14
-
Hi Glenn
I'd draw a distinction between aliphatic resin (also known as carpenter's glue and yellow glue) and the rapid aliphatic glues like Super 'Phatic. I use the former just like PVA - it is supposed to be stronger and sandable, but as far as I'm concerned it's virtually the same deal. I described the brand I use here in my Speedy log, but many manufacturers make their own versions, including well-known brands like Titebond.
However this 'ordinary' aliphatic resin is very different to the rapid glue that your namesake from Scarborough, UK put me on to. Super 'Phatic (which I got here) really is different to PVA. It looks different, being much thinner and more penetrating, and grabs almost as fast as CA, especially if you hold it under pressure for a few moments. As you know from my Speedy log, I found it very useful for laying deck planks where after a few seconds it was stuck enough to lay flat against the sheer and solid enough to trim.
I've only used that one brand, so I don't know how it compares with the one you ordered from Cornwall. If yours is as good, then I'm sure you'll find it provides a useful tool for those situations where CA is too fast and PVA too slow. I'll be interested to hear how you get on.
Derek
- thibaultron, BobG, Canute and 2 others
-
5
-
I’m grateful to Bob for raising this topic.
Being new to airbrushing myself I’m finding this discussion very interesting and valuable. There certainly seems to be a steep learning curve for beginners, but my experience so far (less than a week!) is that the results you can achieve make the effort well worthwhile. One bonus for me is that I’ve found I can airbrush shellac - my preferred finish for bare wood.
Derek
-
-
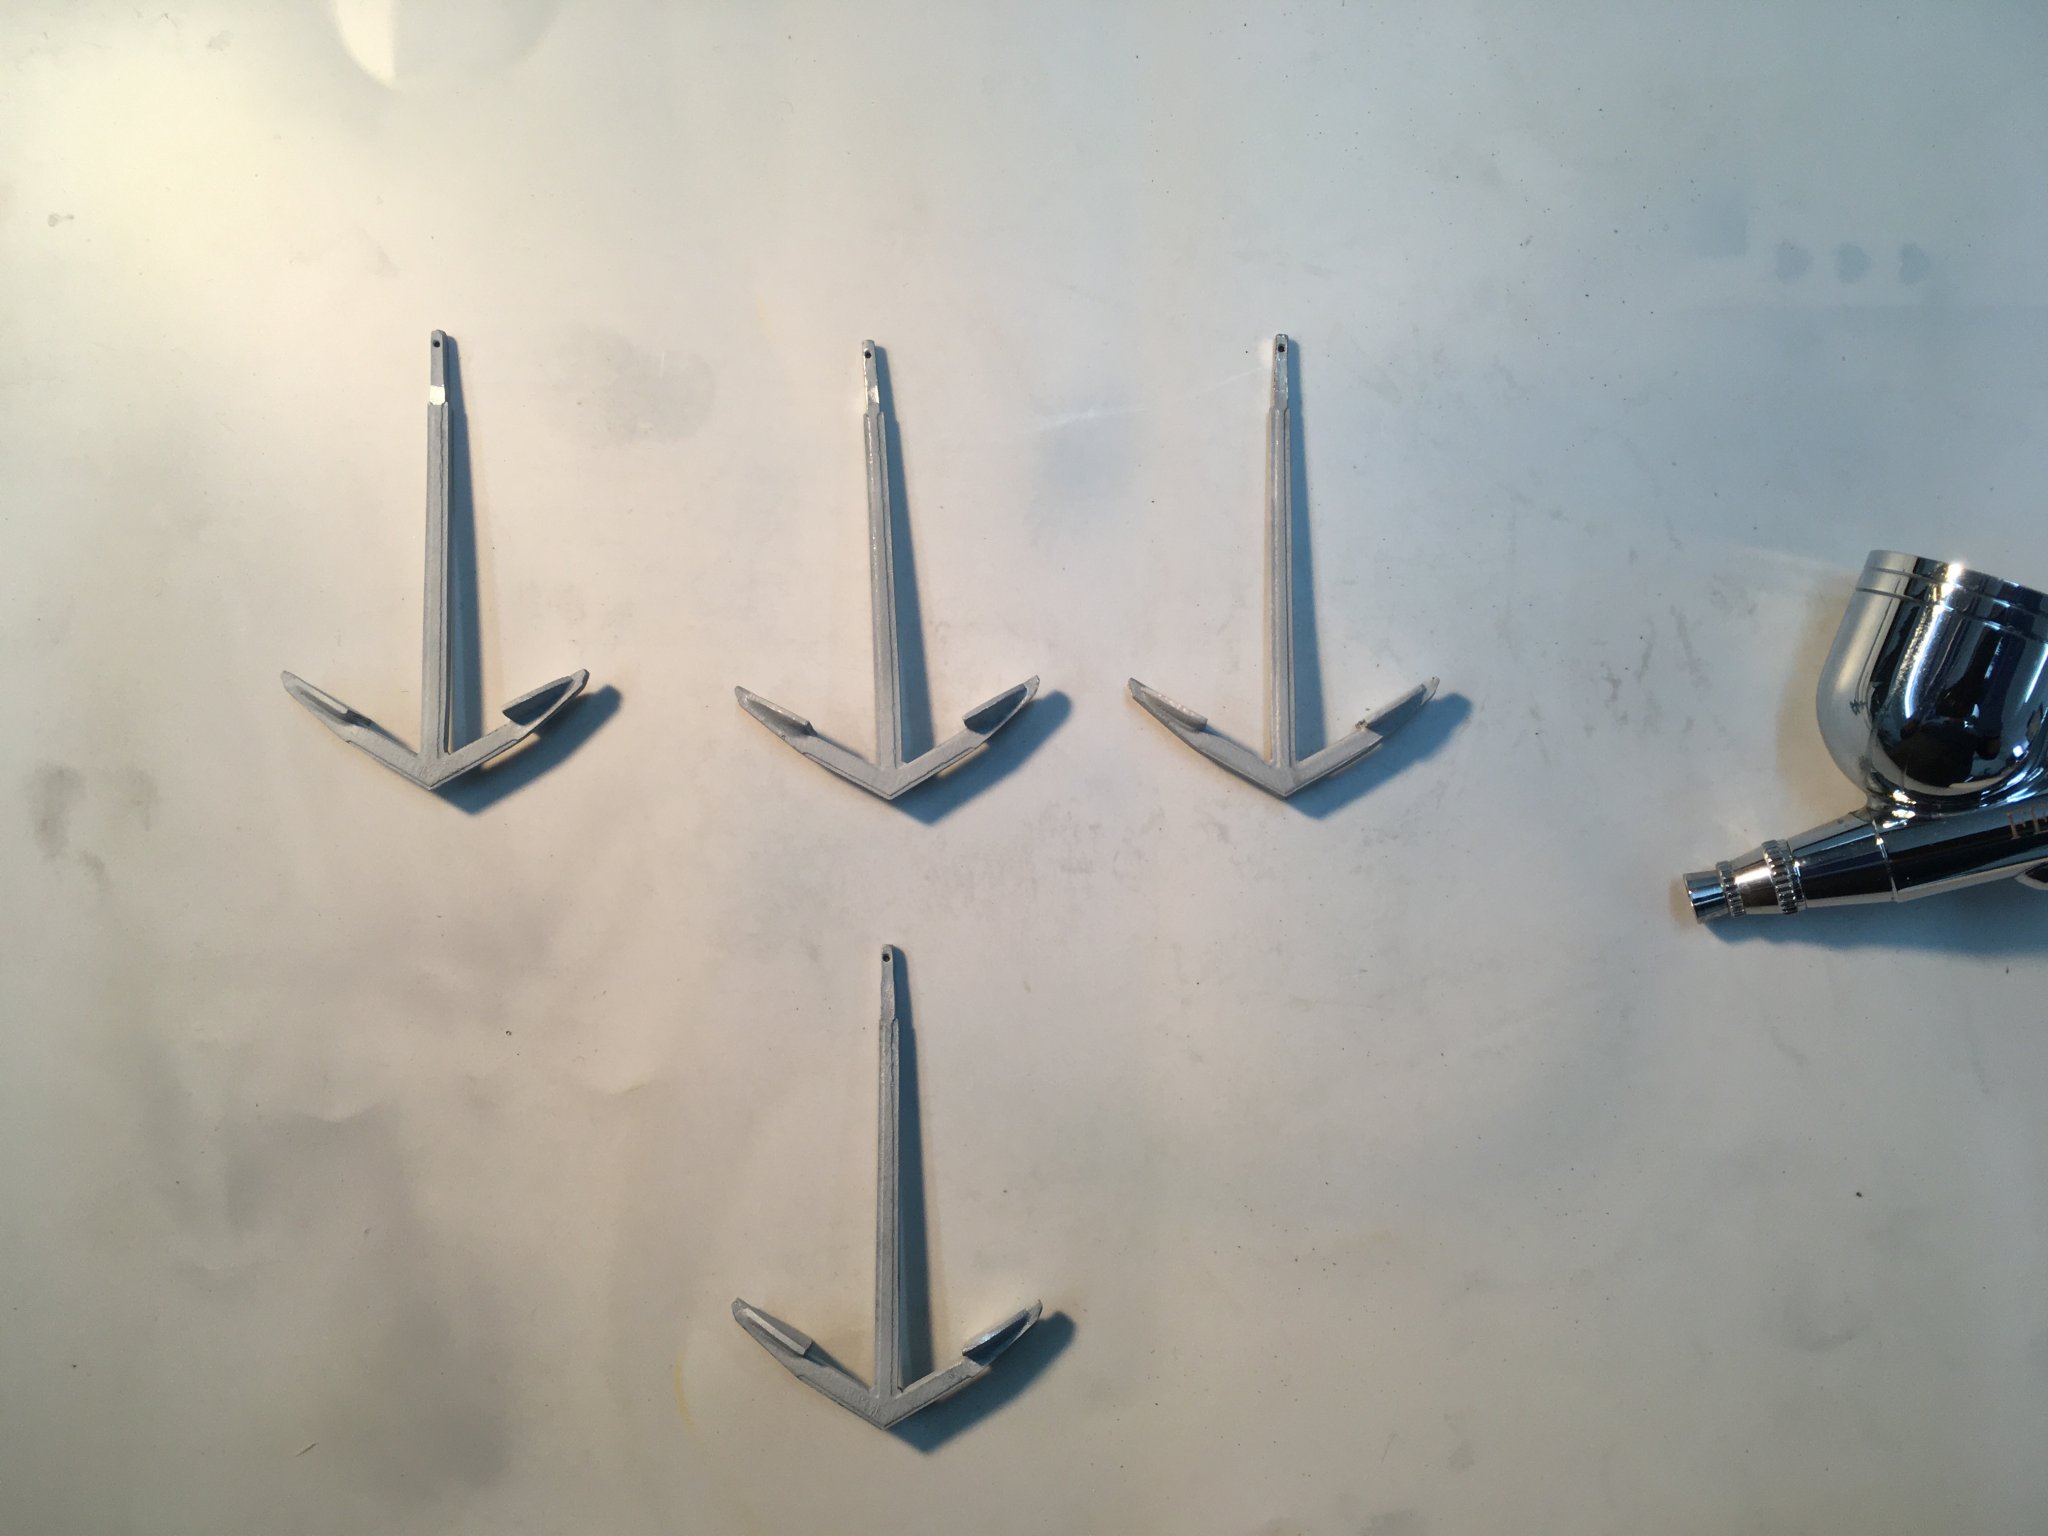
Had my first serious go at airbrushing today, starting with priming the anchors:
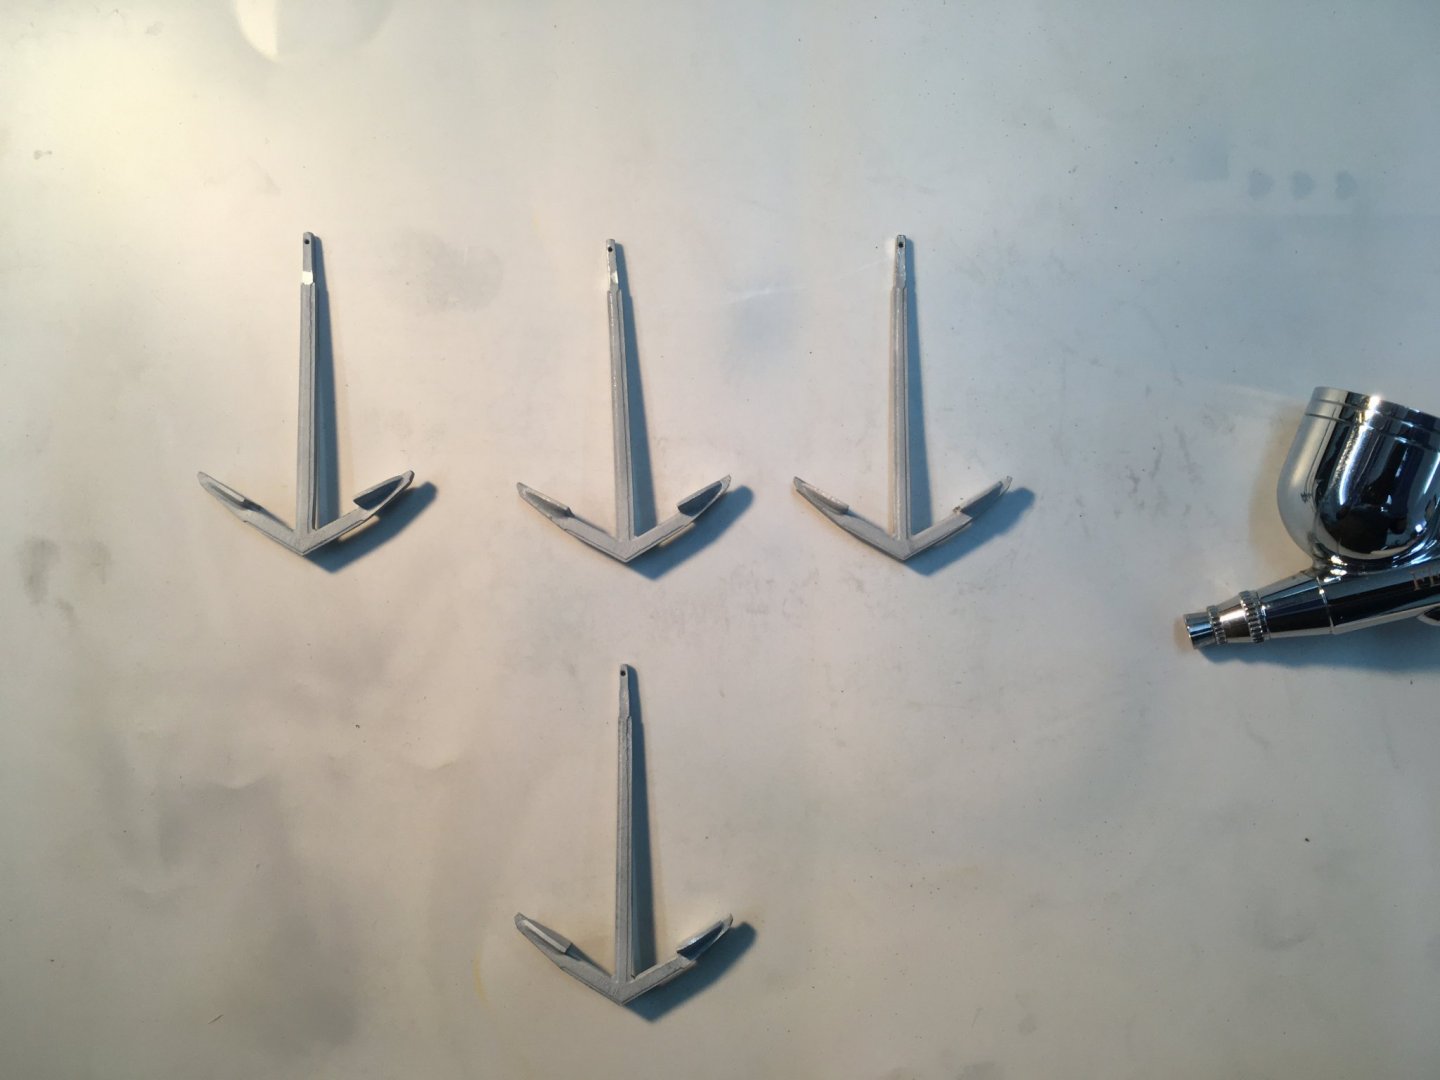
The unpainted bits on the shanks are where I held the anchors - that part will be covered by the stocks. I then sprayed the hatch covers, the swivel guns and finally the anchor top coat.:

Once I'd realised that you need to control the paint flow quite carefully - a light misting being preferred to a heavy coat - I was able to paint the swivels far more quickly than I'd have managed with a brush, and with a much smoother coating that doesn't hide any details. You'll have to take my word for that as I can't take a decent closeup with my iphone!
The anchors went well, although to be honest a brush would probably have been as easy. Similarly, I tried airbrushing the pearwood channels but the result wasn't noticeably better than brushing.
However the gratings were much easier with the airbrush, although I noticed when they dried that they're not quite evenly coated. Another quick go should sort that.
Cleaning the airbrush after use is a pain and took me about ten minutes, but like anything I expect it will get easier with practice.
Overall I'm quite pleased.
Derek
- petervisser, jwvolz, BenD and 11 others
-
14
-
54 minutes ago, Blue Ensign said:
Decision made.
It is a small deck, and I think I can make it look more realistic
I'm sure you will. The provided deck is great for beginners - which you are not.
Derek
- coalman, BobG, chris watton and 1 other
-
4
-
-
Ground Tackle
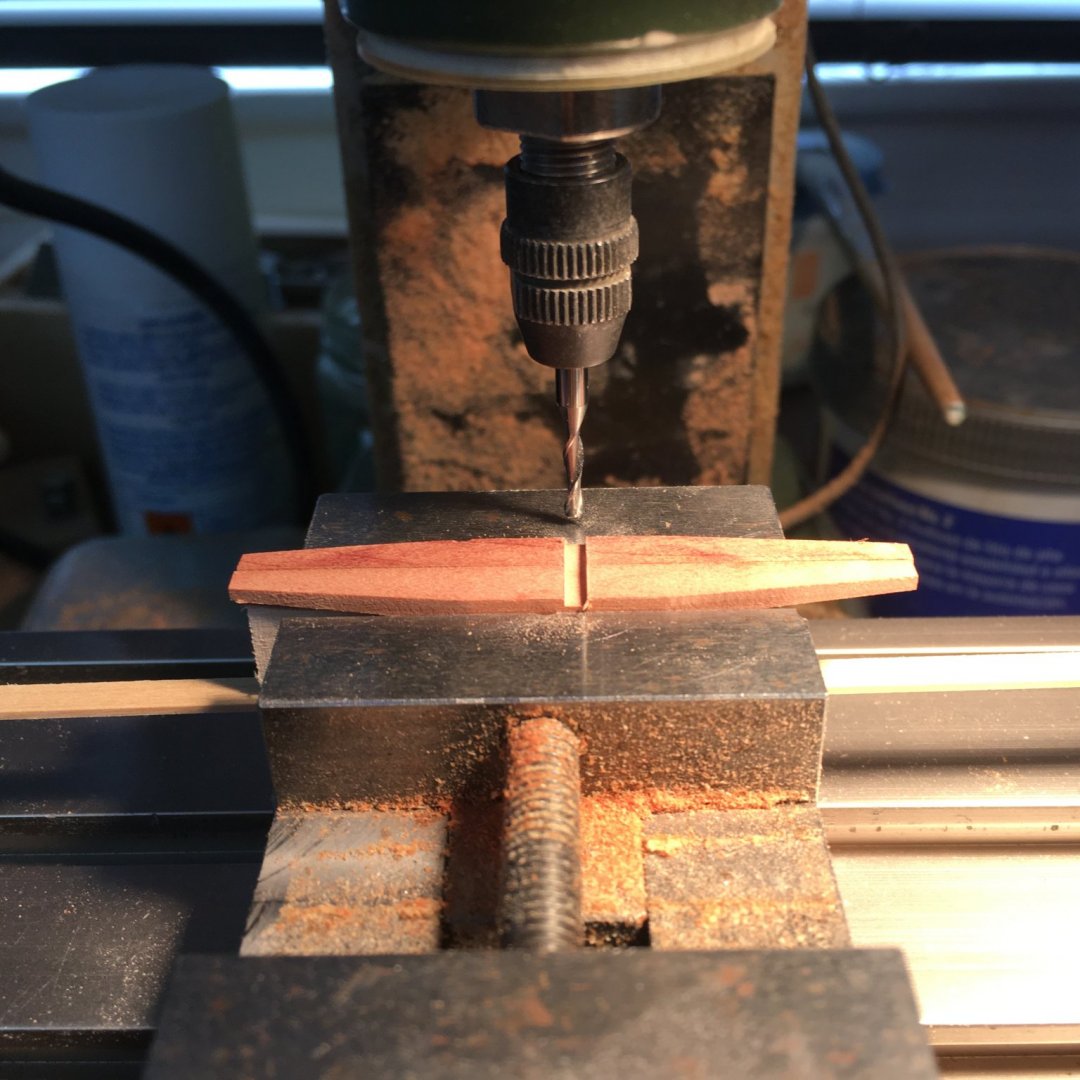
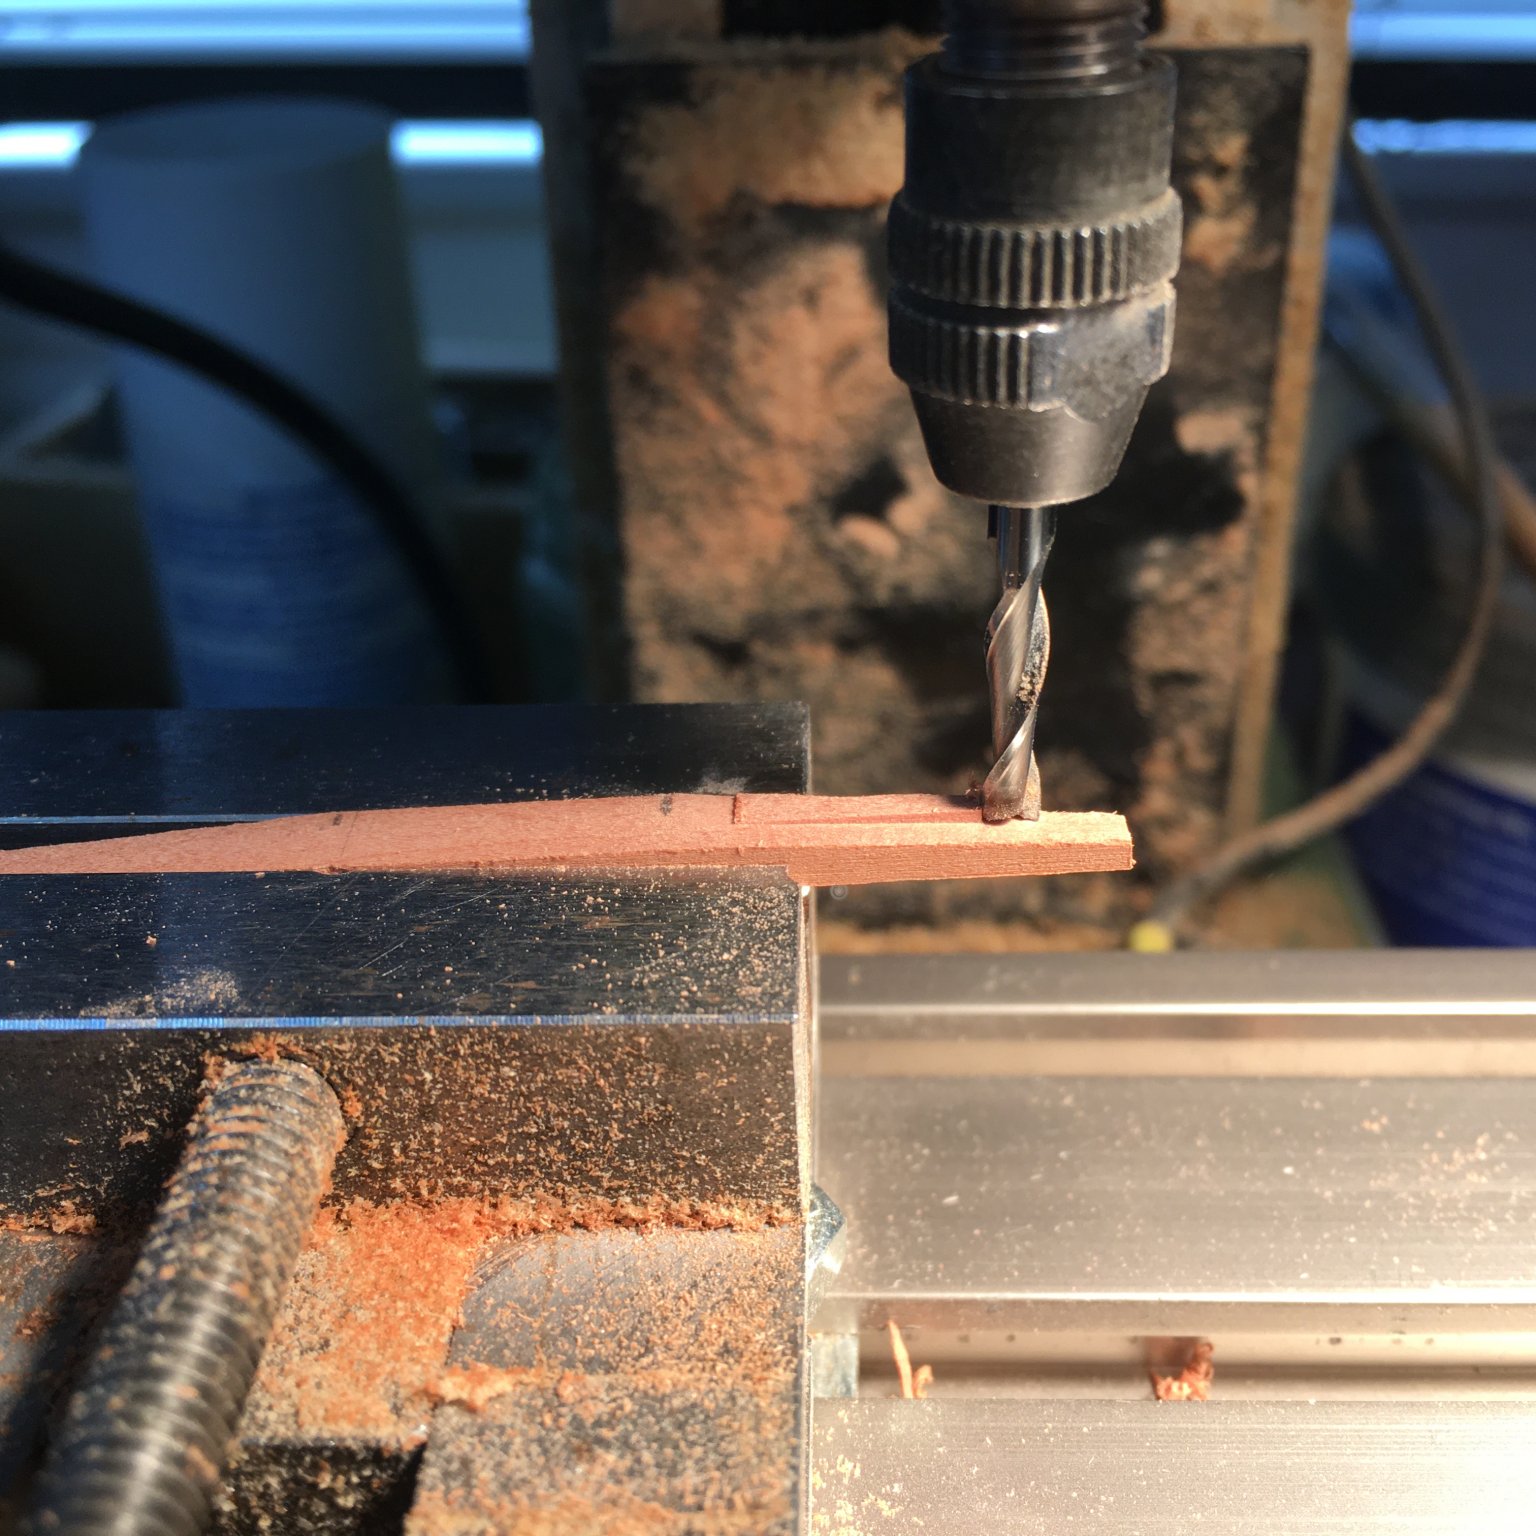
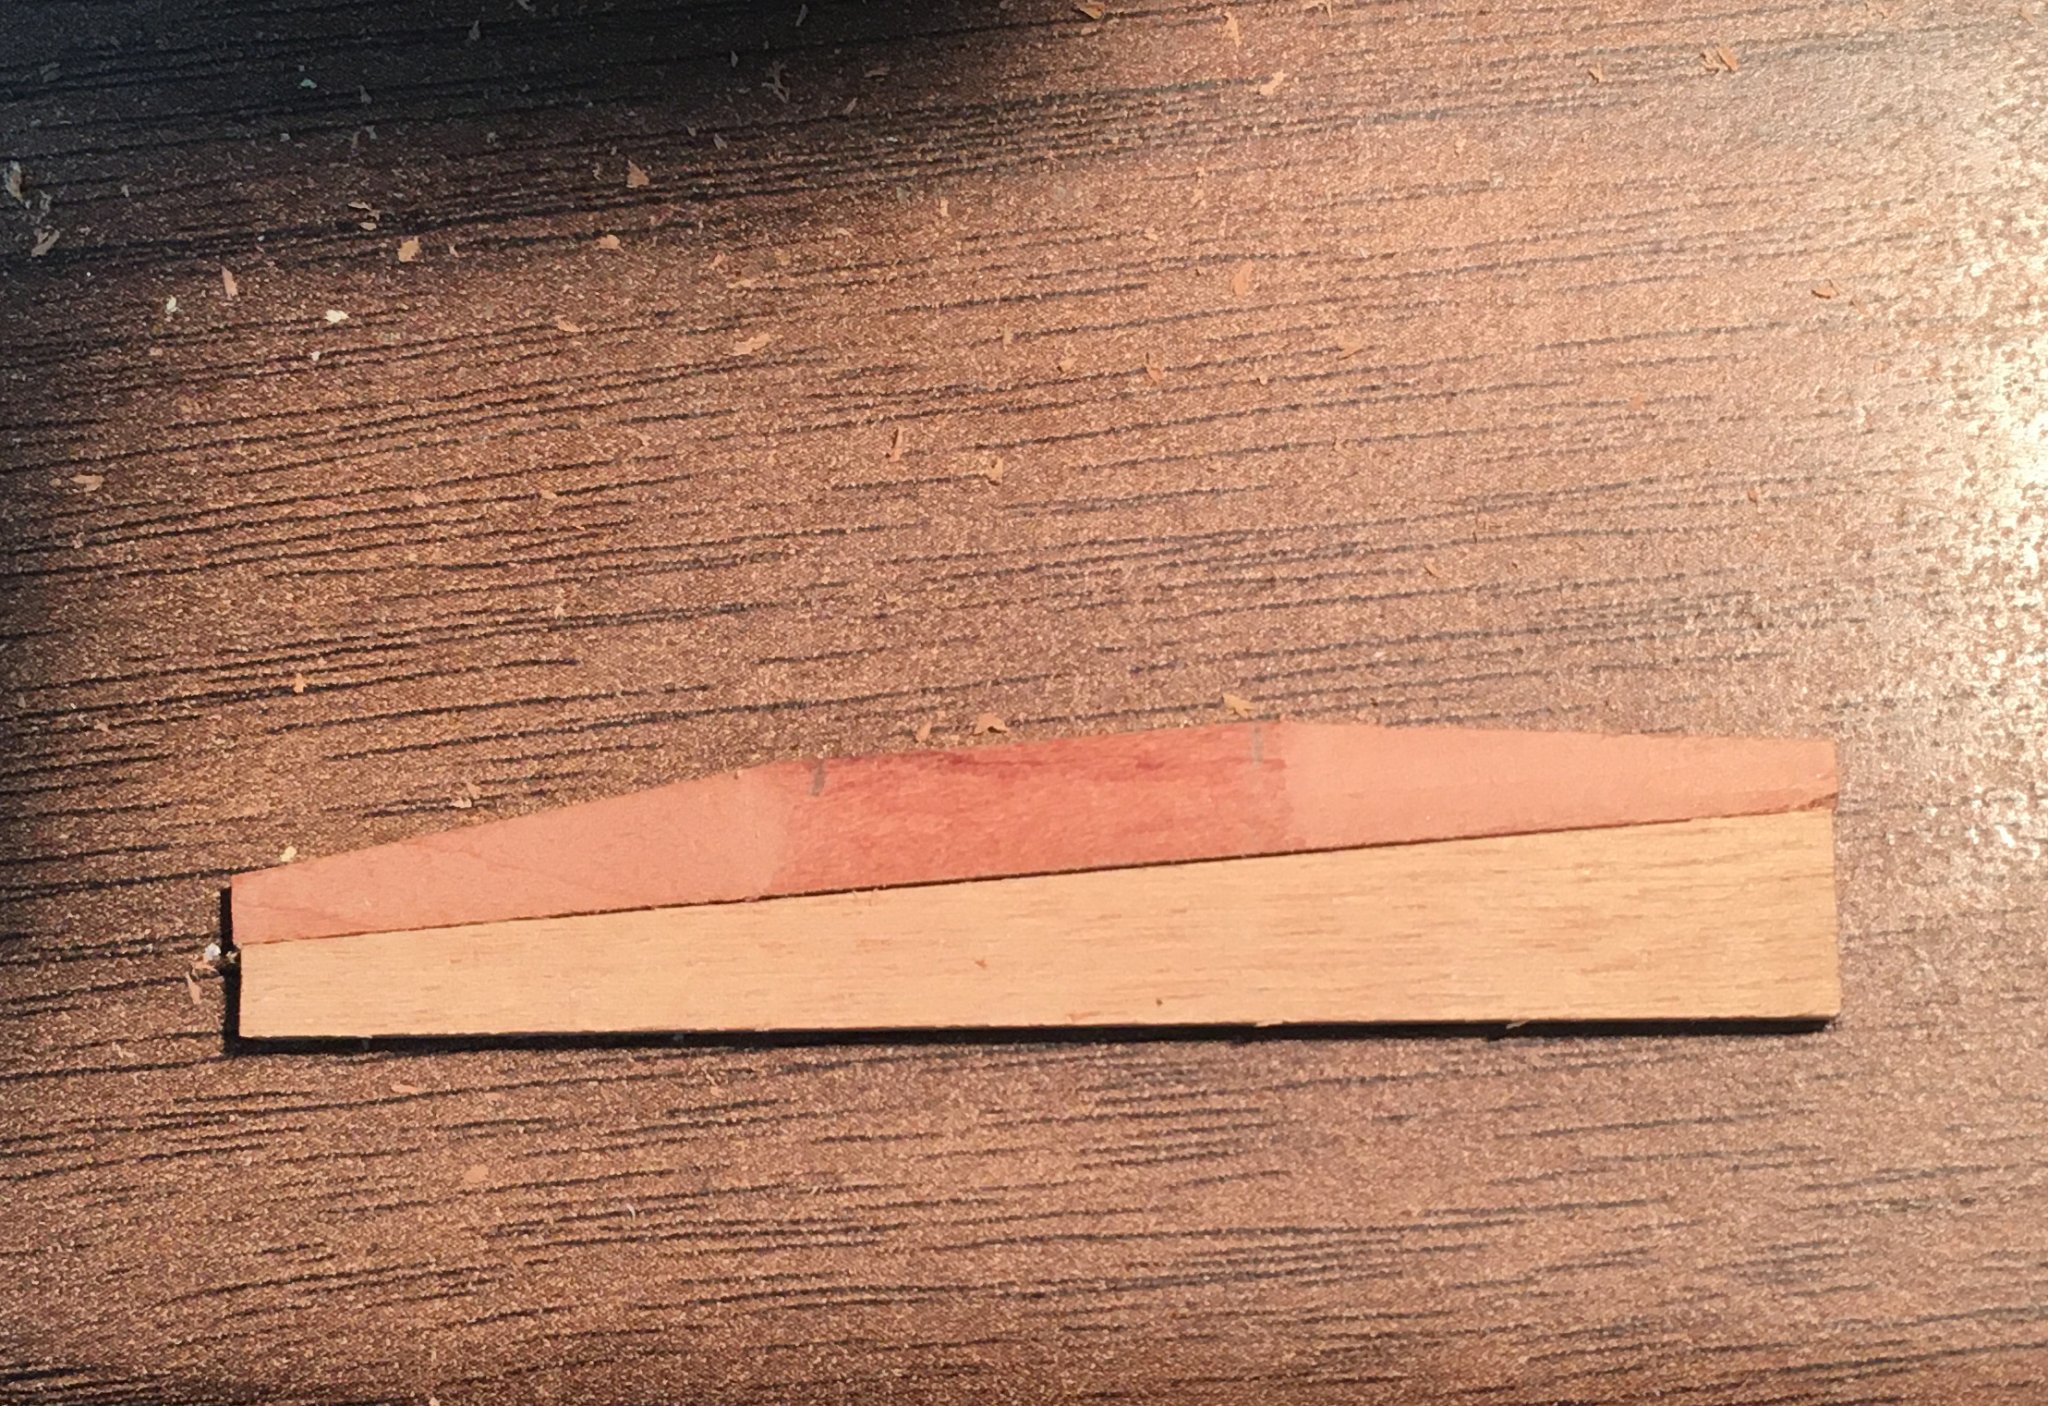
Still waiting for paint to arrive so I've had a go at the anchors. The cast metal parts are OK - the pattern and proportions look correct, and it only needed a small amount of fettling to get rid of any casting marks. However I felt the anchor stocks were slightly under-sized, and they only tapered in one dimension rather than two. So, out with some spare pear wood left over from another build. I decided to follow full-scale practice and construct each stock in two halves, which resulted in eight pieces, each 60 X 5 X 2.5 mm for the four anchors. I used the trusty Proxxon mill to taper the pieces to the correct angle:

The front face and the bottom of the stock had to be cut at slightly different angles. In each case I prepared a piece of wood to support the stock at the required angle:

Once the mill was set at the correct depth for the first angle all pieces were milled without further adjustment. Then the setup was changed for the second angle and the process repeated.
Making the stock in two halves ensured it was easy to mill a square hole for the shank:
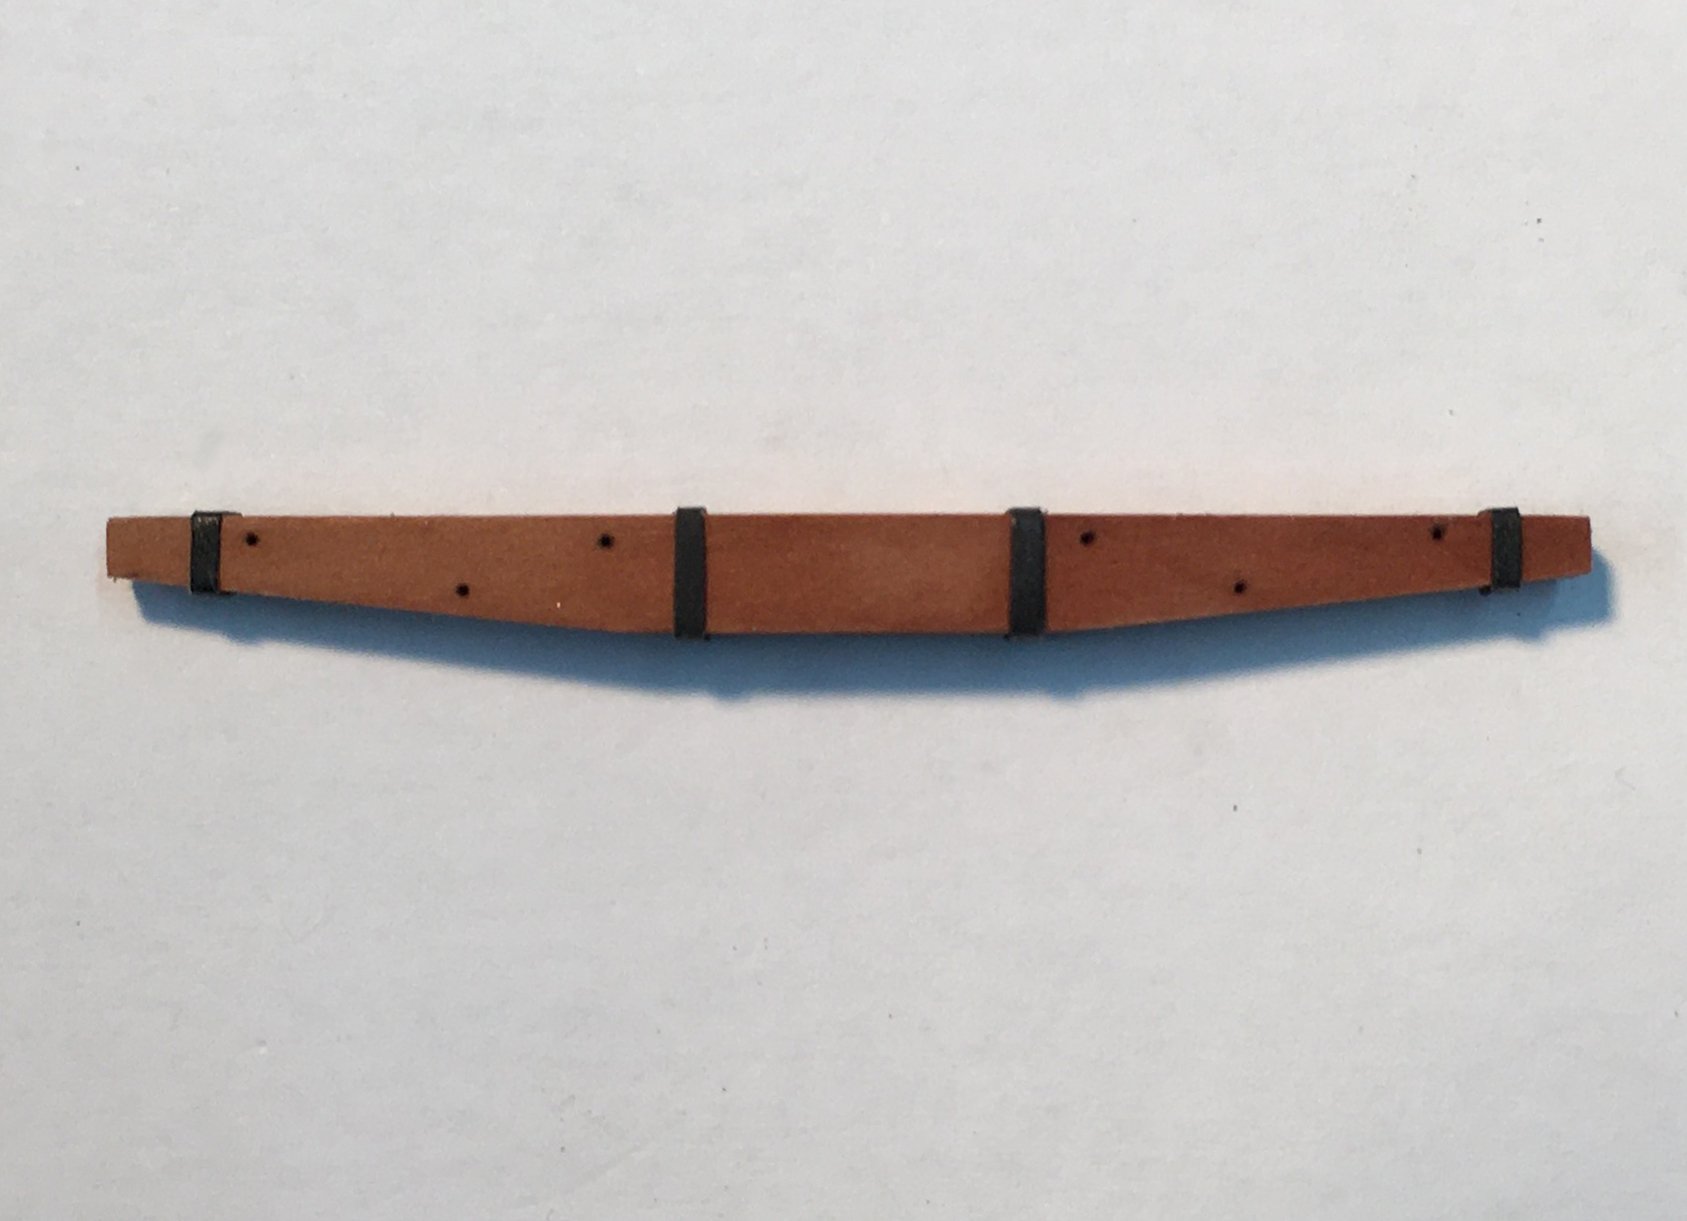
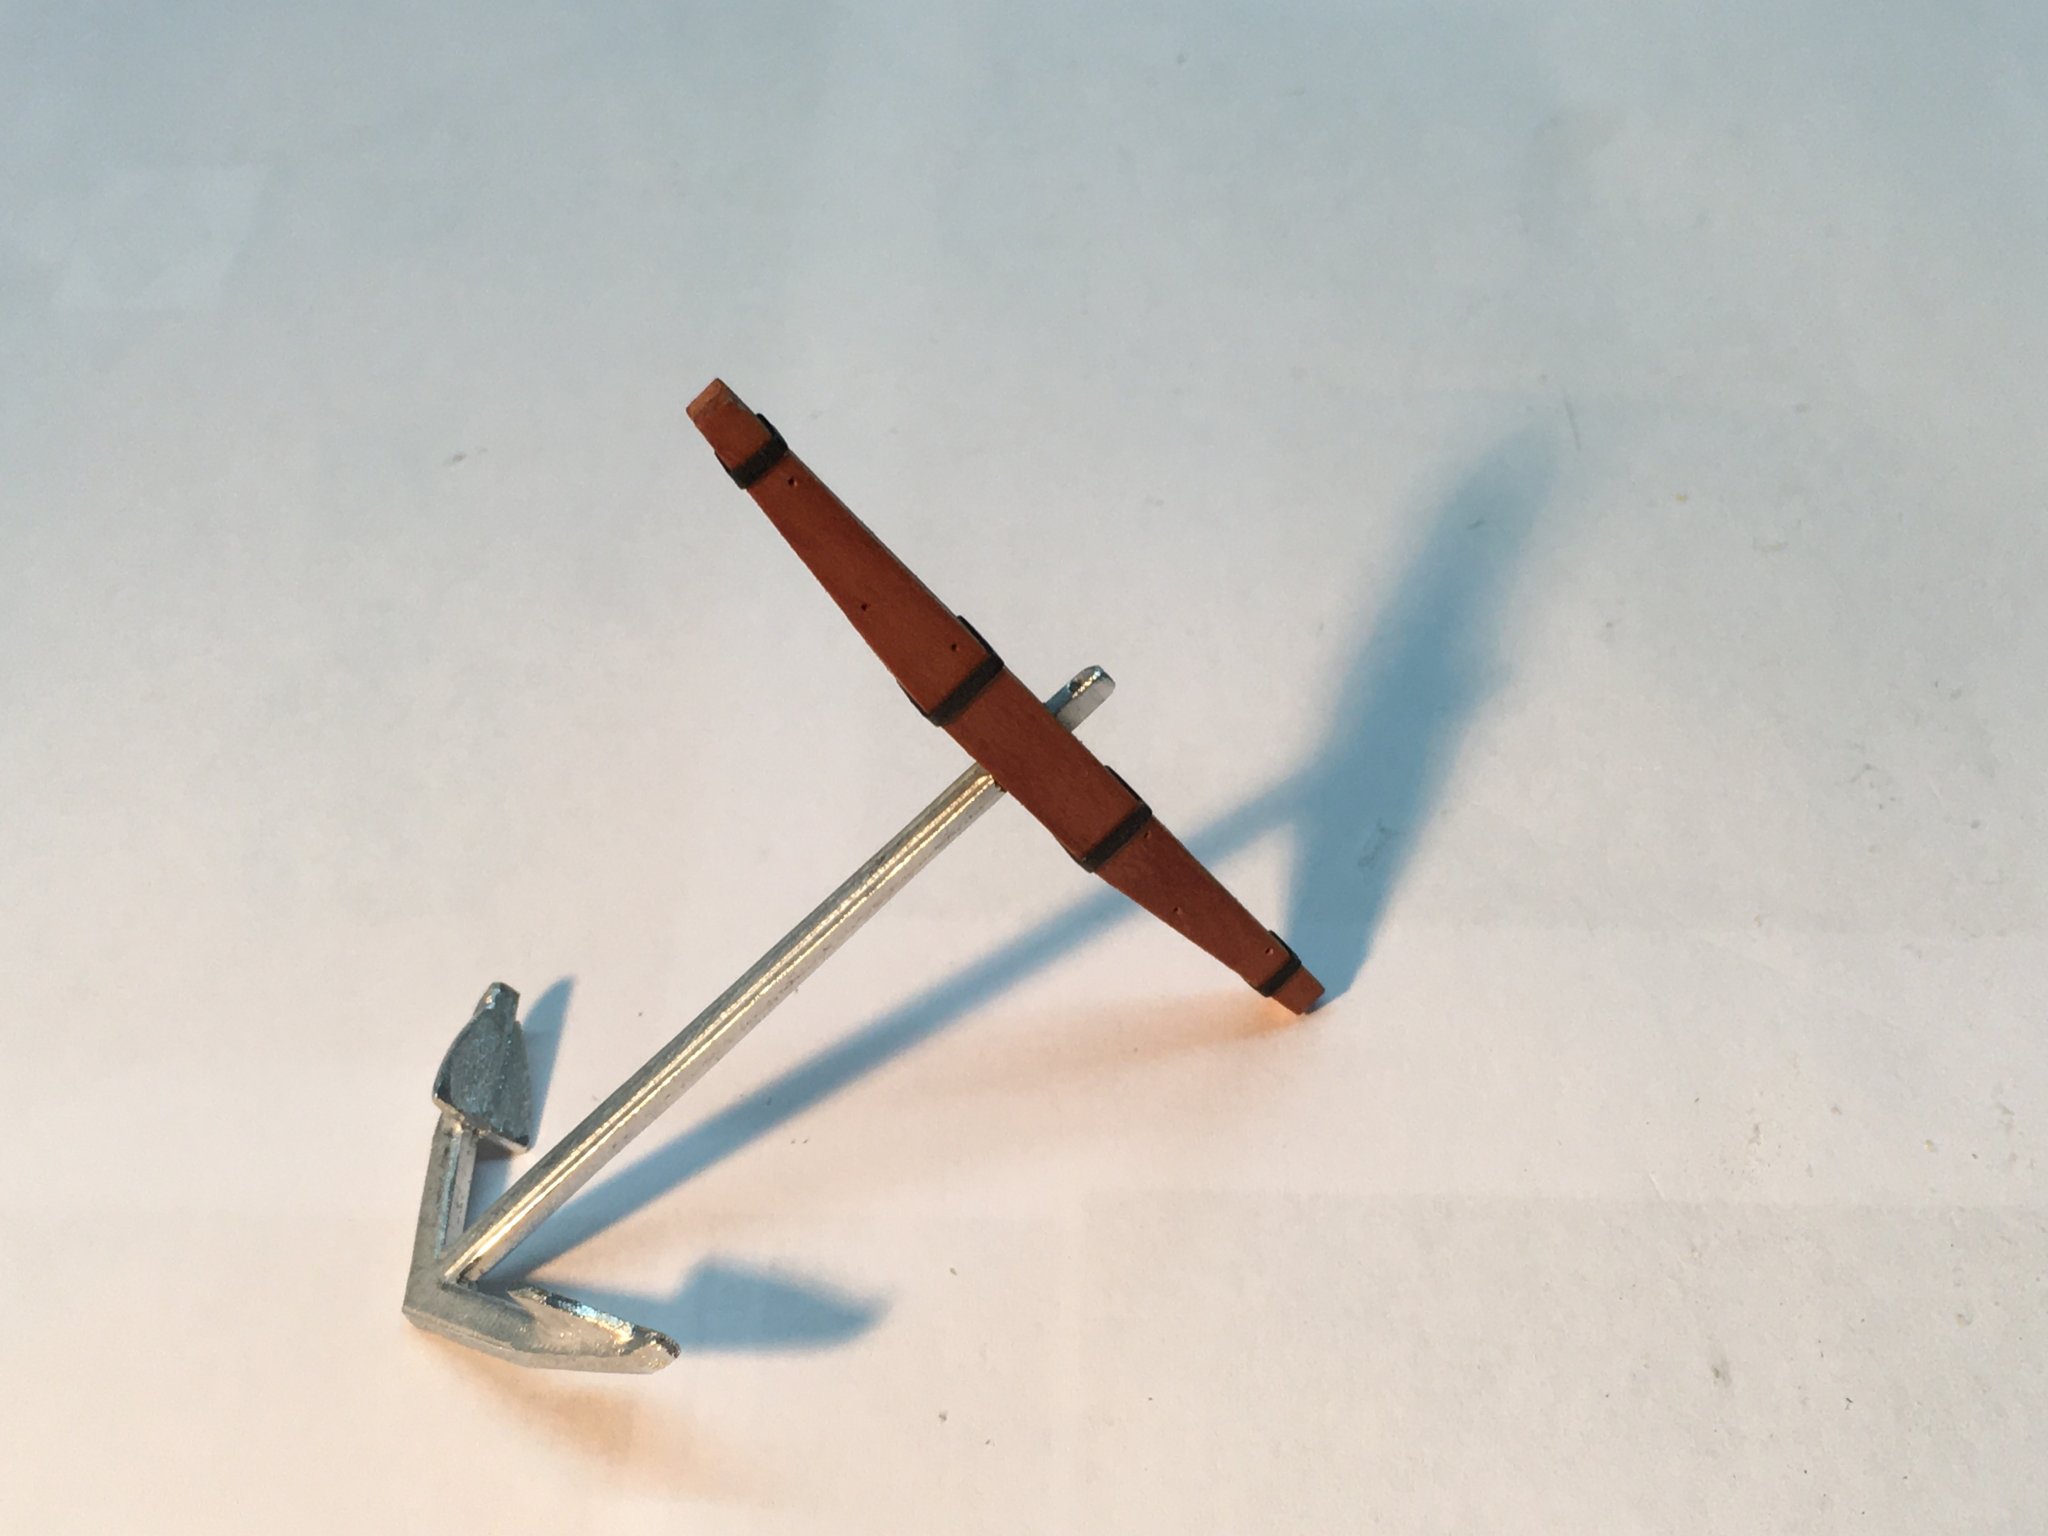
I used a dull point pressed in the stock to simulate bolts then used shrink wrap tube for the iron bands:
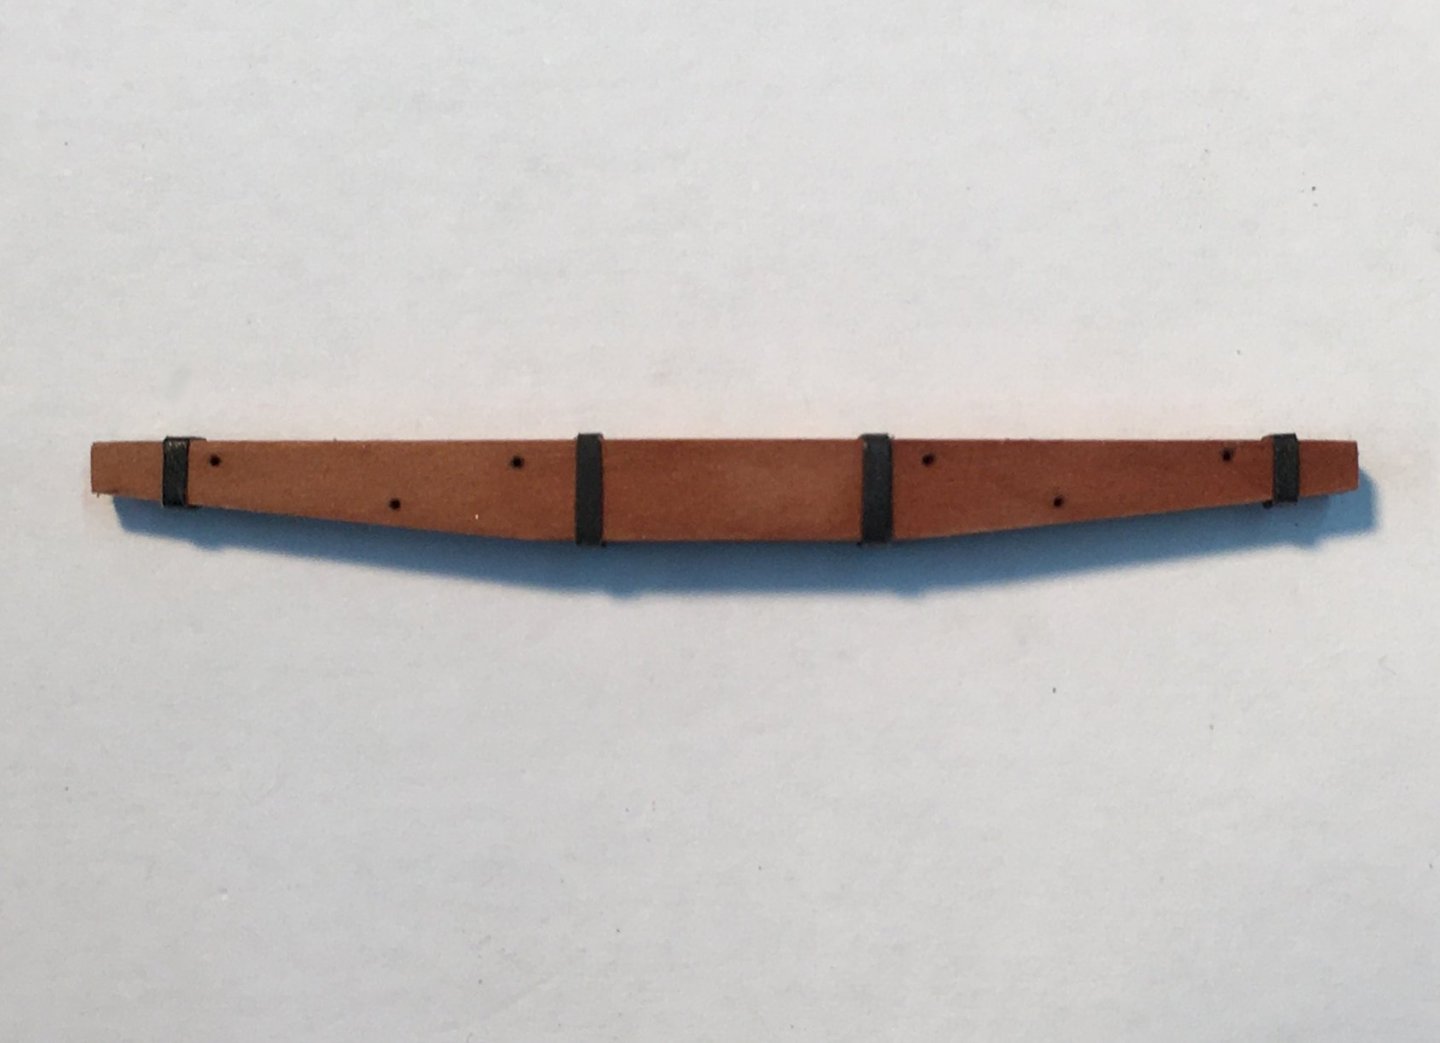
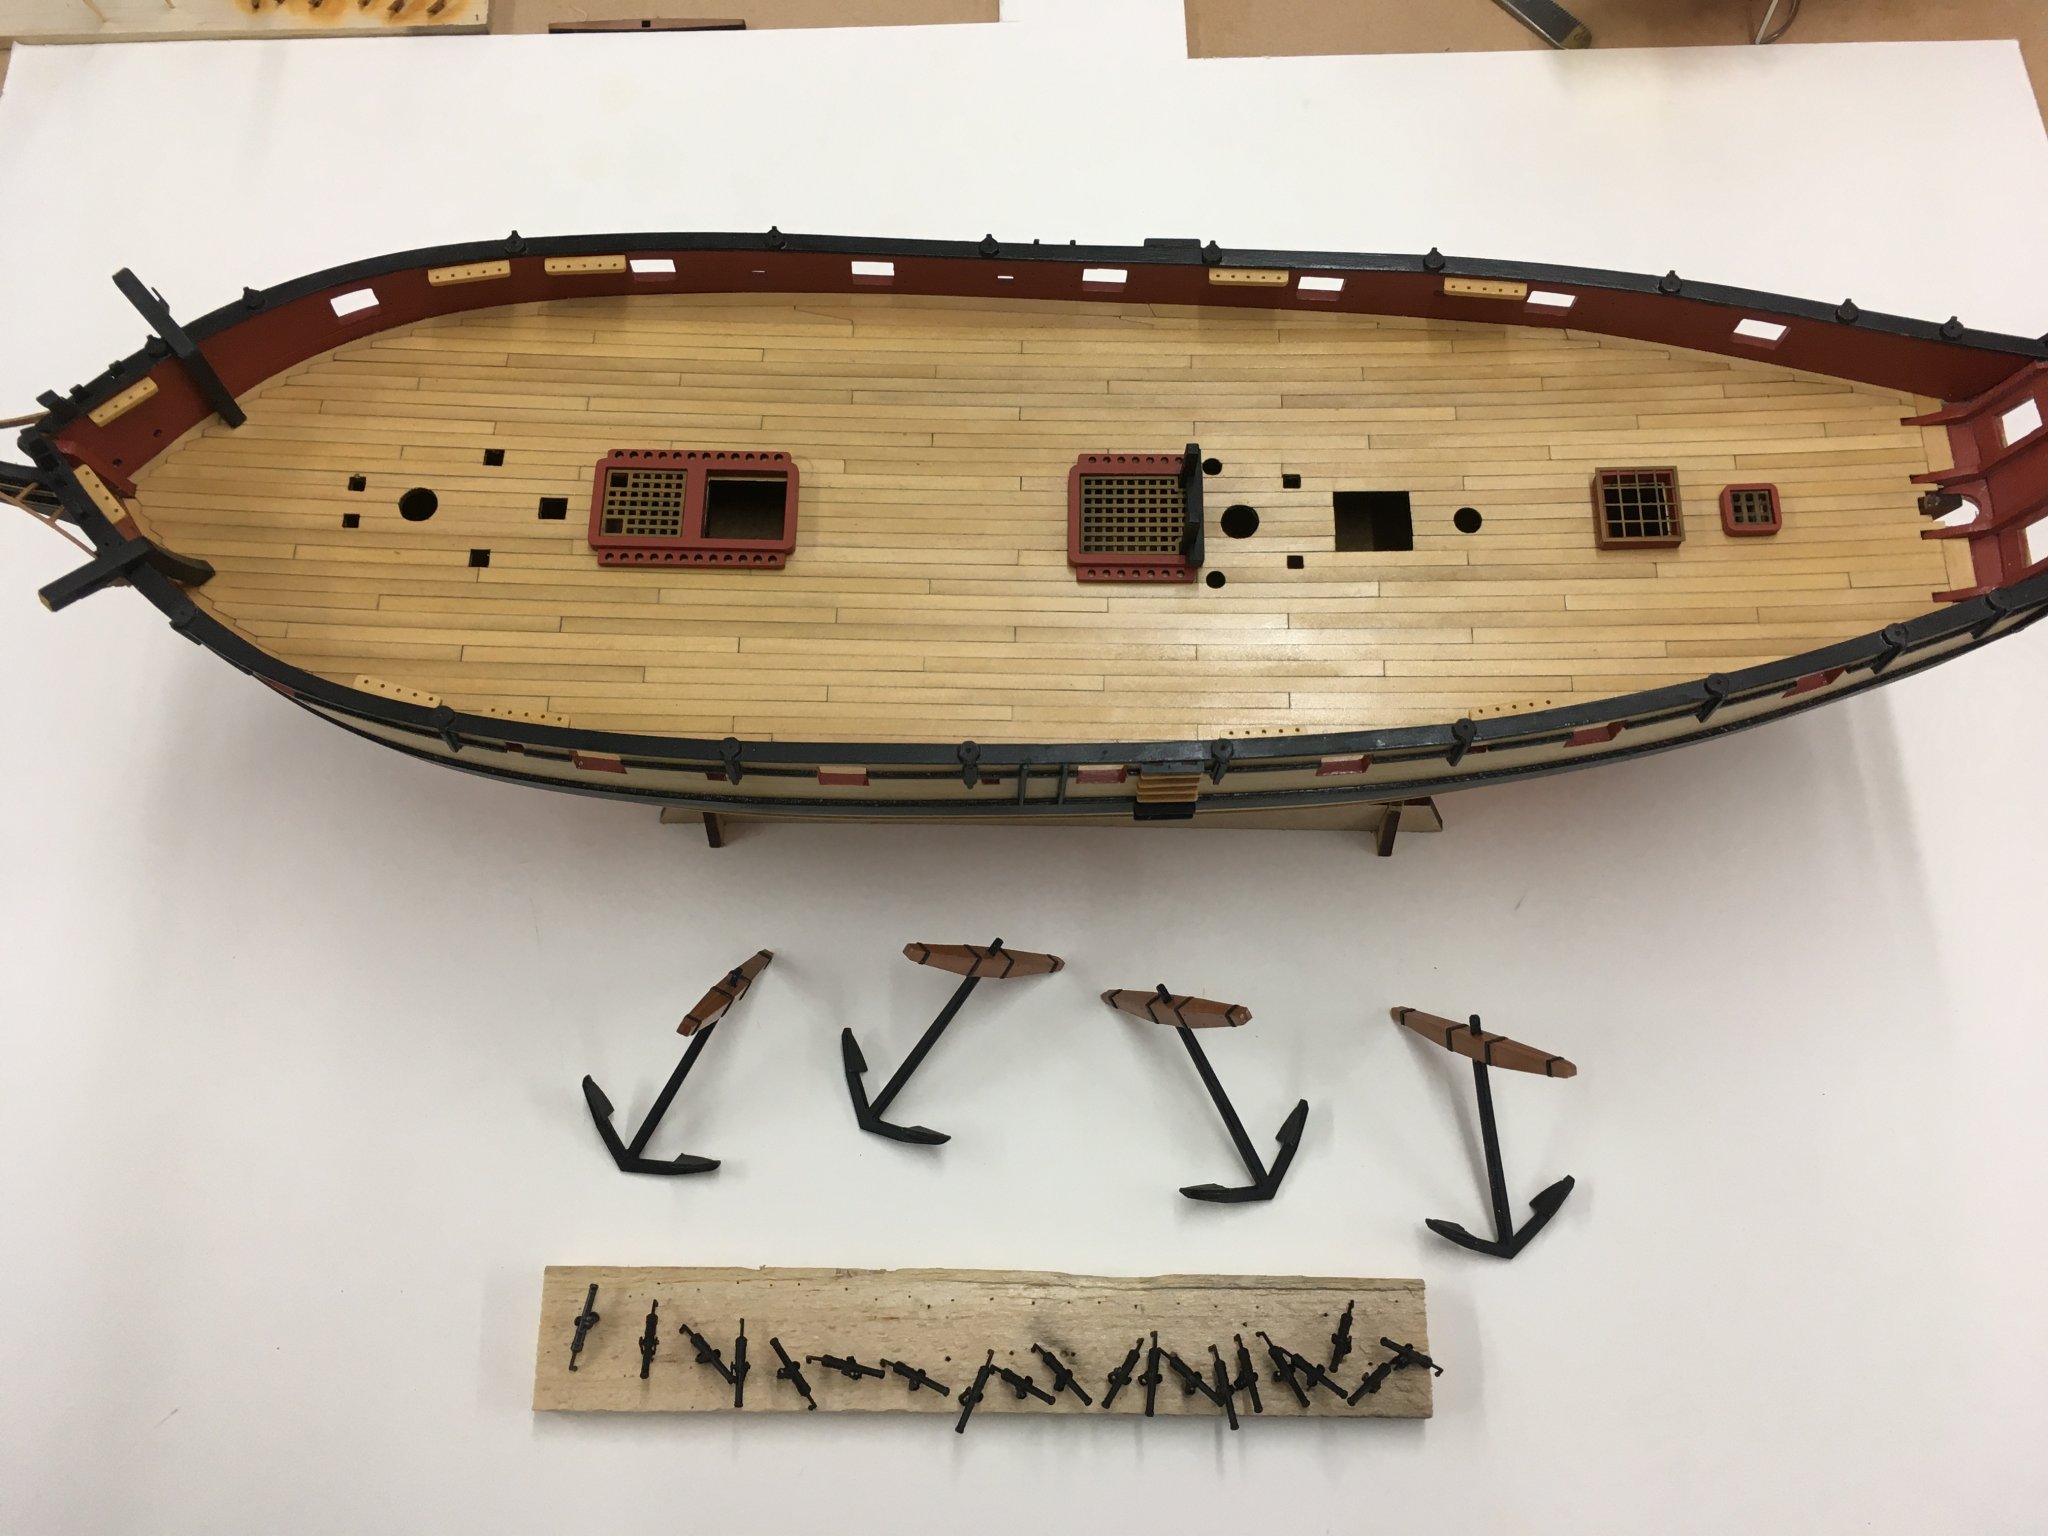
Trying the anchor for size:
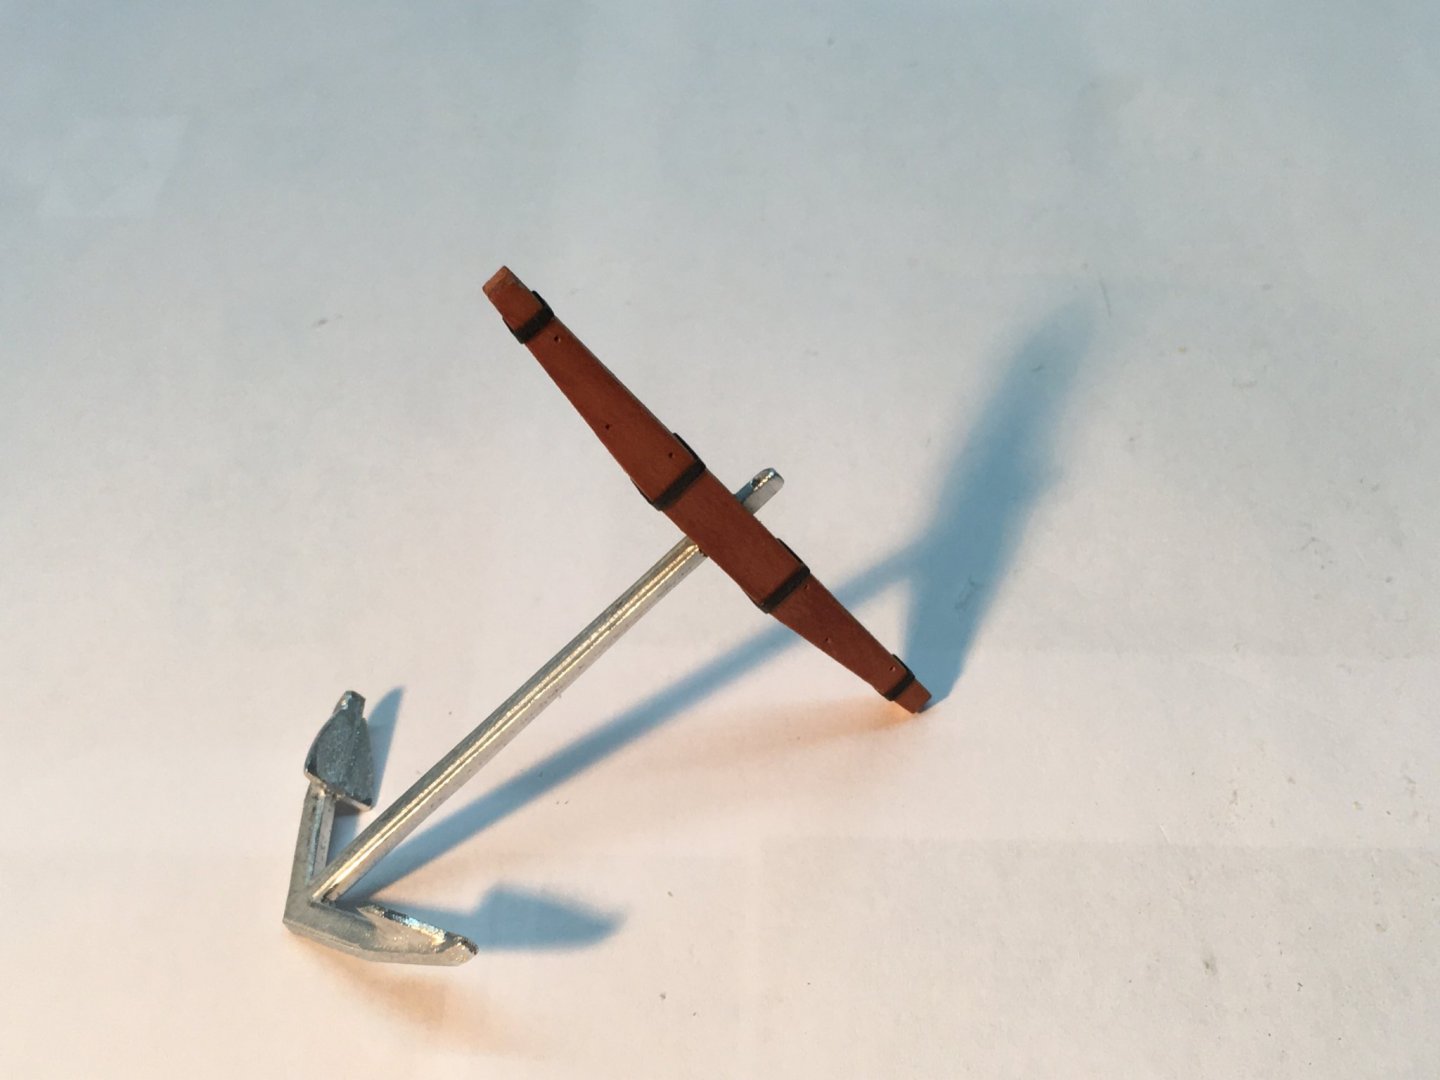

Quite happy with that.
The good news is, some paint was delivered while I was working on the anchors this morning so I should be able to get on with airbrushing. Yippeee!
Derek
- usedtosail, VTHokiEE, Barbossa and 9 others
-
12
-
-
Those decorations really bring her to life - beautiful.
-
-
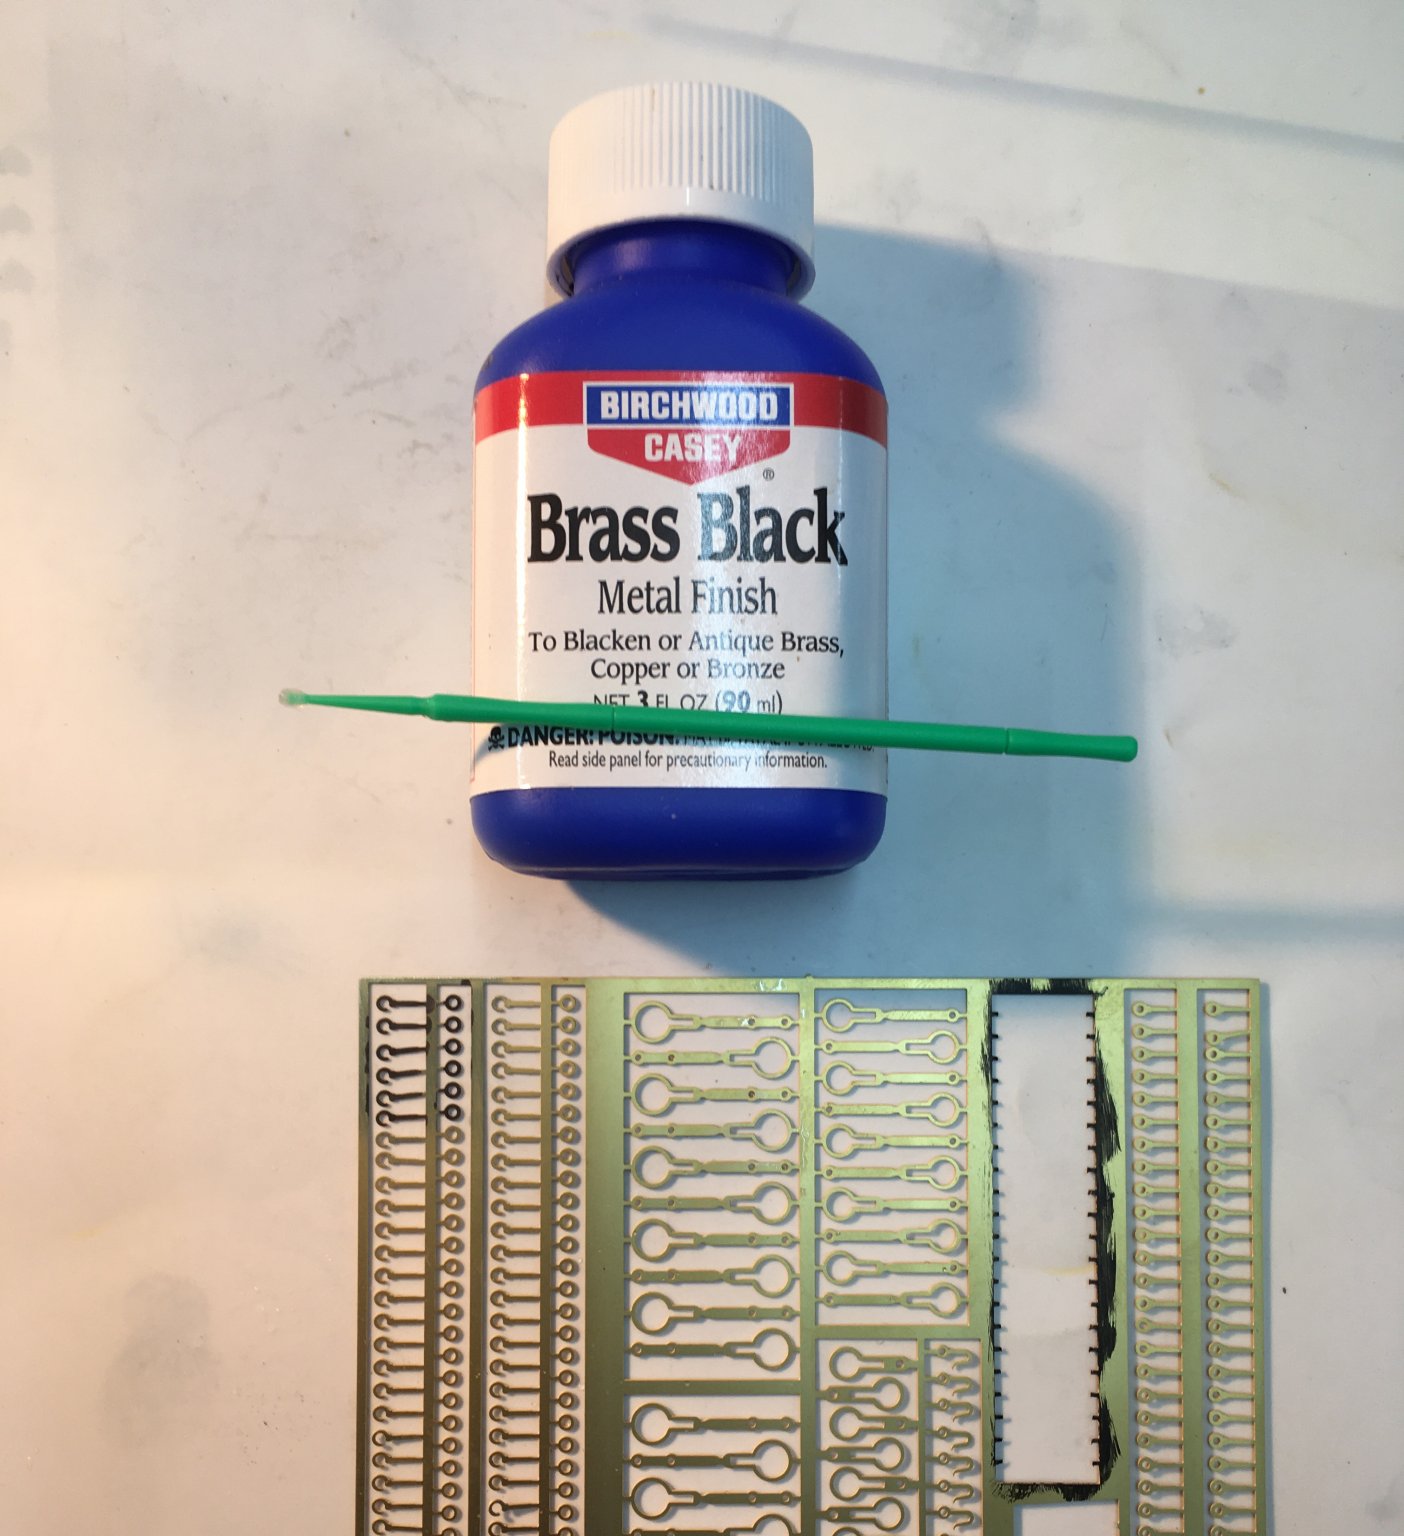
Whilst waiting for paints and primer to arrive for the new airbrush I decided to have another look at chemical blackening. I've used this successfully in the past, including with the small photo etched parts for Speedy's pumps, but I came unstuck when I tried to blacken the ringbolts and cap squares for Speedy's cannon. The problem was I had been trying to treat some 70 tiny components in one go, and I simply couldn't agitate the fluid enough to blacken them evenly.
I'm sure the solution will be obvious to more experienced folk, but the lightbulb moment didn't come for me until I re-read the Brass Black instructions and found you don't need to submerge your components in the liquid - you can just brush it on. So, I realised I could treat PE parts before separating them from the sheet. In most cases, for example with ringbolts, the untreated metal revealed when you remove them from the sheet will be hidden. Otherwise, there will just be a minor touch up required. Here's my first attempt, with half a dozen ringbolts. I started by running a very fine sanding stick over the parts then wiping them with acetone to remove any remaining grease, then applied the Brass Black with the green applicator in the picture. This applies a tiny amount of liquid, but it proved sufficient for the job.
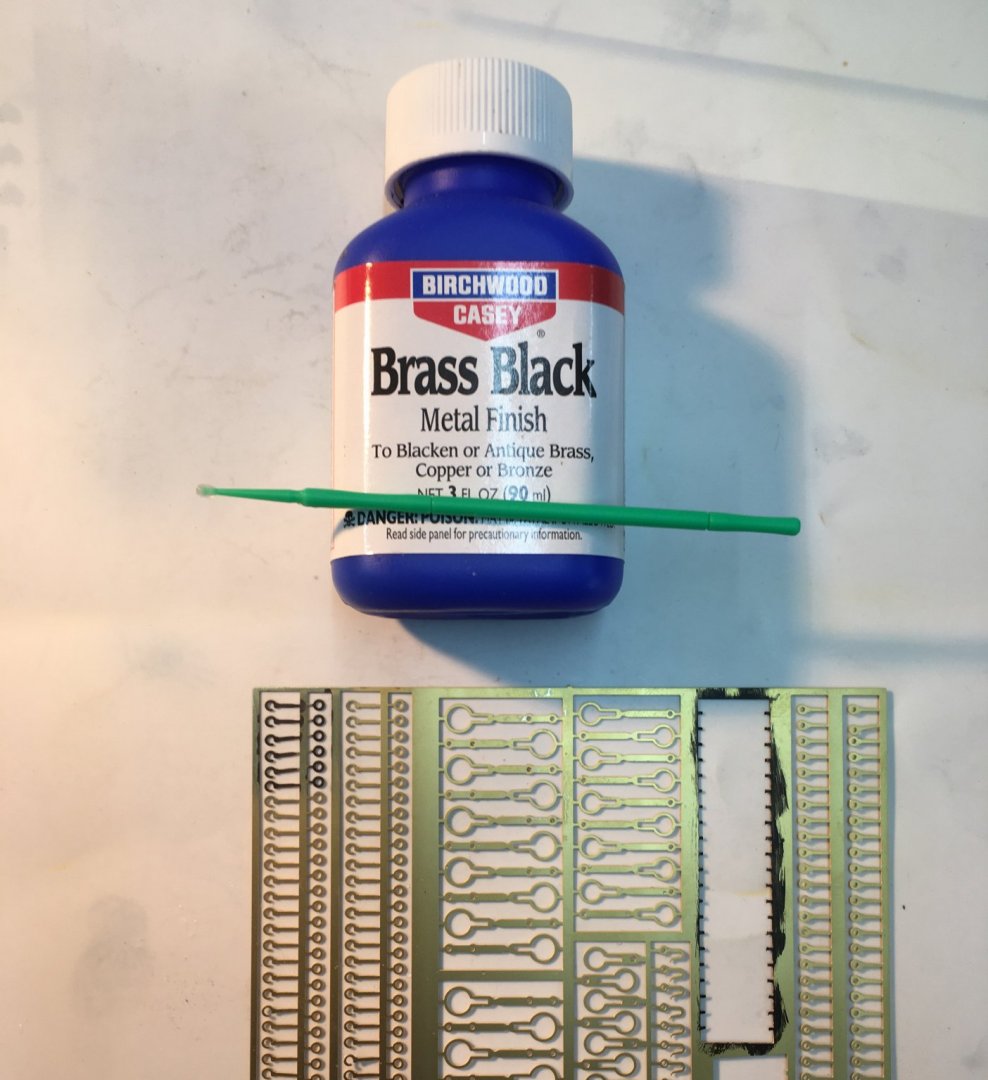
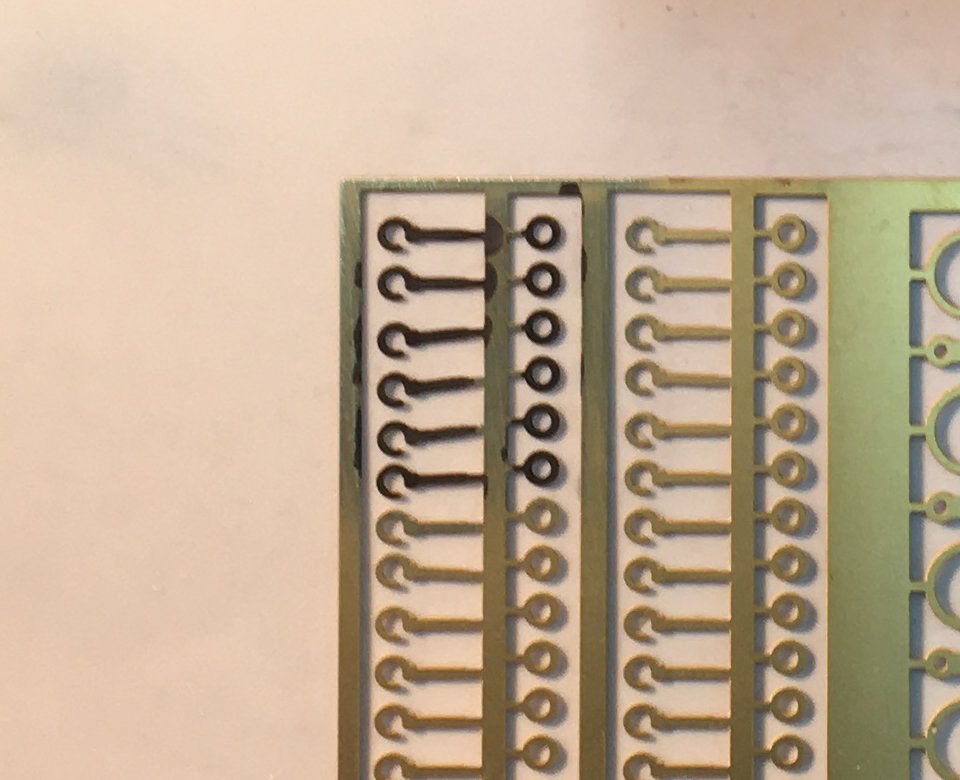
It took two applications to get the depth of black shown here. I'm in two minds whether to rely just on Brass Black, or to use the blackening as a primer for airbrushing. I'll experiment a bit more when I get the airbrush paint.
Derek
- ccoyle, BenD and GrandpaPhil
-
3
-
Hi Glenn
I was impressed when I saw Lady Nelson in the gallery. I'm even more impressed now - a really beautiful little ship - and it's great that you've retrieved your log from the dark side.
Sorry Glenn, I can't resist picking up your typos. This one is even better than the wench you're building on Cheerful!
On 5/30/2020 at 4:50 AM, glbarlow said:I first sanded a rabbit on the bottom
You'll have the animal cruelty people on your case 🐇🐇
Derek


Lady Eleanor by Blue Ensign - FINISHED - Vanguard Models - Scale 1:64
in - Kit build logs for subjects built from 1851 - 1900
Posted
I really like that deep, rich red - to my eye it goes very well with the pearwood. Like you, I'm usually more interested in vessels of the Georgian era, but I could be seriously tempted by this little cracker.
Derek