


DelF
-
Posts
1,398 -
Joined
-
Last visited
Content Type
Profiles
Forums
Gallery
Events
Posts posted by DelF
-
-
Thanks Glenn - makes sense to me.
-
Main & Fore Masts
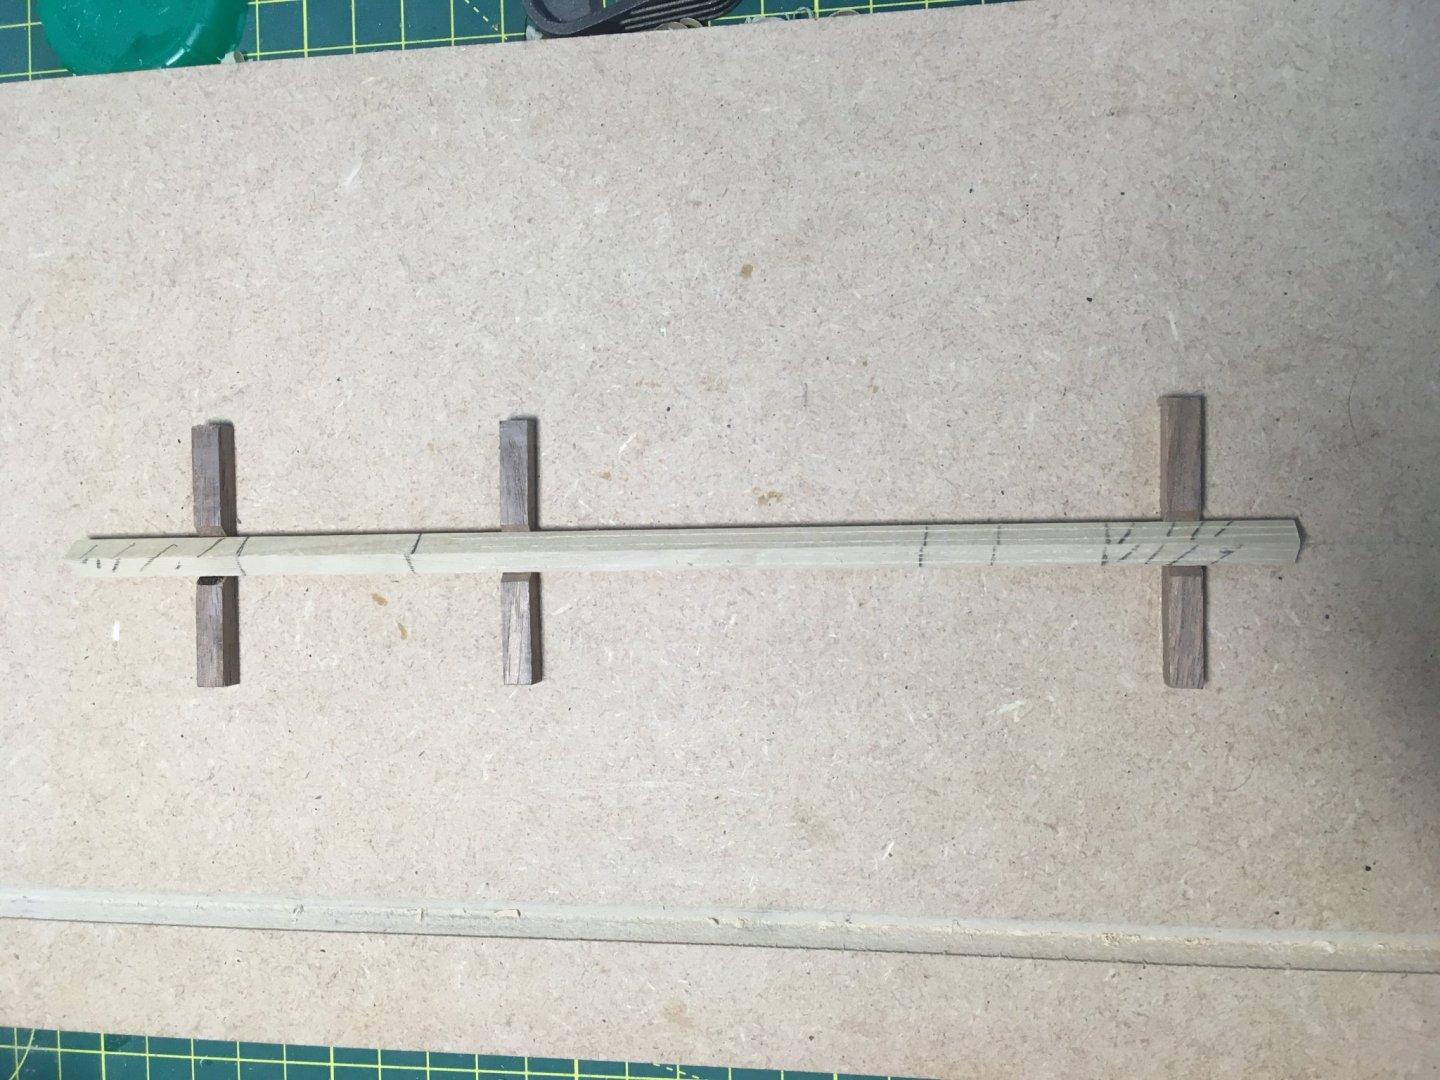
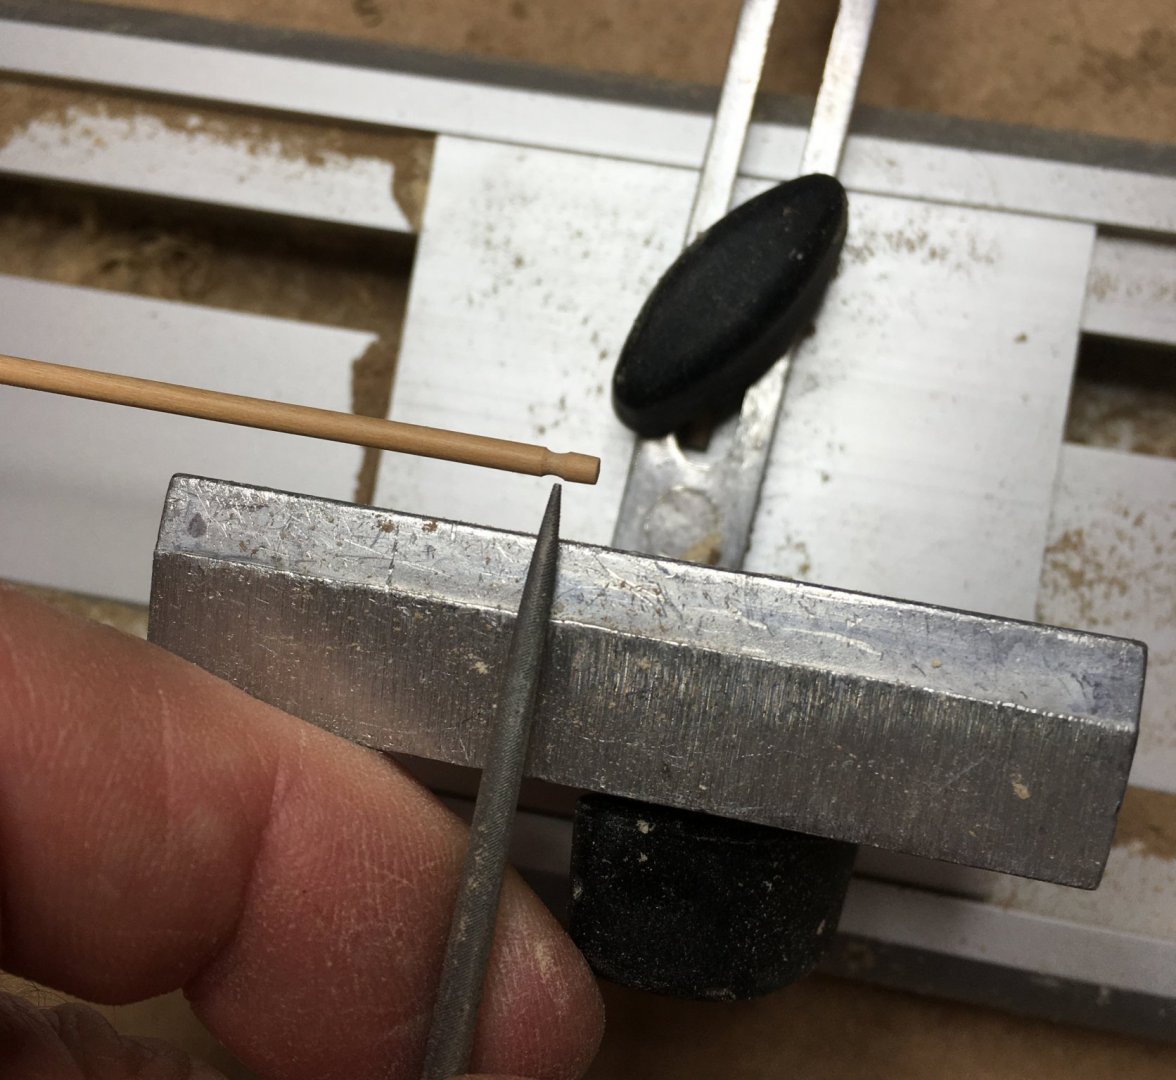
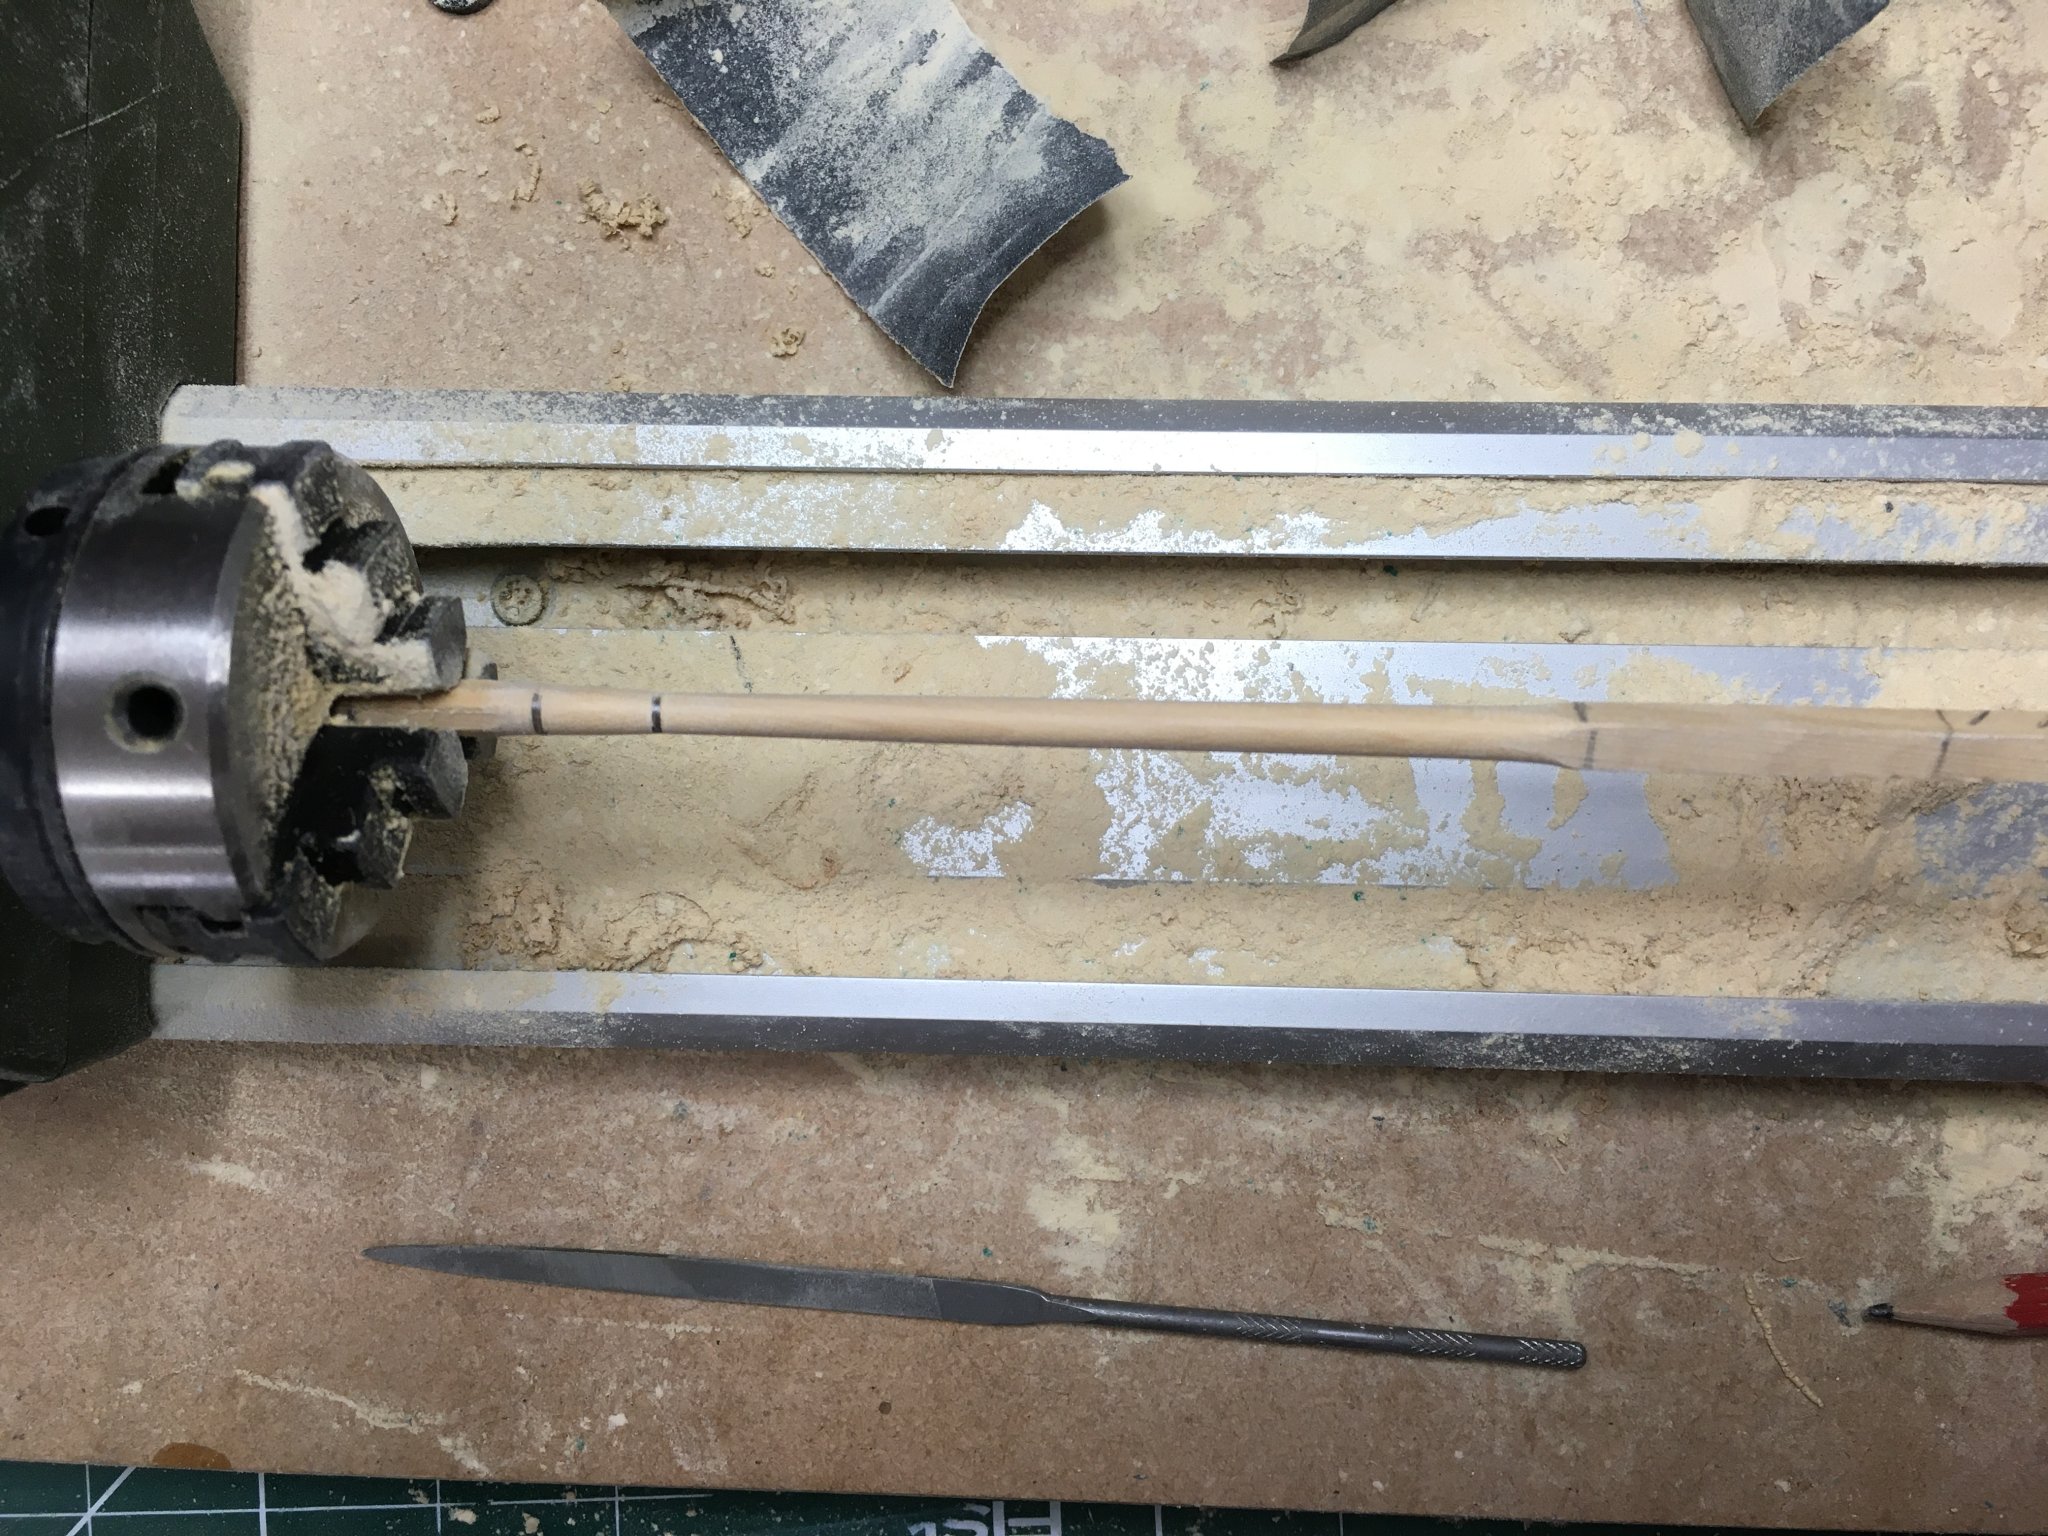
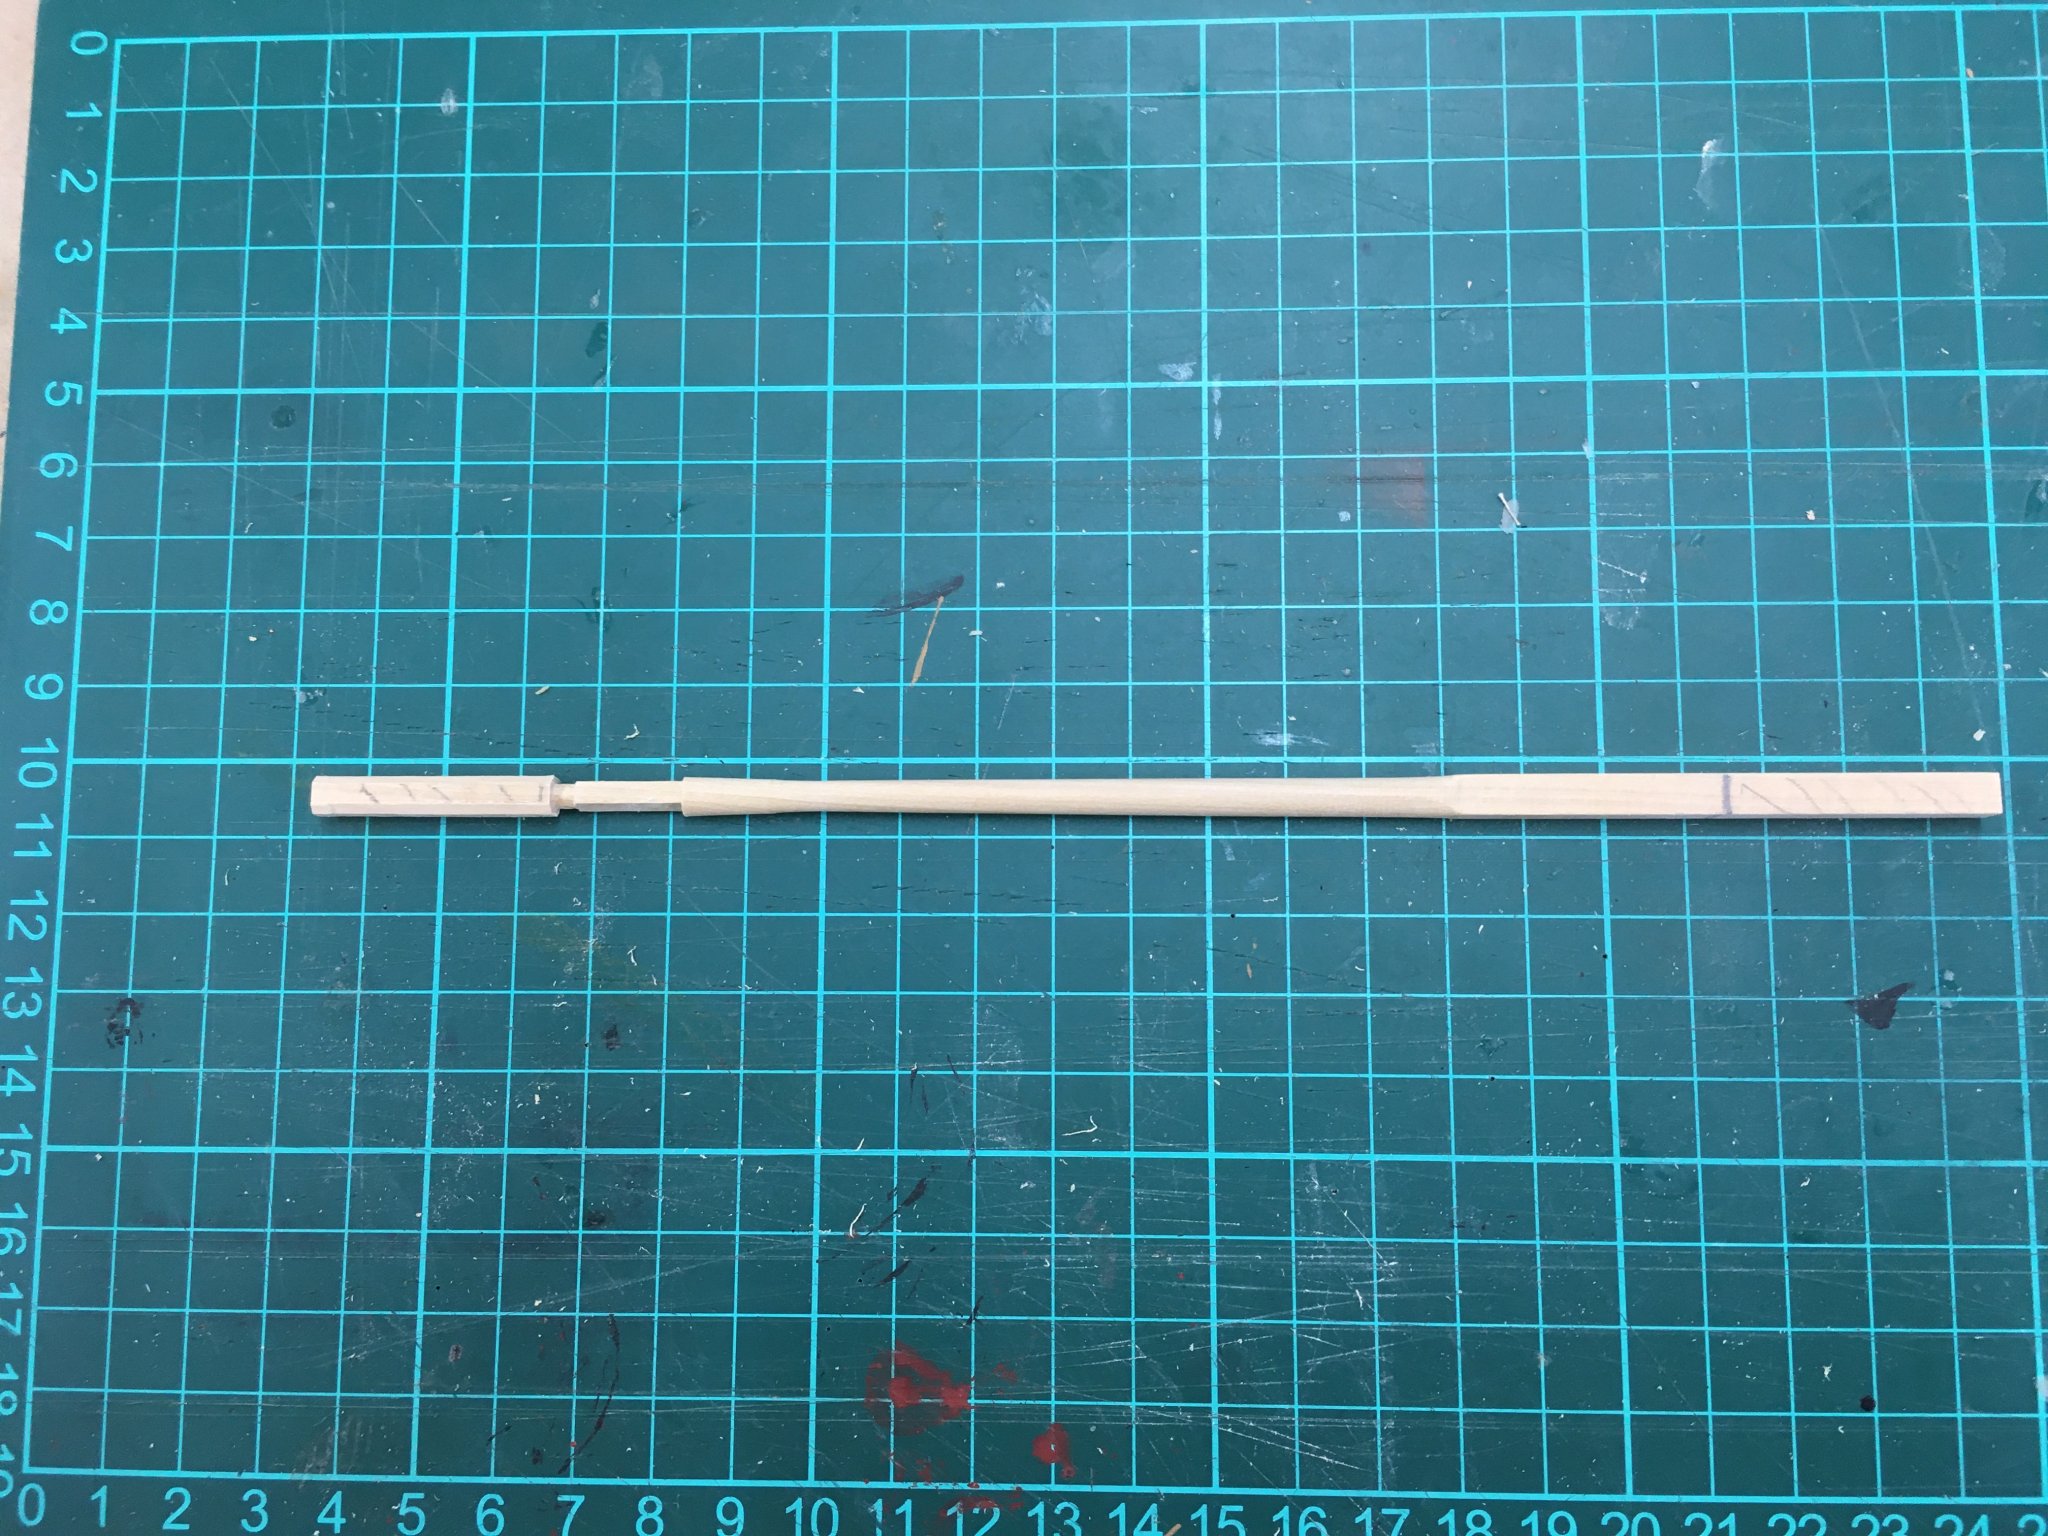
A couple more details on making the masts. Although I used the same method for every spar, planing square stock to an octagon then sanding/filing to round, I had to adapt the method in some cases. Speedy's topmasts are a good example, with their square heels and heads. Here's a topmast blank roughly marked out. The hatched areas at each end are waste that I don't mind clamping in a lathe chuck. The next section at the left of the picture will be left square, so I'll only plane the corners off beyond this part.
Once planed it's over to the lathe (drill/rotary tool of your choice) for the usual sanding and filing to shape. The trick here is to sand as carefully as you can at the junction with the square section, to get it to blend smoothly into the round profile (and yes, I do wear a dust mask!)..

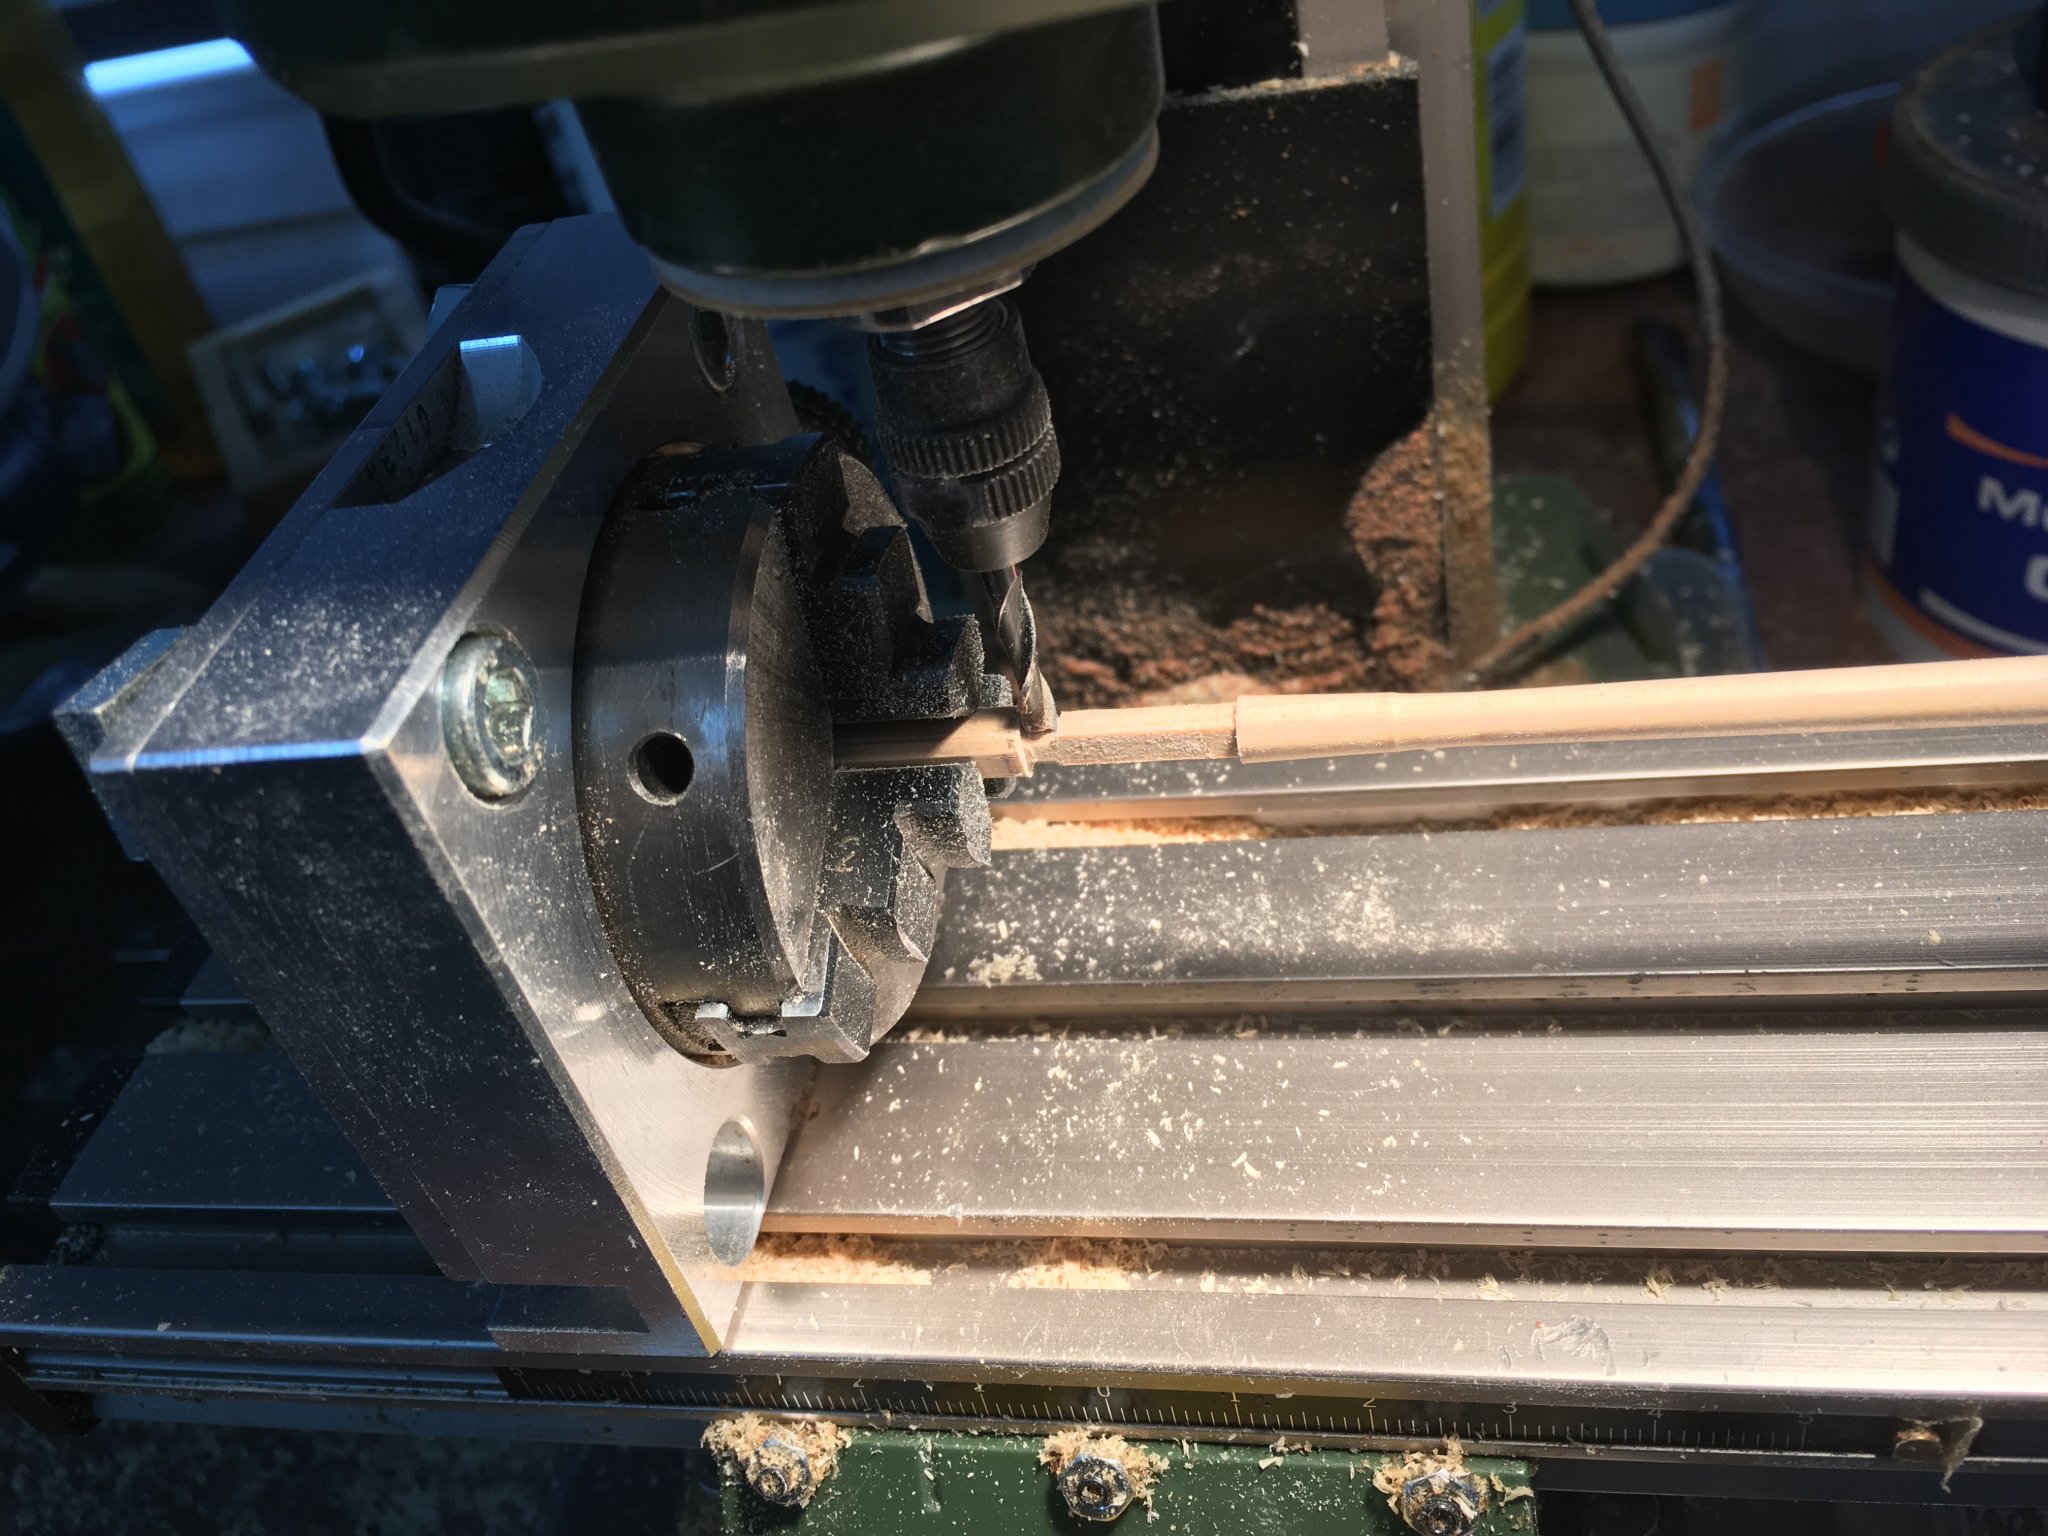
The next part - creating the square topmast head - can easily be done with files, but I chose to use the Proxxon micromill. The rotating table mounted vertically makes it easy to ensure all four faces are at right angles. As a little experiment I used the mill as a crude lathe to create the round peg at the top of the mast. This is the same diameter as the square section, so I just left the cutter in position and running, and rotated the table by hand. The result wasn't perfect straight away (not what milling cutters are designed for!) but 10 seconds with a file on the lathe and it was a perfect fit for the mast cap.

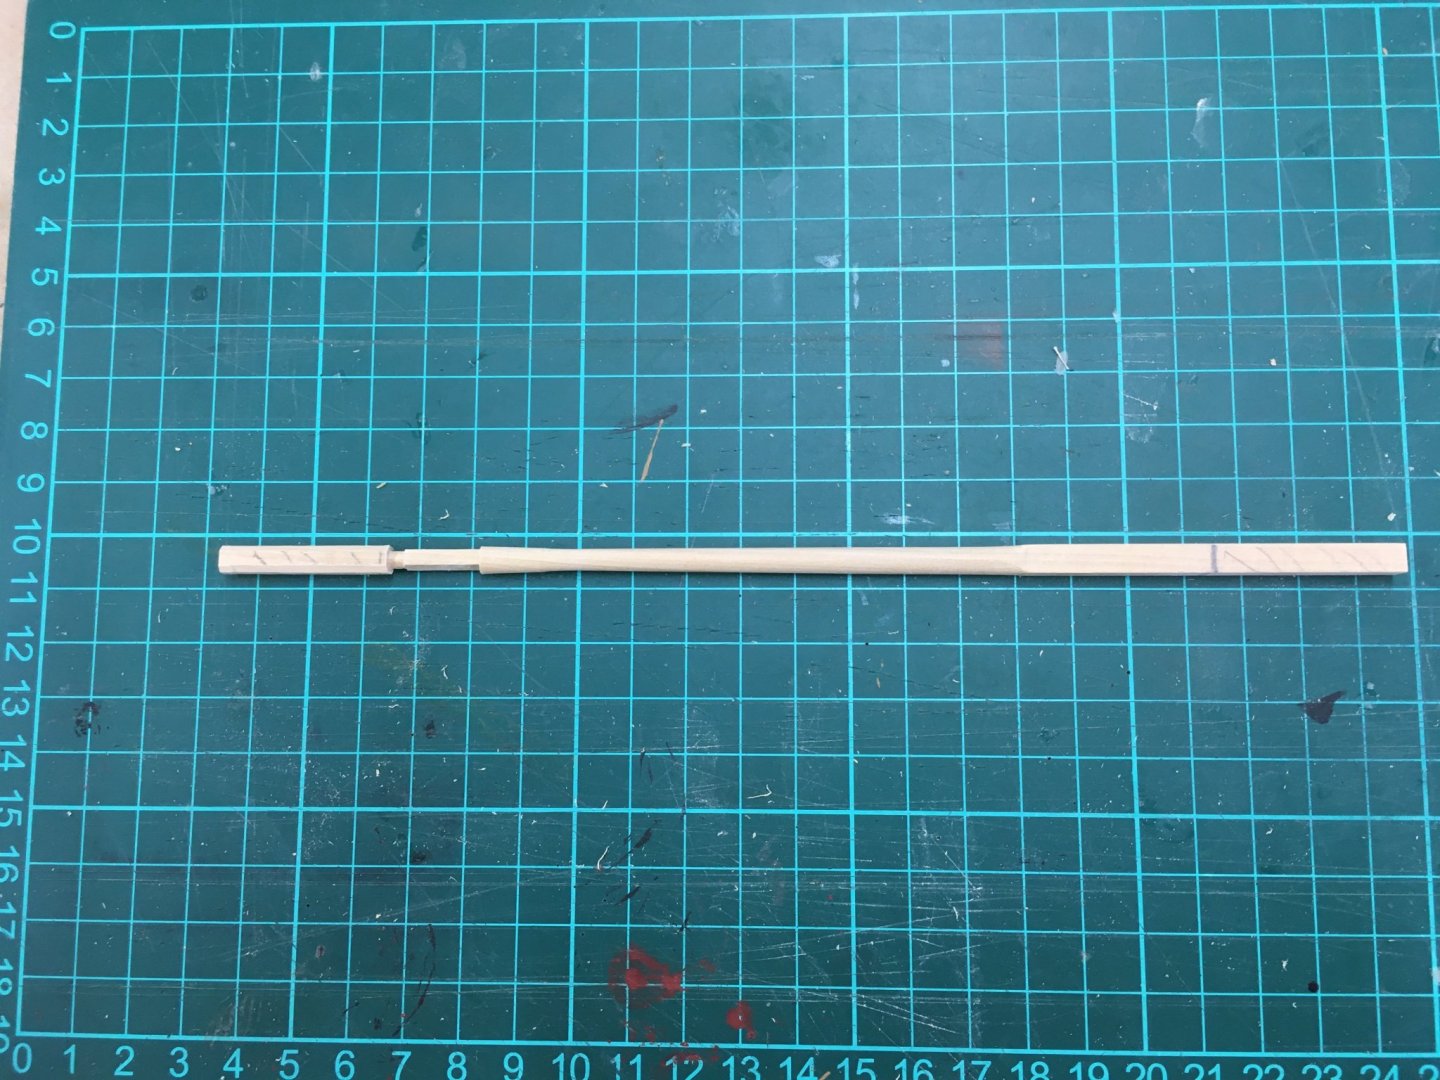
Here's the final result, waiting for the waste to be trimmed:
Next post I'll finish with a couple more details on the masts before I get on with painting them. Also, I've been putting off work on the ship's boat (I've already had enough planking for one year!) - but I must get on with it.
Let me know if I'm putting too much/not enough detail in these posts.
Derek
-
Thanks Vane. I decided to have a go at rigging a pair of shrouds on the model to see how practical it was:

Turned out to be easier than I thought it would be, especially with the Quadhands which can be positioned vitually anywhere you need it.
So I've decided I'm going to make up, paint and step the complete masts then rig them on the ship.
Derek
-
This kit is definitely on my Christmas list! Chris's models seem to get more and more carefully designed and innovative. Thanks for the detailed log & pics.
Derek
- Canute, chris watton and Bobbuild
-
 3
3
-
Looks good to me Gerry, as far as it's possible to tell from a picture. And it's worth stressing that this is just the first planking you're starting - you can get away with a multitude of sins in terms of sanding, shimming and filling - so long as you leave the best possible surface for your second planking.
Having said that, the very fact that the first level doesn't show means it's the ideal place to practice techniques like tapering and edge-bending the planks before you do them in earnest for the final planking. Some practice here will pay dividends later on.
Derek
-
Superb work Tim! I'm sure you'd make a fine job of the side tackle if you decided to go for it.
Derek
-
QUESTION ON MASTS
Before I start painting the masts I need to decide how I'm going to step them.
The question is, do I step and rig the masts one level at a time - main/fore then topmasts then topgallants, or do I make up each mast first then step them as complete units?
On other builds I like to do as much rigging as possible off the model. So for each pair of shrouds, I can seize a bight to form a loop in the middle of a long length of rope then slip the loop over the head of the mast. However if the mast is already made up with caps in place, I would have to make those seizings on the model. On my last fully rigged model I didn't even glue the various sections of the masts together - instead, I found having the masts loose was a useful discipline in that it made me pay particular attention to balancing the tension in the standing rigging.
On the other hand, the advantage of making up the masts beforehand, which is what the manual shows, is that it is easier to paint the required sections black. Part of me wants to try spray painting the yards and masts all in one go just to try out the technique. So I'm in two minds.
I'd appreciate advice and views.
Derek
-
33 minutes ago, Edwardkenway said:
I know you've got a lot on with Glenn's cannon rigging and spars so I won't be asking if you could do it for me😉
You don't need me to help, judging by your work so far!👍
- mtaylor, FrankWouts, Edwardkenway and 1 other
-
4
-
45 minutes ago, glbarlow said:
whatever CITES is
Convention on International Trade in Endangered Species
-
6 minutes ago, Edwardkenway said:
Castello boxwood is CITES listed and requires special licences for export
Well spotted Edward - I hadn't seen that. What's weird though is that castello boxwood comes from South America (Paraguay, I think) which makes it doubly strange that colleagues like Glenn can't get it in the States!
-
-
Well done for having a go at margin planks. I tried for the first time on Speedy and found it well worth the effort.
Derek
-
Spars contd. (after lunch!)
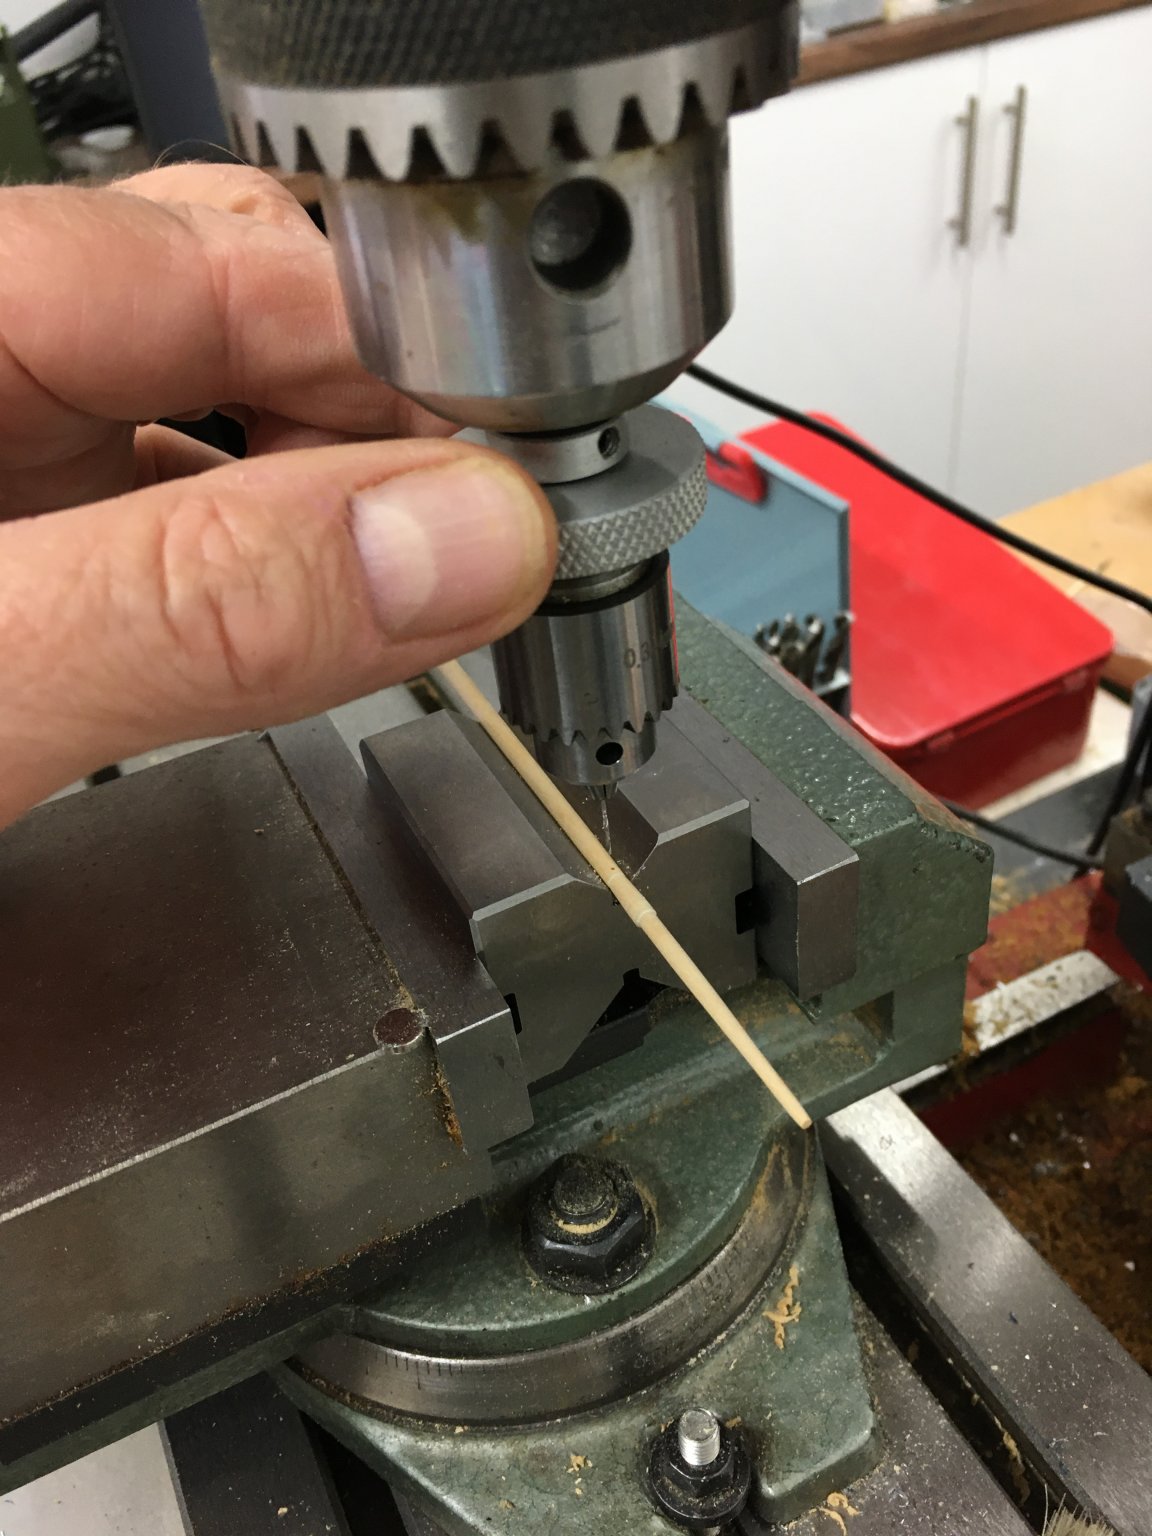
I used to find drilling tiny holes into small diameter dowels quite tricky. There are various ways of making the job more manageable, some more labour intensive than others. This way works for me.
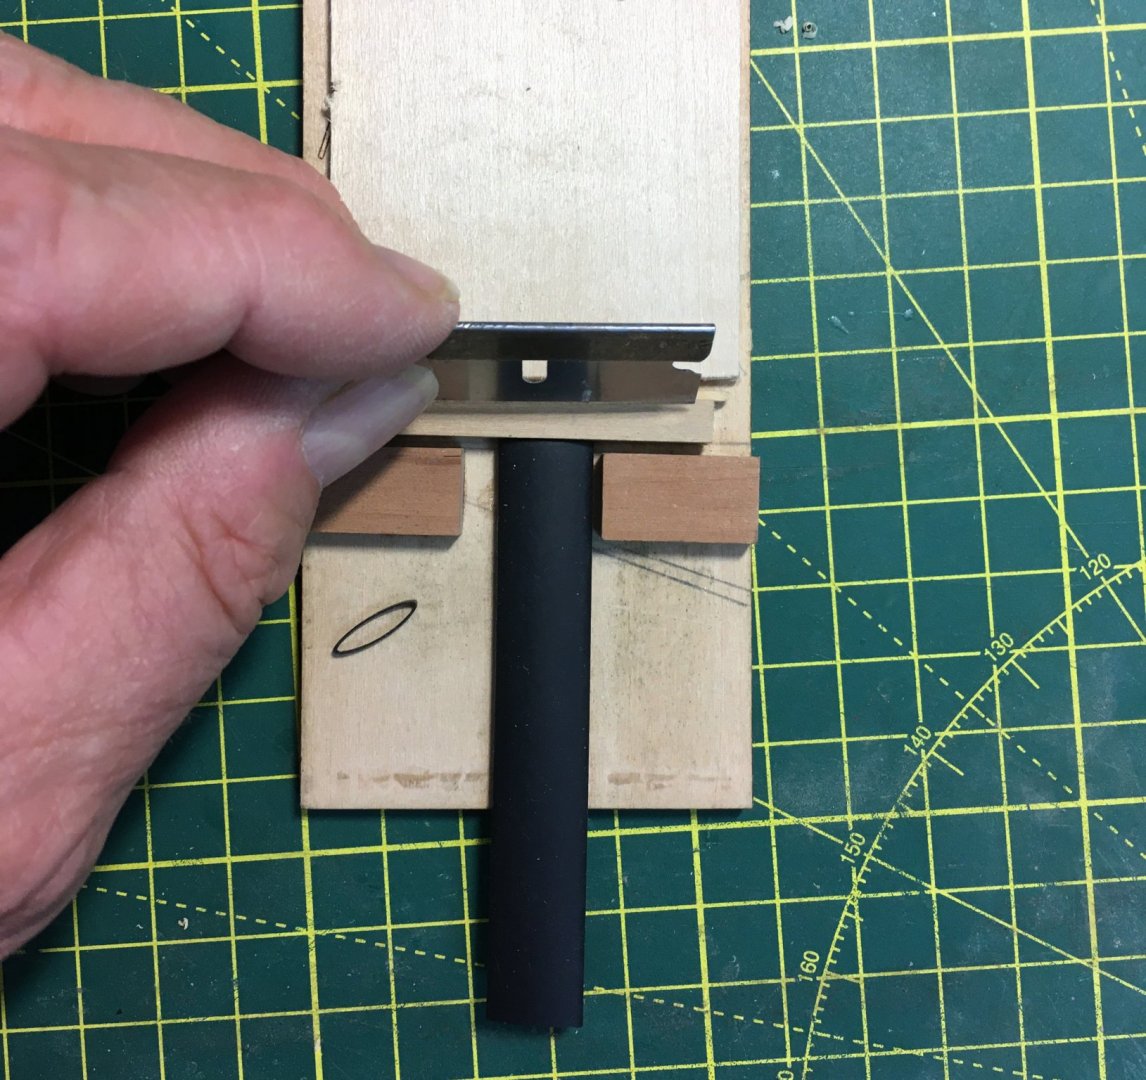
Having marked the position of the hole with a sharp point to give the drill bit something to bite into and stop it slipping sideways, the dowel is held in a V-block:

The V-block comes with a clamp. but for small spars like this I just hold the work down with one finger whilst I'm drilling. With sharp bits and boxwood I find I don't need to worry about breakout on the second surface of the wood. With other timbers I'd arrange some sacrificial wood under the workpiece to avoid breakout.
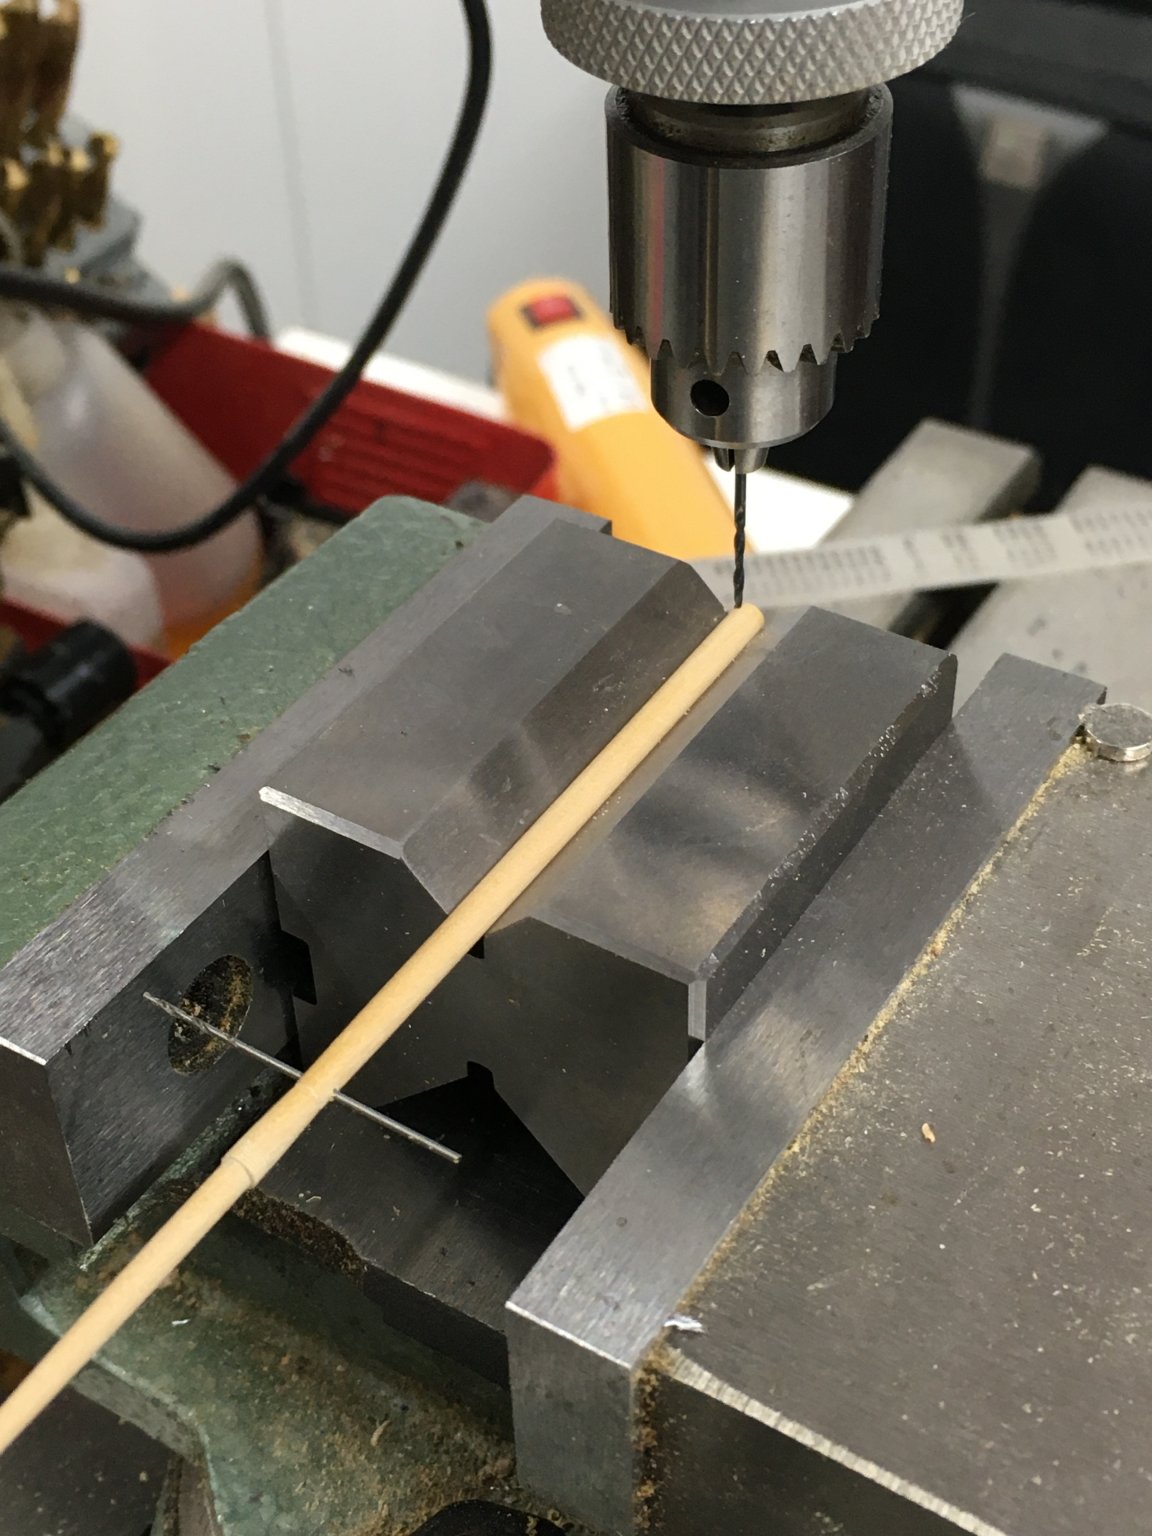
If you have to drill another hole at an angle to the first, a useful trick is to put a spare bit though the first hole so you can judge the required angle. For example in this topmast I need to drill the fid hole at right angles to the sheave hole in the head. The drill bit through the sheave hole makes the judgement easy:

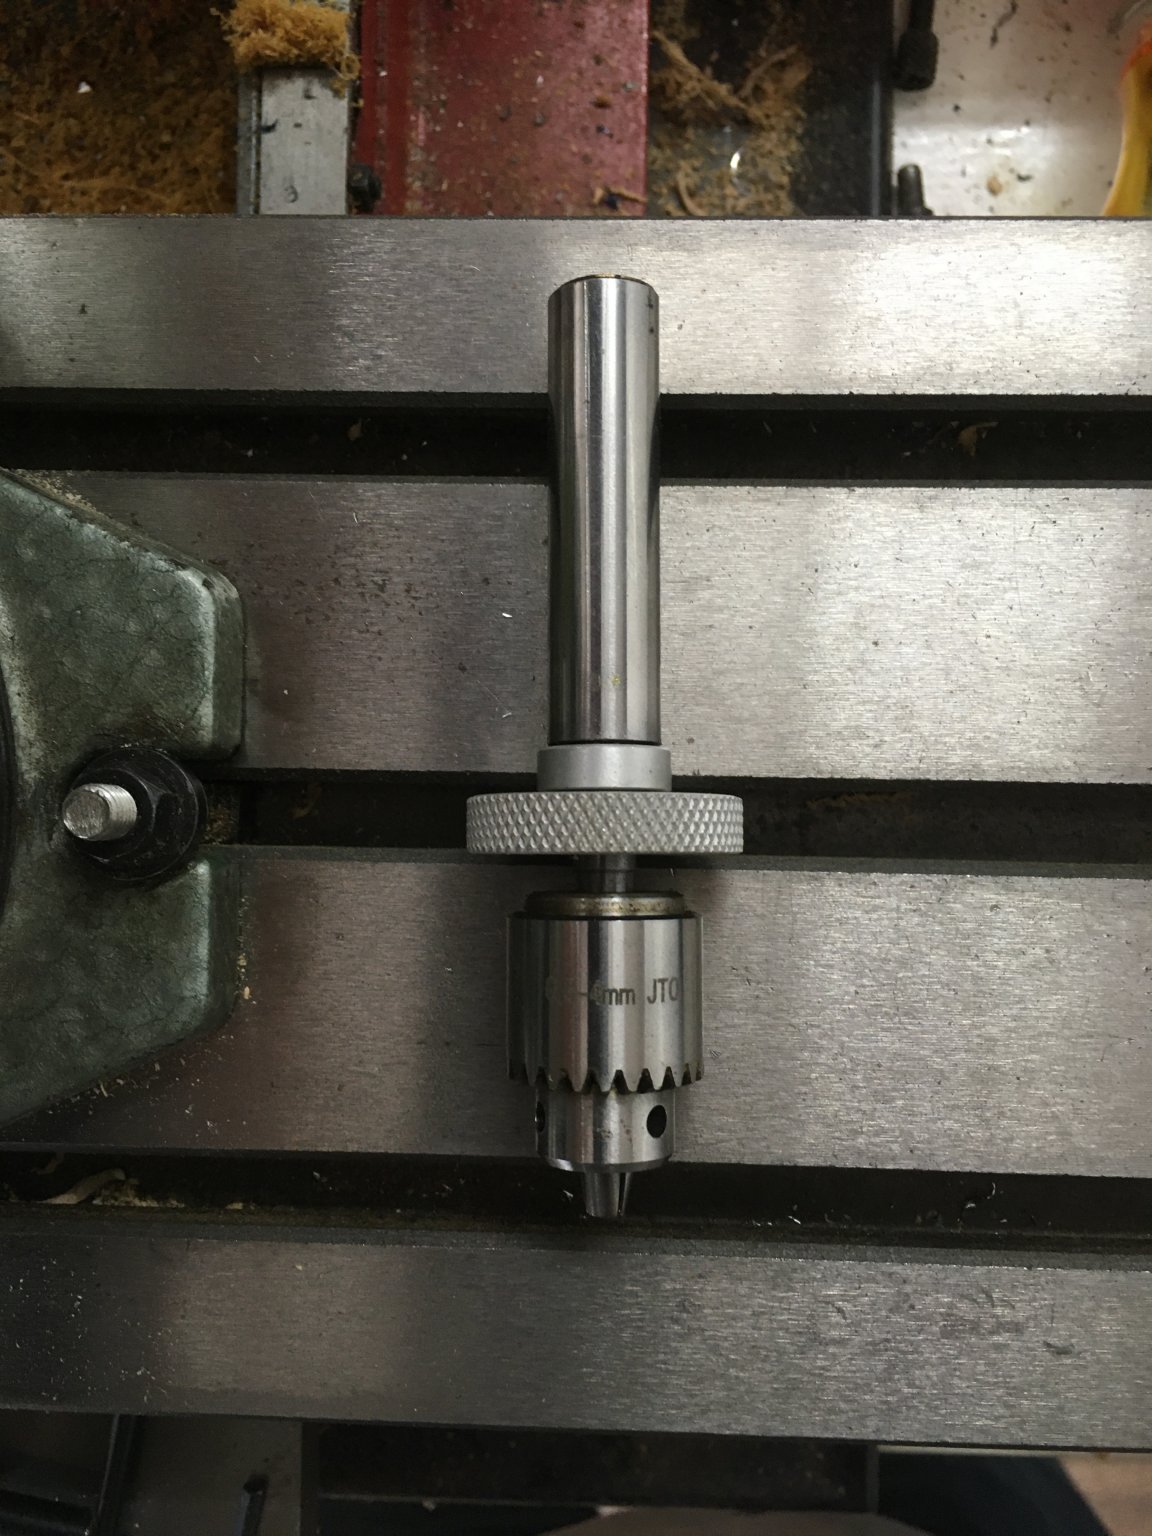
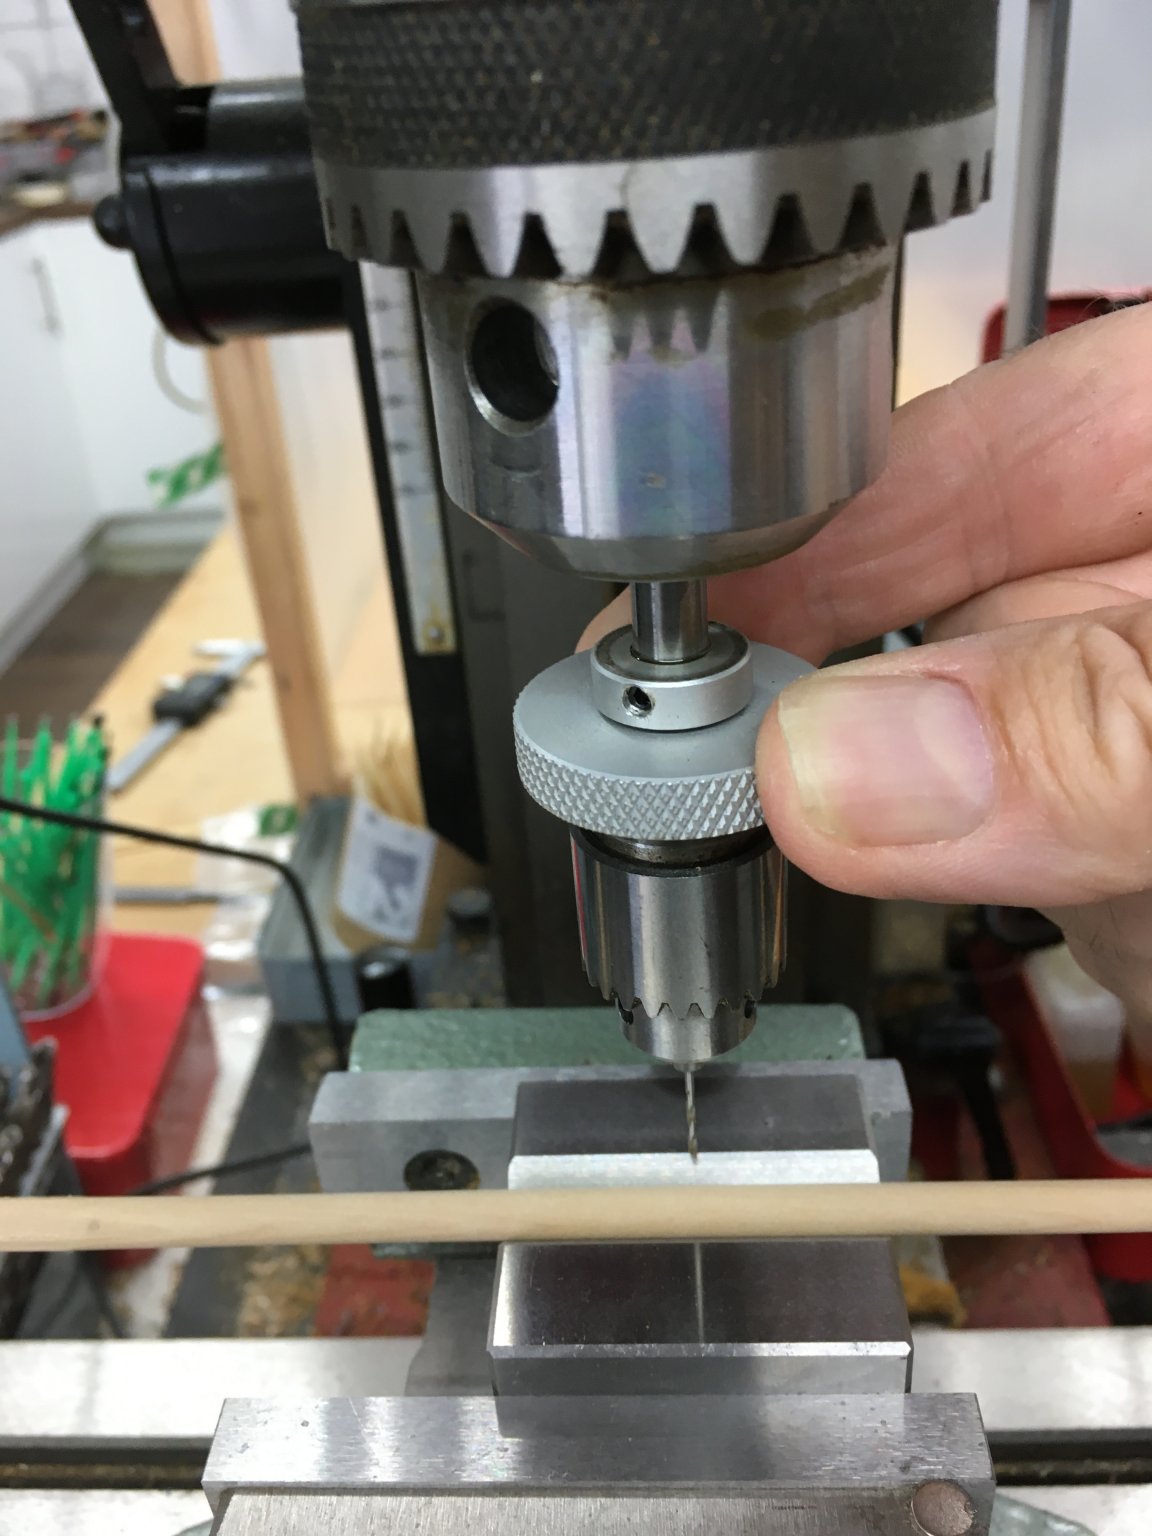
It may not be clear from these pictures but I'm using a drill attachment that I find incredibly useful, variously called a micro drill adaptor or a sensitive drill attachment. If you haven't come across these little beauties it's worth describing what they do. Here it is taken out of the drill chuck:
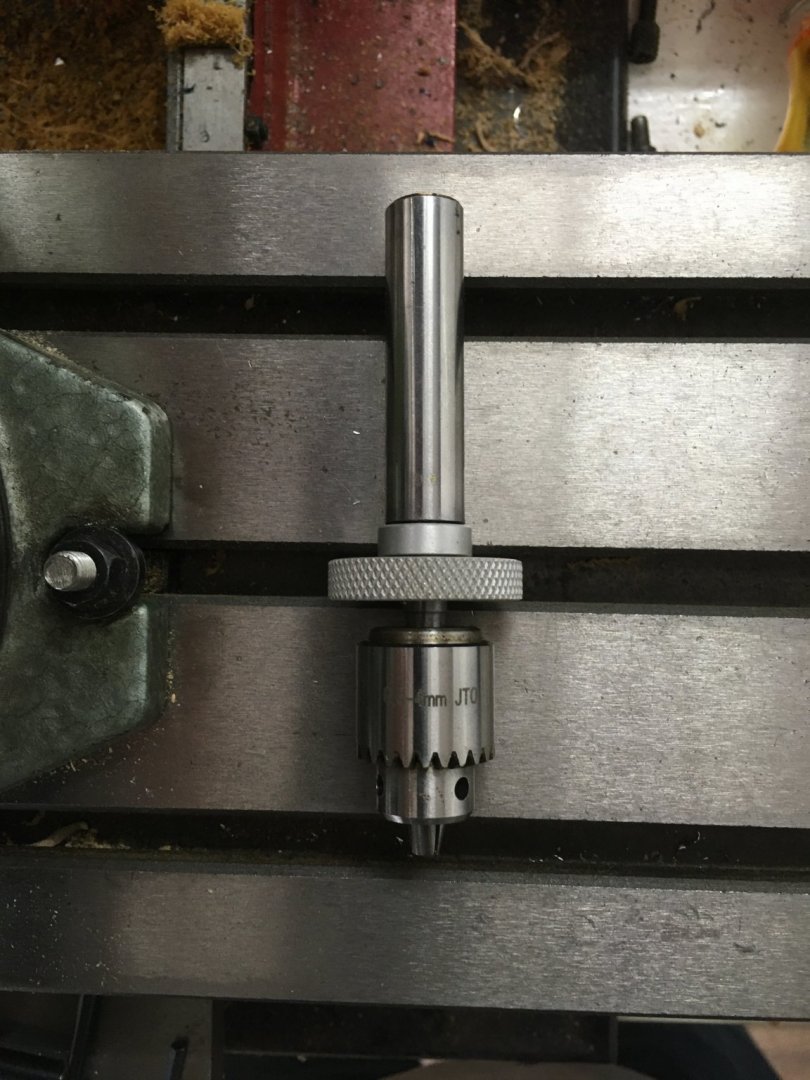
The straight shaft fits into the regular chuck of your drill (or mill or lathe). The micro chuck (mine takes bits size 0.3 - 4.0 mm) spins when you switch your machine on, but the knurled wheel doesn't. That means you can safely and comfortably hold the adaptor and push the micro chuck down towards the workpiece on the spring loaded rod it slides on:
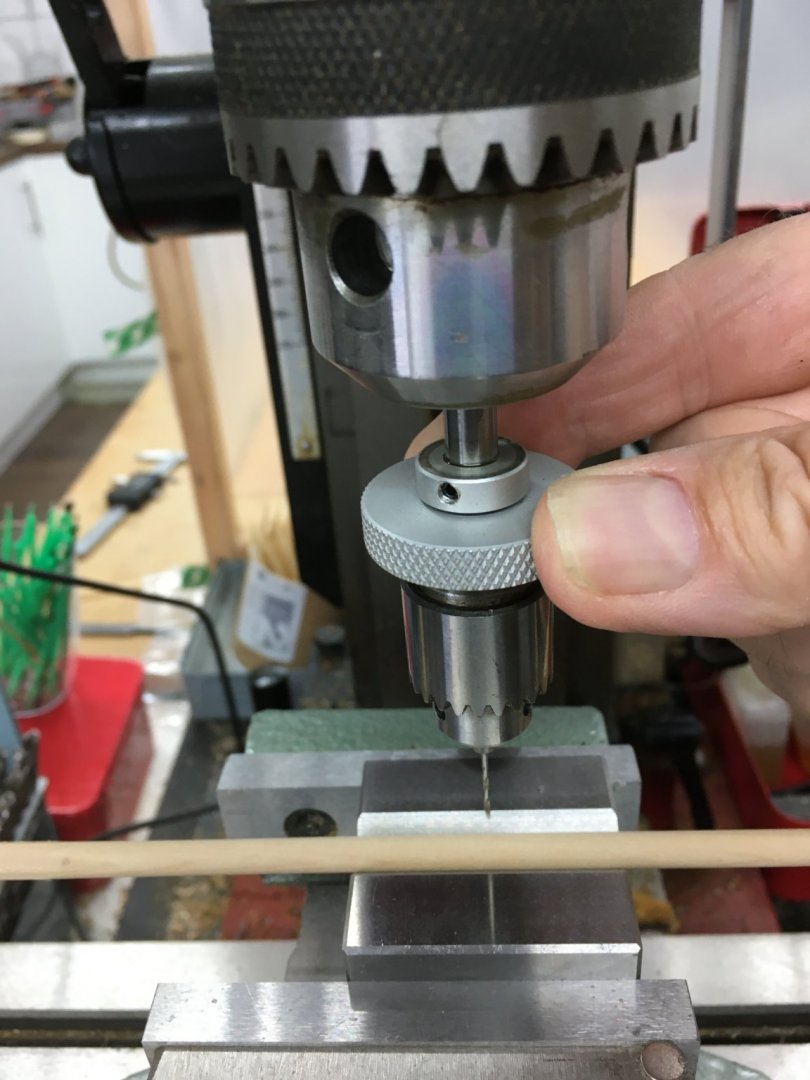
Because you are holding the adaptor with your fingertips and gently pushing the chuck you get a FAR better 'feel' for how far and how fast it is safe to advance the bit into the work. Unless and until you try it you won't appreciate just how much more control you have over the drilling process, leading to much better results and far fewer broken bits. And this applies to all drilling with small bits, not just into dowels.
For some inexplicable reason prices for this little gadget vary hugely. I've seen prices well over $100/£100 on both sides of the Atlantic. The good news is you don't have to pay silly money for what is after all a fairly simple tool. Mine cost £14.75 including the chuck and is well engineered and works perfectly. It's gone up in price slightly but here's the link. I hope its not an oriental (or occidental) knock-off but unfortunately I can't tell. Like I say though, it's very well made and I've used it for several years. I'm sure colleagues in other countries could find similar deals.
Next post, I'll add a few more details about work on Speedy's masts. In the meantime I hope folk will forgive me for touting another 'must-have' tool 🤑. It's often said you don't need lots of fancy gear to make model ships, but I think learning about new tools is part of the fun!
Derek
-
Thanks guys, for the supportive comments and likes - much appreciated.
Spars
I promised to post some more on constructing the various spars. I won't go into exhaustive detail as much of it will be familiar territory for many people, and I've already logged quite a lot of information on how I shape masts and yards - for example here and here. However I'd be very happy to answer any specific questions about points I've missed or not covered in enough detail. For now, I'll just fill in a couple of gaps as I see them.
First a couple of mistakes, which I hope will serve as a warning to others not to rush ahead without studying the plans properly
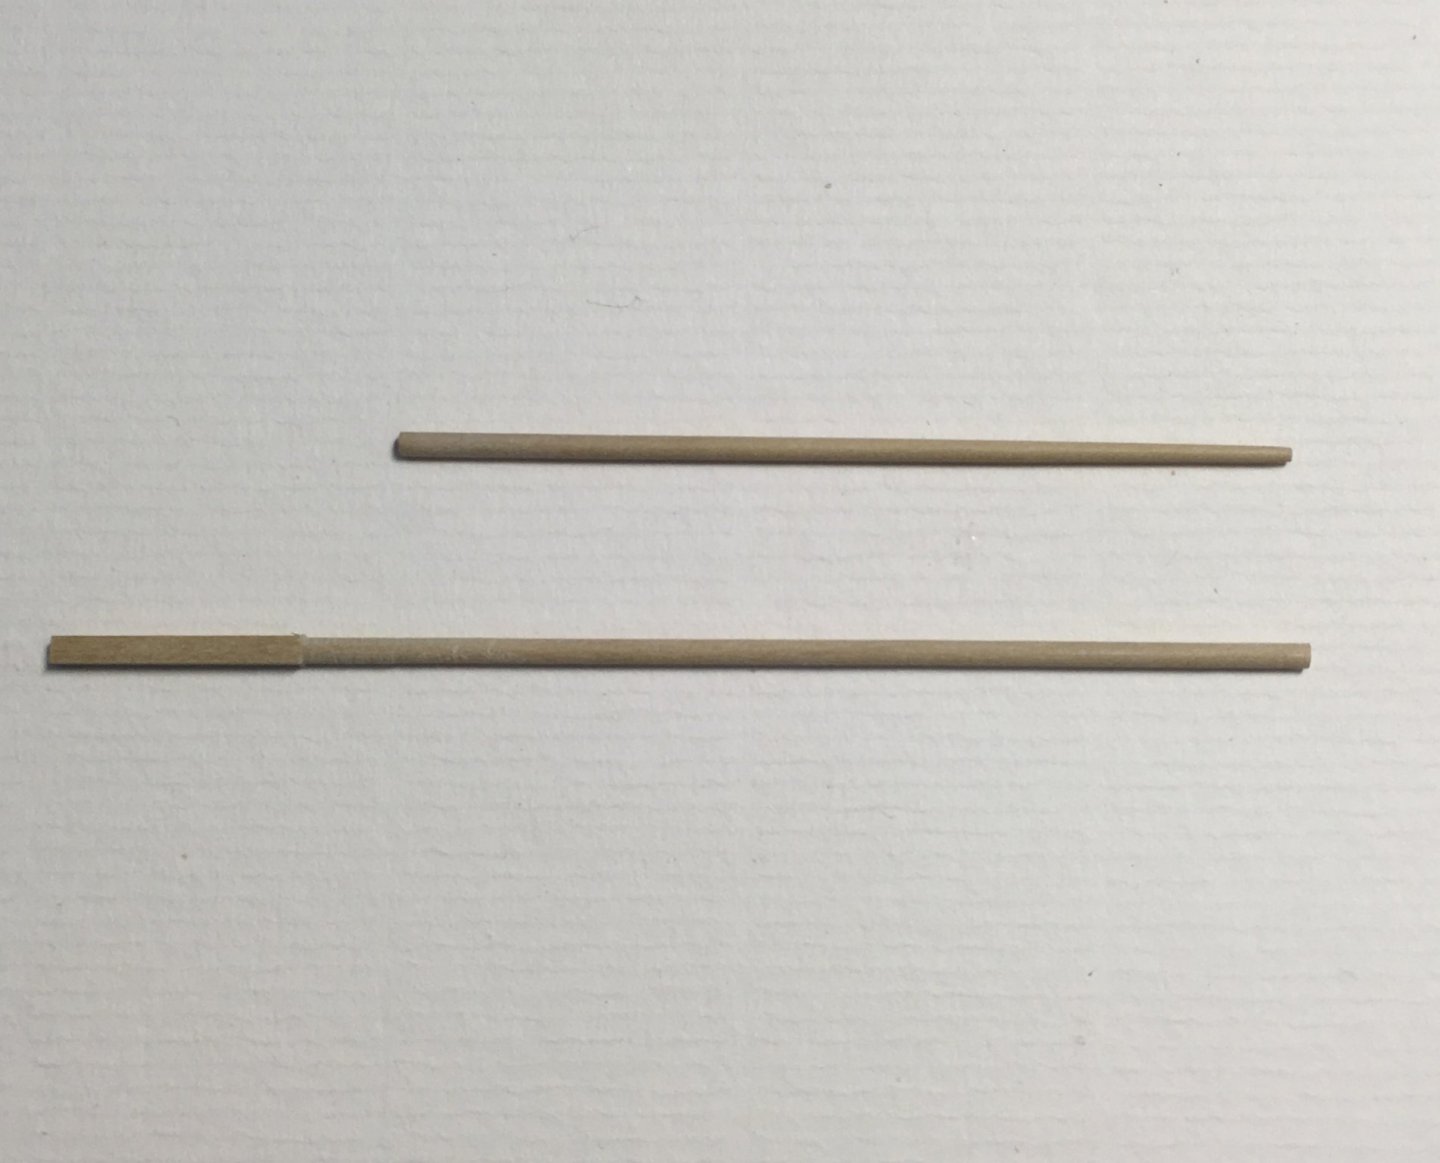
 . I was so keen to get all the spars shaped I did just that regarding the main boom and the driver boom. In both cases I tapered each end of the boom identically, failing to notice that one end had to fit into the jaws that hold the boom against the mast. I'd tapered that end too much, and although I could have squeezed the jaws to hold the boom it just wouldn't have looked right (even if the glue had held). Also, I failed to note that the main boom is not symmetrical - in fact the widest part is not in the centre of the boom, but considerably offset towards one end. Again, it just didn't look right. I was particularly annoyed because I knew booms are often shaped like this, and I'd got it right on my previous 3-master. So, no alternative but to redo. Fortunately I was able to use dowel from the kit as the booms will be painted and there are no octagonal sections.
Once I'd redone the booms and fitted the jaws, I filed the end of the booms so they merged into the jaws more smoothly and also rounded off the edges of the jaws:
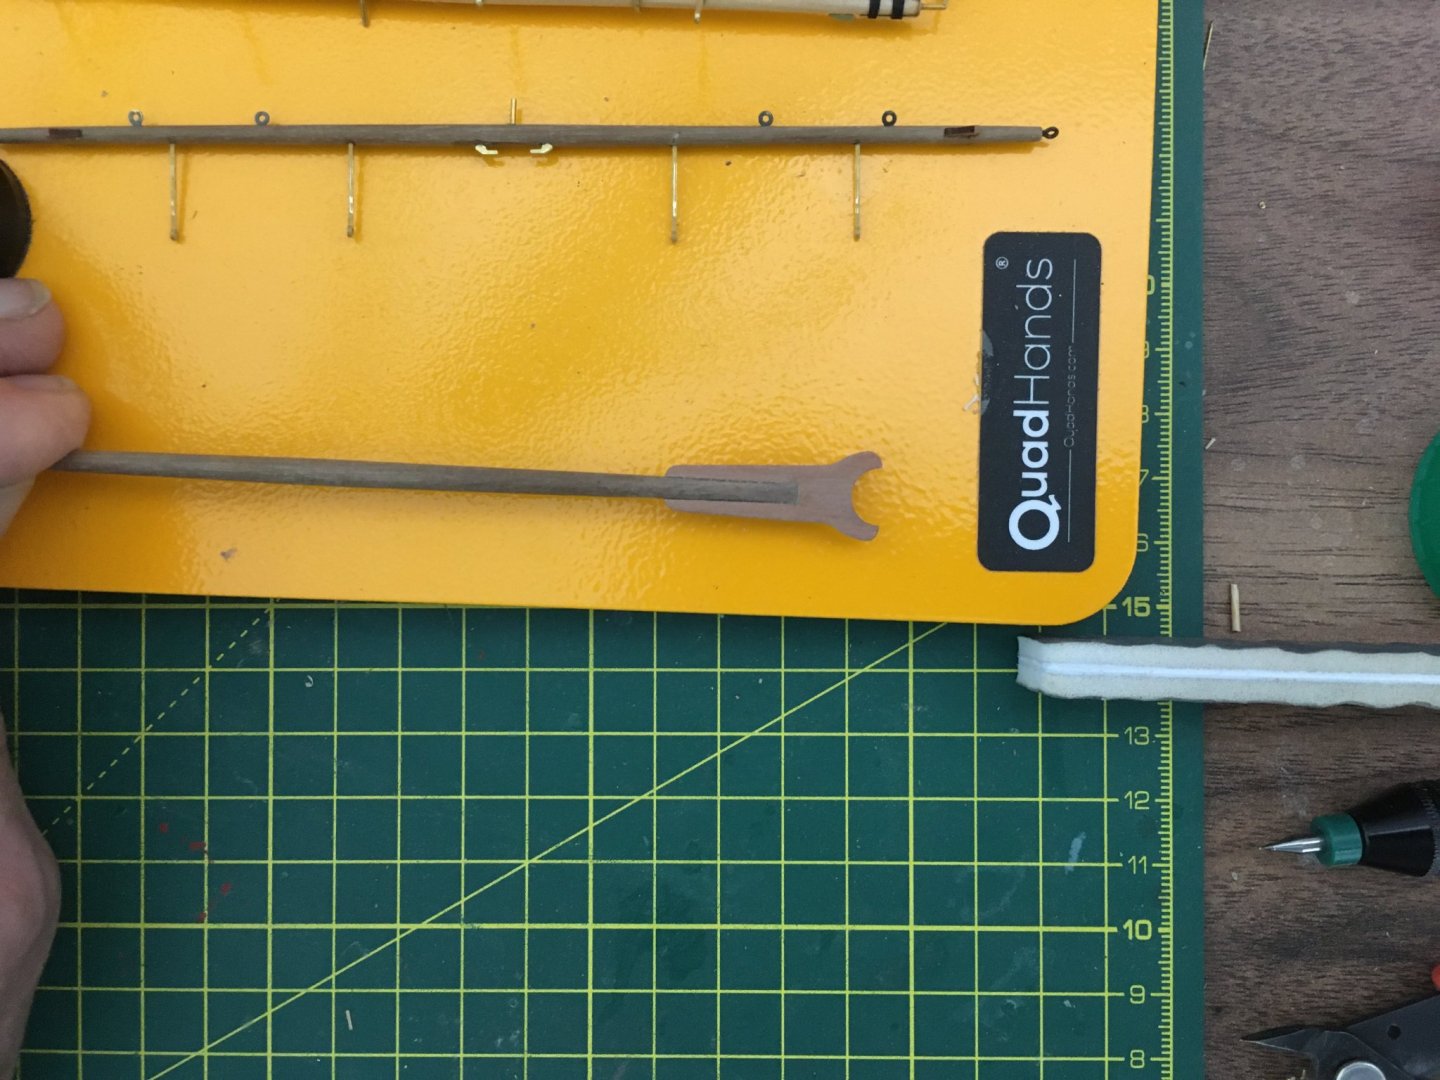
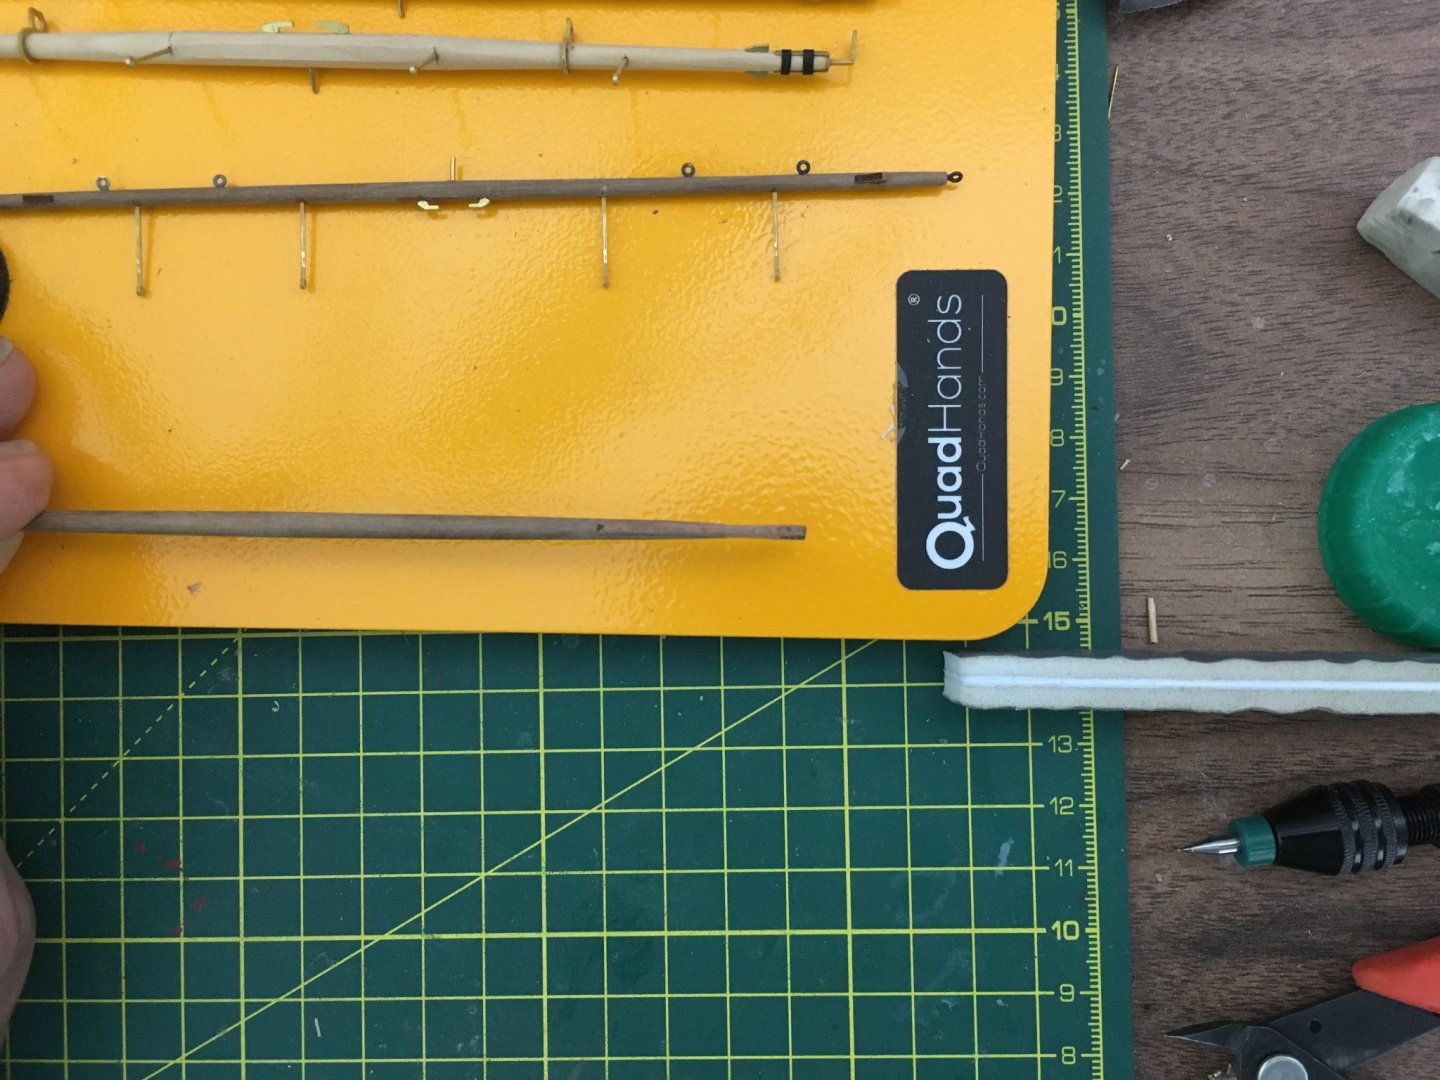
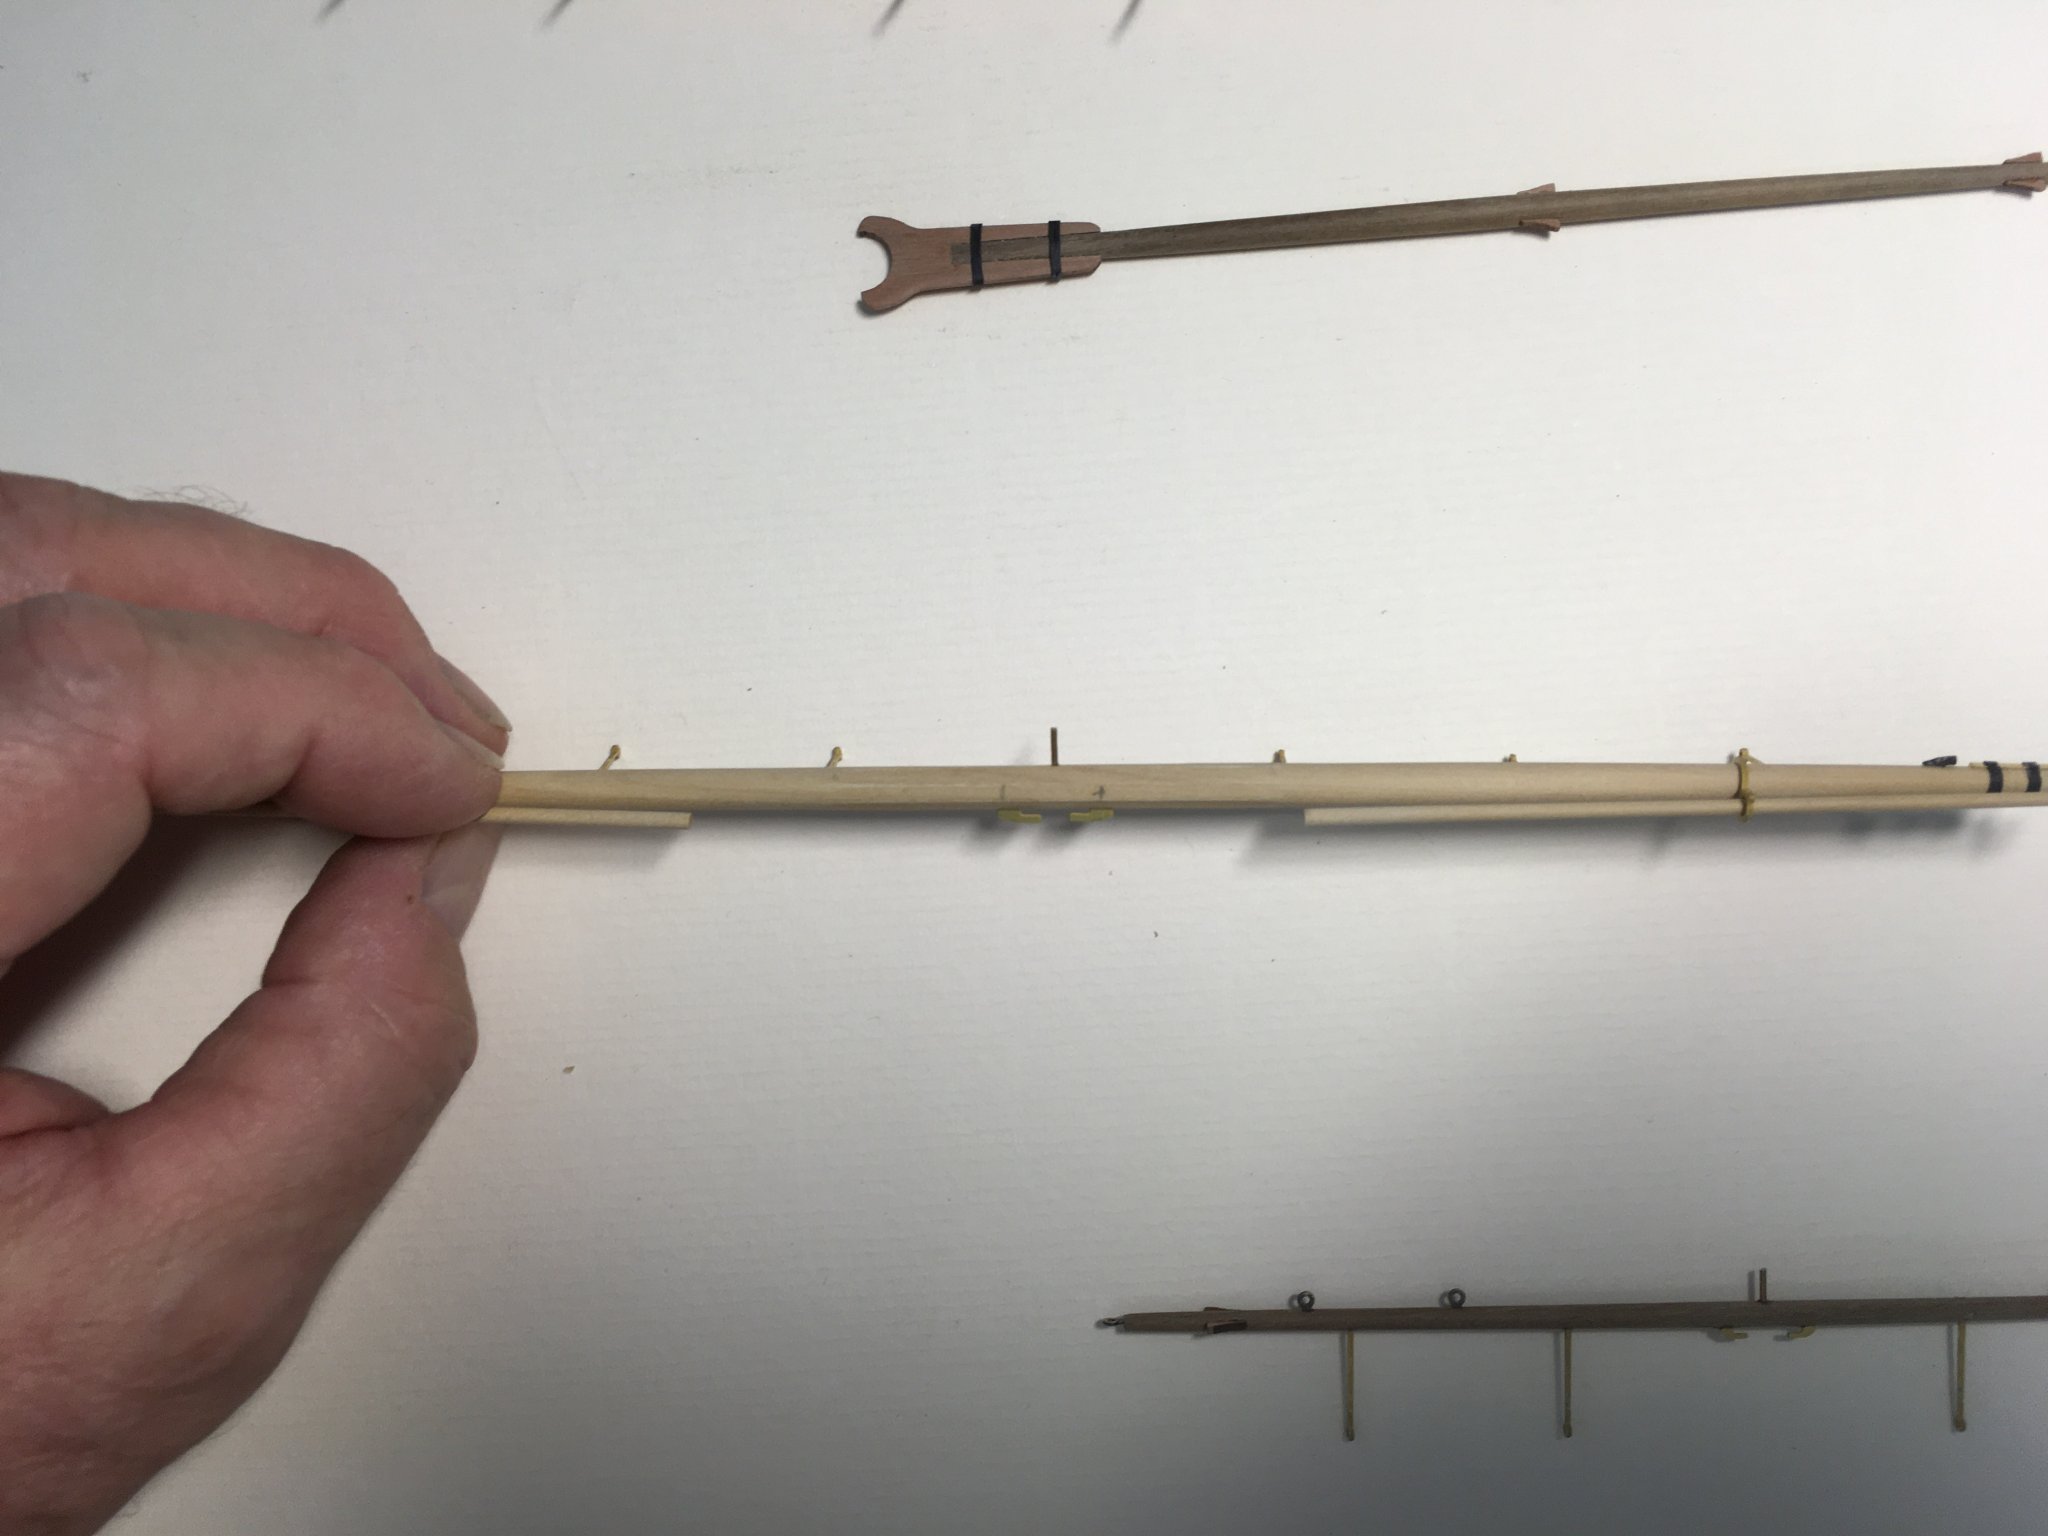
The next picture shows a couple of points worth mentioning:
First, you'll notice I've taken the advice in the kit instructions and fitted a pin to the main yard (in fact to all the yards). Pinning the yards to the masts makes rigging much easier, and it is much better to fit the pins and make the required holes in the masts and bowsprit at this stage when everything is fully accessible.
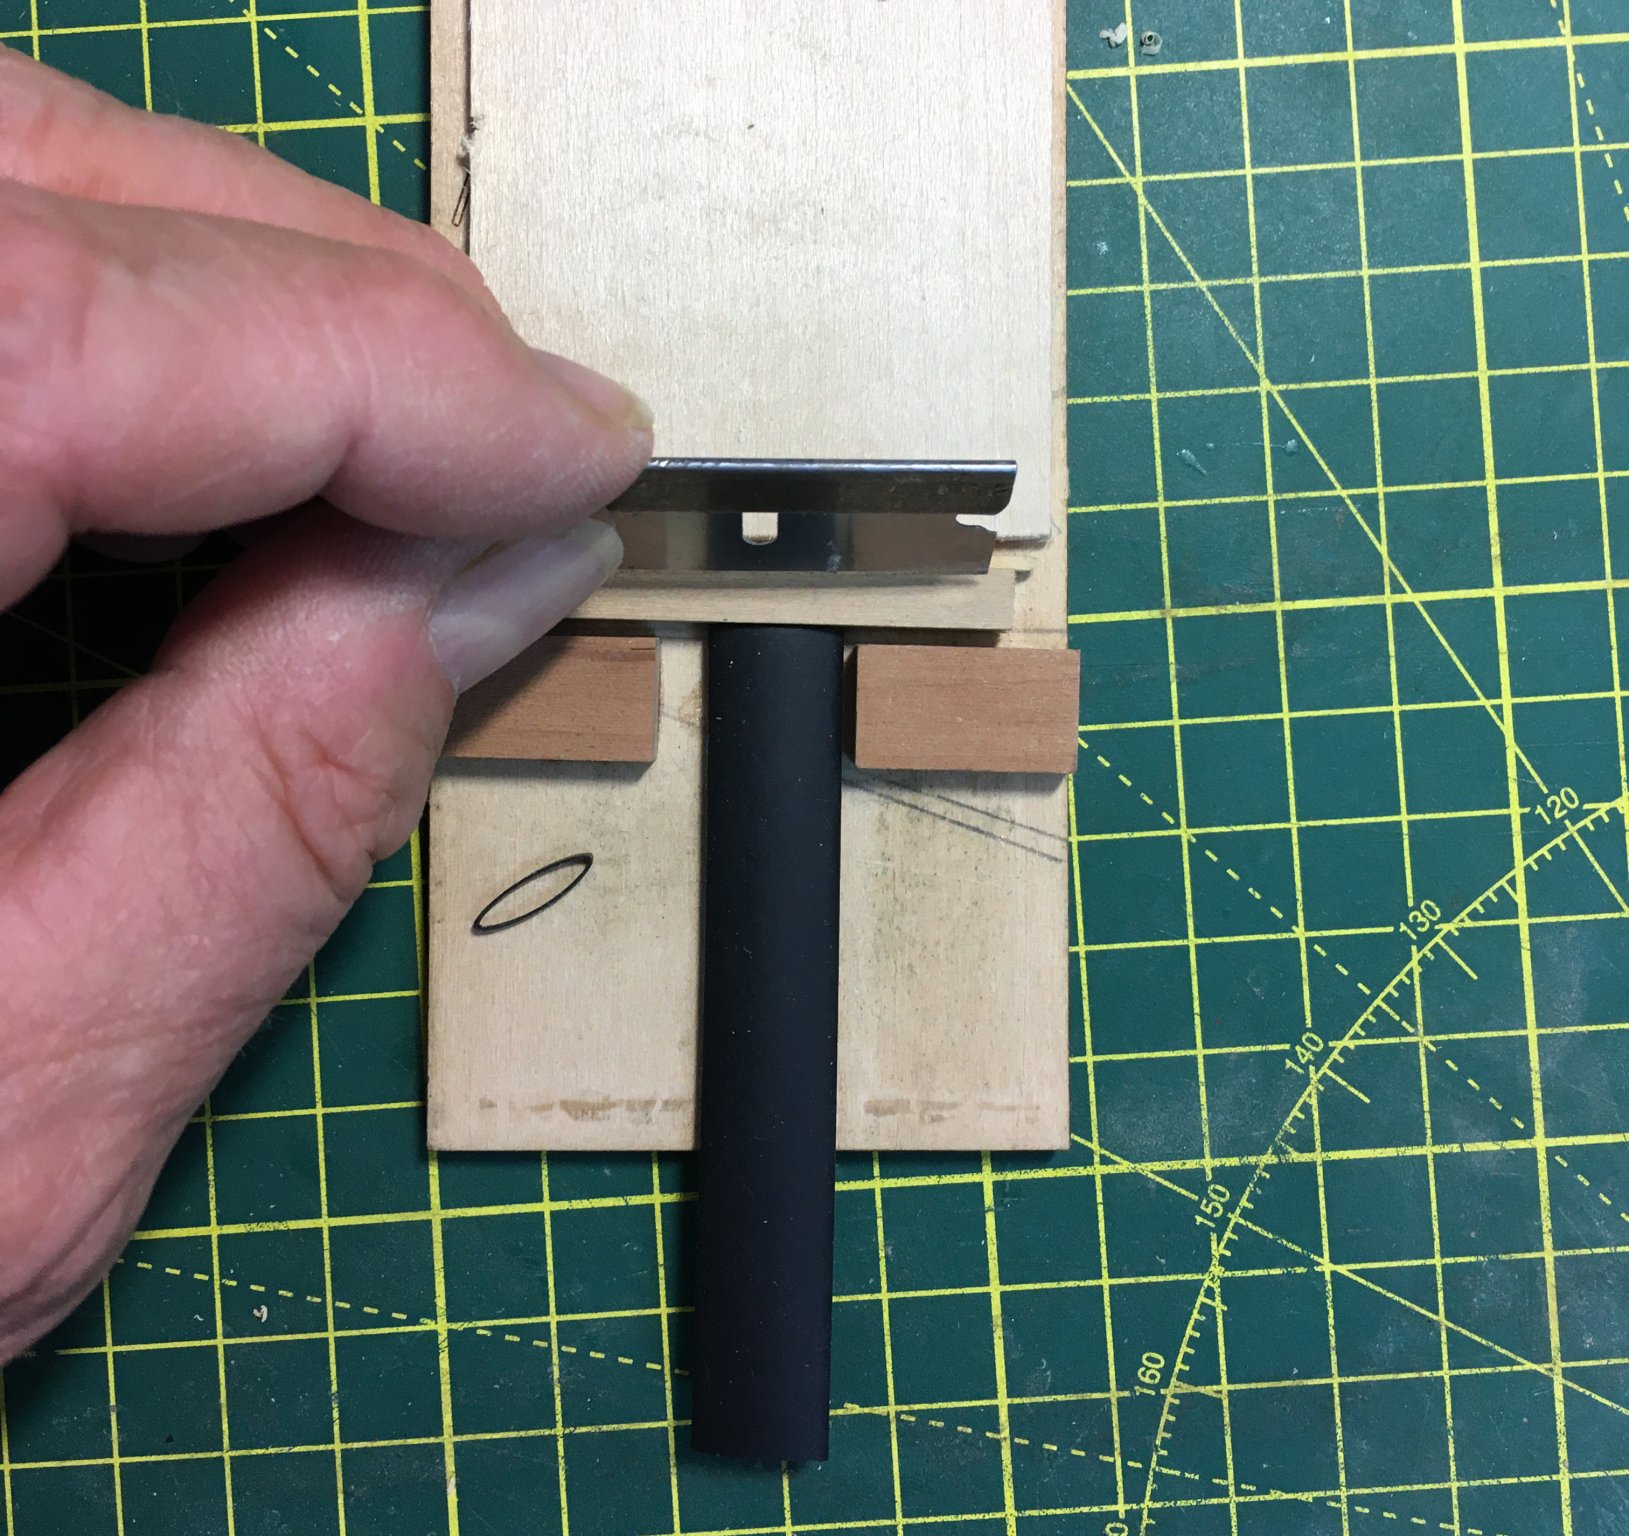
Also, I want to point out another use of my favourite substitute for iron straps - shrink-wrap tube, which you can see on the boom jaws and the yard arm. I'm still using the huge stock I got from Amazon years ago for about £5 and it'll last another couple of lifetimes. I've made up a little jig to cut bands on equal width:
By inserting shims I can cut the different sizes of band I need.
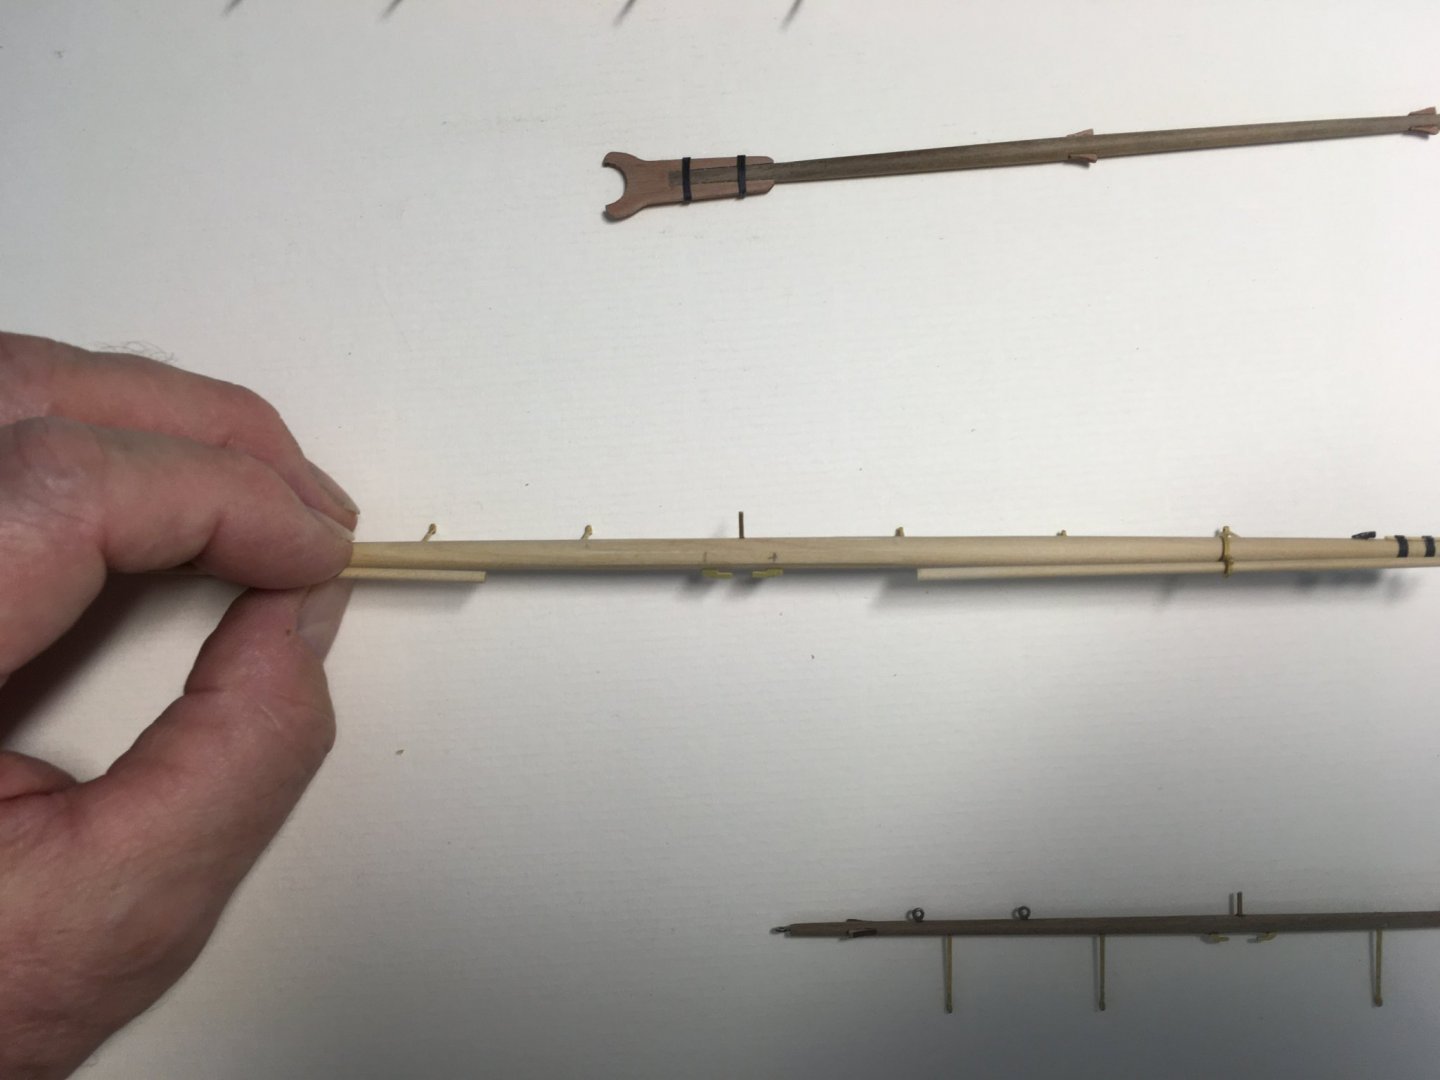
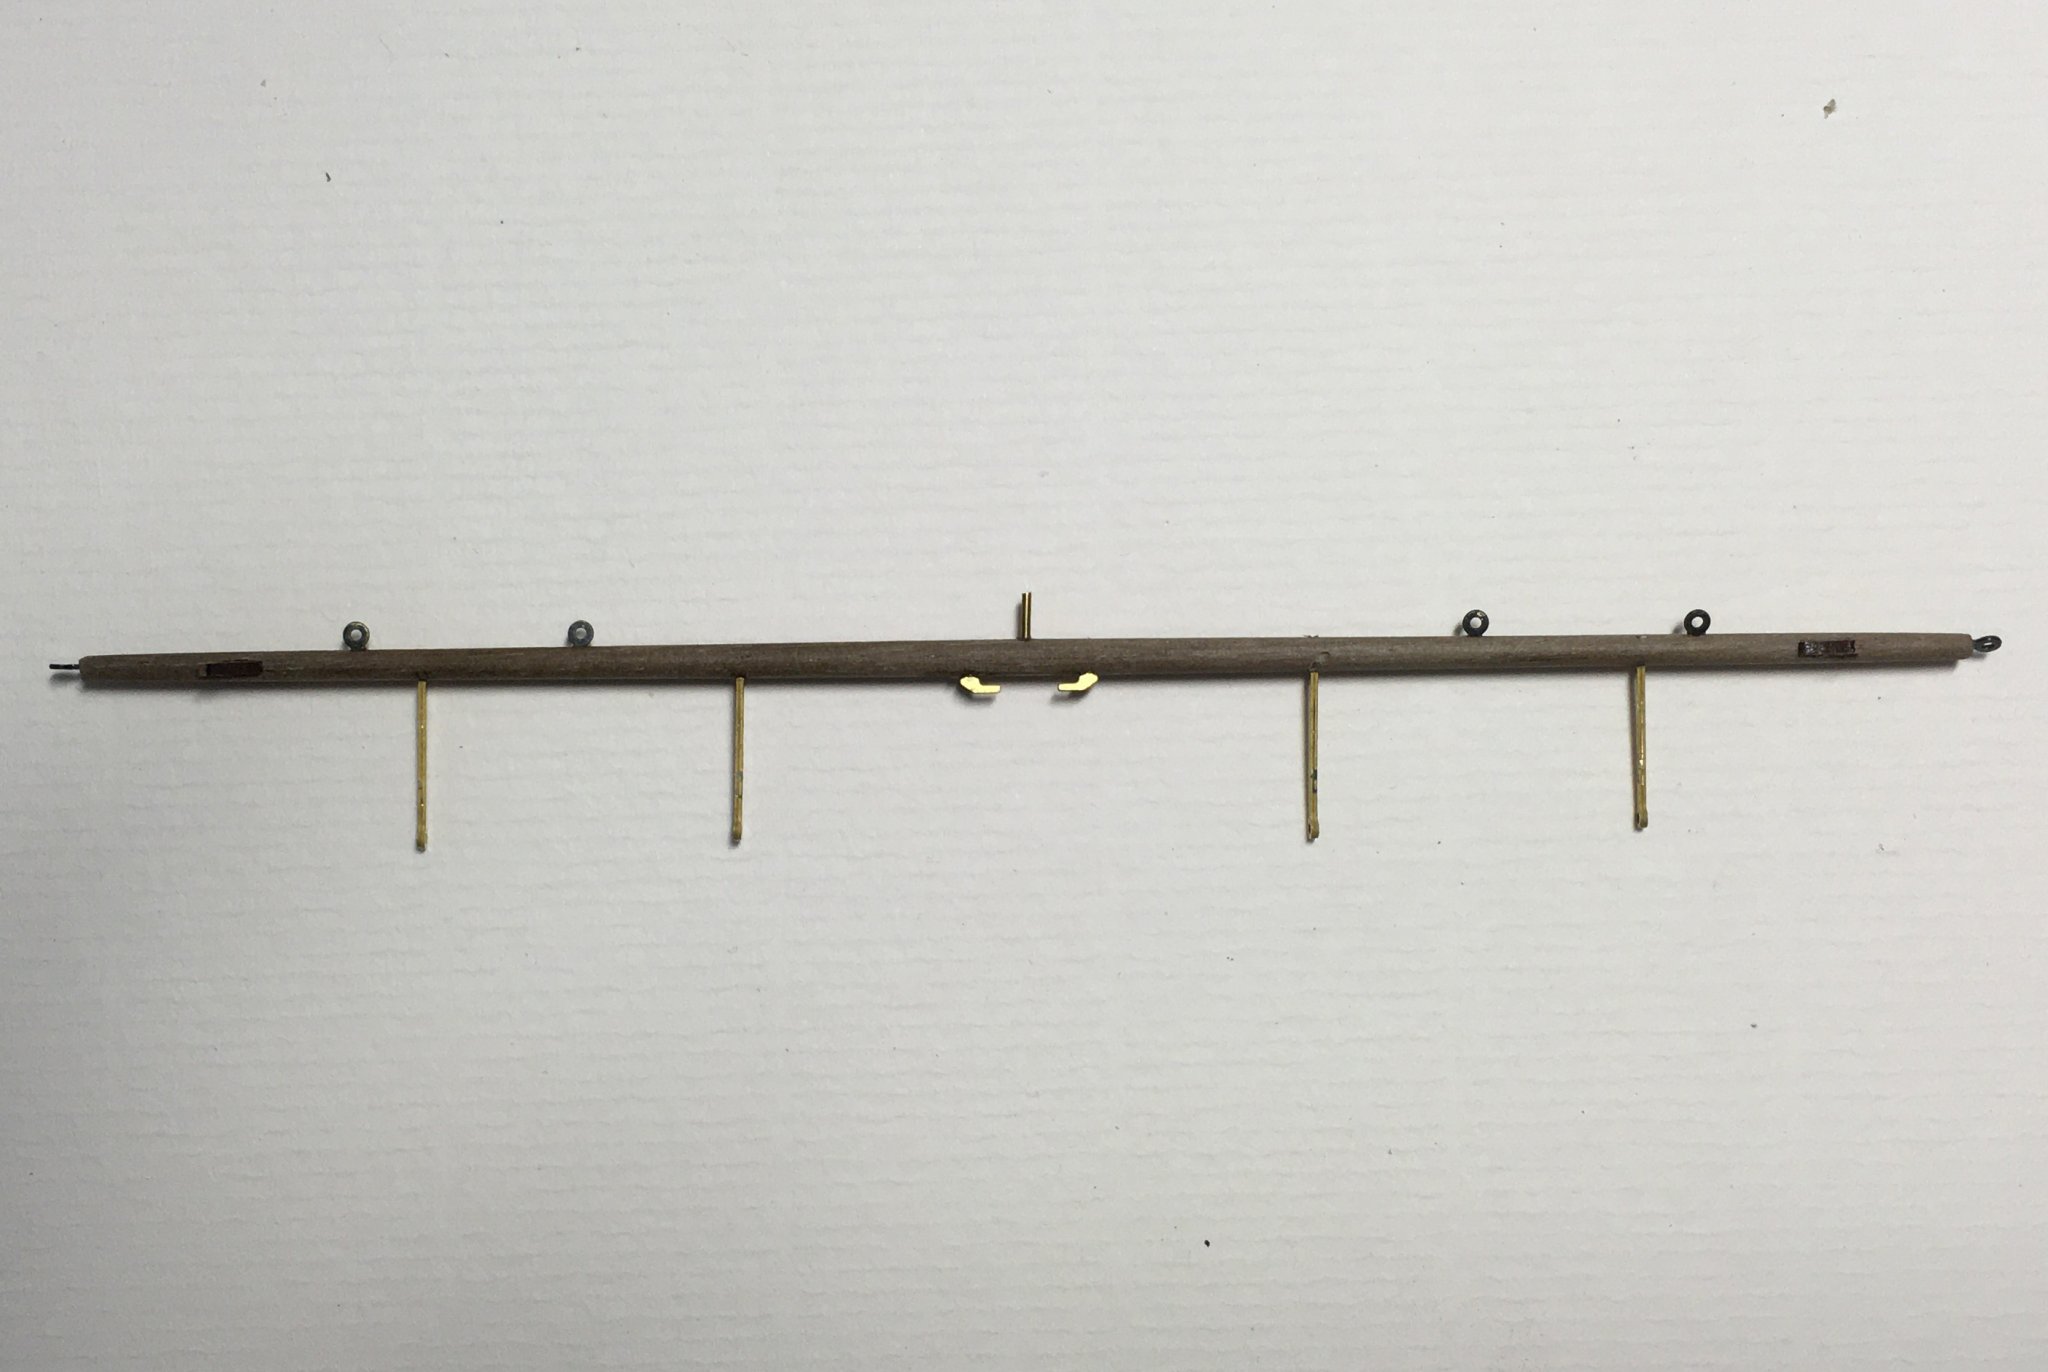
The last point I'll cover in this post is about drilling holes...and there's a lot of holes needed in these spars! For example I count 17 in this one little spritsail yard:

Although that's partly because I've got the original photo-etched cleats - I understand Chris now produces laser cut wood cleats. Still a lot of holes though. Two tips I've got that I've found helpful. First, if you need to ensure that two components are exactly opposite each other - for example the yardarm cleats - it's easier to drill one hole straight through than trying to get two holes to line up from opposite sides of the spar. Similarly, with very thin spars such as the one above (3mm tapering to 2mm, I think) its a good idea to drill right through for components such as the footrope stirrups and the ringbolts. This ensures sufficient contact for the glue to hold, and as the spar will be painted the extra holes can easily be sorted.
I'll save the second point on drilling for another post as this one is already getting a bit long (and my lunch is ready!).
Derek
-
19 minutes ago, glbarlow said:
If an iPhone touch the subject on your phone screen, it will focus there signifies by a yellow box.
Thanks Glenn. I'm using an iphone so I'll try that.
19 minutes ago, glbarlow said:the mast and spars. I’ll outsource mine to you
I'll struggle to get them done AND your cannon rigged
-
Stuns'l Booms and Boomkins
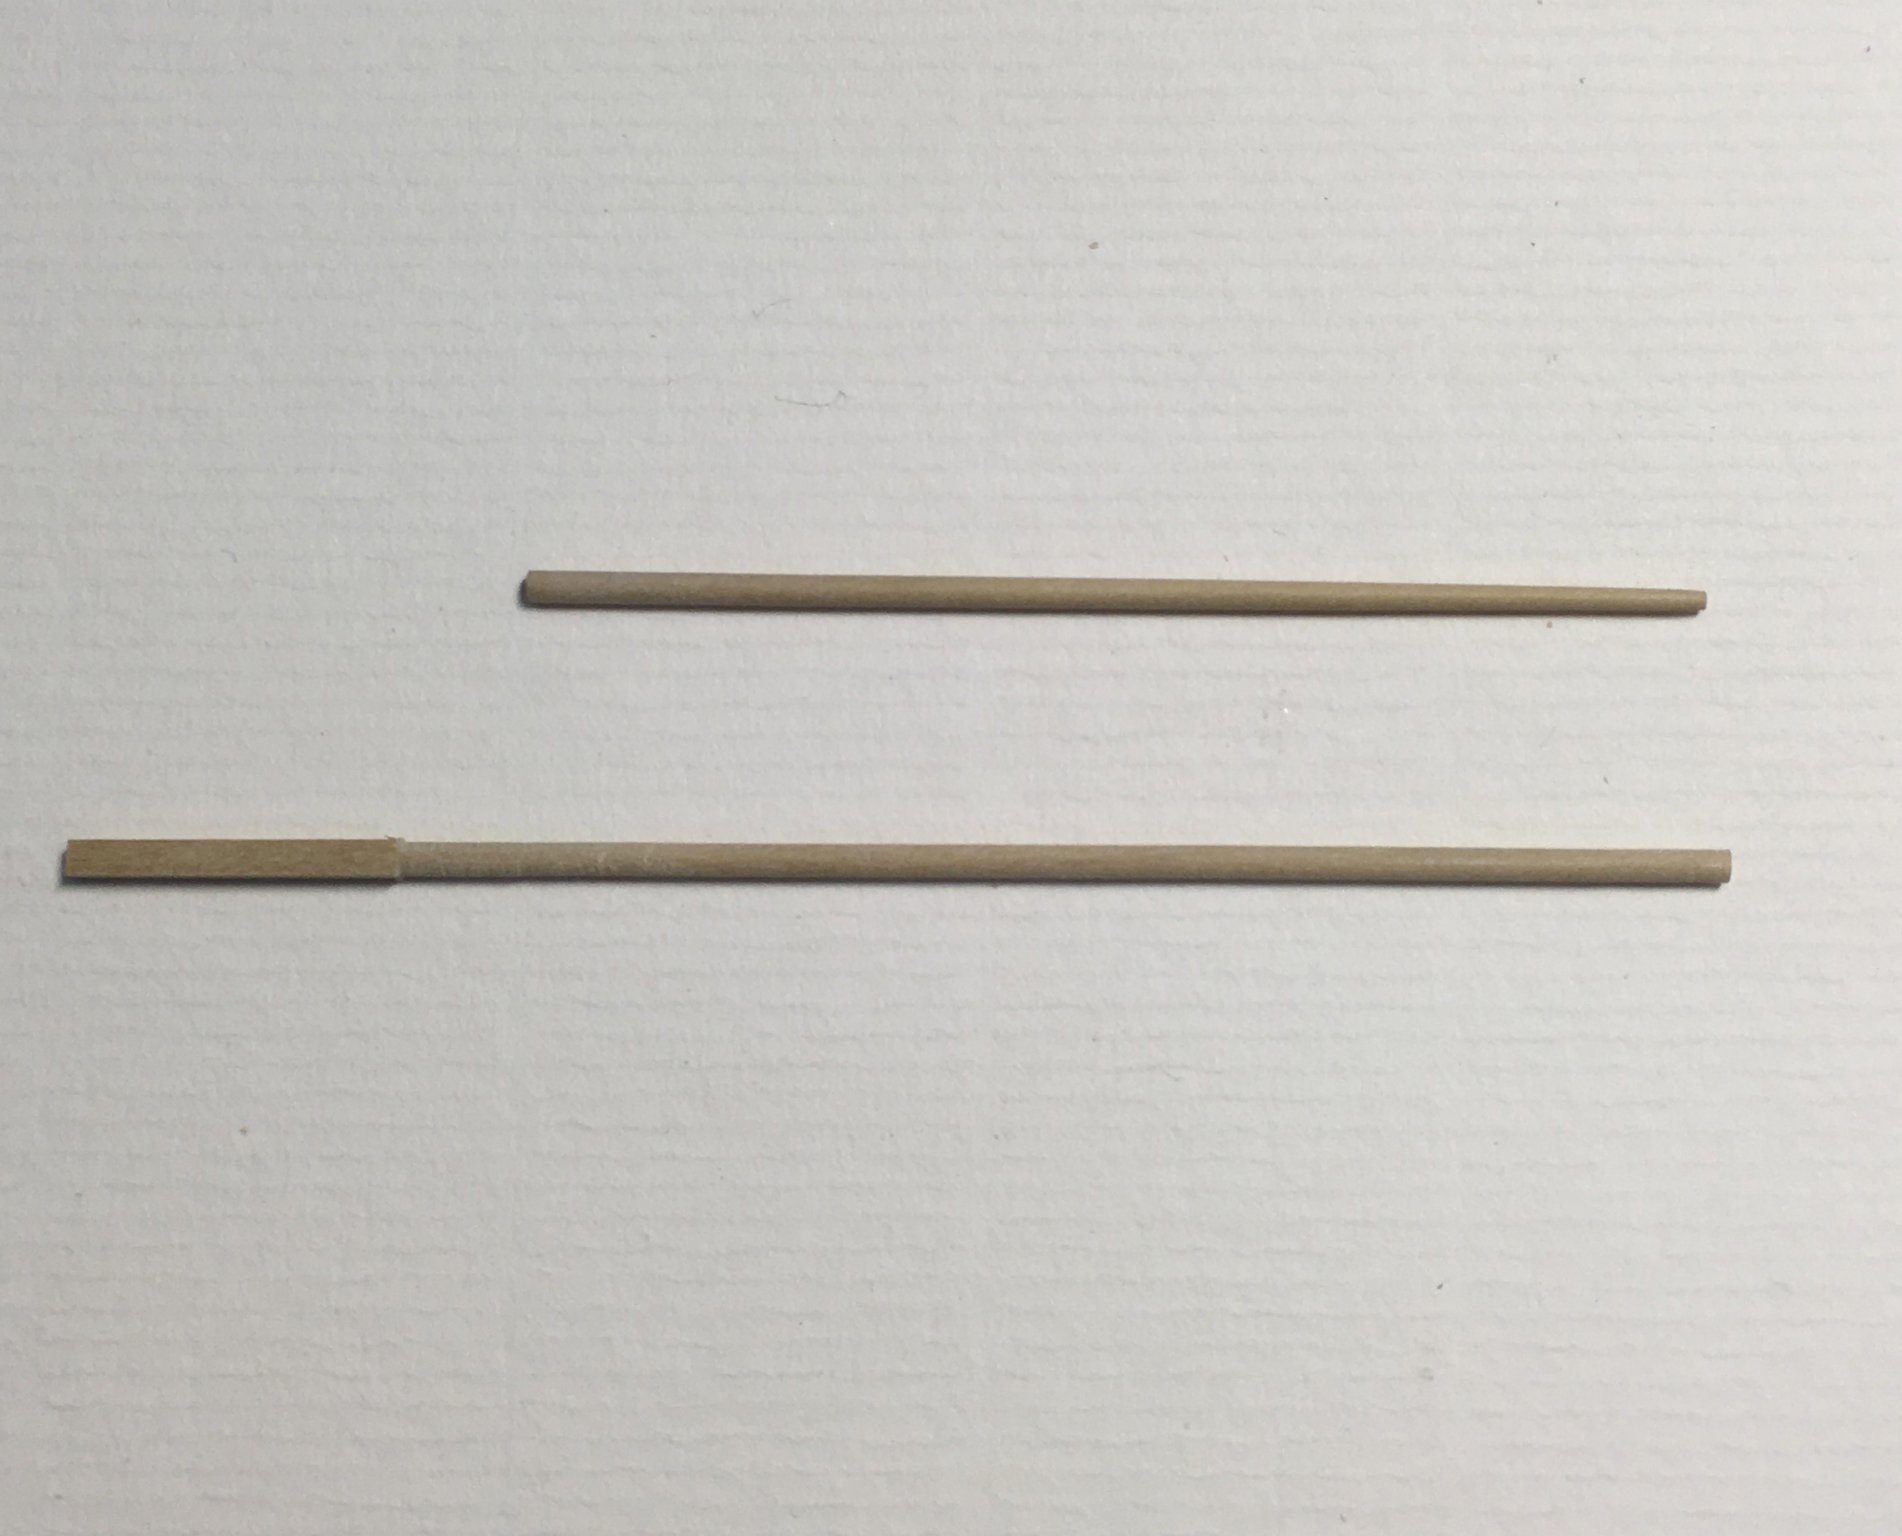
I added the stuns'l booms this afternoon. I'd already made some boxwood dowels using a homemade drawplate I described earlier, so all I had to do was sand them to shape in the lathe:
Here's all eight fitted:
While I had some spare dowel I decided to make the boomkins, simple spars with just a shallow groove in the outboard end. This was easy to make with a round-edged file:
Note to self: try to figure out why some shots are perfectly sharp and others are rubbish

Derek
- Barbossa, chris watton, BobG and 3 others
-
6
-
-
SPARS
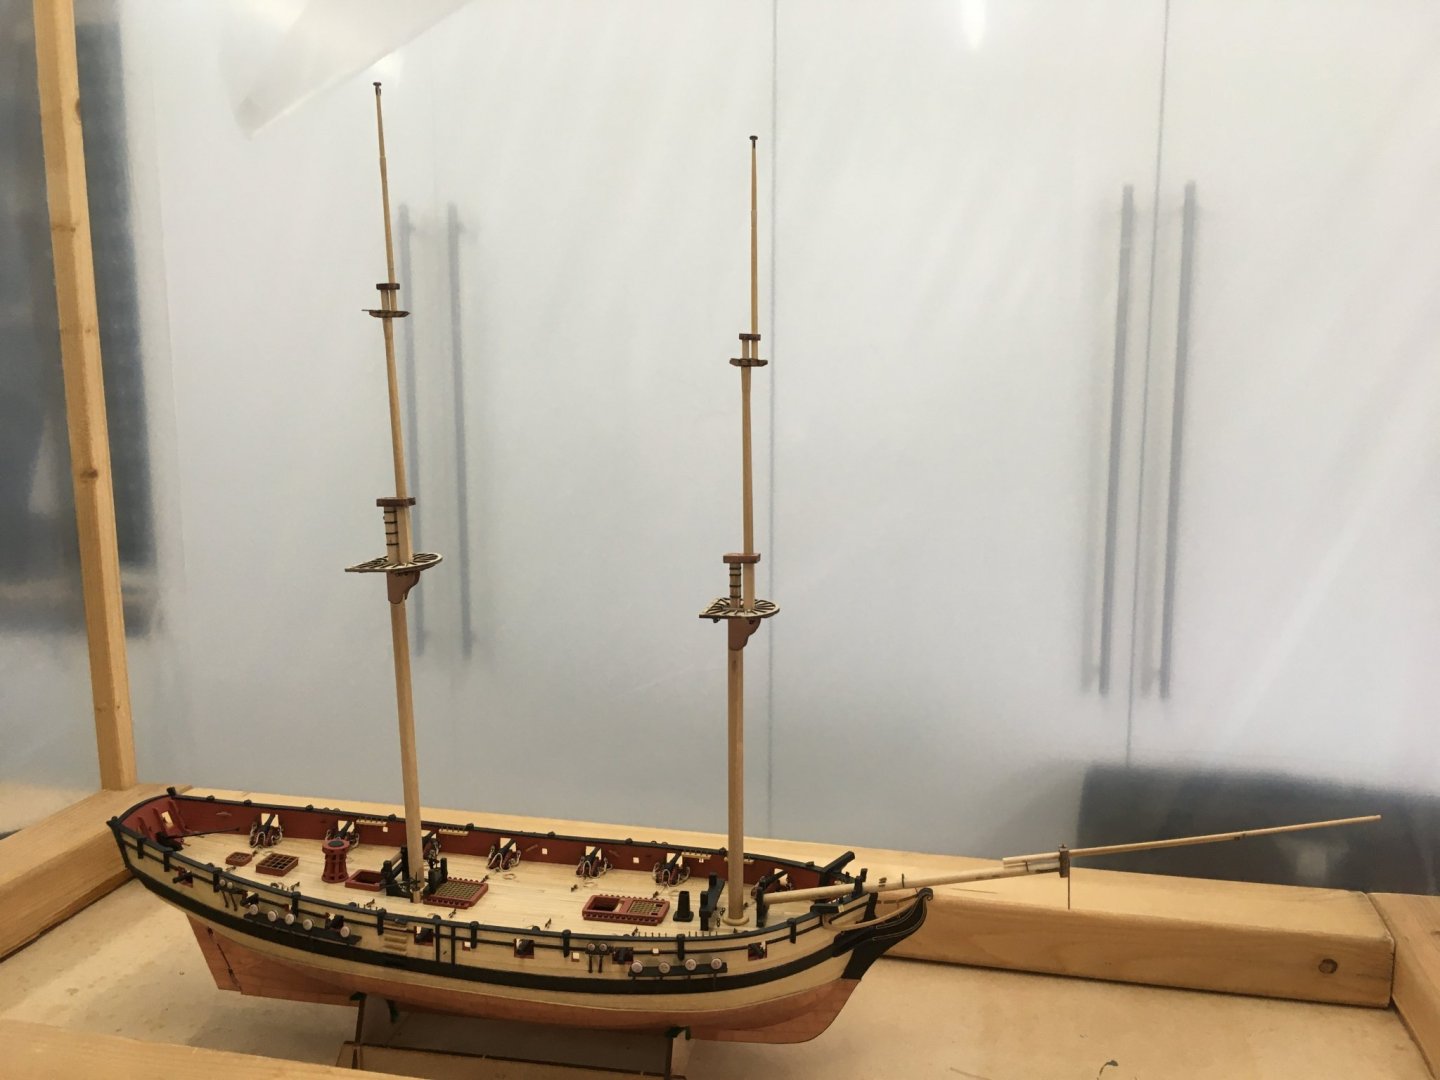
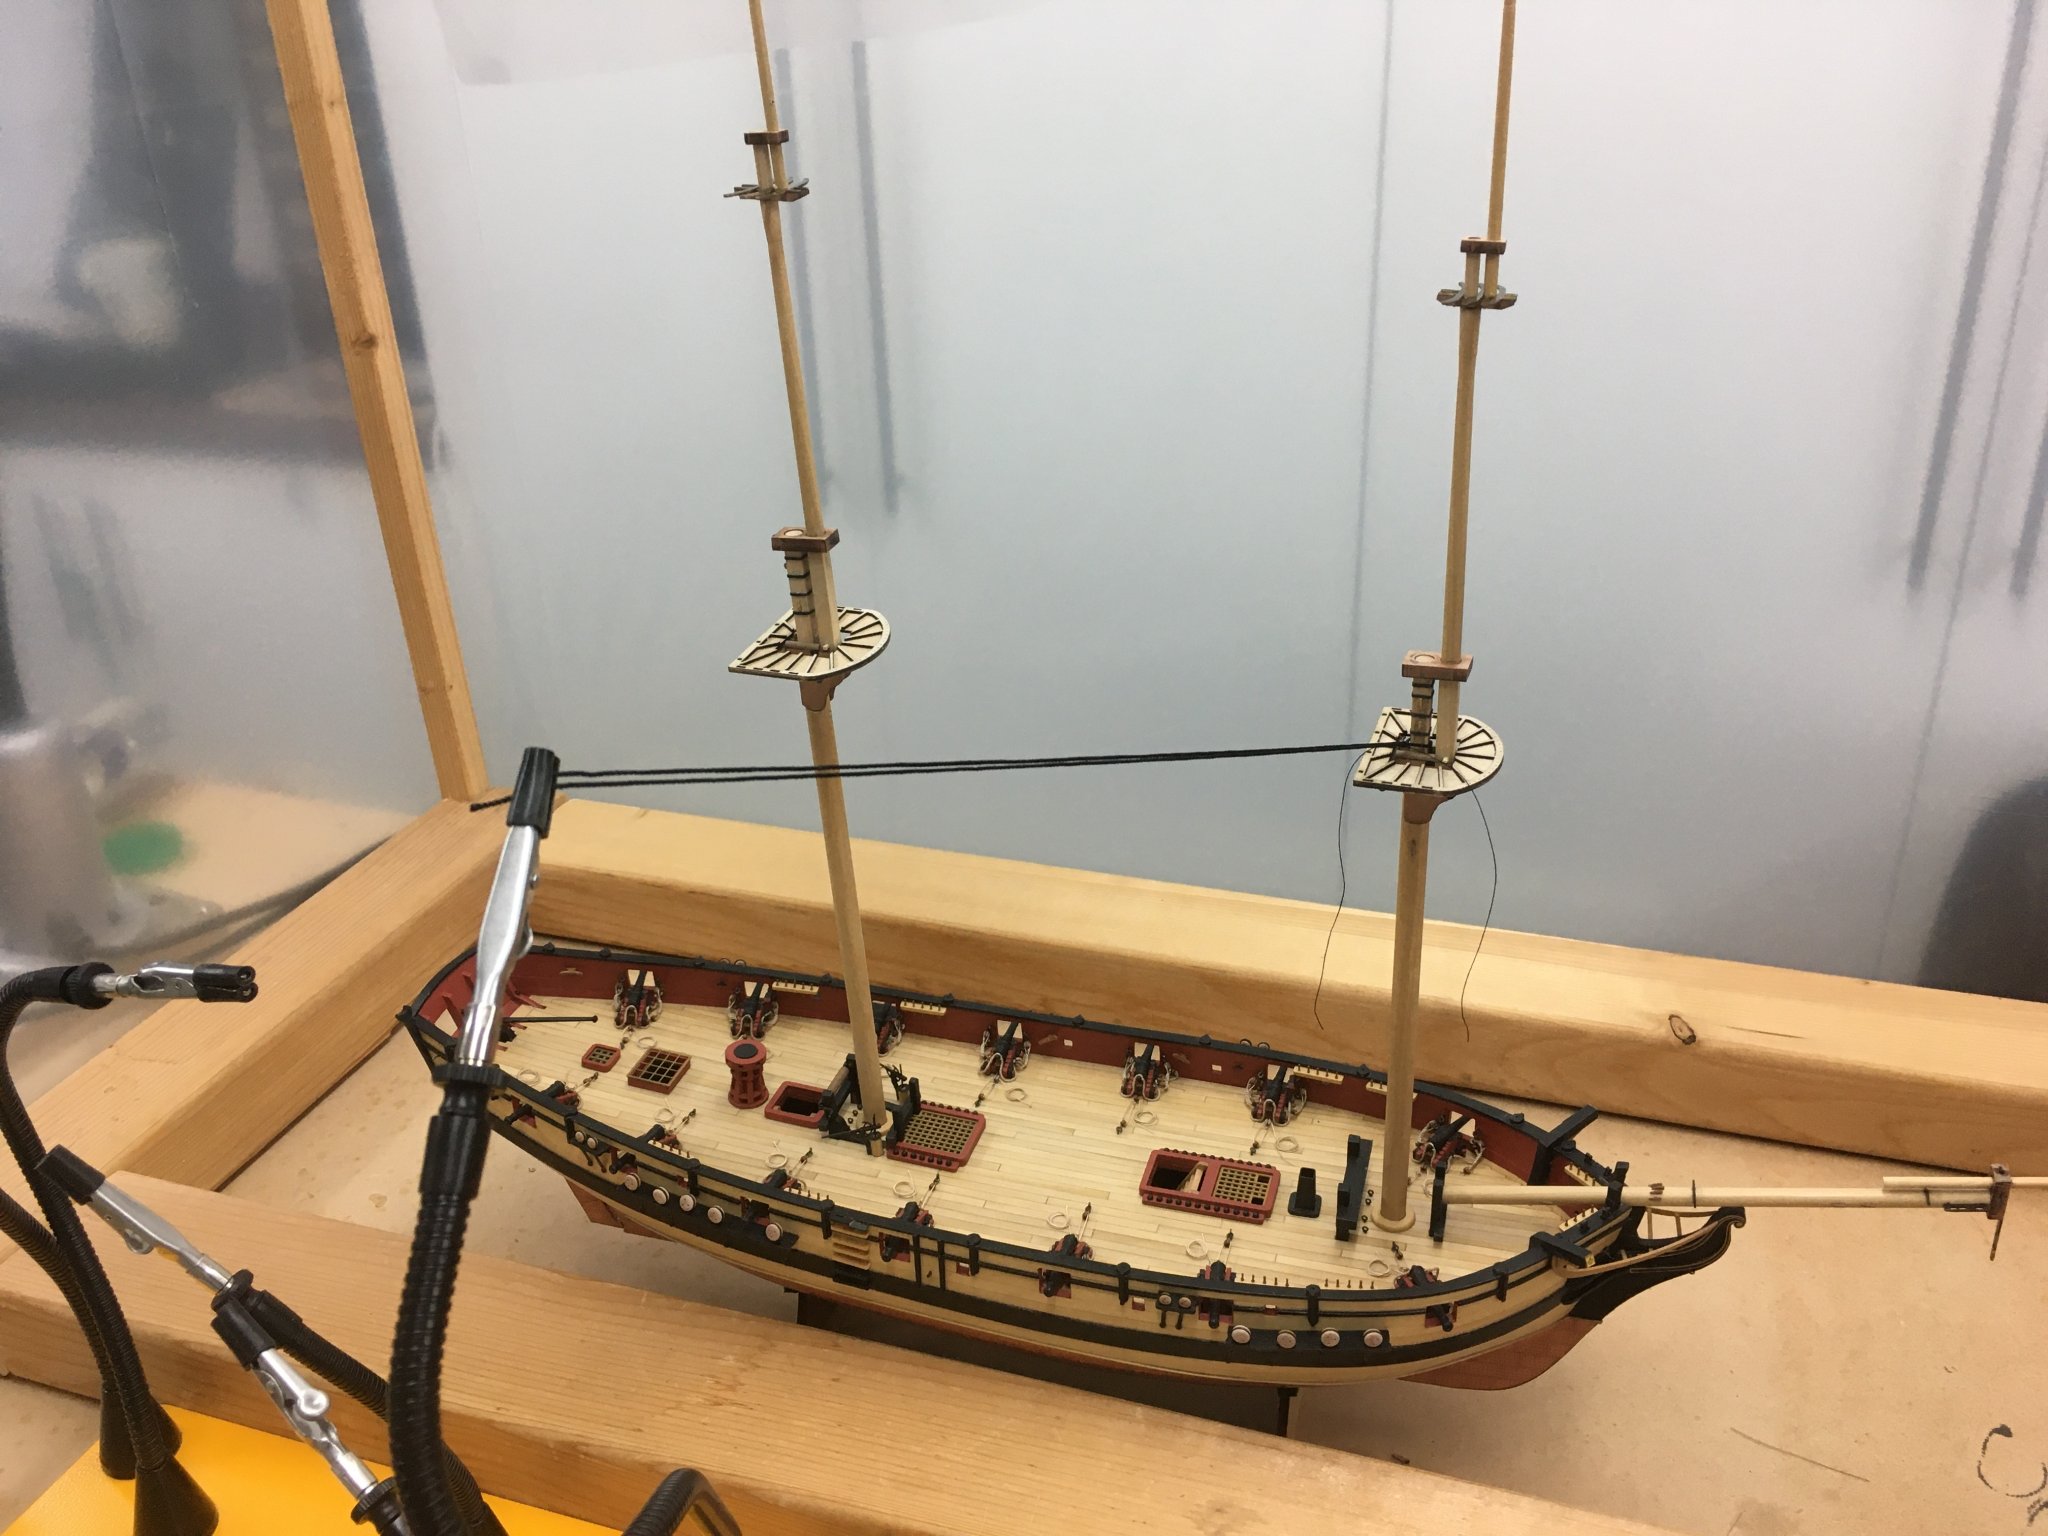
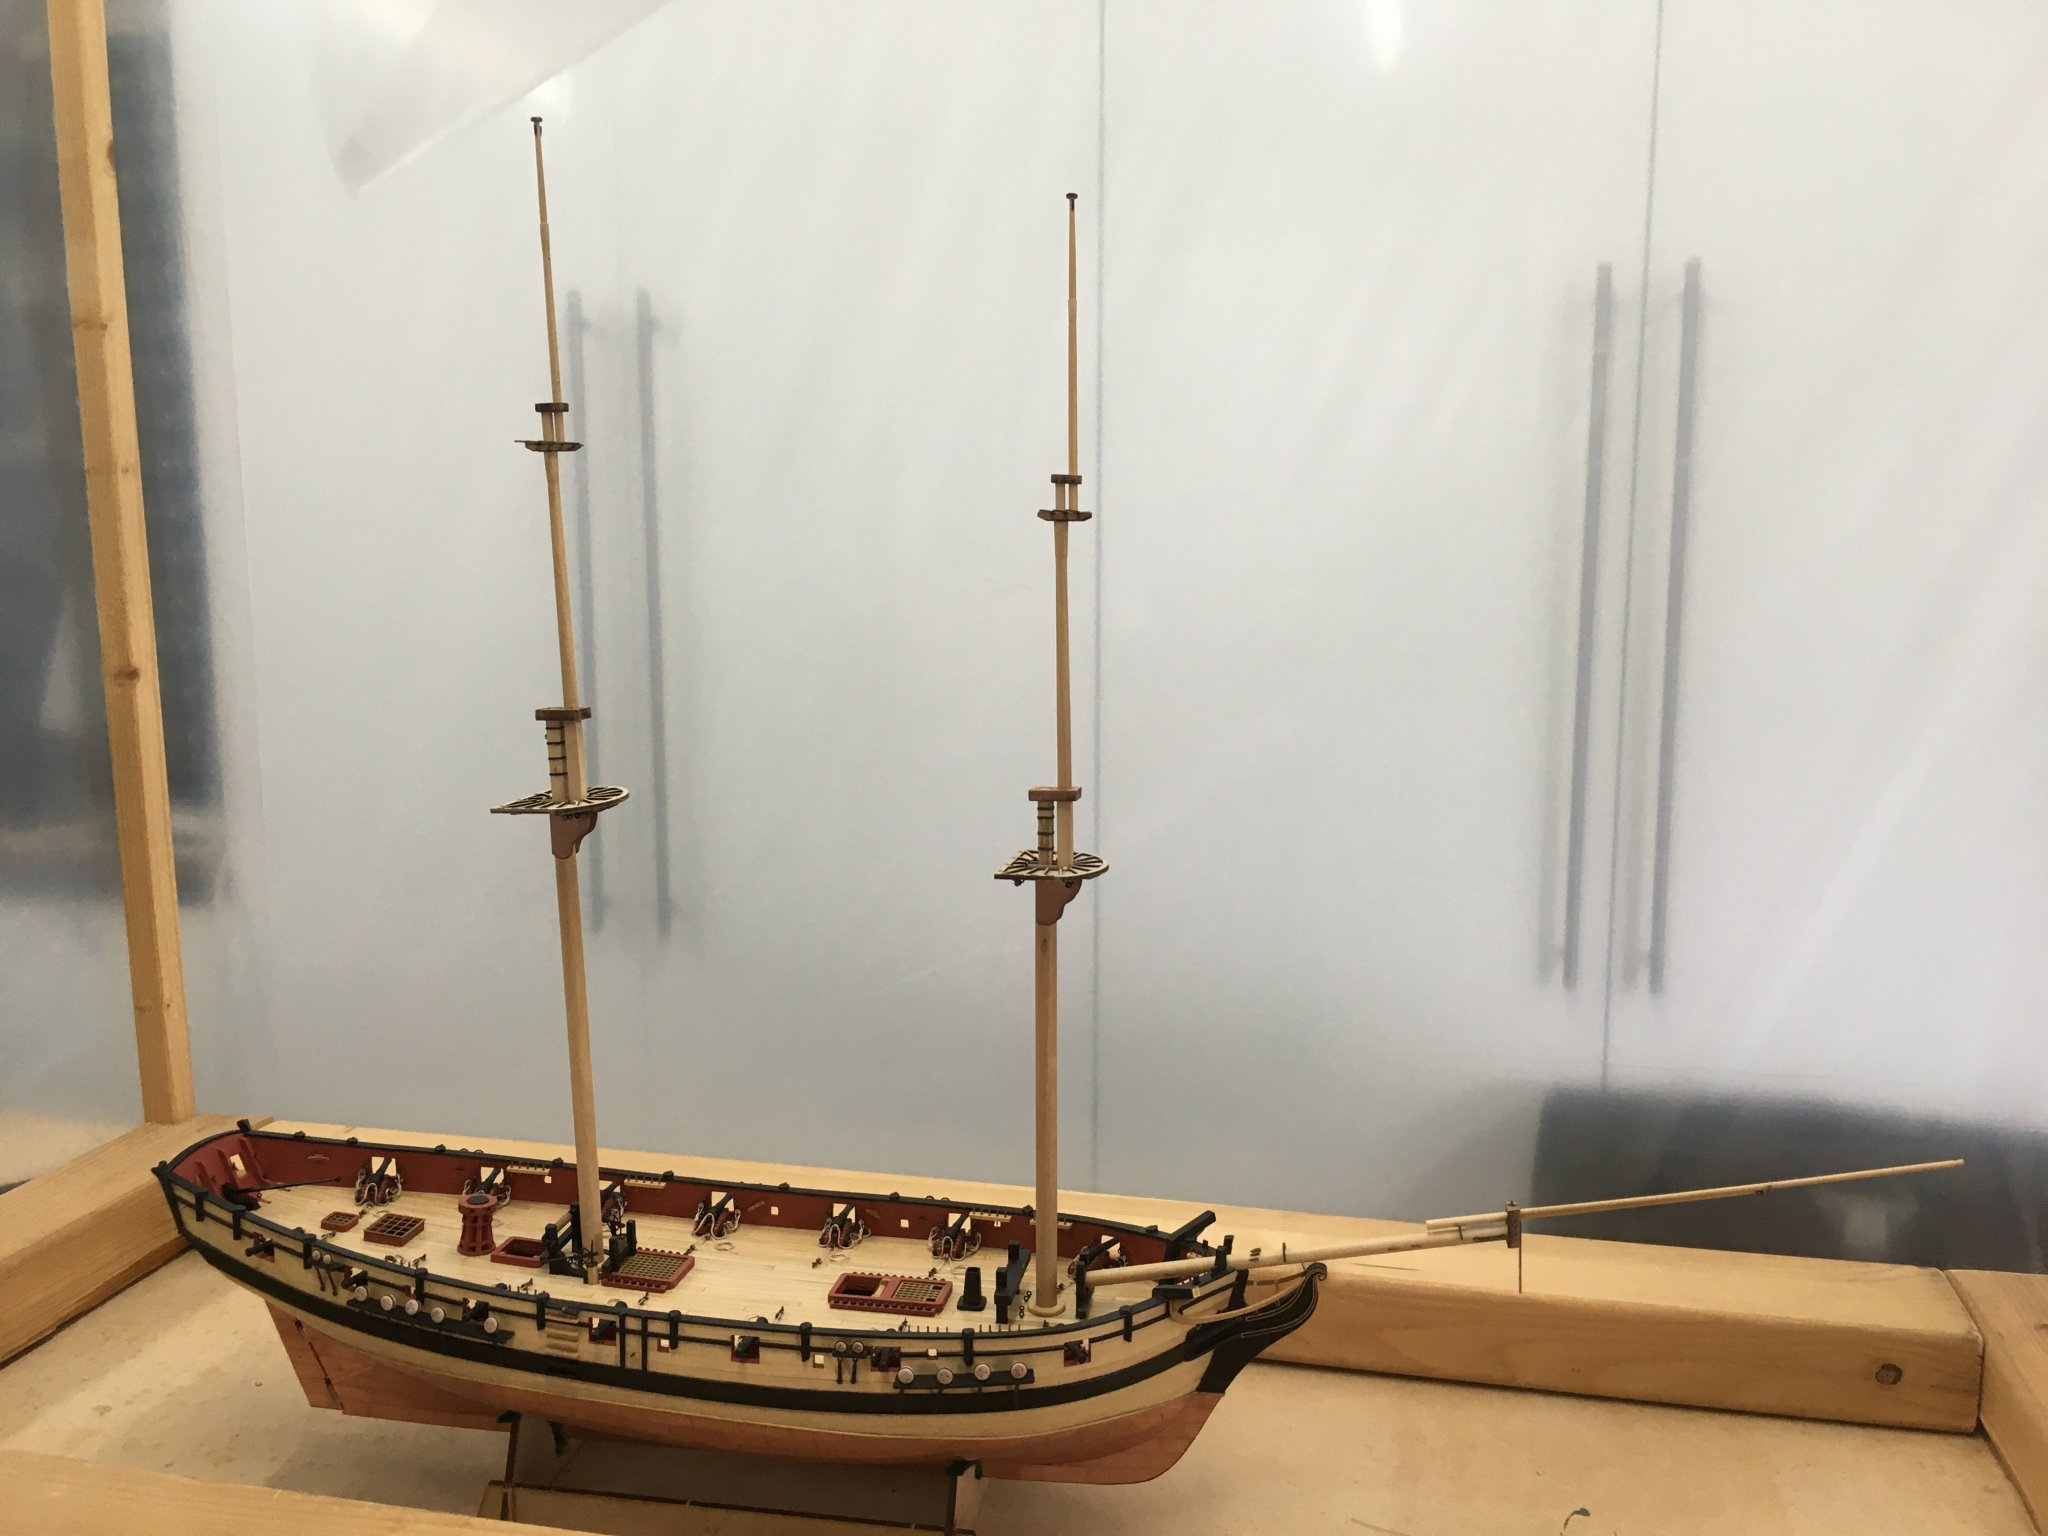
Work on the masts and yards is progressing well. I've dry-fitted the masts and bowsprit just to make sure everything looks right before I apply glue. Here she is in my homemade dust cabinet:
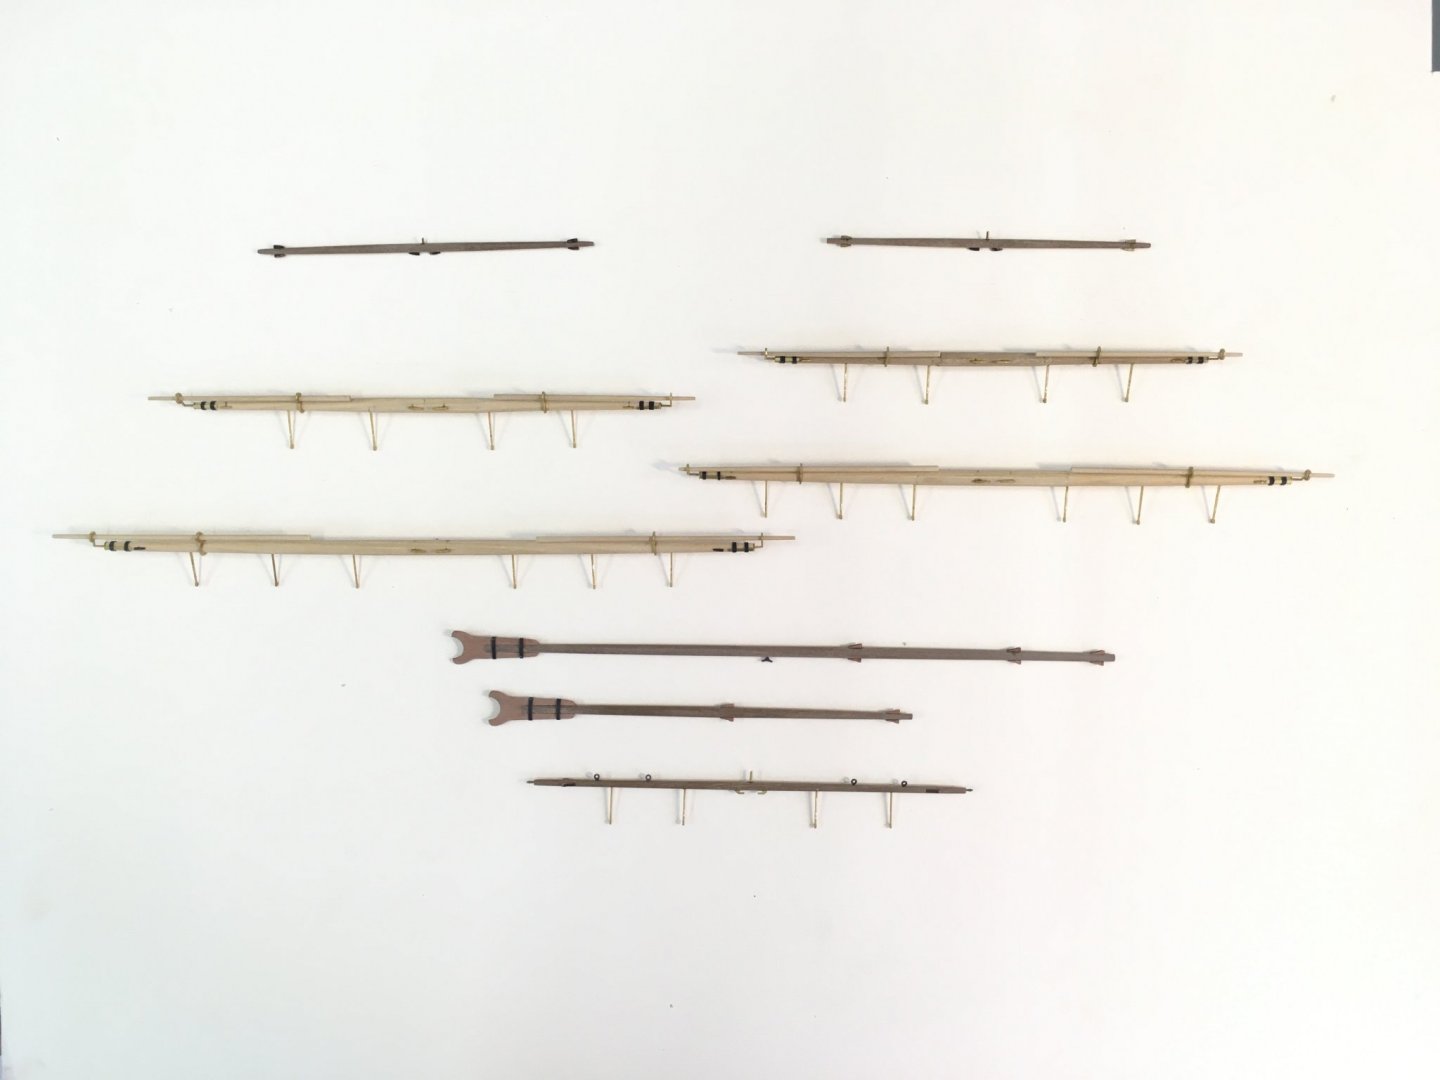
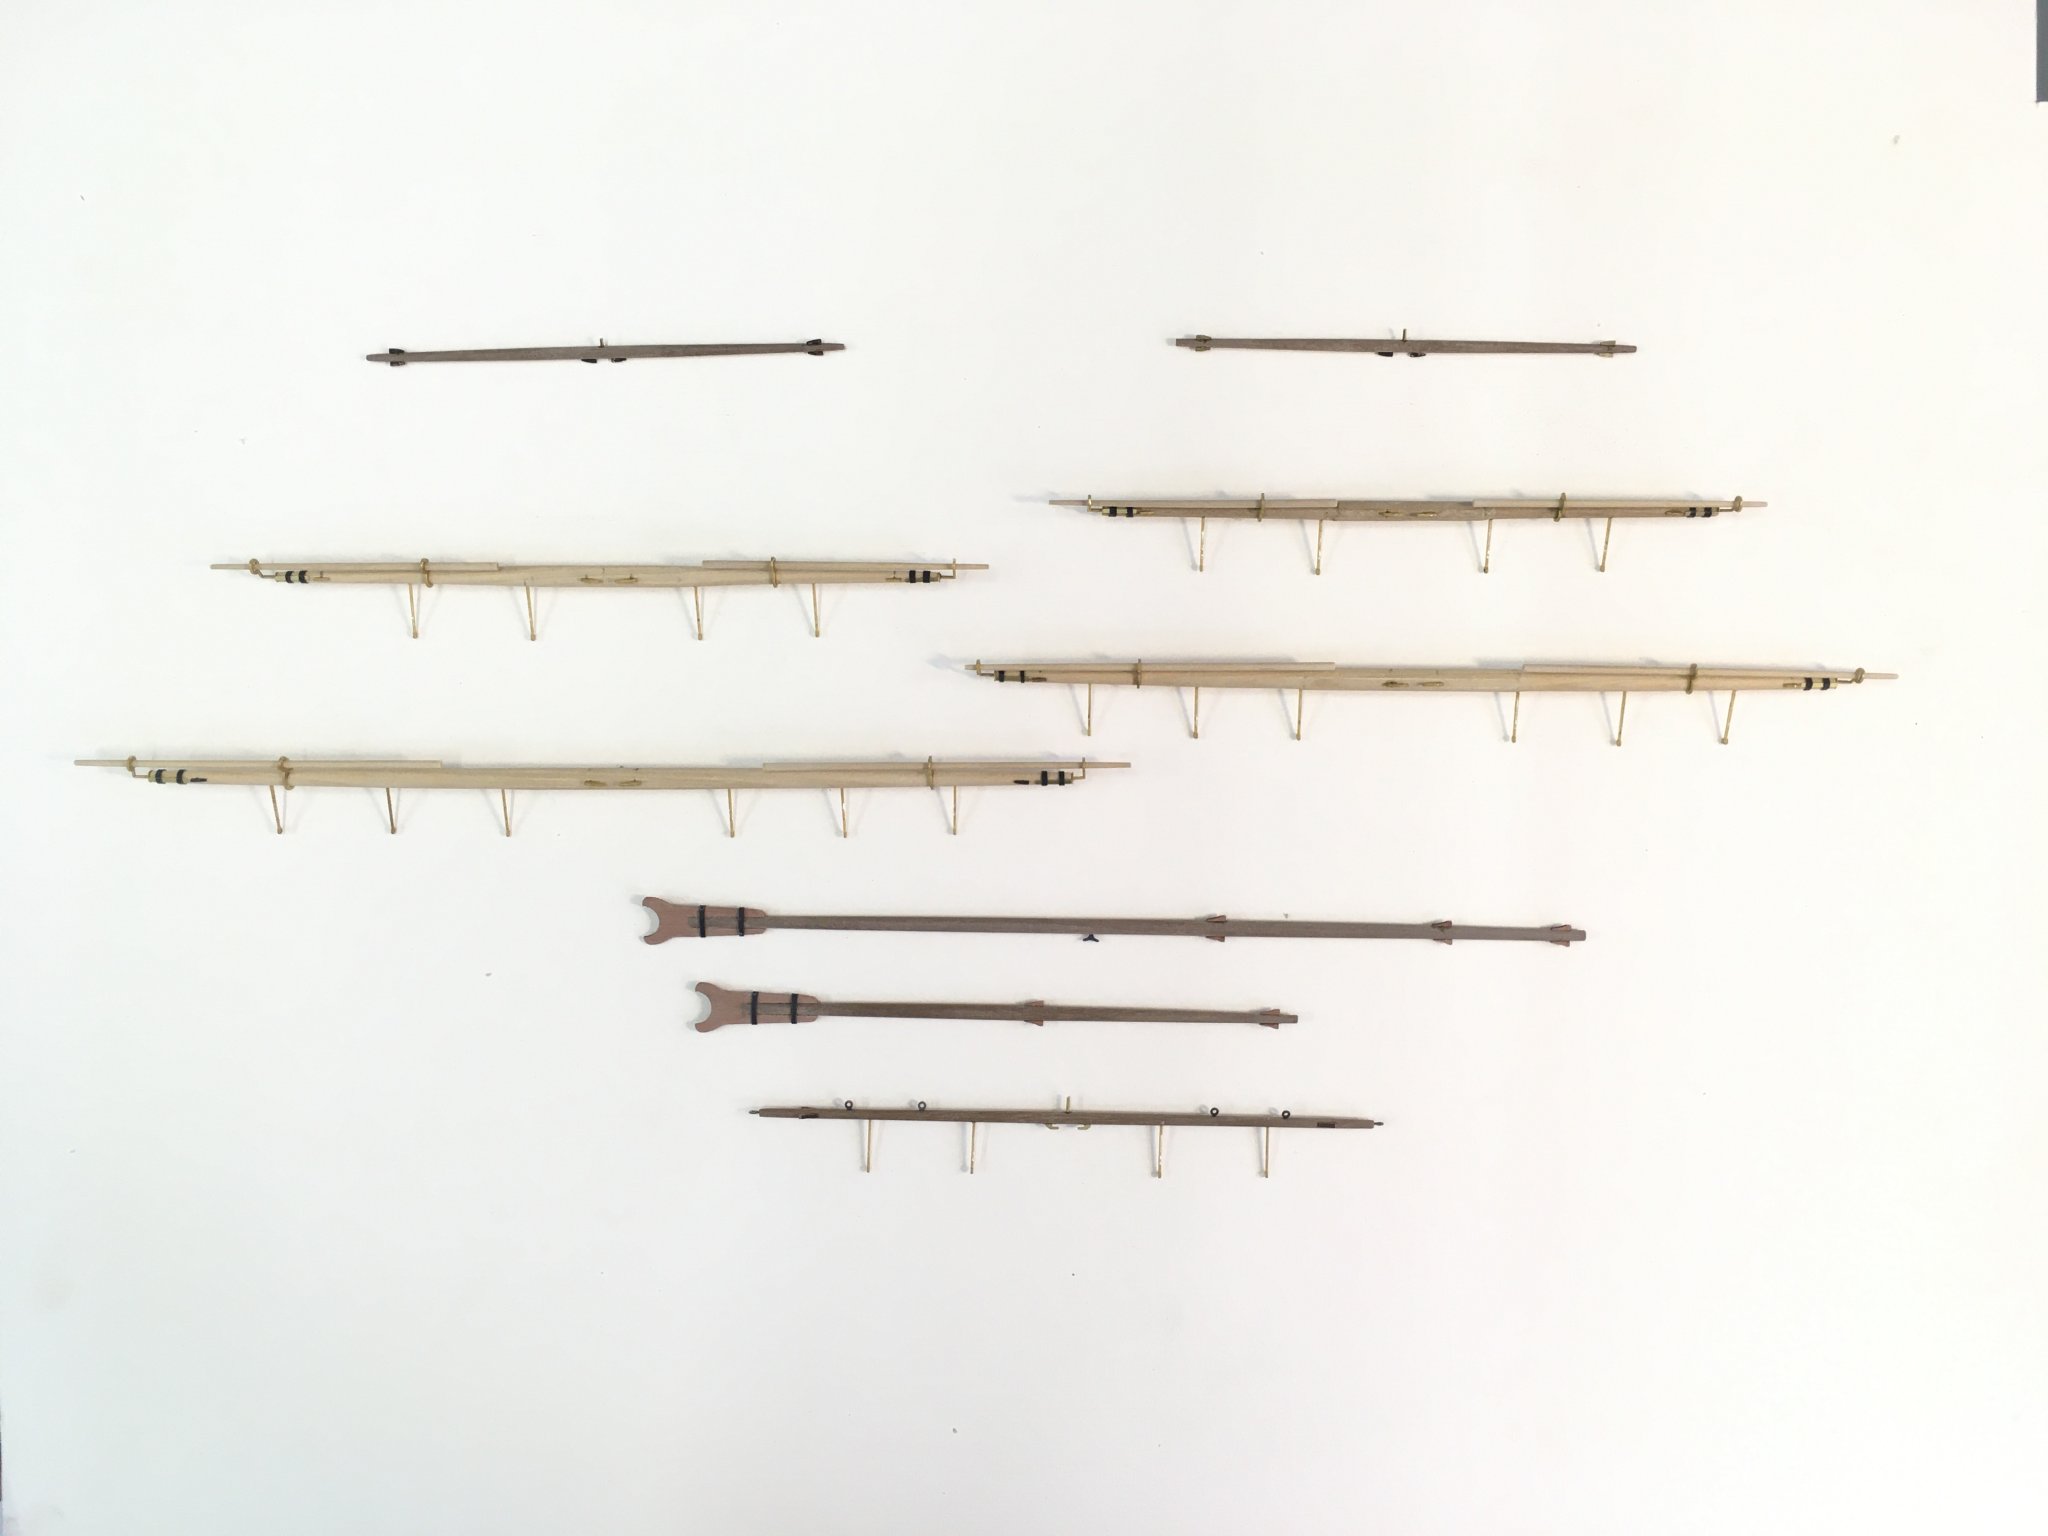
Here's the various yards and booms:
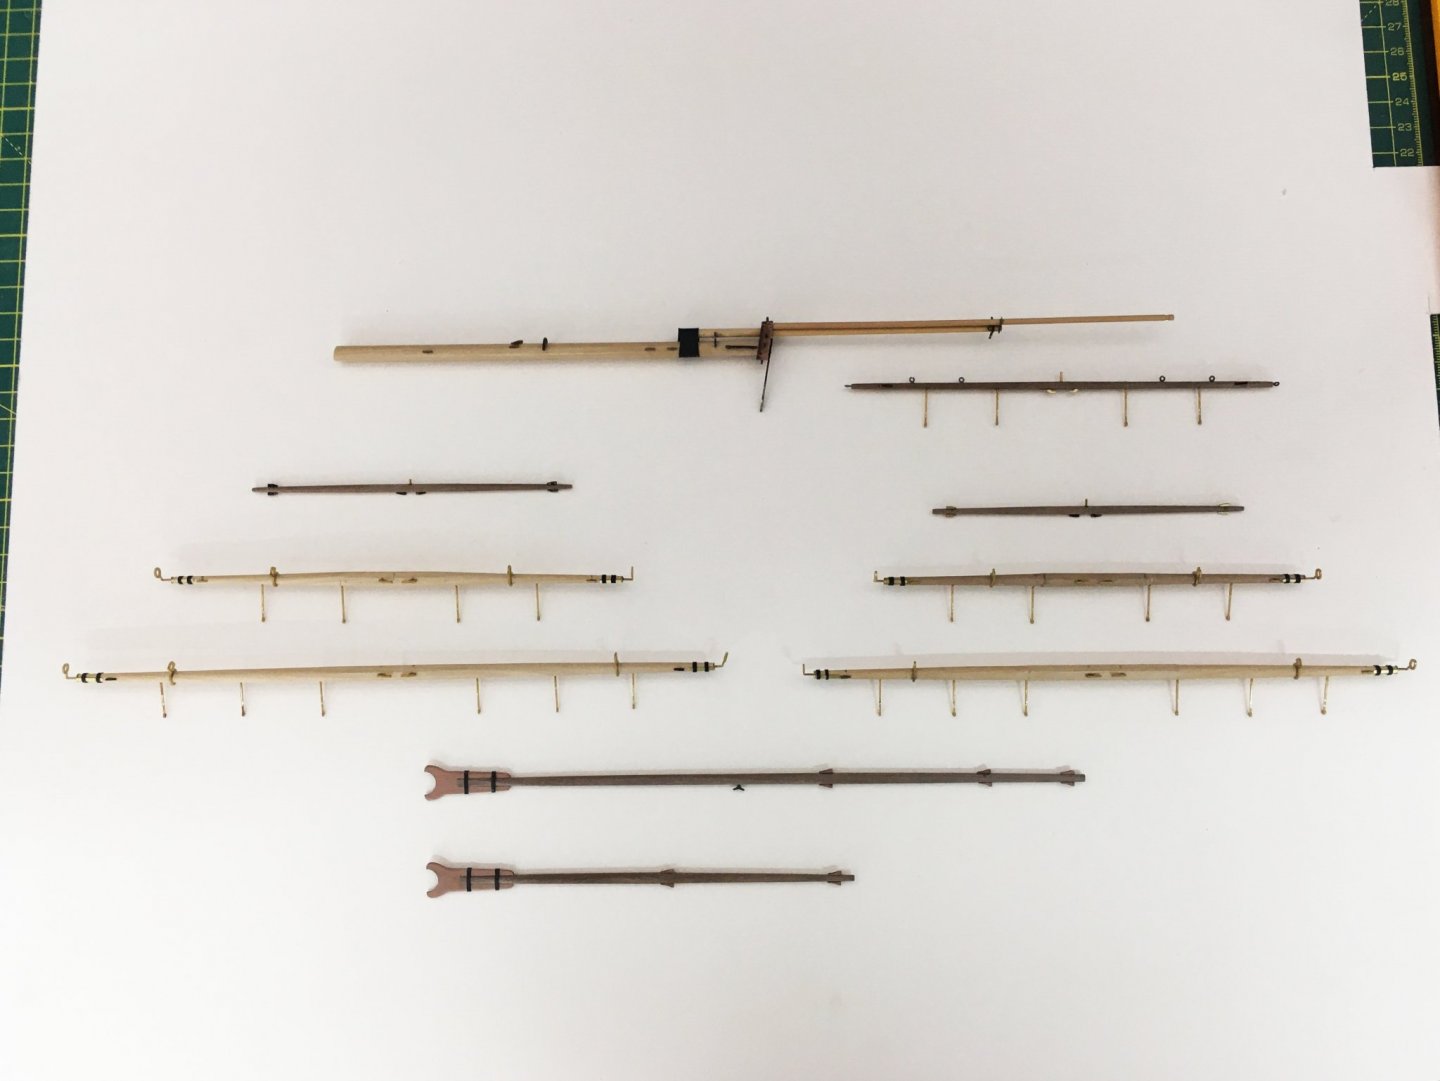
Everything is just awaiting painting and rigging with blocks etc before fitting to the ship.
I'll post a few more pictures on some of the detailed points of interest once I get them sorted (other domestic duties are intruding on dockyard time just now!).
Derek
- Barbossa, VTHokiEE, Nunnehi (Don) and 6 others
-
9
-
-
7 hours ago, mtaylor said:
Like a desk at the office, a clean work bench is the sign of a sick mind and work not getting done
At last - an argument in favour of untidyness! Can I use this one with my wife?
-
Glenn, you have created a thing of true beauty. Those shots of the completed hull are simply stunning. The best compliment I can make is that your planking is indistinguishable from that of the master, Chuck Passaro.
I agree with Lou on treenails. They're clearly a matter of personal preference but all too often they can make the ship look like it has a bad case of the measles. For me, leaving them off and not over-doing the caulking allows the eye to focus on the beautiful lines of the ship and the superb planking. Perfect.
Thanks again for the detailed explanations which I shall bookmark under 'planking tutorials', as before. This is yet another model I'm going to have to add to my ever-growing wish-list!
Derek
- Ryland Craze, bruce d, BobG and 3 others
-
6
-
Looking really good. Novel use of sugar/flour shakers and oven mitts!
- chris watton and Baker
-
2
-
Excellent description of how you use the Byres saw Glenn. I've had mine about a year now but I'm still learning how best to use it and I'm definitely going to adopt one or two of your tips - especially the wood block you use to keep the work snug against the fence.
One point I wasn't sure about. I knew from Jim's instruction sheet that you are supposed to tighten the front fence knob first, then the back. However I thought the 0.005" relief was built into the fence - I didn't realise you had to push the back end of the fence to achieve that offset. Or have I misunderstood something?
Thanks again for a useful tutorial.
Derek
- Ryland Craze, Canute, glbarlow and 1 other
-
4
-
46 minutes ago, drumgerry said:
feel you need a thickness sander in your life! Sawn planks surely need tidying up after ripping even if they're close to final thickness?
Not if you’ve got a decent table saw. My Preac leaves a virtual mirror finish; the Byrnes saw has a micrometer stop accurate to 0.01mm and the finish is nearly as good. The downside is cost. I was lucky, buying the Preac years ago before prices (and import duties) got silly and the Byrnes more recently off eBay for a bargain.
If you can stretch to a Byrnes saw (or strike lucky like me in the second hand market) I’d highly recommend getting one.
Derek


HMS Flirt 1772 by drumgerry - Vanguard Models - 1:64 Scale.
in - Kit build logs for subjects built from 1751 - 1800
Posted
Good questions Gerry. Strake is the term for a whole run of planks from bow to stern. In full size ships the garboard strake would consist of several planks laid end to end; we modellers tend to use a single plank for convenience especially where it won't show.
That's the easy question answered! Personally I find the garboard strake/plank the hardest to fit. I find the most important thing is not to let the plank rise too far up the stem at the bows. If you do you'll struggle to get all the rest of the strakes to fit in the remaining area. Have a look at Speedy:
You'll see at the bow end that the plank has been shaped to follow the curve of the stem along its bottom edge. Although it's not obvious from the photo, if your eye was level with the garboard plank it would look as close to a level, straight line as possible - the idea being that the next strake up will be as easy as possible to fit. Eyeballing that straight line before you fit the plank should show you where the top edge of the plank should meet the stem. At the stern the plank doesn't need to be tapered; rather, the area to be covered is wider so you'll end up inserting extra planks ('stealers').
The only comfort I can offer is that this is easier to do than to describe! I hope this helps, but please know that I'm by no means an expert. I'm sure a search through the forum for advice on garboard strakes would produce a wealth of information.
Derek