


DelF
-
Posts
1,398 -
Joined
-
Last visited
Content Type
Profiles
Forums
Gallery
Events
Posts posted by DelF
-
-
Hi Gerry
Yes, I fitted the laser etched deck onto the false ply deck before I decided to lay the boxwood planks. By then it was too late to remove the laser deck so I just had to make my planks thin!
Derek
-
24 minutes ago, drumgerry said:
If I don't put the boxwood on top of the laser etched maple deck do you reckon I could use planks of 0.75mm or even 1mm thick and still not interfere with the position of the guns? Also did you stick with the same width of boxwood deck plank as on the laser etched maple deck? Hope you don't mind me asking.
From memory (I’m not in my workshop so can’t check) the false deck is 0.8mm. I used 0.5mm planks on top of that so you should be fine with 1mm planks if you’re leaving the false deck off.
I cut mine 3.5mm wide which is 9” at full scale. I think that matched Chris's deck midships, although he showed the planks tapering towards the bows and stern. I suspect that may have been poetic licence on his part - I’m sure a naval dockyard would have preferred to deal with nice straight boards, leaving sophisticated planking layouts to super-yachts! Having said that, Chris puts a lot of research into his designs so he may have found information to prove me wrong.
Be good if you could try reproducing the margin plank and joggling though - a nice visual touch which isn’t as hard as it may look.
And of course I don’t mind you asking - that’s the great thing about this forum - I’ve learned so much from other members, I welcome the opportunity to put something back.
Derek
-
Odd thing is Tim, castello boxwood comes from Paraguay, so I don’t know why it’s easier for us to get hold of?
Derek
-
Hi Drumgerry
Great to see another Vanguard model log.
I was seriously tempted to get Flirt - I suspect it’ll be even better than Speedy now that Chris does his own laser cutting. However it’s very similar to Speedy so I’m waiting for one of Chris’s future models.
That’s an impressive chunk of castello! I also get mine from Timberline and I’ve always been happy with their service. I normally buy thinner boards - either 4mm, 6mm or 12mm and usually 1m X 100mm. If I want planks I just slice them off the edge of the appropriate board. Similarly, for spars I just cut square lengths then plane/sand them to round. You’ve probably got several models-worth in your board!
I’ll follow your log with interest (and I’m glad you found mine useful).
Best wishes
Derek
- BobG, Ryland Craze and drumgerry
-
 3
3
-
I've always left flags off models as I could never get them to look realistic enough. You've managed it beautifully, and I'll certainly have a go with your method in future.
And I'm strongly tempted to get the barge having seen your superb work (once I've finished several other items already in the dockyard!).
Derek
-
You've done a fine job on those gunport patterns James. As you say, any slight irregularities will be hidden by the planking.
I found this part of the build a challenge, but you've nailed it (unintentional pun
 ). Well done!
Derek
-
2 hours ago, Vane said:
great to see how Chris designs evolve over time and small new things are added making everything simplier
I agree - the etched numbers and words on components make the kit even more foolproof. I think I'll have to add the Duchess to my Christmas wish list.
- chris watton, Canute and glbarlow
-
3
-
-
20 hours ago, glbarlow said:
Being a great modeler is not making the mistake in the first place
"The man who makes no mistakes does not usually make anything" Edward John Phelps 1899
- BobG, glbarlow, Ryland Craze and 2 others
-
5
-
Thanks Glenn.
4 minutes ago, glbarlow said:I really hate that I’m now going to have to buy a lathe...
You really can do most of this stuff with a drill or rotary tool securely mounted. The advantage of the lathe is that the hollow headstock enables you to hold long spars in the middle, as I did with Speedy's main yard. The good news is that wood lathes are a lot cheaper than metal working lathes. The Proxxon one I use would probably go for less than $200 in the U.S.
Do what I do when I want a new tool - put your valet on short time for a few weeks and save the money that way 🤑🤪
Derek
- VTHokiEE, BobG, Edwardkenway and 1 other
-
4
-
Spars #2
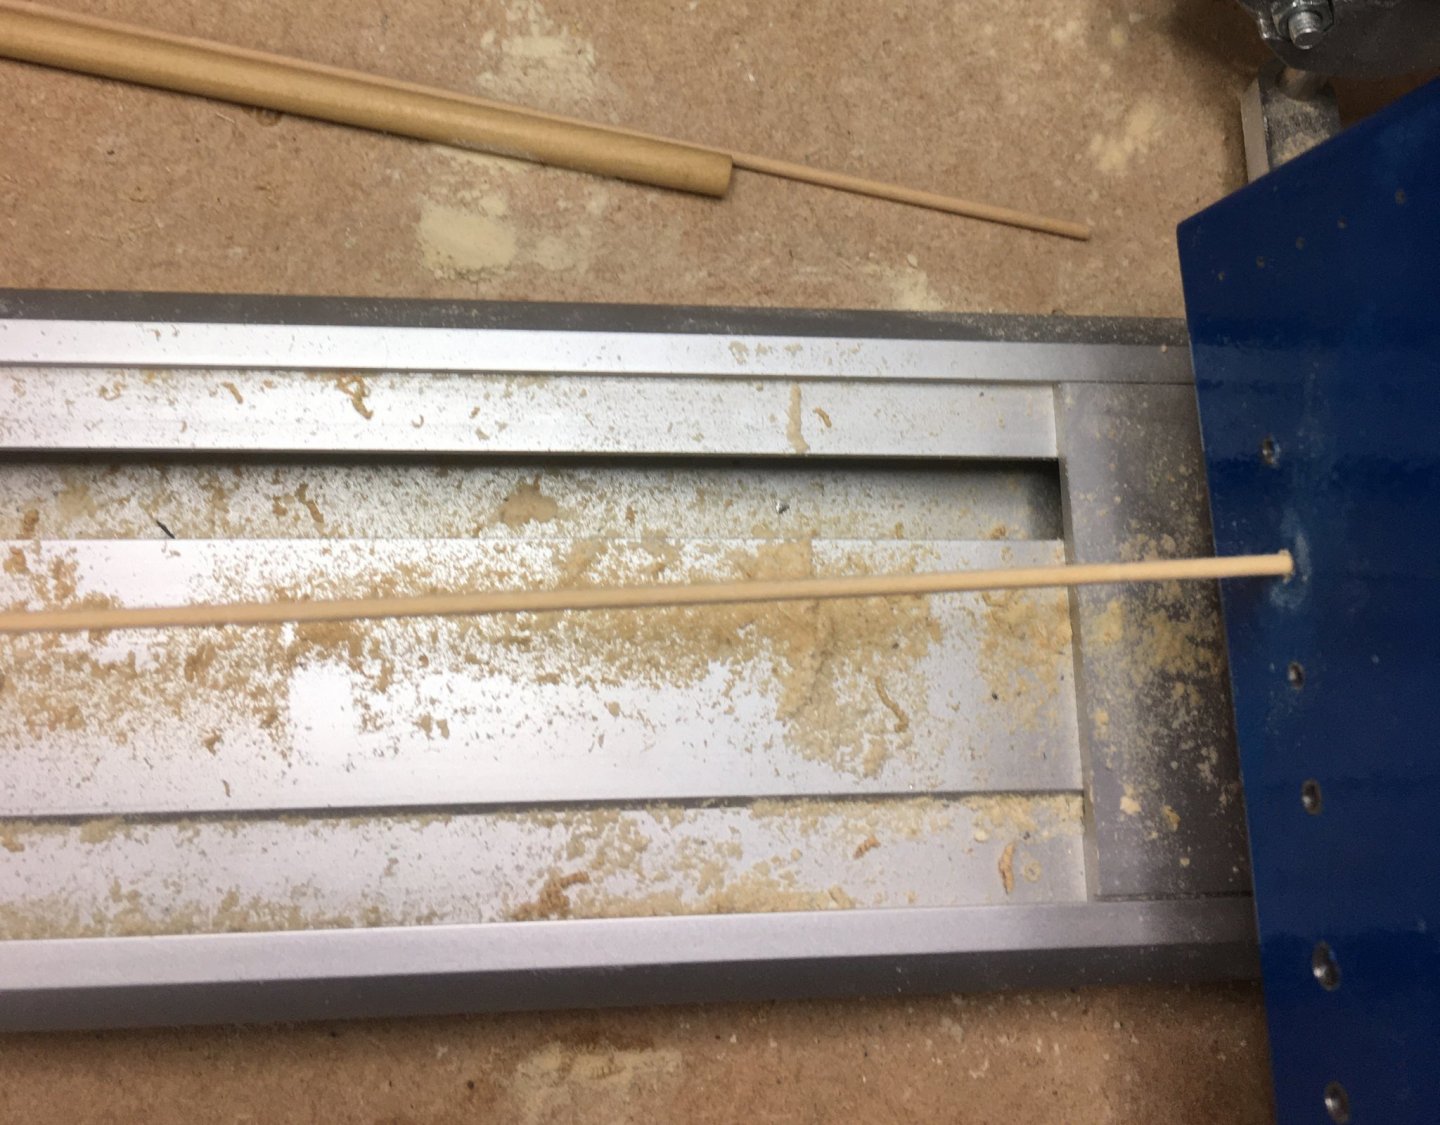
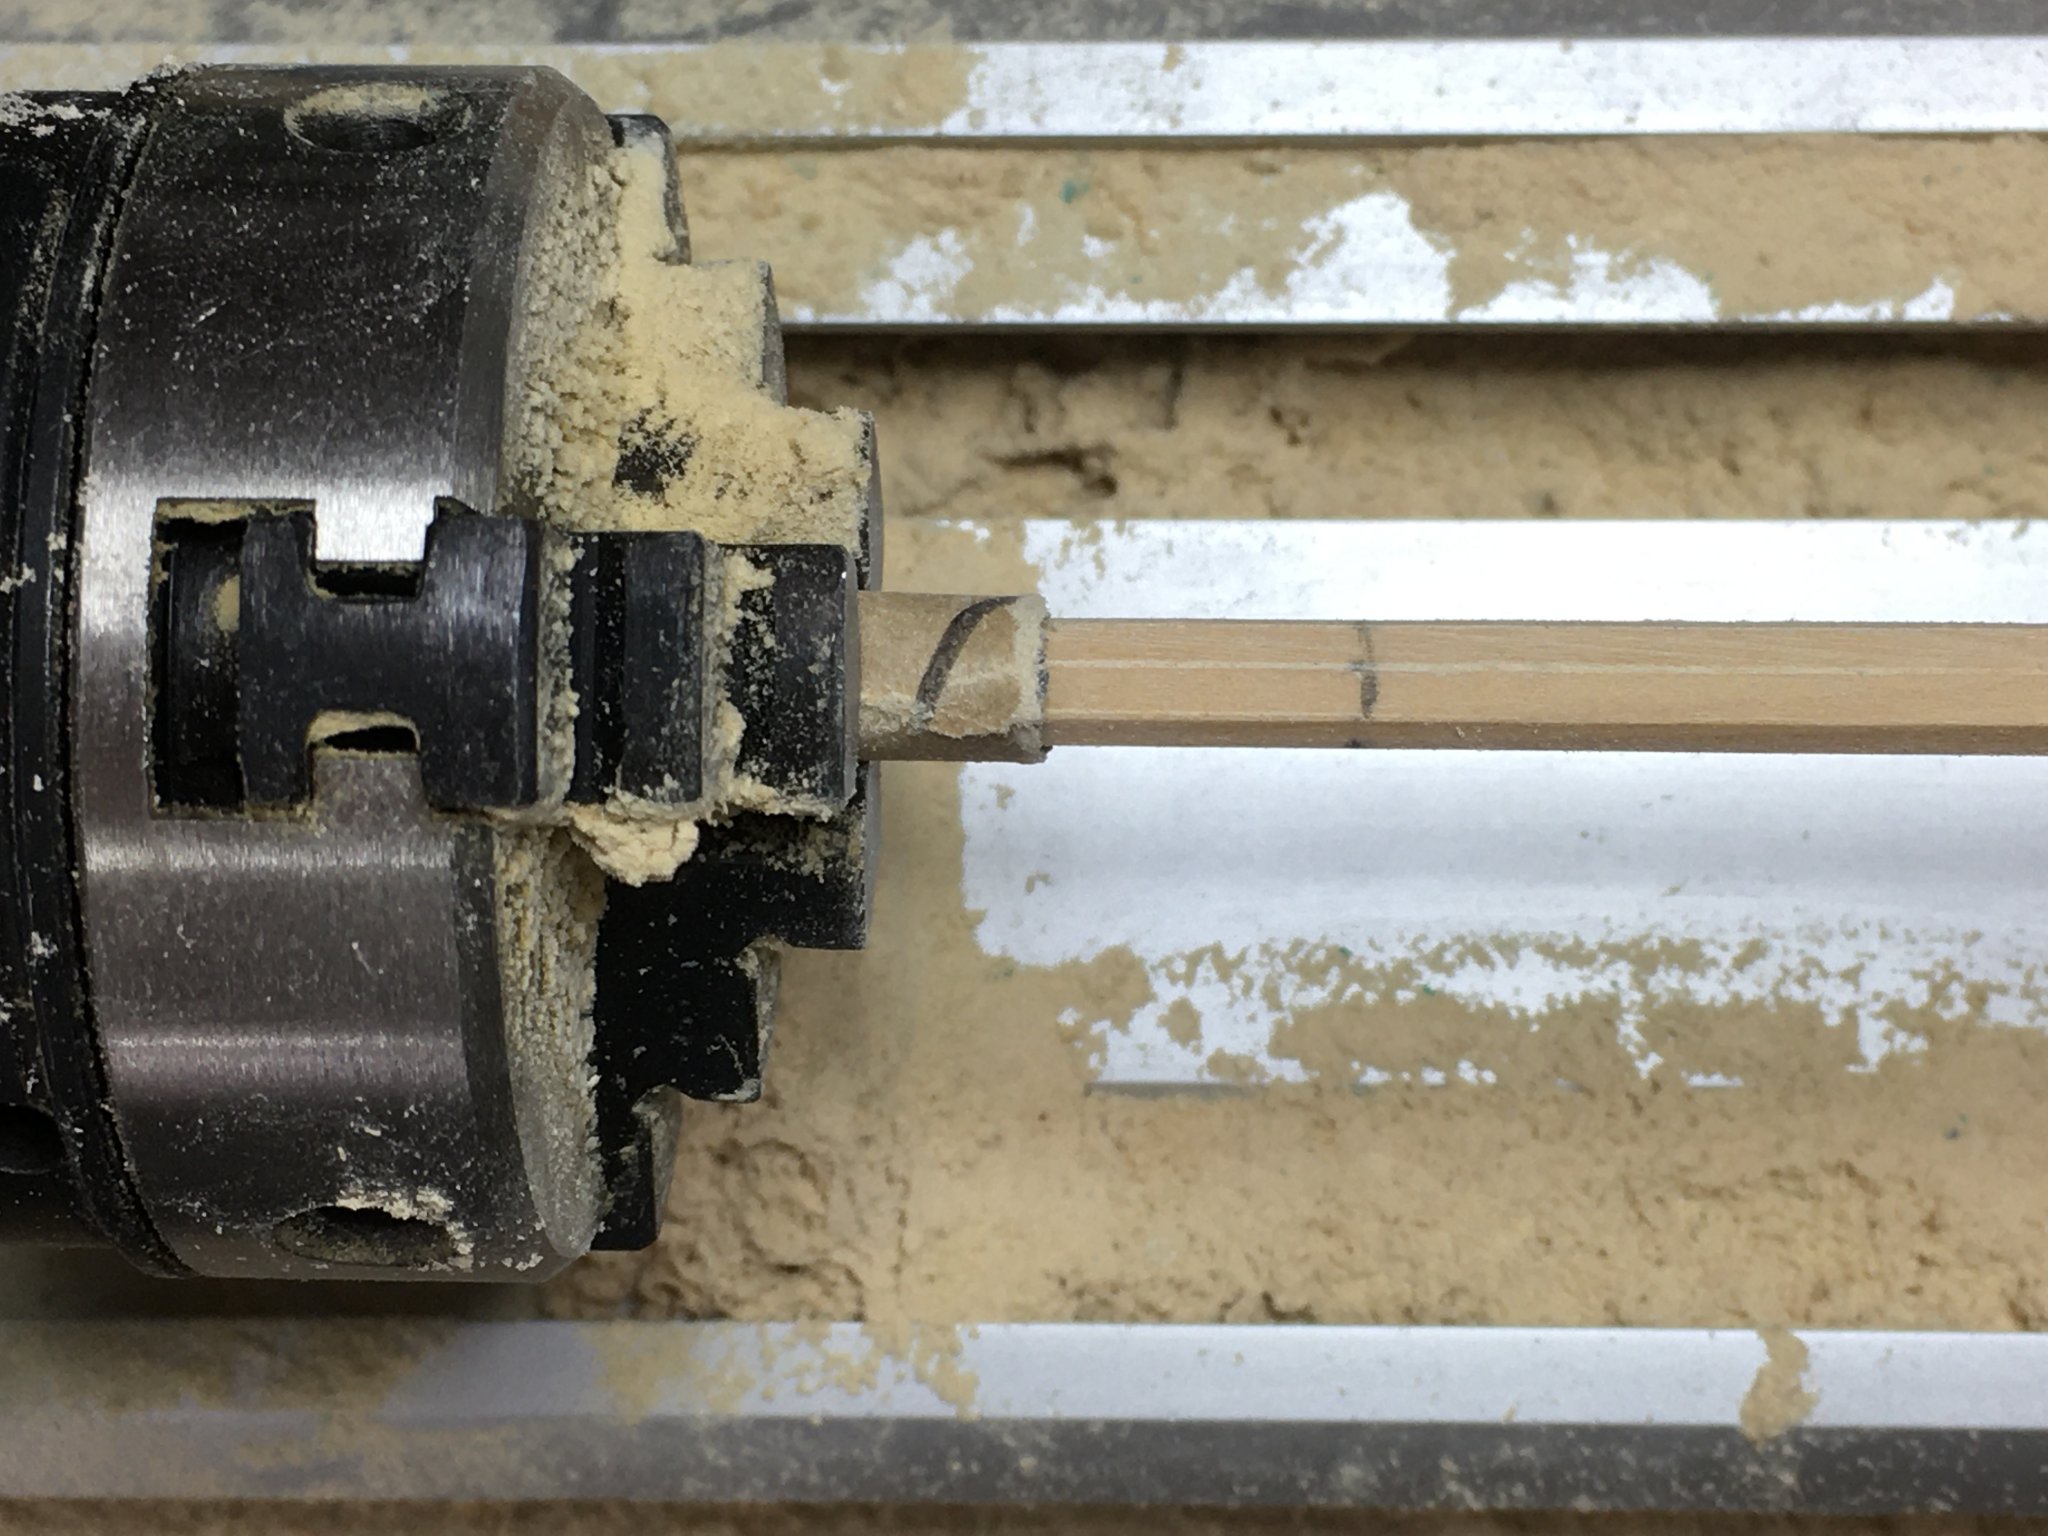
The thinnest spars are the flying jibboom and the stuns'l booms, all 2mm. The latter are unpainted so need to be made from box like the masts. In both cases I doubted my ability to use the square/octagonal/round method I use for larger spars so I tried an alternative. On my recent English Pinnace build I used a homemade drawplate to make the oars. These were 2.4mm in diameter so I saw no reason why I couldn't use the same method here. I explained the method in detail in my pinnace log, including how I made the drawplate. I really would urge anyone to have a go at this if they need to make small diameter dowels. It's not hard, and just requires a suitable piece of steel (eg an old steel ruler) and some decent drill bits. I've got a set of 1mm to 6mm bits in 0.1mm increments which is ideal. The pinnace log has plenty of pictures, but here's a couple for Speedy.
The first one is a bit daft really - the spar is spinning so you can't see it's square going into the drawplate! But at least you can see it will handle a reasonable length.
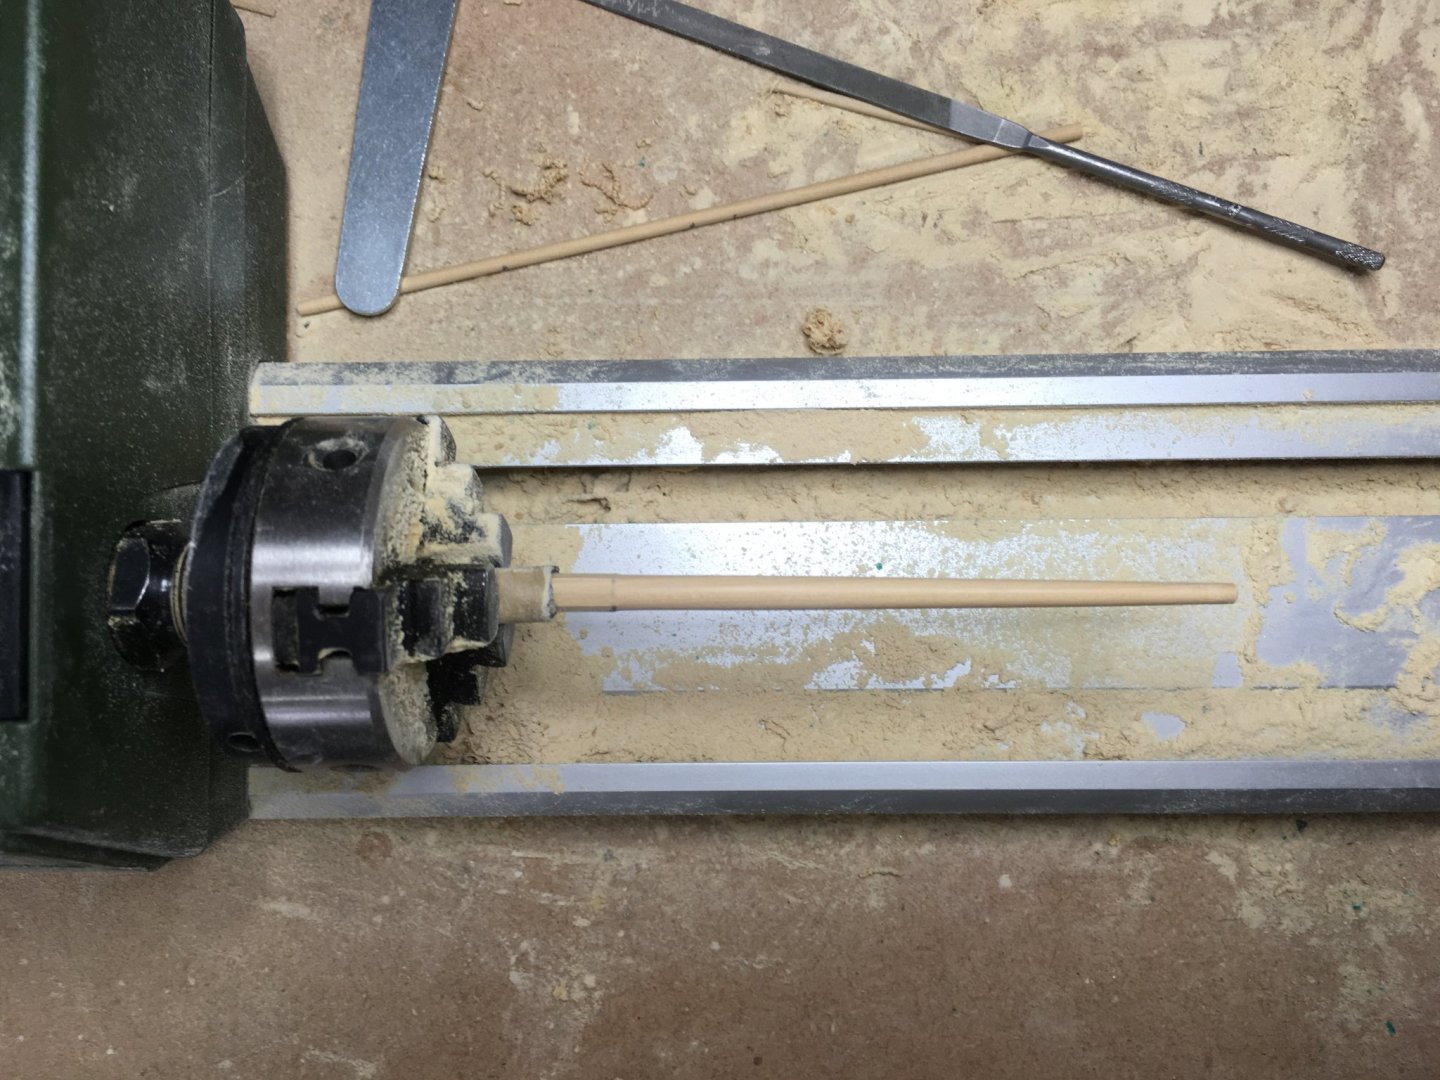
Here's the drawplate right up to the chuck:

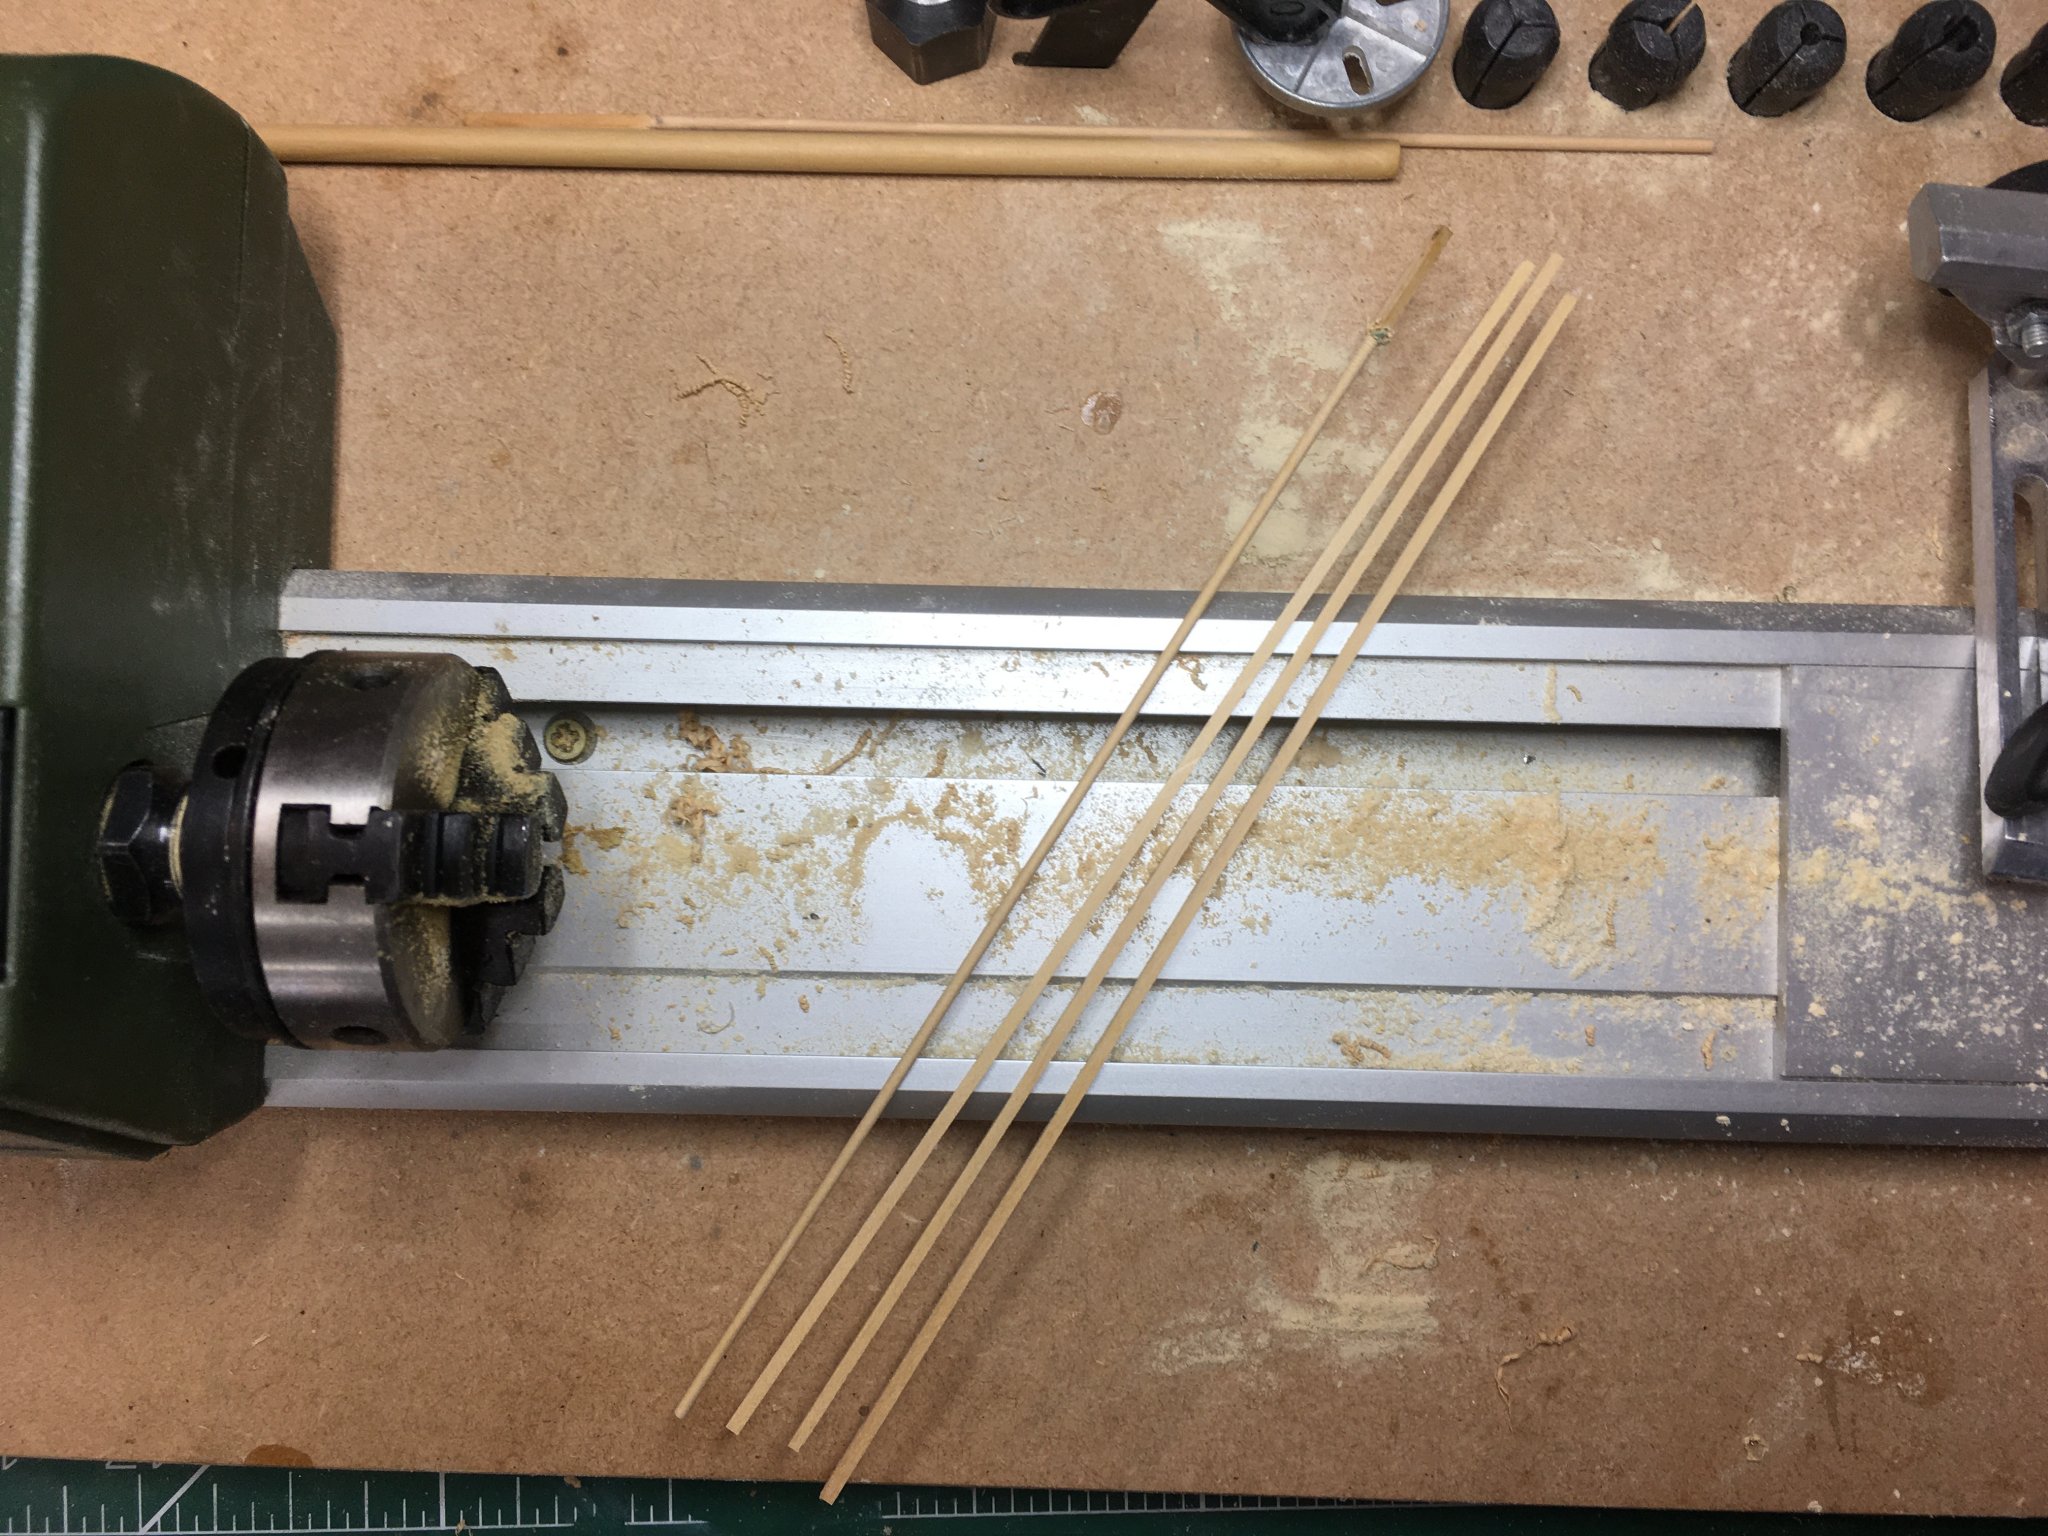
And the first of four dowels completed. These four will be enough for all 8 stuns'l booms, and the flying jibboom is visible at the top.

A lot quicker, easier and more accurate than sanding ( although of course the stuns'l booms will require tapering).
I've tried the technique with larger diameters but with less success. For some reason larger holes in the drawplate tend to leave unwanted spiral grooves in the wood. I may do a bit more experimenting in the future, but for now I'm happy using the plane-to-octagon method with anything over 2mm.
Derek
-
Spars
Rather than wait until I've completed all the spars I thought I'd do two or three posts to log progress.
As I mentioned earlier I decided to make all the masts from boxwood, starting with square stock, planing it to octagonal then sanding to round where necessary (see post #187).
I also decided to make all the yards from kit-supplied dowels as these would be painted black.
I'll start with a couple of exceptions to these decisions. First, the main and fore yards have octagonal centre sections. Chris suggests starting with 6mm dowel, creating the octagonal section with a file and then sanding the rest. I thought it would be easier to start with square stock, plane it all to octagonal then sand all but the centre section.
I started with over-length square stock, planning to leave enough spare wood at each end of the yards to grip in the lathe chuck. However I decided that sanding a ten inch stick with only one inch held in the lathe was making the job harder than it needed to be. Instead, I wrapped a small piece of sandpaper round the centre section of the yard and held that in the chuck. The sandpaper provided enough grip to hold the stock firmly but without damaging it. I was then able to sand each end in turn.

I was slightly surprised to see that the plans call for the fore and main yards to be identical, although Chris notes that Cochrane is thought to have lengthened the main yard by a few feet (Chris suggests 15 - 20mm). I don't know how far unrated vessels like Speedy conformed to rules current at the time for larger ships, but lengthening the main yard as suggested brings the ratios of the various spars much closer to the 'norm' - namely that the main yard diameter should be 0.9 X the main mast diameter and the fore yard 0.875 X the main yard.

I'll cover the second exception to my decisions about spars in the next post.
Derek
- Blue Ensign, VTHokiEE, BobG and 1 other
-
4
-
Lovely, atmospheric model (I can almost smell the herring!) and another excellent build log. What's next in the dockyard?
Derek
- Blue Ensign, Mirabell61 and BobG
-
3
-
15 hours ago, Vane said:
The bow is abit fiddly to get in place but slowly getting there
Have you tried bending the head rails in a bit, so they make better contact with the cross rails? See here
9 hours ago, SpyGlass said:is there a reason why you didnt drill many of them from outside along with the premarked gunport bolts before second planking
I thought this was a really neat aspect of Chris's design.
-
Good grief, what a beast. I'd have to move to a larger house to accommodate it and probably dismiss the butler to afford it!
- mtaylor, James H, FrankWouts and 2 others
-
5
-
11 hours ago, BobG said:
I just read through your build log and all I can say is just WOW! Magnificent!!
Thanks Bob - glad you enjoyed it!
-
50 minutes ago, glbarlow said:
i need to stop reading these forums, I learn about too many great tools that I can’t resist
Me too! Hope you're getting on OK with the Qhands?
-
Many thanks B.E. and Joe - much appreciated.
52 minutes ago, Blue Ensign said:That Quad-hands tool looks an excellent investment, I'm tempted
I would urge you to give in to temptation! No other 'helping hands' I've owned is a patch on this - every aspect of the design is well thought out and constructed. Heavy metal base, repositionable arms with very strong magnets keeping everything stable, thick sleeves on the clips that hold work firmly but gently, and lock-nuts that enable you to lock clips once you've got them in the right position. Even the bright paint is a help, providing contrast with the material you're working on. I went for the larger one with five arms for £59.99 from Amazon but I'm sure the regular 4-armed version at £49.99 would be more than adequate - I've not yet used more than three arms simultaneously. Highly recommended (and I'm not on commission, honest!).
Derek
- Blue Ensign and glbarlow
-
2
-
5 hours ago, ErnieL said:
I now own all five of Chris’s releases
C'mon Ernie, play fair - leave some for the rest of us! Between you and Glenn it seems like Texas is cornering the market in Vanguard models.
5 hours ago, ErnieL said:574 years of quality bench time
If you rig all the guns, add another 200 years 😁
Derek
-
Beautiful model with superb presentation - well done!
Derek
-
-
12 hours ago, glbarlow said:
Plus I'm outsourcing the cannon to Derek 😄
I'd be very happy to rig your cannon Glenn, but after having let you persuade me to fully rig all fourteen guns on Speedy I think it's only right you should have the pleasure of rigging your own 🤪
Seriously though, congratulations on getting another great looking kit from Vanguard. It's good to see Chris doing well on both sides of the pond, and beyond. I was seriously tempted to go for Flirt as well, especially now that Chris is doing his own laser cutting, but I just felt she was a bit too similar to Speedy. I've got another of Chuck Passaro's small boats on the stocks to keep me going for a while after Speedy, so I've got time to wait and see what Chris comes up with next.
Derek
-
-
Thanks guys, much appreciated.
2 hours ago, SpyGlass said:That is EXCEPTIONAL WORK - can i suggest you post a pic with your finger in to remind everyone how small these guns are.
Thanks SpyGlass, and thank you also for your encouragement and for your helpful post that showed me the right way to go on frapping.
Here's the finger shot you suggested:

Derek


HMS Flirt 1772 by drumgerry - Vanguard Models - 1:64 Scale.
in - Kit build logs for subjects built from 1751 - 1800
Posted
Well handled Gerry. It's always great to see other people's mistakes - and fixes. It serves as a caution to others to avoid the same errors and brings comfort to modellers like me who are always making our own mistakes.
Good job wood is such a forgiving material!
Derek