


DelF
-
Posts
1,398 -
Joined
-
Last visited
Content Type
Profiles
Forums
Gallery
Events
Posts posted by DelF
-
-
-
10 minutes ago, No Idea said:
If the piece you want to cut is not round, glue it to a piece of round dowelling to mount it onto the dividing head.
This method works really well with the Proxxon dividing head. For example to create wooden rings for mast hoops or whatever, I superglue a piece of sheet material of the required thickness and size to a dowel (the sheet can be any shape so long as you can get the required outside diameter out of it). Once clamped in the dividing head you mill to the outside diameter then the inside and hey presto you've got a ring. If the outside of the ring needs to be chamfered you can do that before milling the inside diameter.
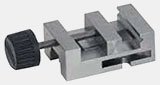
53 minutes ago, wefalck said:and more precise than the PROXXON vices
If you're talking about the standard Proxxon vices I would agree. However the precision machine vices are more than adequate for milling purposes. This is the PM40:
Derek
-
-
Only six guns? I envy you!
- Edwardkenway, glbarlow, mtaylor and 2 others
-
 5
5
-
-
Interlude
I'd decided I wasn't going to post an update until I'd completed rigging at least the port or starboard guns, but as that is likely to be some time I'll post a quick update on two tools/products I've just got.
The first is Quadhands.
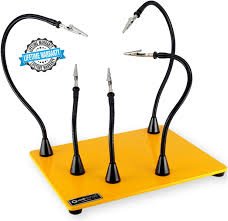
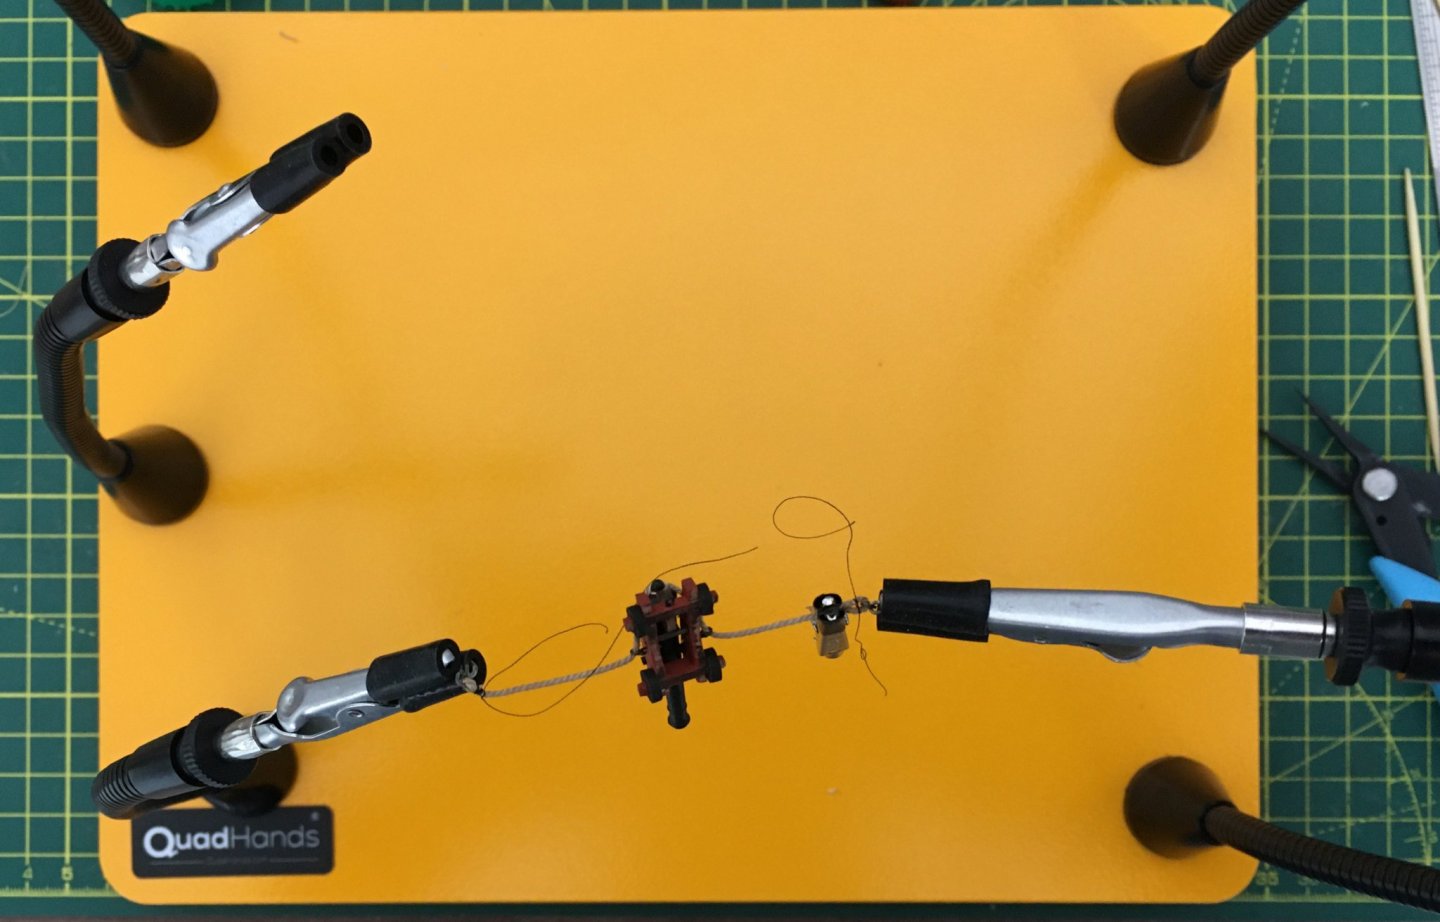
I saw this in other people's build logs and persuaded myself I needed one. I'm glad I did - it's so much more substantial and versatile than other helping hands I've used, with a solid metal base and five (not 4?) flexible arms. These are magnetic and are therefore re-positionable. Great for rigging jobs:
The second product I got for protecting Speedy's copper plates. I quickly decided not to leave the copper to weather naturally - I must have touched the hull with unprotected fingers in several places, because in a few days there were several unsightly smudges. Using spare plates I experimented with a number of varnishes, both water-based and polyurethane, but didn't like the results. Finally I tried clear lacquer. The one I bought was intended for protecting touch-up paint jobs on cars:
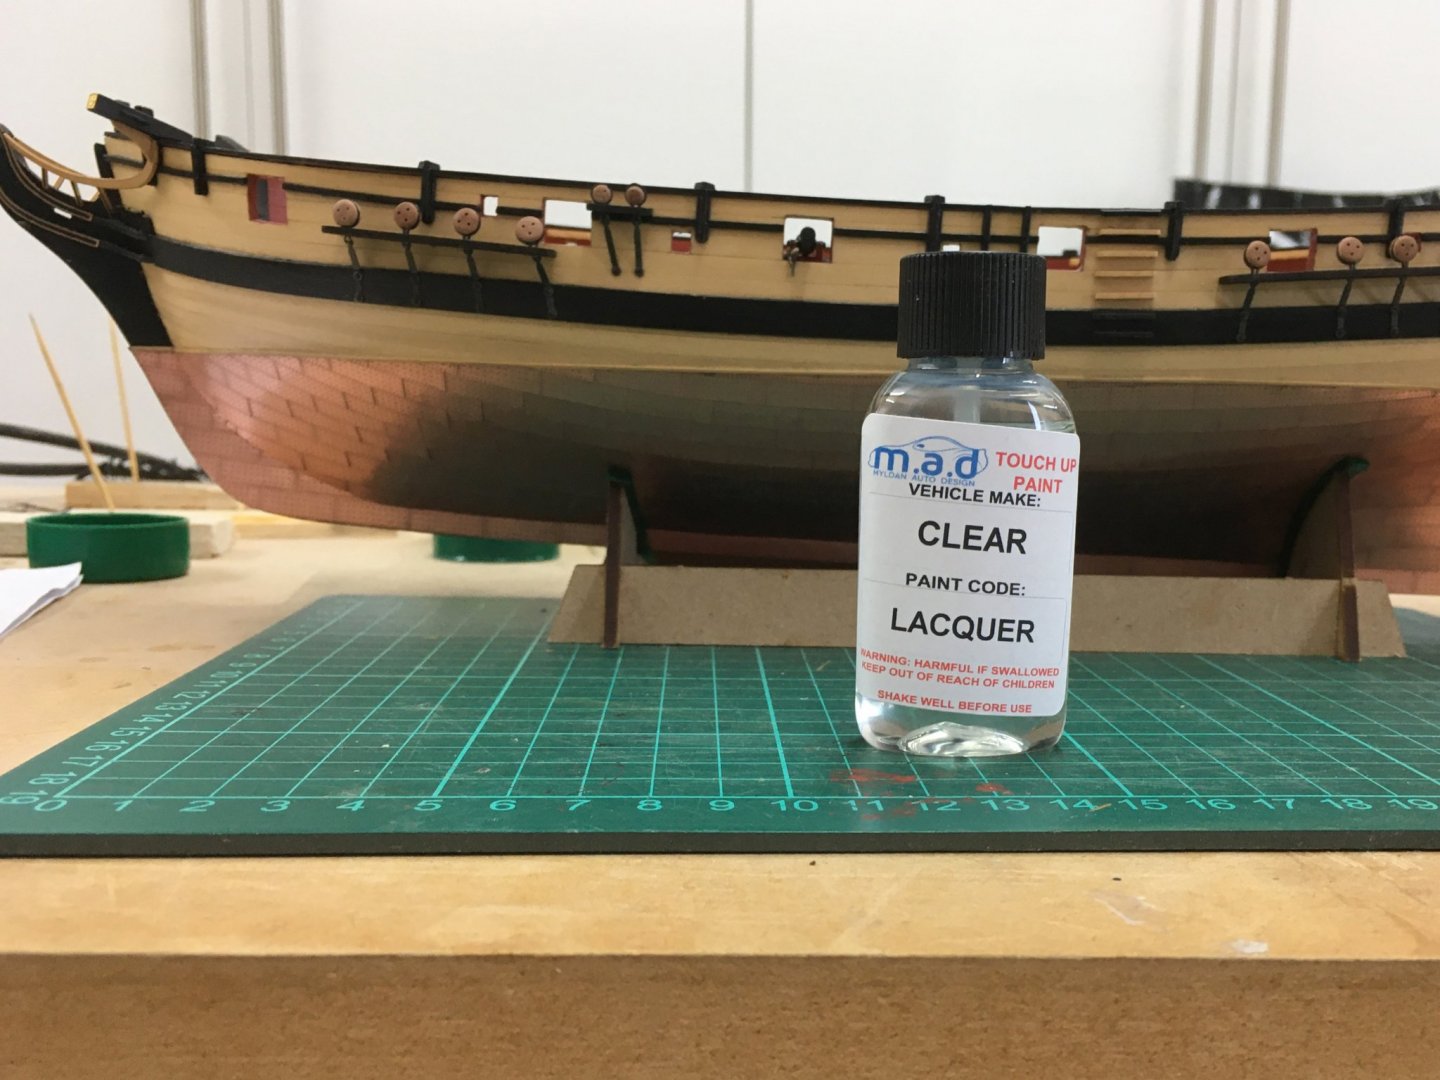
I toyed with the idea of airbrushing the lacquer but after a test I found it brushed on really easily. It dried quickly and to my eye enhanced rather than masked the copper. From now on it'll be a relief not having to worry about touching the hull.
Back to the guns!
Derek
- GrandpaPhil, egkb, VTHokiEE and 5 others
-
8
-
-
Thanks Glenn. 'Talking' these things through with you guys has really helped me make up my mind on the cannon rigging and several other Speedy issues. I'm so glad I'm taking a more active part in this forum now - it adds a whole extra dimension to my enjoyment of the hobby. So do your typos:
9 minutes ago, glbarlow said:You may have converted me on flapping
...another beaut! 😁
I've read the one about Cochrane carrying a broadside around in his pockets - all I can say is that with seven balls each weighing four pounds and just over three inches in diameter, he must have had big strong pockets!
Derek
- VTHokiEE and Ryland Craze
-
2
-
Never mind the ingredients, what shape was it?!
- mtaylor and Edwardkenway
-
2
-
Cannon Rigging (again)
OK. this may be my last post on cannon for some time. I think I've figured out how I'm going to rig them, so it just remains to actually crack on with the task. My last bit of experimentation has been around replacing the carriage ringbolts and trying to make the side tackle look more realistic.
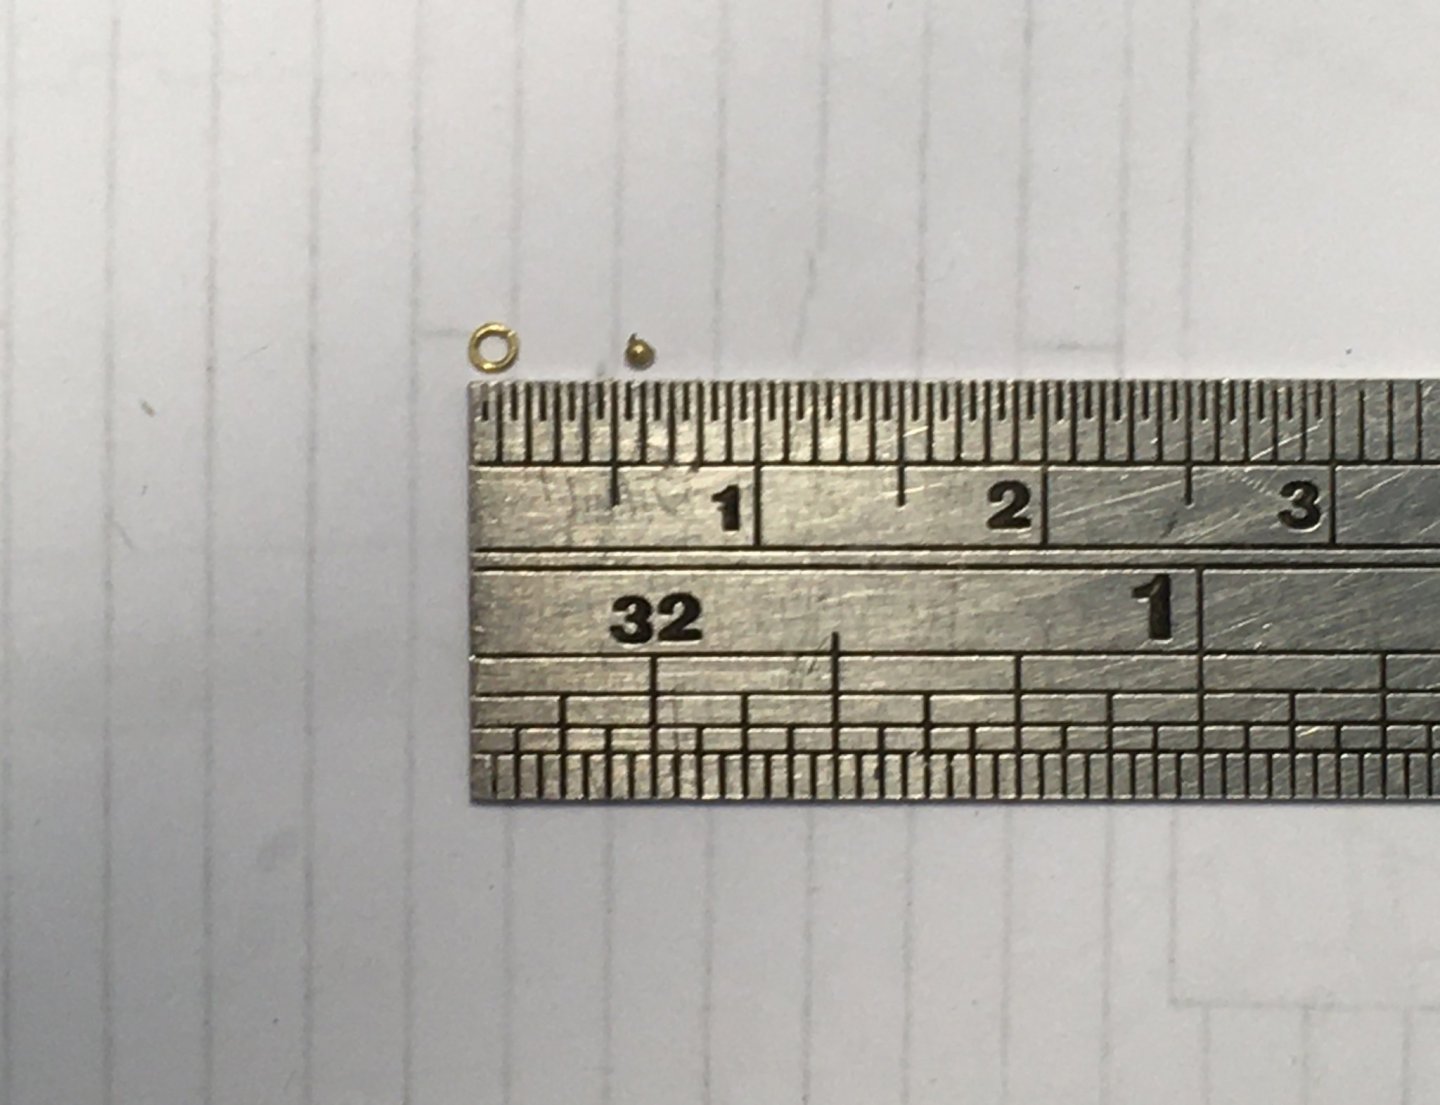
I tried forming new ringbolts from 0.3 mm brass wire, but even my finest needle-nose pliers were too big. I ended up wrapping the wire round a 0.5 mm drill bit and pinching the end round with some long-nose pliers:
Once blackened, the new ringbolts look much better, to my eye:

Side by side with the original ringbolts the difference is obvious:
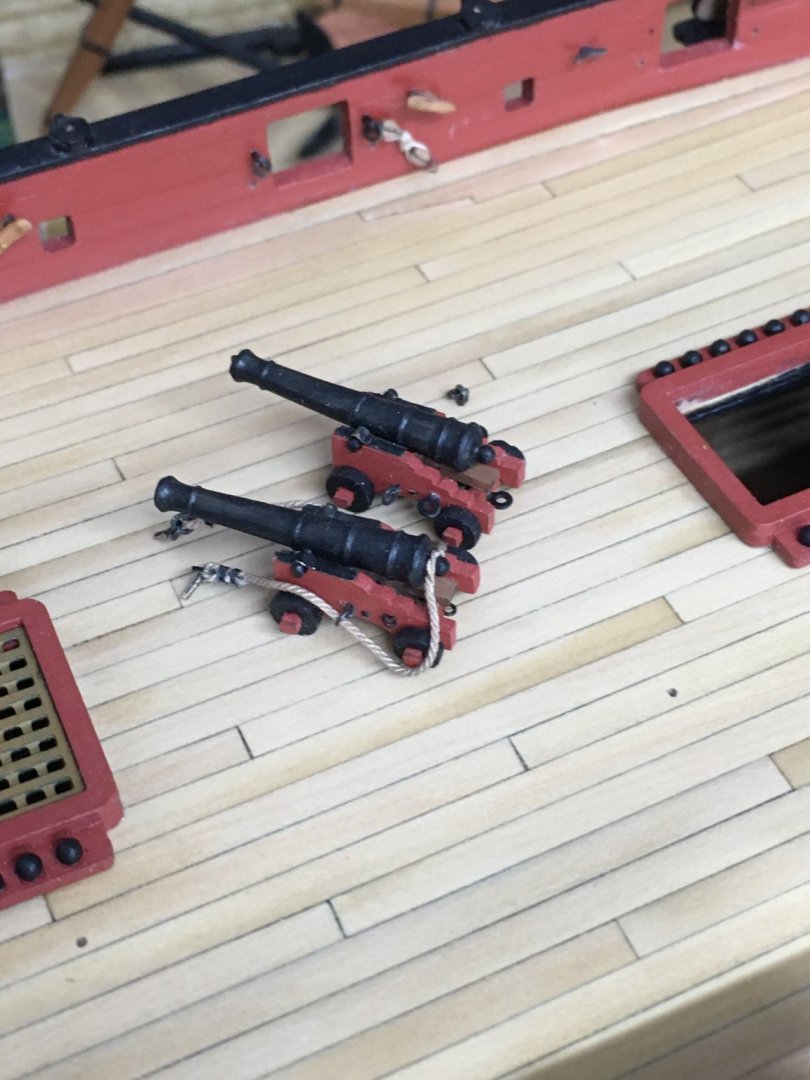
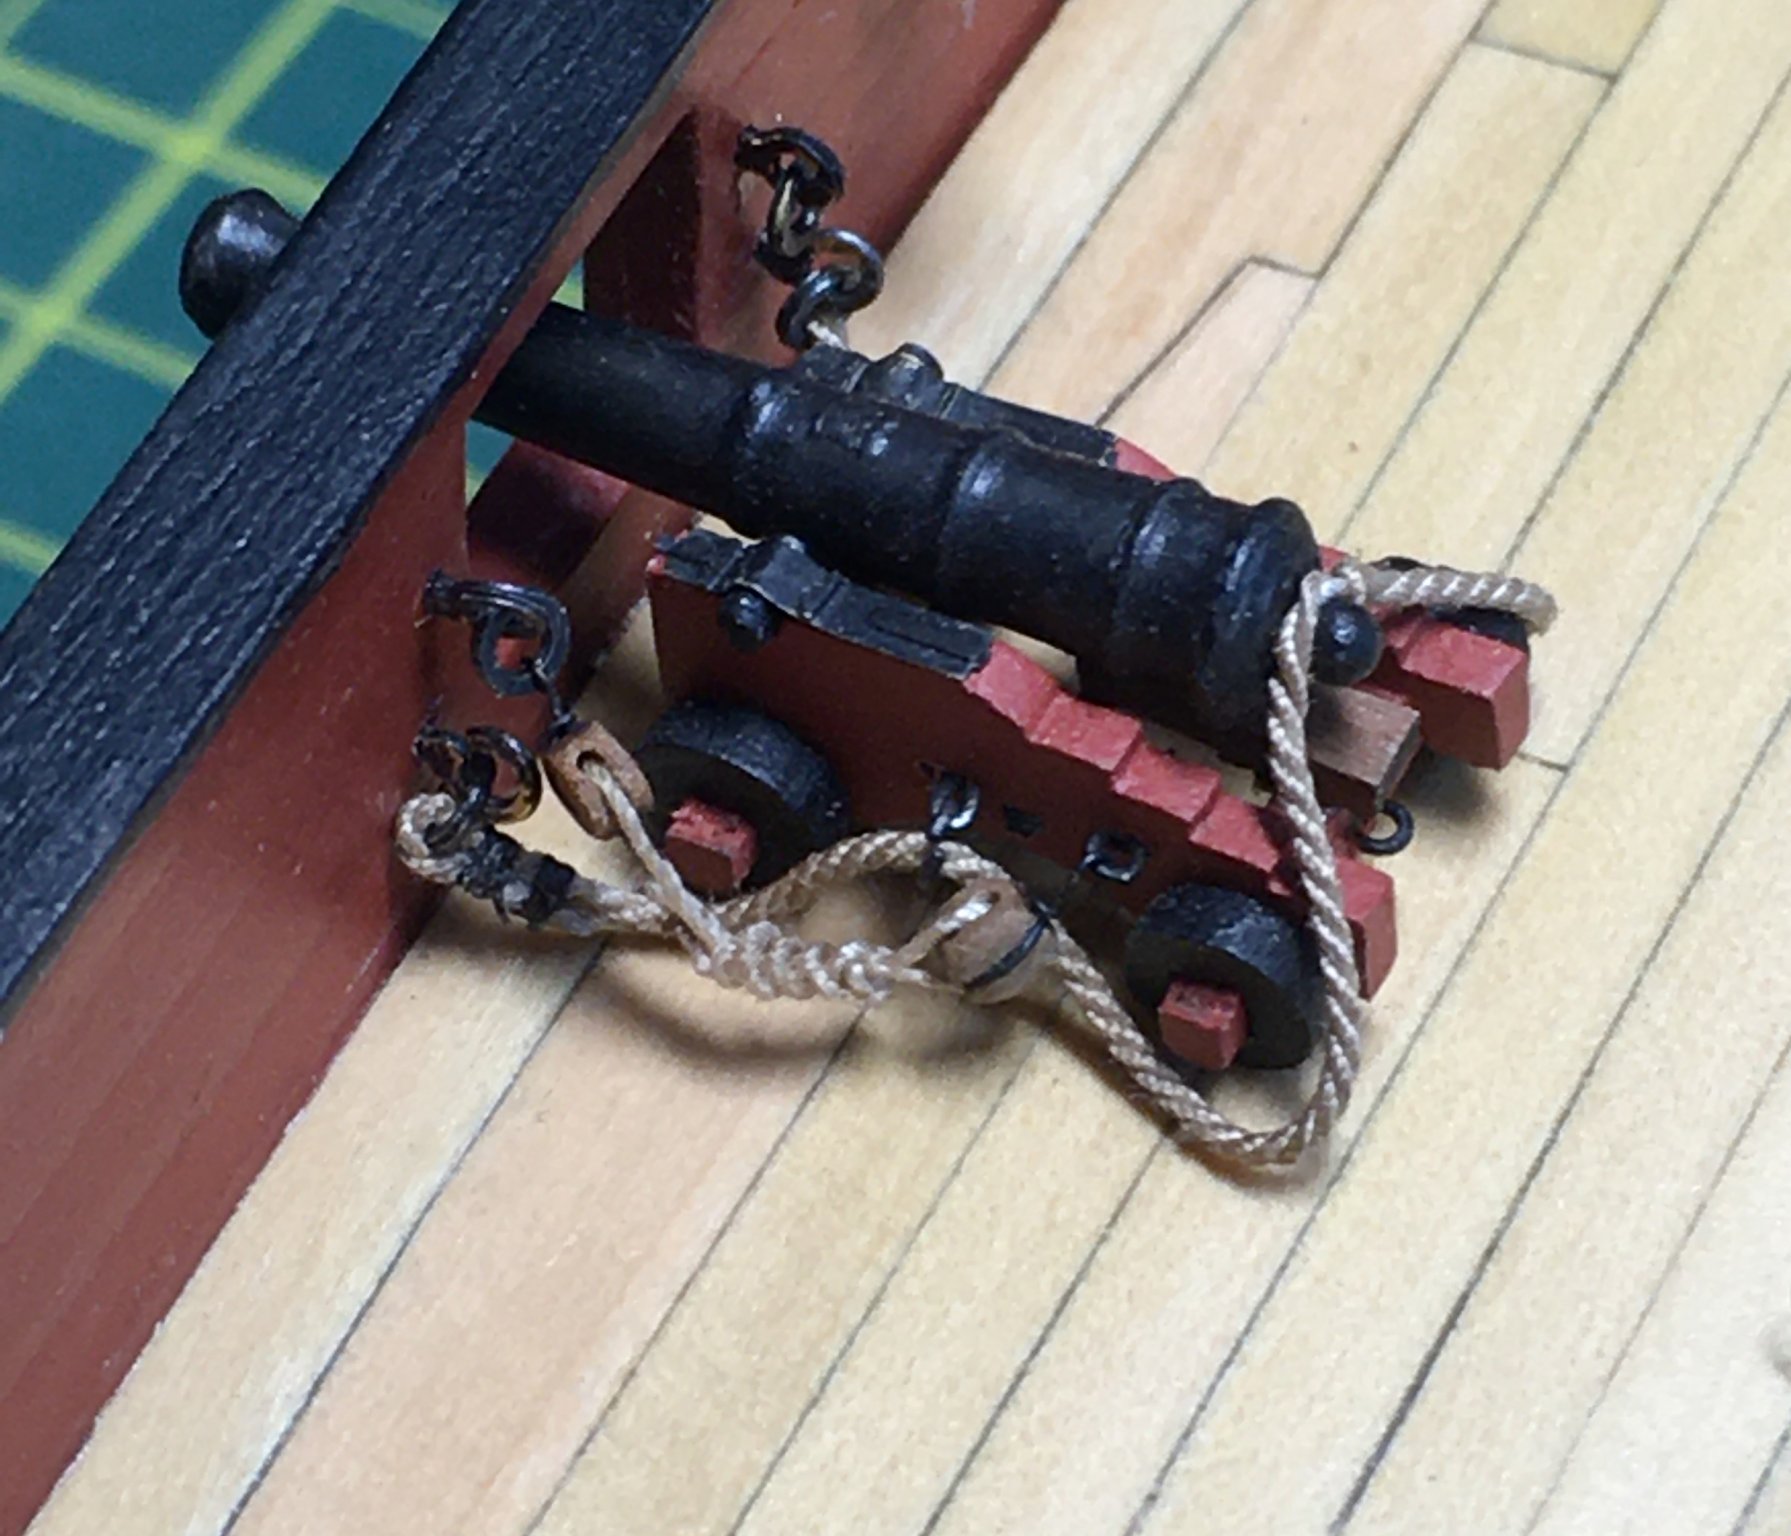
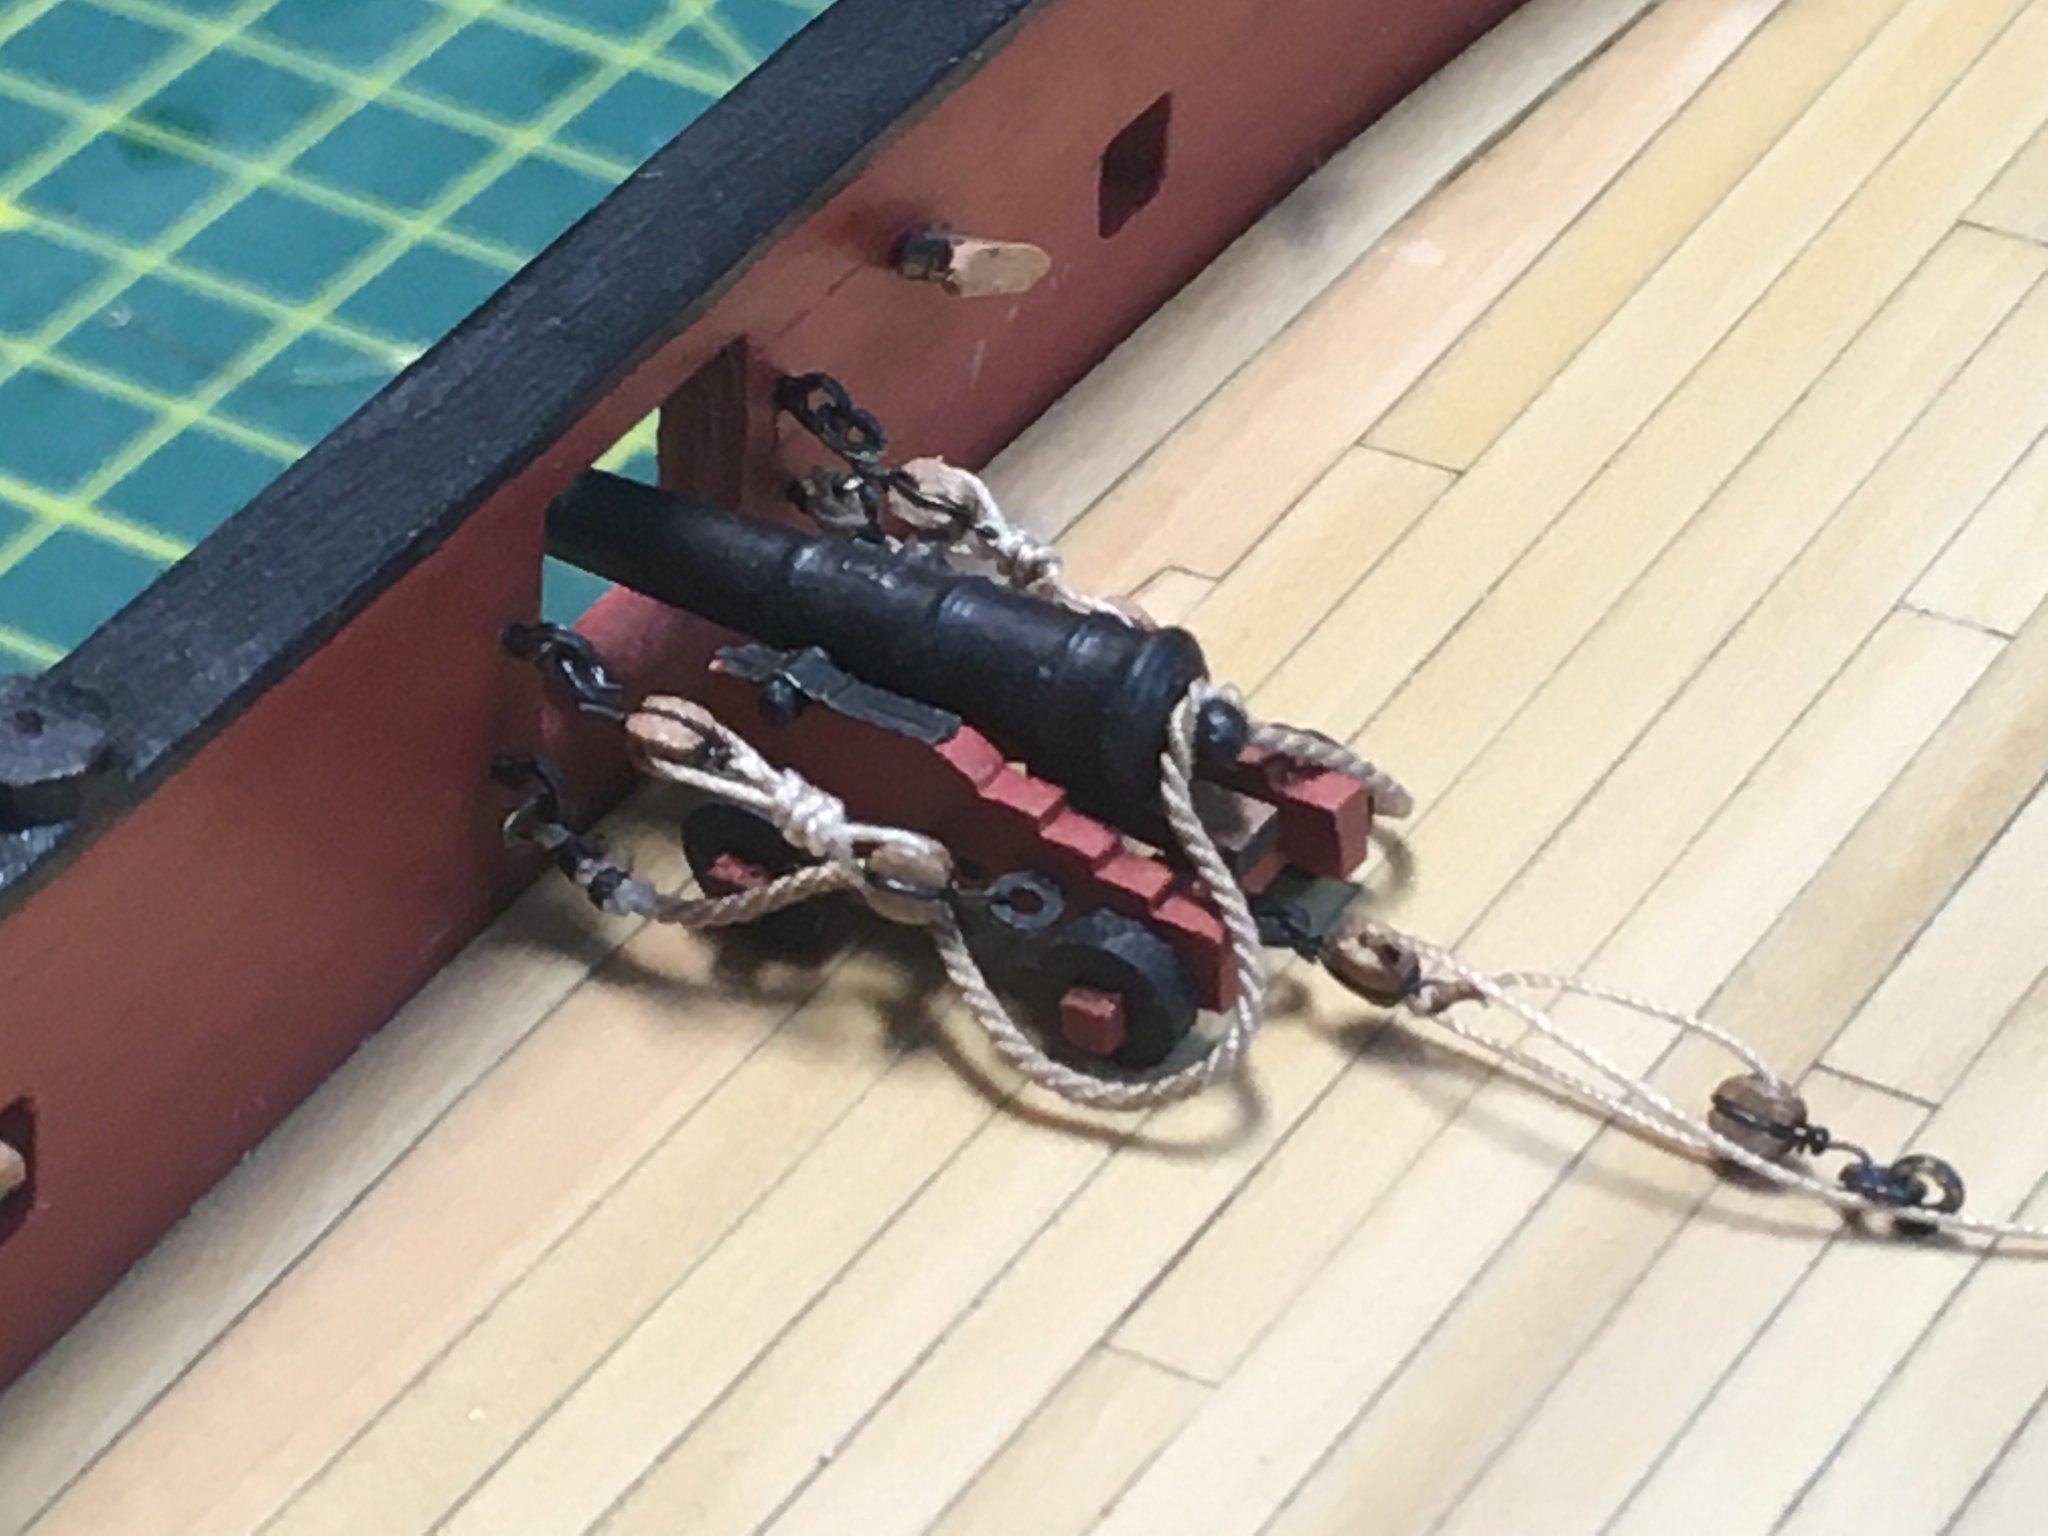
On side tackle, I've decided to stick with frapping. Ideally I'd probably want to show the tackle freed up for action, but I'm not sure I could get ropes and blocks this small to lay loose and look natural. I've also decided against coils. So, for the frapping I've just lengthened the distance between the blocks, allowing the tackle to hang lower and show more of the breeching. Here's what I've ended up with, minus the inhaul tackle which I'll fit when I eventually fix the carriages in place.

Now it's nose to the grindstone to get a production line going on the remaining 13 guns. I may be gone some time, as Captain Oates said.
Derek
- egkb, usedtosail, BenD and 10 others
-
13
-
I agree - you've made an excellent job of the first planking. Whilst I also agree with Glenn that the sternpost might be a little thin, I think you might also want to take a little more 'meat' out of the deadwood area in order to ensure you have a smooth taper into the sternpost. It's always difficult to judge from photos though, so you'll be best placed to decide once you've taken Glenn's advice with the strips of second planking.
-
I apologise in advance if this is a point you have already considered, but are you sure you are not confusing circumference and diameter? As I'm sure you know, historical sources tend to give rope sizes in circumference. Even on a first rate like HMS Victory at 1:48 scale, very few ropes would be 2mm in diameter - the main stay and a few others, but certainly not the shrouds and the running rigging.
Derek
-
Thanks for your kind comments guys
1 hour ago, glbarlow said:I doubt your friends from three feet away will say “why are those ring bolts out of scale.”
No, but I will now I've started obsessing about it! I understand your point, but equally, I see no harm in striving for greater authenticity. Besides, you helped persuade me to rig the blasted things in the first place so I blame you for my current obsession 🤪
51 minutes ago, VTHokiEE said:How do you secure the gun to the deck? Simply a drop of glue at each wheel?
That's what I plan to do. An alternative would be to put pins through the front and/or rear axles to the deck, but that's not really an option once the barrels and cap squares have been fixed to the carriages.
Derek
-
On 7/4/2020 at 10:08 PM, DelF said:
Conversely, I may take a leaf out of Captain Cook's diaries and stow the guns in the hold!

Thanks for the thought SpyGlass, but on reflection and considering Cochrane's penchant for prizes, I don't think he would ever have stowed his guns in the hold. That may have worked for the great navigator Cook when all he had to contend with were islanders' canoes, but I think Cochrane must have been almost permanently ready for action considering the number of vessels he snapped up. So, I'll have to stick to plan A and press on with the rigging

-
Hi SpyGlass
Thank you so much for taking the time to put together such a helpful and informative post. That last picture captures exactly what I meant when I said I was thinking of lengthening the side tackle to let it hang more naturally and allow more frapping. I like the frapping on the breech ropes too.
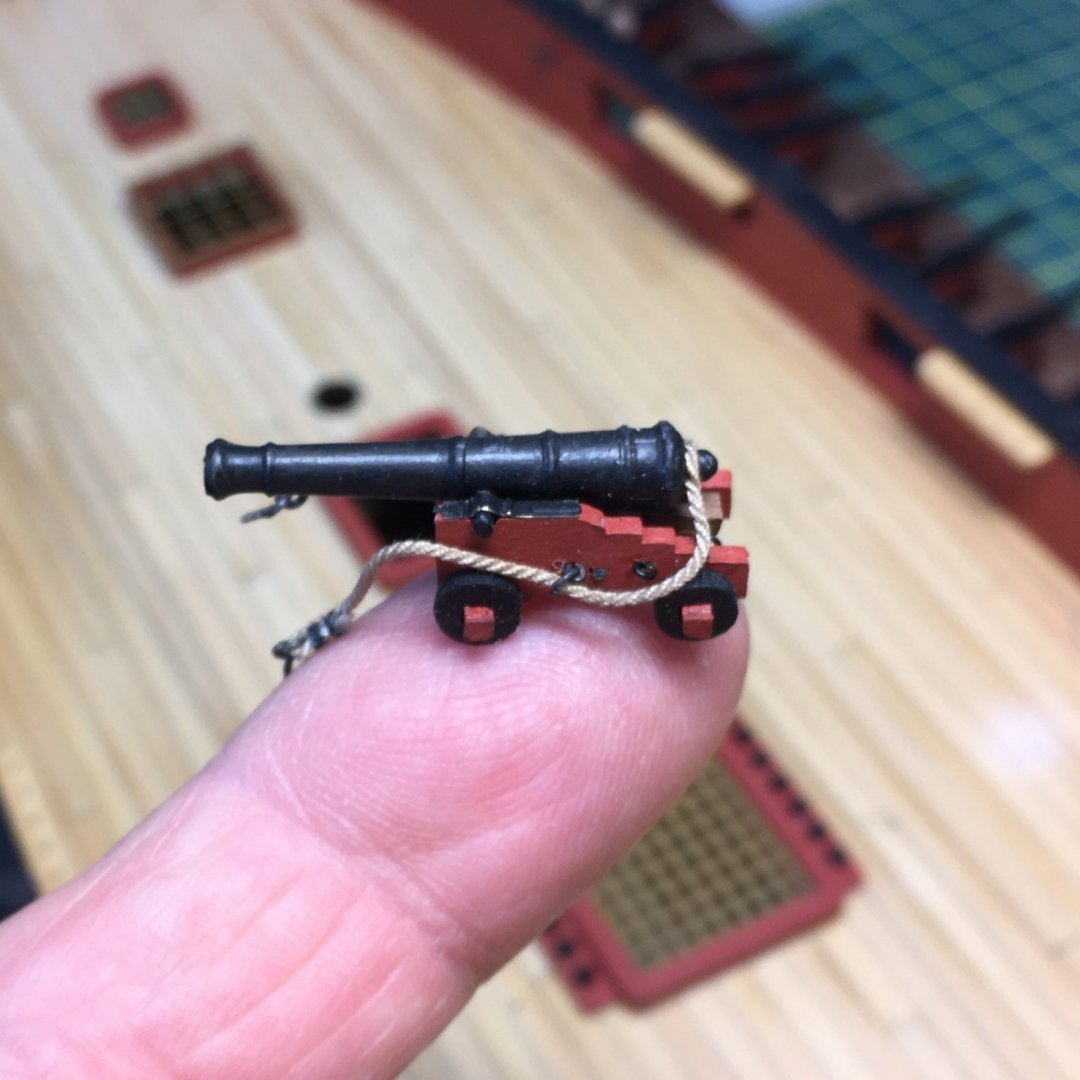
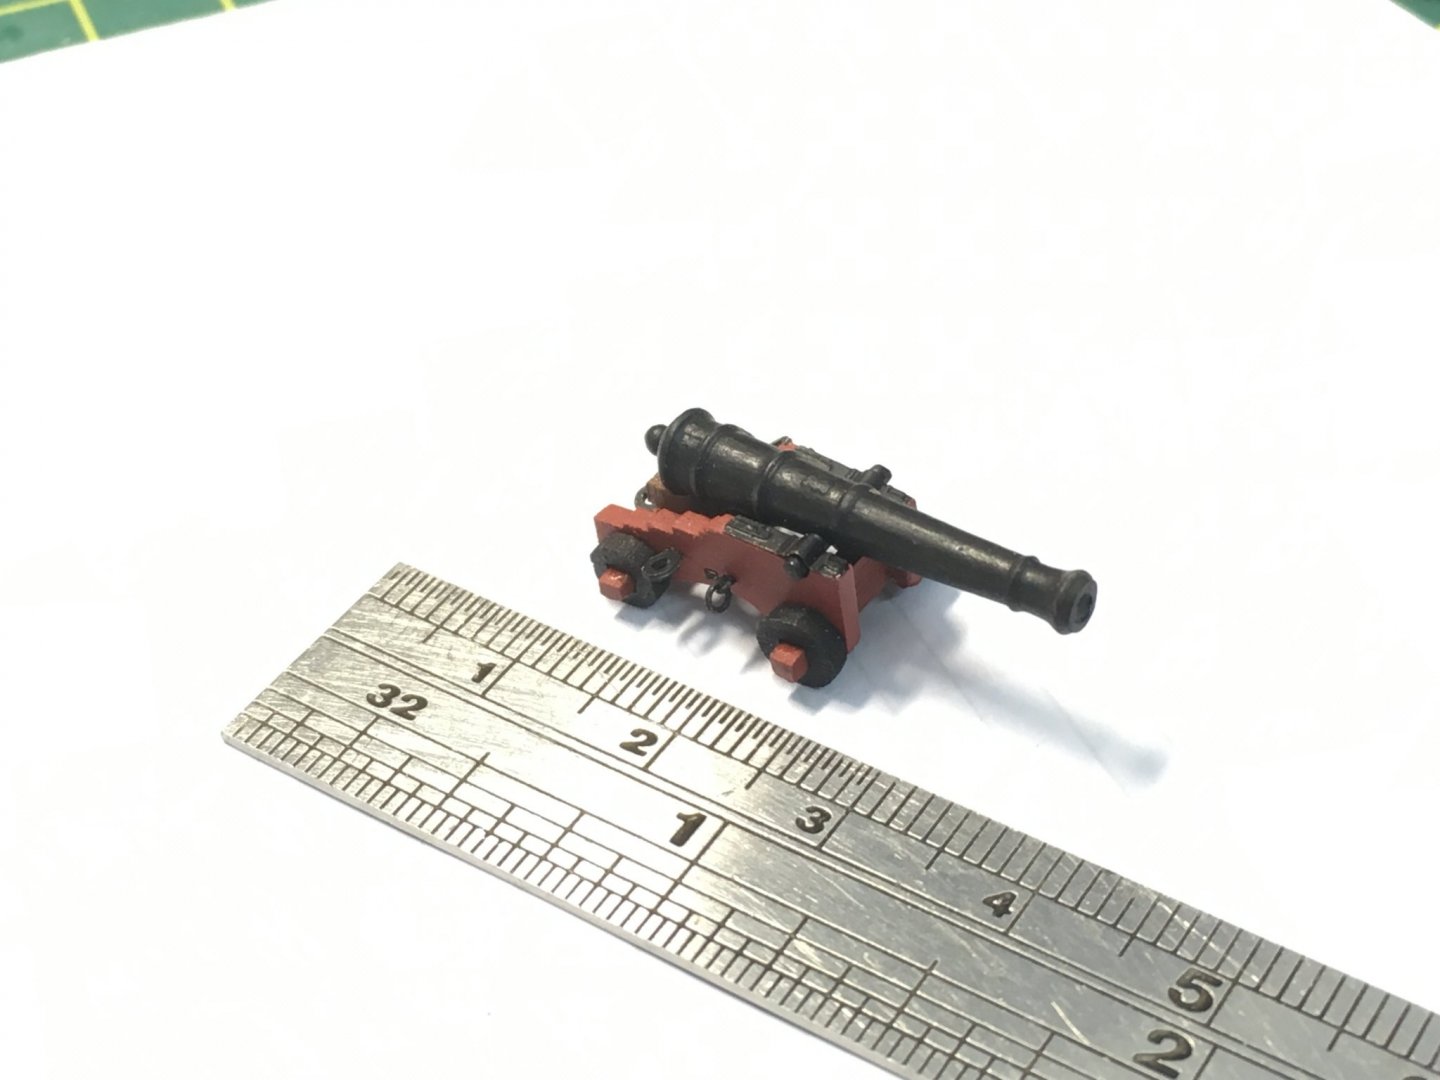
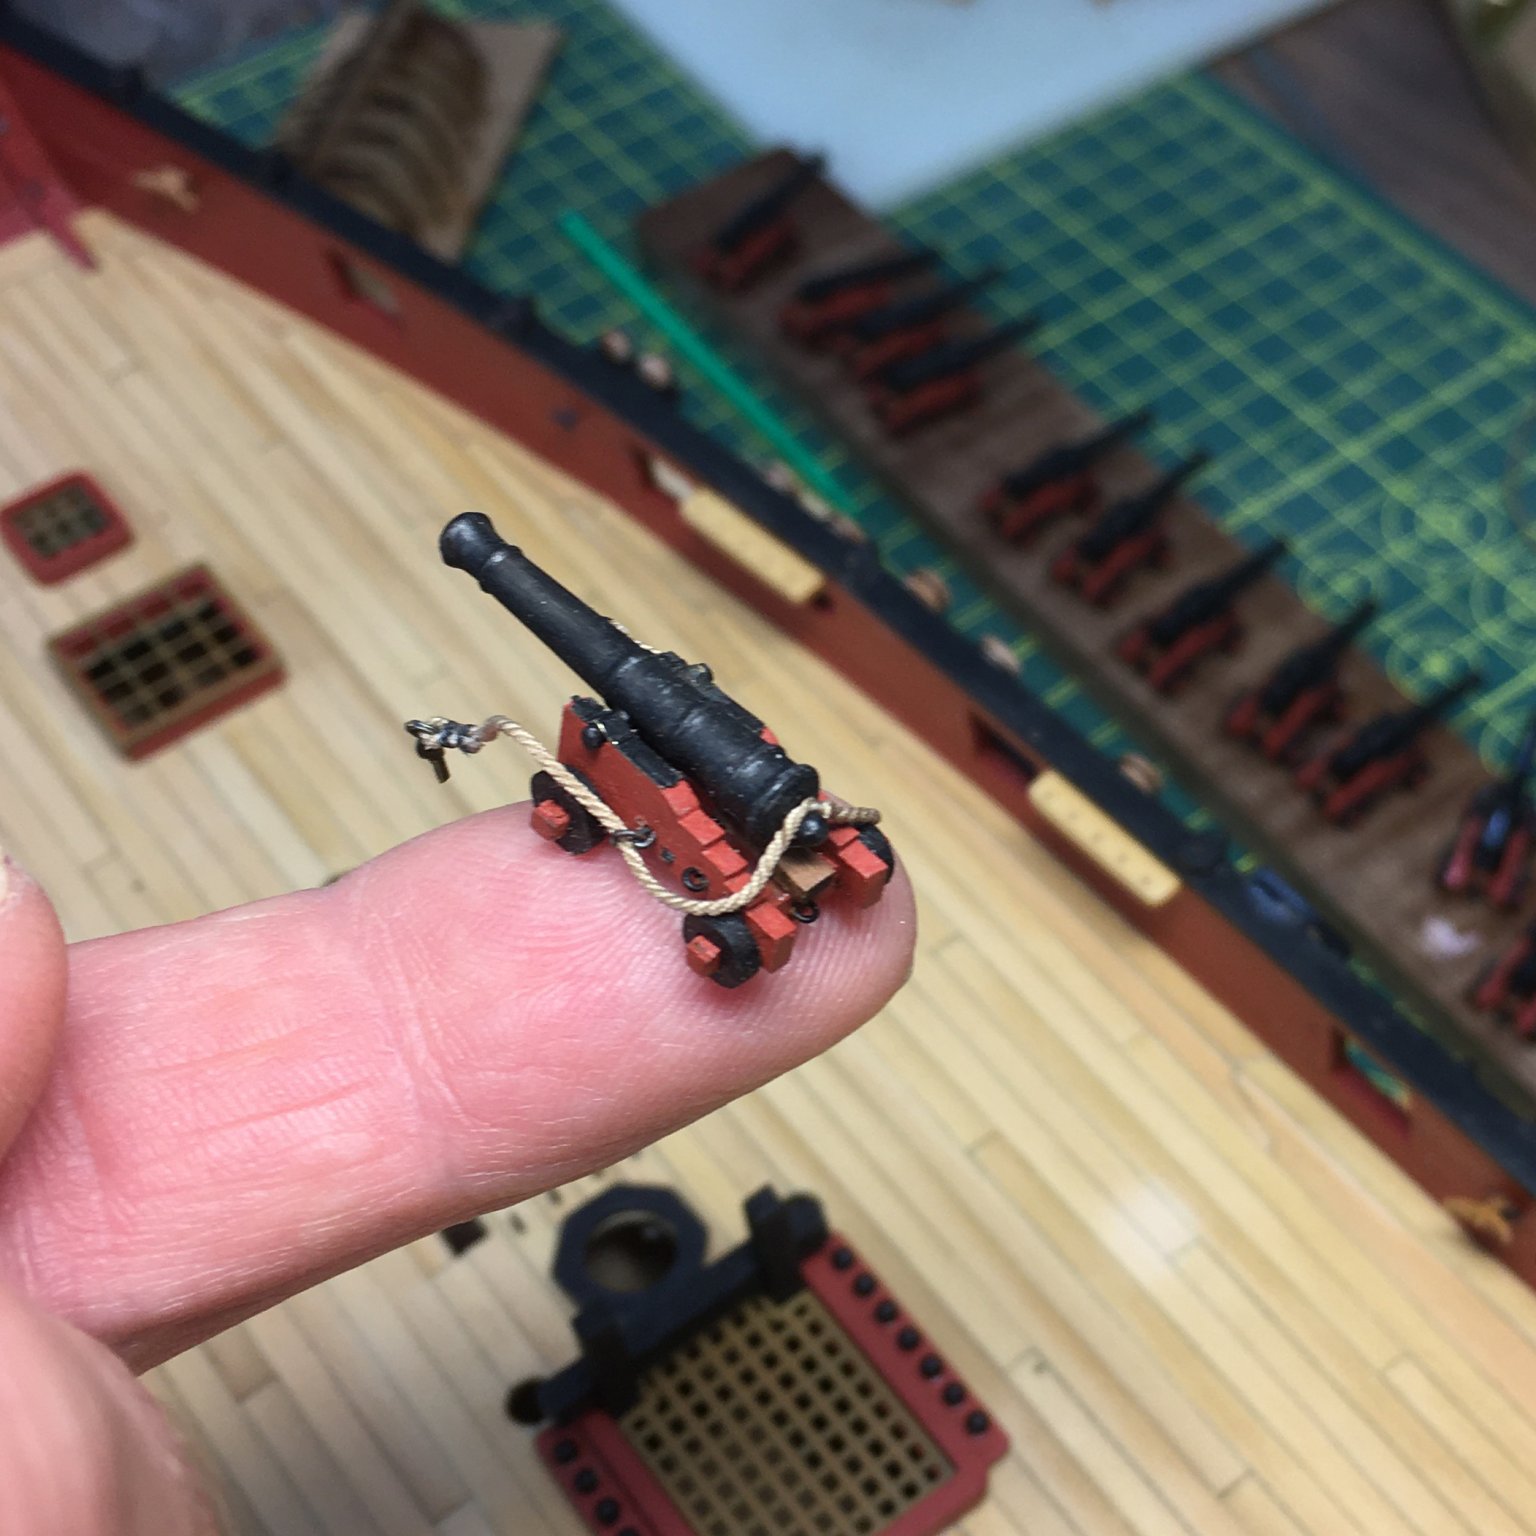
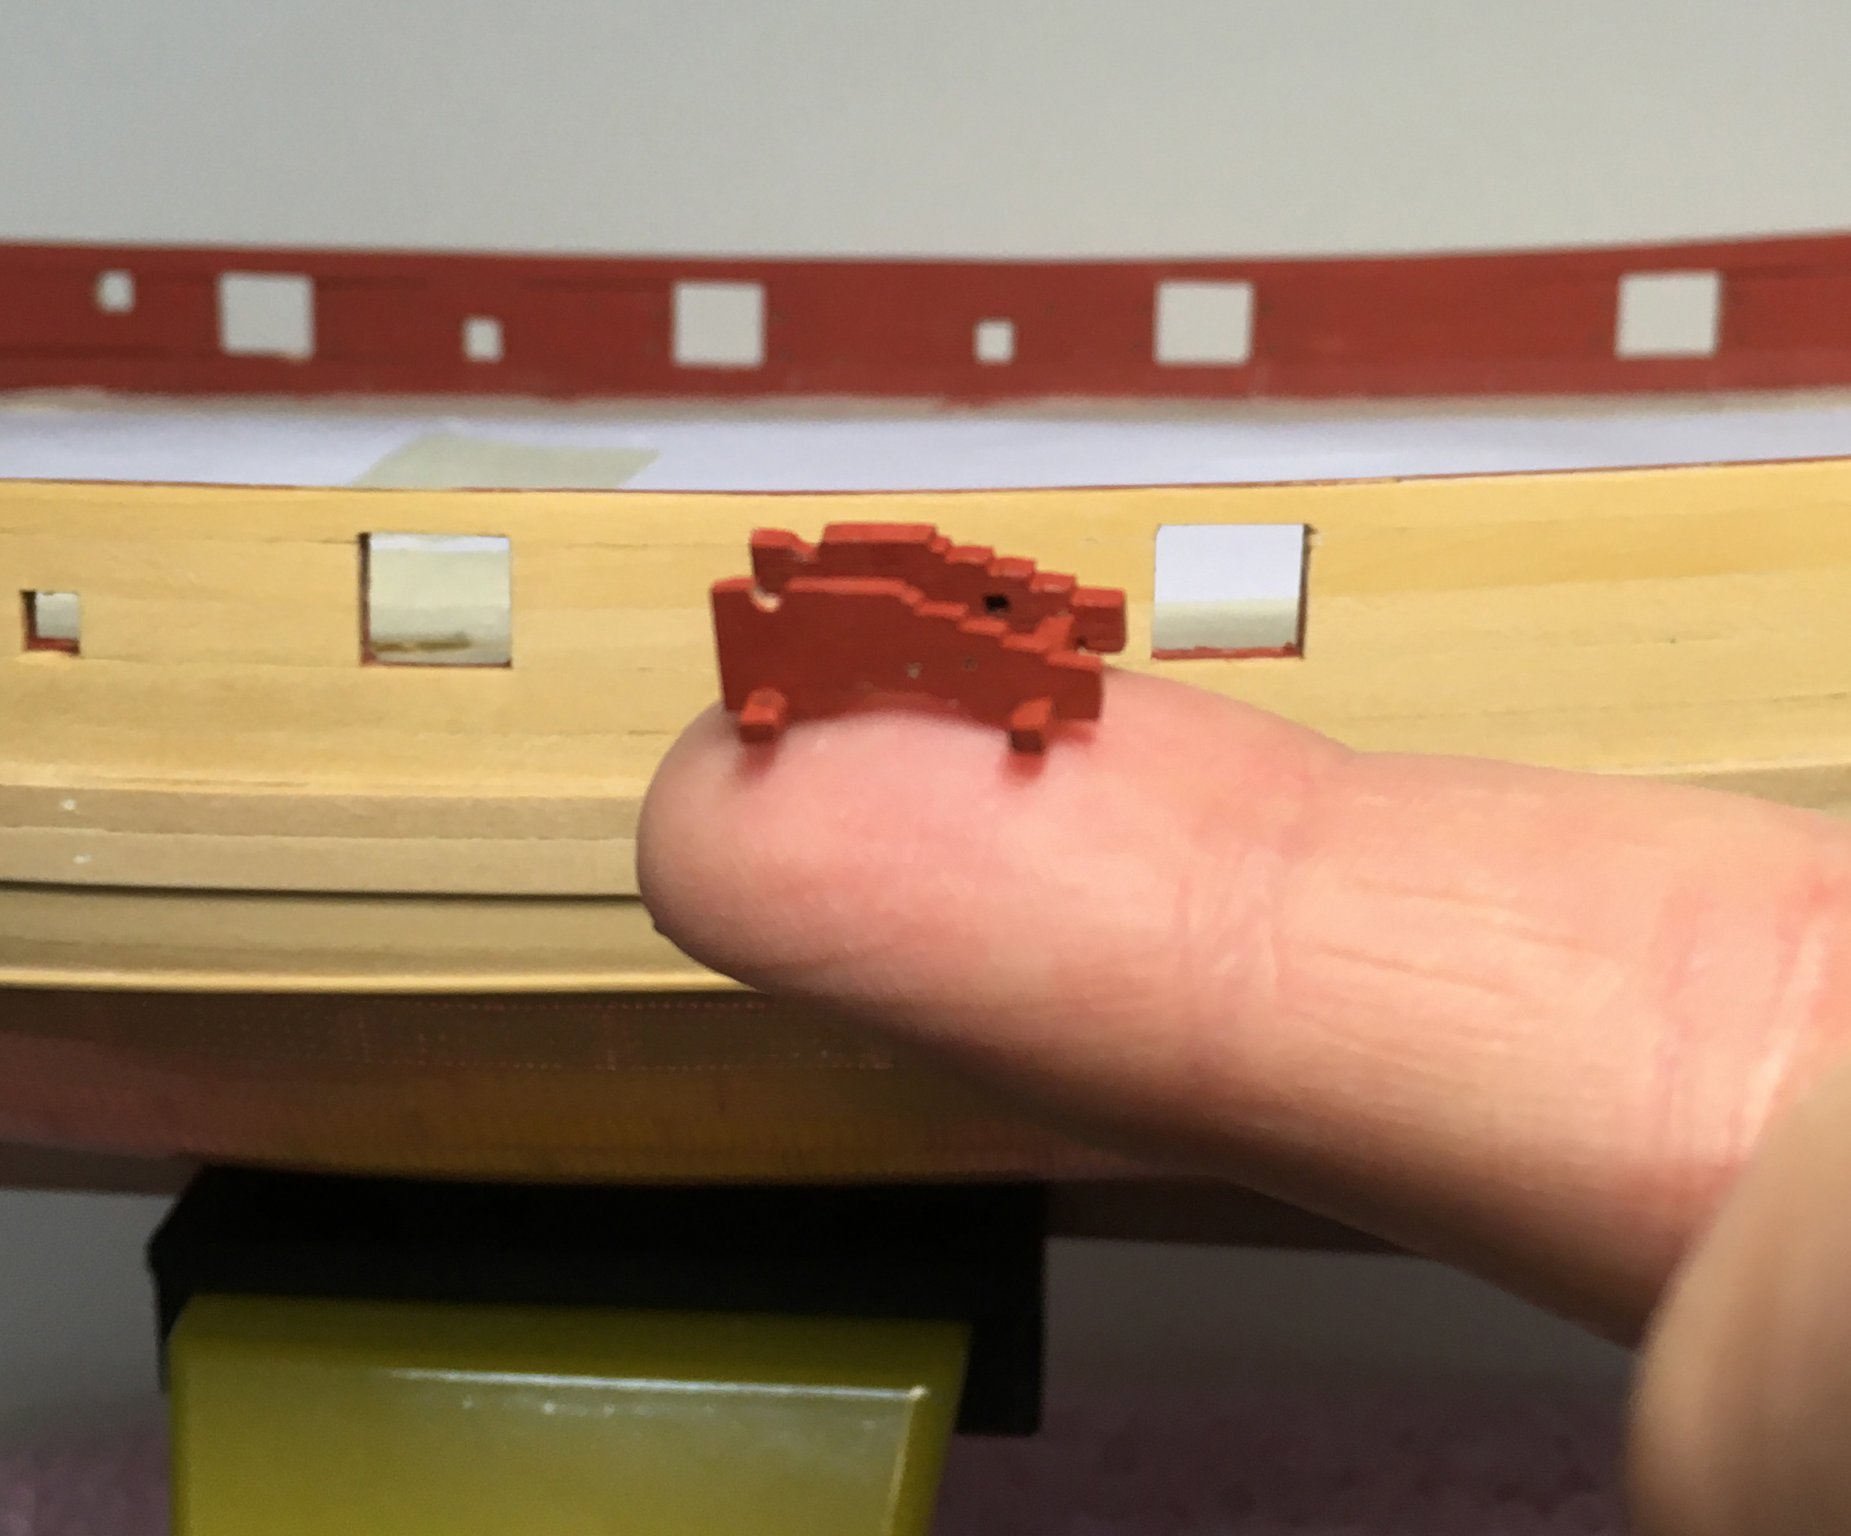
34 minutes ago, SpyGlass said:put a pic of one with your finger in to show the reality of their size!
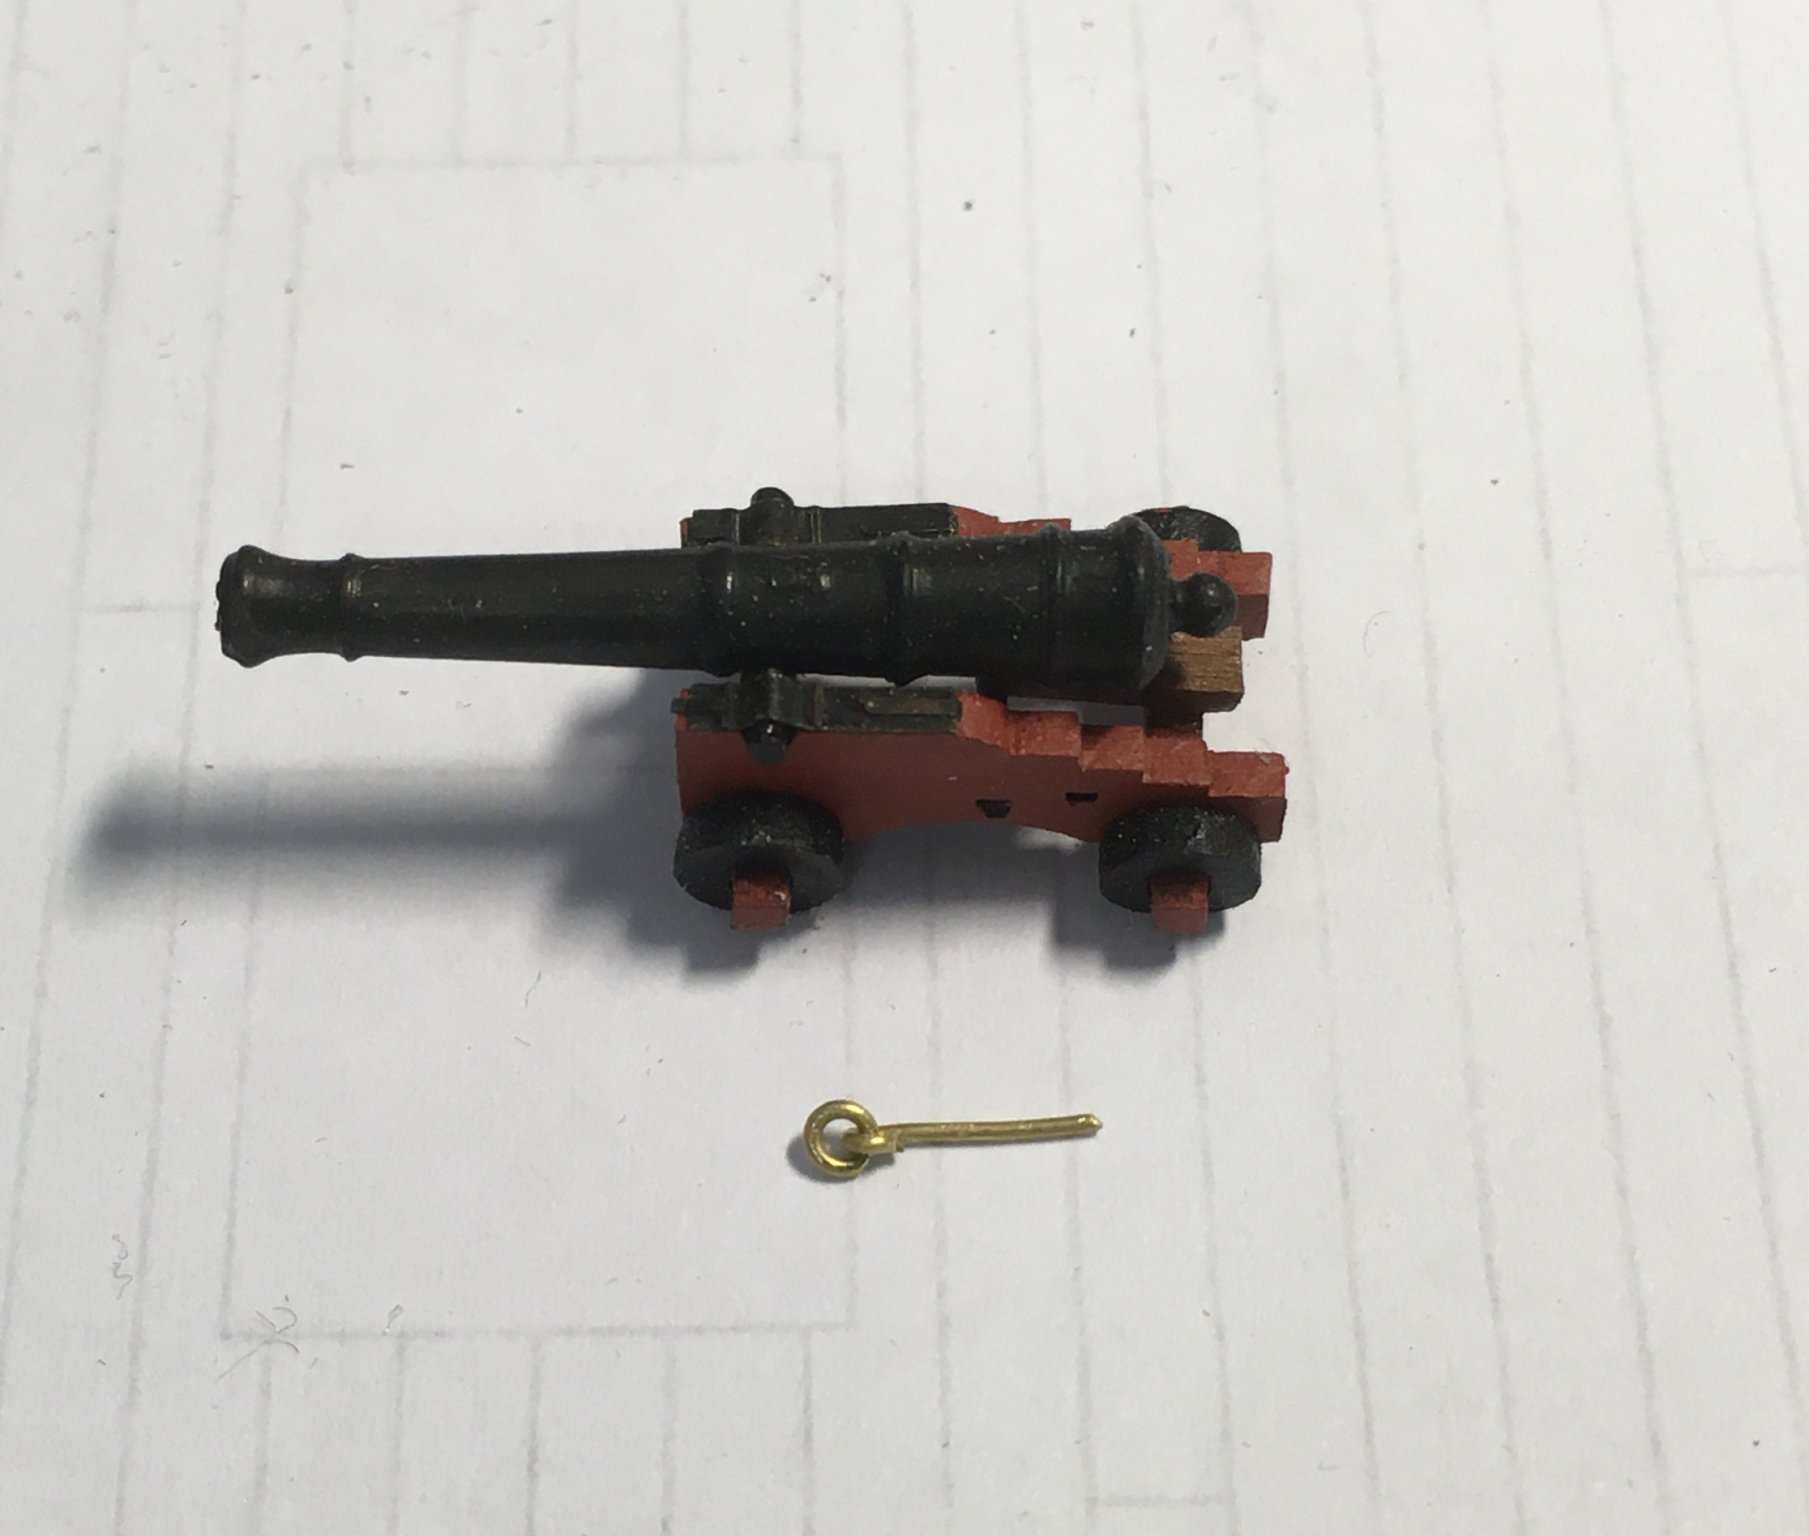
Here's a photo I took a few weeks ago:

I've been putting off replacing the PE ringbolts, but I'm putting so much into these guns I think I may as well go the whole hog. Conversely, I may take a leaf out of Captain Cook's diaries and stow the guns in the hold!
Thanks again for the kind words and encouragement.
Derek
- chris watton, VTHokiEE, GrandpaPhil and 3 others
-
6
-
Thanks Edward and Vane. I've been so close to the work for the last few days that I'm probably not the best judge - your kind comments are very reassuring.
Derek
-
Cannon rigging #92 (ish)
Sorry Ernie - other duties around the house and garden have limited the time available for more important dockyard work.
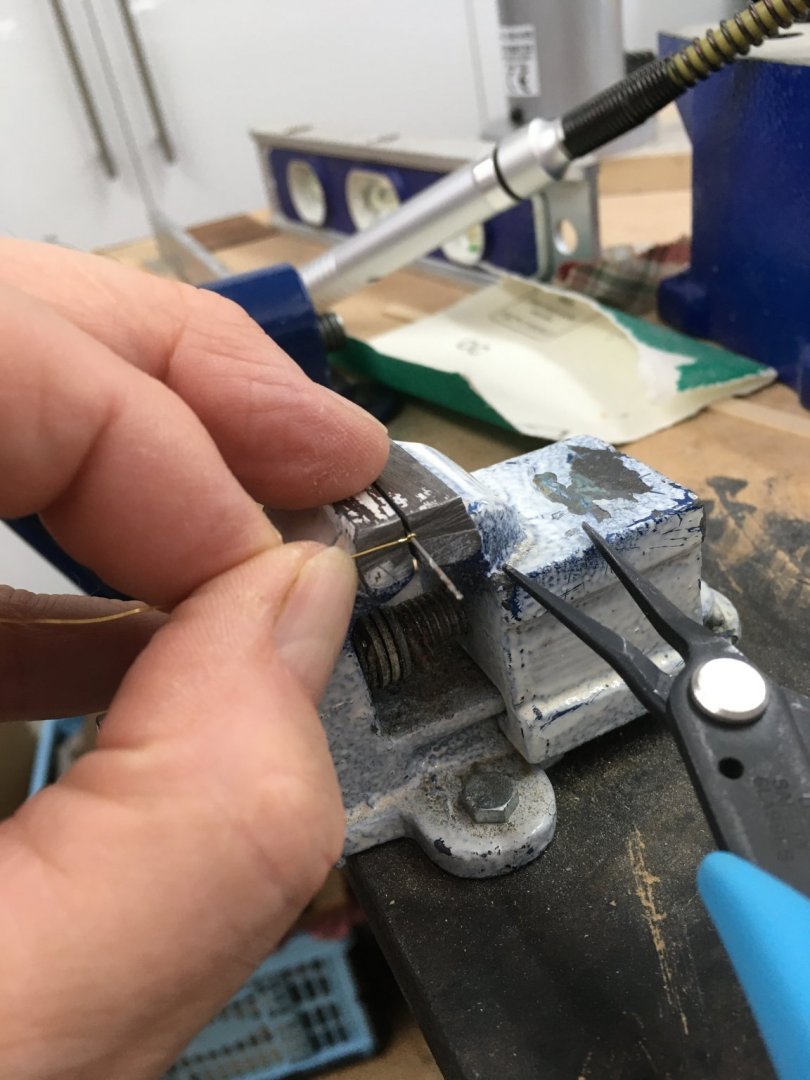
I'm still not 100% comfortable with my first attempts at rigging the guns so I'm still experimenting. First, I wanted to see if I could incorporate a ring into the 2 mm blocks. There are tried and tested methods for this, but I wasn't sure how practical they would be with such tiny blocks. I started with a small jig consisting of a block of wood with three pins - one 0.5mm diameter to form the ring, and two of 0.3mm to fit the sheave holes. With the block pushed onto the pins the 0.2 mm wire is wrapped once round the pin...

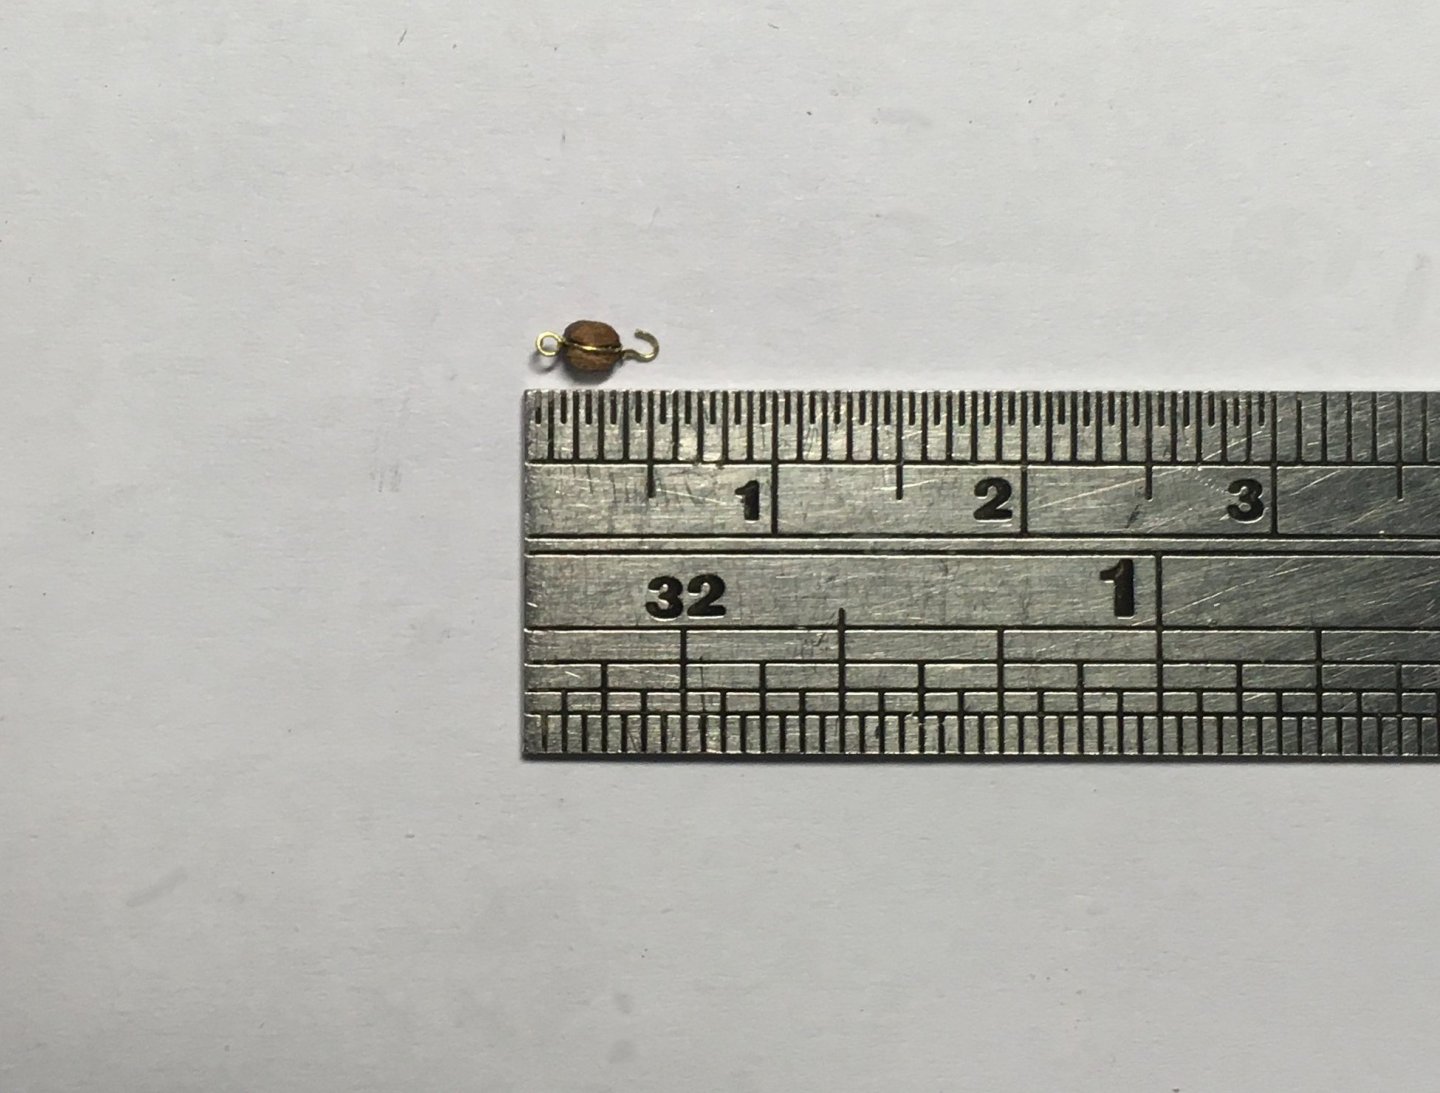
...then round the block:
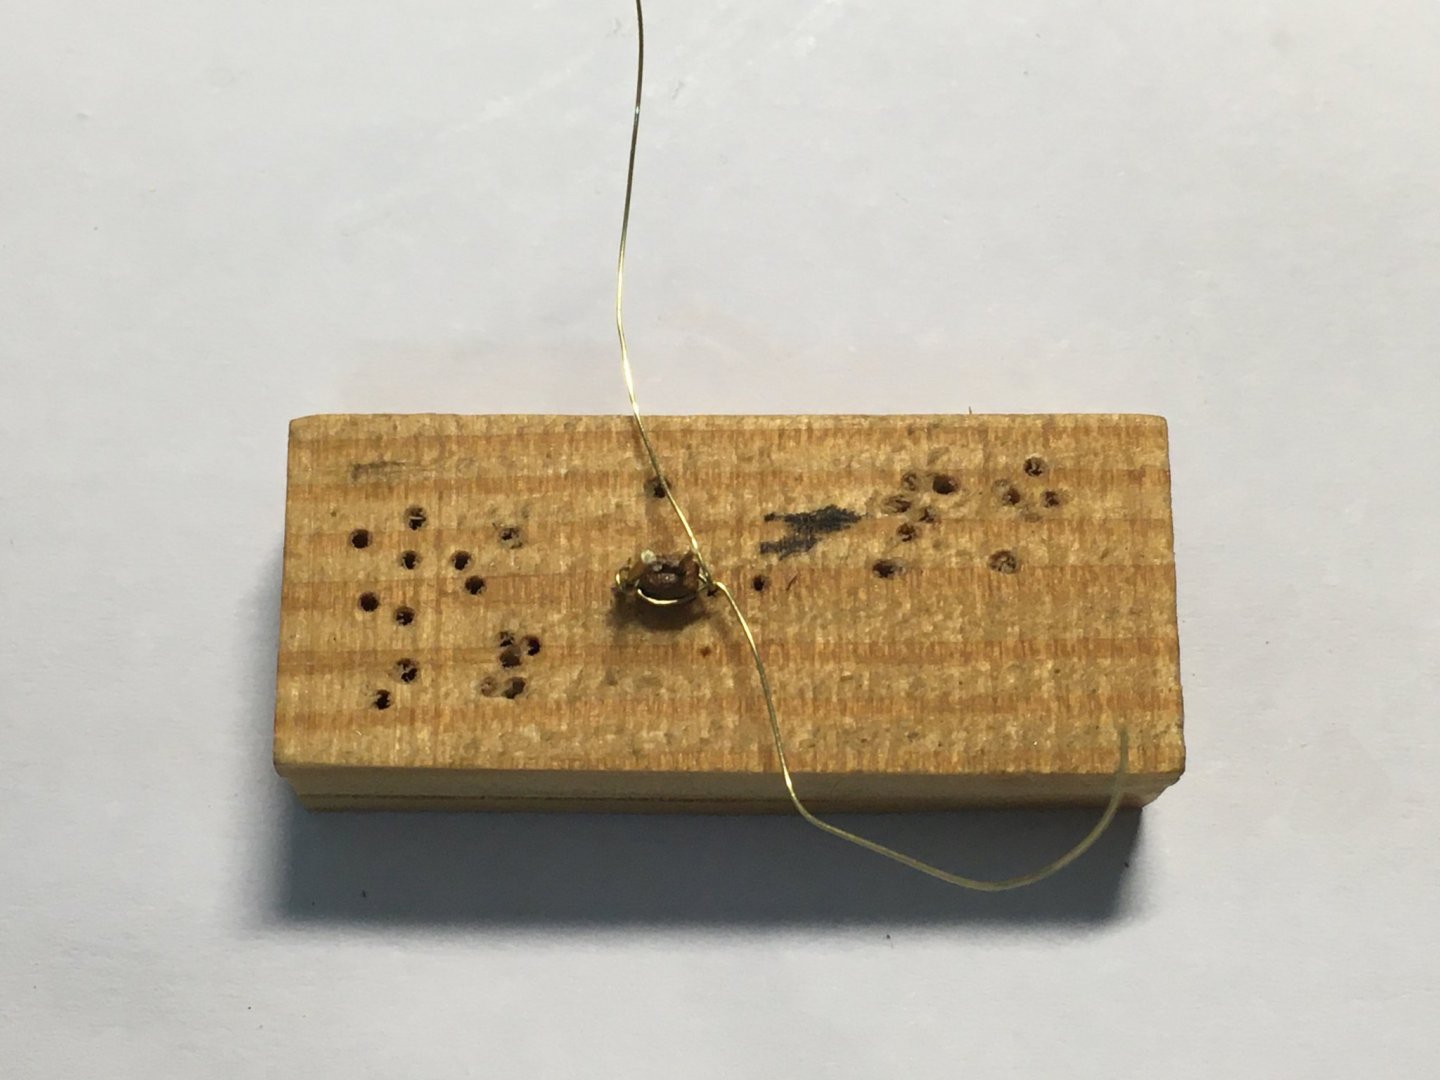
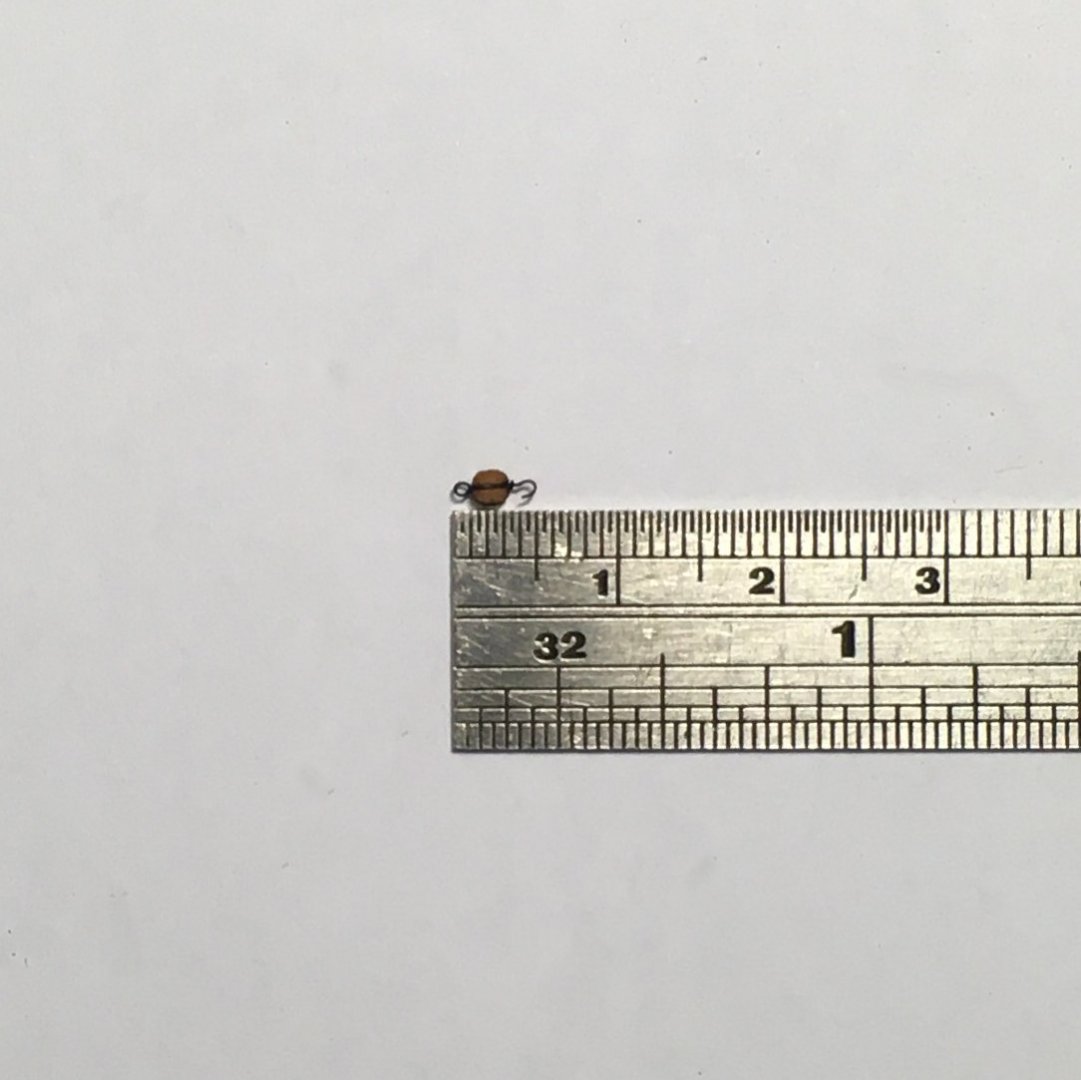
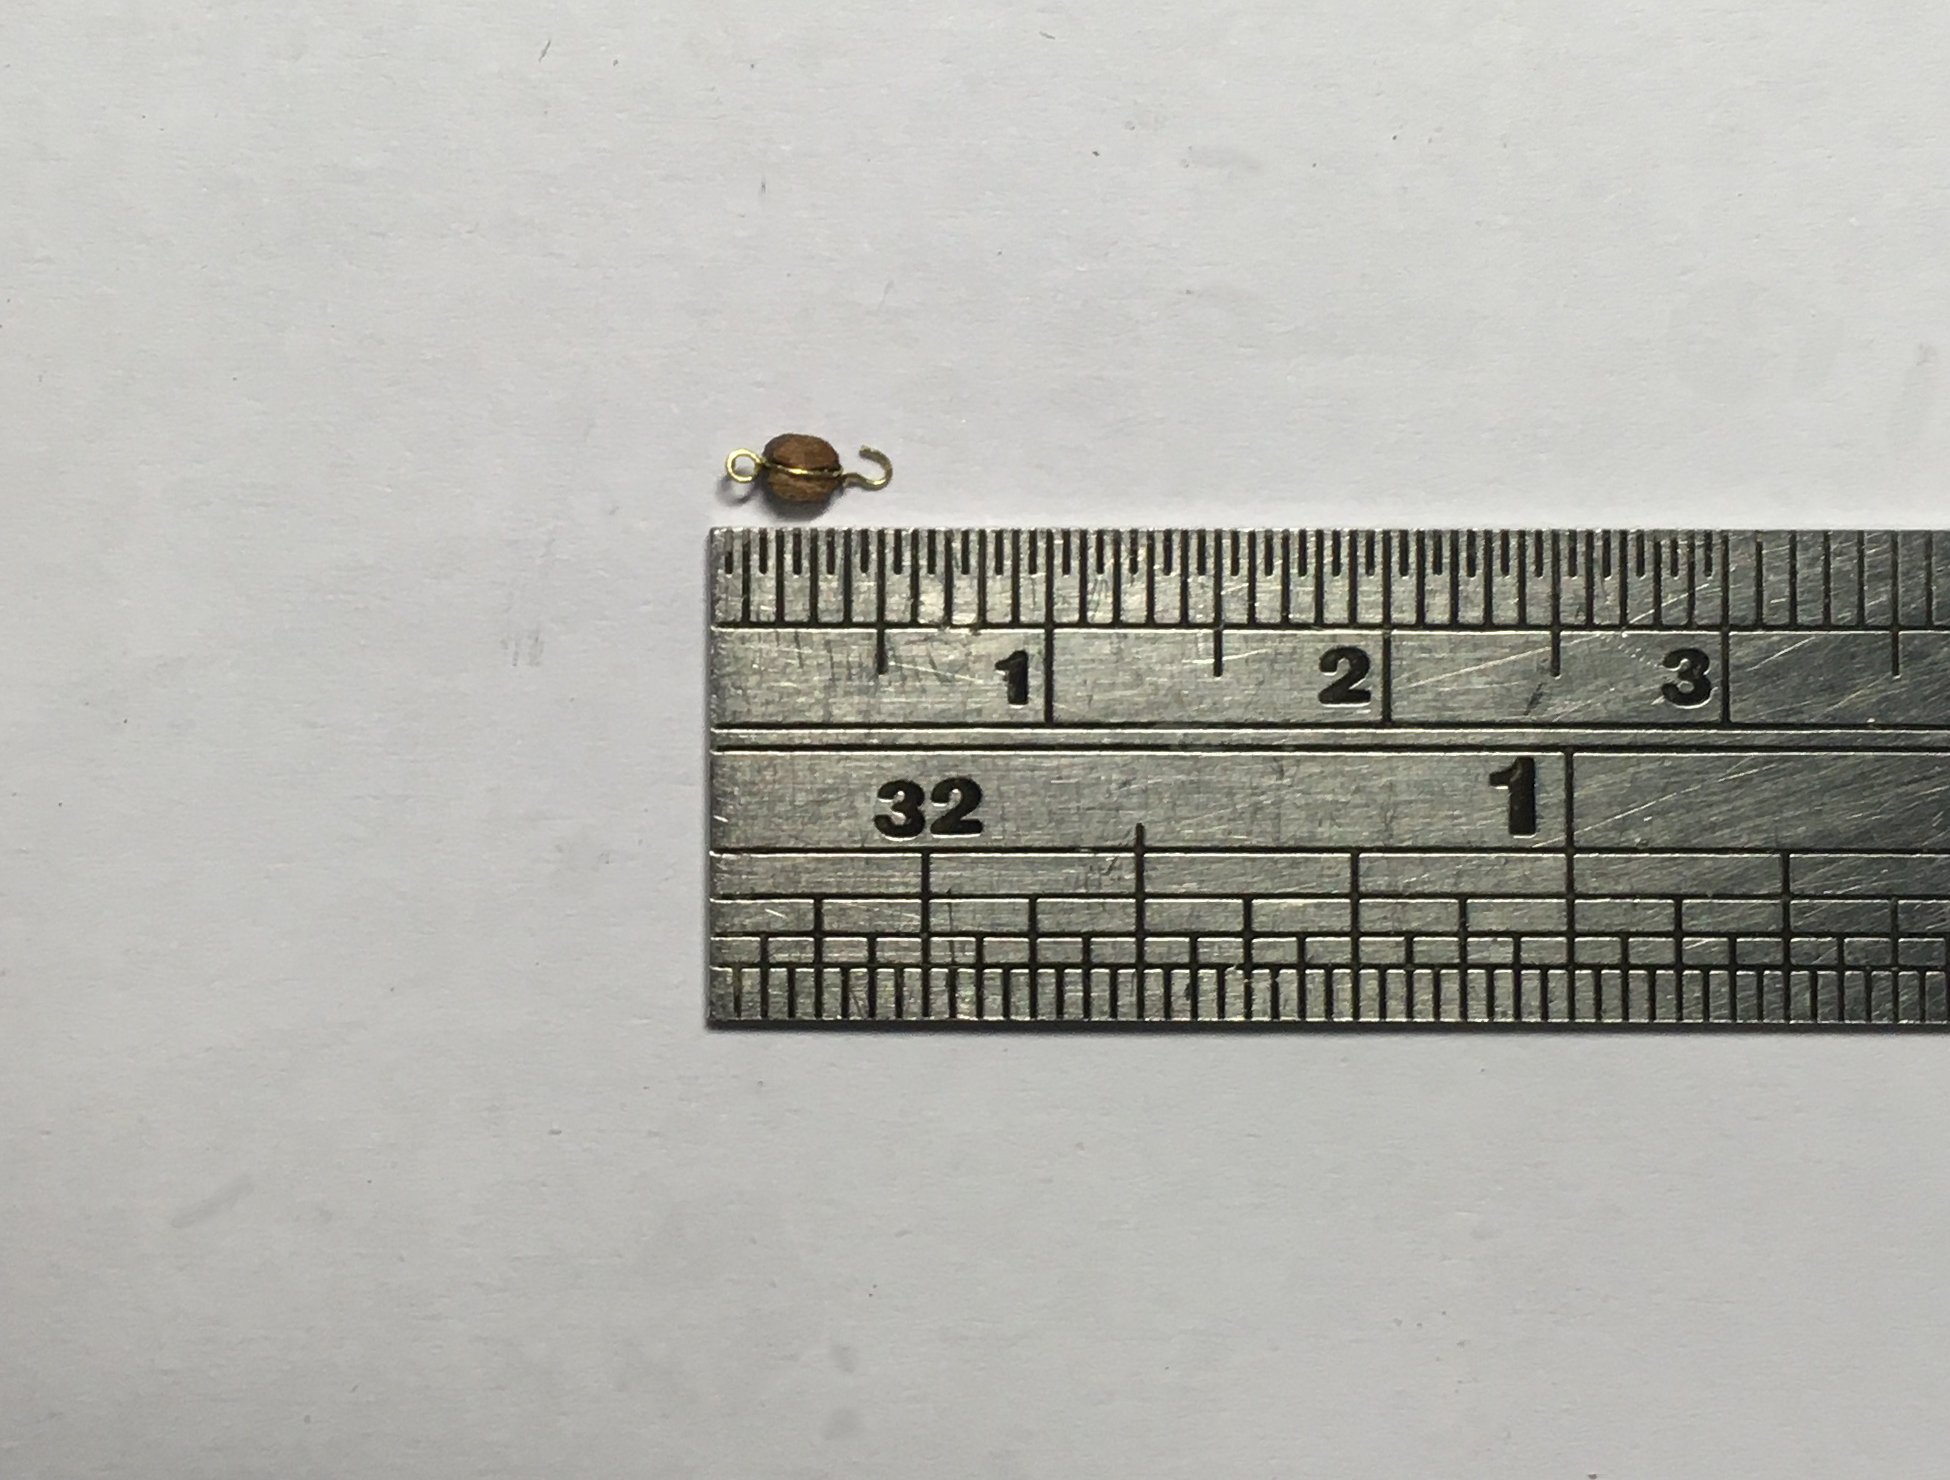
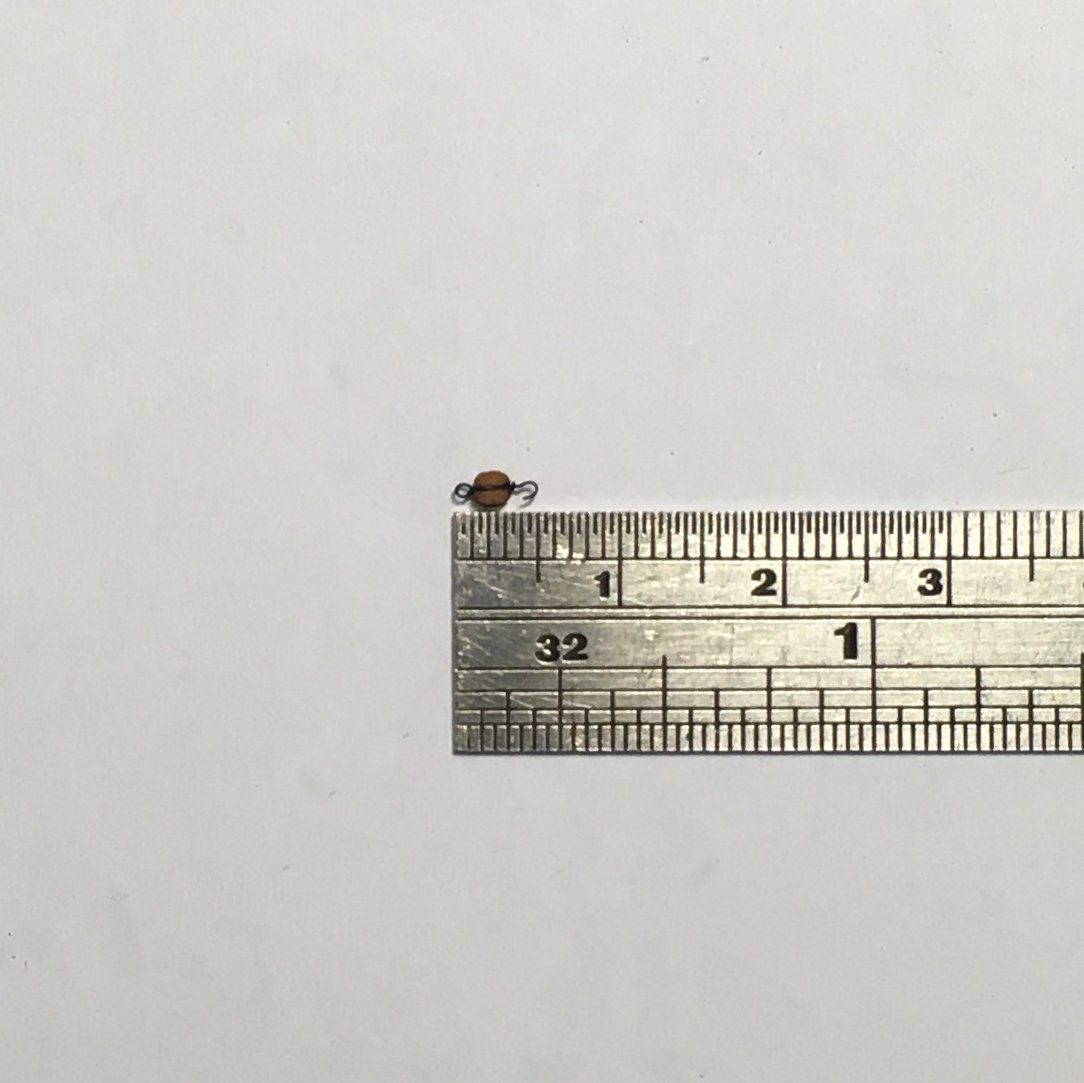
One end of the wire is wrapped around the other as shown above then cut off as close as possible. The remaining end is formed into a hook with a pair of fine needle-nose pliers and the excess wire snipped off. I was quite pleased with the result:
Dunking in acetone followed by Brass Black worked well. The wood looked a little dried out, probably due to the acetone, but a dab of matt varnish sorted that:
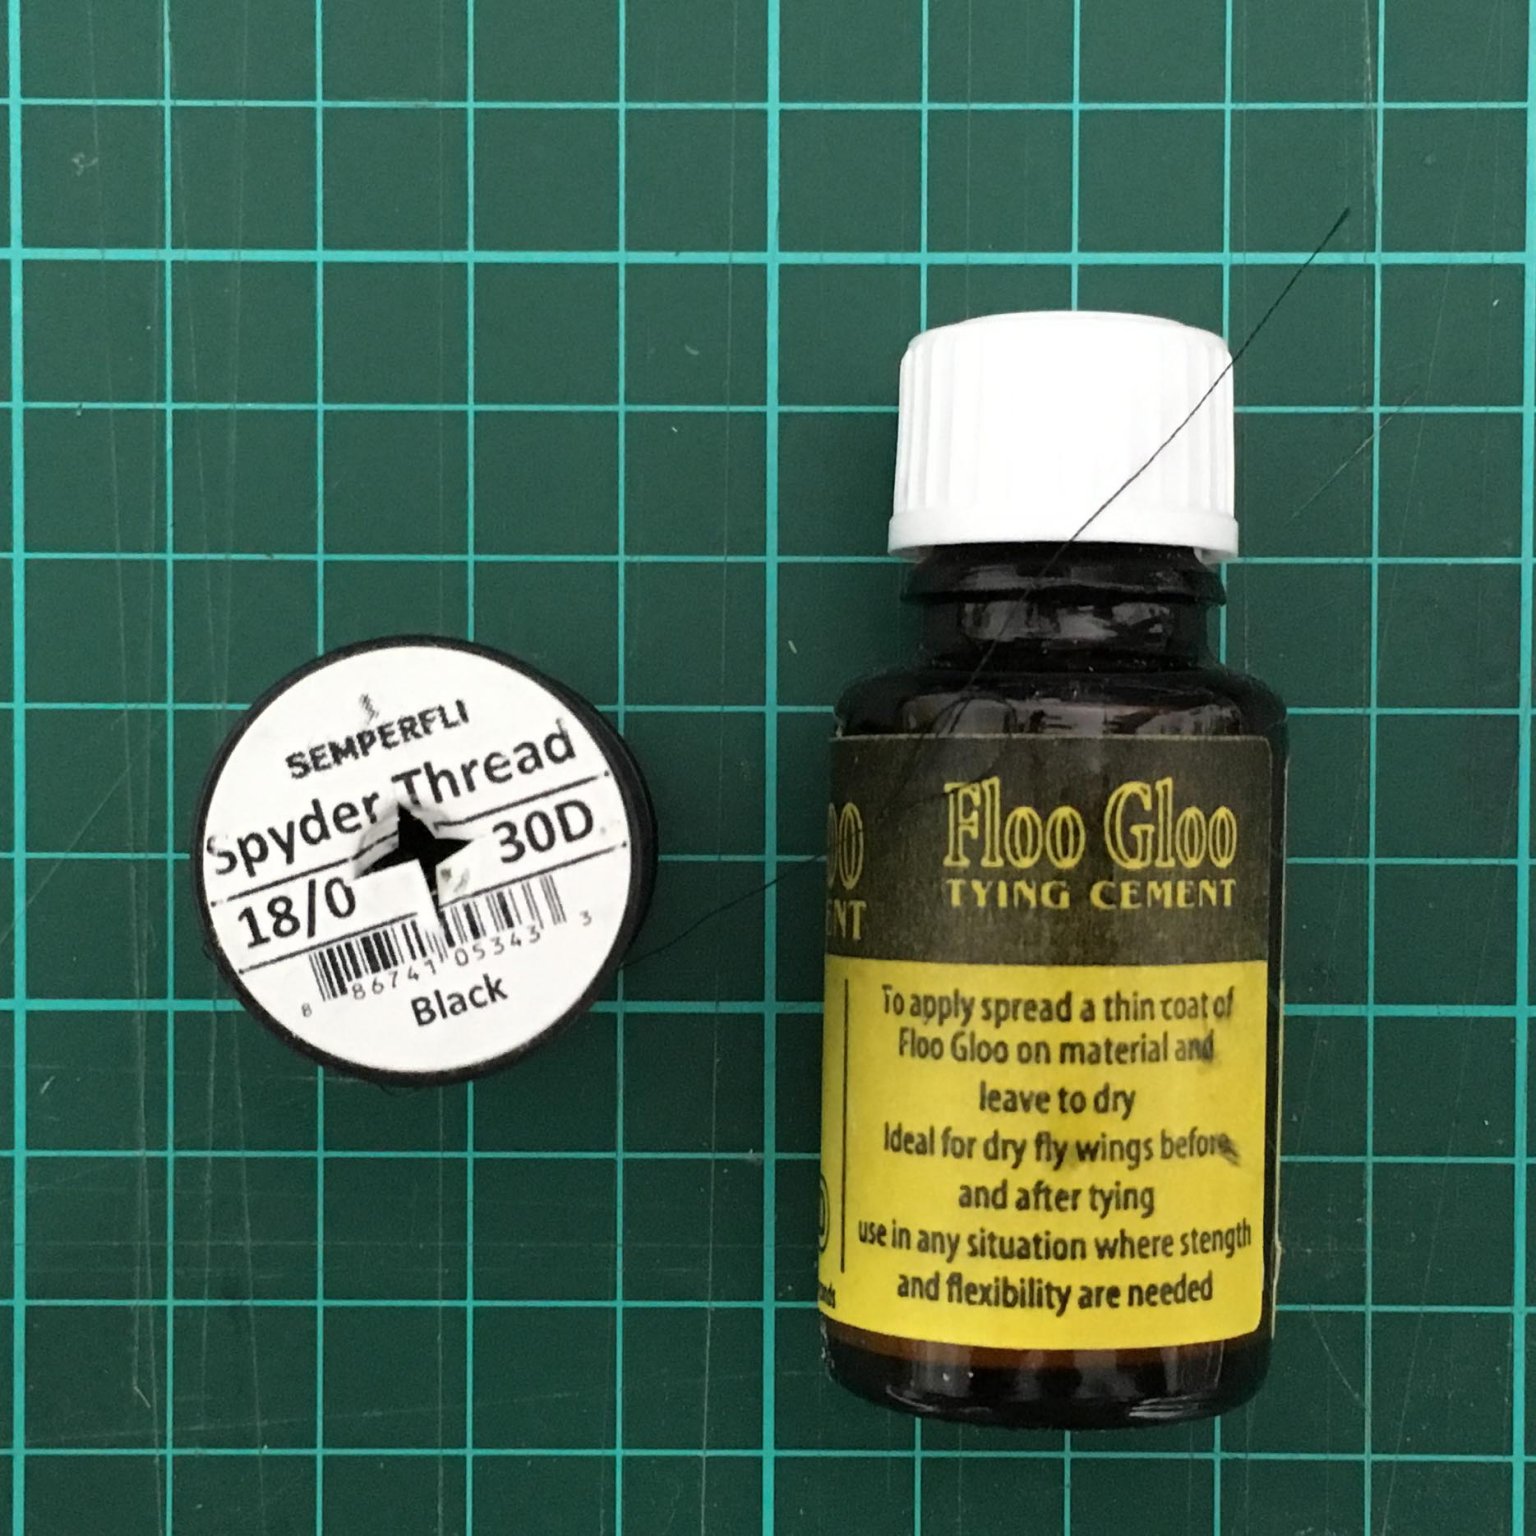
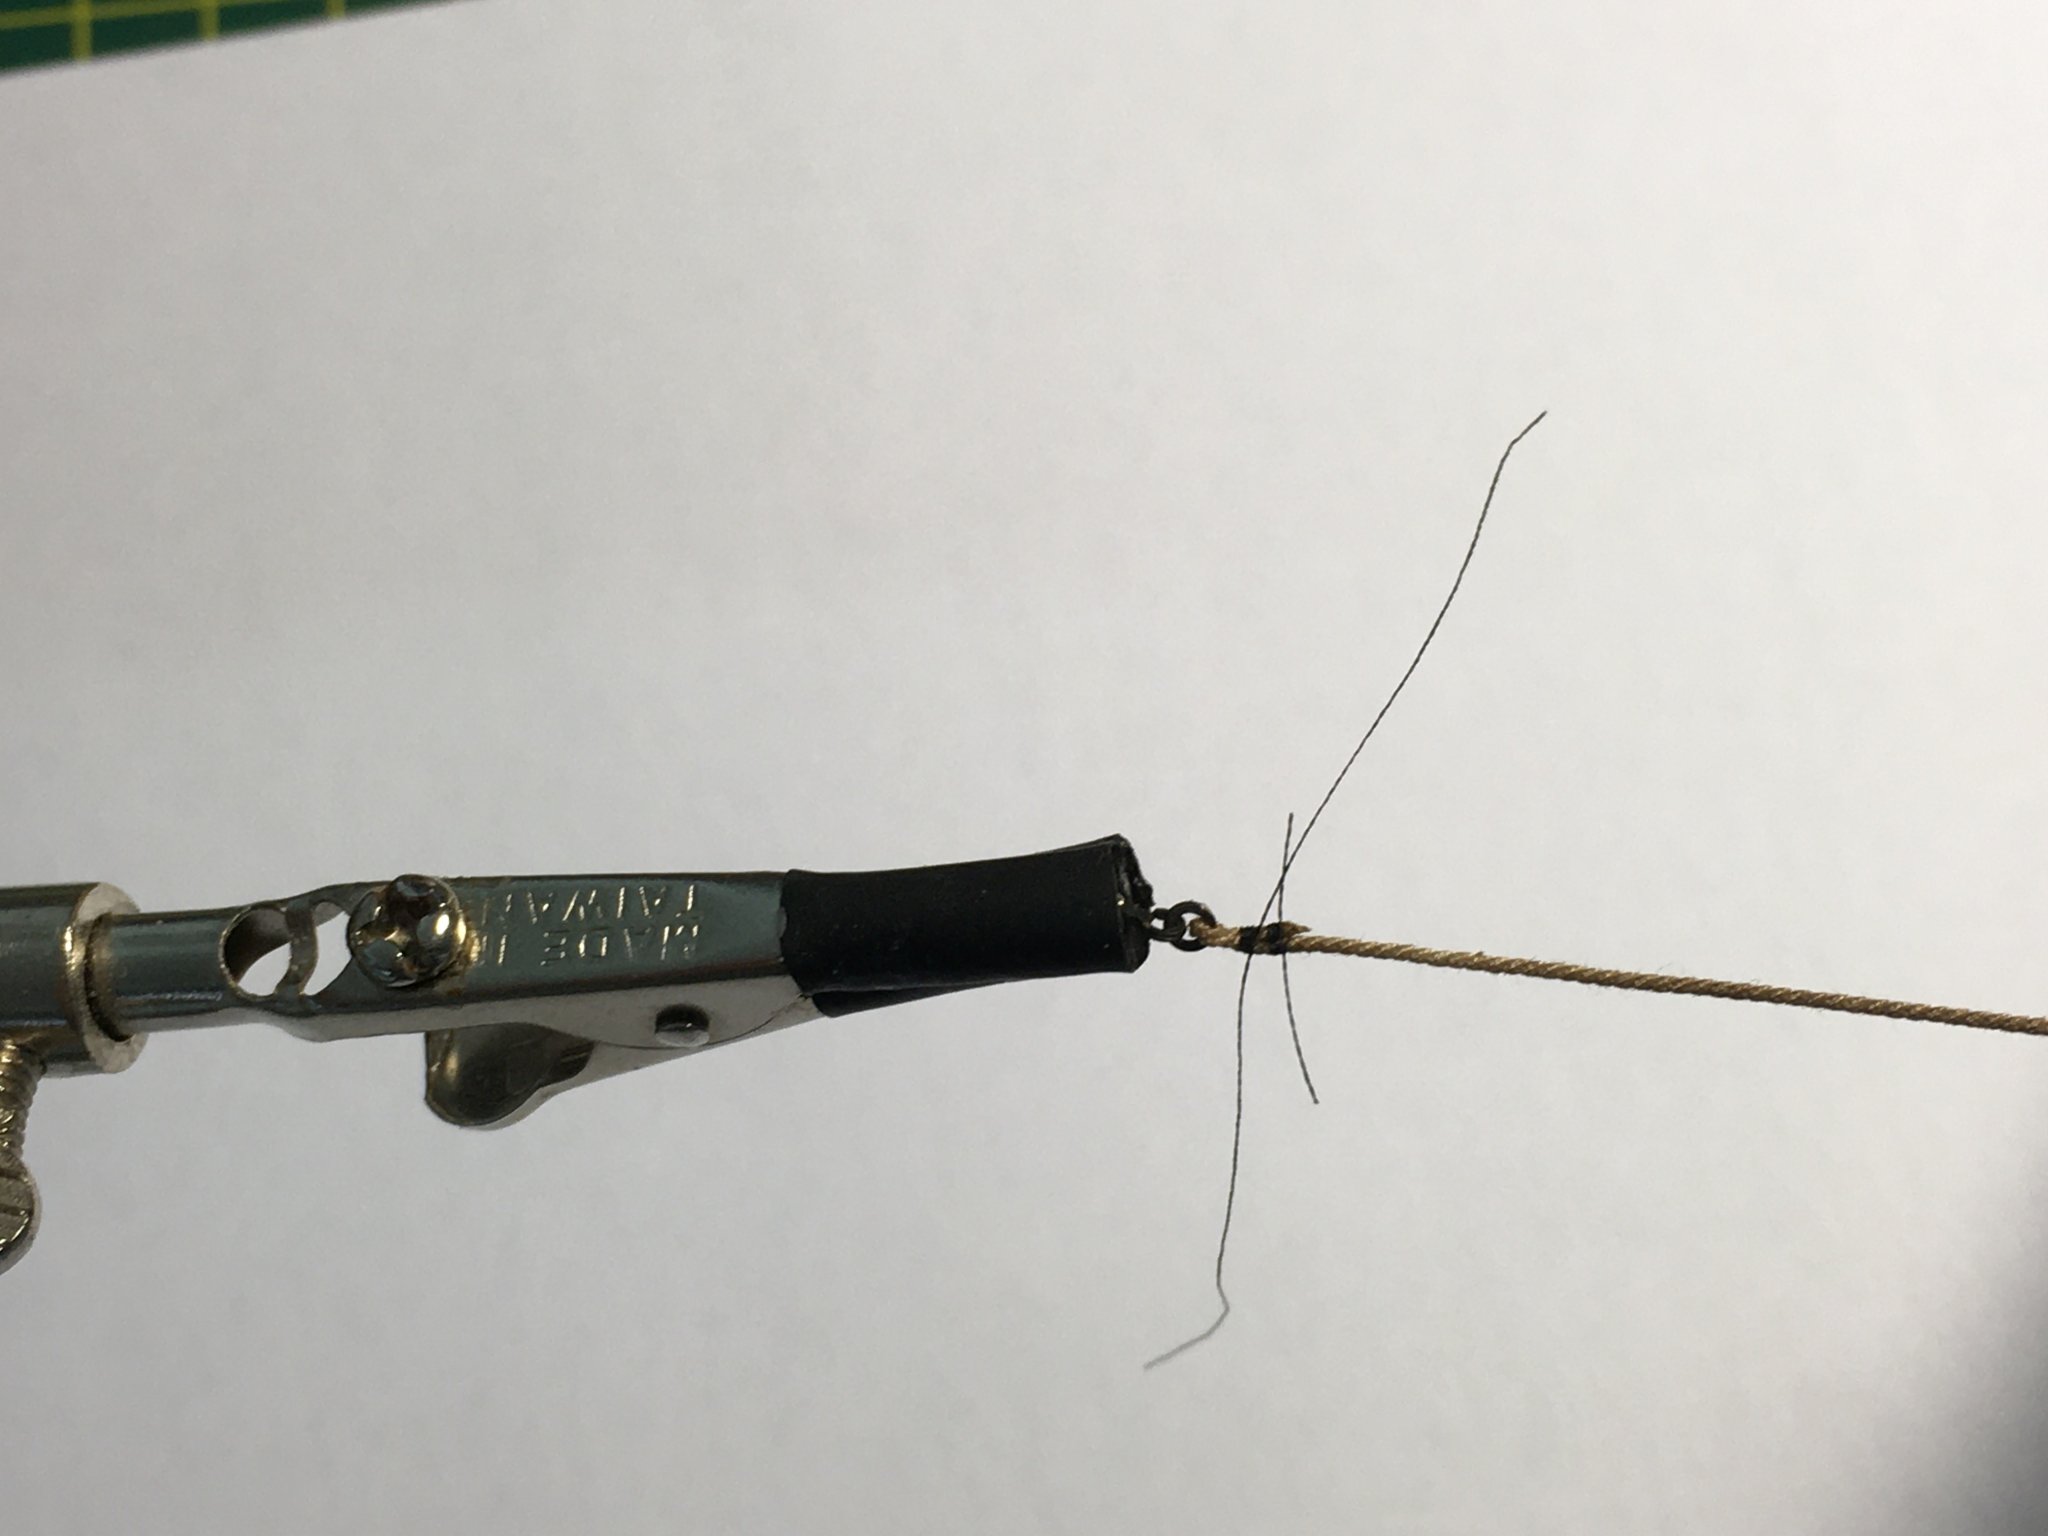
For the seizings I decided to use fly fishing thread. The one I like is just 0.04 mm/ 0.0016" - arguably TOO fine at just 2.5 mm/ 0.10" real size, but I'd always rather err on the side of under scale than over scale. Here it is on the bobbin, and being used to seize the breeching:
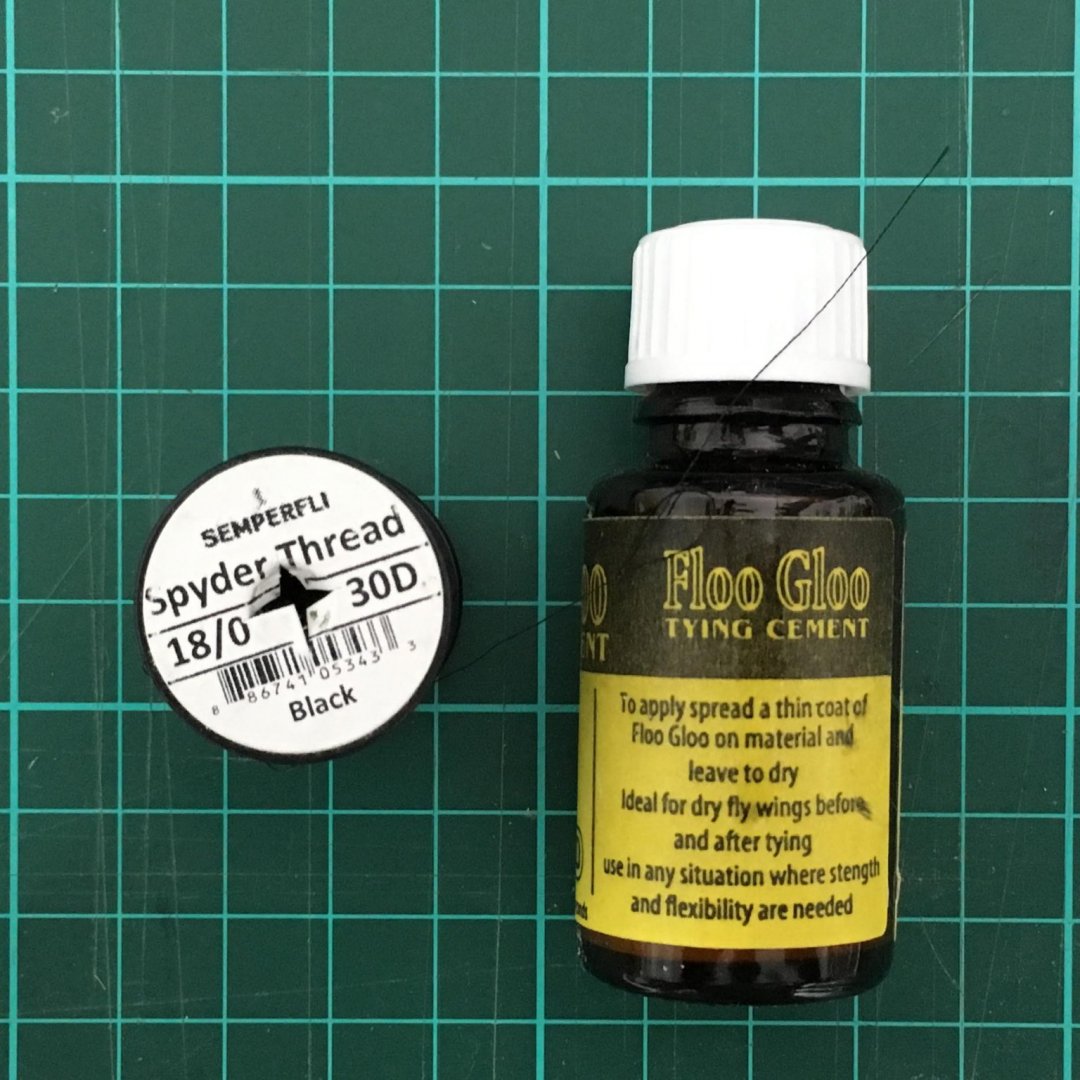

I tie the seizings in the normal way then put a tiny dab of the fly tying cement on the knots. Within a minute or two the excess line can be snipped off.
Here's the first gun rigged temporarily to see the overall effect:

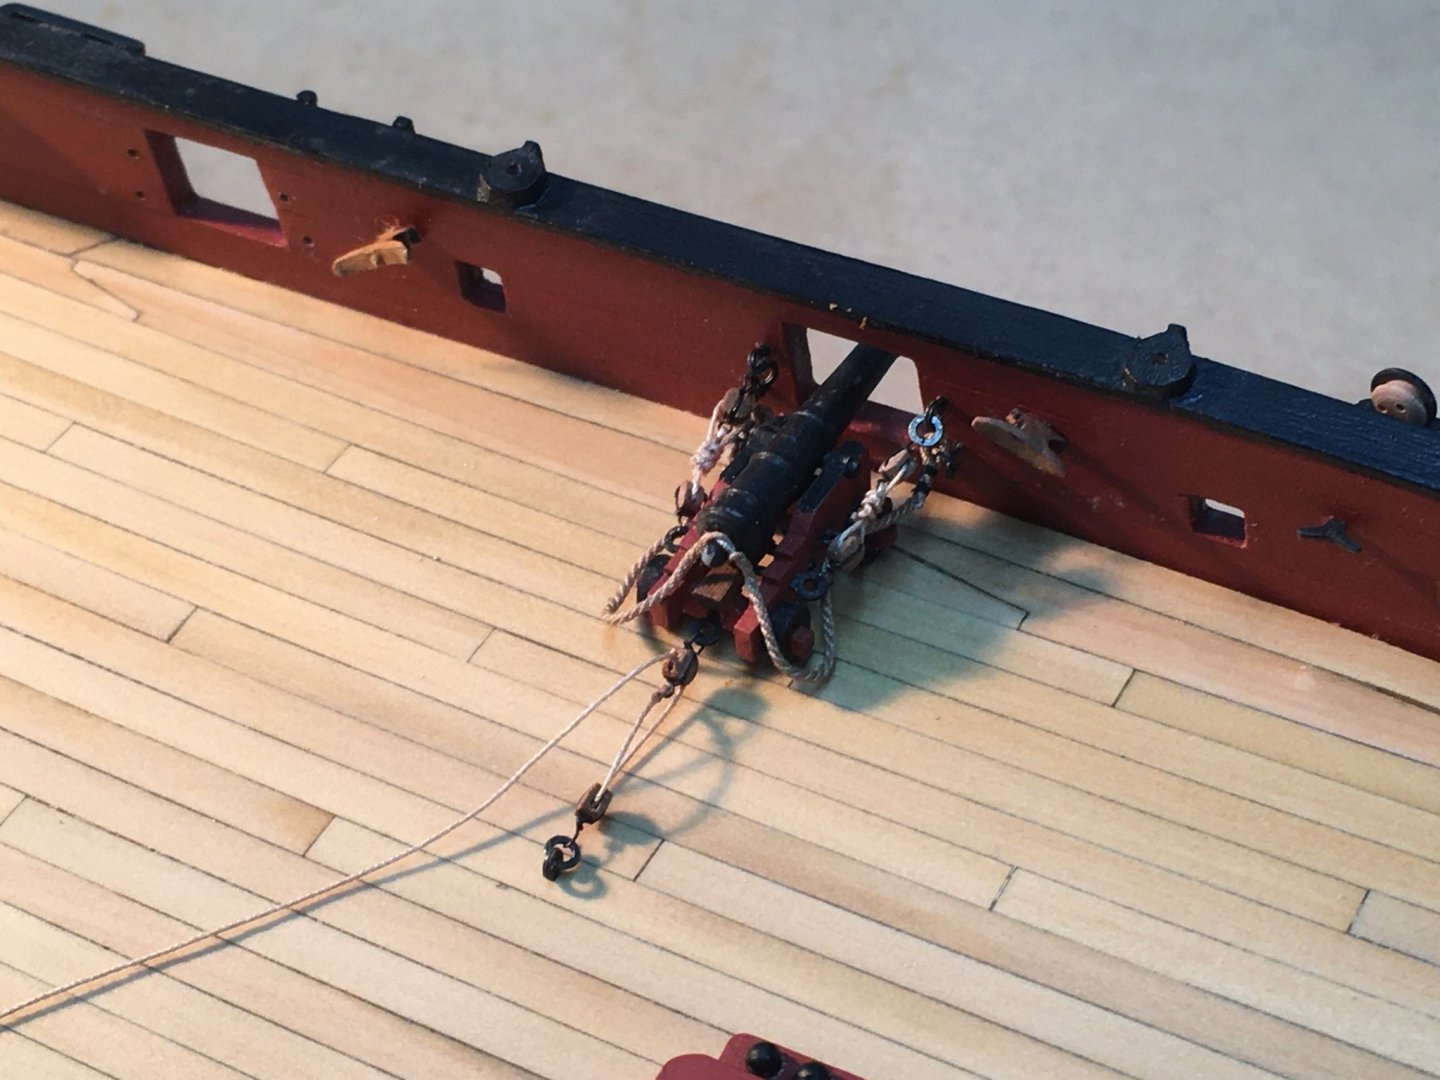
I'm still not sure about the side tackles. Apart from anything else, they completely hide the neat little ringbolts I made on the carriage for the breechings. I've seen rigging where much more rope is left between the side tackle blocks, leaving space for more realistic frapping and allowing the whole tackle to hang down and show more of the breeching. Alternatively I could move the rear ringbolt onto one of the carriage steps. I'll do some more experimentation.
Having said all that, it doesn't look too bad from a distance 😀.
Derek
-
Congratulations on completing your first ship model - the first of many, I hope. Well done!
Derek
-
I second B.E.'s praise - those fashion pieces look beautiful, and your detailed explanations and photos will help other modellers.
Derek
- Ryland Craze, Saburo, BobG and 3 others
-
6
-
Tell the War Department that's fine, so long as she doesn't mind the furniture being 1:64 scale 😀
- Edwardkenway, glbarlow and ErnieL
-
3
-
-
Thanks Chuck & Vlad.
I've just ordered Model Shipways' 18th Century Longboat - another Chuck-designed classic that should make a fine addition to the fleet.
Derek
- MEDDO and Ryland Craze
-
2
-
-
There's a danger this is going to turn into "the cannon rigging log", 'cos that's all I seem to be doing these days.
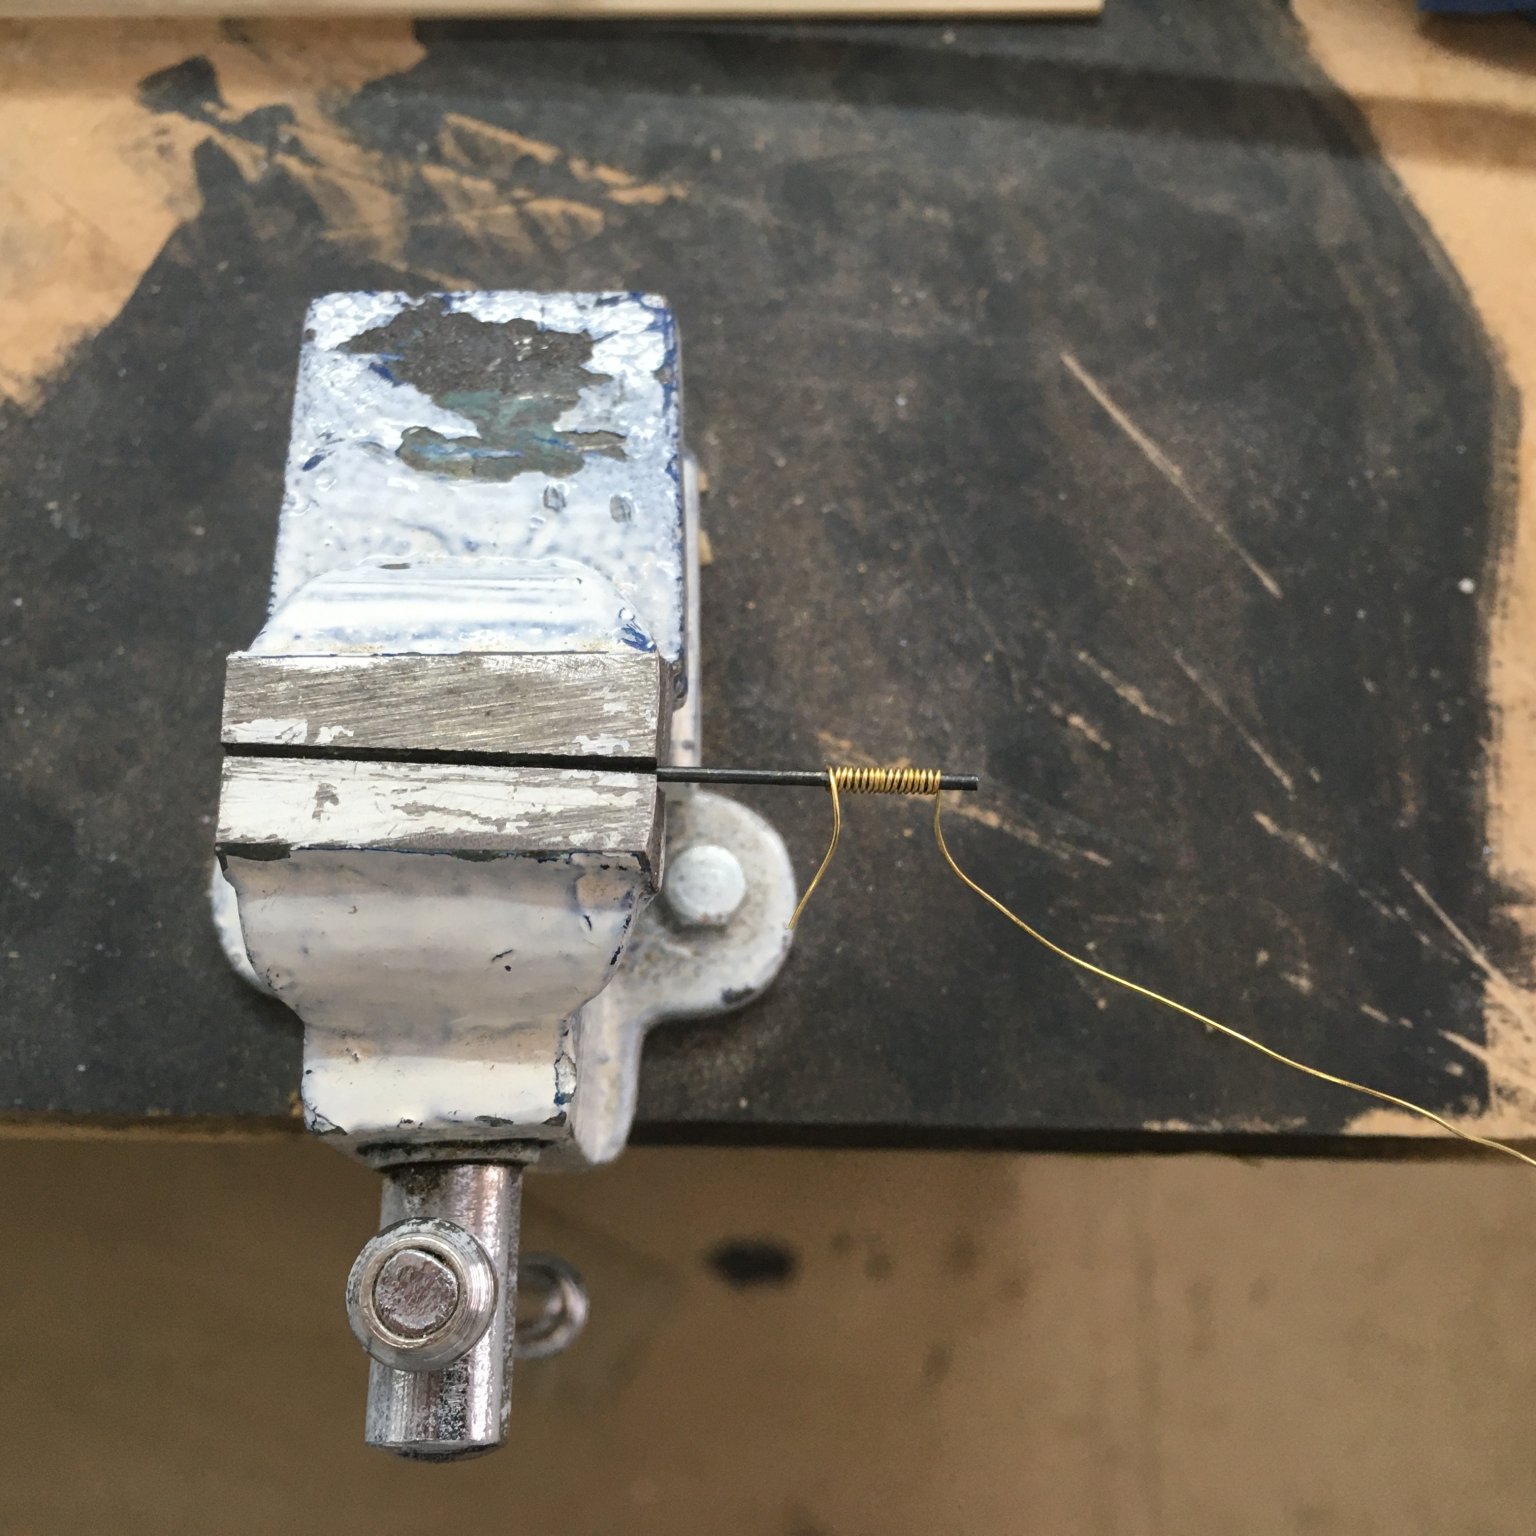
Having said that I'm enjoying the challenge, including the opportunity to refresh old skills such as silver soldering. Having decided to fully rig the guns one of the first tasks has been to make the 28 ringbolts required for the breechings. I made my first attempt with 0.50mm brass wire...

...and quickly decided it was over scale. I settled on 30 s.w.g. / 0.32mm which equates to 20mm/0.8" at 1:64 scale. My method for making rings is fairly standard, starting by winding the wire round a 1.0mm drill bit...

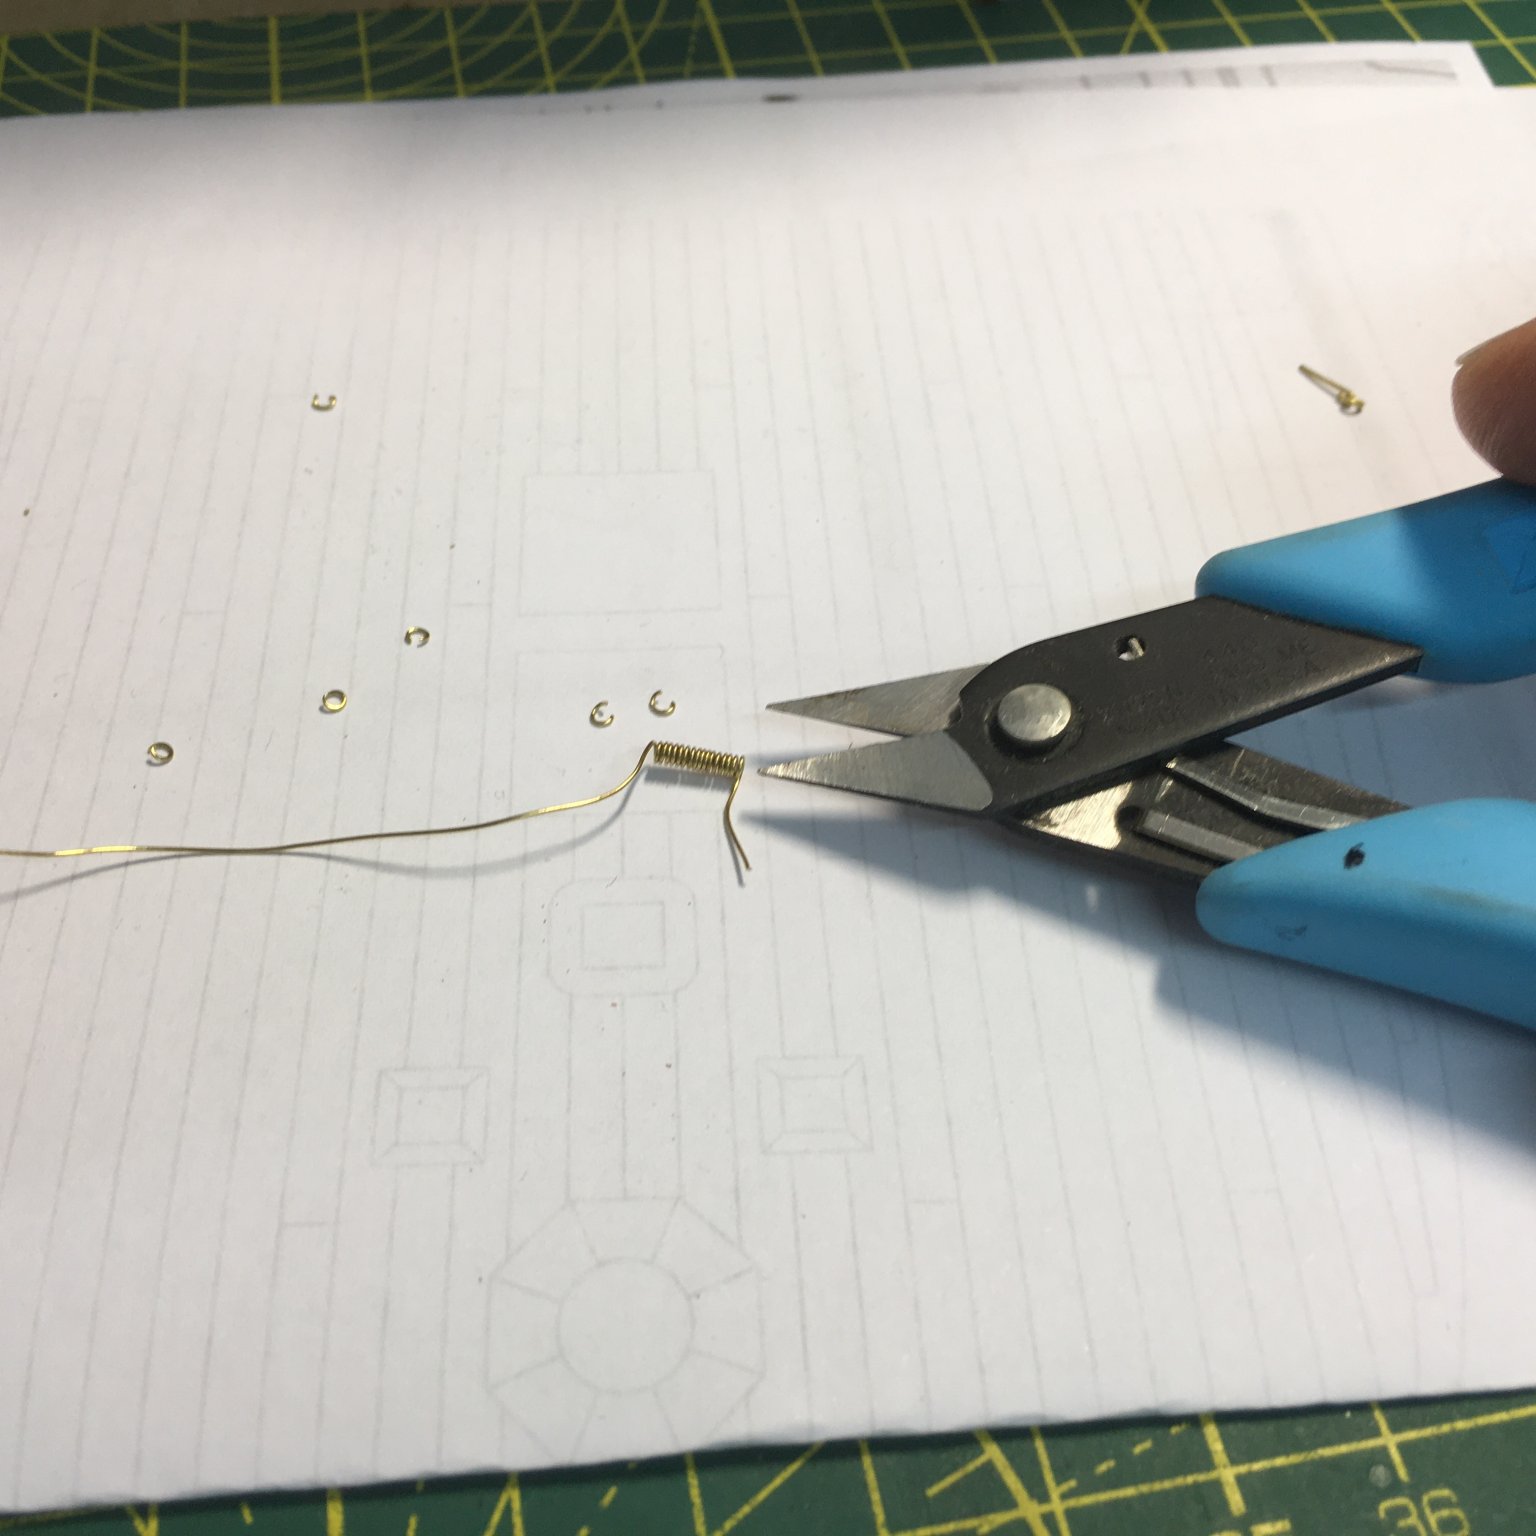
...then cutting along the resulting coil with the smallest snips I could find:

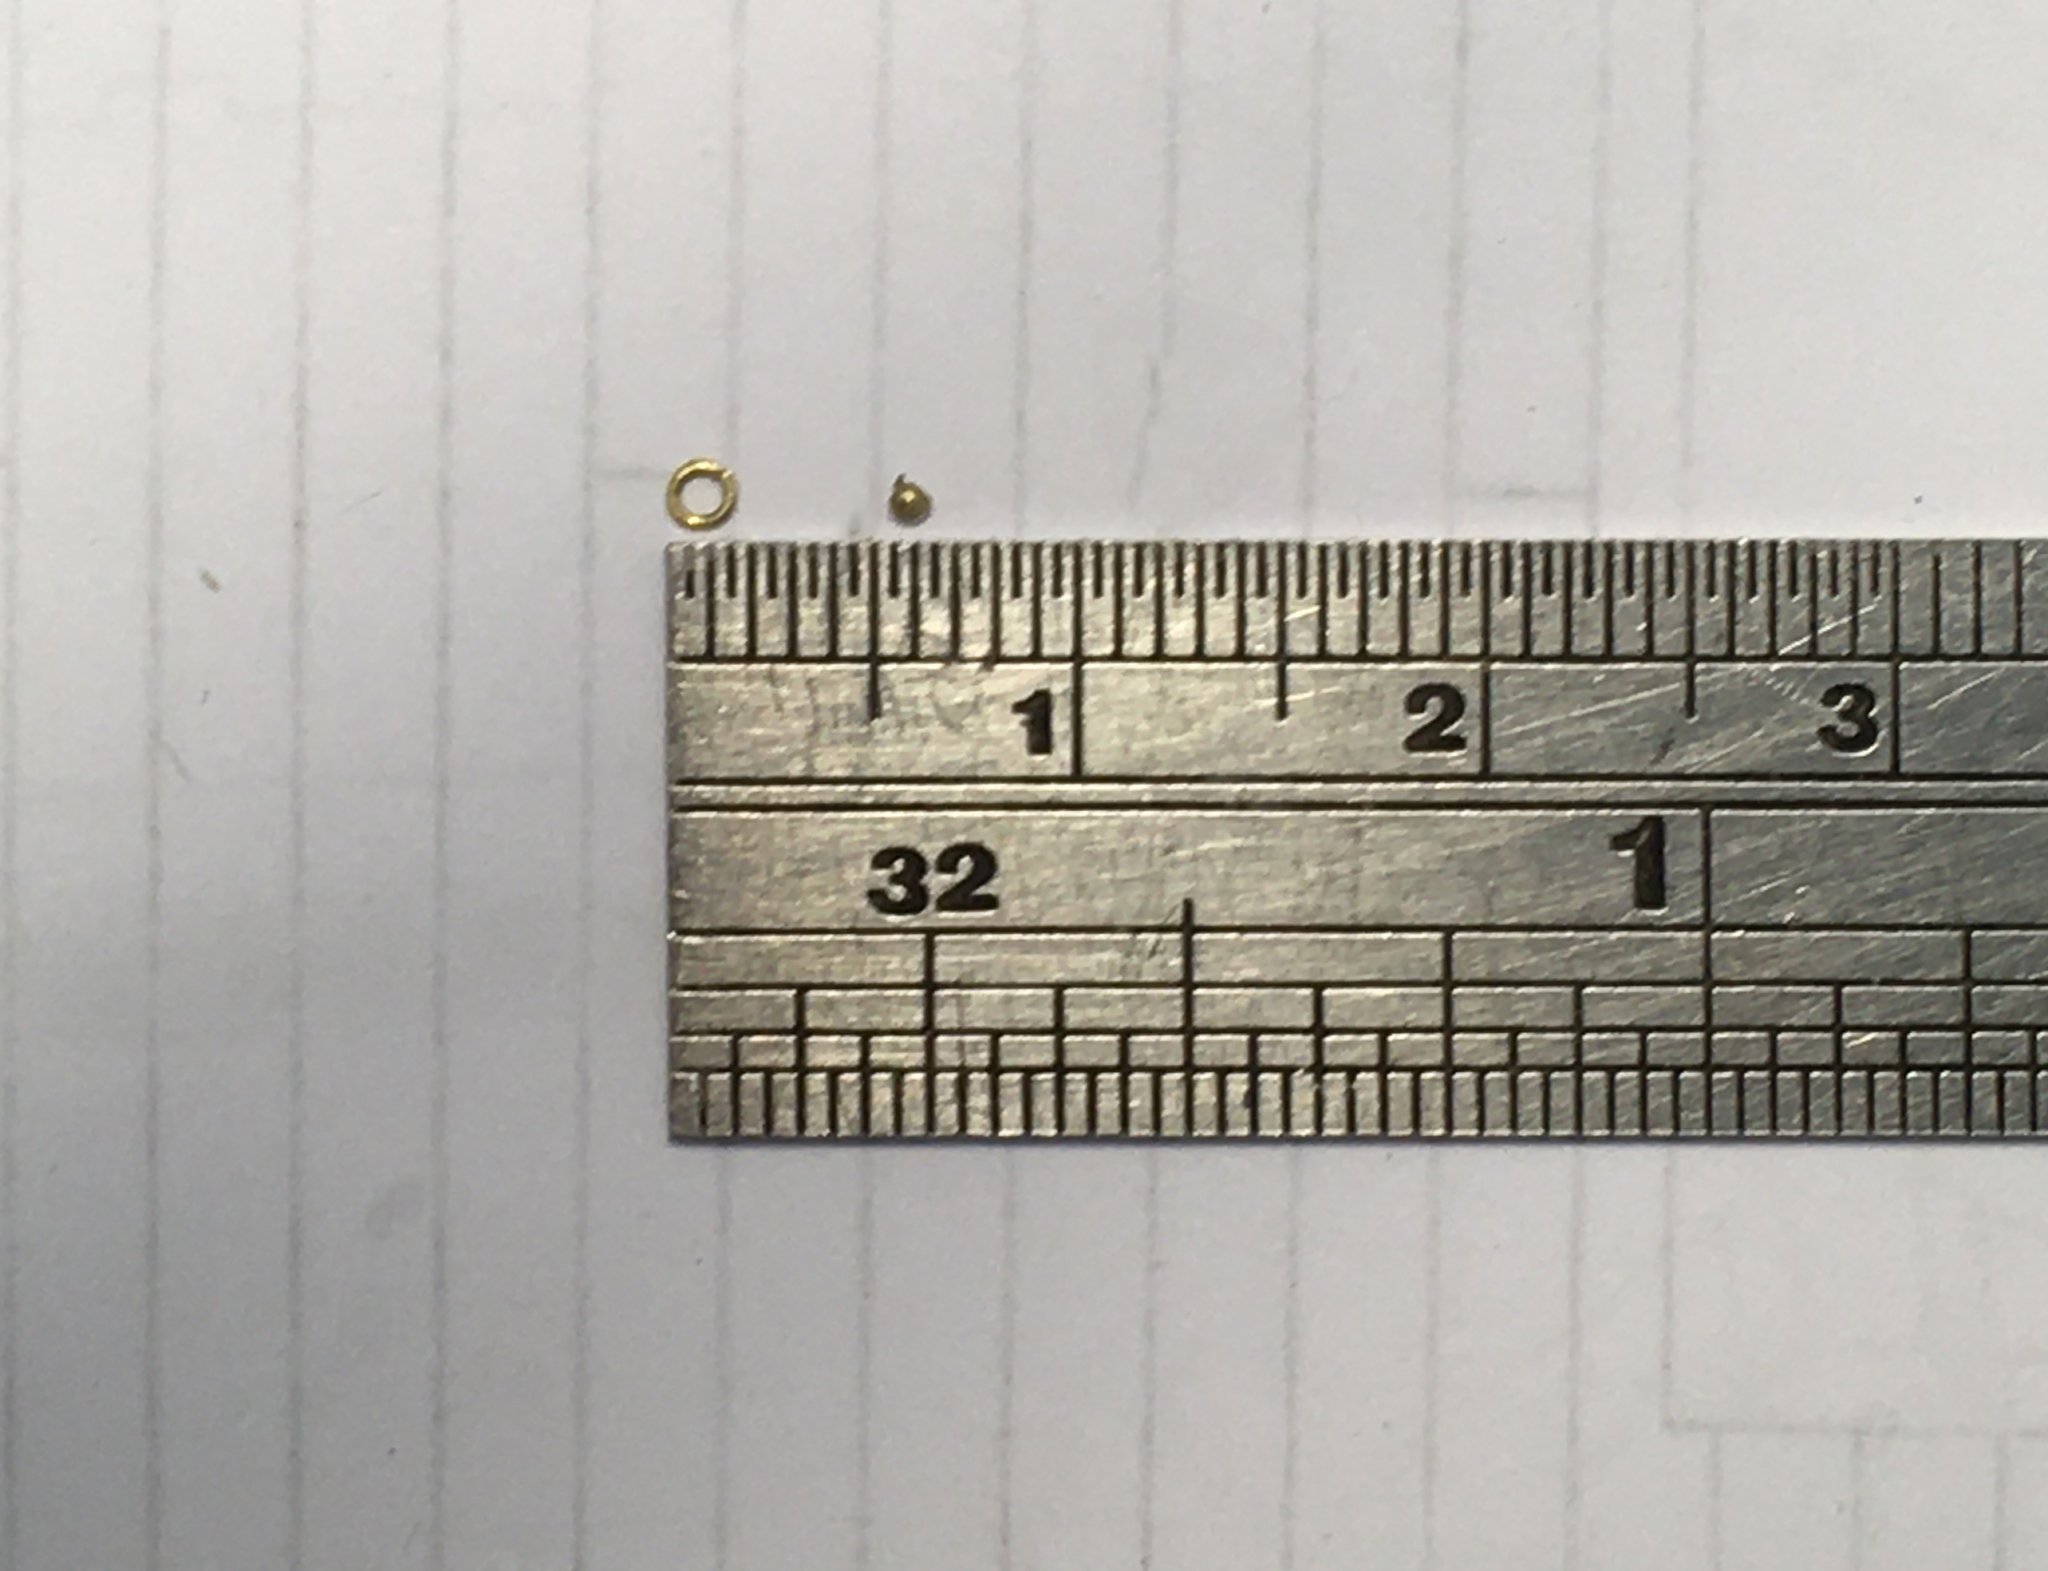
The wire I'm using is soft, so squeezing the individual pieces back into rings is fairly easy - apart from the inevitable tendency for rings to go pinging off to be lost in the black hole lurking in most workshops. I probably lost around one in five that way (and yes, I've read the entertaining forum topic on that phenomenon and tried the various solutions suggested, all to little or no avail. But I digress). I thought I could get away without soldering the rings, but unfortunately the brass is so soft and easily bent that I had great difficulty getting them to stay on their bolts. So, out with the silver soldering kit. For very small jobs like this I use silver solder paste which works a treat as the flux and solder are combined in the one material. The brass is so thin I found the solder melted into the join when I got within about 20 mm with the torch. Here's what happened when I got too close:
Believe it or not, the blob on the right is all that was left of a ring the same size as the one on the left.
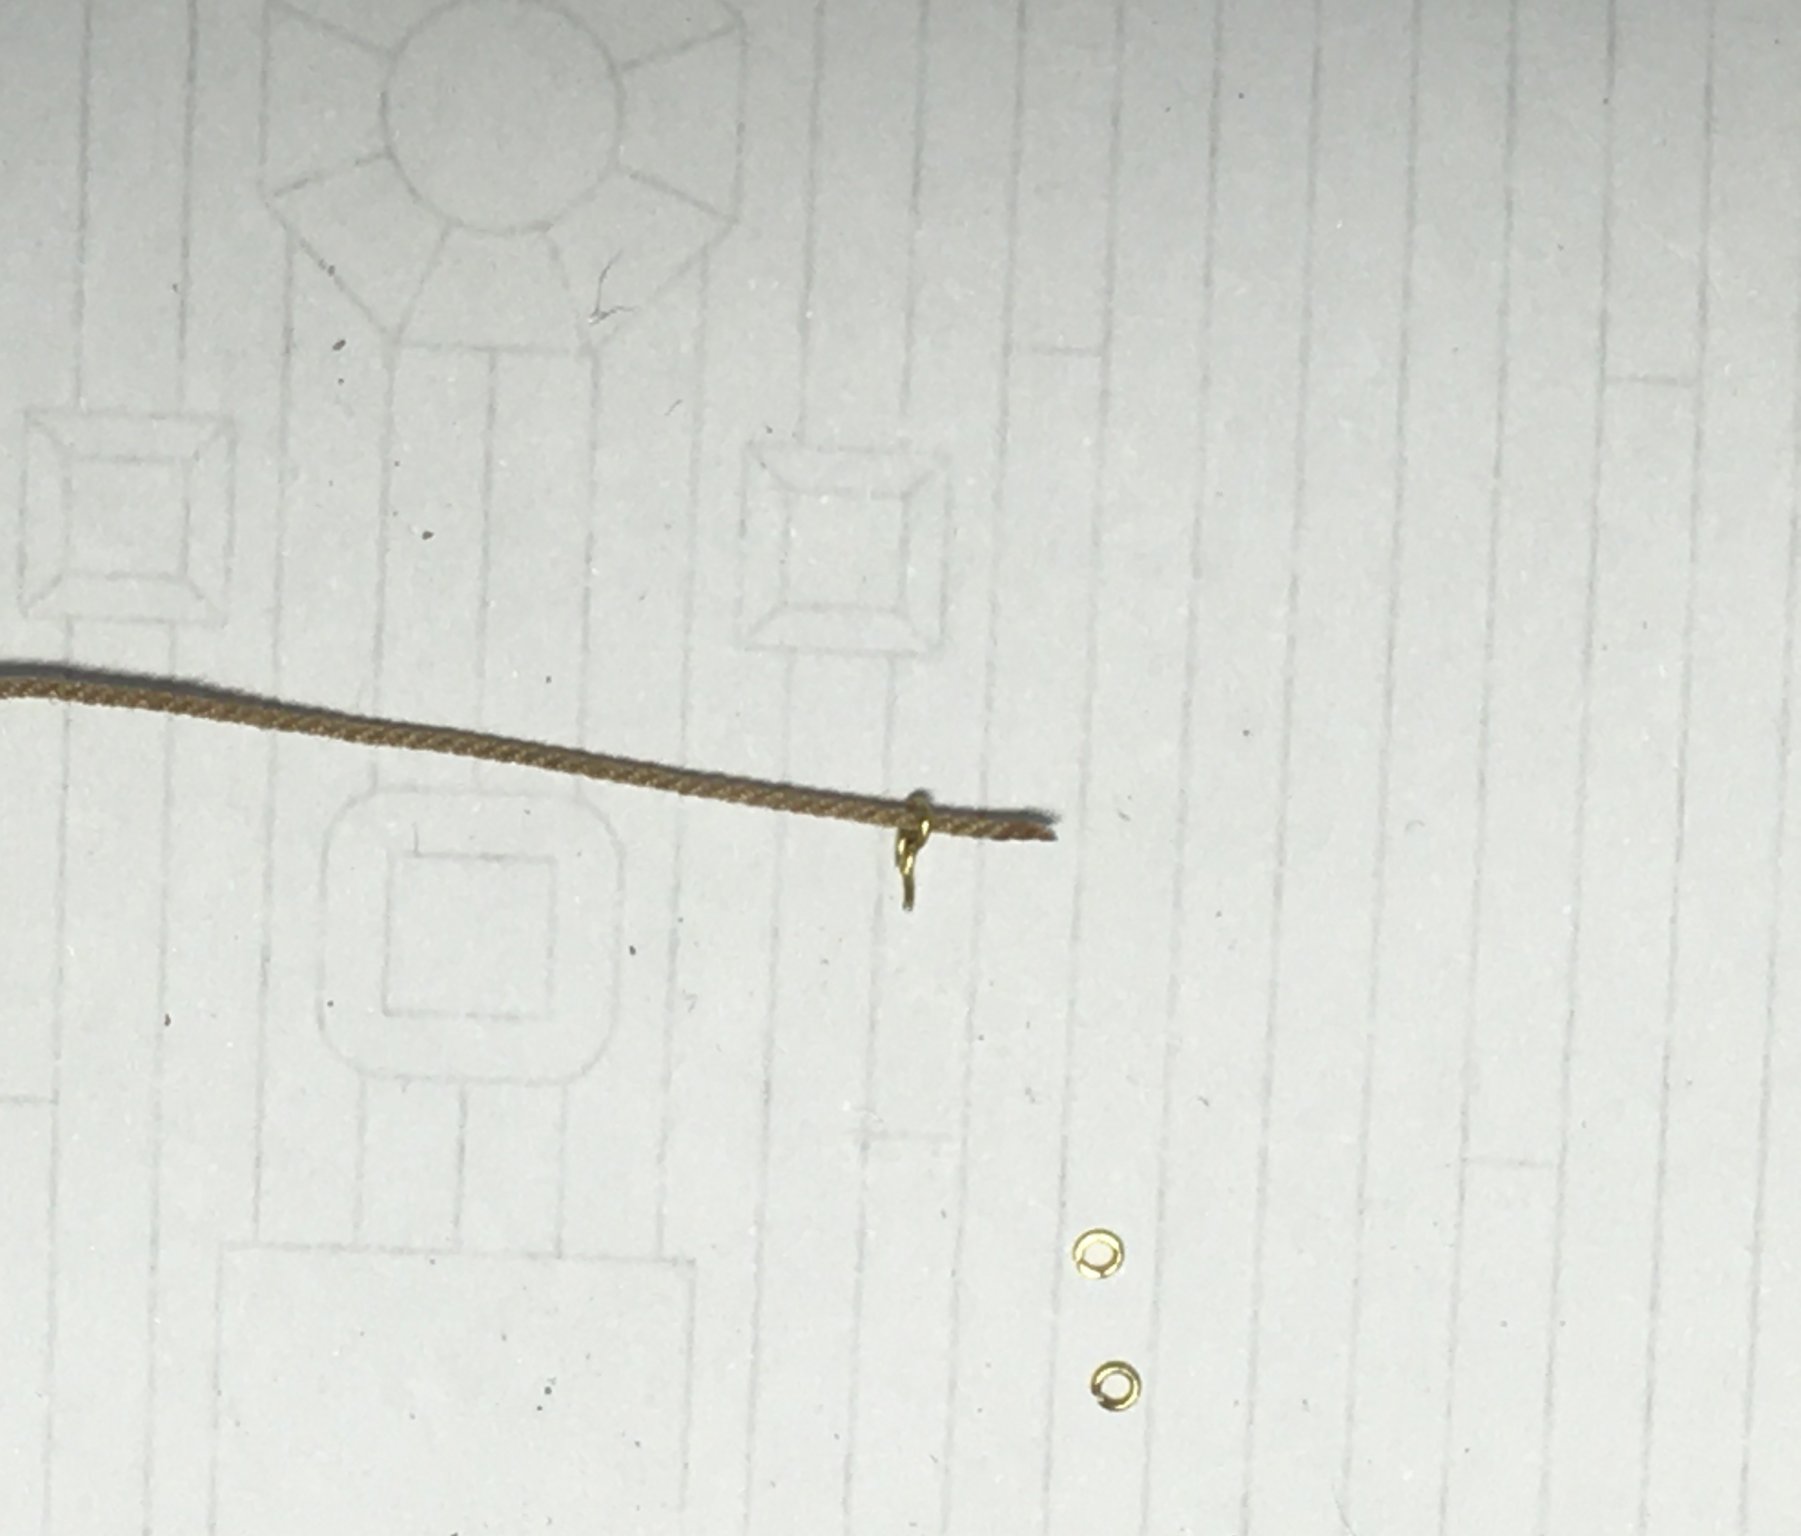
Next, I fitted bolts by just bending a piece of wire round the rings and snipping it off short. Before going any further I checked the breeching would pass through the ringbolt:

The breeching I'm using is 0.75mm rope I made on my Syren rope rocket. Another of my favourite tools. That test passed, I blackened then fitted the ringbolts:
I'm happy with the size and appearance. Unfortunately they rather show up the photo etch rings for the side and train tackles, but I draw the line at making another three ringbolts for every carriage. I'm sure all will look fine when all the tackle is in place.
On tackle, I've re-thought my approach to blocks and hooks. Although the method I described in a previous post works - gluing the hook in a hole drilled in the top of the block - the process involved is fiddly and nerve-wracking to say the least, and I'm not convinced the resulting tackle will be robust enough to withstand handling when I come to rig the guns. I can imagine a fair percentage failing.
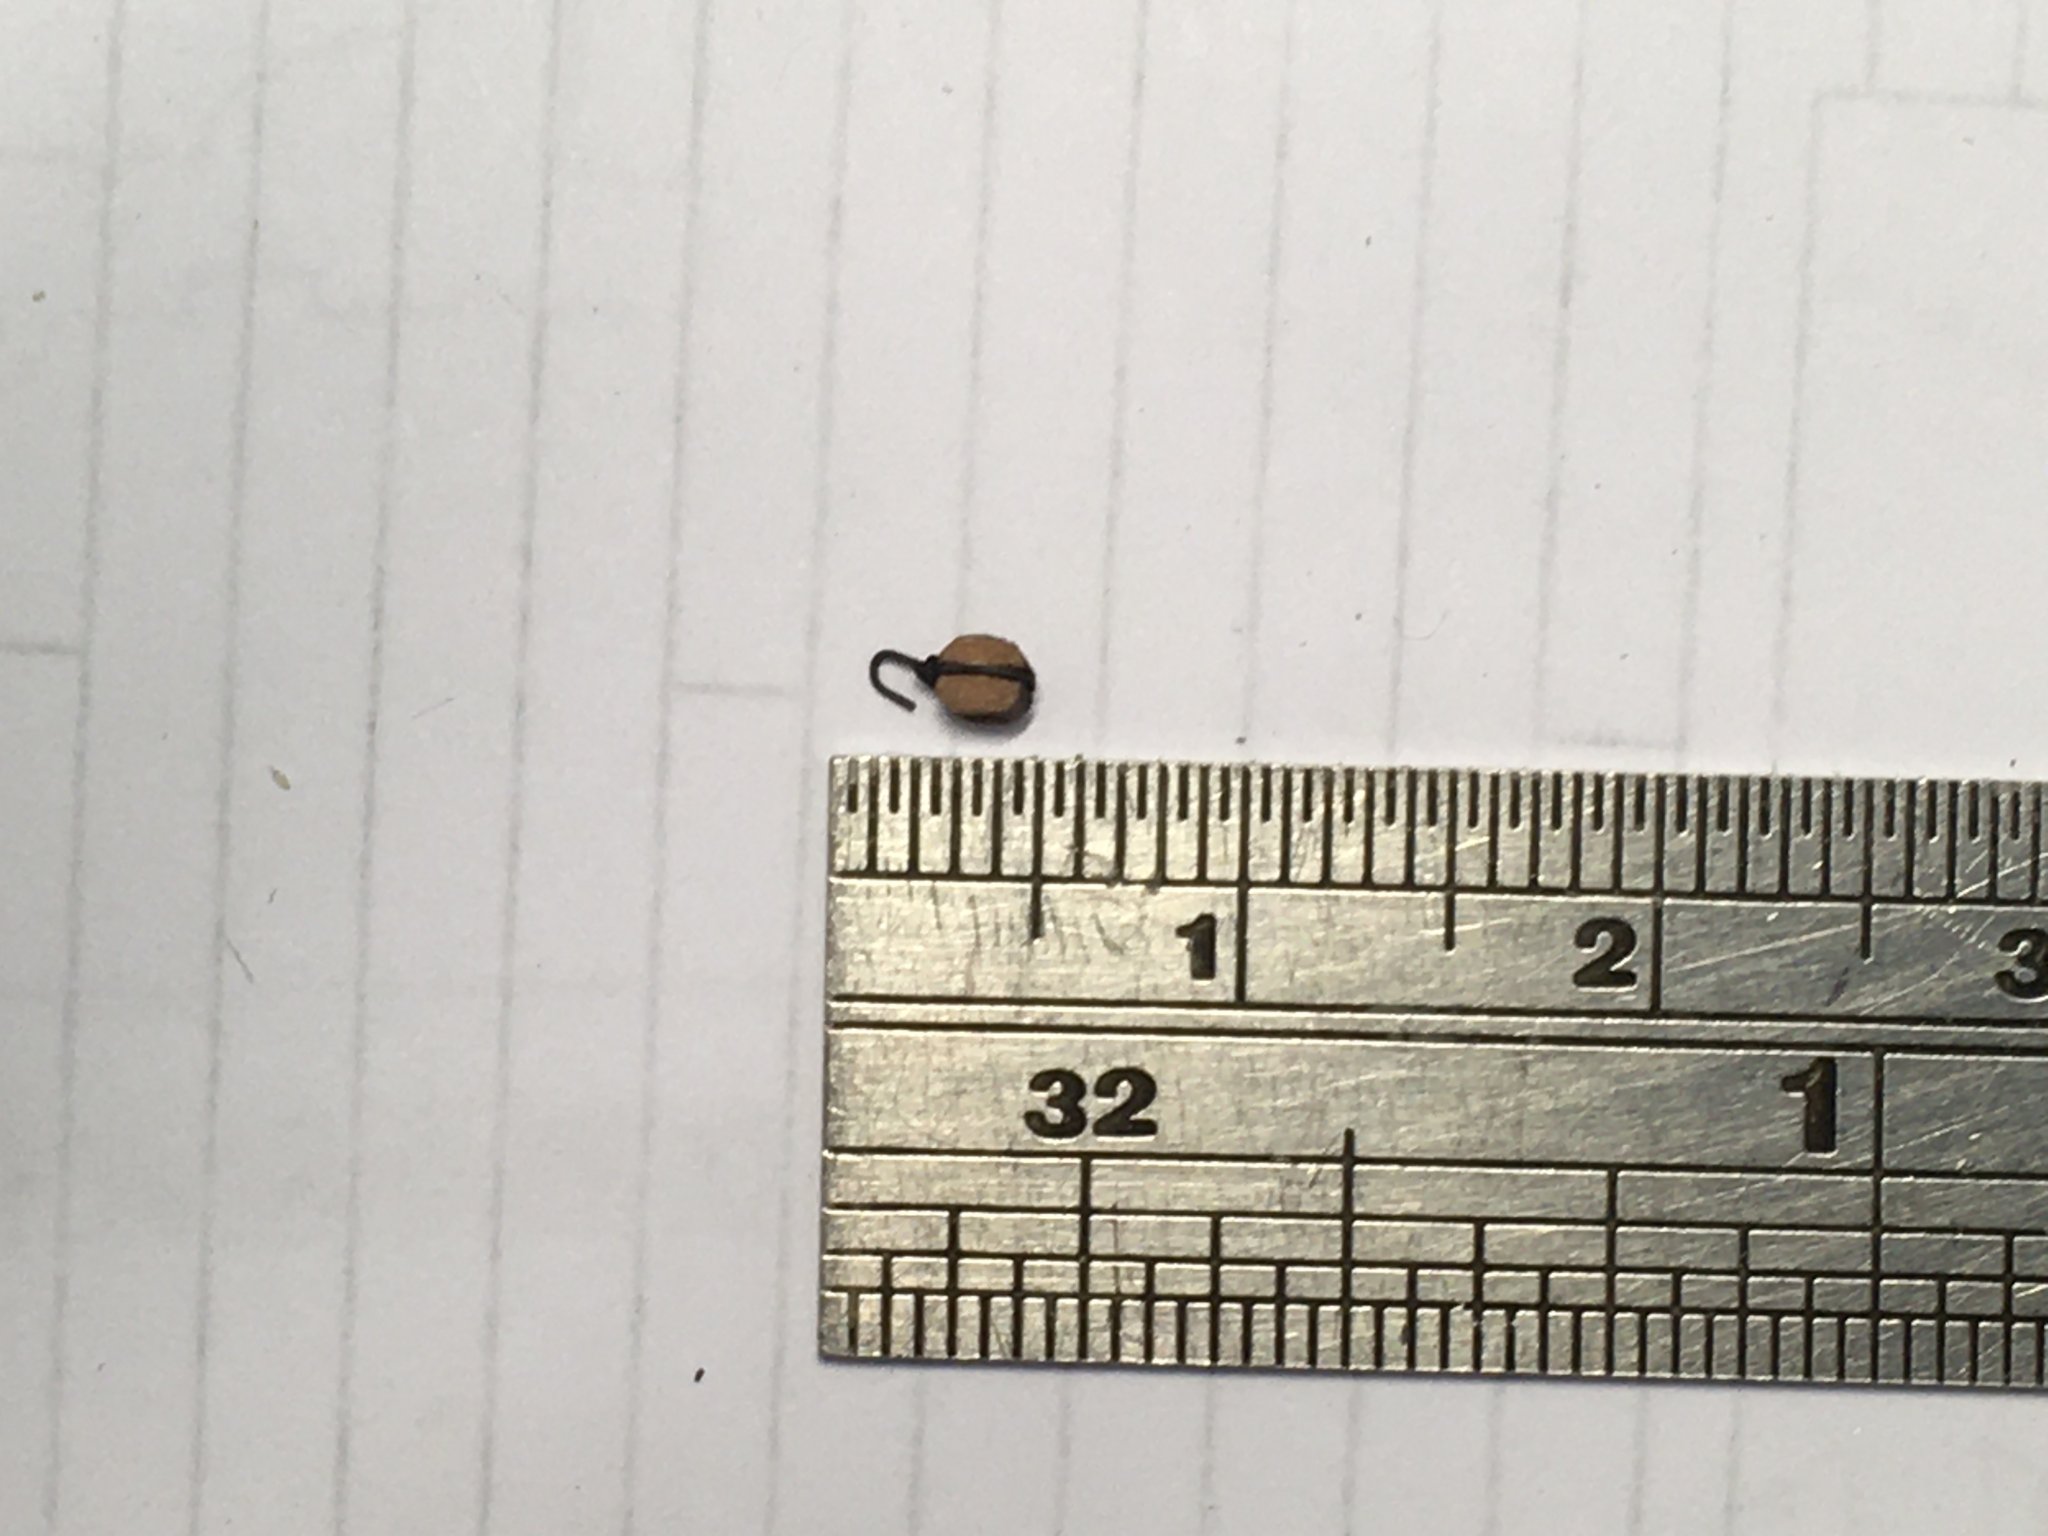
So, in search of another approach I ordered some 0.20 mm brass wire. This is 12 mm/0.5" at scale which seems reasonable. I can't photograph the process I used at this scale, and neither can I claim copyright. I got the idea from EdT's magnificent Young America log - here. Basically, you take a short length of wire, wrap it round the block, take one end and wrap it round the other, and shape the latter into a hook. I dropped the block complete with hook into acetone followed by Brass Black, which didn't seem to do the block any harm. This is the result:

At 4 mm overall length I'm happy with that. Only another 83 to go!
Derek
- ccoyle, Ryland Craze, Edwardkenway and 7 others
-
10


Milling a mast cap
in Masting, rigging and sails
Posted
Glenn
Making what you call mast caps with the mill worked very well for me, using the technique No Idea described. Here's a couple I made for Royal Caroline (not very good pictures, I'm afraid). I'll see if I can put some pictures together to illustrate the method more clearly.
Derek