

JohnB40
-
Posts
183 -
Joined
-
Last visited
Content Type
Profiles
Forums
Gallery
Events
Posts posted by JohnB40
-
-
I agree with Mark,sand down and fill in the gaps in the deck. It has been a long time since I built the Swift.... If I remember correctly the hull is double planked. The first basswood layer makes it easier to rectify mistakes,once again filling and sanding to make a good shape and surface to glue the outer layer of veneer to.
Take your time and don't get discouraged over mistakes. When you are done they won't be noticed.... It will be the over all look of the whole model your eyes take in. You will have learned a lot of how-to knowledge in the process.
- Robin Lous and mtaylor
-
 2
2
-
-
Hi Mike,
Very nice work so far. I like the idea of a ship build that is not a warship for a change.
When Woodland Scenic lettering.... I used a really thin board in the right shape and color. Then sprayed it with Dullcote (if unsealed), transfered the letters and then another thin coat of Dullcote.
Thanks for the info on inserting text
- mtaylor, Elijah, Landlubber Mike and 2 others
-
5
-
Hi Gary,
I'm following your and Dirk's stern assemblies very carefully and book marking them for future reference when I get to that part.
"I will at least continue to check the hull for "fairness". " Point taken... I have ordered a small machinist square and a couple of Machinist 1-2-3 square blocks from Amazon to help myself get the bulkheads at a true right angle to the Bulkhead former. I'll have to wait until they arrive to continue with chapter 2,but with my eye sight plowing ahead would probably end in disaster.
-
-
-
-
-
Gary,
That is a brilliant idea for temporarily reinforcing the bulkhead extensions. Your construction is proceeding very nicely indeed.
I contacted John at Model Expo about the plywood in my kit and he said new material would be shipped... I will start my build log when it arrives. It will be nice to have building log still in the somewhat early stages of construction to check in on about what lies ahead.
-
-
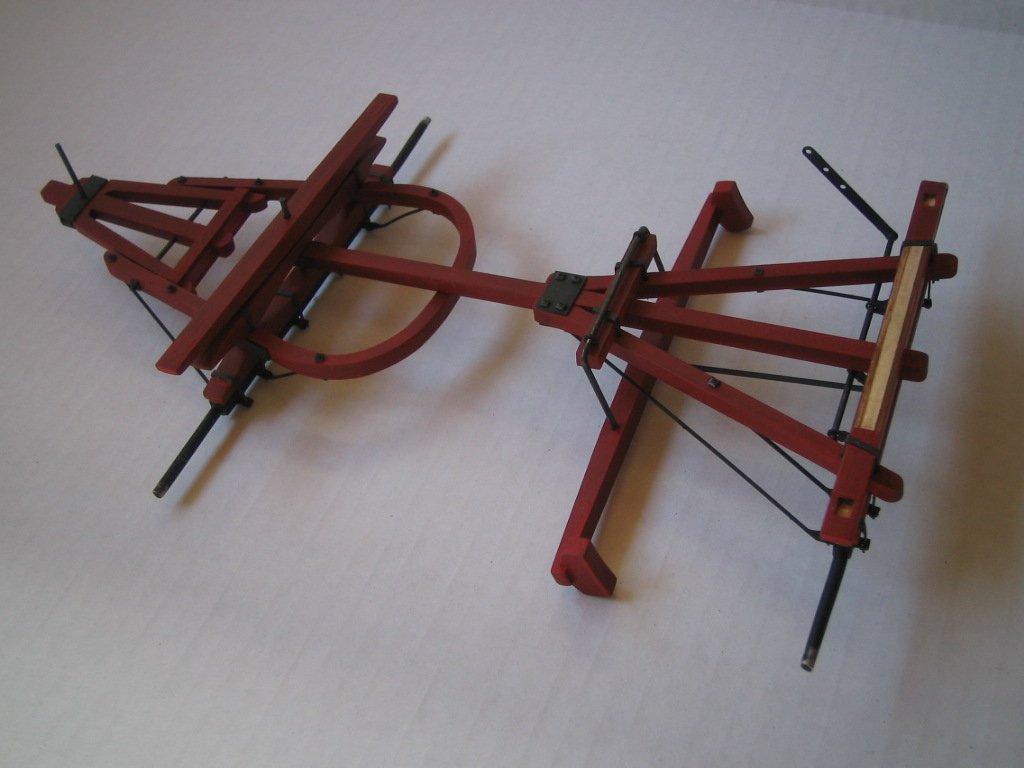
Greetings to all,
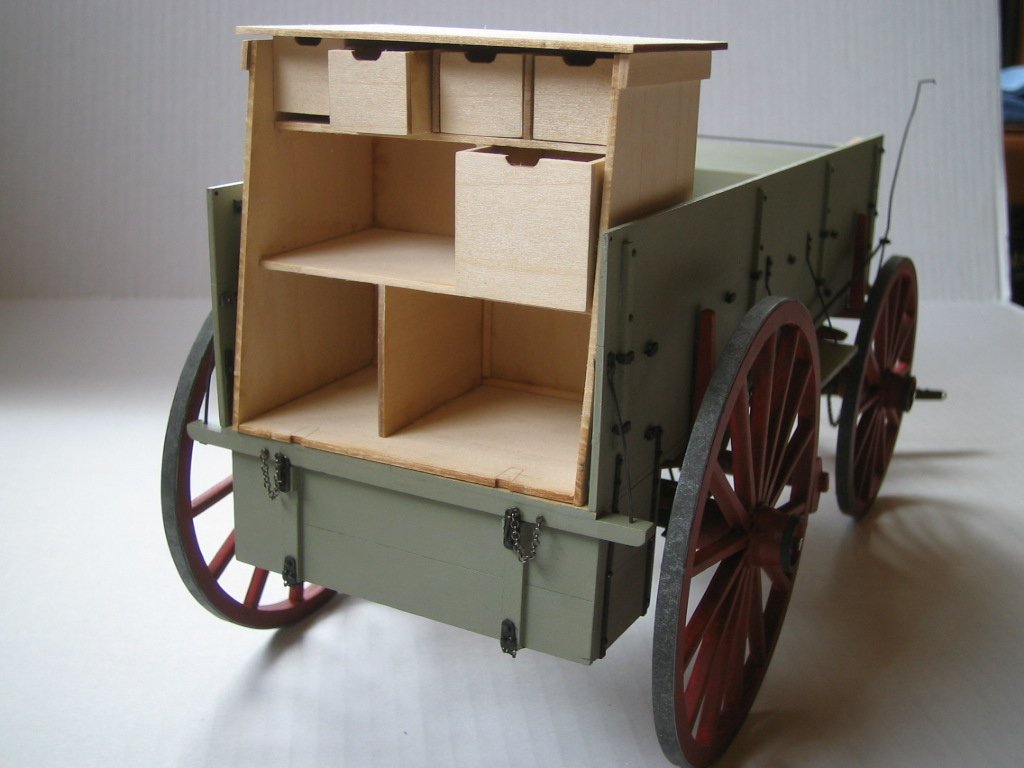
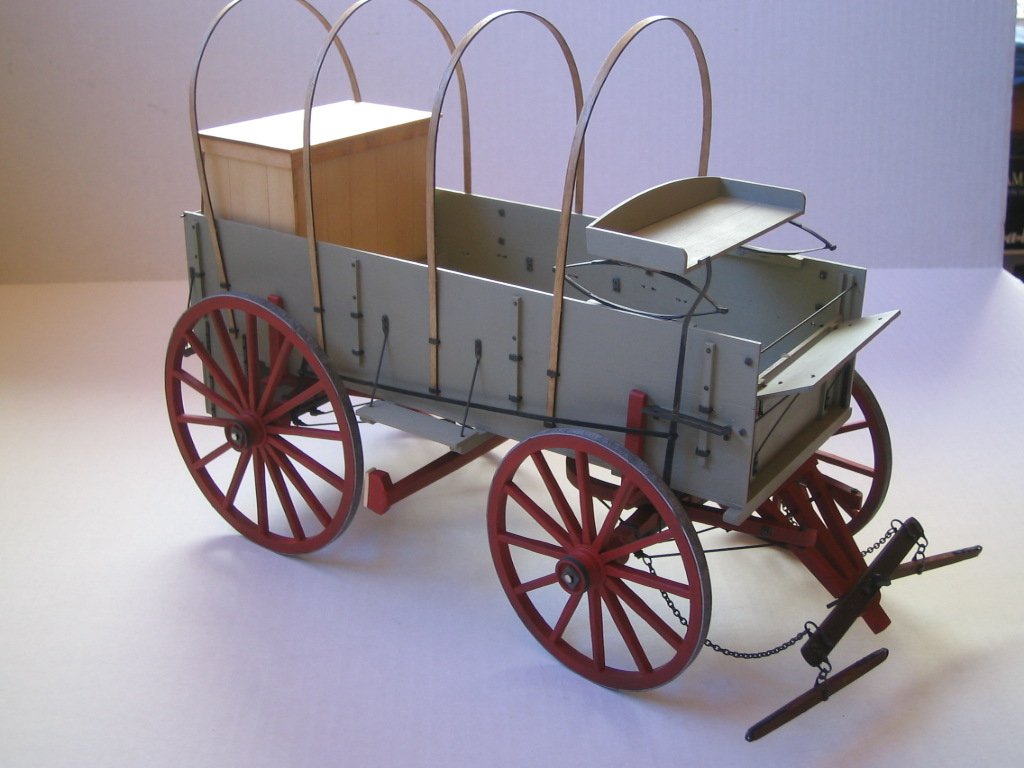
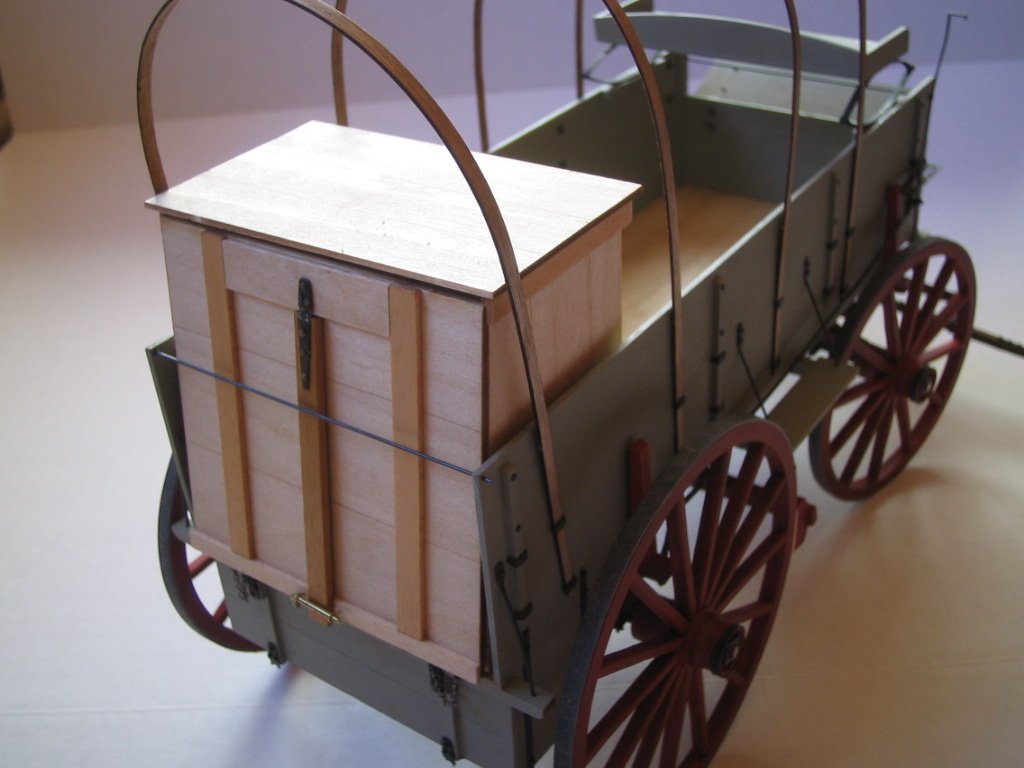
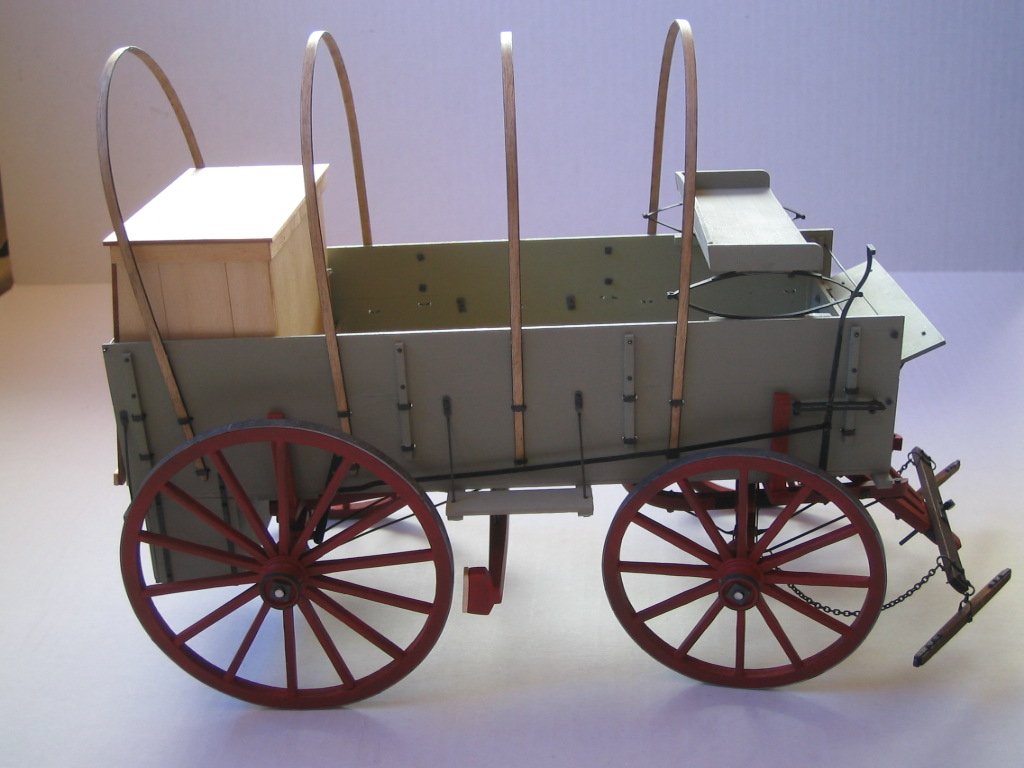
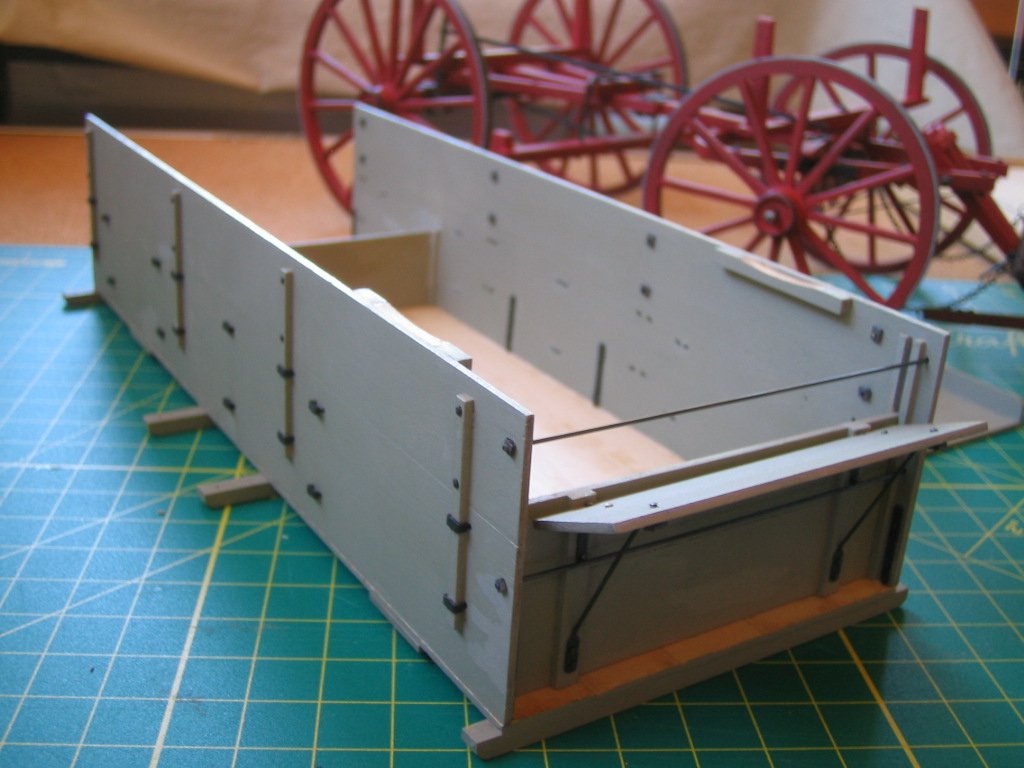
Well the diversion into wagon building is completed. I have enjoyed building the kit,and it is now back to the ship construction for me. It was nice to have a project that could be completed in a shortish period of time,as I have been working to make Corel's Unicorn into a reasonable rendition of a 'first frigate' for quite a time.
I have left the canvas cover in my wife's hands. I decide whether to attach it fully covering the bed or folded up when she is finished.
-
I then used the right angle jig to glue the components together using Titebond 3 and JB Weld's Woodweld epoxy. It is the first time I used Woodweld and I think it is a good product. It sets up in 6 minutes and is fully cured in 1-3 hours. An added bonus is it dries a tan colour and is easily painted. I kept everything square,used clamps and rubber bands and was pleased everything went together well. Just a few more bits of ironwork to add on and then on to the chuck box........
- Old Collingwood, Altduck, coxswain and 5 others
-
8
-
Greetings All'
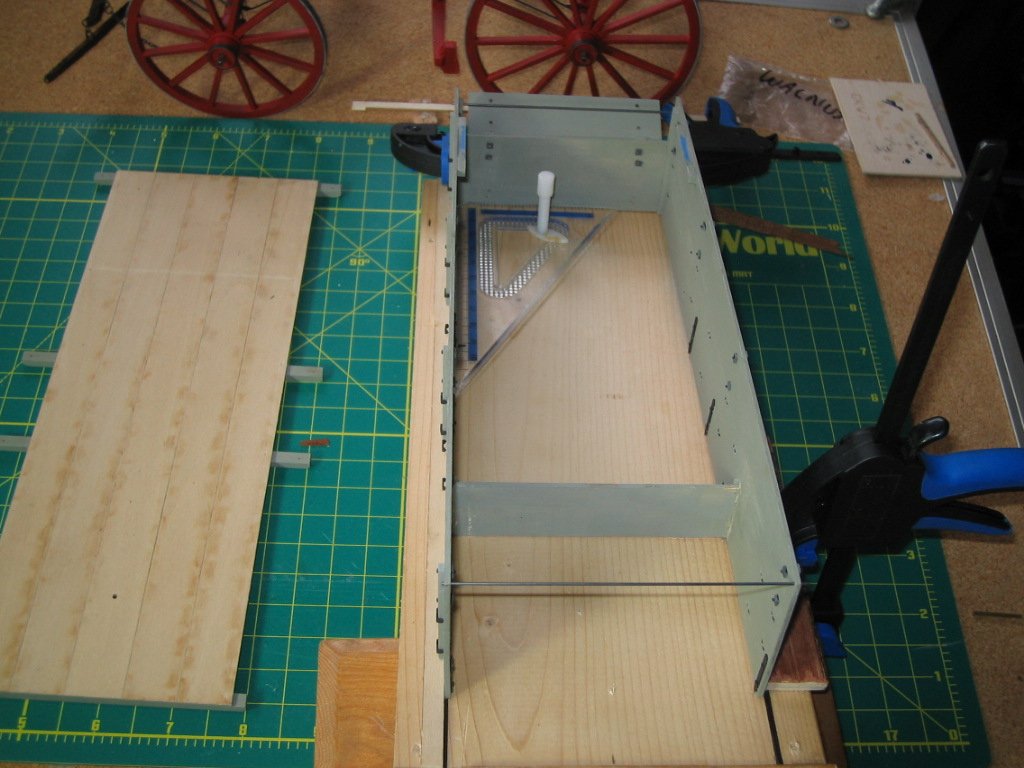
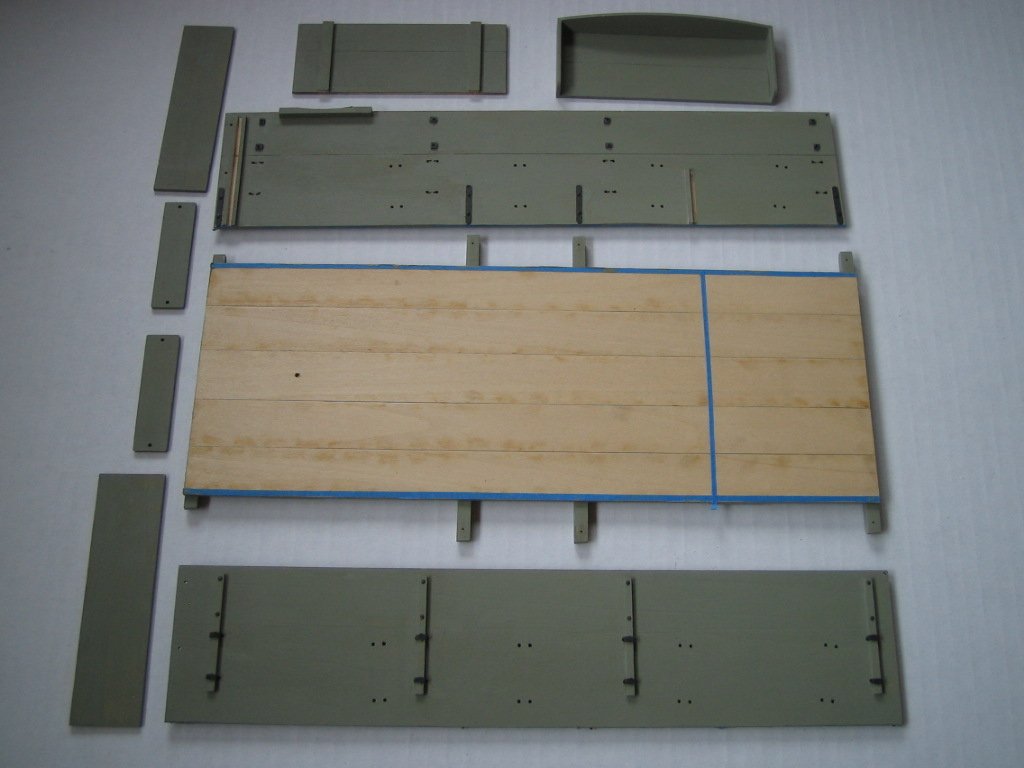
Some progress made on the wagon bed. Components were painted beforehand,masking the surfaces to be glued.
- Ryland Craze, thibaultron, coxswain and 3 others
-
6
-
Very nice Mike
-
Greetings to all,
Thanks for the likes,and thanks Dan for the advice.
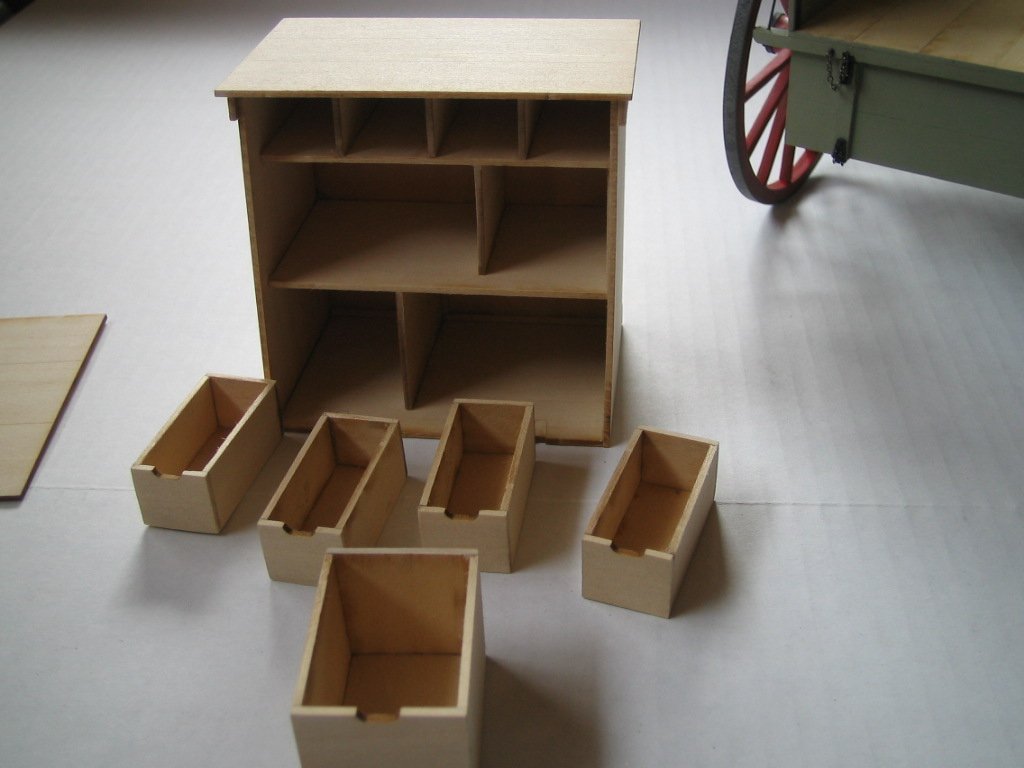
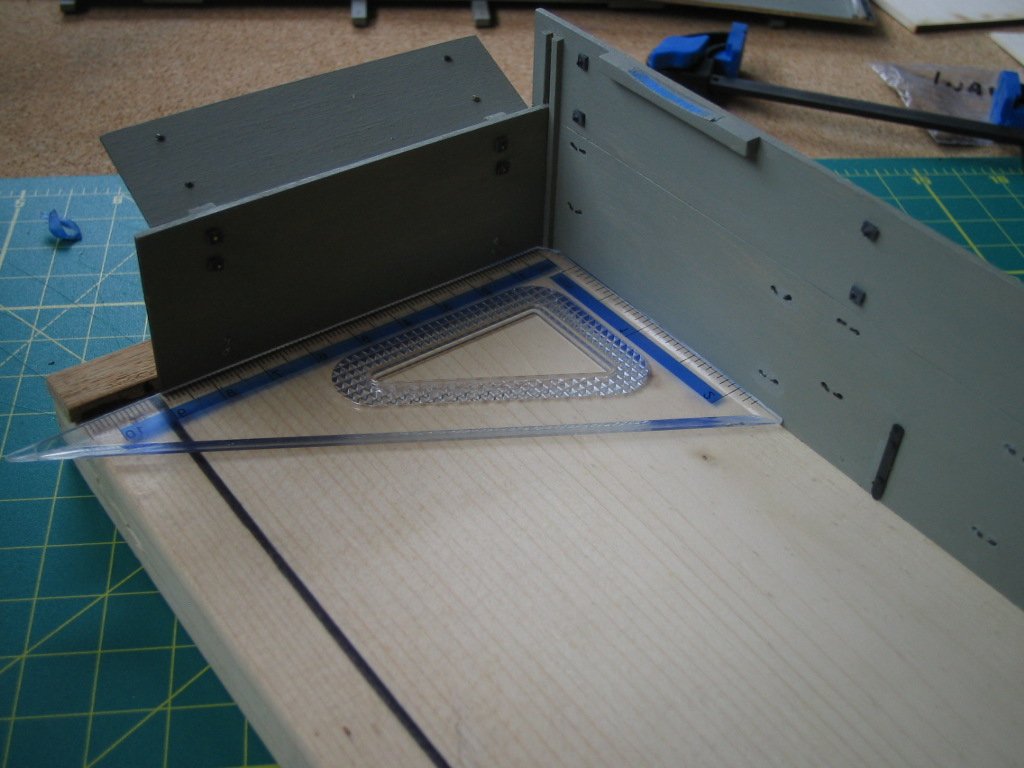
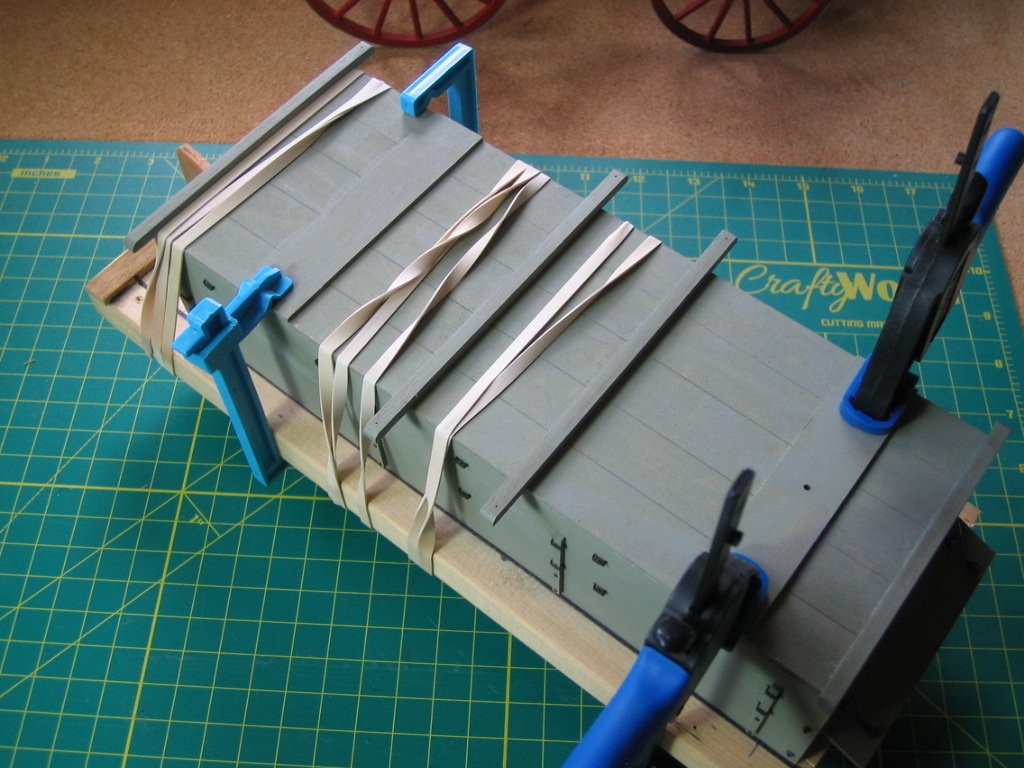
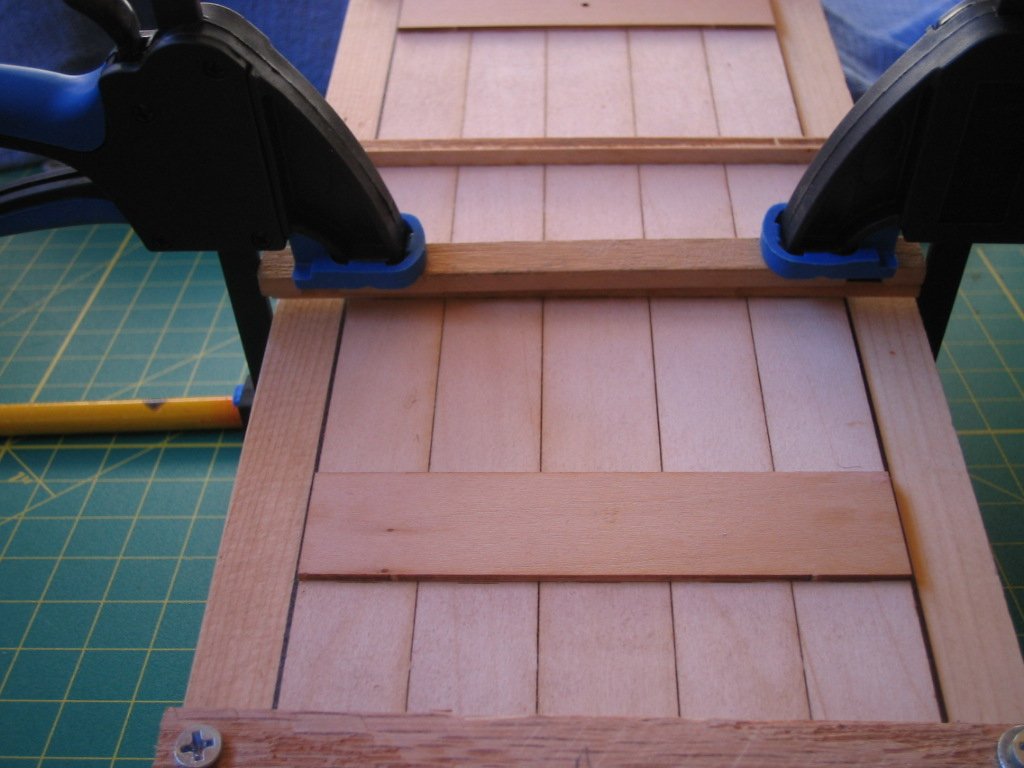
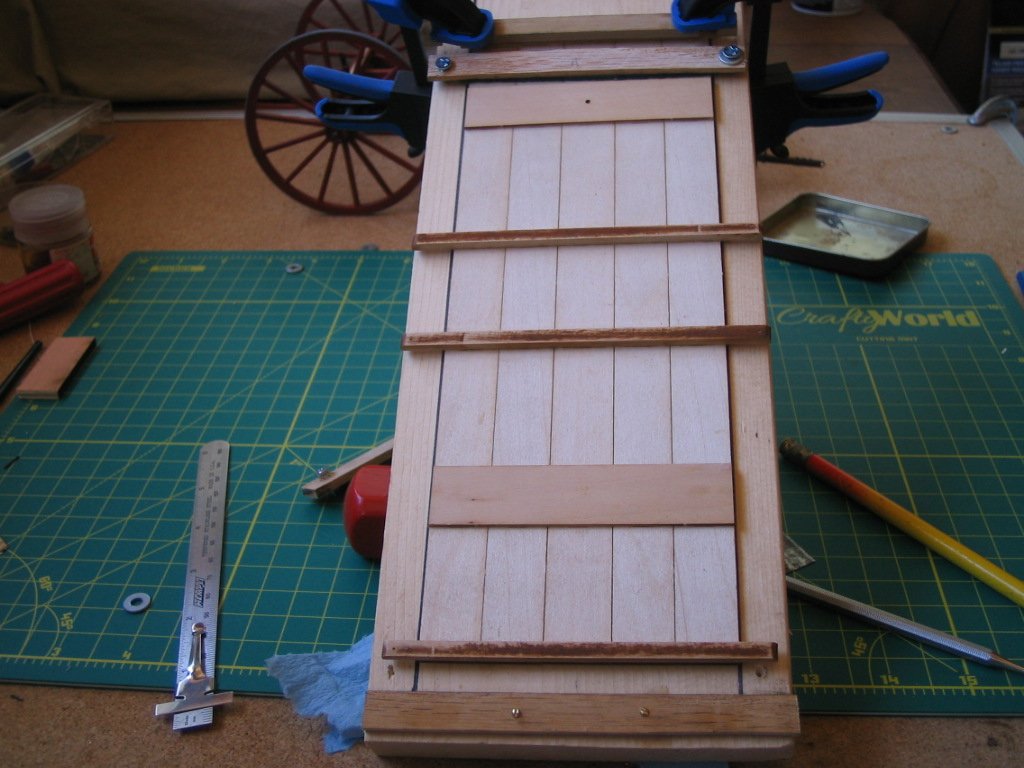
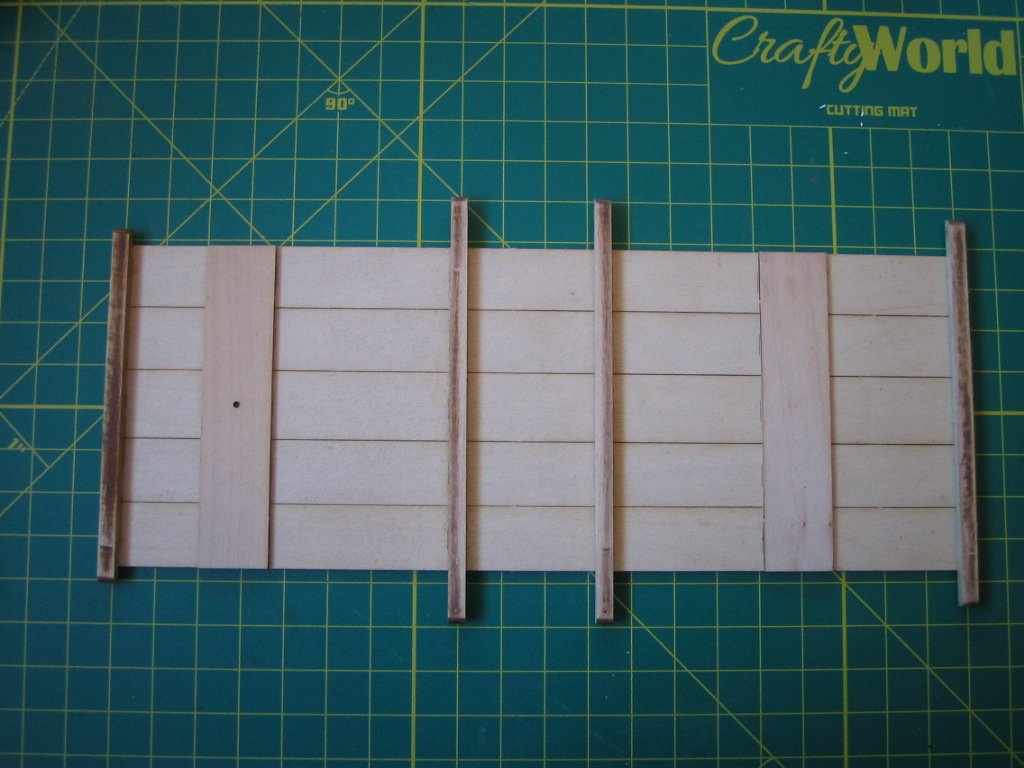
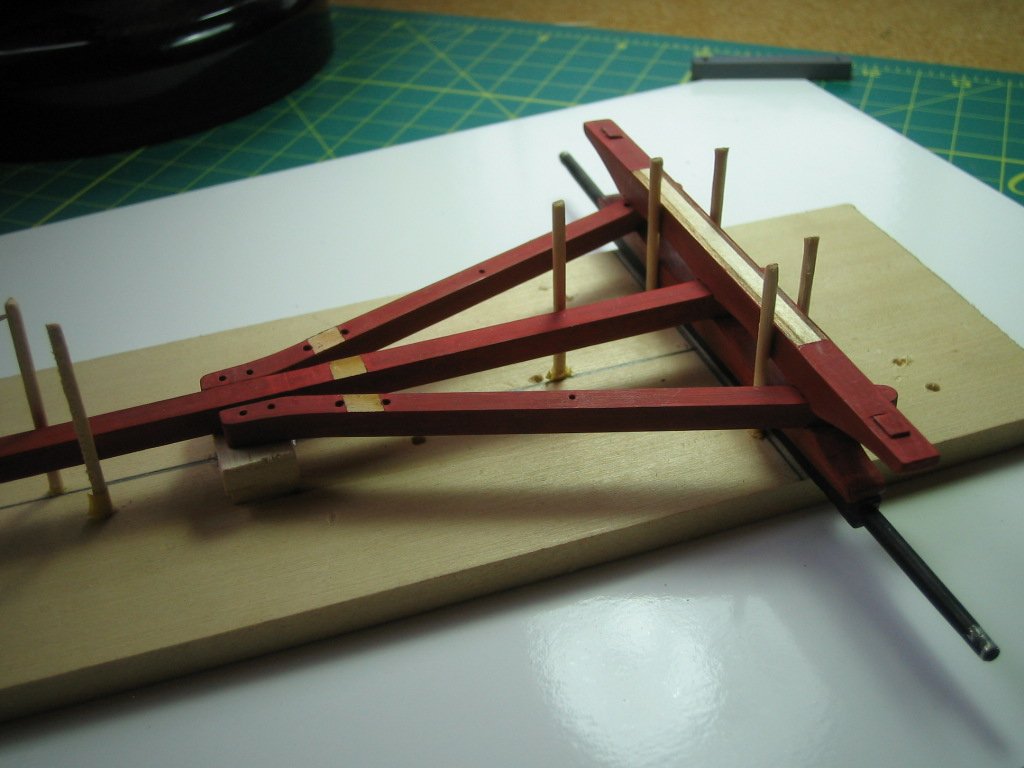
Some progress on the wagon box so far. The box bed floor is together ready for sealing and finish.
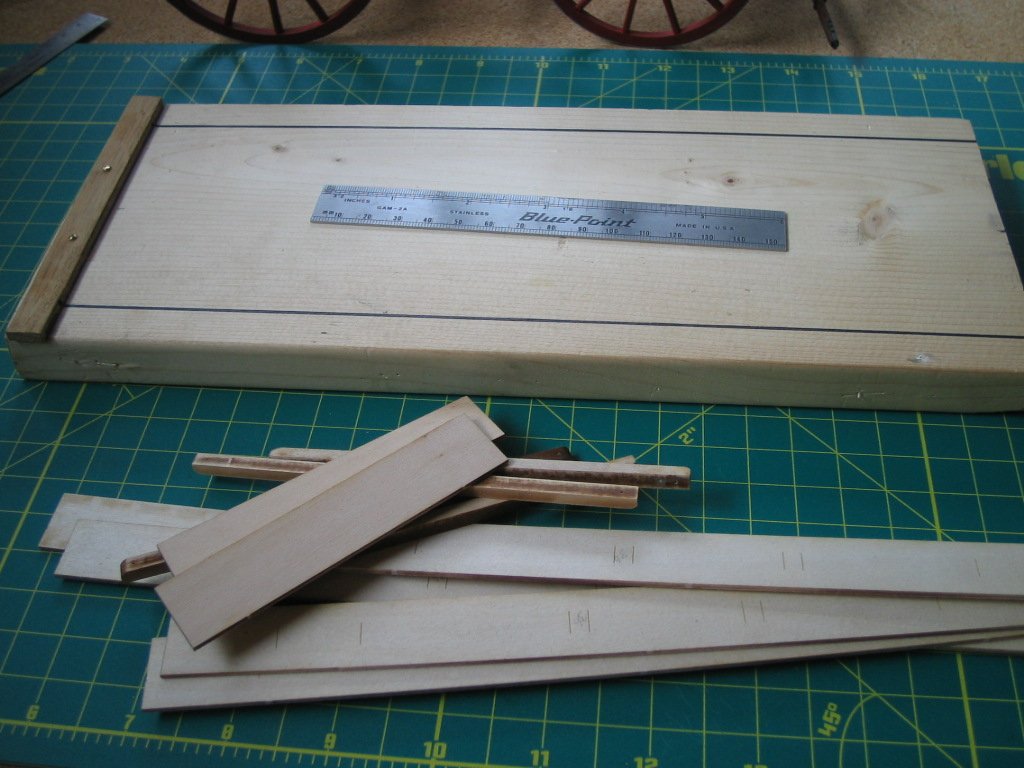
I wear glasses because besides other issues I have an astigmatism. The prescription to rectify this is ok for general use/reading,but causes weird parallaxes when focusing close up. As a result I needed a guide for keeping objects at right angles etc. I made a jig for the wagon box using a just milled piece of squared pine. I attached a back stop for the floorboards parallel to the end and then drew in 2 lines perpendicular to it the width of the bed. Using this as a guide I laid the boards in position and clamped them down. I was then able to glue and clamp the sills and cross beams in place one at a time,checking for alignment and squareness from several points. I let it set up and released the clamps and was glad all was as it should be,even though my eyes were telling a different story. I reckon I can use the jig for for the rest of the bed to keep everything true.
-
Greetings to all,
Thanks for the likes and replies.
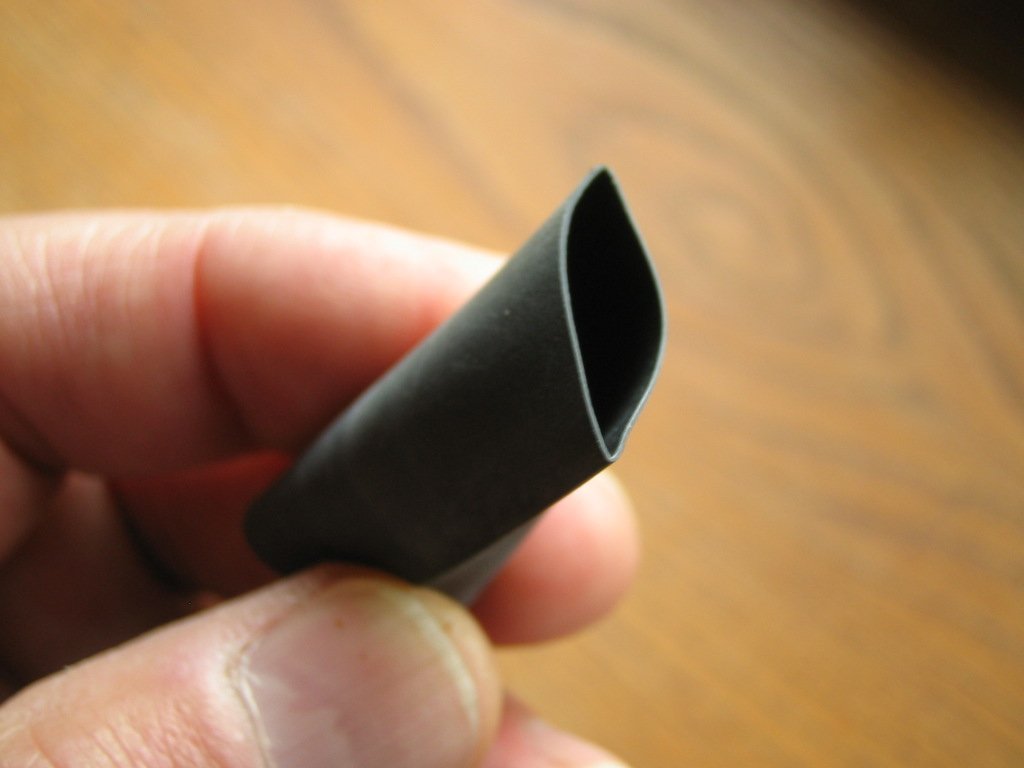
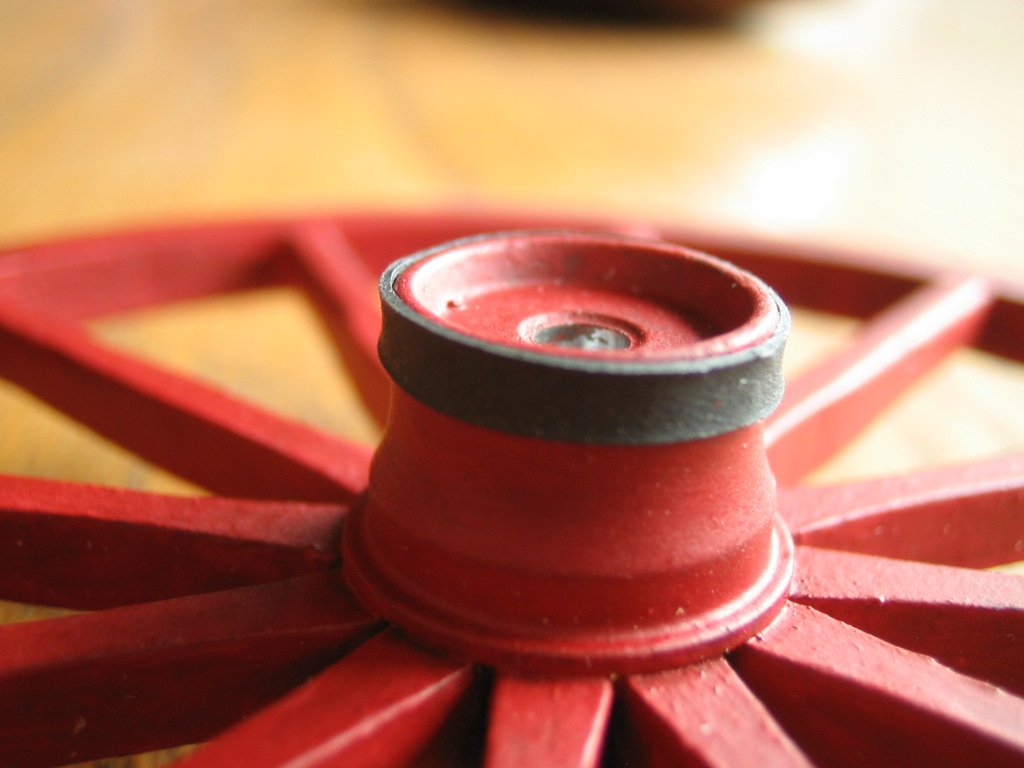
A bit of nomenclature confusion over the wheels. I used shrink tubing on the wheel hubs and not the rim iron tires. After assembly and painting,I did a web search looking for pictures of 19th century wagon wheels. The wheel hubs were wood with iron reinforcing bands to help stop them splitting. One was on the outer end of the hub and one was further inwards where the spokes join the hub. There was probably more on the inboard side too (no photo found). I ended up just doing the outers as it was impossible to paint or use the tubing for the spoke band without making a mess of it.
- coxswain, Canute, Ryland Craze and 3 others
-
6
-
Greetings to all,
Some more progress on the chuck wagon...
The jig supplied with the kit made the wheels construction easier than I anticipated. For the outer bands on the hubs I cut shrink tubing to the correct width and used a heat gun to shrink in place
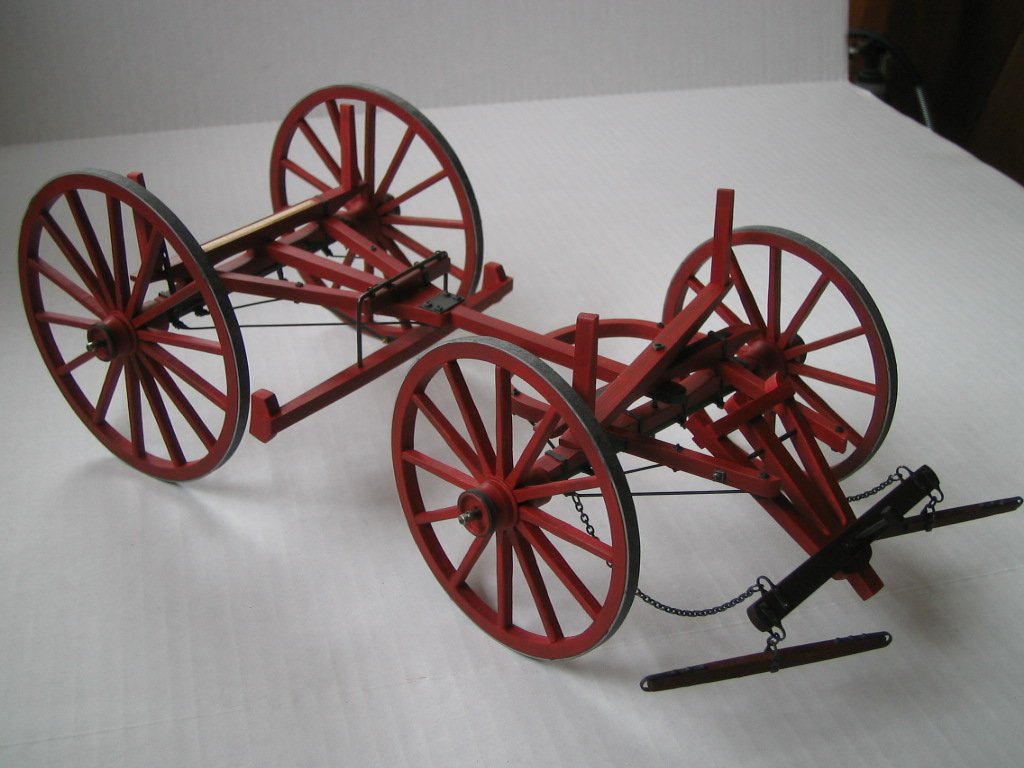
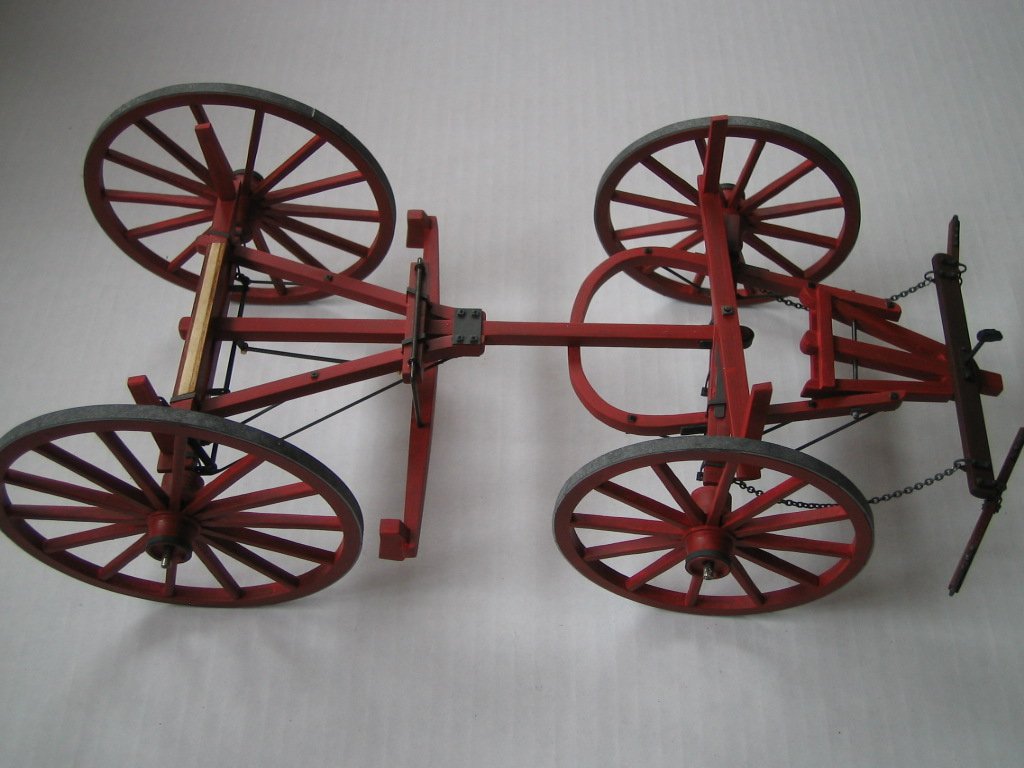
The chassis is complete with the exception of trimming the axle shafts to the correct length and fitting the axle nuts. For some reason presently unknown to me the instructions list this as the last thing to do after the wagon body is complete. I will stick to this as every time I don't follow instructions it never ends well.
Moving on to start the wagon bed construction tomorrow.
.
-
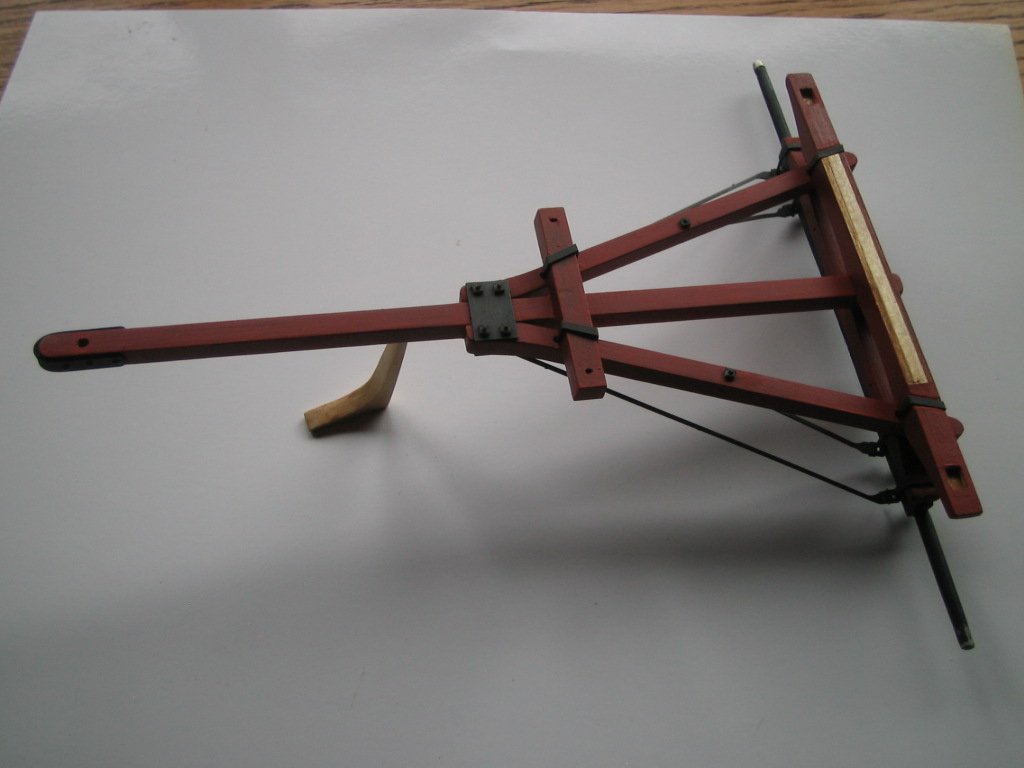
Greetings all,
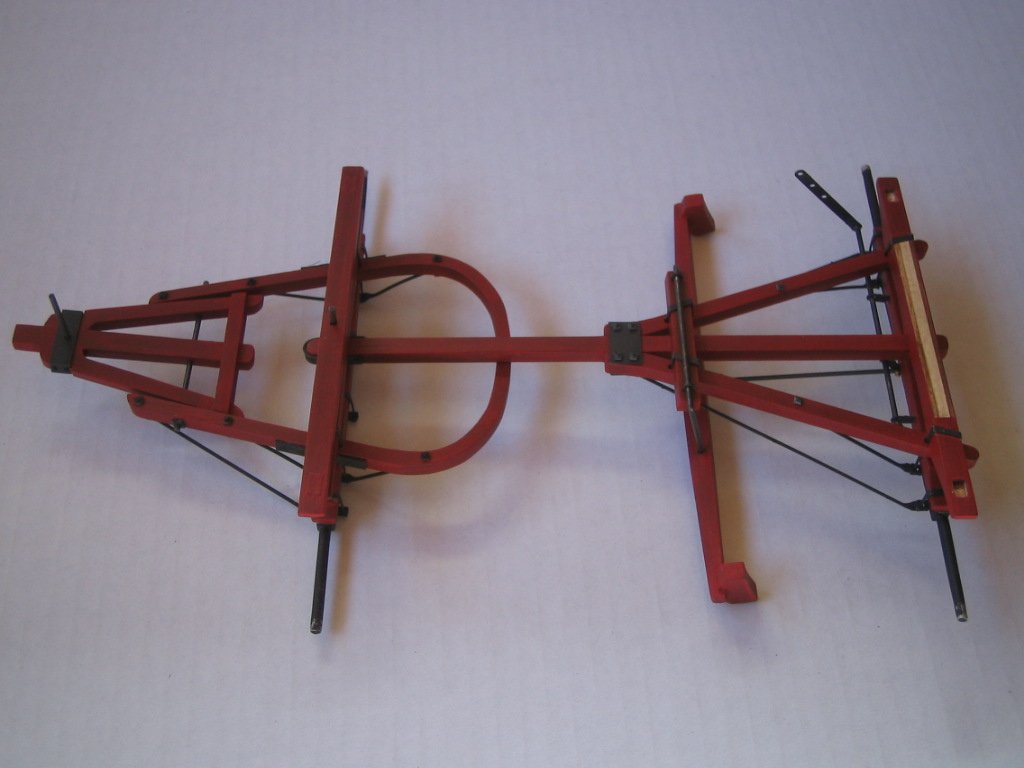
The fore and rear hounds are now completed on the chuck wagon.
I will be starting on the assembly of the wheels next. Model Expo sent a new laser cut ply sheet for the wheels to replace the defective one...Great customer service.
Building this kit reminded me of a visit to the Gene Autry Museum Of The American West in LA. One section had a display of old 'Salesman Models' from the later 19th century. These were highly detailed scale models of Items ranging from plows to wagons,which traveling salesmen would use to show potential customers their products. My wife had to drag me out of there.
- Mirabell61, Eddie, thibaultron and 7 others
-
10
-
-
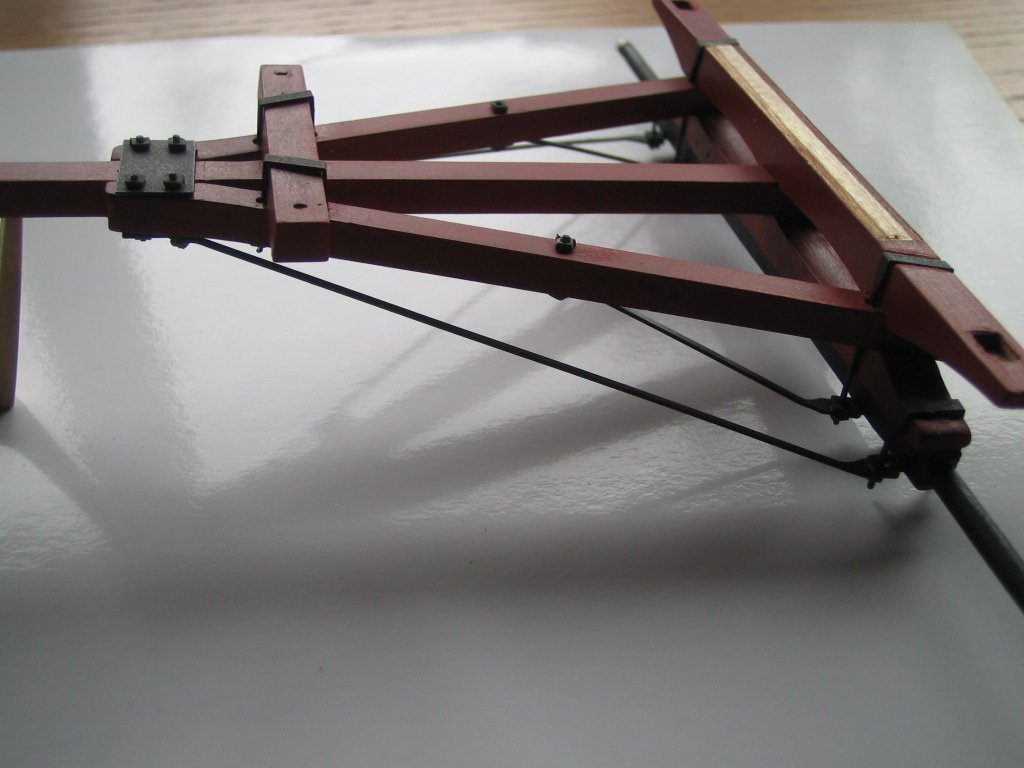
Thanks for the likes on the build so far.
The rear carriage (hounds) now has the iron work installed. The parts went together well. The only finicky part was fitting the gasket material square nuts. I found a piece of small diameter brass tubing in the scrap box and used it to push the nuts down in the bolts after applying a dot of CA glue. The brake mechanism parts are prepped and ready for installation. Will be starting on the front hounds next.
-
The parts of the rear axle assembly are painted and ready for assembly. With the painting finish,I went back and forth on whether to to go with a new off the showroom floor or a has been on the Chisom trail weathered look. My wife settled it for the latter option by saying its not a "circus wagon". After primer,I used thinned flat red with a spot of black mix and used fine sand paper and rubbed with a piece of leather to give it a sun bleached,well used look. I went over to an old red barn and tried to replicate the look of the paint on it...They must have used the same red oxide,skimmed milk and lime paint on the wagons. I epoxied the axle to the axle bed. To keep everything squared and aligned while gluing I made up a jig. The ironwork comes next.....
-
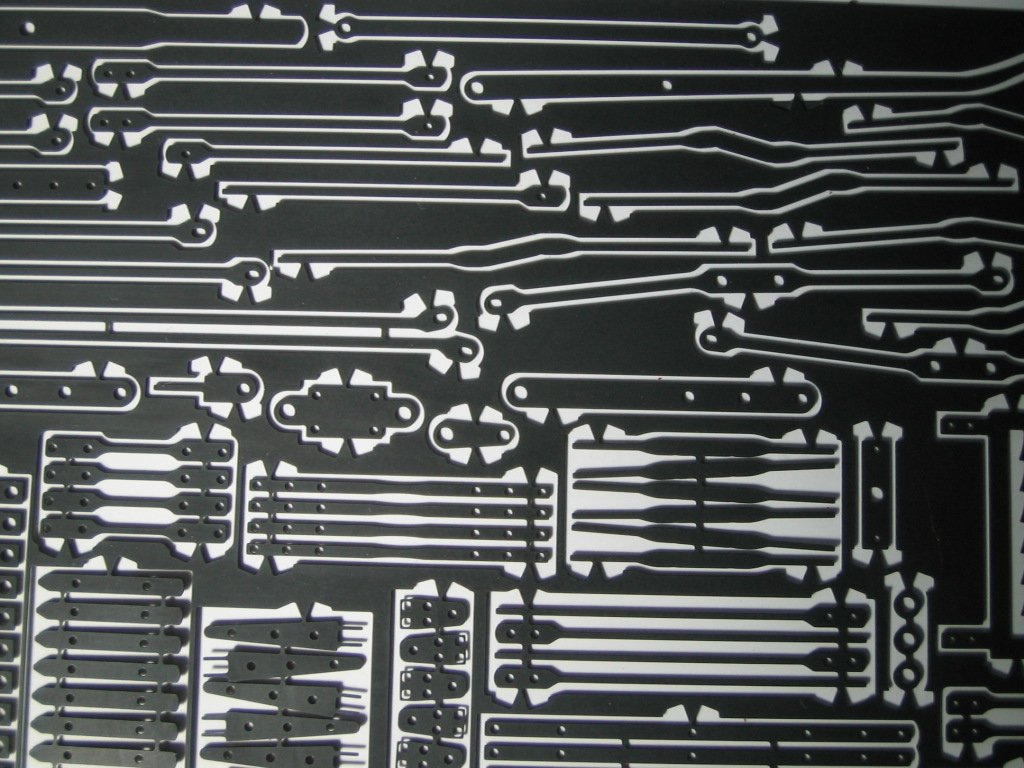
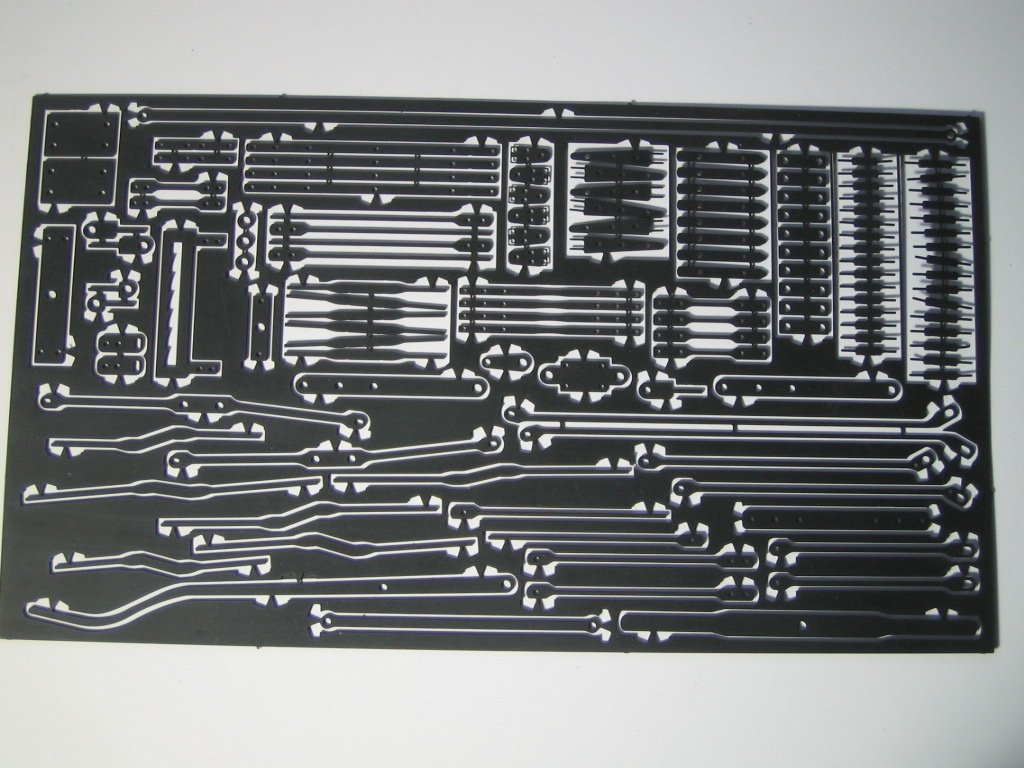
I need some of the etched brass parts to assemble the rear axle assembly. I decided to blacken the whole sheet instead of the just the parts as needed for each assembly . This is also the safest way to store them till needed. I searched the forum for blackening tips and after reading up,went with the following. I started by carefully by sanding the front and rear surfaces with 1500 grit paper.My wife donated an old 8" x 8" baking pan. Using latex gloves,I filled this with enough acetone to just cover the sheet and cleaned off any photo resist and oil left on it. I left the sheet to dry,rinsed the pan and refilled with white vinegar. I left the sheet in the vinegar for 15 minutes,agitating and lightly wet sanding the surfaces again with the 1500 grit ,followed by a thorough rinsing. I then immersed the sheet in a solution of 7 parts water to 1 part BC Brass Black for 10 minutes. I removed the sheet,rinsed,wiped the film off and returned to the pan to repeat the process twice more until it was a uniform black after the film was rubbed off. It was then rinsed and returned to the pan with a baking soda solution,then rinsed again and left to dry on a paper towel. I am really happy with the results. I have used BC Brass before but I was never happy with the result,it was always crusty and not uniformly black. I now know it was not the product at fault,but bad prep and impatience on my part
- Rik Thistle, coxswain, John Allen and 9 others
-
12
-
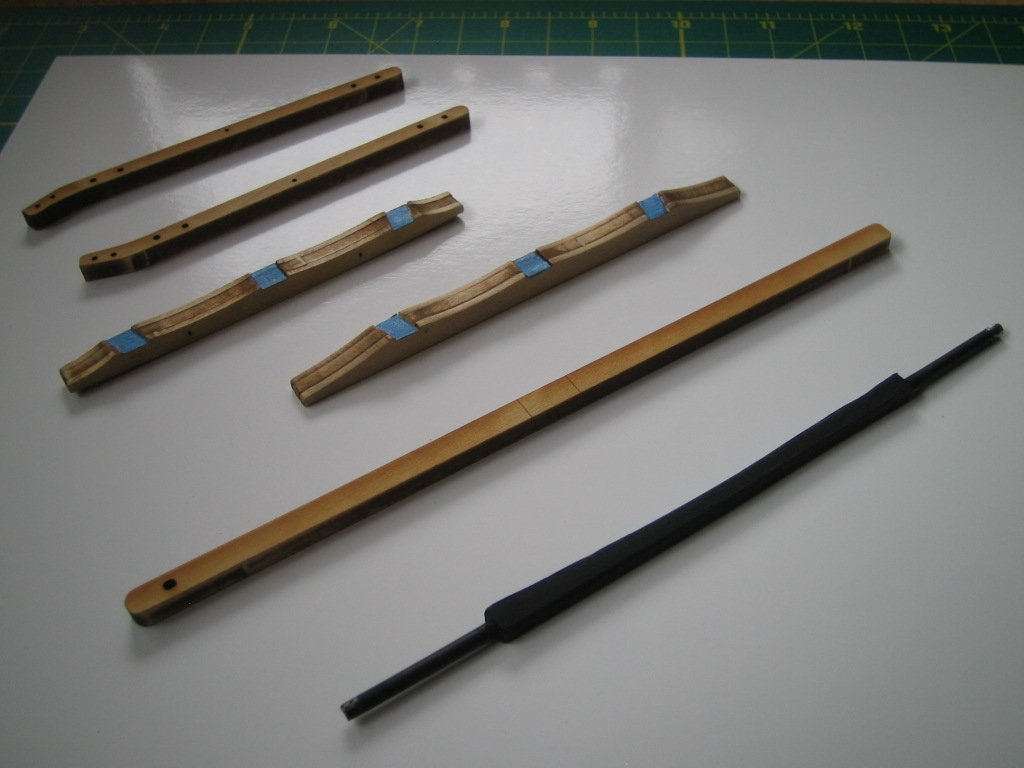
Started on Rear axle assembly. Turned down the axle shafts to fit hubs. Followed Dan's #11 blade scraping method,followed by polishing with 600 grit paper.Then primered,painted black and sealed with Dullcote. The other wood parts Have been trimmed,sanded and sealed with Dullcote. I am trying the Dullcote as a sealer/primer after reading online how it is popular with model train layout builders. Seems to work well,lays really flat,dosen't lift the grain and sands easily. I will know for sure when I paint the parts red tomorrow. I masked areas to be glued in the hope to be able to paint and then assemble as I go with minor touch up as needed
-
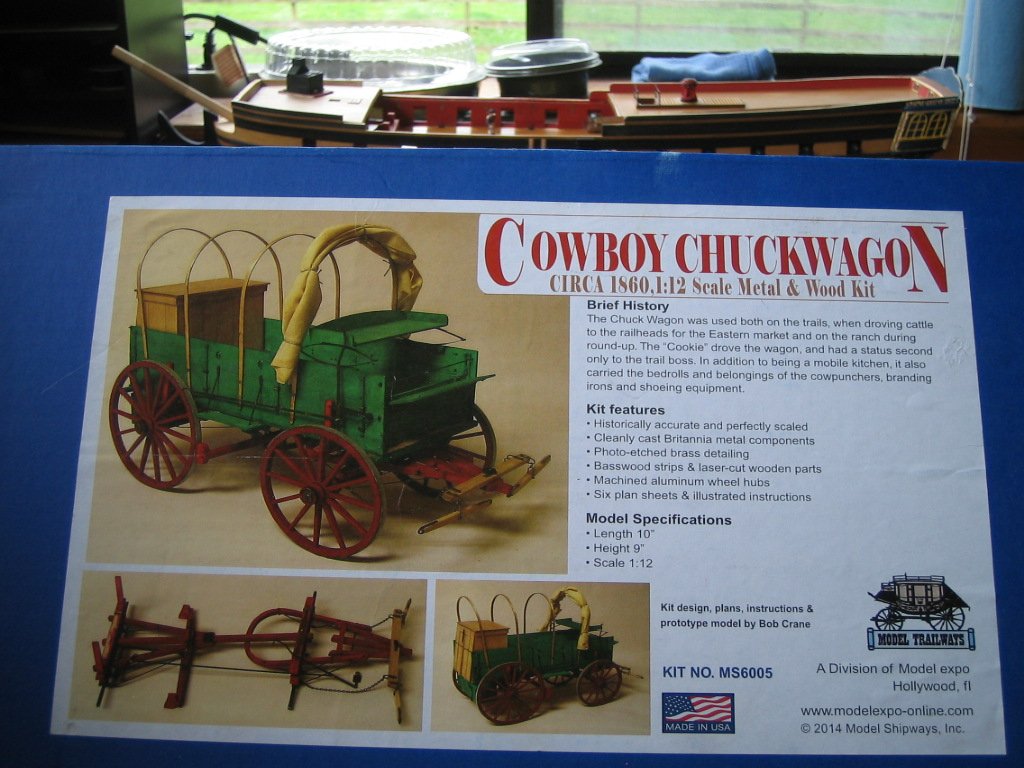
Hi to all,
Decided to join the 'Wagoneers' over here on shore leave after seeing Dan's and the other wagon builds in progress. I needed a break from the Unicorn for a while and wanted to try my hand at something different. I chose the Chuck Wagon partly because I live on a cattle ranch and partly for nostalgia from old films. I really like the Kit,instructions,and the plans. All the parts with exception the ply sheet used for the wheel rims are first class. The ply is kind of rough with splintering and gouges on top and bottom surfaces,which I don't think can be rescued with filler. I will send an email to John at Model expo to see if replacements can be sent.
- coxswain, Eddie, thibaultron and 6 others
-
9
$10 Electric Pen Sander
in Modeling tools and Workshop Equipment
Posted · Edited by JohnB40
Greetings to all,
I have been doing a lot of sanding lately fairing the hull and constructing the stern on the Confederacy. For fine details like the lintels and sills on the windows I thought a detail sander would be a help. Besides the expensive prices,I found MicroMarks on back order and Proxxon's PS 13 to have quite a few bad reviews. Whilst looking on line I found the idea on U tube of using a n electric toothbrush. On my next trip shopping I found an Oral B rechargable one for $10 and decided to give it a try.
What else was needed was some double sided tape,sandpaper and gasket making punch kit.
I used a smaller headed brush my wife had than the one that came with the unit although that one would work fine,it is just a bit larger .Then removed the bristles with pliers
I used the 7/16" punch from the gasket making kit I punched out some some tape and sandpaper discs.
Mount the double sided tape to the head ....mount sandpaper disc to tape and detail sand away. It works surprising well