No Idea
-
Posts
1,038 -
Joined
-
Last visited
Content Type
Profiles
Forums
Gallery
Events
Everything posted by No Idea
-
 Just my thoughts - but looking at the picture and the drawing I would suspect that the 9" top timber tapers very slightly in the bend as it meets the 8 1/2" futtock. If I were making this part I would make it out of a wider piece and cut the shape into it. I don't know if this will help but thats what I see - cheers Mark
 -
Hi Tony I’ve not actually used this line at all during my construction so far. I have always rightly or wrongly assumed that it is the ships waterline. If you drop Gerard a message who is on this forum I’m sure that he will be able to answer your question. I will have an update on my build pretty soon too. Mark
-
NAIAD 1797 by Bitao - 1:60
No Idea replied to Bitao's topic in - Build logs for subjects built 1751 - 1800
Bitao - your work is truly stunning mate 👍 -
This is a great thread and I agree that actually you don’t need that many tools. However some power tools do not just speed the job up but make the results more accurate and repeatable. I have Jim’s tools and I cut all of my own material from bigger pieces of wood. They allow me to make strips of wood in any size time and time again. Is it really needed - probably not and I think builders should use what their budget allows. It’s taken years of saving to get this kit but it never stopped me before I had it. Having said that I wish Jim would make a vibration free spindle sander 😊. If I had to buy just one piece of kit I would buy a table saw as it’s so flexible in what it can do.
-
La Palme by Tobias - 1:36 - POF
No Idea replied to Tobias's topic in - Build logs for subjects built 1501 - 1750
Lovely work Tobias your ship is looking great. I'm looking forward to your updates. -
Your work is incredible - it just brings this ship to life
-
4" Sliding Bevel Required
No Idea replied to No Idea's topic in Modeling tools and Workshop Equipment
Wow that is nice 👍 Thanks very much for pointing me in this direction and I'll have a good look at this one. It may be a little bit too big for model ship building but what a lovely tool it is! Hi Bruce - yep these are my go to guys as well. I buy all of my wood from these people and I did not know that they sold tools too. I'll give them a ring in the morning to see if they have anything in stock or any ideas too. Thanks again 👍 -
Hi All I want to get myself a really nice 4" sliding bevel preferably made completely from metal. I'm struggling to find a really decent one as Richard Kell no longer makes them and Vesper tools in Australia do not take back orders anymore. If anyone knows of a 4" sliding bevel supplier could you please point me in the right direction Cheers Mark
-
Hi marsalv - so not only did you work out the difficult programming for milling dead eye's; you then made a drive system to put them on the lathe. This my friend is genius level machining and so great to see 😀
- 589 replies
-
- 8
-

-
- le gros ventre
- cargo
- (and 1 more)
-
Fantastic work there HH - Enjoy your well earned holiday.
- 2,623 replies
-
- 3
-
-
- heller
- soleil royal
- (and 9 more)
-
Thanks - By the way I think your forum name is great 😀 Thanks Greg and cheers again for pointing me in this direction to sort it out 👍 We've never been to Corfu and its 32 degrees at the moment - we can't wait!
-
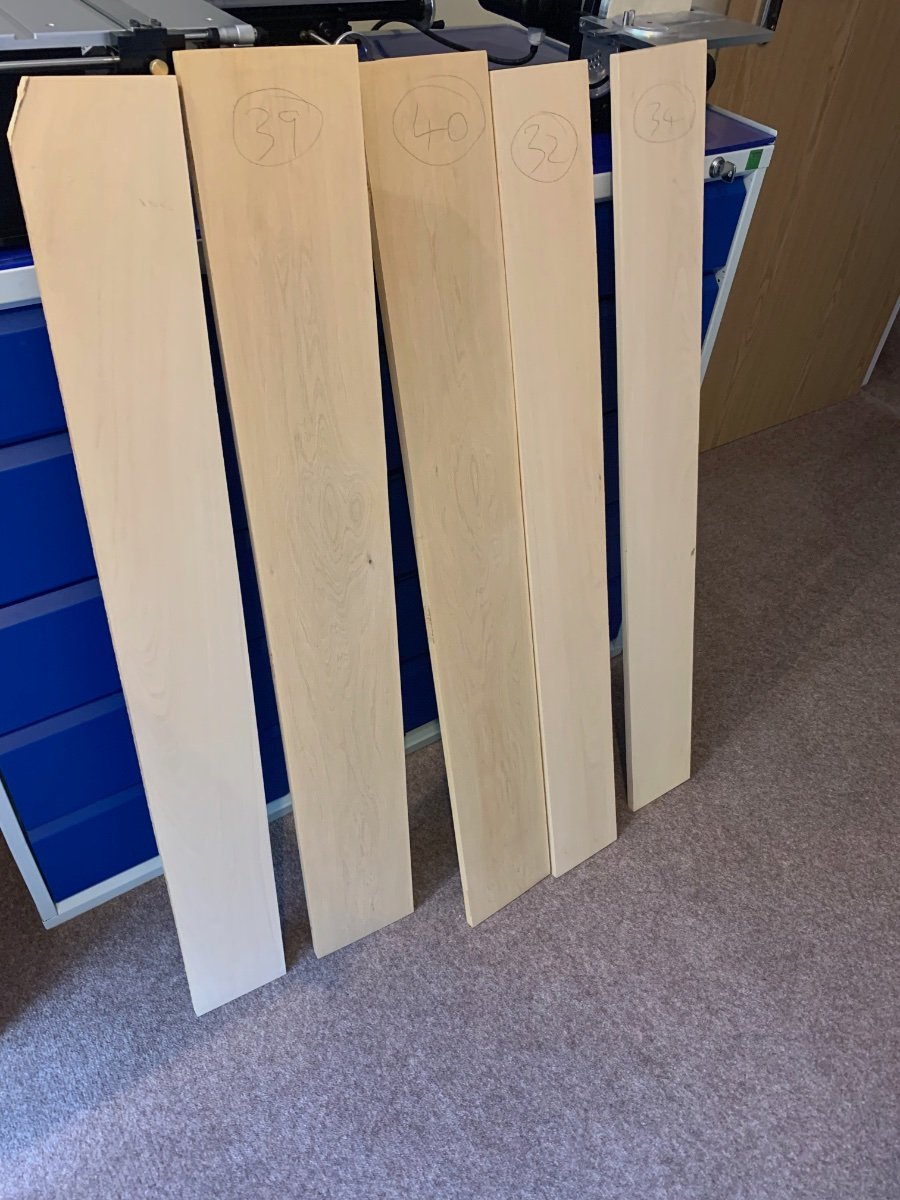
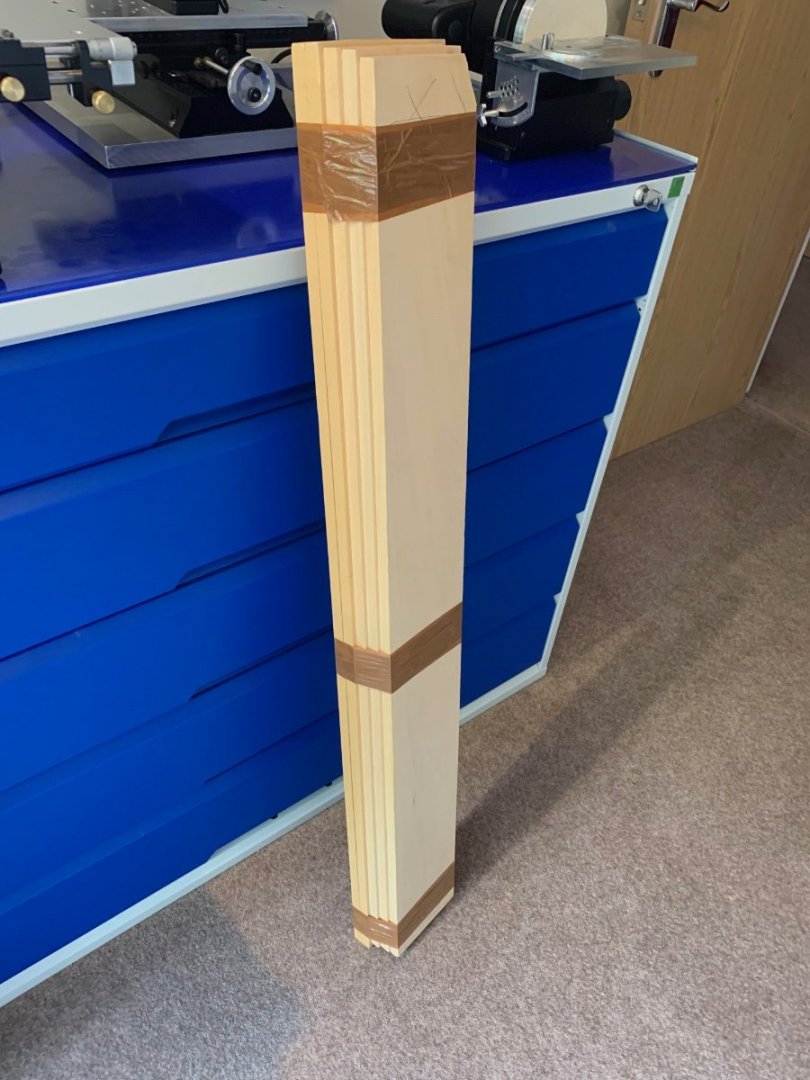
Hi Tobias and thanks for the comment 👍 The laminating is finished and sanded into the correct shape. I've also cut the radius's at the end of the wing transom and I think I've pretty much got away with it. It now all blends nicely together as it should of in the first place and actually it doesn't look as bad as I thought it would. I'm glad that I've now got this sorted as at least the transom is the correct shape now and the planks should lay on them nicely too. My mantra for my next build is "leave some extra wood on until the fairing stage". Its also been like Xmas as I've been stocking up on some Castello - 6 planks that are 13mm thick so that will keep me going for a while. I'm off away now for the next 4 weekends, 3 of which will be on holiday in Corfu 😁 so the build will have to wait for a while but when I get started again on the whale I'll get another update up on here. Cheers Mark


-
High torque, really low speed drill
No Idea replied to Brinkman's topic in Modeling tools and Workshop Equipment
Cooks on gold sell them in the UK that’s where I got mine from. I’m unsure though why you think RPM has anything to do with torque? The motors that Foredom supply are very powerful and I’ve never been able to stall mine. Even at really low speed the power is there and I think mine is an SR. -
High torque, really low speed drill
No Idea replied to Brinkman's topic in Modeling tools and Workshop Equipment
Hi - I’ve got the foredom drill and although they are expensive it’s probably what you are looking for. It has a foot control so you can go as slow as you like. It also has loads of torque and I cannot compare it to my old dremel. Mark -
NAIAD 1797 by Bitao - 1:60
No Idea replied to Bitao's topic in - Build logs for subjects built 1751 - 1800
Fantastic work bitao 👍 -
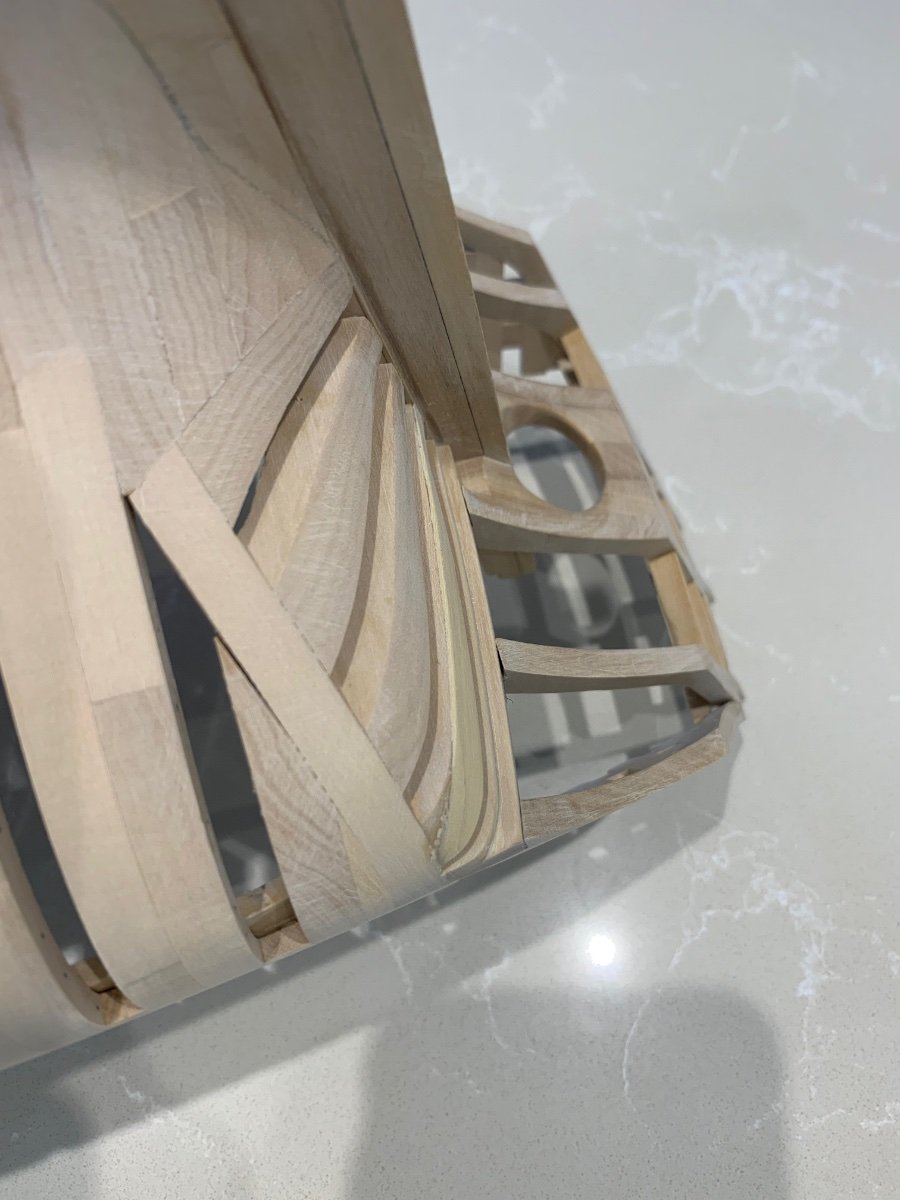
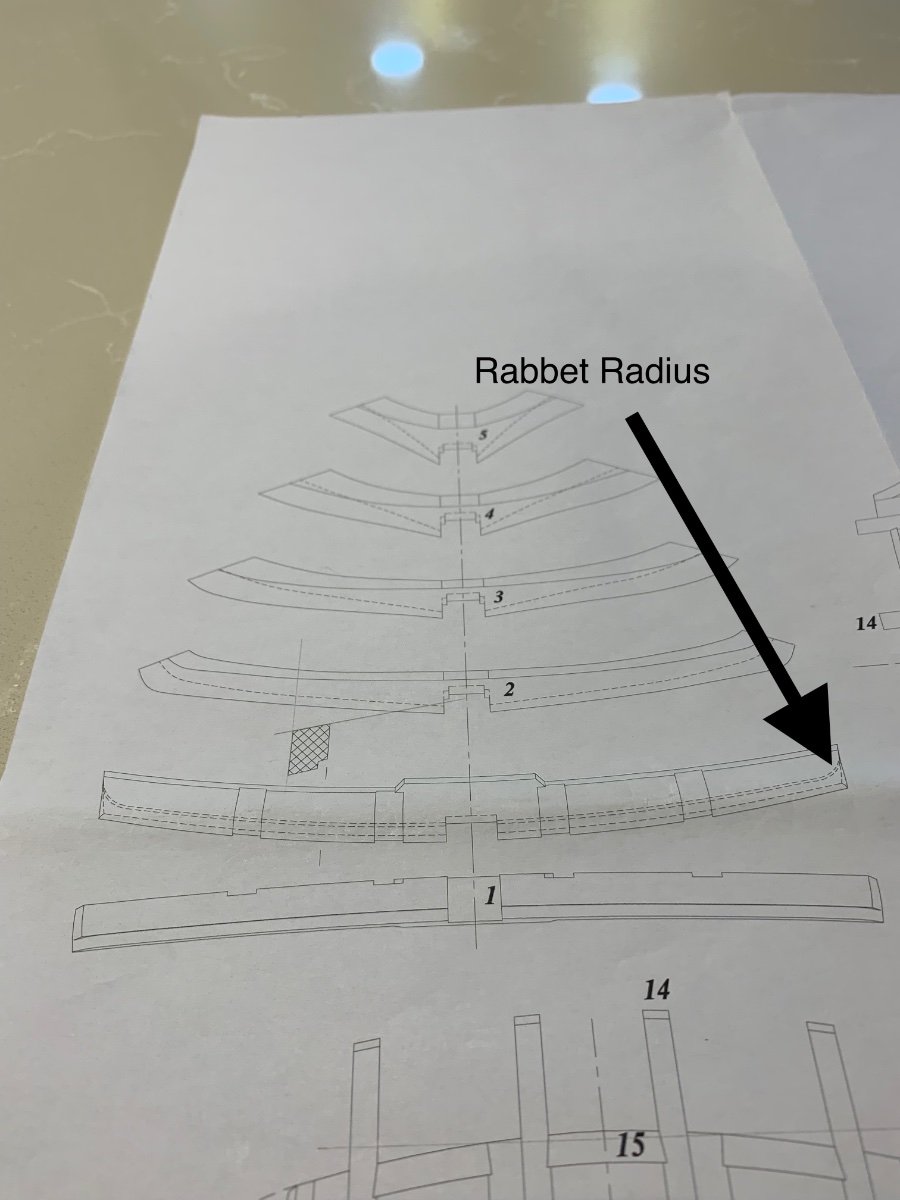
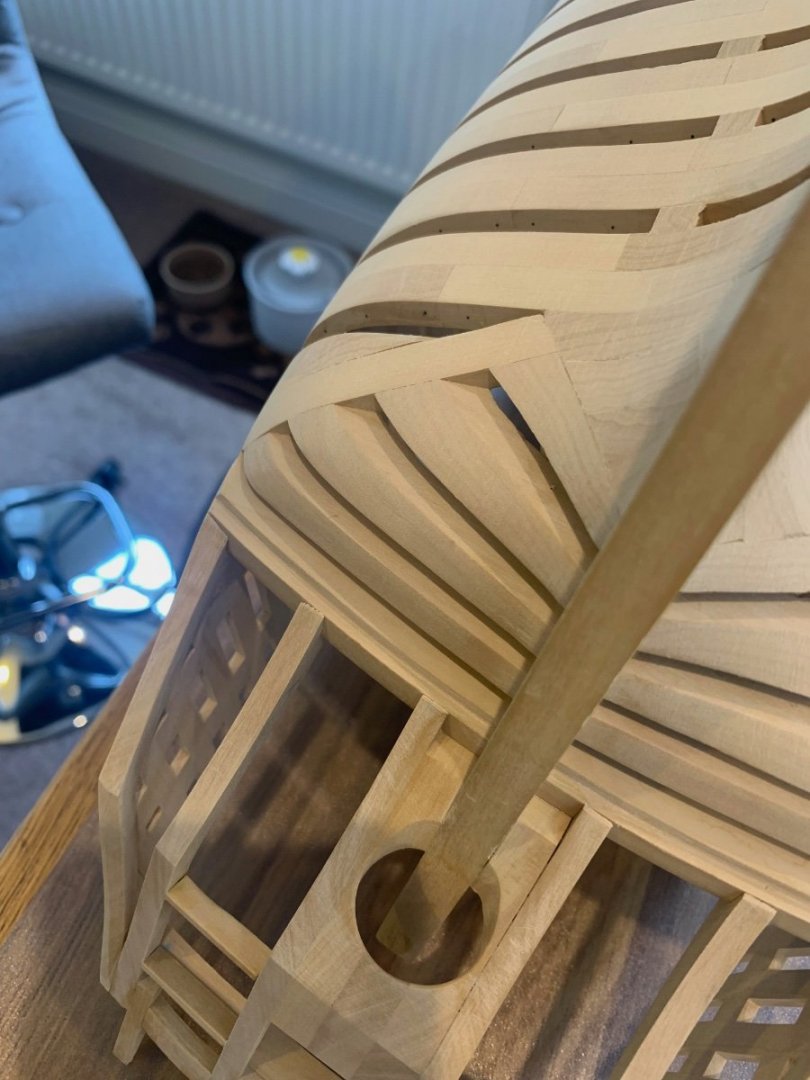
I've now started the lamination process and now that I've gone back to the drawings I can see that things are not as bad as I thought. My issue is that I squared off the top of the top transom filling piece but the rest is pretty much all ok. I've checked the rabbet dimensions are they are correct at 2.3mm x 2.6mm but the one thing that I never did was to cut the rabbet corner radius into the wing transom. Now it's very often that I get a lucky win but on this occasion I have, as this radius makes things so much better in terms of the transom pieces all lining up. As you will see in the picture the radius goes about 2/3 through the width of the wing transom. The lamination strip I'm using is just 0.5mm Castello and it bends very easily at this thickness and I only need to build up about 3 laminations to get the correct shape. Cheers Mark


-
Yea something else for me to think about. I do seem to like making things difficult for myself. I think that lamination of very thin strips will probably be my way forward. I would rather that it looked a bit messy but had the correct shape and it’s going to be planked over anyway. I’ll keep you all updated as to how it goes.
-
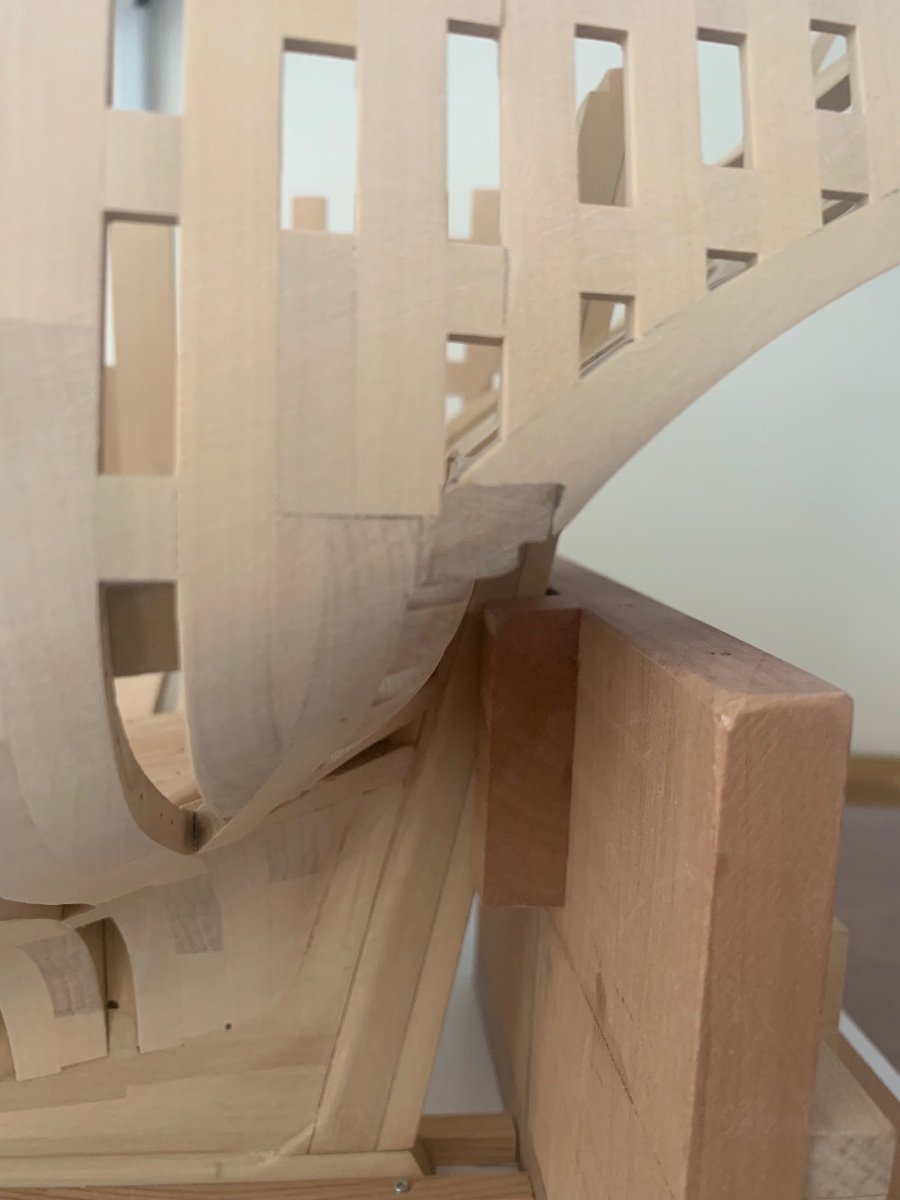
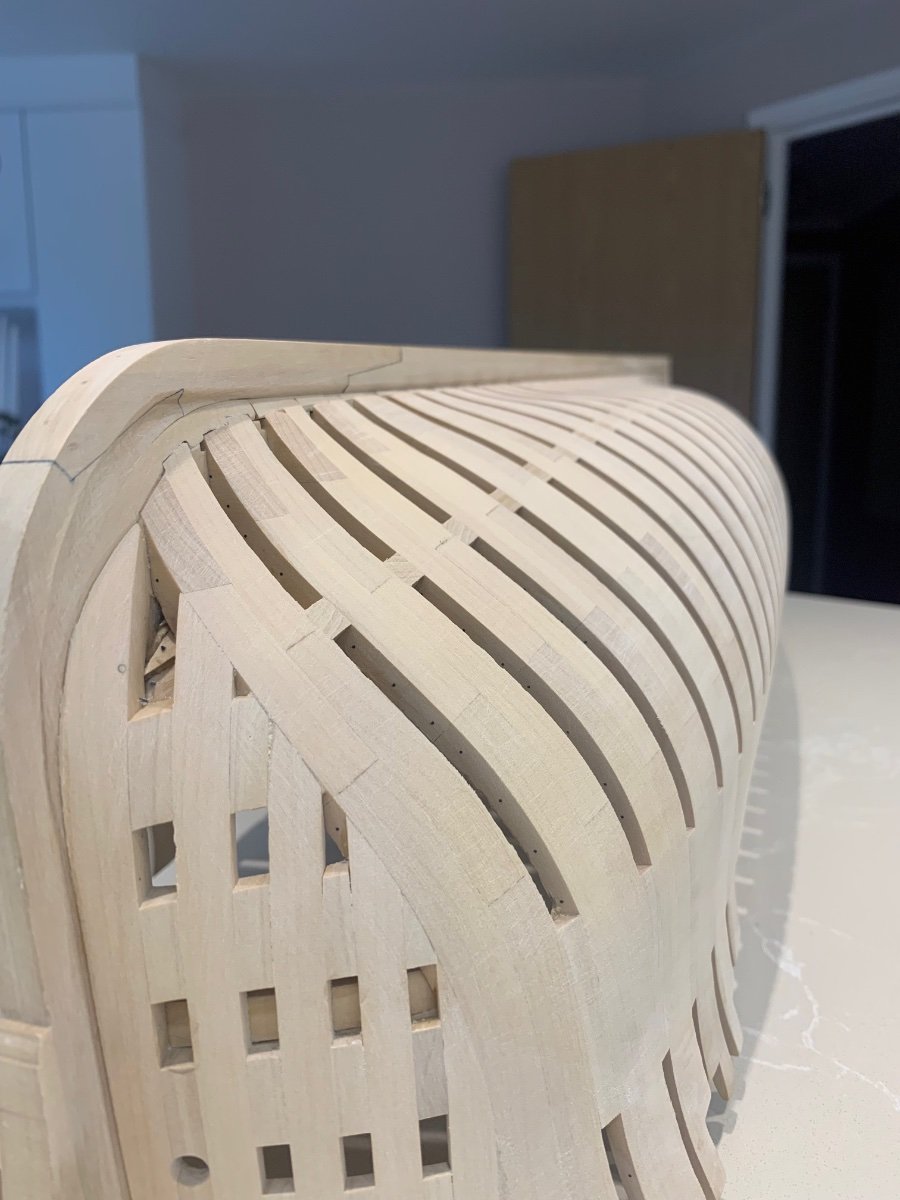
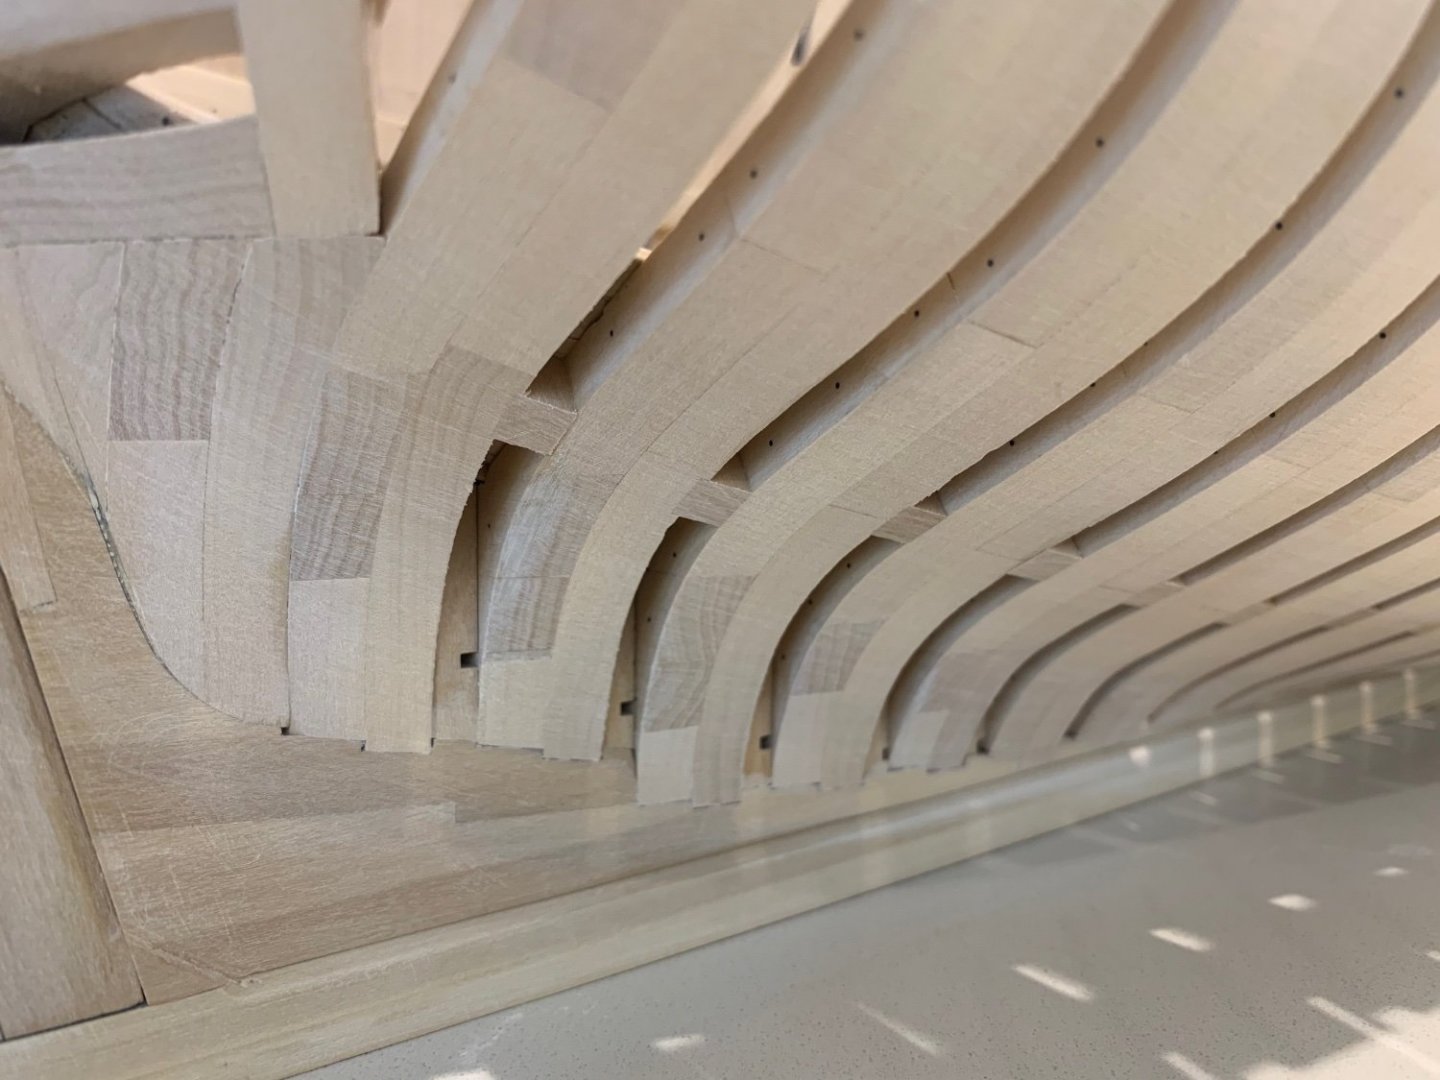
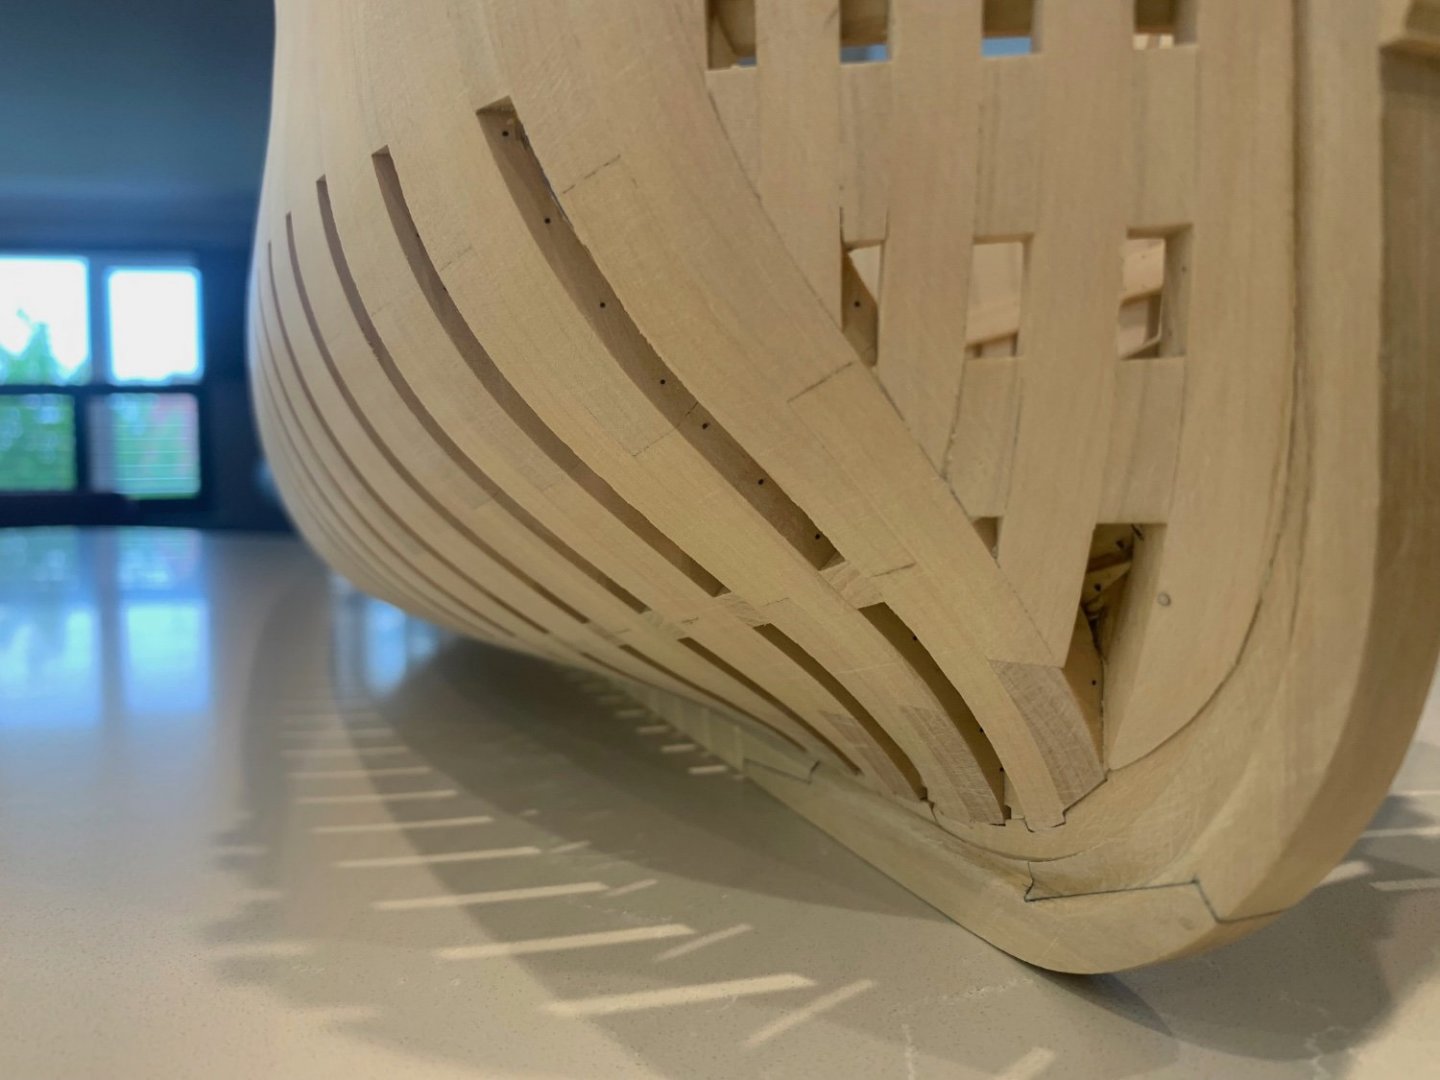
Here's another picture which exaggerates the problem somewhat but probably explains it better. I've also attached a picture of how I marked out the line of the top timbers for those who may be interested.


-
Hi HH - yes the counter planking should run straight off of the transom fillers into the rabbet on the wing transom. At the moment the planking will hit the wing transom before the rabbet as the filler pieces should be more full towards the stern. I could get away with this for about half way along from the sternpost but then the gap is far too big and does not line up at all.
-
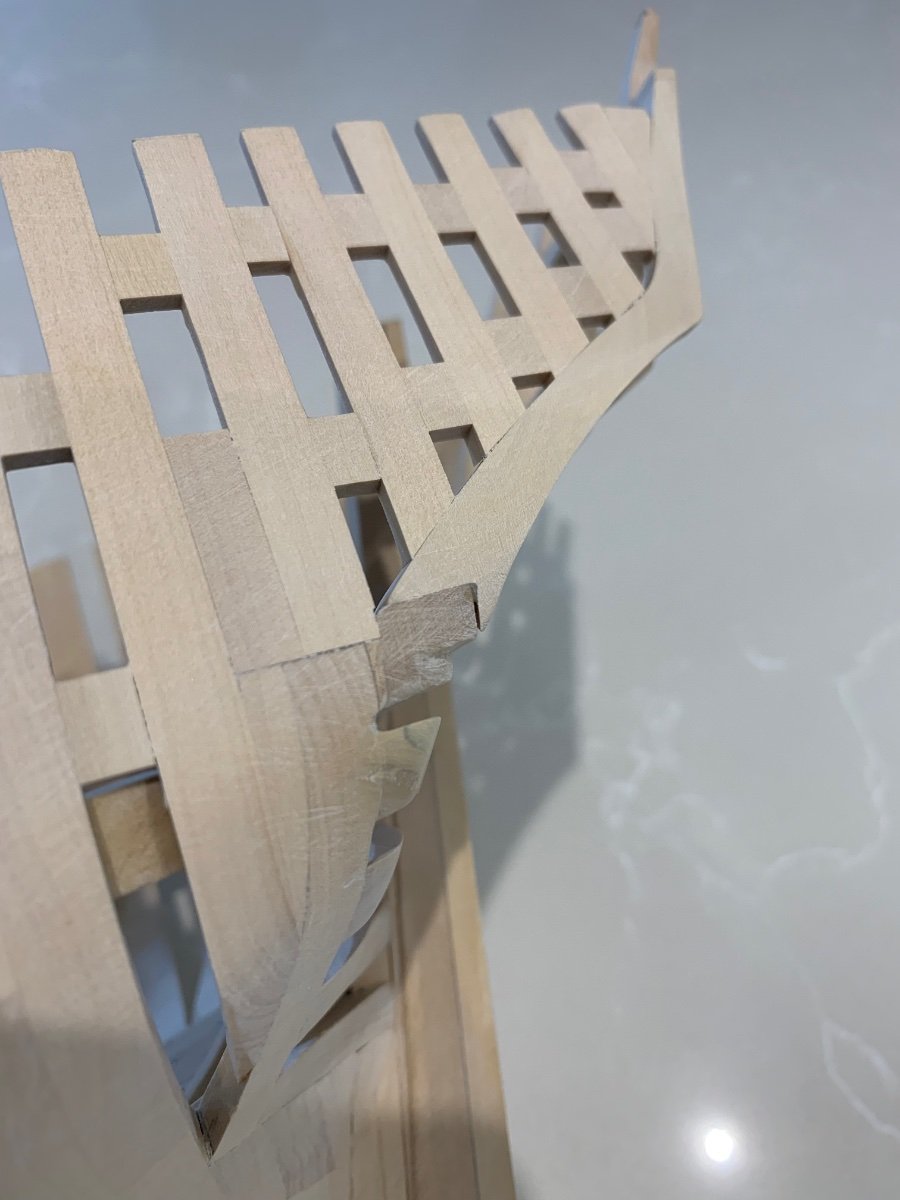
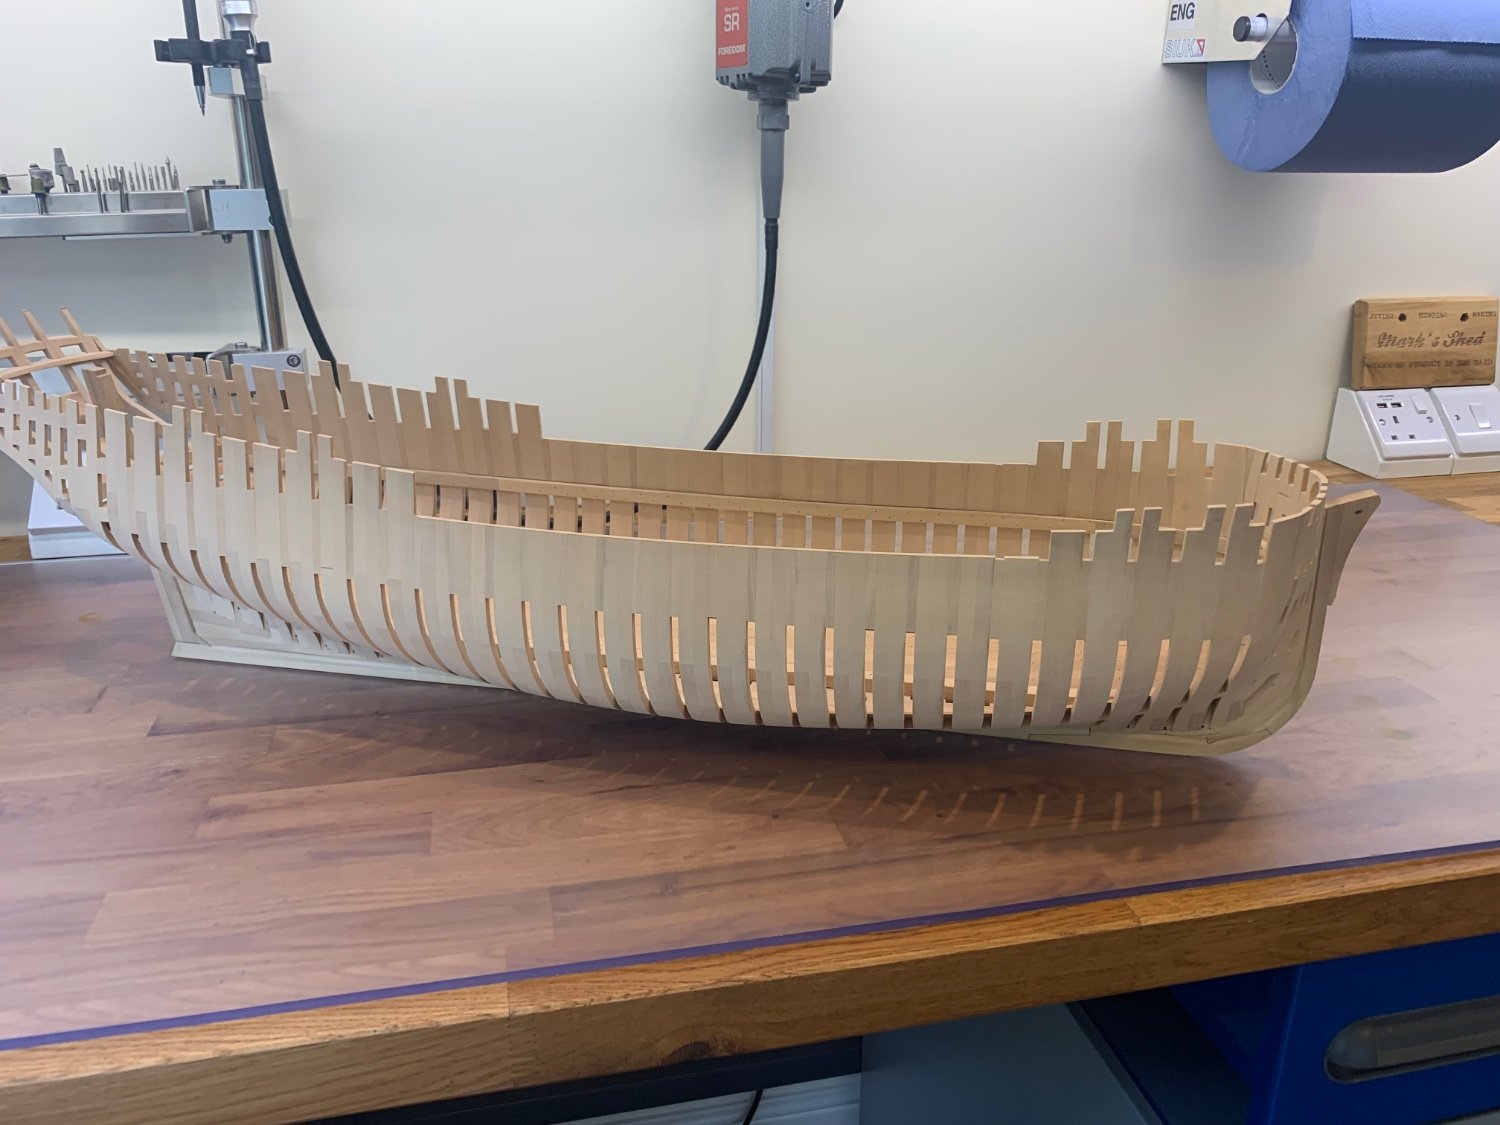
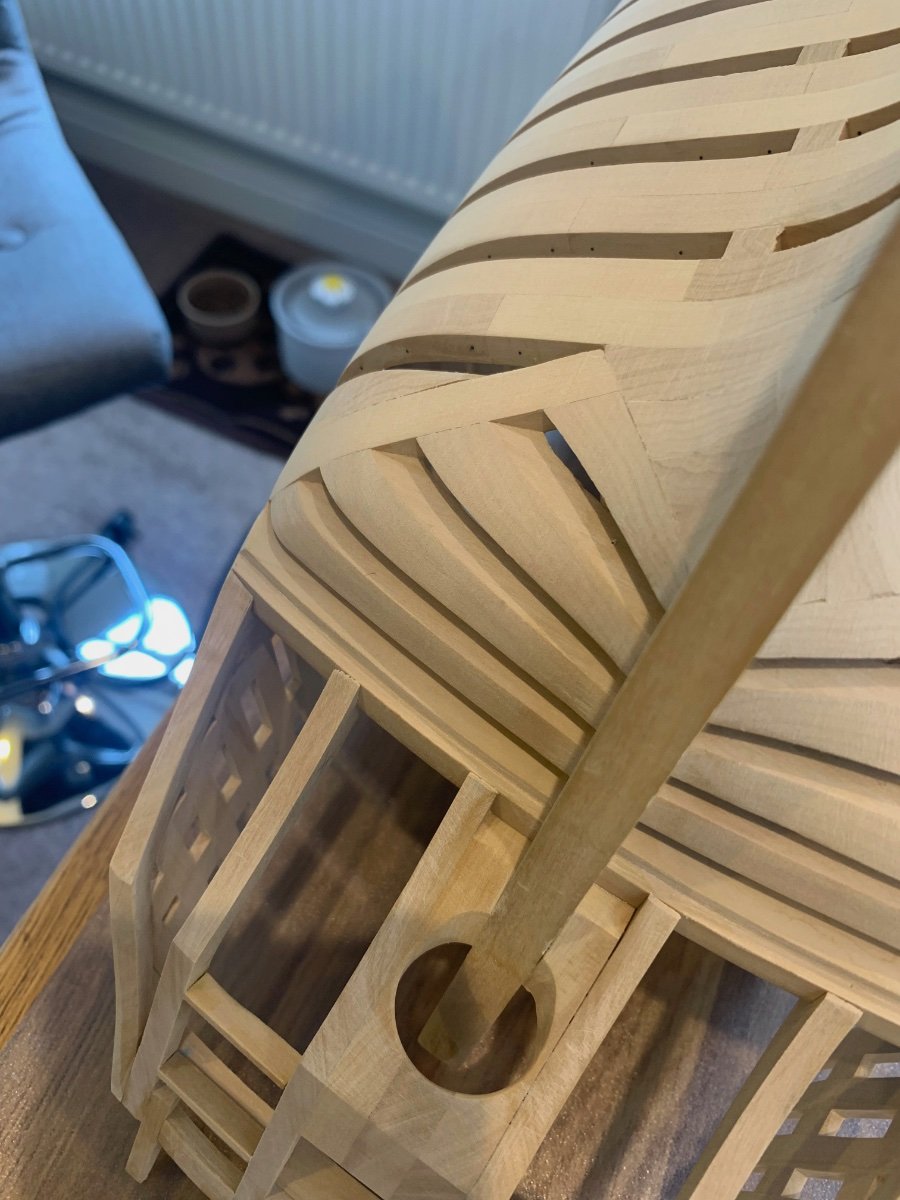
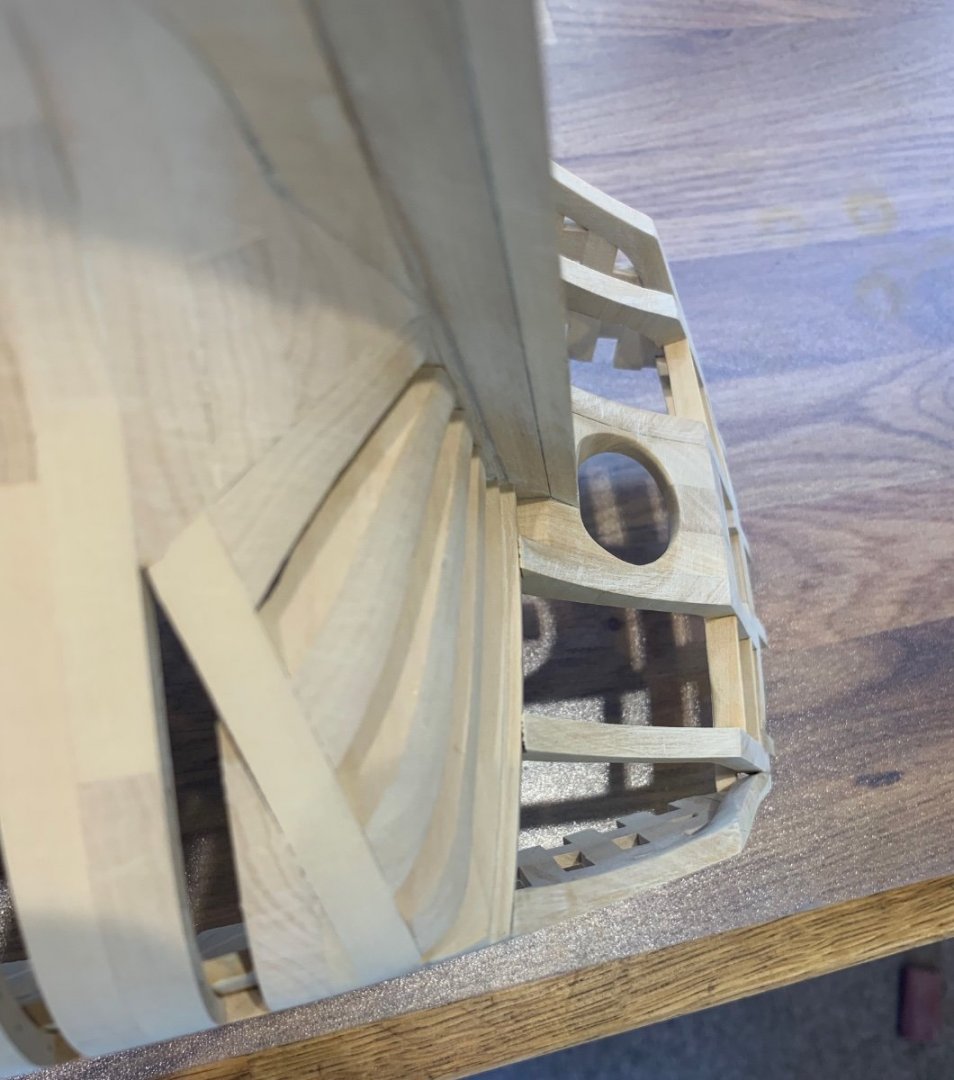
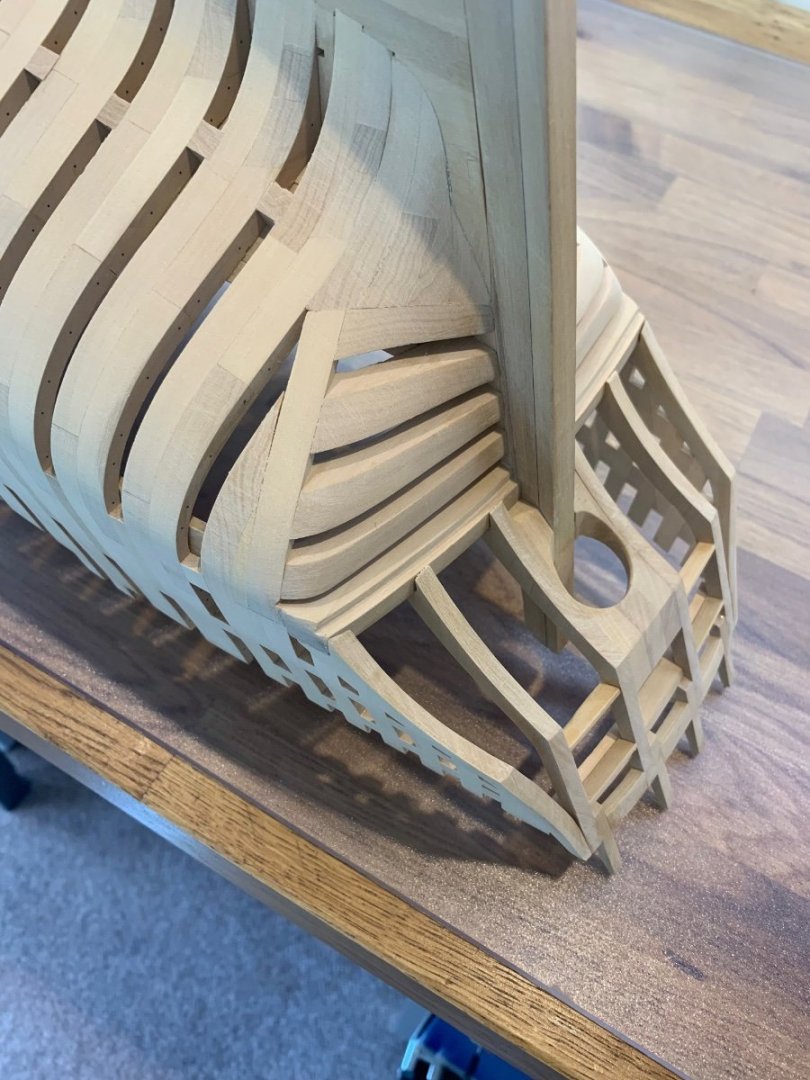
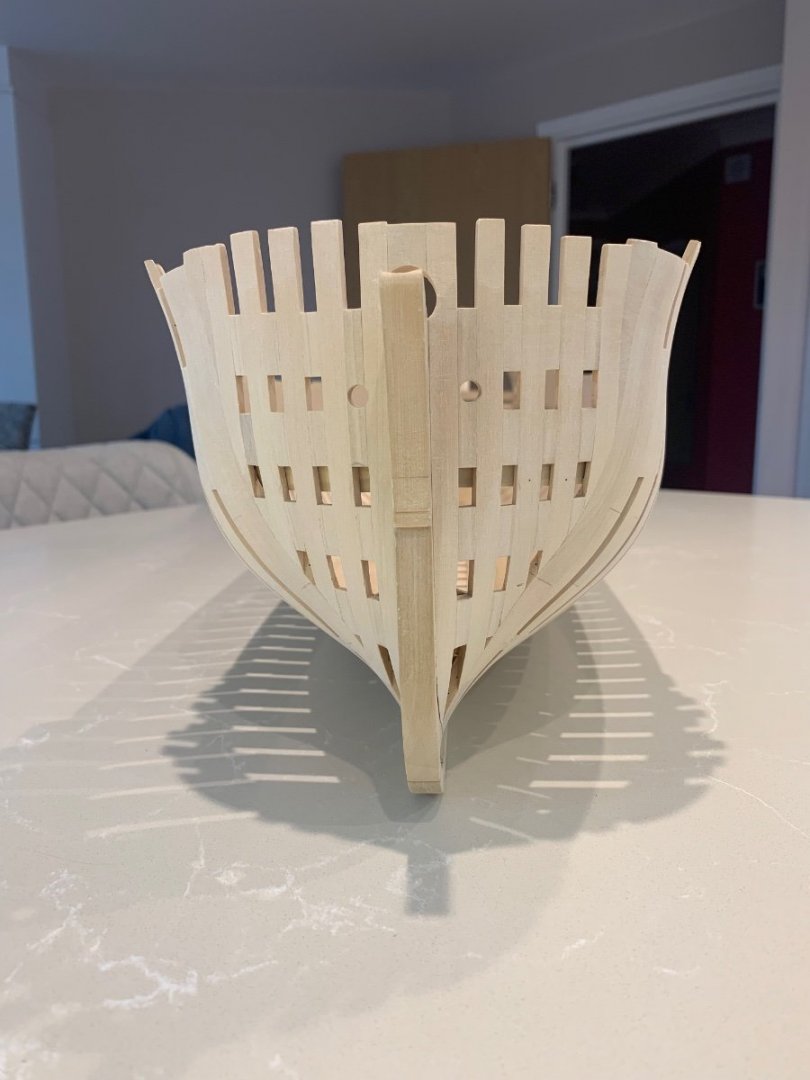
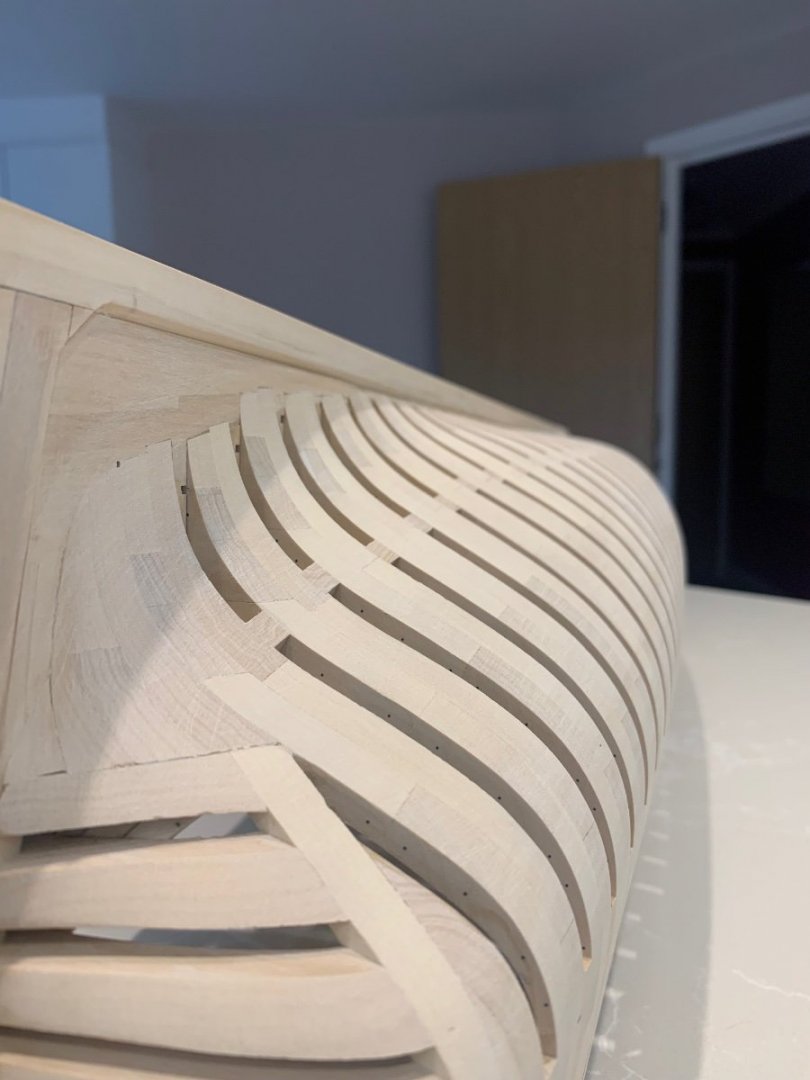
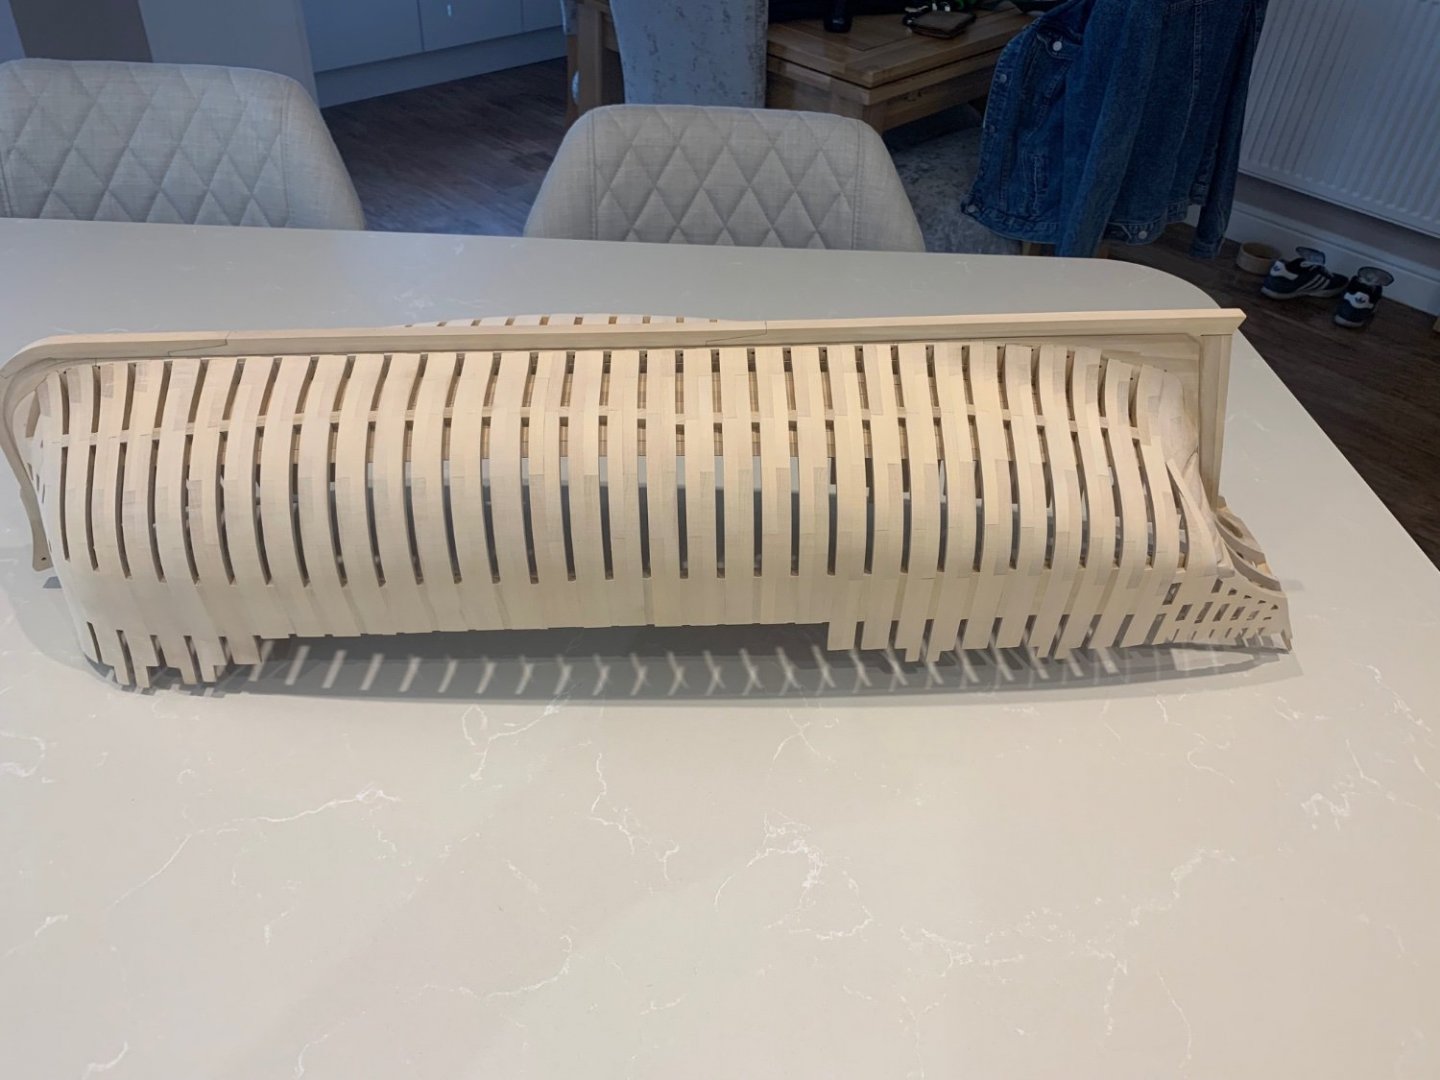
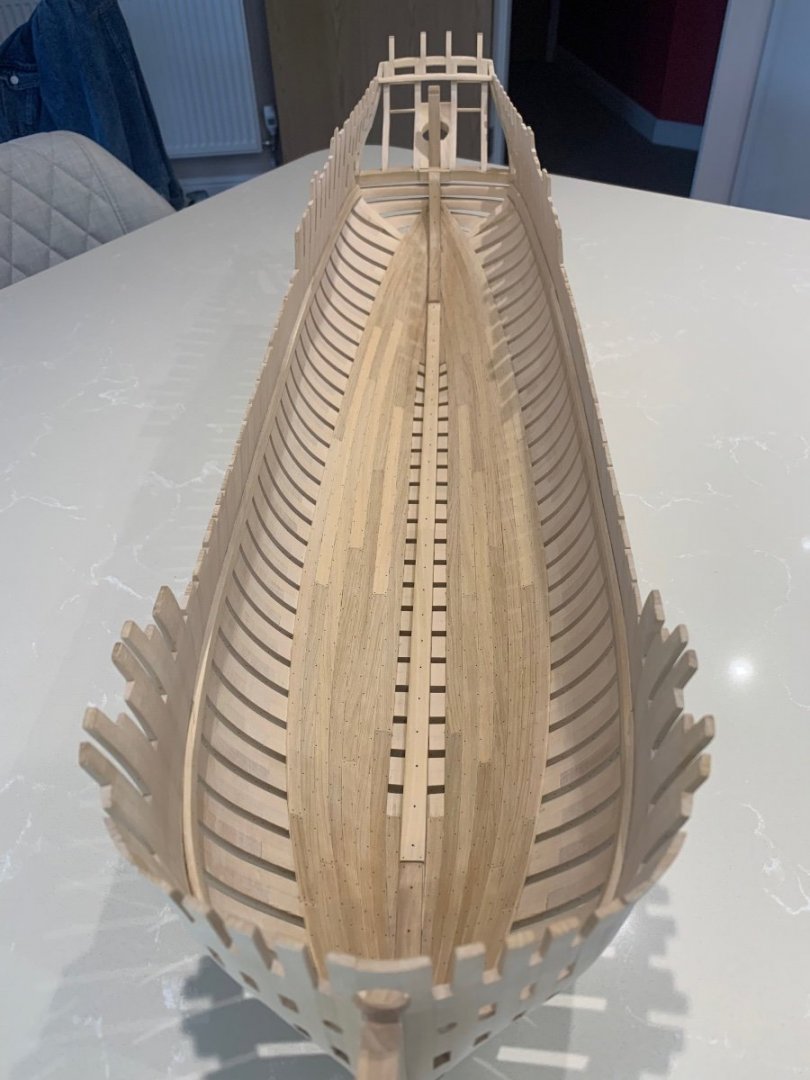
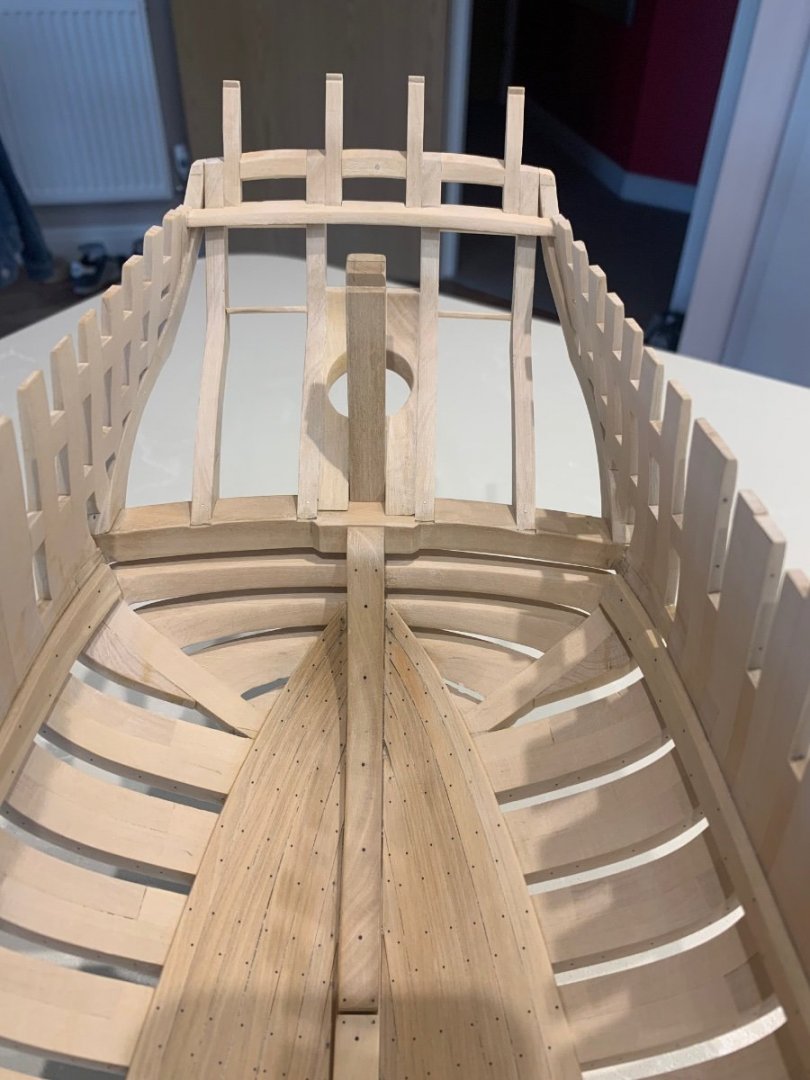
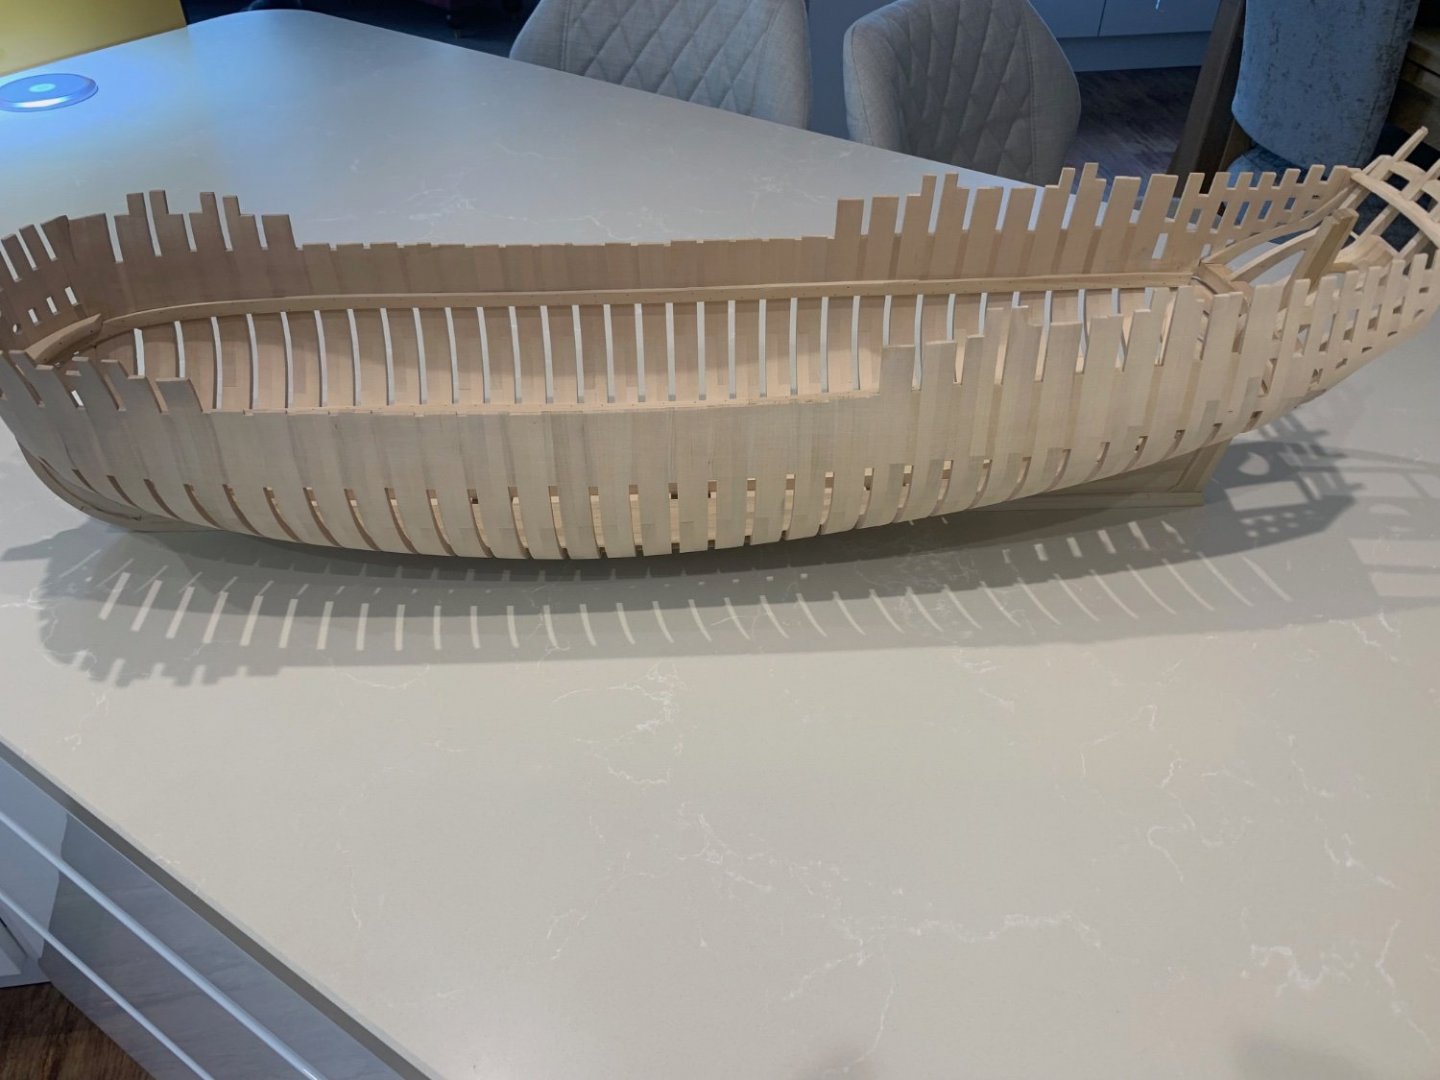
Thanks for the comments and the likes 👍 Tonphil1960 I'm sure that you will enjoy building this ship! Ok first the good news - the top timbers are now cut and I would like to thank Gerard Delacroix again for helping me understand the drawings correctly. There's a few pictures below and she's looking smart now in fact better than I hoped. Now the bad news - if you've followed my build you will know that I find my mistakes when I need to move onto the next part of the build. So this time it's the transom that I have made incorrectly. When I made these parts I really didn't understand how all of the combined parts of a ship hang and work together to make the whole. I learn by doing things and now I know better for the future but I'm left with a problem right now. The transom filling pieces do not line up with the wing transom rabbet. It's so obvious to me now but it wasn't back then and now I need to fix the issue. I've attached a few photo's for you to see my error and having emailed dvm27 (thanks again Greg) I think I have two options. 1. I can build up the lower transom filling pieces by laminating some wood onto them. I think that this would be best achieved by building up thin layers of wood over a period of time. I have no doubt that this will look pretty bad but I would get the correct shape that I require. 2. I could bodge it by cutting the wing transom rabbet deeper and change the shape of the stern of the ship a bit. I would need to blend the trailing edge of the wing transom into the planking. I could minimise this by using thicker planking at this point in the ship and blend it in as well. As always your advice and thoughts are more than welcome and hopefully I will come to a workable solution. I really need to keep in mind that this ship is and always will be a way into learning ship building skills. Cheers Mark

-
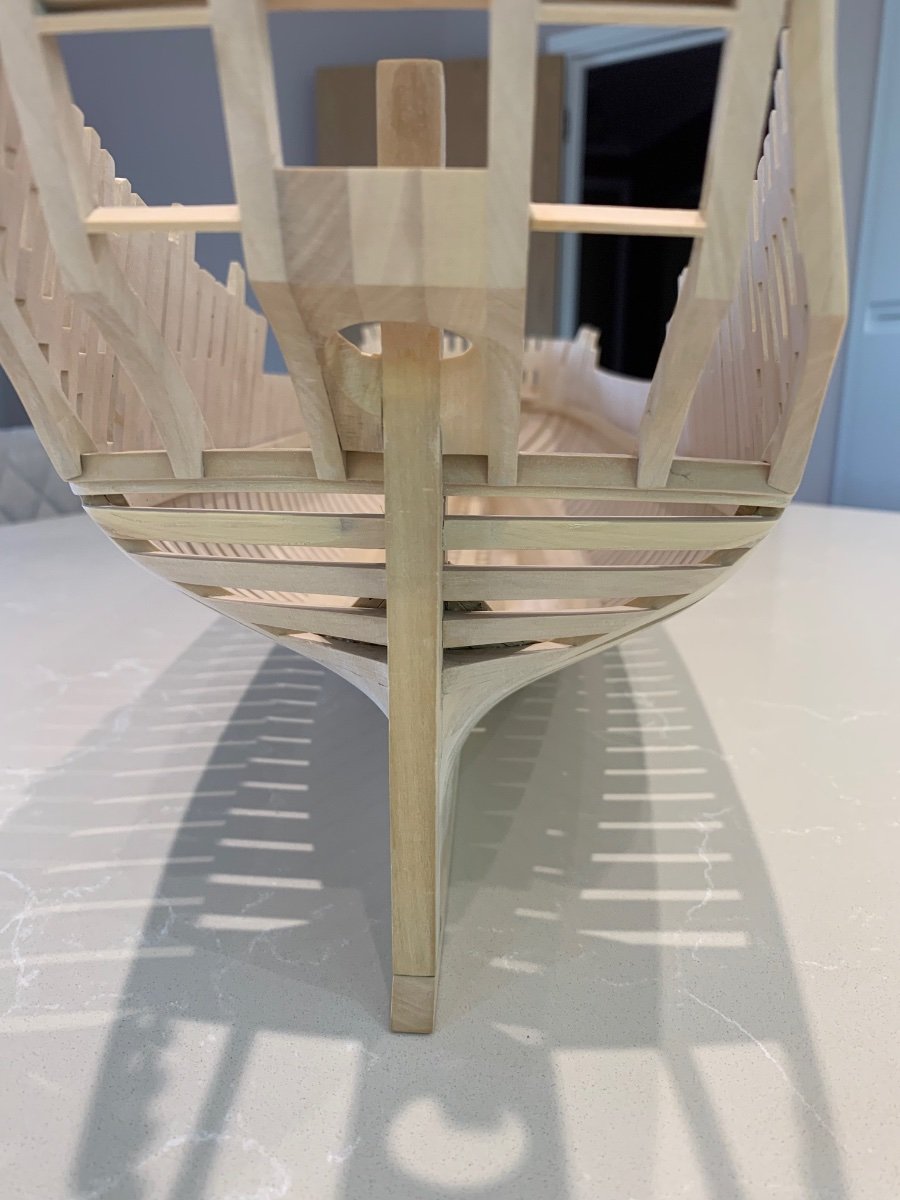
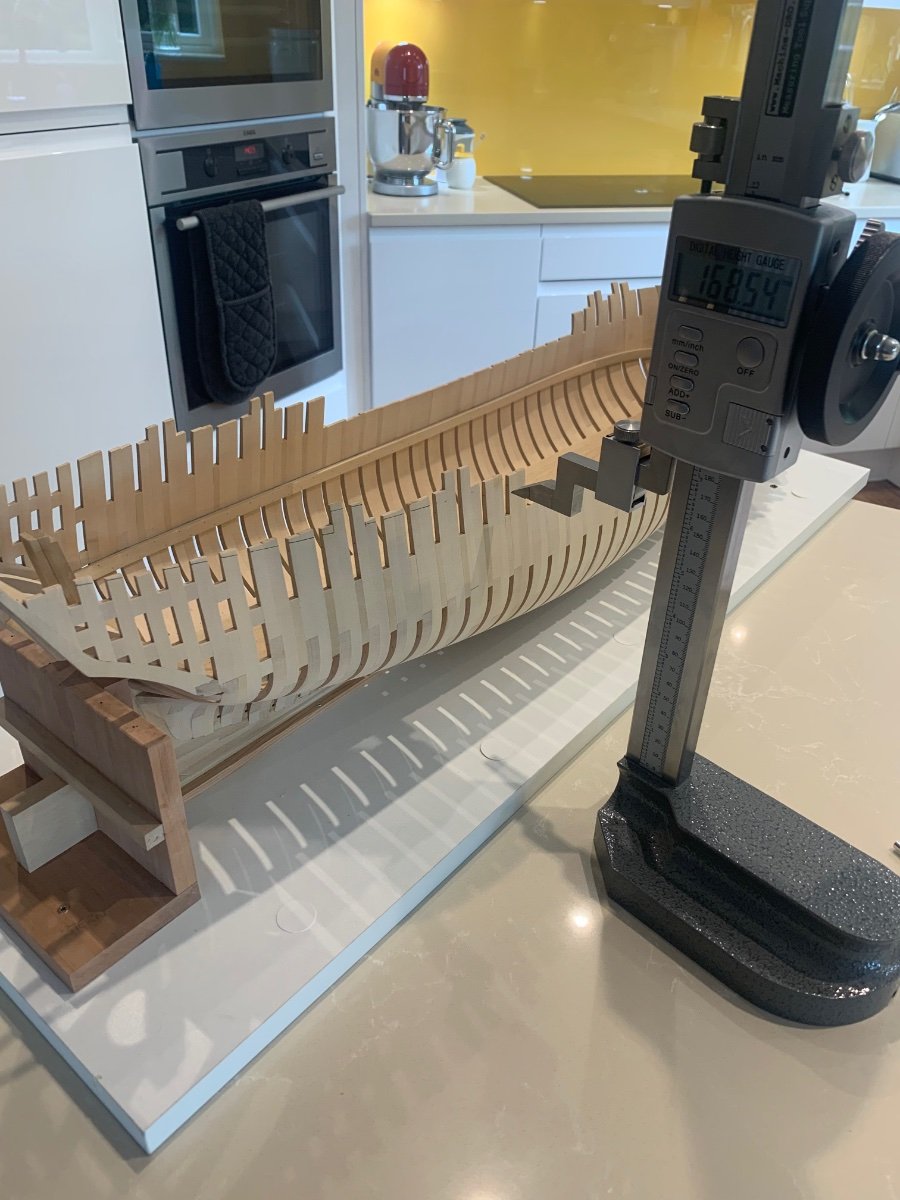
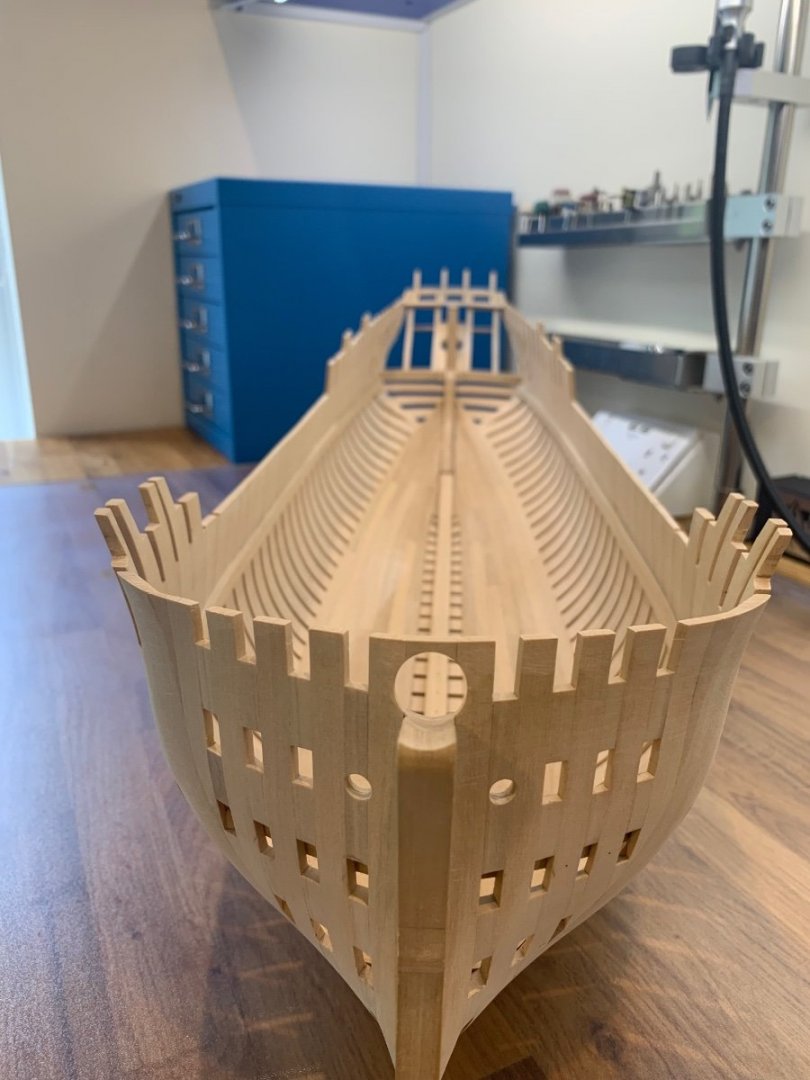
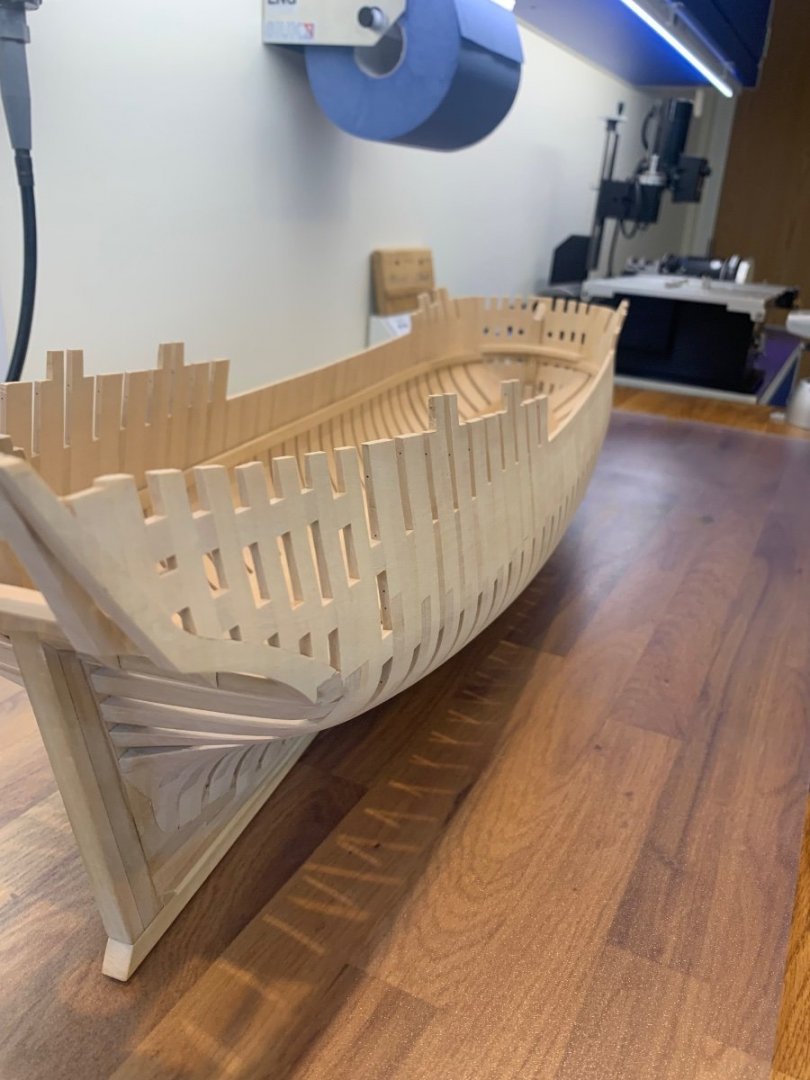
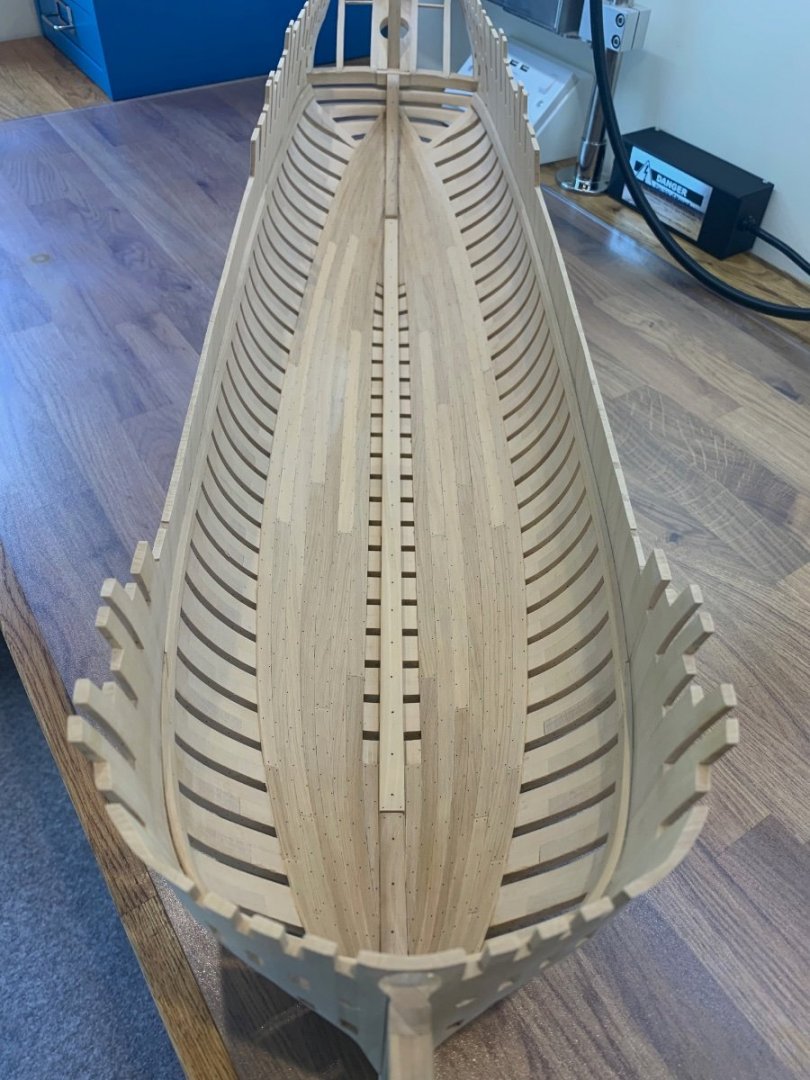
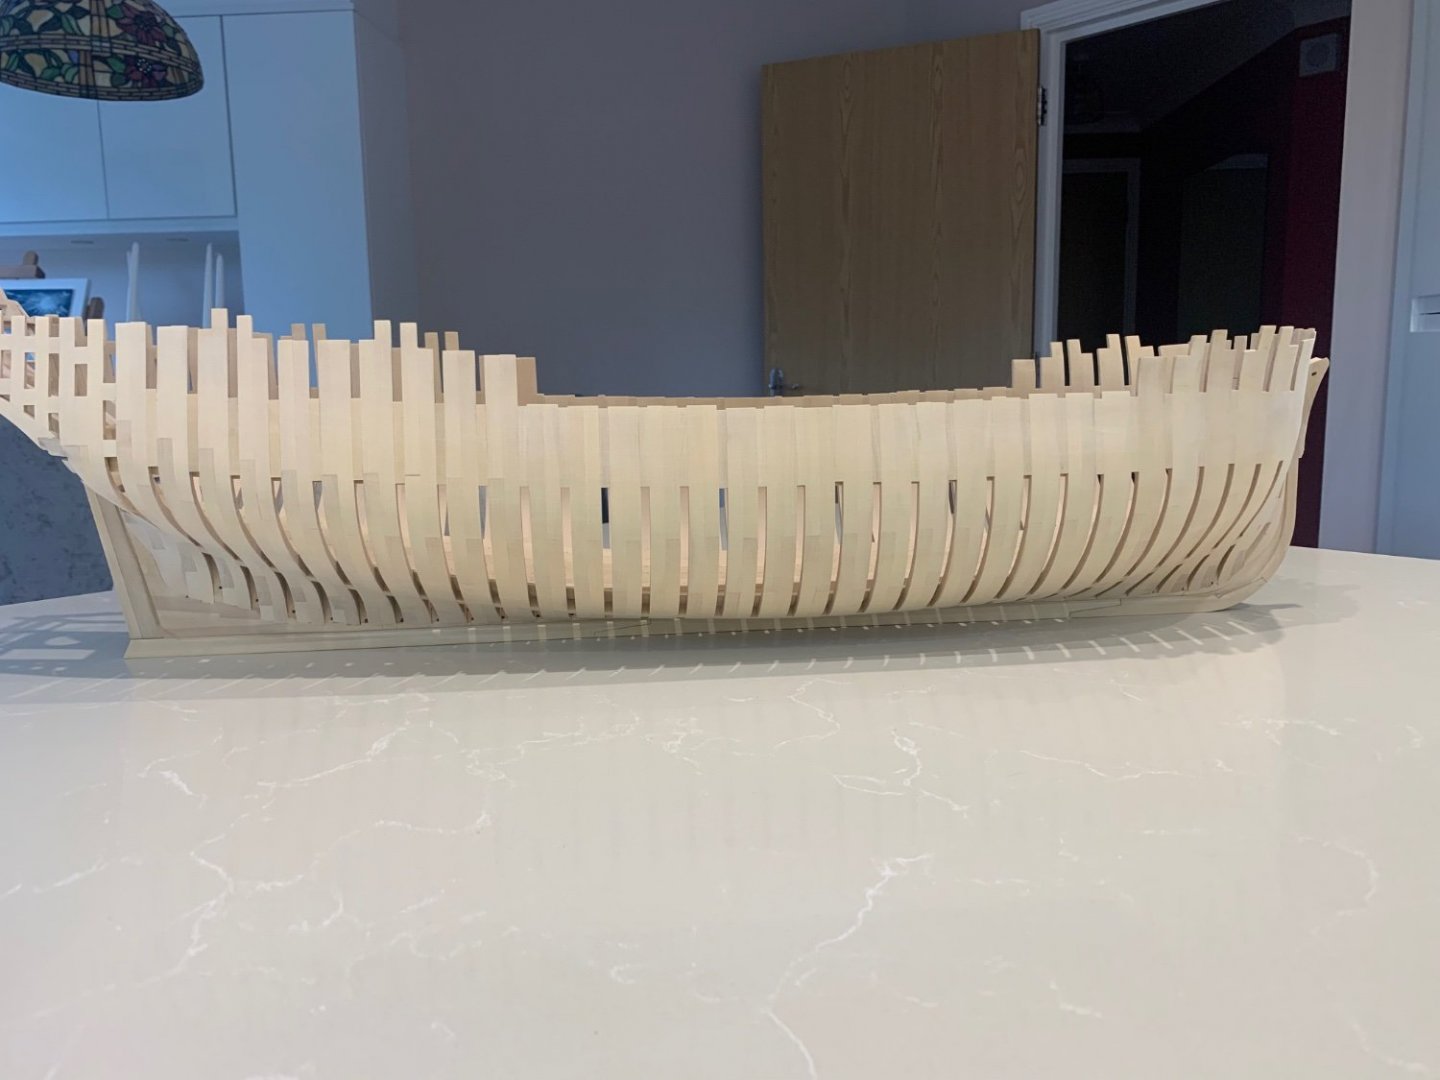
Thanks HH but it would have looked a little better had they have been slightly smaller. I'm trying to source some cobalt drills for the job for future nailing. So she's faired 👍 This is such a milestone for me as I always thought that when I began this build, if I could get this far I can definitely finish her. It took a while as a decided to fair her completely by hand without using any power tools. I just couldn't take the risk of messing this up and let's be honest how often does a builder actually get to do this job. I did have a one low frame which was the same on both sides. I had obviously made this frame slightly incorrectly which then meant that I chased this low point up about the next 7 or 8 frames to pull her fair. The dogs legs are also now a bit slender but not to the point of weakness. Next time I'll leave more on everything so that I have more to play with. I'm so happy with the way this little ships frame has turned out and its better than I hoped for. I also hope that some of the fantastic kit builders on MSW who's builds I follow who often talk about how they would like to try scratch building see that if I can do this then so can they. So the next job is to mark out the top timbers and cut them to length which will make her look even better. A few pictures below - Cheers Mark


-
Such beautiful work marsalv - it really leaves me speechless 👍
-
Thanks Albert 👍