druxey
-
Posts
13,360 -
Joined
-
Last visited
Content Type
Profiles
Forums
Gallery
Events
Everything posted by druxey
-
 Astonishing work. To cut such short lengths of fine wire to length, do you use cutters or roll the wire on a hard surface under a scalpel blade?
 -
I suspect for weight and stability issues that the roofs were not tile, but painted as you suggest, Claire. Coming along nicely! I really like the beam end detail.
-
Topmasts and Topgallant masts vs Lower Mast
druxey replied to Tommy Vercetti's topic in Masting, rigging and sails
No, all the drawings in the RMG collection are 18th century. -
Alternatively, you can buy a good scale rule and measure directly from the appropriate edge without needing any math whatsoever!
-
Topmasts and Topgallant masts vs Lower Mast
druxey replied to Tommy Vercetti's topic in Masting, rigging and sails
There are numerous books such as James Lees' Masting and Rigging English Ships of War, 1625-1860 or R. C. Anderson's Seventeenth Century Rigging that will inform you. -
Nice scratch moldings, Giampiero!
-
Another time try wood filler (if needed!) and sanding sealer before priming. Less nasty, too.
-
Well done, Chris.That is excellent news for Western Europe - and you!
-
I think it would be safe to go with shelving in any and all of the areas that you mention, Jim.
-
Only 7588? Nice progress!
-
Swan-Class Sloop by Stuglo - FINISHED - 1:48
druxey replied to stuglo's topic in - Build logs for subjects built 1751 - 1800
Looks like you've had a fight there in the last photo! Did you use rubbing alcohol to unglue or just carve away the plank? -
Lovely photos of your work! A very happy holiday season to you, Dick.
- 186 replies
-
- 1
-

-
- keelless
- reverse clinker
- (and 4 more)
-
Yeah, it's a burden I have to bear!
-
I don't think much aiming was involved when using a carronade - it was a short range, wide-spread anti=personnel weapon, Simply point it in roughly the right direction, No finesse required. Love the deck of cards, but shouldn't the image on the back of them be of, ahem, a deck? Happy if modified holidays!
- 542 replies
-
- 4
-
-

-
- Sphinx
- Vanguard Models
- (and 3 more)
-
Lovely work there, Some Idea! I might suggest you attach a piece of wood to the top of the support to form a protective 'T' over those vulnerable counter timbers.
-
One of the proposed alternatives to the Panama Canal
druxey replied to bruce d's topic in Nautical/Naval History
Yes, a classic palindrome, Frolick! Another example; 'evil rats on no star live'. -
Sea Witch 1846 by Zooker - RESTORATION
druxey replied to Zooker's topic in - Build logs for subjects built 1801 - 1850
As this is a complex job, I wonder if you have a ship model club in your area (wherever that is!)? If so, you will have access to a lot of experienced folk who can help you at your shoulder - covid permitting. They can show you what to do, which is easier than corresponding here. However, if that isn't possible, we'll try our best to assist online. -
A lovely little model. Apart from the maker's name, I think that there is perhaps an unconscious joke in there. There is a sect who believe in a literal 'translation' of the living to heaven at the Second Coming . They would be hoisted up by a (fictitious) hook-like bone at the base of their spines called 'the bone of Luz'.
- 7 replies
-
- 5
-

-
-
- whaleboat
- restoration
- (and 2 more)
-
Looking good, Dan. Rubbing alcohol is the modeler's best friend!
- 51 replies
-
- 1
-
-
- Model Shipways
- norwegian sailing pram
- (and 1 more)
-
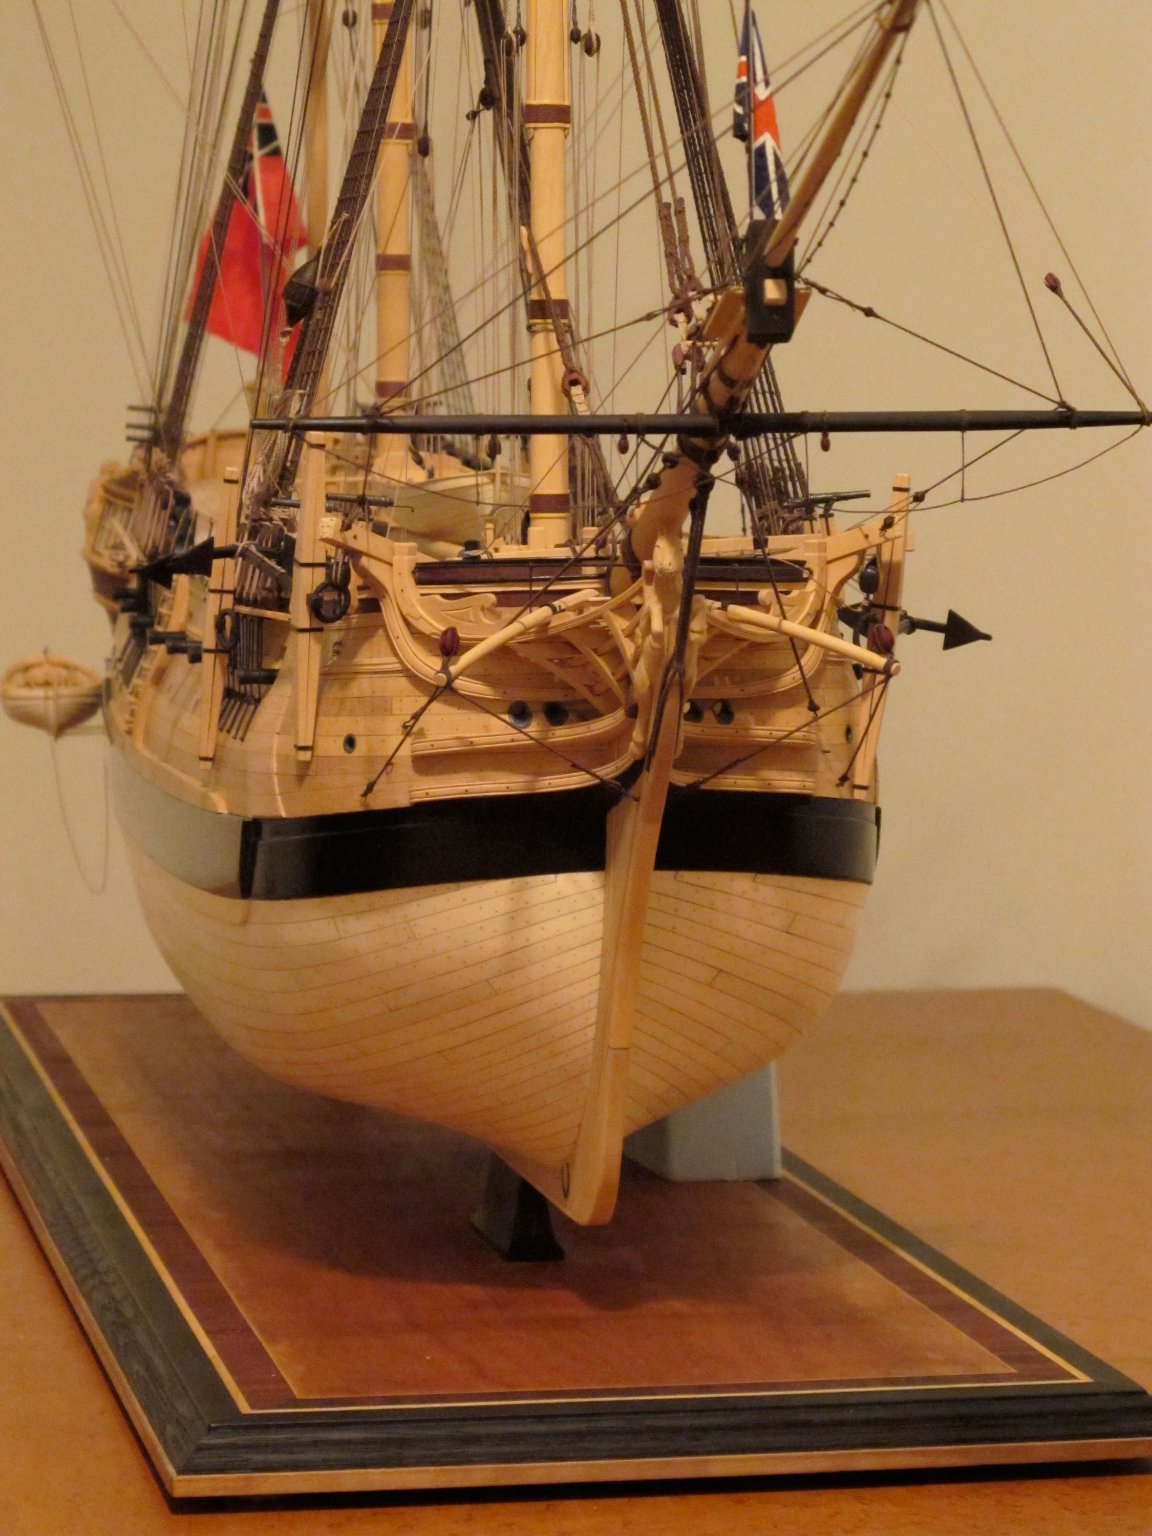
I think that the example shown is more mid-1800's than earlier.
-
Footropes are under the jibboom, as Henry has said. You can just see a pair of these knotted ropes under the jibboom in the photo. The illustrated ropes are hand lines or manropes.
-
The acrylic 'glass' looks like antique mica now: the effect looks nice, actually. Nice splice as well.
-
Why not, indeed? "Never make a thing simple if you can make it complicated." (Thanks, Dad! It was one of his favorite sayings. He was an engineer. Need I say more?)
-
Tricky pieces superbly done and assembled!