


druxey
-
Posts
13,353 -
Joined
-
Last visited
Content Type
Profiles
Forums
Gallery
Events
Everything posted by druxey
-
 Here is a photo of a binnacle based on the Amazon class model's example.
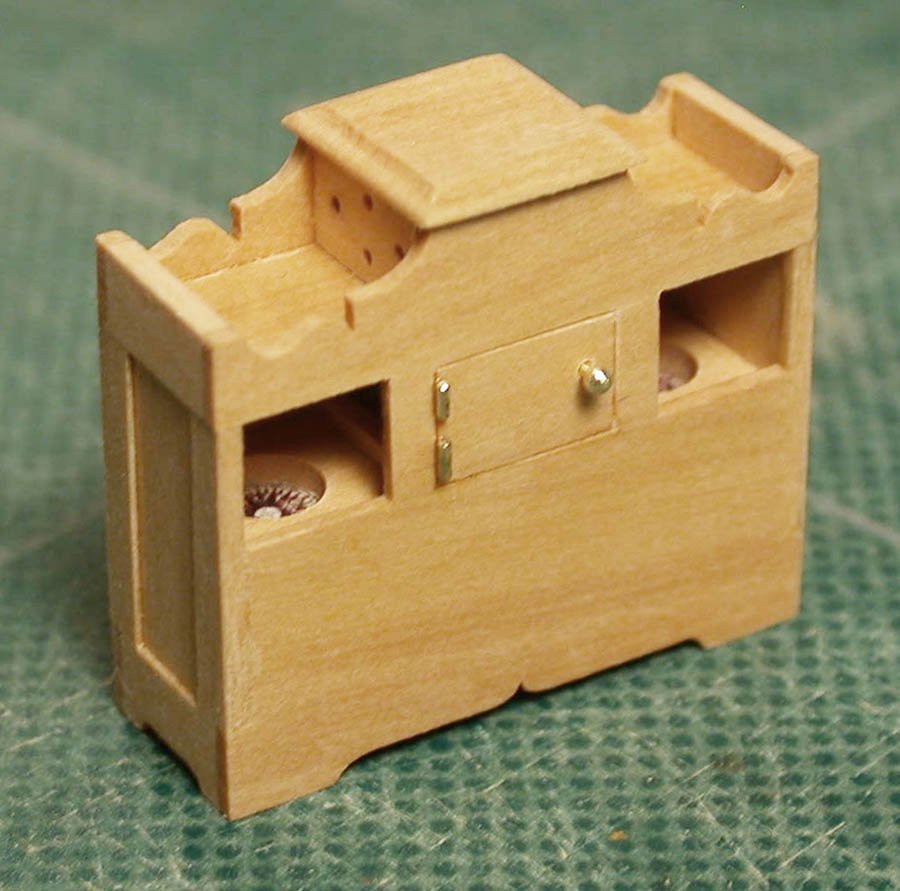
-
The lower left one in the illustration above is strange: normally there are two compasses, one on either side with the lamp in the center compartment. Why two compasses? One can be seen no matter whether the helmsman stands to the left or right of the wheel. Also, as planned redundancy, should one compass fail.
-
One way to get around not having a drill press is mark out accurately on both sides, prick the center points and drill, slightly under size, from both sides. If the holes don't quite meet in the middle, the correct size drill up should take care of things.
-
Dan: The issue with the 'gratten' tops on the NMM model is that the openings are at least 6" square: a real hazard. Were they finer mesh, it would be more plausible.
-
This looks like a fascinating model, Clare. I'm looking forward to seeing the model take shape.
-
I see the issue more clearly now. If you cut the crêpe rubber to the width of the openings between the frame elements or a whisker less, that should work.
-
Try a piece of crêpe rubber eraser on the gummy remnants instead of solvent. Have you tried the low-tack version: 3M's Scotch brand removable matt tape instead?
-
Boring? Hardly. Your step-buy-step is most instructive. Lovely work, yet again. Break out the winter woolies now, Keith!
-
Welcome aboard! I recall seeing St Roch in Vancouver some years ago, She makes an interesting subject. Looking forward to seeing your progress. And there is nothing like good ol' fashioned manual drafting! (I'm also doing some this afternoon.)
-
Oooh! See if I help you out again, Moonbug. Seriously, you'll have to post a photo or two of your own completed binnacle as reparation.
-
NAIAD 1797 by Bitao - 1:60
druxey replied to Bitao's topic in - Build logs for subjects built 1751 - 1800
Beautifully done!- 371 replies
-
- 14
-

-

-

-
Swan-Class Sloop by Stuglo - FINISHED - 1:48
druxey replied to stuglo's topic in - Build logs for subjects built 1751 - 1800
Because the pump runs through at an angle, the athwartship opening needs to be slanted to match, which may account for at least part of the fitting issue. -
There were always vents, but not a funnel or chimney. The latter seems to be a 19th century development. An Amazon class model in the NMM collection shows the form used in the 1770's: https://www.rmg.co.uk/collections/objects/rmgc-object-66276 Hard to see in the photo, but the sides of the central raised portion have several vent holes (five in a diamond pattern, one hole in the middle, if memory serves me correctly). o o o o o
-
And swivelling swivel hooks! Amazing.
-
Swan-Class Sloop by Stuglo - FINISHED - 1:48
druxey replied to stuglo's topic in - Build logs for subjects built 1751 - 1800
Well done: Grooving those posts accurately is tricky! -
It goes together by trial and error fitting. If you have some re-stickeable 3M Magic tape you can lay a piece down in the gap and trace the shape you need. Peel off the tape and stick it on your planking stock. Cut the plank a hair oversize and sanding stick it down until it just slips into place. Labor intensive? Yes! But, with care, the result is well worth the trouble.
-
To avoid distortion (and for safety's sake!), make an outer plaster of Paris two-piece jacket with the joint at right angles to the split line in your RTV mold.
-
Well re-worked, Alex. Fixing 'oopsies' up is a skill every model-maker has to develop. And you've learned to be gentle and patient when ungluing!
- 23 replies
-
- 3
-
-
- Lowell Grand Banks Dory
- Model Shipways
- (and 1 more)
-
A scraper works well for a rabbet on a cross-section. Of course at bow and stern the angles change considerably, but for your model it did a good job.
-
Well, congratulations on your new toys. As was pointed out, the quality remains long after the cost is forgotten.
-
I believe that there was a V de V exhibition at the NMM some years ago, and a large format catalog volume was produced at that time. Am I remembering this correctly? Also, (if you can get there!): https://www.holland.com/global/press/news-resources/exhibition-of-van-de-velde-marine-art.htm
- 7 replies
-
- 4
-
-
-
- Marine artist
- Dutch
- (and 2 more)
-
Thank you for bringing this book to our attention, Marcus!
- 7 replies
-
- 4
-
-
- Marine artist
- Dutch
- (and 2 more)
-
Archaeology of a 19th century Great Lakes shipyard
druxey replied to JKC27's topic in Nautical/Naval History
Excavation by Brock University archaeology students and professionals have been held up the past two years by the pandemic. It is hoped that the site will become active again next year. It is known that an abandoned 'canaller' is buried at a deeper level on this site.