


druxey
-
Posts
13,369 -
Joined
-
Last visited
Content Type
Profiles
Forums
Gallery
Events
Everything posted by druxey
-
 Your idea that: "There is a little decorative carving on it but most importantly, it appears to be rotated to starboard and the lower end of the stem head protrudes into the stem." is, I think, misinterpreting the plan. The head knee is central and let in with a shallow scarphed mortise on to the stem head. The shading at the tip of the knee is indicative only of the carved detail. The bowsprit is centered between the two bollard timbers. There is a minimal shallow groove centrally on the breast hook for the bowsprit. I suspect that the stem head proper was cut down and is either shown before it was revised or is erroneously drawn. If the bowsprit were offset, it was more frequently done to starboard, not port. The only reason to offset a bowsprit was to run it inboard past the mast, as on a Revenue cutter. In that case, it would never be lashed to the knee of the stem as shown. Other opinions?
 -
Now on to the tholes. These look to be either bronze castings or of lignum vitae on the actual boat. For contrast, I'm using pear wood. The photo shows three stages in making these. It is much easier to shape them in situ than hold them in a hand vise. One done, eleven to go!
- 433 replies
-
- 17
-

-
- open boat
- small boat
- (and 1 more)
-
Stitching sails with sewing machine
druxey replied to Jorge Hedges's topic in Masting, rigging and sails
That's an impressive result for using a woven material. -
Have you TFFM Volume II? There is a method for making wheels in it if you do.
-
Welcome aboard, Alexander!
-
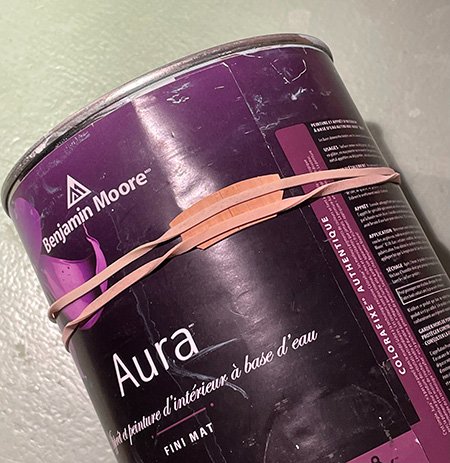
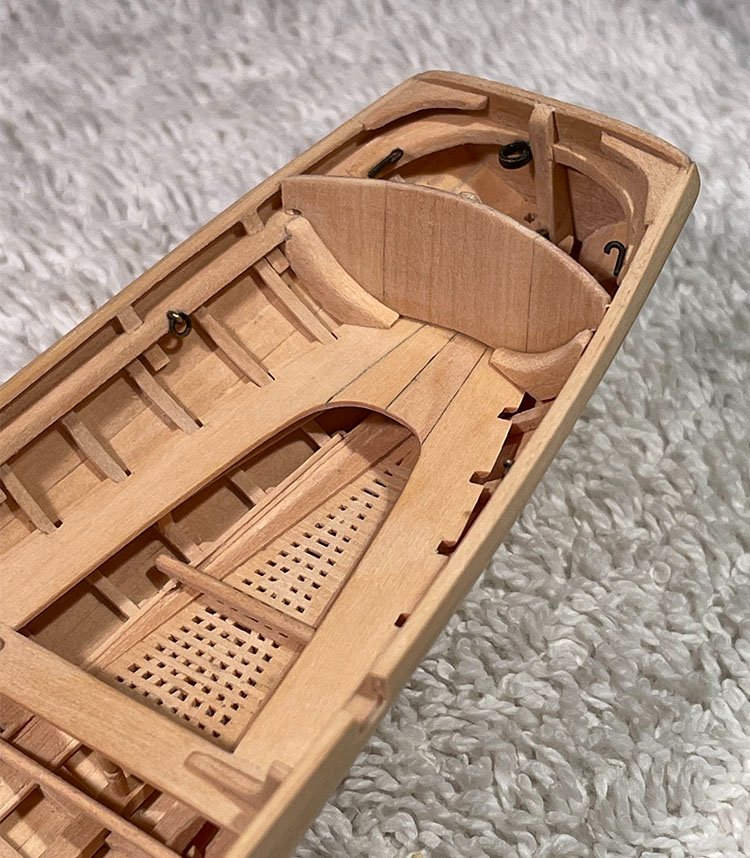
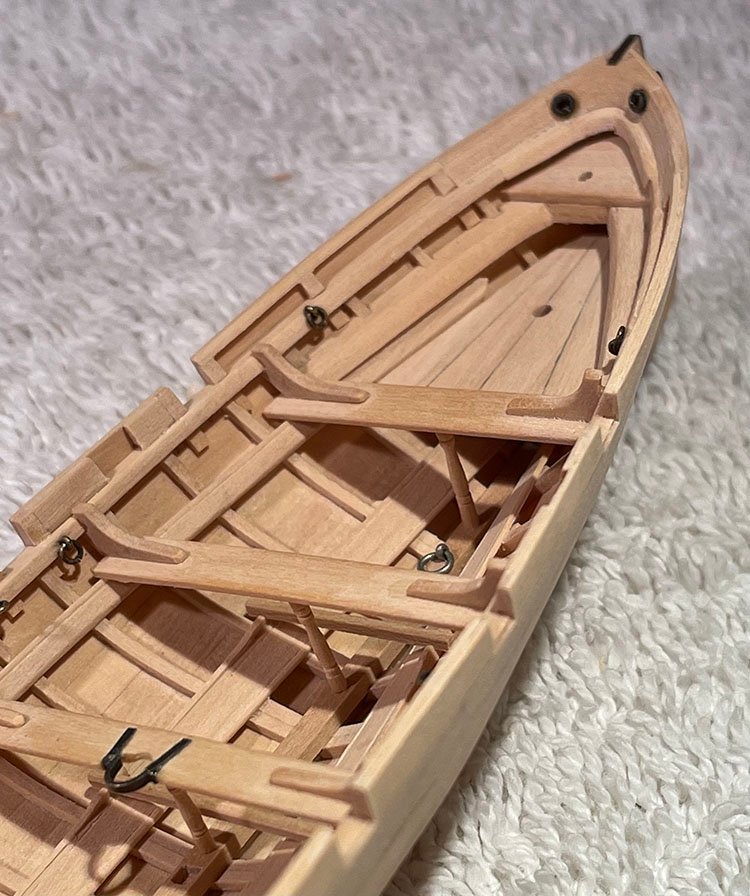
Thank you again, everyone, for following along and for your kind comments. The seat back held several challenges. It curves, is tilted and has to fit properly. The shape was determined using card patterns. A two-layer veneer of Castello was laid up on a one quart paint can. This, 4" in diameter, was exactly the correct radius - sometimes the gods smile upon us. I noted two supporting battens on the rear of the seat back, just visible in one of Eberhard's photos. As it turned out, constructing the back was the easy part. Much more challenging were the two 'horns'; the supporting timbers on the fore side of the seat. Compound curved surfaces and compound angled scores were needed. It took a very long full morning to successfully complete these. These completed the internal woodwork on the cutter. Next will be finishing the exterior: rudder, rubbing strake, tholes and decorative roundels at the bow.
- 433 replies
-
- 26
-
-
- open boat
- small boat
- (and 1 more)
-
Round house (poop) height
druxey replied to allanyed's topic in Building, Framing, Planking and plating a ships hull and deck
It probably was not a poop deck at this time period. The 'cabin' under was a hutch for the 'trumpeter'. -
Sweeps? Yes, there will be. Davits? No - then I'd have to build the ship the davits are attached to. "Ain't got no time for that!" Thanks for the kind comments and for looking in again, everyone.
- 433 replies
-
- 7
-
-
- open boat
- small boat
- (and 1 more)
-
NRG Capstan Project
druxey replied to tlevine's topic in - Build logs for subjects built 1751 - 1800
I might suggest making a coaming joint from scrap first as practice and to provide a pattern for the actual joints. -
Did you use a steady?
-
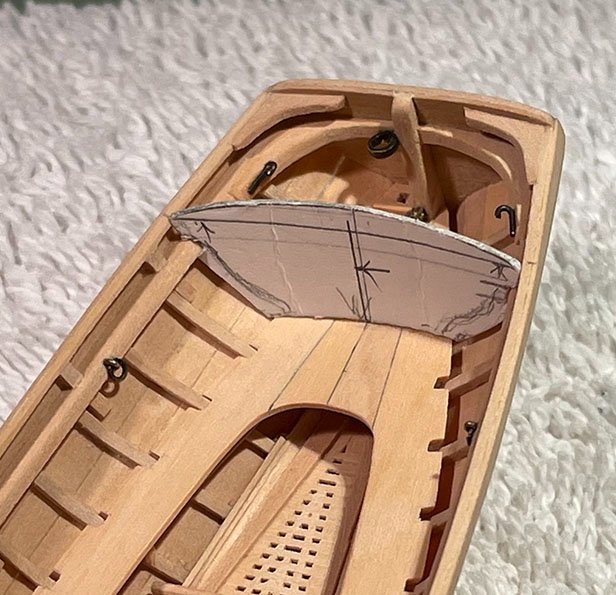
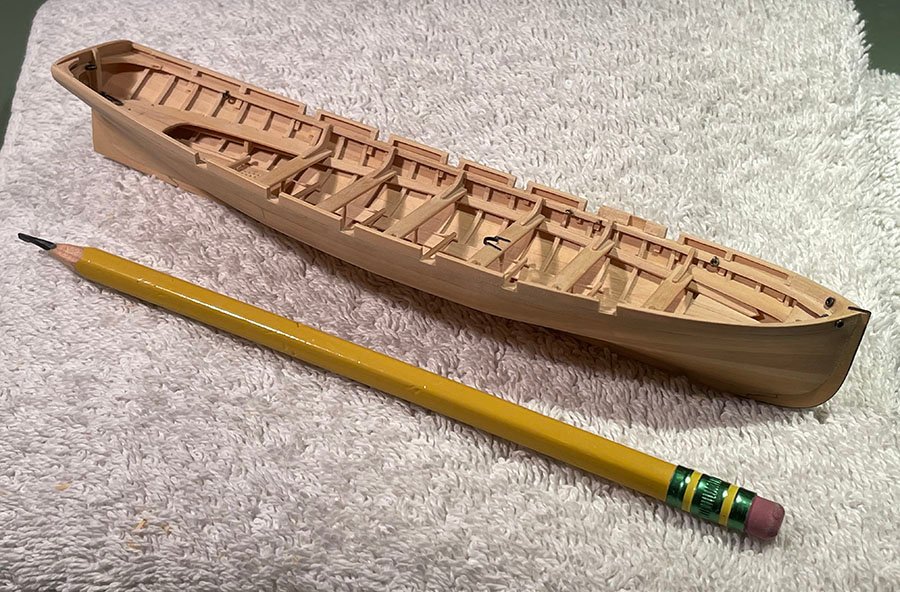
The wash strakes are now complete with their reinforcing pieces of in-rail. The in-rail is trapezoidal in section. I cut strips wider than the finished rail, beveled the outer edges, glued the pieces in, then trimmed the inner edge with a sharp blade and sanded. It is surprising how solid the structure of the model is. I'm in the process of fitting the last two knees at the stern, uniting in-rail with the transom. Again the knee is fitted and glued in over-size and the inner face shaped once it is secured. Although there are still quite few details to make, it is time to start considering how to mount and display the model. I'm favoring a similar base to that of other open boats that I have made, featuring burl veneer. However, a final decision is still pending. (The pencil included for scale has been requested!)
- 433 replies
-
- 28
-
-

-
- open boat
- small boat
- (and 1 more)
-
I use MicroMark's lead-free pewter. The MP is a little higher, but it's safer! Good luck trying to resuscitate the existing pieces.
-
I would not be too concerned about that slight hull asymmetry: in the completed model, who is going to measure whether that beakhead bulkhead is exactly at 90 degrees to the centerline? Nice progress, HH.
- 2,699 replies
-
- 4
-
-
- heller
- soleil royal
- (and 9 more)
-
I was terrified of trying to cast in metal, but when I finally tried ( in pewter) I found it was not so difficult. RTV moulds are similar to resin casting ones. The only thing with a two-part closed mold is to provide air escape vents. A regular propane torch is fine for melting the metal.
-
Treenail holes
druxey replied to Don Case's topic in Building, Framing, Planking and plating a ships hull and deck
End grain and moisture are always an issue that needs to be dealt with. -
Each step is a micro-model of its own. Nicely and neatly done.
-
Could you mold and cast from the 'good' queen post?
-
Aaand...he's under way! Nice start, Michael.
-
Planking options
druxey replied to Don Case's topic in Building, Framing, Planking and plating a ships hull and deck
Yes, you had better plan on paper or risk utter frustration! I might observe that the lowest ceiling planks creep up the bow much too far. The outermost planks should end in the vicinity of the foremost cant frame.That will simplify the congestion up the stemson a bit! -
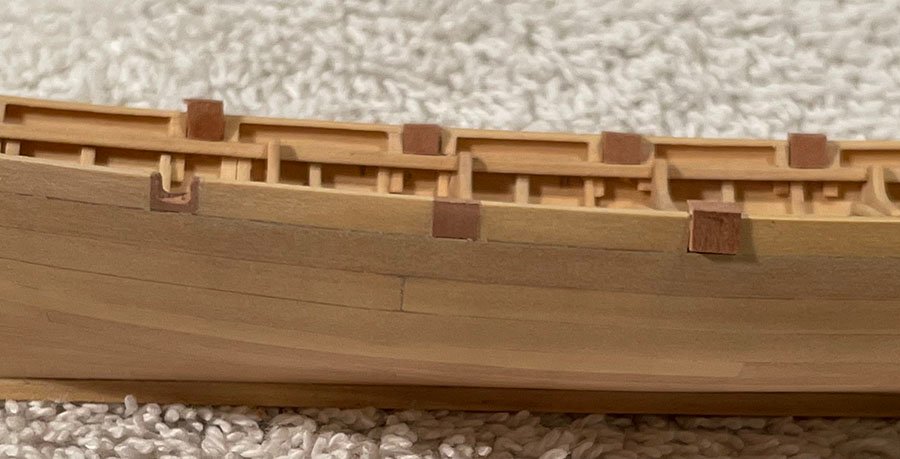
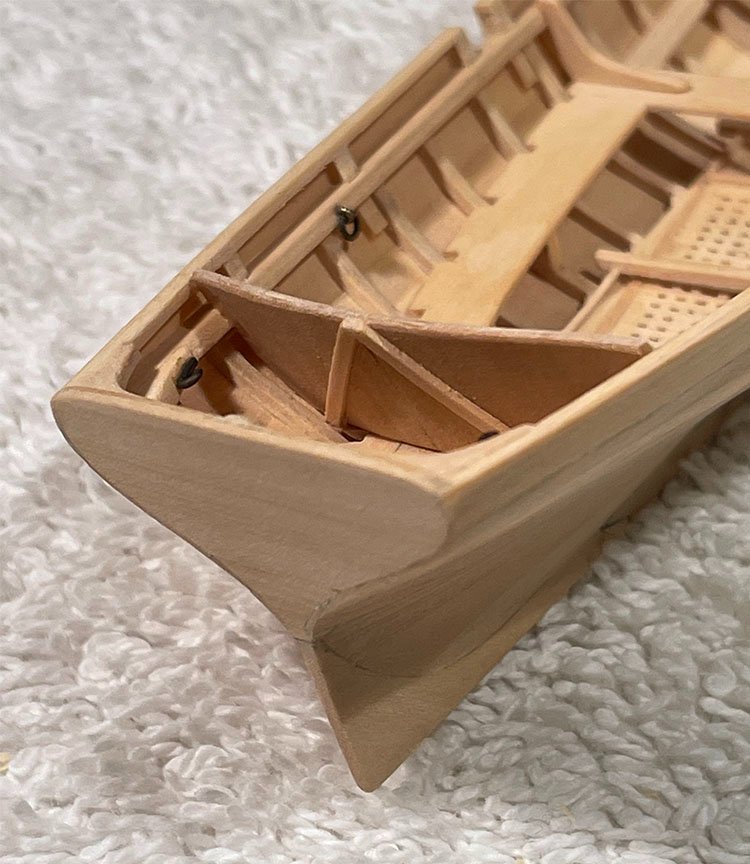
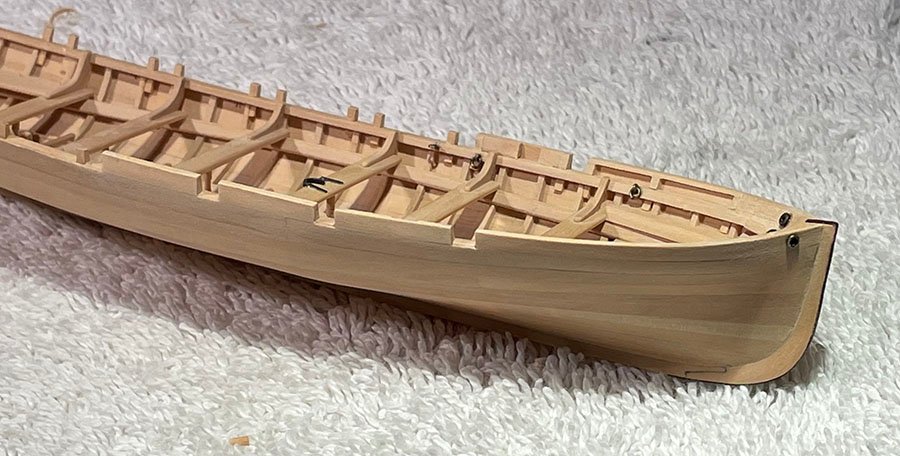
Moving on, the details at the bow have been completed. I noticed on the photographs of the actual boat that the flanges on the inner sides of the hawse pipes were larger than those on the outer sides. A protective metal strap extends down the face of the stem as well. I'm now working on the wash strakes. First the stub timberheads were sanded to uniform height. Short lengths of plank are being added and then reinforcing pieces of mini in-rail. There are pieces of timber with a gap between tholes 1 and 2 on the prototype. I have no idea what their purpose was, but copied them here.
- 433 replies
-
- 27
-
-
-
- open boat
- small boat
- (and 1 more)
-
The way to remember it is that the lower deadye looks like a skull and the upper one is the mirror of it.
-
HMS Discovery 1789 by Don Case - 1:48
druxey replied to Don Case's topic in - Build logs for subjects built 1751 - 1800
No, Don, ships of that era had that turn of the clamp aft just as you have it. That is correct, strange as it may look! -
Nice demonstration, dafi. If you are planning on actually manning the capstan in your model, remember that they gripped the bars thumbs upward and palms towards them. (This was to avoid broken forearms should the capstan kick back.) So often the wrong grip is shown, like pushing a baby stroller or bike.
-
Some of you have too little faith in me, others too much!!! Thanks anyway, Toni.
- 433 replies
-
- 7
-

-
-
- open boat
- small boat
- (and 1 more)
-
Interesting preventative method, Alan! Well thought out. I'd eight-square and round off manually rather than put it in the lathe, but to each his own.