
HOLIDAY DONATION DRIVE - SUPPORT MSW - DO YOUR PART TO KEEP THIS GREAT FORUM GOING! (Only 13 donations so far - C'mon guys!)
×


CaptainSteve
-
Posts
1,858 -
Joined
-
Last visited
Content Type
Profiles
Forums
Gallery
Events
Everything posted by CaptainSteve
-
 Thanks for that information, Cristiano. So it may be that my ship actually has some historical background to it, after all.
- 66 replies
-
- 2
-

-
- resolution
- hunter
- (and 2 more)
-
Books for historic rigging reference
CaptainSteve replied to pshrynk's topic in Masting, rigging and sails
I've got the book by Lennarth Petersson. Lots of great rigging diagrams in that one. I'd get the title for you ... but I'm too lazy. -
Yer ... sounds about right. I'll go with that explanation.
- 66 replies
-
- 2
-
-
- bounty launch
- model shipways
- (and 1 more)
-
Some years back, I built Occre's Apostol Felipe. The box blurb gave some obscure reference to it being a treasure ship built for King Philip IV of Spain. Although I didn't buy this kit based on any historical interest in the vessel, I have often wondered about its' actual historicity (if such exists). A quick internet search for 'APOSTOL FELIPE' reveals only (i) the Occre kit, (ii) St Philip, or (iii) the San Felipe (a completely different ship). PS: It did build into quite a nice model.
- 66 replies
-
- 3
-
-
- resolution
- hunter
- (and 2 more)
-
Looking very nice, B. You can get clamp marks out easily by getting a piece of tissue paper, soaking lightly with a few drops of water and then clamp it over the errant mark. Hold it in place with a clothes peg over-night, and the clamp marks should disappear.
- 66 replies
-
- 3
-
-
- bounty launch
- model shipways
- (and 1 more)
-
You may need to scroll down a few posts from the link in my post above. The bed-rolls are put in over three or four postings.
-
Nice modification on the billet, Sawdust !! (I knew it had to happen ... but my bookie had longer odds on you starting to carve already)
- 742 replies
-
- 4
-
-
- constitution
- frigate
- (and 1 more)
-
Do you plan to fit bed-rolls to your netting, Paul ?? I've seen one USS Constitution builder make his using bakeable modelling clay. They've come out looking very realistic, and I plan on using the idea for my own build, when the time comes.
- 708 replies
-
- 1
-
-
- victory
- constructo
- (and 1 more)
-
Lookin' good, Slog. Hope you have a great Christmas/New Year's break.
- 244 replies
-
- 3
-
-
- borodino
- dom bumagi
- (and 1 more)
-
Looks like second-time around was the charm, Tom. They look very good. Hope you have a great Christmas/New Year holidays.
-
Great work, Paul, and so tidy, too. Looking very nice (much better than mine at the same stage). Hope you have a great Christmas/New Year.
-
1:50 Connie ?? That'll be HUGE, Dave !! Count me in !!
- 962 replies
-
- 5
-
-
- sovereign of the seas
- ship of the line
- (and 1 more)
-
If it's any consolation, Sunsanvil, I think many of us met with some form of "difficulty" with the planking on this kit. I know I did ... but at the time I put it down to inexperience.
- 66 replies
-
- 1
-
-
- bounty launch
- model shipways
- (and 1 more)
-
Cutty Sark by NenadM
CaptainSteve replied to NenadM's topic in - Build logs for subjects built 1851 - 1900
What about trying the bread-and-butter style for making your boats, Nenad ?? You'd have to cut about five or six "slices" for each boat and glue them together. Each slice would look like an oval-shape, with the centre removed. One slice would be solid, for the bottom. If you cut the slices from thick card, and staggered them when gluing together, then it could look like clinker planking (somewhat). Then just fit a false keel, fake ribs, seats, oars and sails.- 4,152 replies
-
- 7
-
-
- cutty sark
- tehnodidakta
- (and 1 more)
-
Wow !! What a difference a little splash of paint and added lattice make !! Very nice, Michael.
-
Ah, cleats !!! (I was going to guess cleats ... really) Nice work, Matt.
-
Nice work on your cross-section, Steve. I can see what you mean about the wood quality. Fortunately, Connie is mostly painted (on the exterior, anyway), so you should be able to cover that up quite successfully. If it were me, I'd think about applying a thin coat of PVA on that planking and then sanding it back with a fine grit sandpaper. The sawdust will go into the rough parts of the planking, helping to even it out. You may need to change your sand-paper, as it will become clogged. Once completely dry, a coat of sanding sealer, followed by Connie's trade-mark black and white colours should help to fix things.
- 108 replies
-
- 4
-
-
- mamoli
- constitution
- (and 2 more)
-
You forgot one final bullet-point: Crack open celebratory bottle of champagne. Lookin' good, JS !!
- 974 replies
-
- 3
-
-
- rattlesnake
- mamoli
- (and 1 more)
-
My choice: Rudder stowed on-board. I think I did one with it fitted, and the other three had it stashed on-board and visible. I thought it a nice detail to show this when doing the boats on my own build, as most people (most non-MSW people, anyway) wouldn't know this was how it was done. I certainly didn't !!
- 962 replies
-
- 6
-
-
- sovereign of the seas
- ship of the line
- (and 1 more)
-
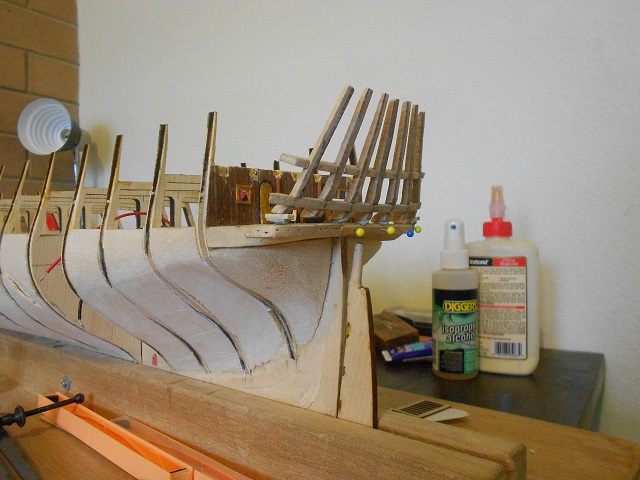
Thanks, Guys. Earlier today, I splashed a bit of Isopropyl about the place and removed the collar-plank. Once the new footings were sanded down level with the rest, I found that the collar was putting too much stress on the uprights, pulling them out of alignment. I'll be needing to re-cut/re-groove that piece ... tomorrow.
-
I would agree with John ... mostly. The Model Shipways kit can build into a very, very nice model (see XKen, among others). But it is not for the faint-hearted. For myself, a so-so builder with a couple of builds behind me, whilst I find the MS plans to be better-than-excellent, the near total lack of any step-by-step instructions has meant a great deal of head-scratching and hand-wringing. Check-out the Caldercraft Bluejacket version before you make up your mind. I also agree with John about the Proxxon tools .... I very nearly have the whole set. EDIT: Mark, I do believe you are right !!
-
One further matter … Our Hero were to be a-reading back throughout-eth his own log recently, and didst happenstance to note a most handy tip which he hadst overlooked. As such, he hath now rectified the problem, and reinforced those fragile bulkhead tips wi’ a brew o’ diluted CA. Many thanks to both Mark and XKen fer the helpful tip. “But great damage,” CaptainSteve didst bemoan, “be wrought upon one o’ me paint-brushes – it be a chisel now.”
-
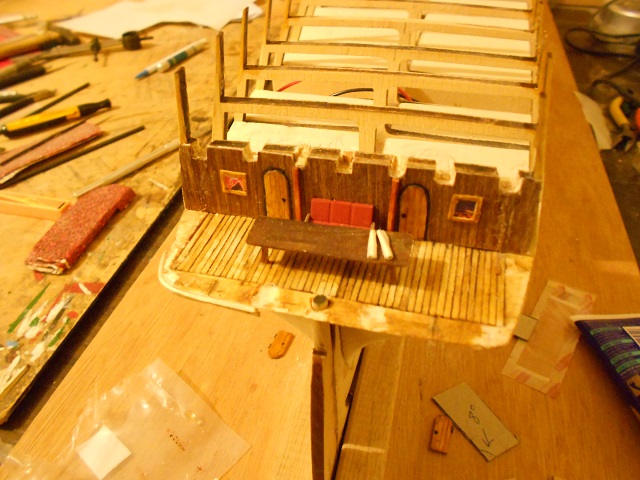
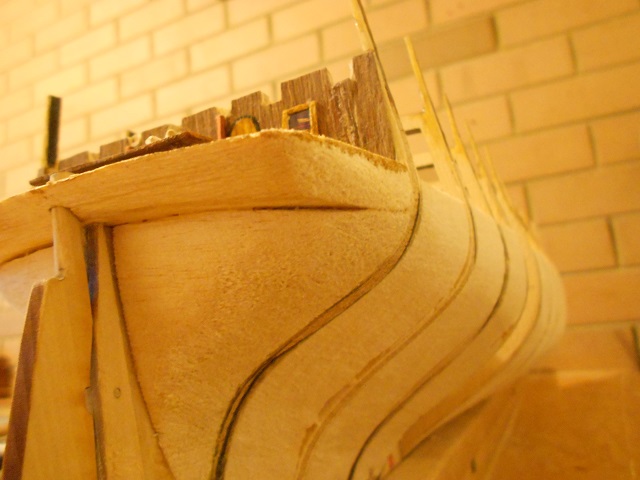
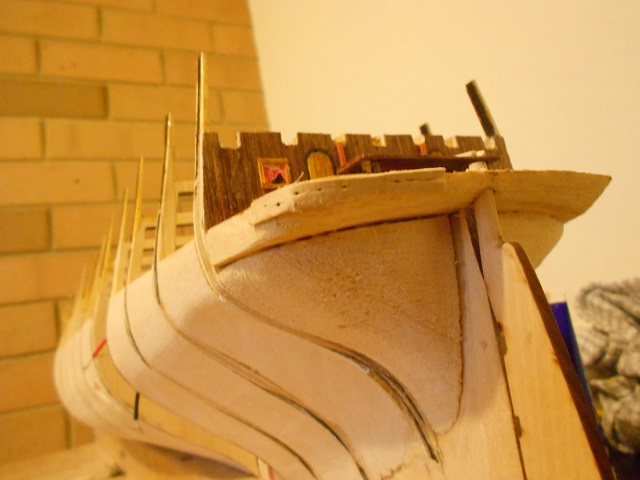
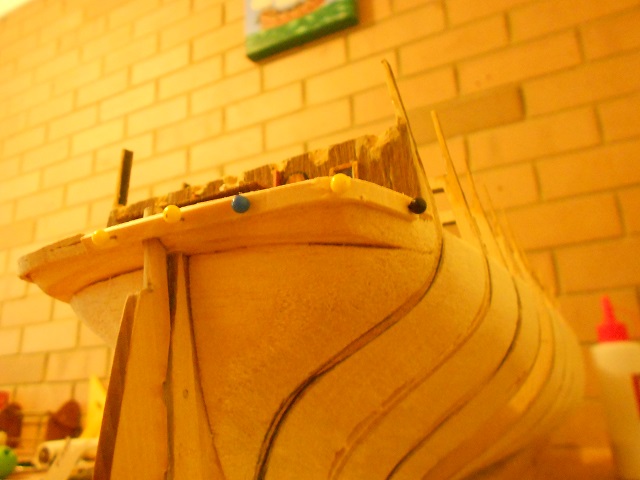
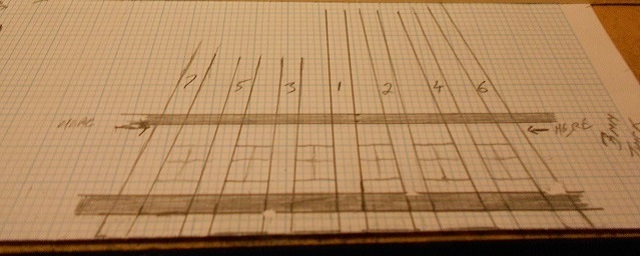
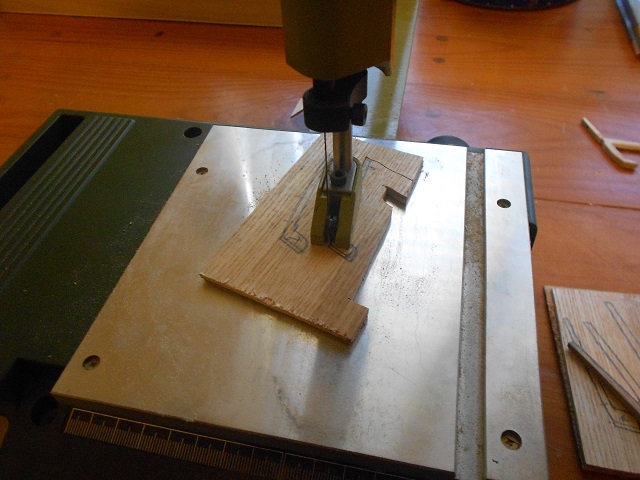
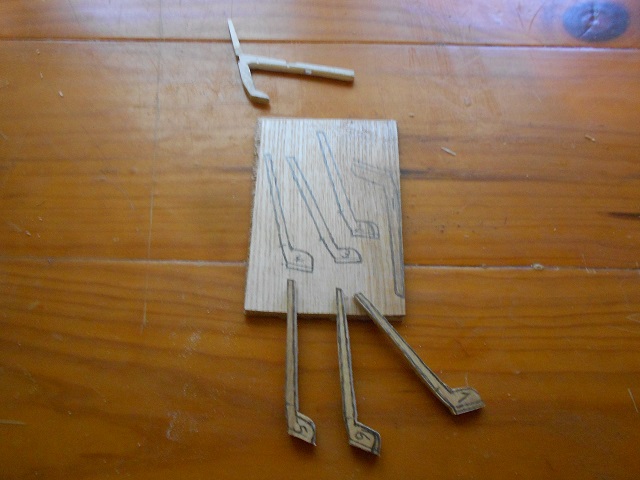
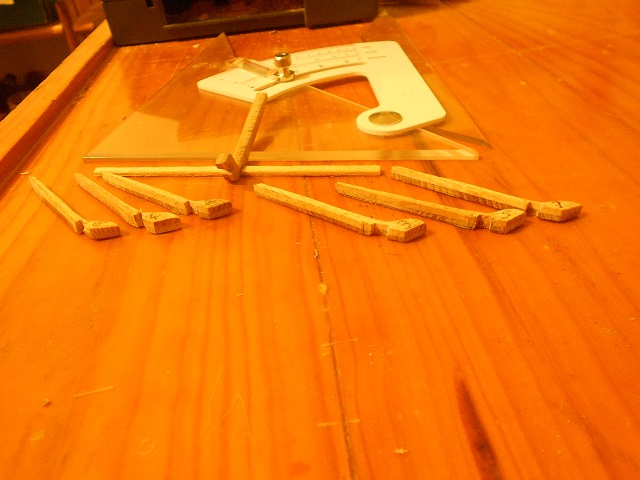
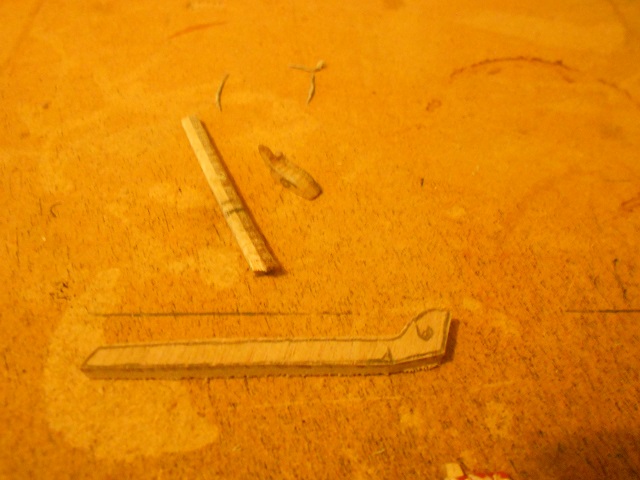
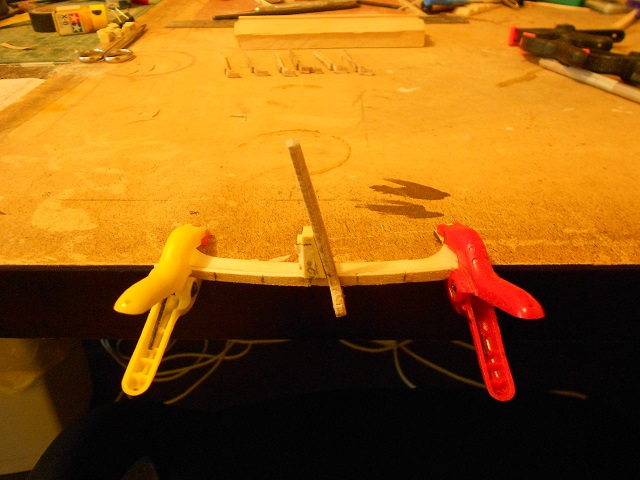
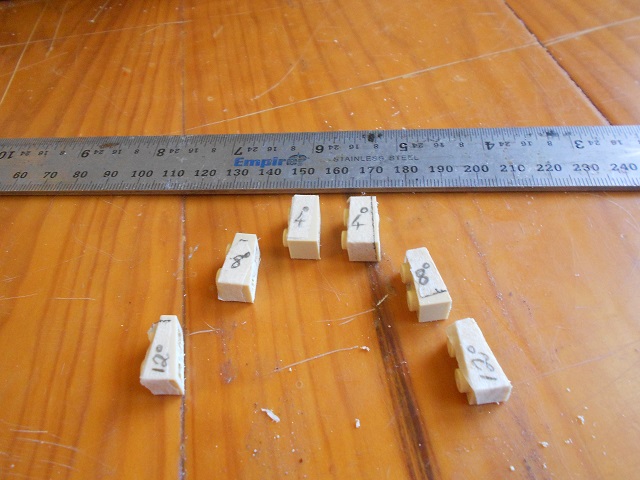
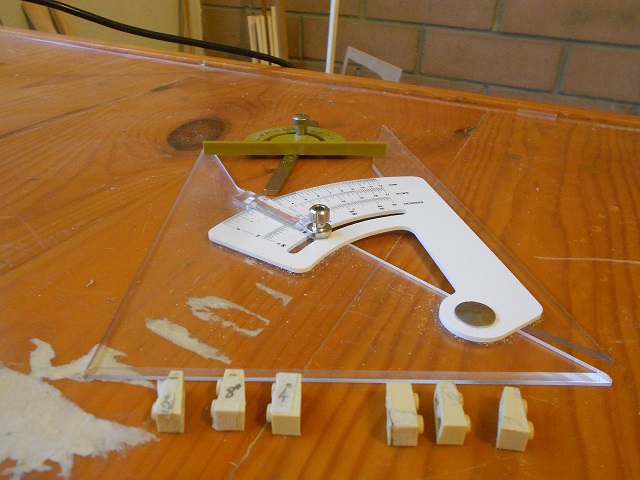
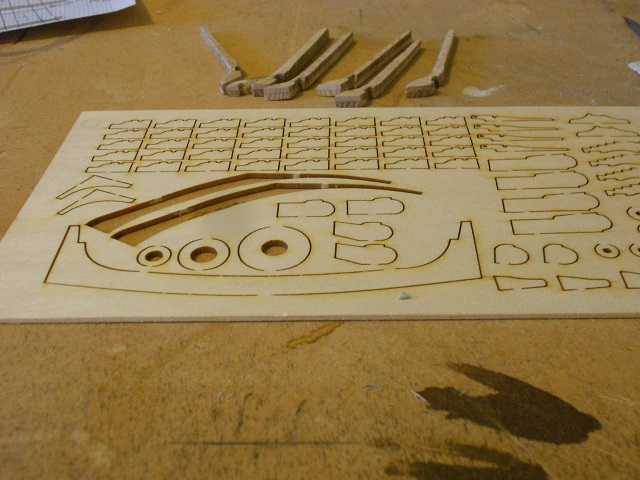
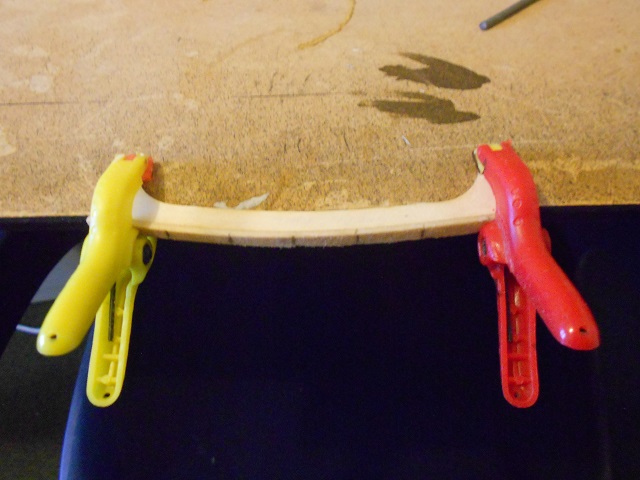
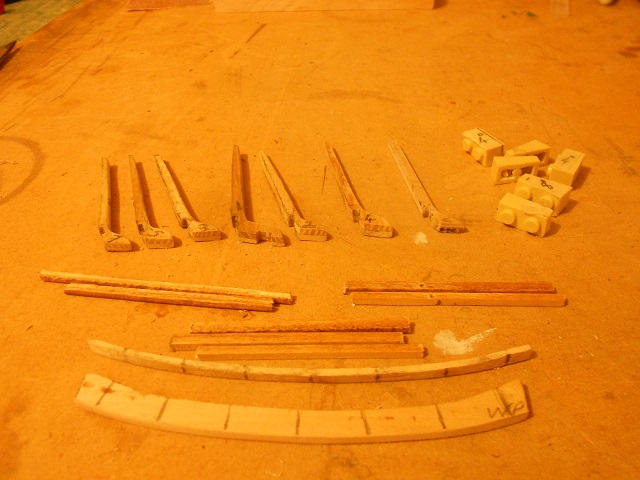
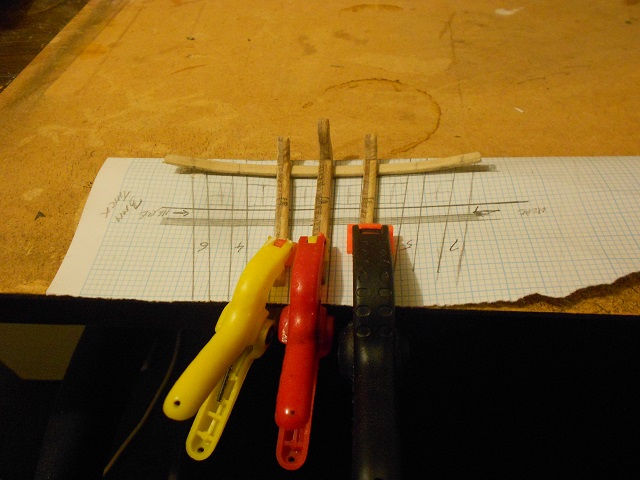
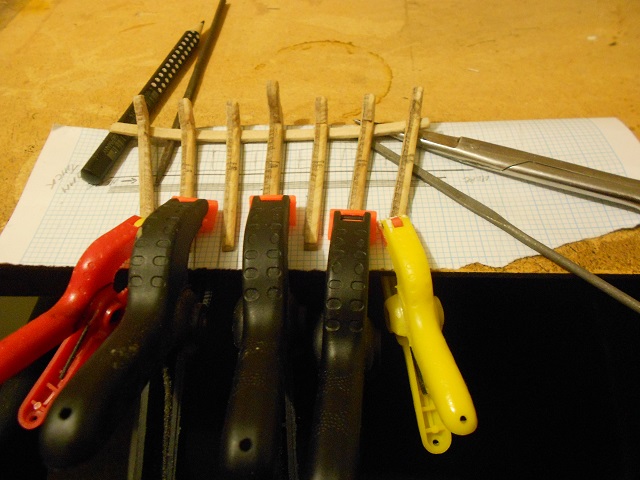
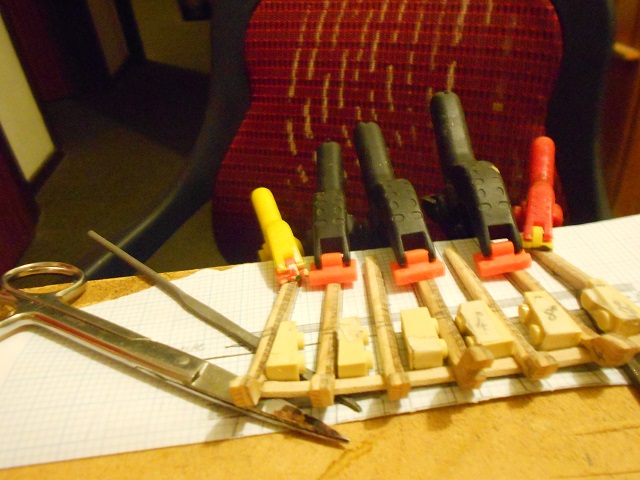
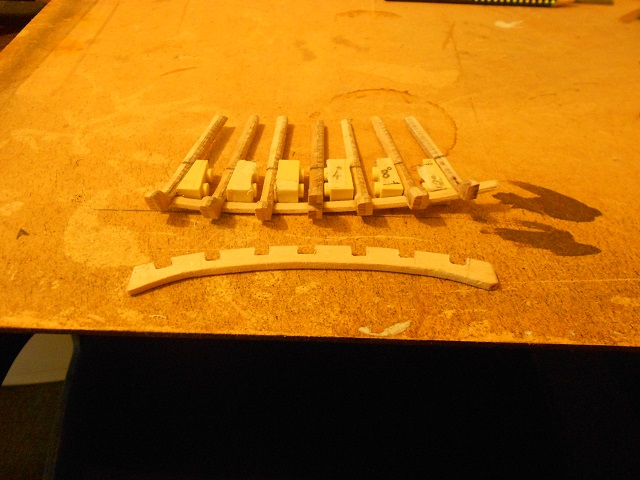
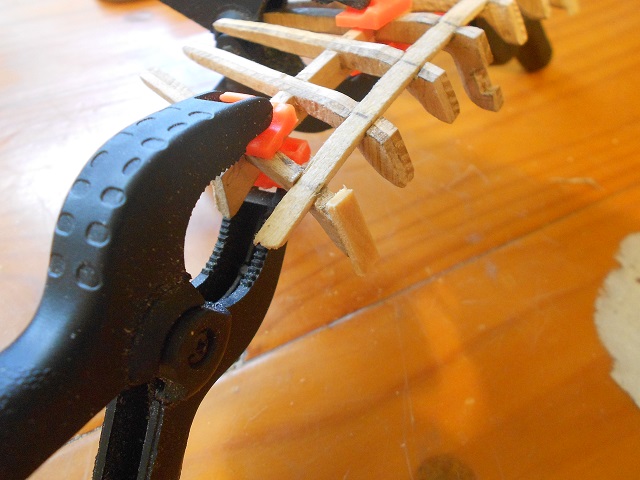
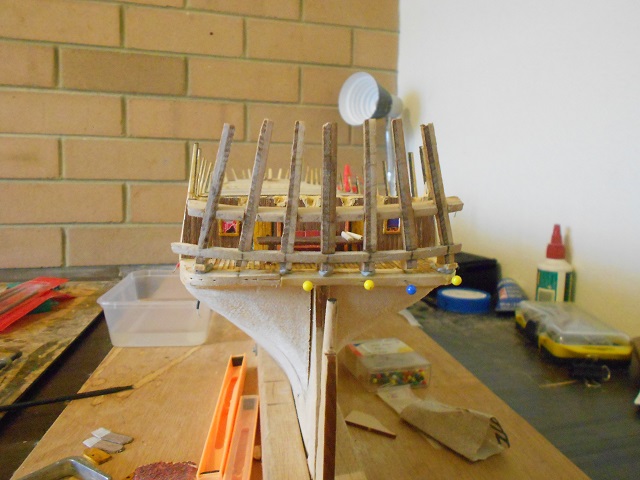
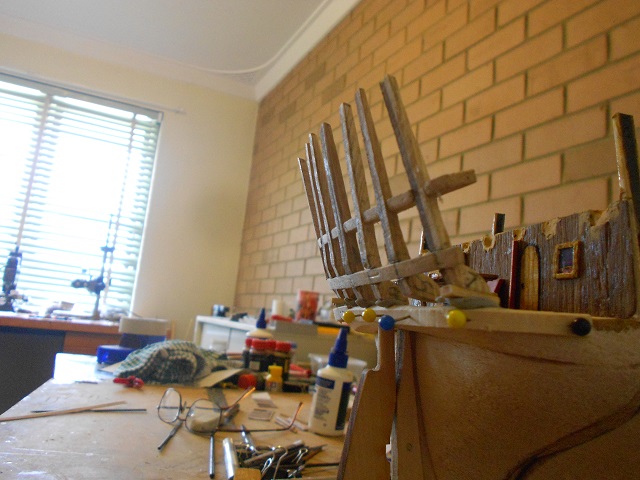
“A’ first,” Our Hero began-eth, “I didst contemplate tearing out the entire gallery section and re-making me counter piece, fer it be mis-shapened, and doth lack-eth in length.” But, upon further reflection, he didst decide-eth that he couldst merely build-eth up the errant counter piece with added scrap strips of wood. “After all, this be only the framing and none shall be visible once the planking be on. At this point, I jus’ be needing to get the shapeliness a-right,” Our Hero self-justified. Those wi’ a keen eye may have noticed that CaptainSteve has improved his photography skills … somewhat. “I be getting meself a new camera,” he bragged. “It be just a Nikon Coolpix, but it come-eth with a new tripod, so I be a-hopin’ that future pics will be more better.” Do you mean ‘in focus’, CaptainSteve ?? “Err … that, too”, he stammered. At least it appears to have motivated Our Hero to return to his workshop. To start this latest re-do, CaptainSteve did something radical and didst draw-eth up some plans to aide him. As before, Our Hero didst use the stern frame templates from his kit as a stencil. But this time, he hath elected to make separate pieces for the uprights and horizontal cross-beams. “It be much easier,” he explained, “fer me to cut (and re-cut, and re-re-cut) these pieces in this manner.” “Look-eth !! A-ready,” he declared, perhaps a little too smugly, “I be needing to re-make one of the upright stern timbers.” For each timber upright, CaptainSteve grooved a precisely measured groove in the base. Each, in turn, were set to 40, 80 or 120. In this manner, he hoped to position each timber/window frame properly. “To be a-makin’ this easier on meself,” he began, “I took-eth me blade to some Lego blocks and didst slash-eth most precise angles unto each.” "These be me tools fer setting the angles properly." But, eventually, Our Hero had a full set of timbers … [NOTE: For those lacking in sense and wishing to follow in Our Hero’s footsteps in this manner, it should be noted that he didst mark the top of the “knuckle” on each timber upright, and use-eth this as a reference.] Meanwhile, he took another piece of scrap and didst cut-eth a collar-piece … Here, the base-plank has been clamped to the back of the collar-piece for shaping. “Again, I be utilising the kit templates …” “This ‘ere pic,” CaptainSteve droned on, “also shows a base-plank (having been soaked, heated and curved) to which me angled uprights shall be positioned and fitted …” [NOTE: The attached frame in the above pic is positioned the wrong way around. It is for demonstration purposes only, to show how the uprights are angled and fitted to the base-plank.] “Next up,” Our Hero were to continue, “I didst finish me scantlings fer the gallery framing.” Looking closely (“Ye may be needin’ to squint.”), CaptainSteve has finished the uprights, the base- and collar-planks, as well as the roof beams. “Two o’ these,” he were to helpfully point-eth out, “I didst groove-eth and drill to later take the lights and wiring.” “An’ two others,” he were to continue, “have been grooved to take the side gallery ‘walls’.” And so, with the frame pieces complete, Our Hero took to construction … “No need fer long-winded explanations,” he went on to explain, “me pictures be speaking fer themselves, I hope-eth.” Next, CaptainSteve did notch-eth out his collar-plank. “This piece be locking me frames into place,” he didst add-eth, “locking them firmly in place at the required angles.” It will also provide a seating for the ends of the cabin roof beams … once the lighting has been done. “Patience patience,” CaptainSteve were to huff, somewhat exasperated, “I be getting’ to them. Just how much do ye be a-wantin’ from one update ??” In closing, Our Hero’s final duty for this weekend were to be adding some extra wood to the outer footings (Frames 6 and 7). “I be deliberately adding to the footings when I didst cut these,” he complained. “But, alas, ‘twere not enough.” Once the glue has dried, Our Hero will shape the footings to his satisfaction, but he be tired now and in need of a nap. "Just 'cause I be knowin' you lot thrive on pictures," said CaptainSteve, wind-ething up, "here be some last-minute pics showing the framing loosely positioned in place."

-
That must be one very satisfying milestone to tick-off, Tom. She looks fantastic !!
- 1,348 replies
-
- 2
-
-
- constitution
- model shipways
- (and 1 more)