

.jpg.f26acc9a74319261612561bfa7da1303.jpg)
vaddoc
-
Posts
1,528 -
Joined
-
Last visited
Content Type
Profiles
Forums
Gallery
Events
Posts posted by vaddoc
-
-
-
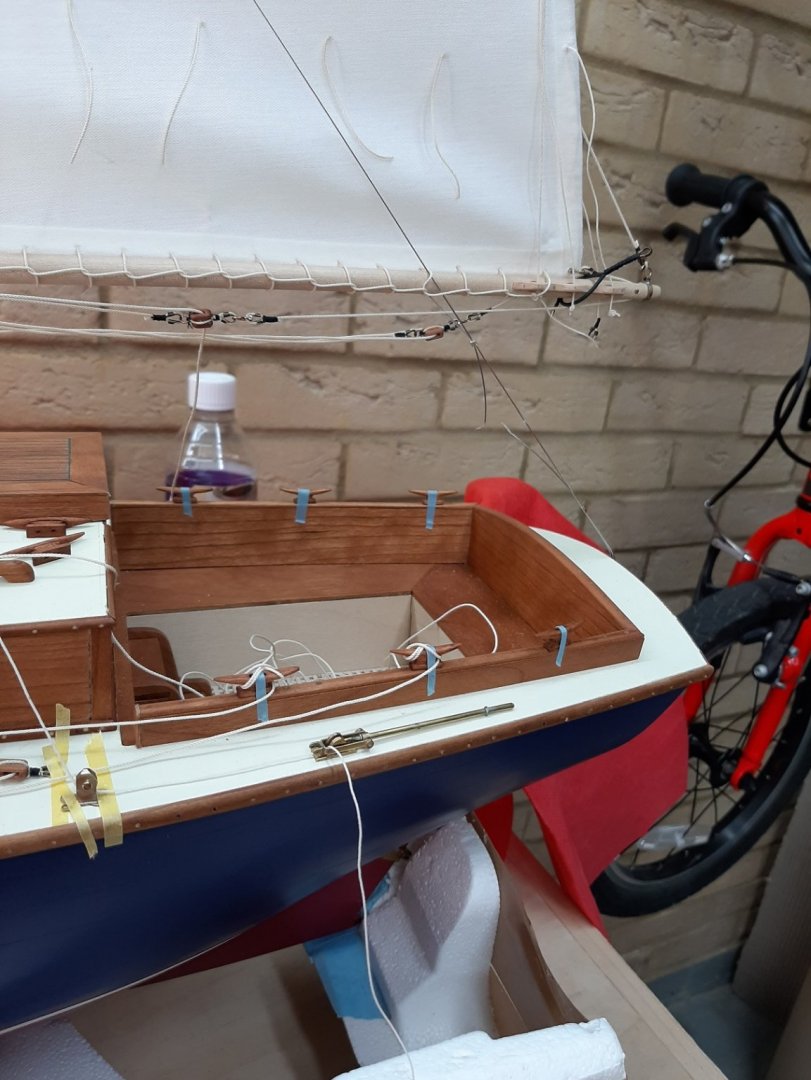
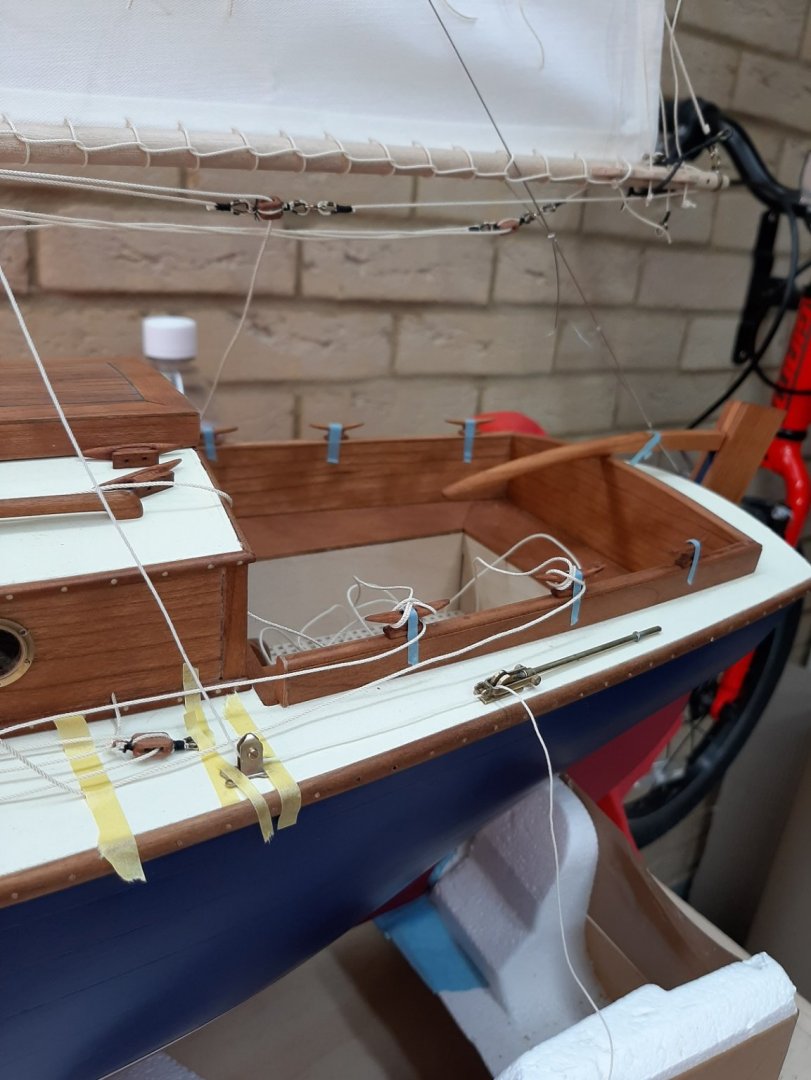
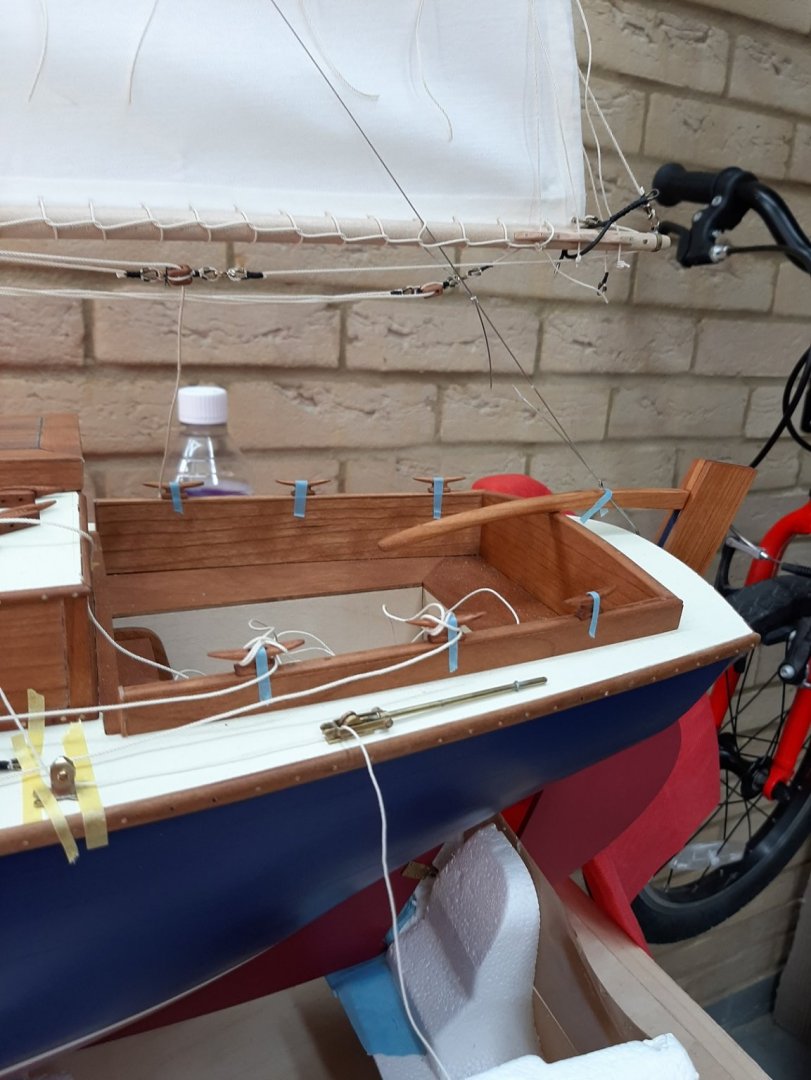
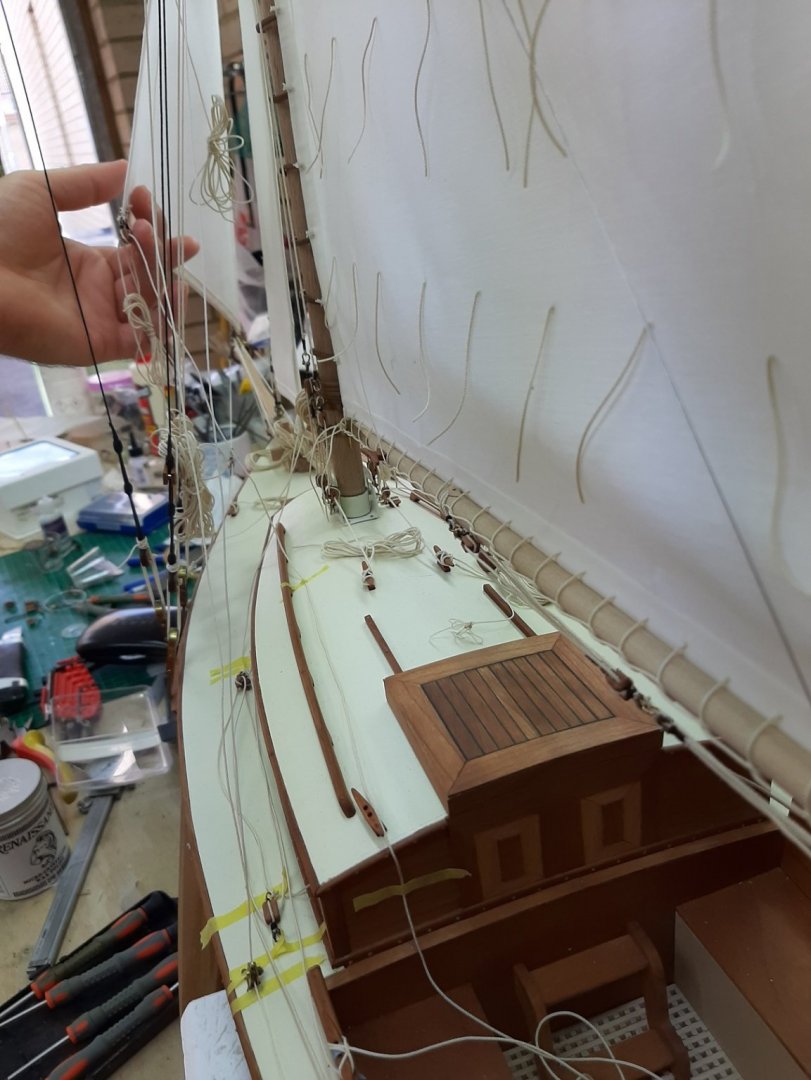
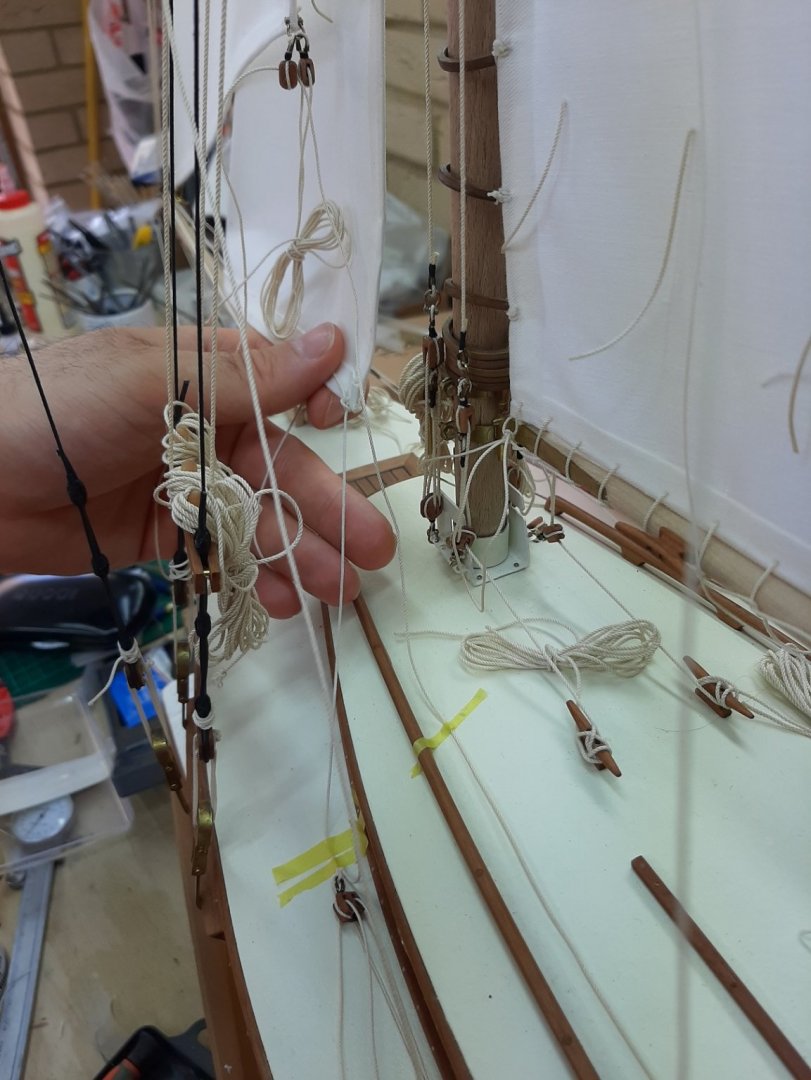
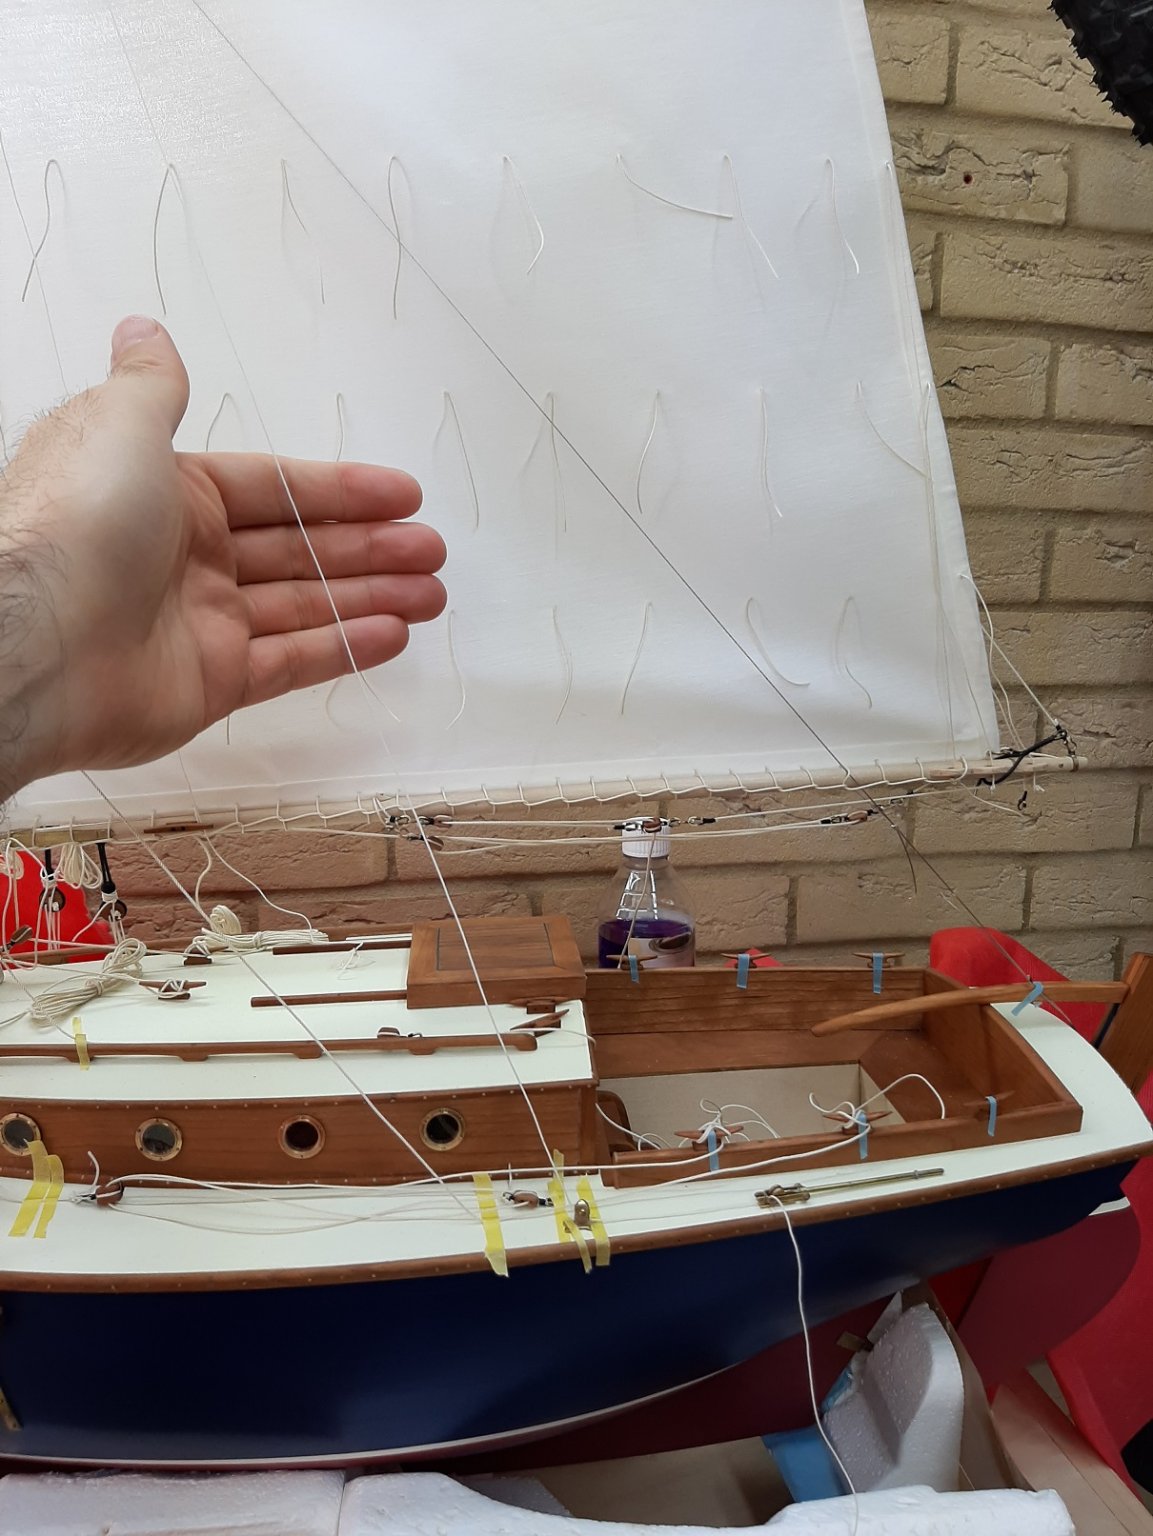
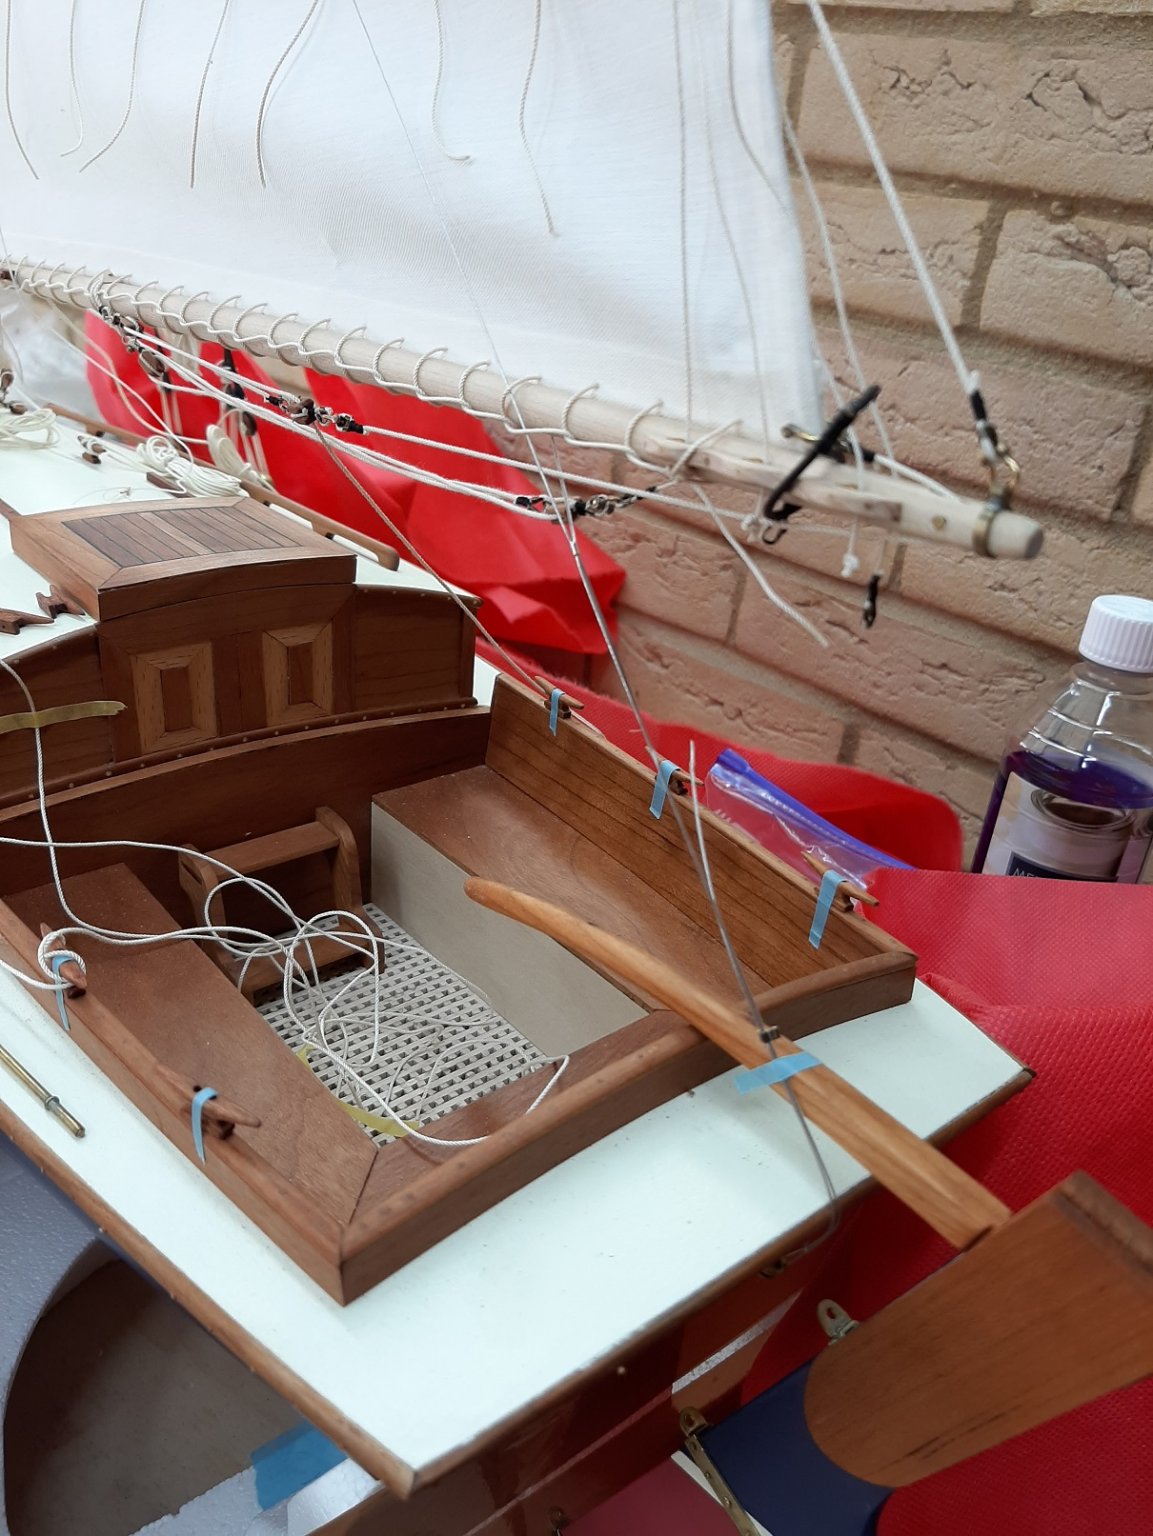
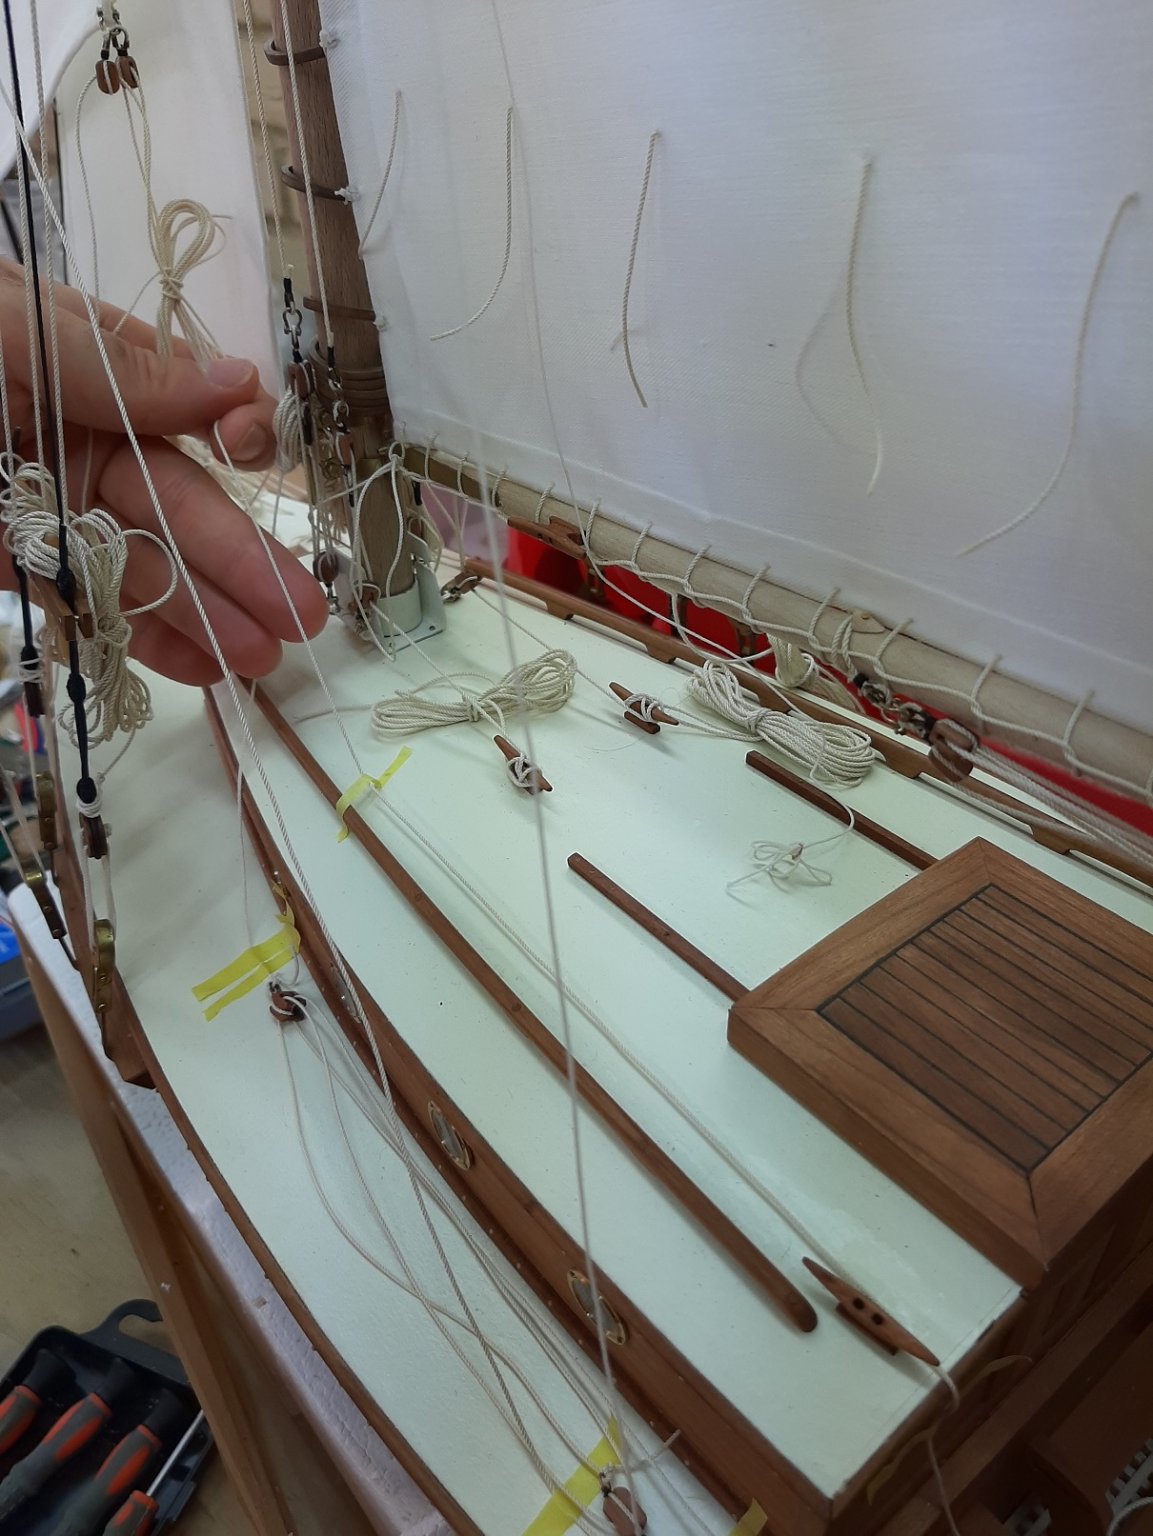
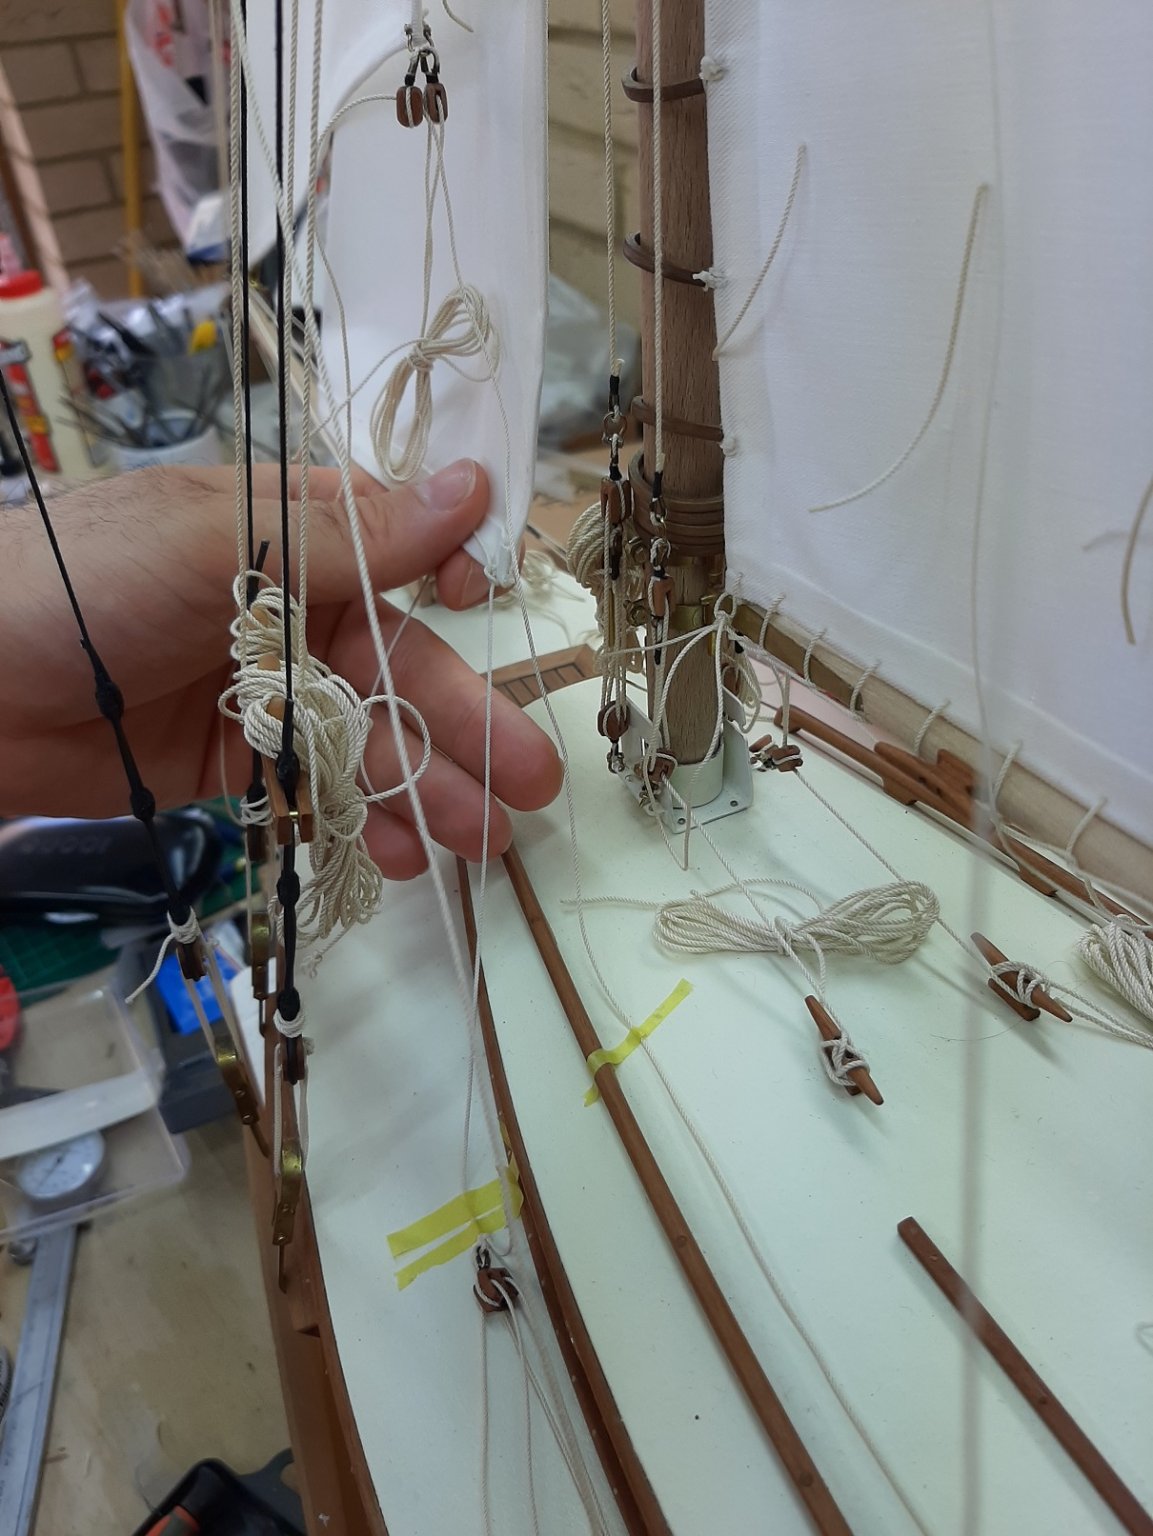
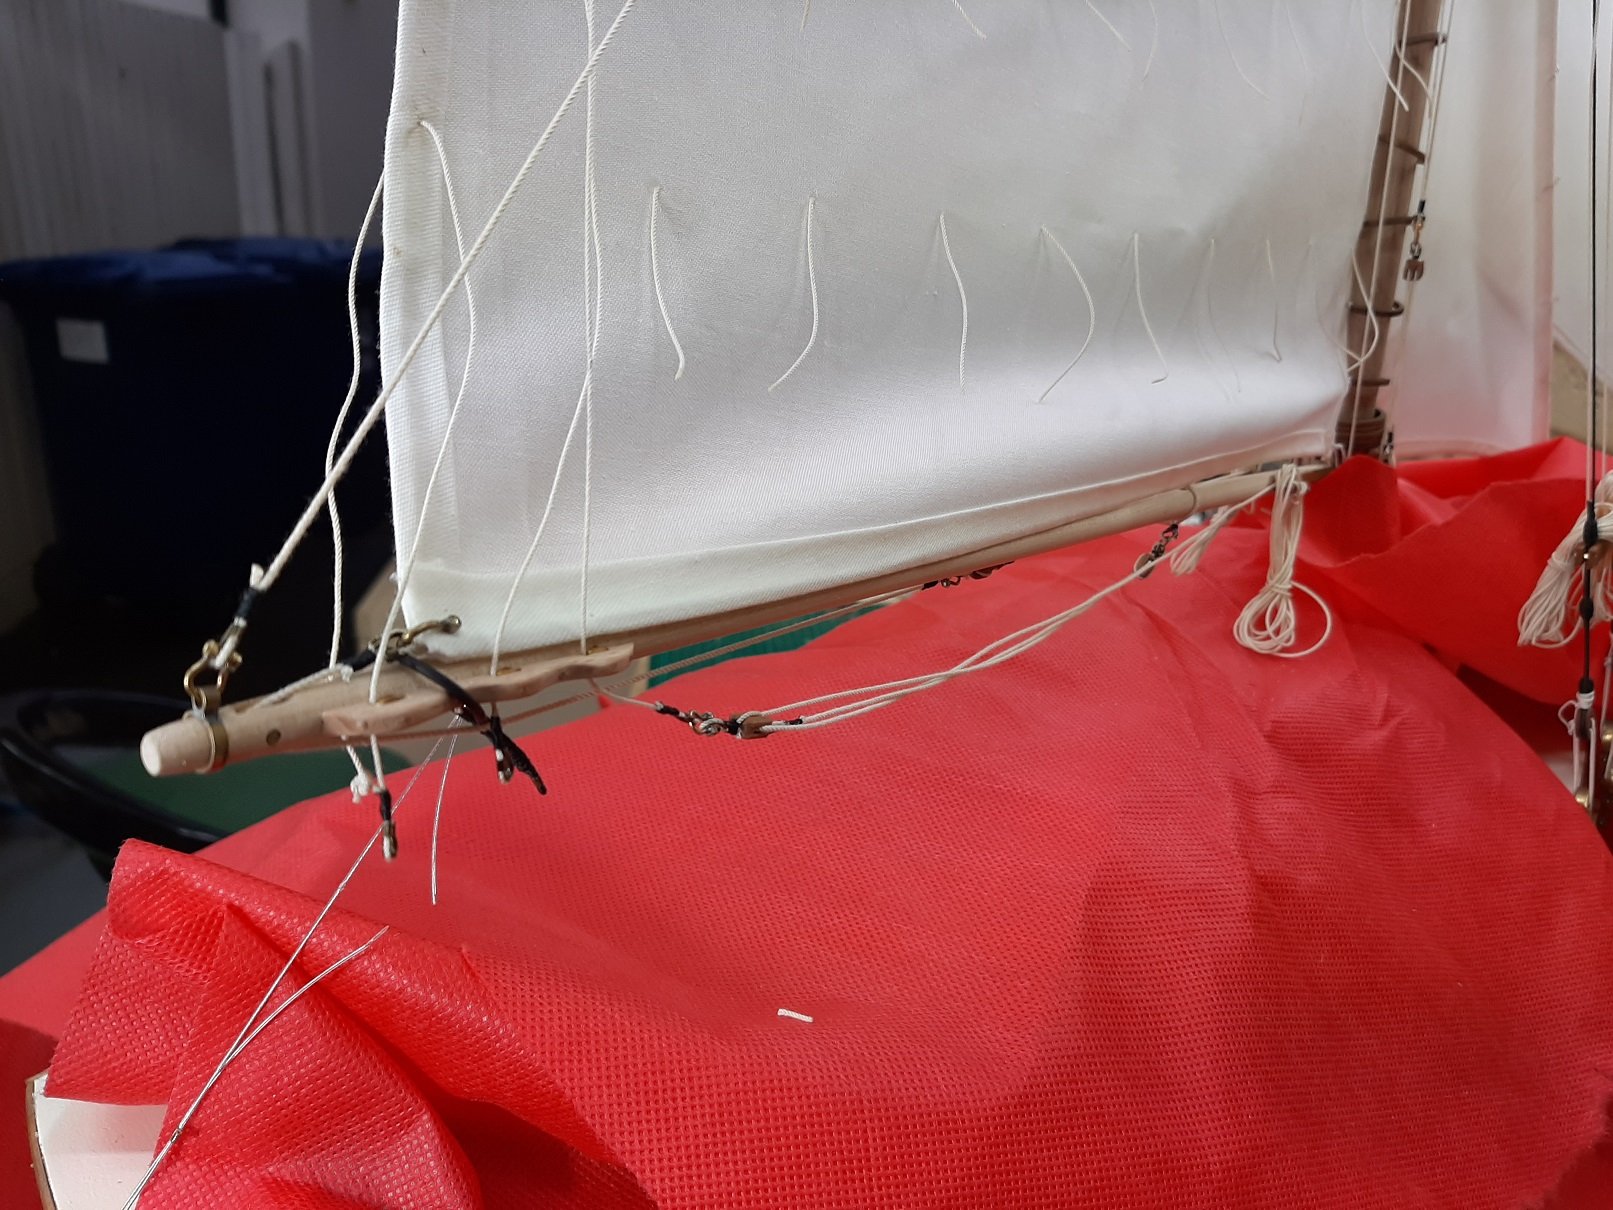
Well, the end is very near but I am struggling with the rigging and I badly need some advice! I will try and explain as best as I can and have taken a few pictures but please bare with me, the boat is large and my photo skills bad so if further pictures are needed to explain the situation please just ask.
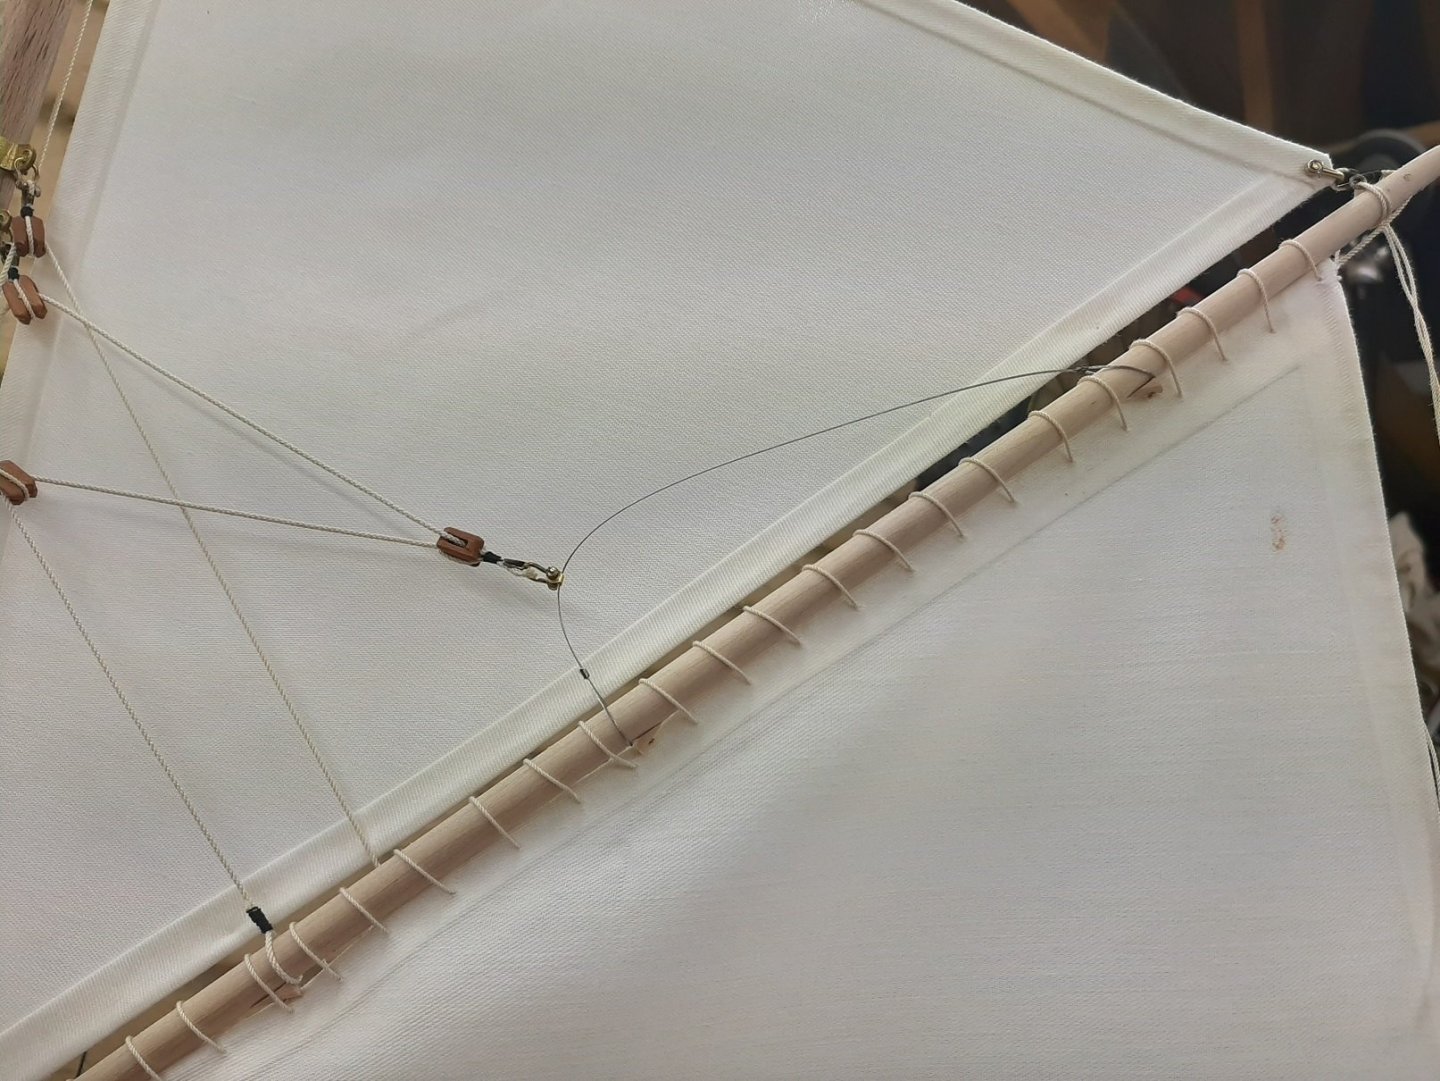
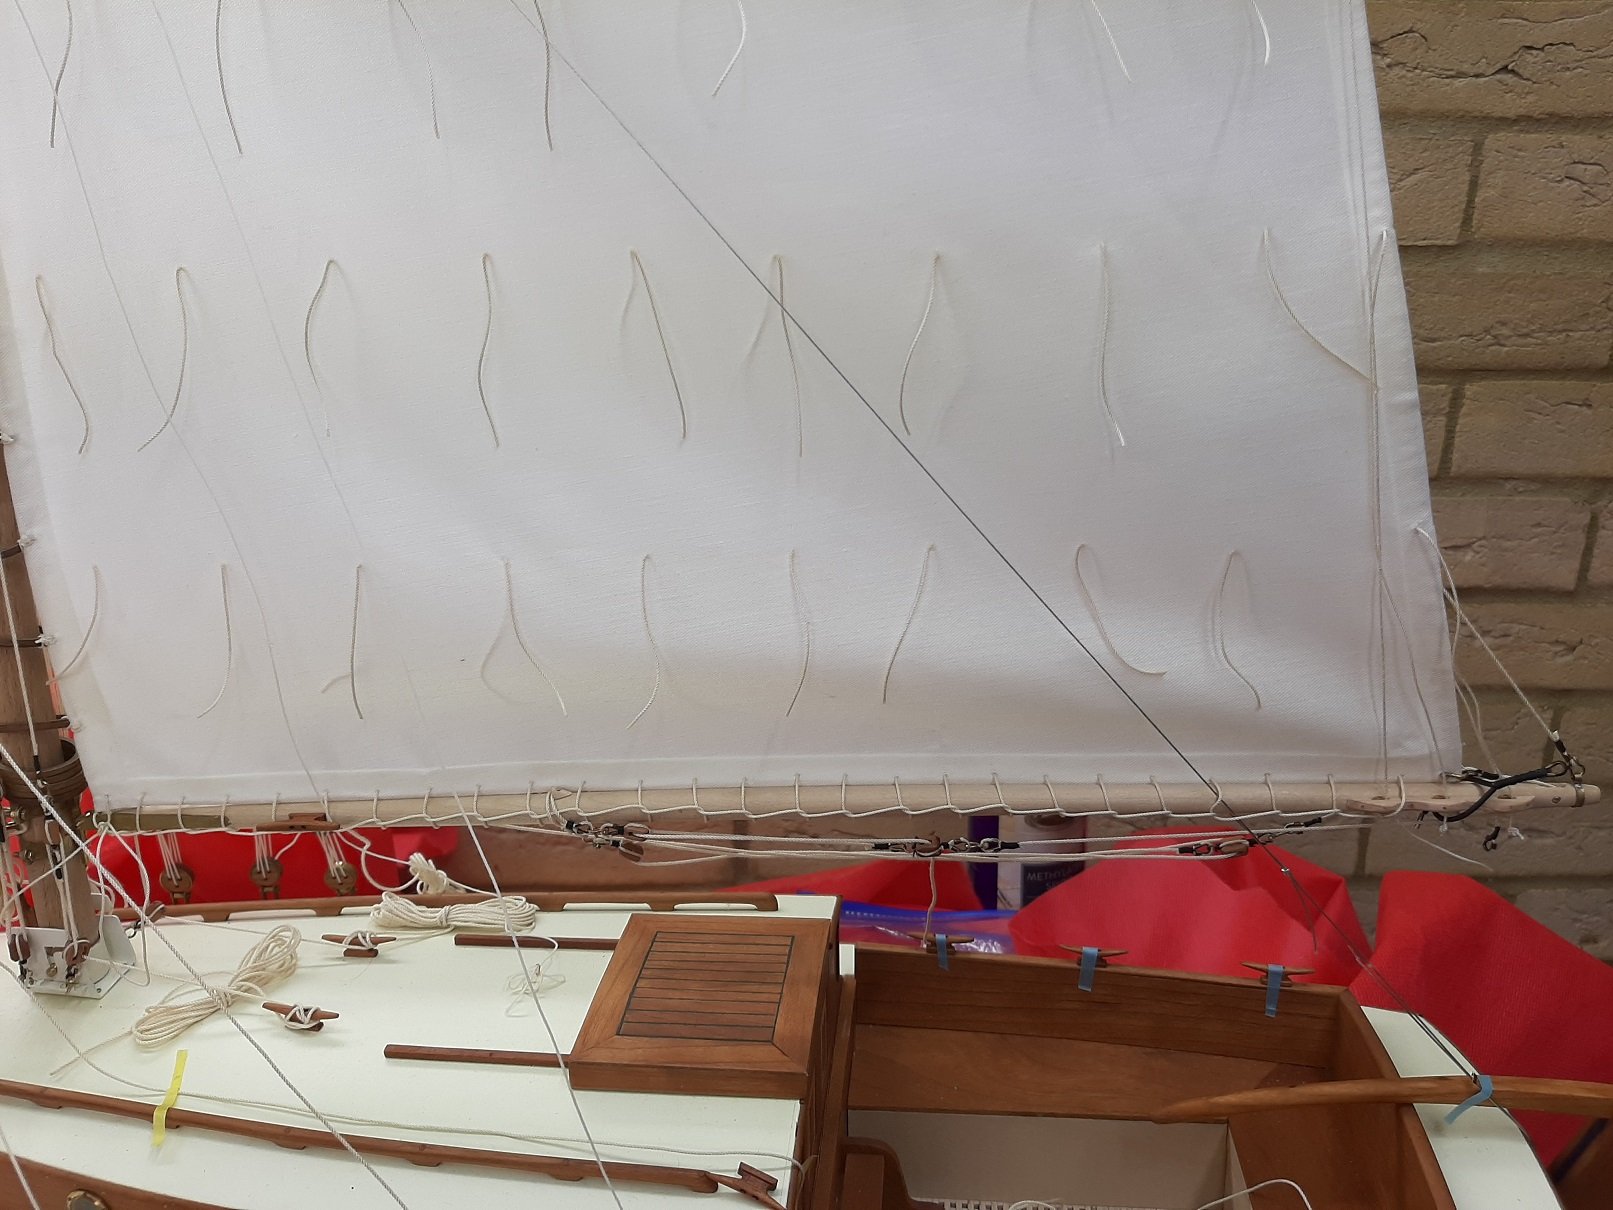
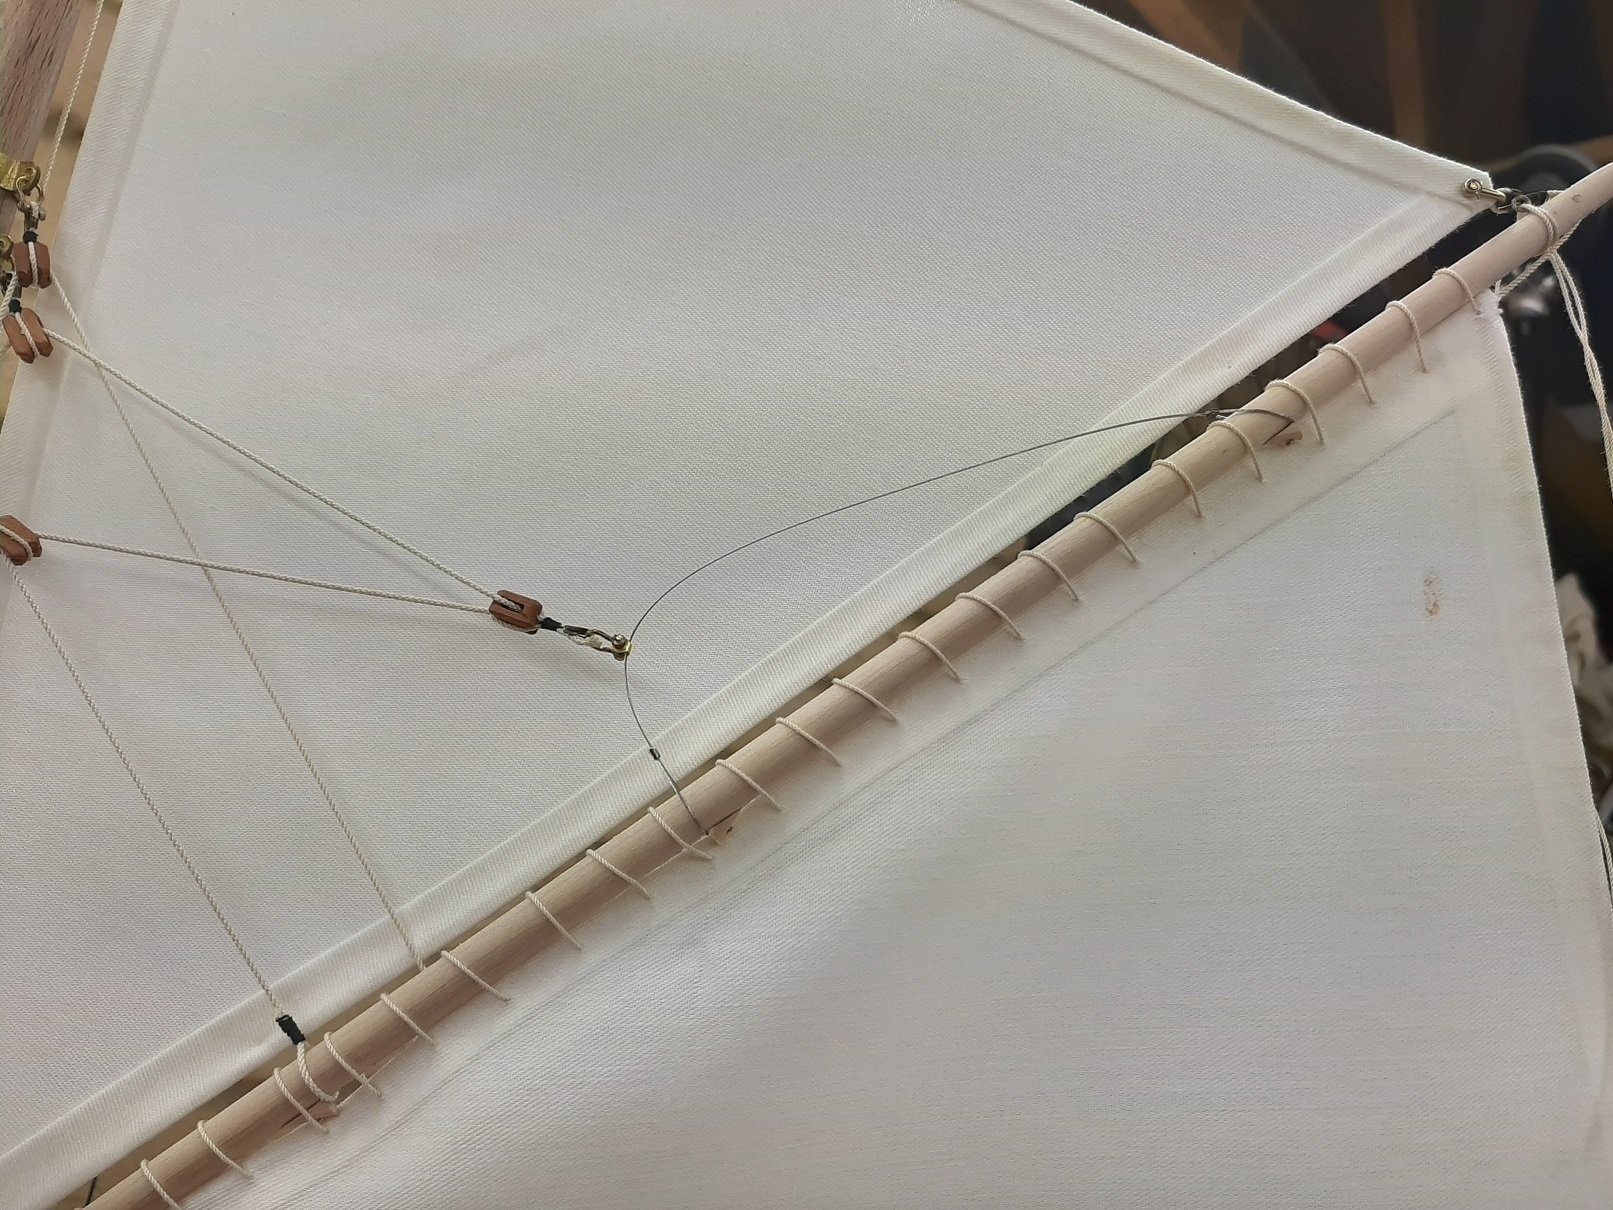
First of all I laced the boom

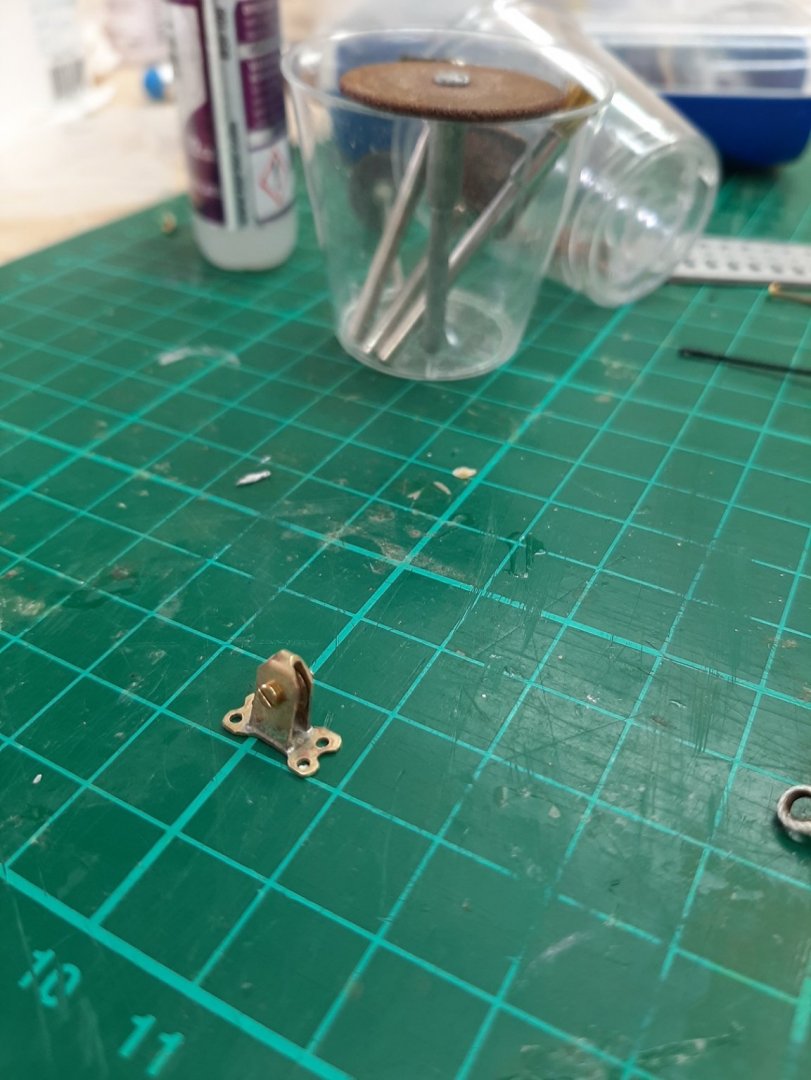
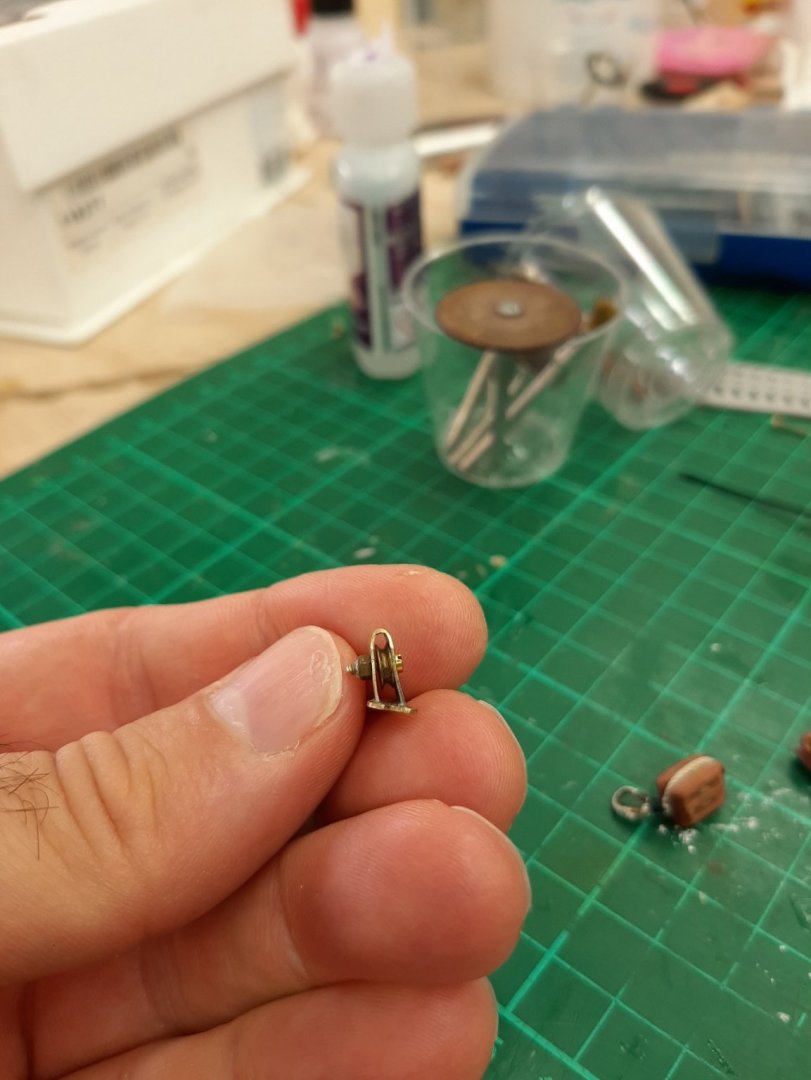
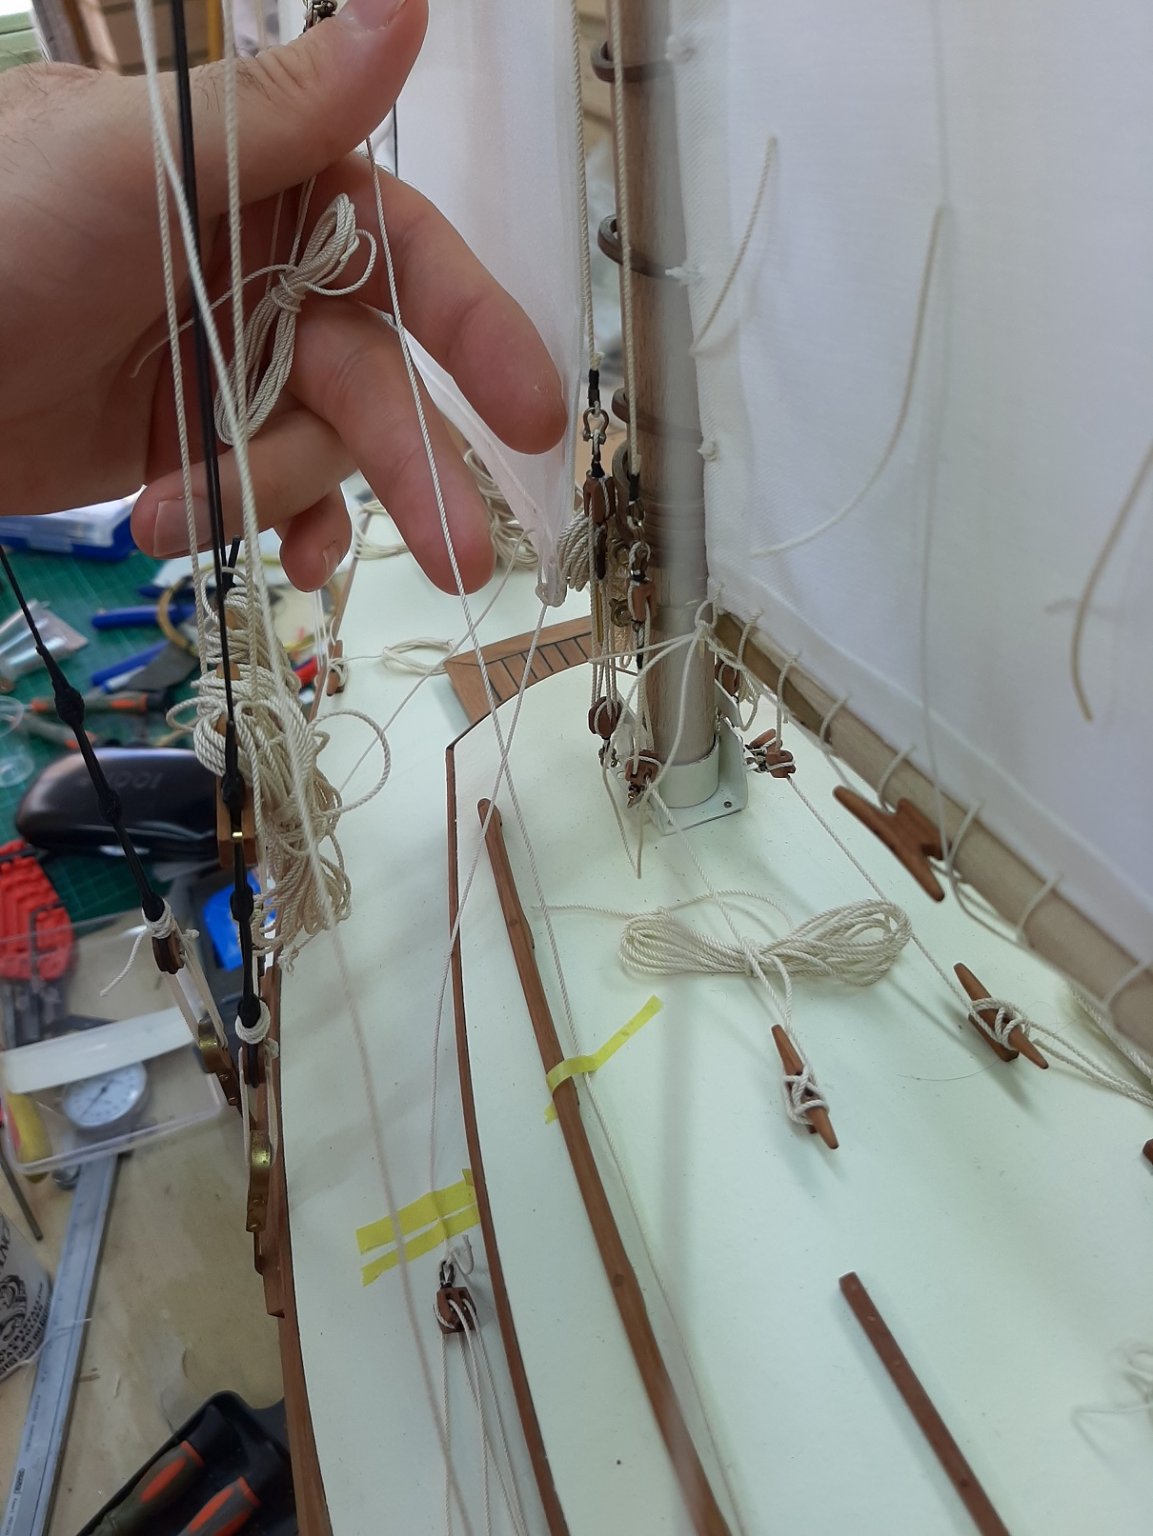
I also made a brass pulley to re route the backstays from vertical to horizontal. These are offset inwards to follow the course of the backstays to the mast. There will be quite a lot of tension so I ll use screws to secure to the deck


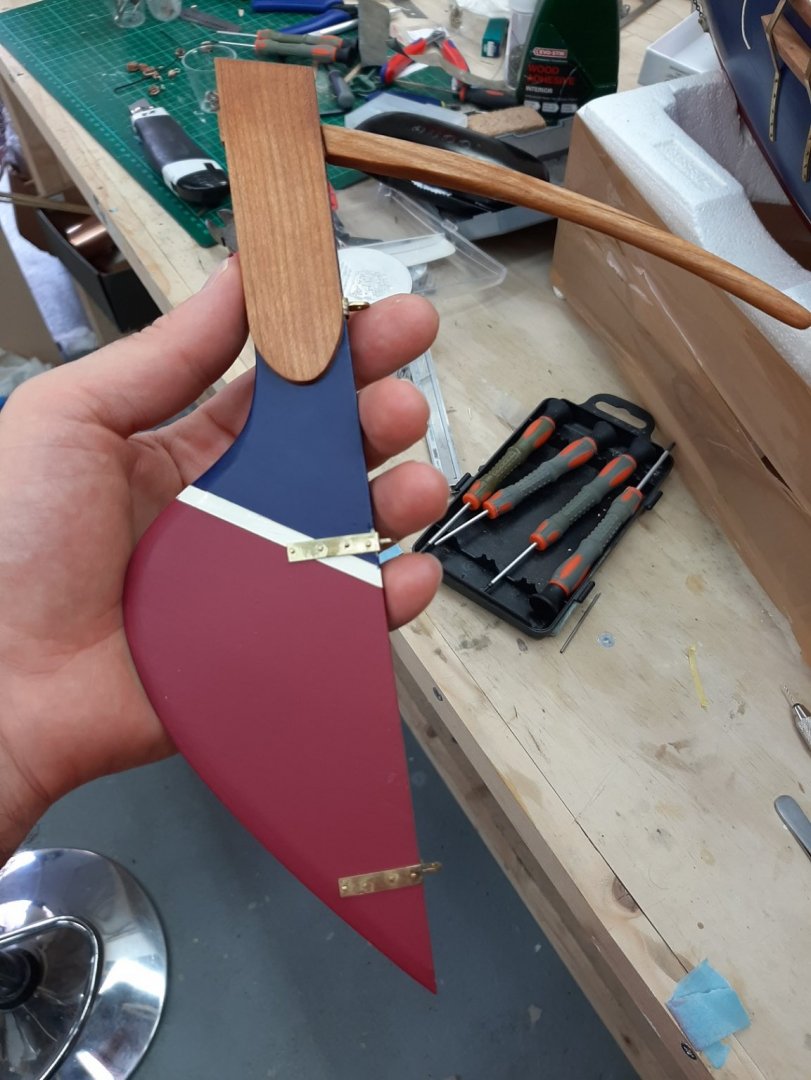
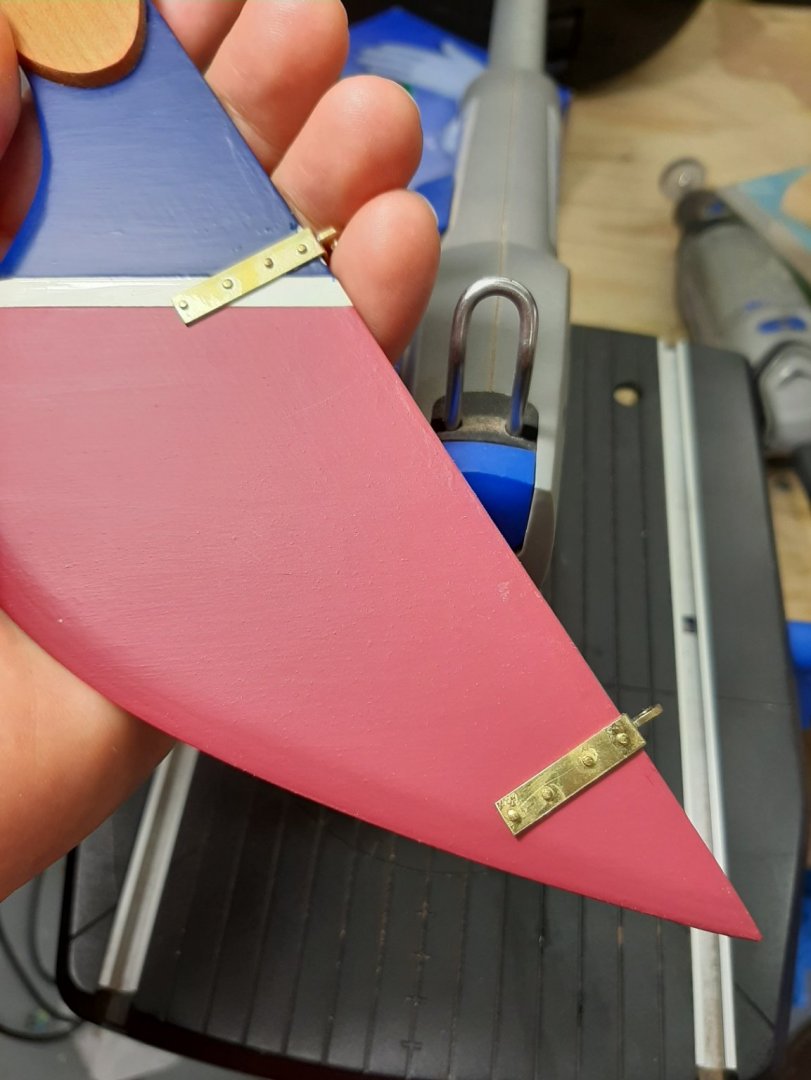
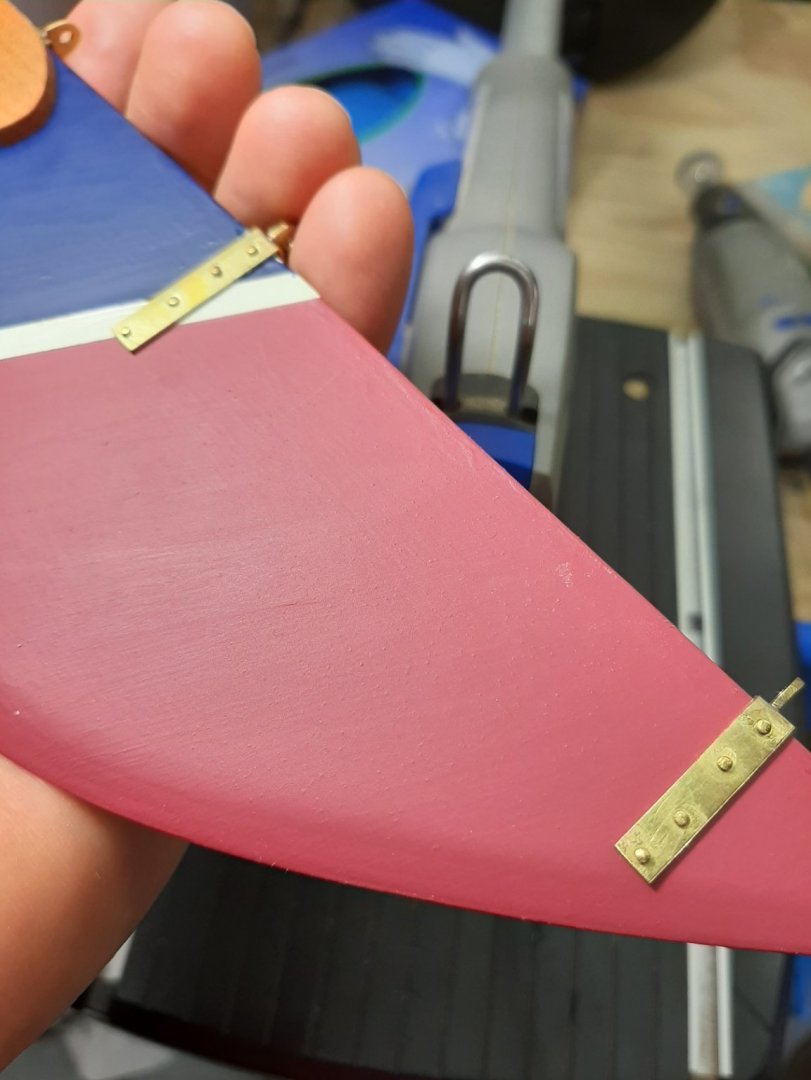
I took out the rudder I ve made a very long time ago, it is quite huge! It is painted with Valejo acrylics and satin and matt polyurethane varnish, no brush marks at all! Modern acrylics are amazing.
Now, to get to the problems
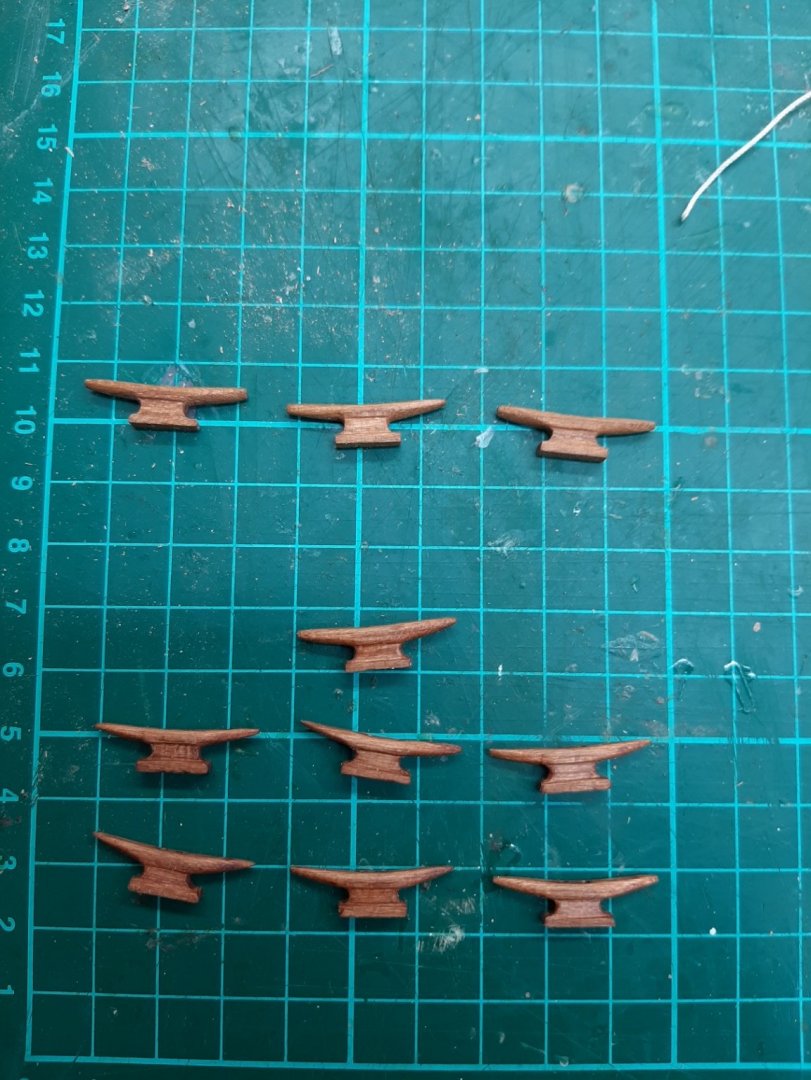
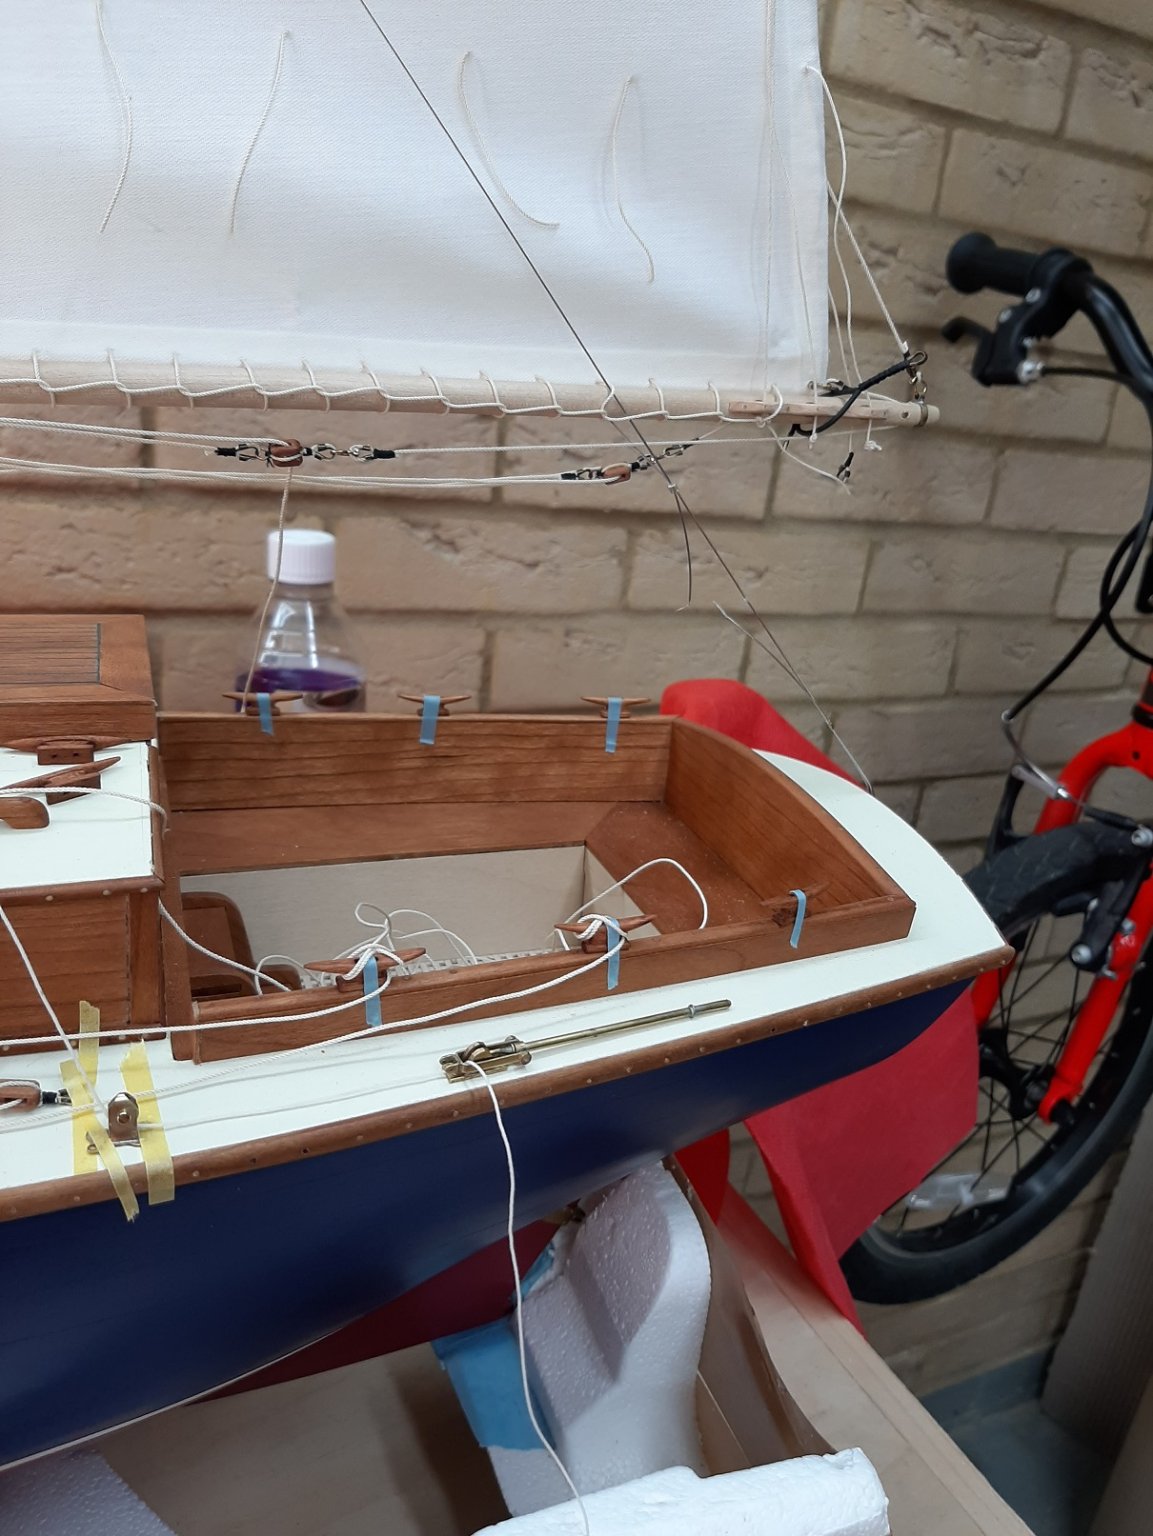
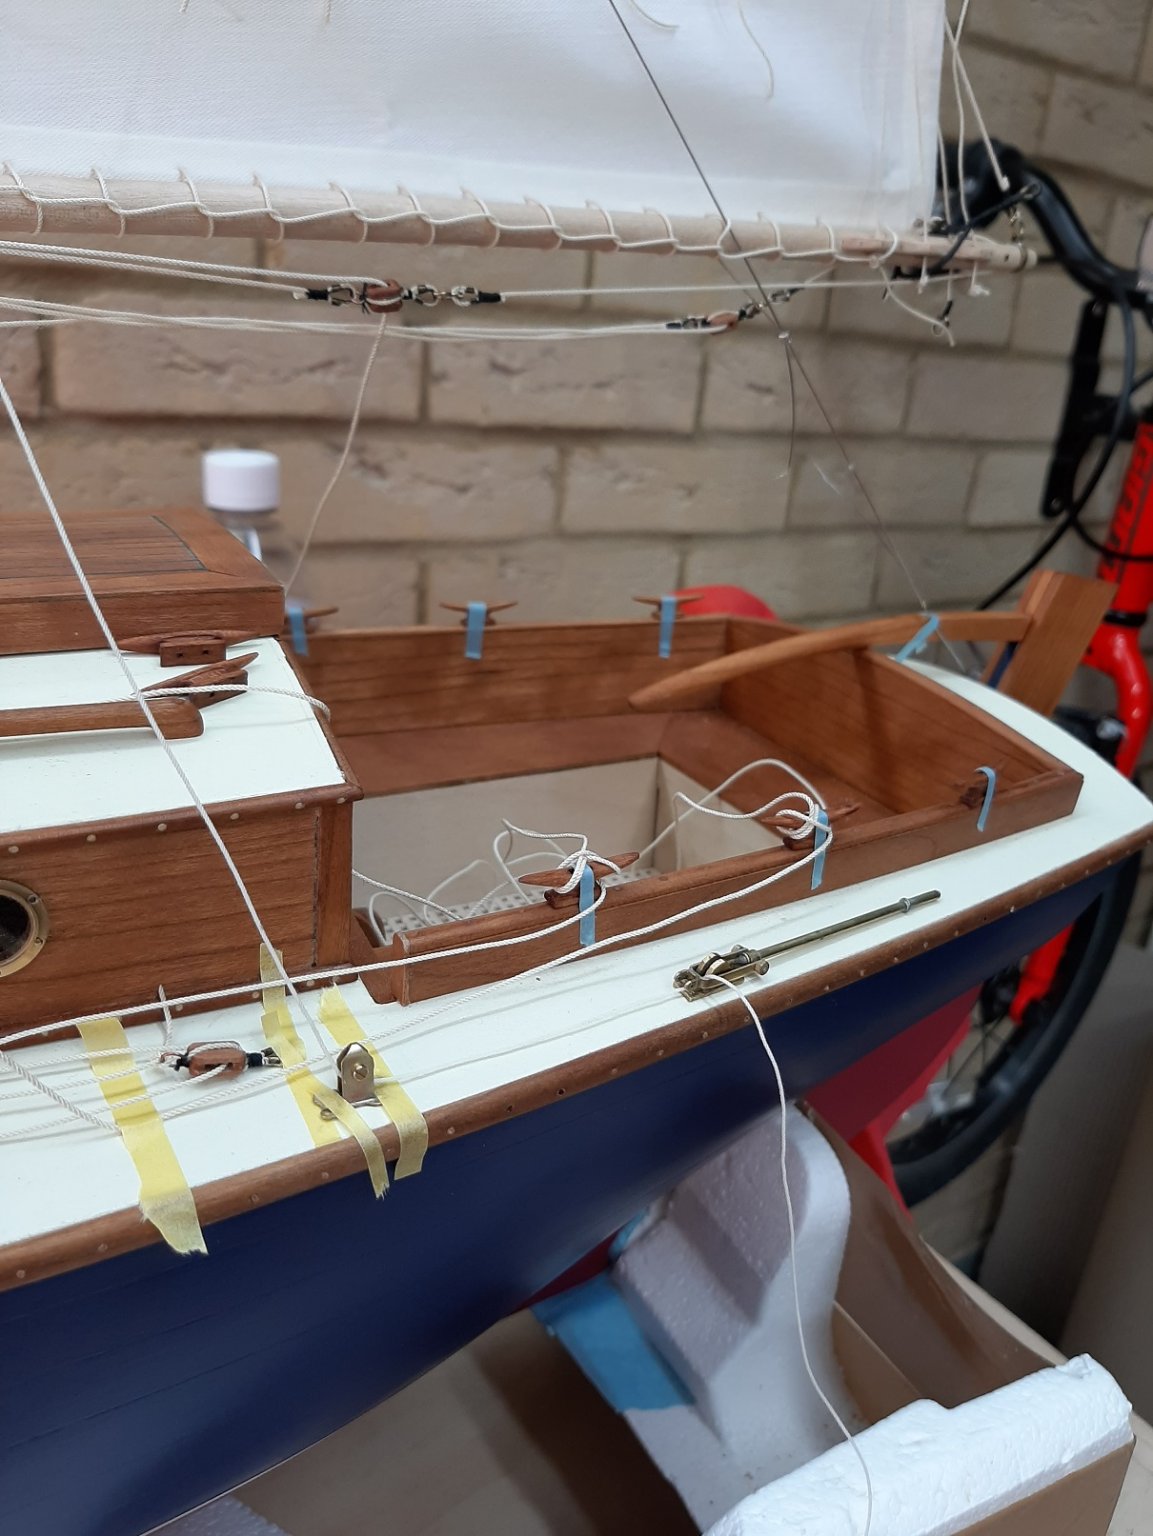
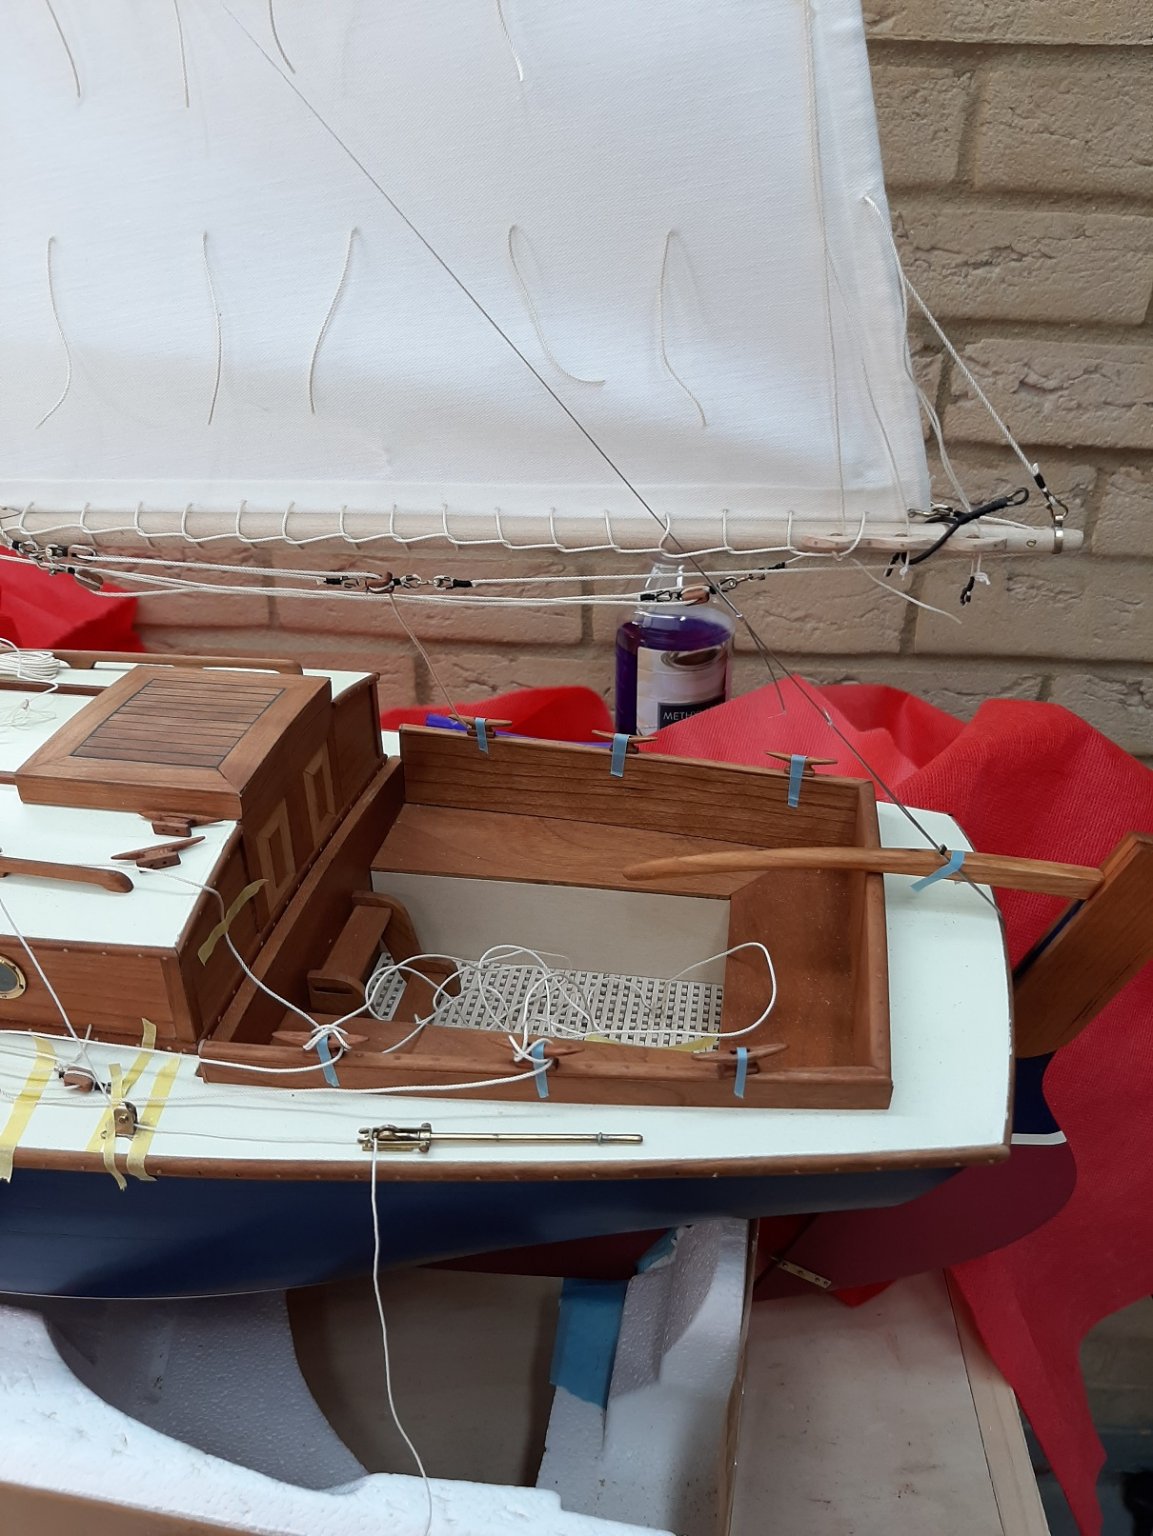
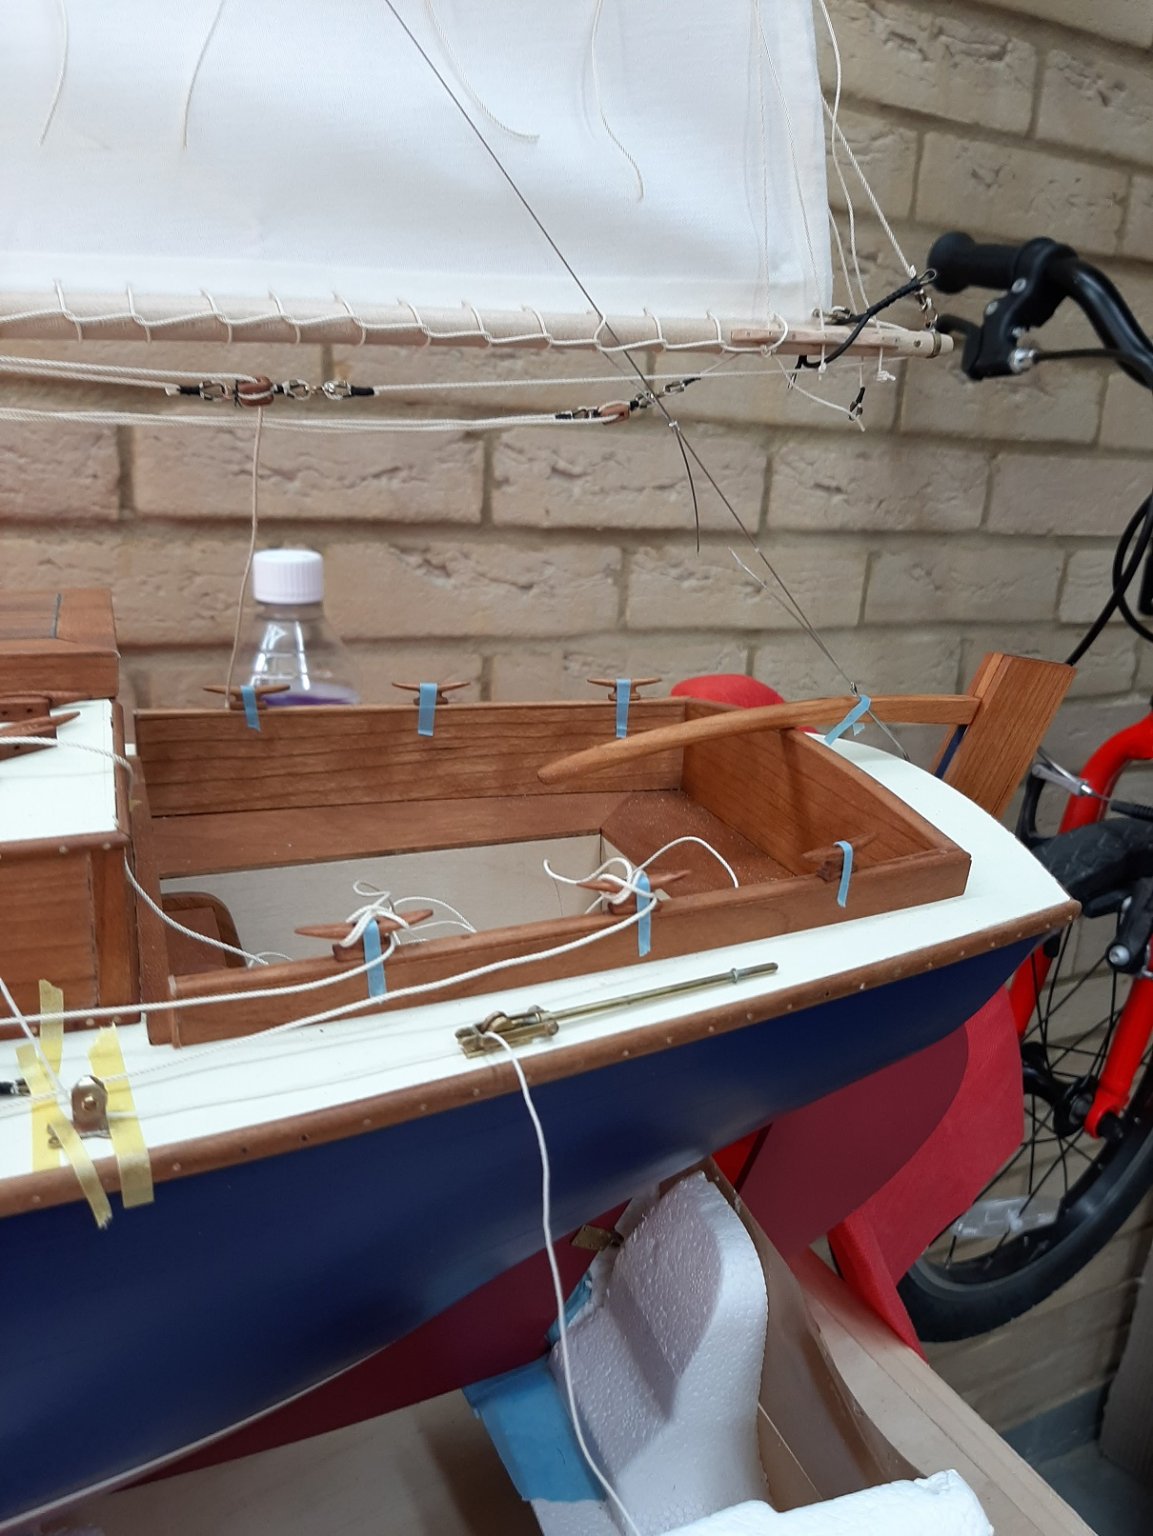
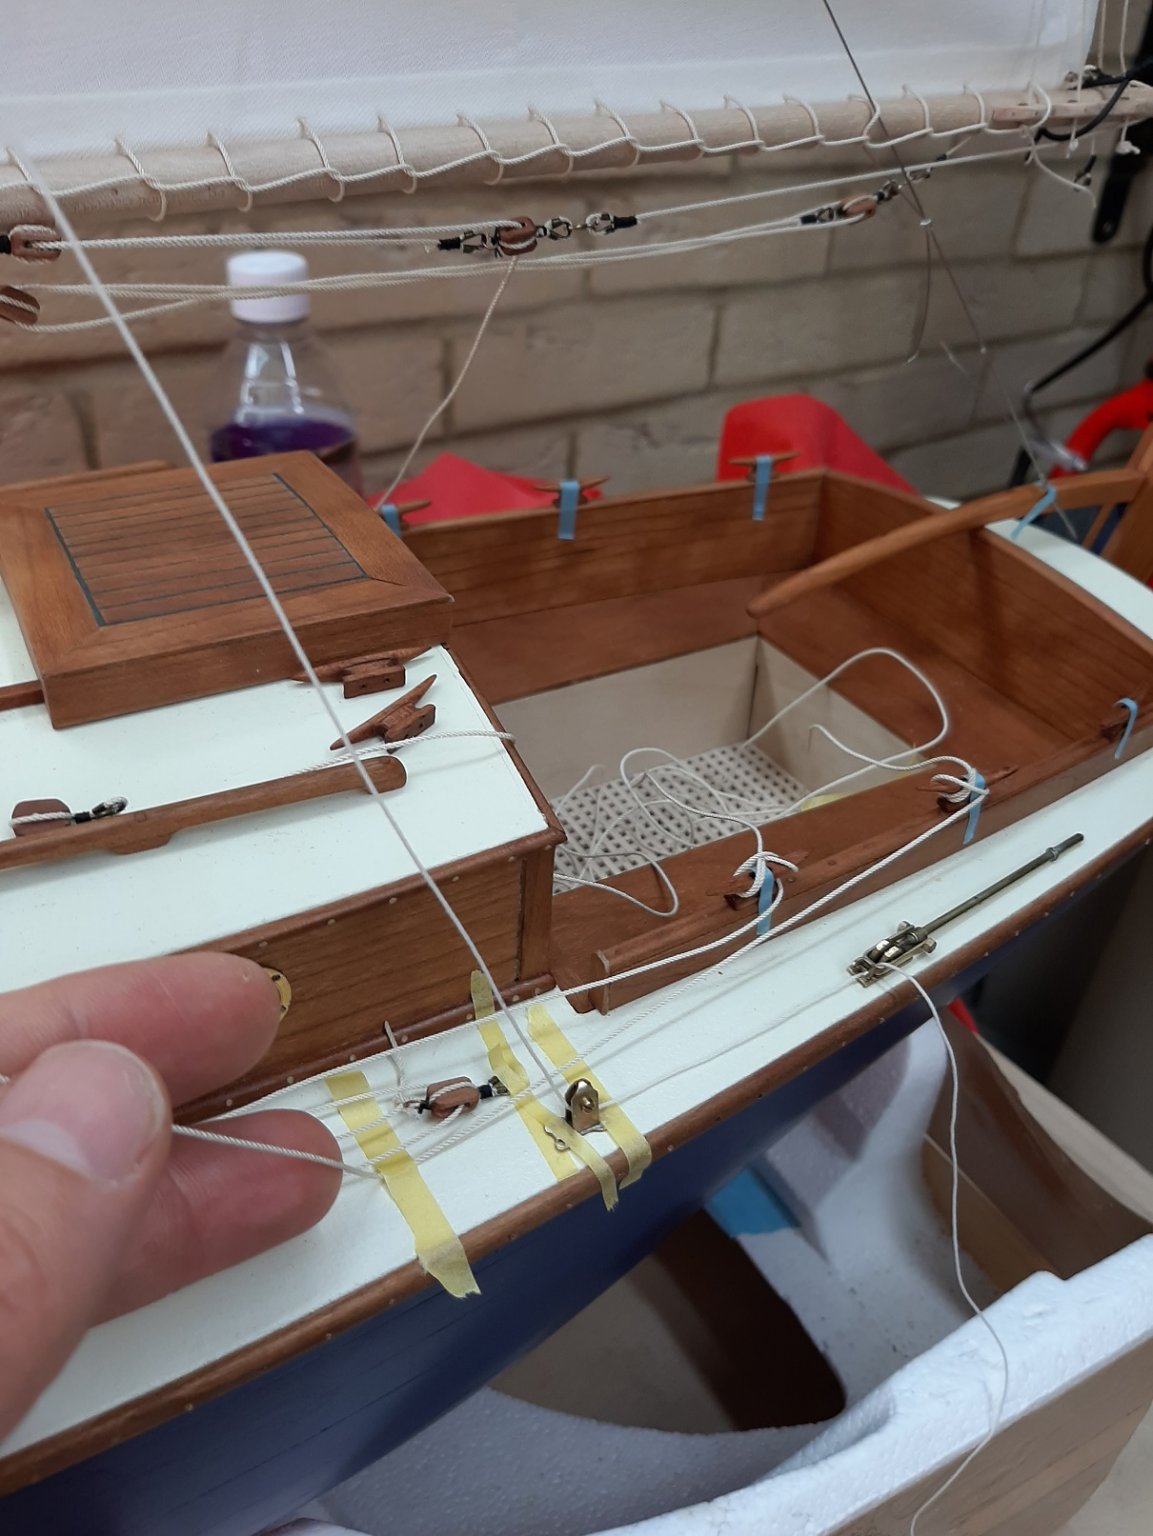
1. I have very little space for cleats, I need at least three on each side. Is the position of the cleats on the coaming acceptable? If not I could make some round bases attached to the outside of the coamings to screw the cleats on but the coamings are very thick, as thick as the cleats.


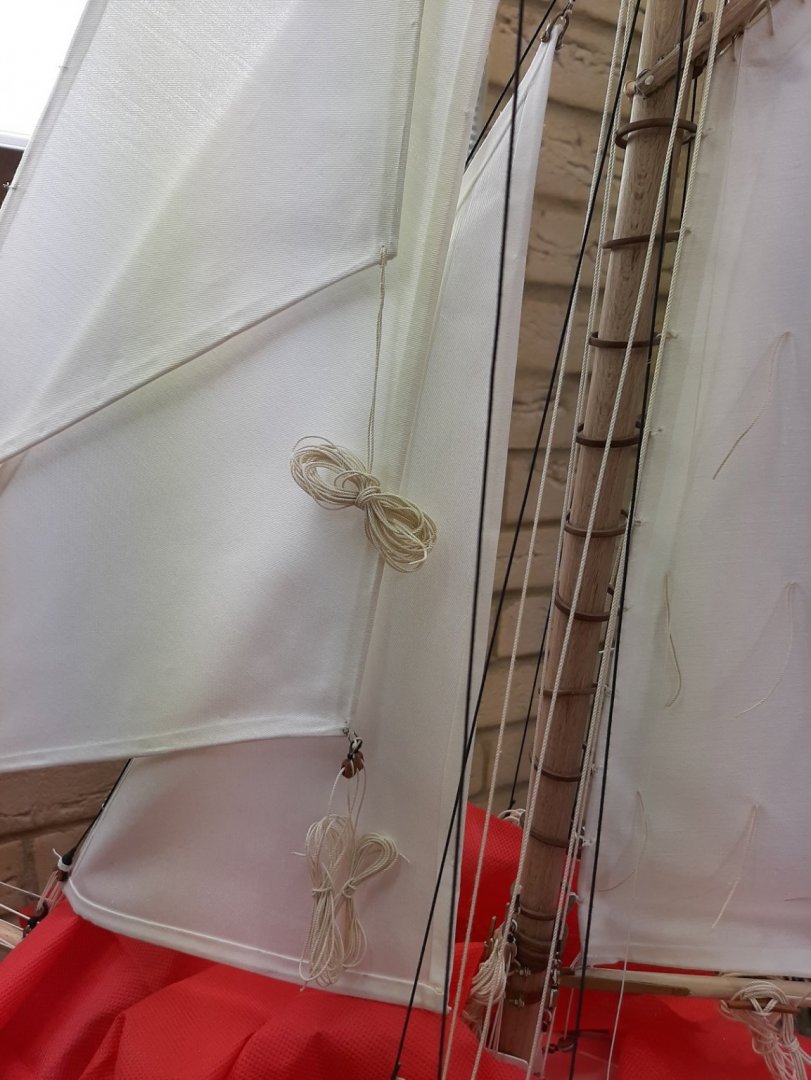
The next questions are about the sheets of the three fore sails, the top jib, the flying jib and the staysail.
2. The only way the sheet from the topjib will not rub and catch on anything is to go in between the shrouds that go to mid mast and the shroud that goes to the top of the mast. The sheet then will go through an eye on the deck and then to a cleat aft. Is this ok?

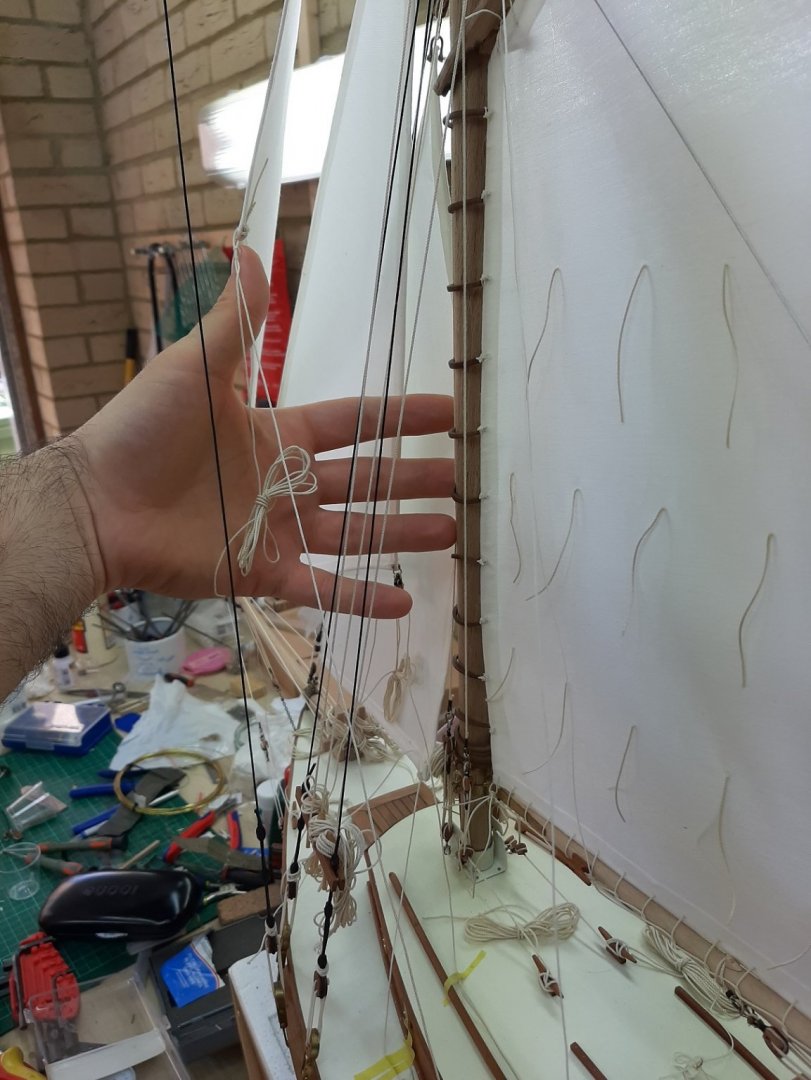
3. The flying jib will have a single block on the clew, one end of the sheet will go to the deck. However, the sheet, in order to clear other ropes, has to go to an eye or block on the cabin top and then to a cleat aft, next to the companionway. I ve never seen a jib sheet going to the cabin top, is this acceptable?
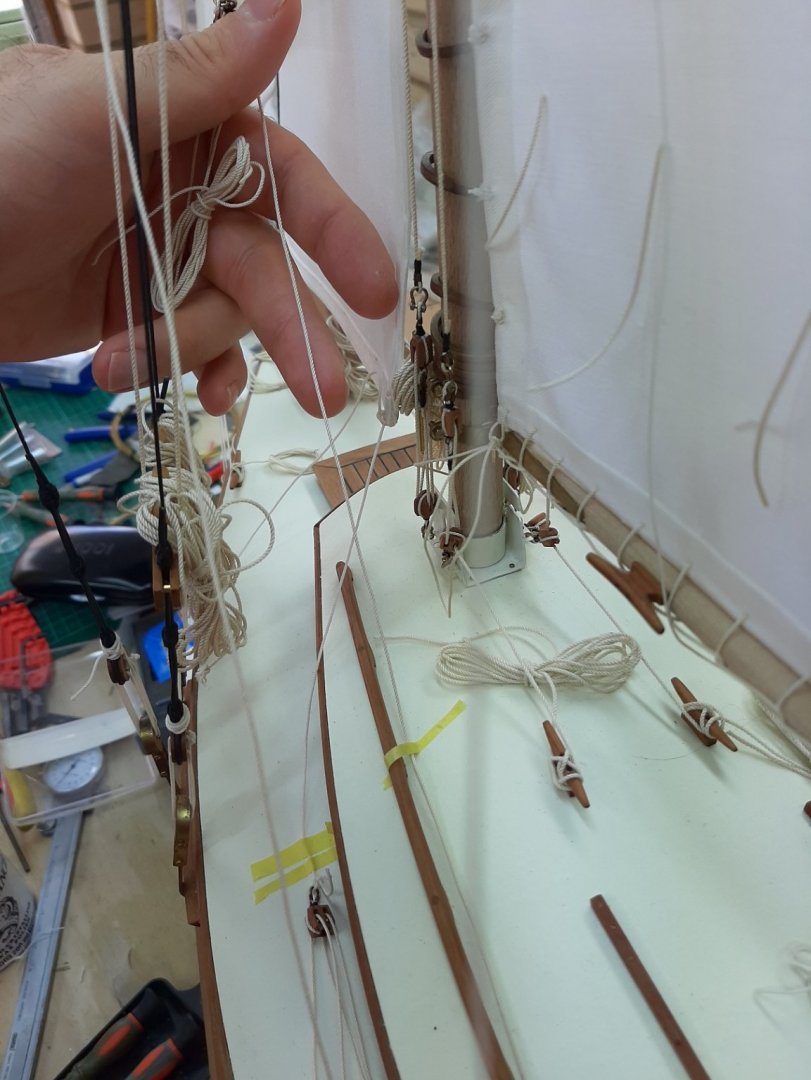

4. It seems that the staysail sheet is the easiest one. The books say that this is a powerful sail so two blocks will be needed to tension it, the sheet going aft to a cleat. How do people feel about this?

The cleat that is closest to the bow in this proposed arrangement will be used for the mainsail sheet.
Very many questions I know, I hope I ve explained adequately, any advice will be greatly appreciated!
Regards
Vaddoc
- cog, KeithAug, Keith Black and 3 others
-
 6
6
-
-
56 minutes ago, dkuzminov said:
could you please provide more info?
It is a very thick putty, thicker than play doh or plastelin, and is the colour of porcelain. It hangs on to the rough edges of the broken pieces and cures rock hard. A tiny amount will be needed so invisible. It is very cheap.
I tried to find that repaired piece but it has moved on.
-
Superphatic is actuallg marketed as CA glue alternative
I ve used the Cornwall model aliphatic glue extensively, it is very nice but just an alipharic PVA, nothing more. I now use Titebond that seems to have a bit faster opening time.
- glbarlow, thibaultron, mtaylor and 2 others
-
5
-
-
-
Oh dear, I completely missed the plot then!
- Keith Black, Canute and mtaylor
-
3
-
Cheap vs expensive CA glue, I found there is a world of difference. Really I only use CA for metal to metal or metal to wood.
White PVA, dries clear, longer opening time. Aliphatic, dries yellow, very short opening time. I use both depending on properties I need.
Joints glued with PVA should be stronger than the wood itself. If you had failures, maybe the surfaces were contaminated or you did not apply enough pressure-PVA shrinks as it dries. Maybe lightly sand the surfaces and make sure they mate fully with enough pressure.
All PVAs are pretty much the same, except for some being waterproof.
- mtaylor, BobG, thibaultron and 2 others
-
5
-
I remembered that once I used Rennaisance wax over wood treated with Tung oil (after it had cured). This wax is completely transparent, did not change the colour at all and did not really add any shine-the wood though was pear sanded to 400 grit. This would certainly seal and waterproof the wood. Maybe this would have been a option but not over painted wood.
- Keith Black, mtaylor and Canute
-
3
-
Those 50 guns make a great photo background!
-
A very nice boat at a proper scale! Excellent.
I hope I won't get stoned but how would the hull look in gold? 😁
-
You ve made very good progress Bob. I really like your planking job, I would think that as this boat is not very large quite a lot of spilling would be needed but you did a fantastic job, pretty impressive considering you used straight planks! Really nice. Did you have to bend the strips across their width?
Elmer's filler is the one I use after trying many alternatives. Try using a razor (the one that they use to cut carpets) on your hull, you ll be amazed how smooth it leaves it but take care with 1 mm thickness, much quicker than sand paper too.
Maybe also in future consider maple for planking, it is fantastic and holds an edge that lime does not.
This is a lovely boat and lends it self to even larger scale. I am looking forward for the rest of the journey.
-
Keith, I just finished catching up, it was such a pleasure, your work is fantastic. Indeed, a calendar with 12 selected photos would work very well! An incredibly tidy and clean model.
Regarding brass staying bright, I use Renaissance wax, I think museums also use it. I have brass pieces that are shiny 10 years down the line with no maintenance. I ve also used it in wood, completely invisible.
- KeithAug, mtaylor and Keith Black
-
3
-
7 hours ago, BobG said:
Is there much difference between Vallejo Model Air Paints and the regular Model Paints?
Just to add regarding the Valejo, that the thinner for air brushing and for hand brushing are very different and not really interchangeable.
For hand brushing, it is important to use the proper thinner to get good results, I did not have good results using the air thinner that comes in a very big bottle or water. However, using the hand thinner with a bid of retarder and thinning the quite thick paint to a milky consistency, painting is a dream with no brush marks at all. This is why I do not have an airbrush despite the large scale I work at.
-
-
-
-
2 hours ago, Mark Pearse said:
Did you decide to keep the mainsail loose-footed?
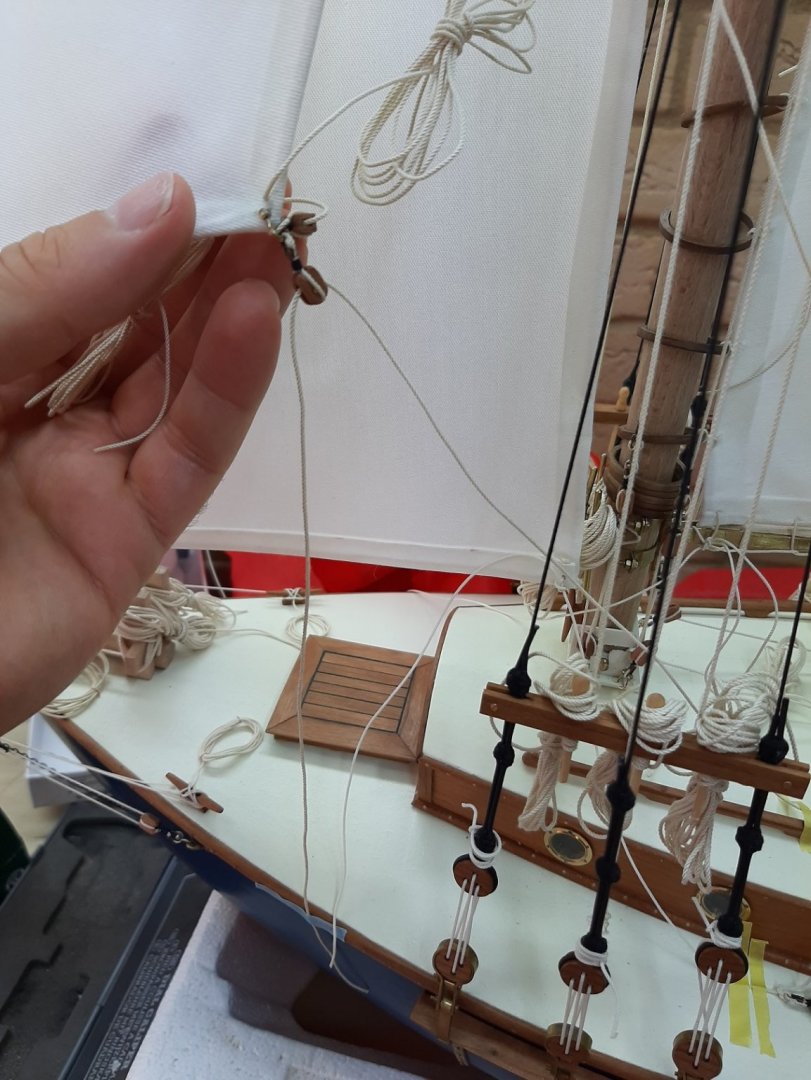
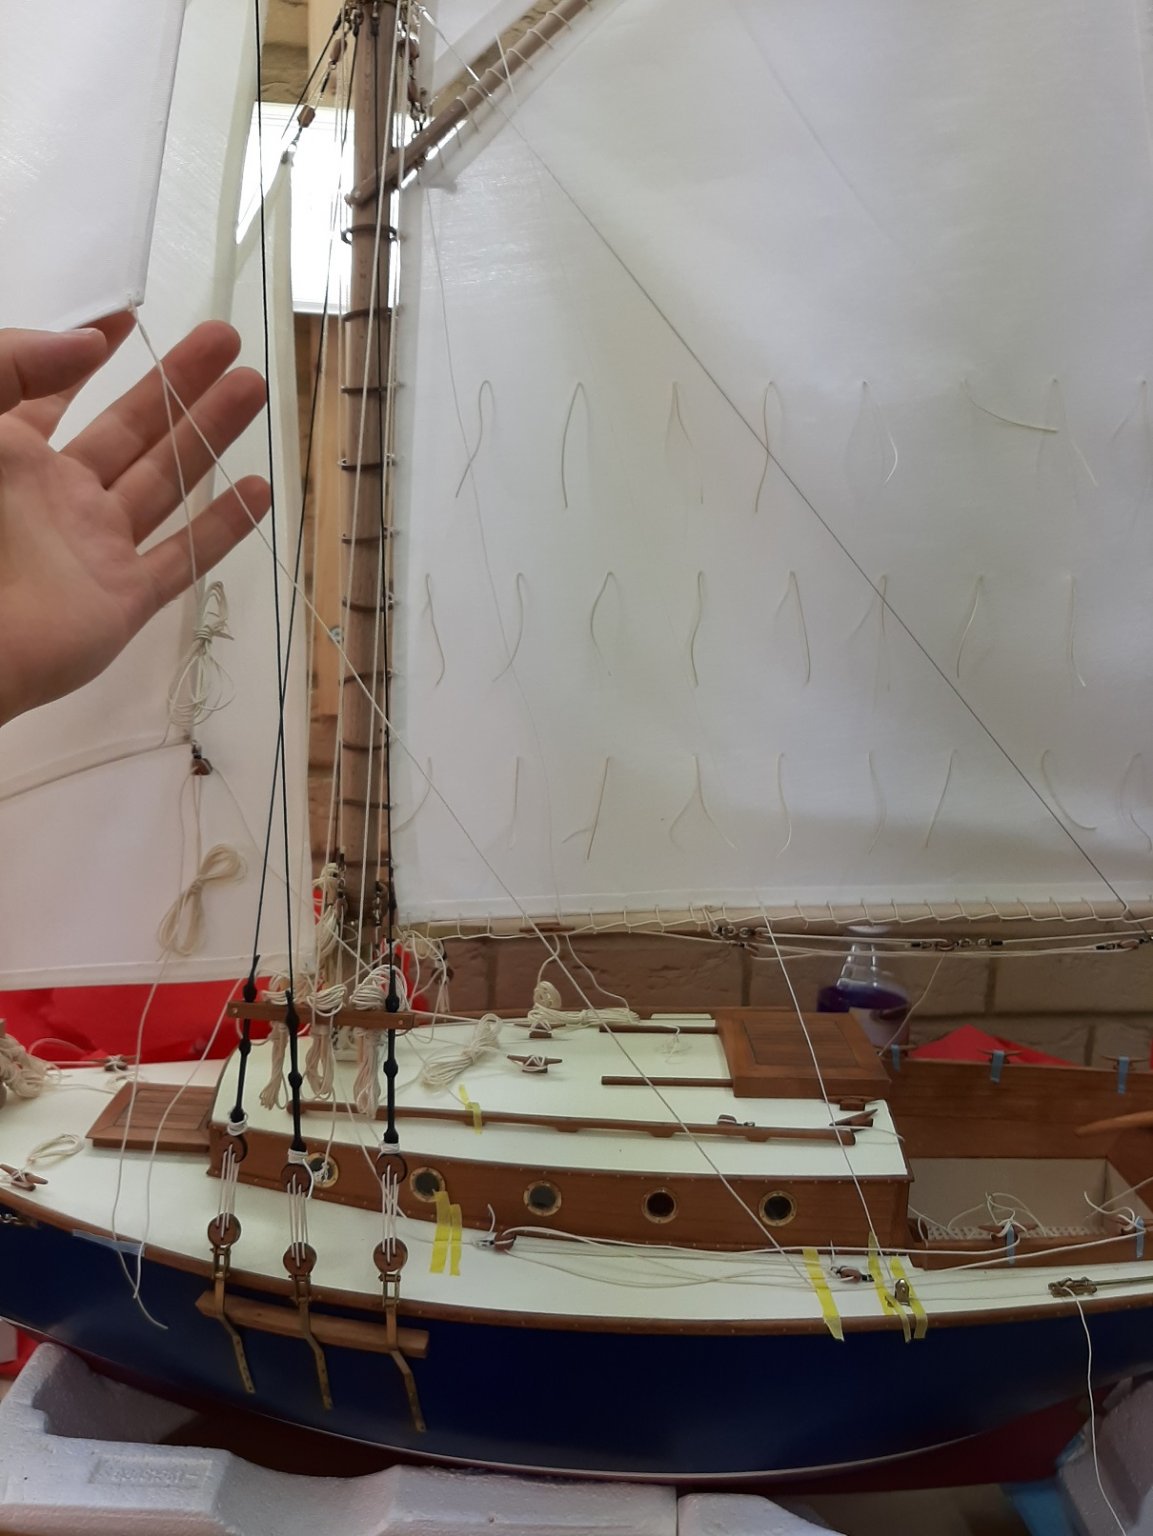
Thanks Mark! No, I will lace it, it is just that I find the task boring so I keep putting it off. It involves drilling the fabric, dilating the hole, pass a tube, pass the rope through the tube, then around the boom and through the previous loop and then repeat 40 odd times!
I ve been visiting your log, your plans have had 90 years to mature which is plenty enough!😉
-
-
This is an unusual boat Brian. Very beamy and little draught as you mentioned but also very little overall height and those slopping sides would guide waves over the ship. Was it intended for open water or just for coastal/river cruising?
You are doing a good job and indeed, this is a big boy!
-
Now this is an interesting project. I ll take that sit at the back.
-
Keith, I just finished going through your log, very nice work on a very interesting ship! I think I ll have very little to contribute unfortunately but I am looking forward for the rest of the journey.
Regards
Vaddoc
- Keith Black, FriedClams and mtaylor
-
3
-
Thanks Druxey and Mark and everyone that visited and hit the like button!
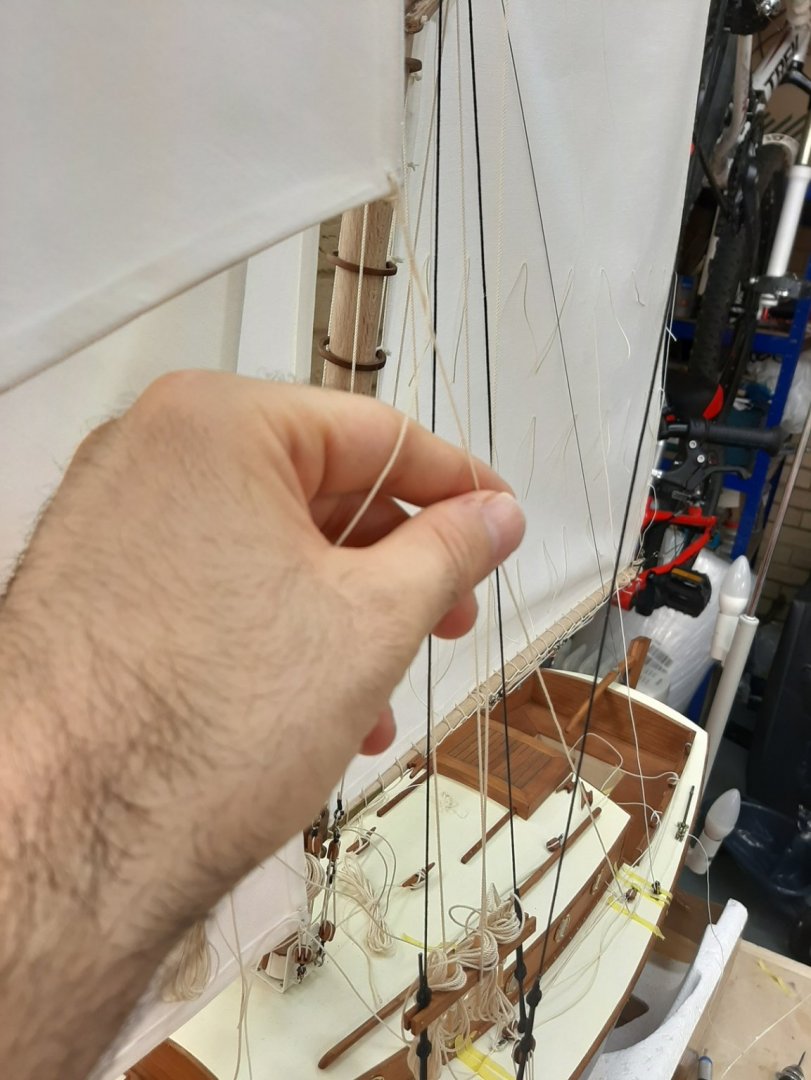
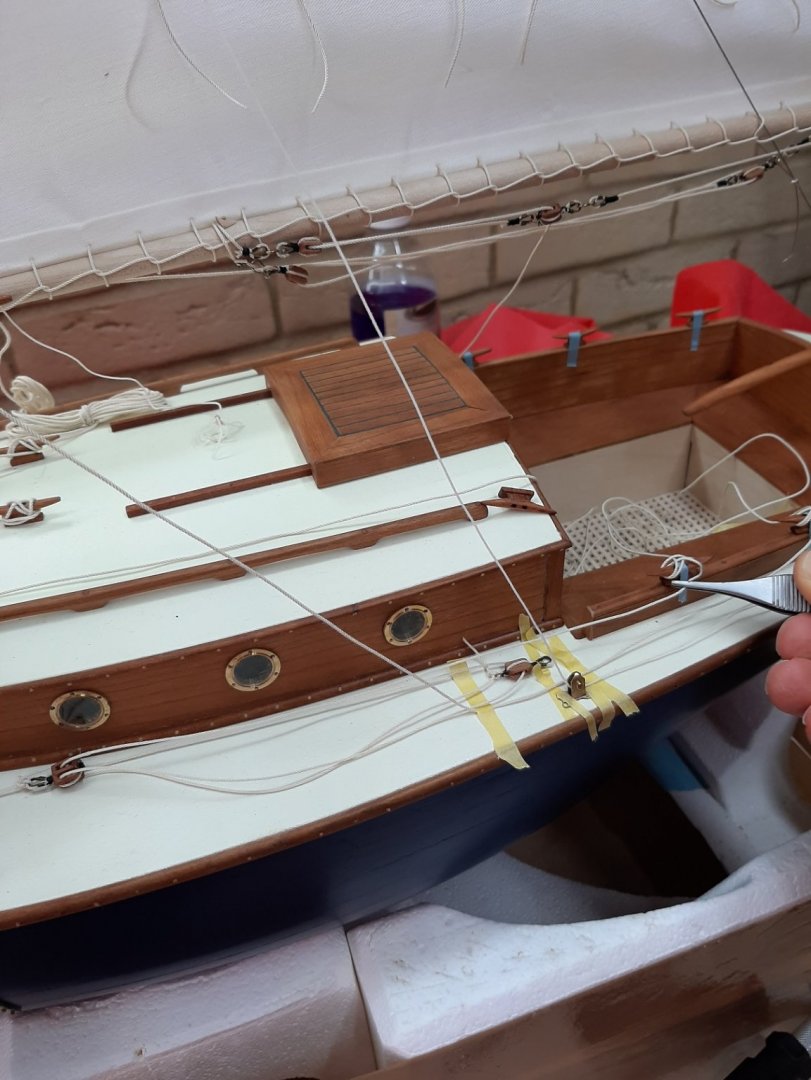
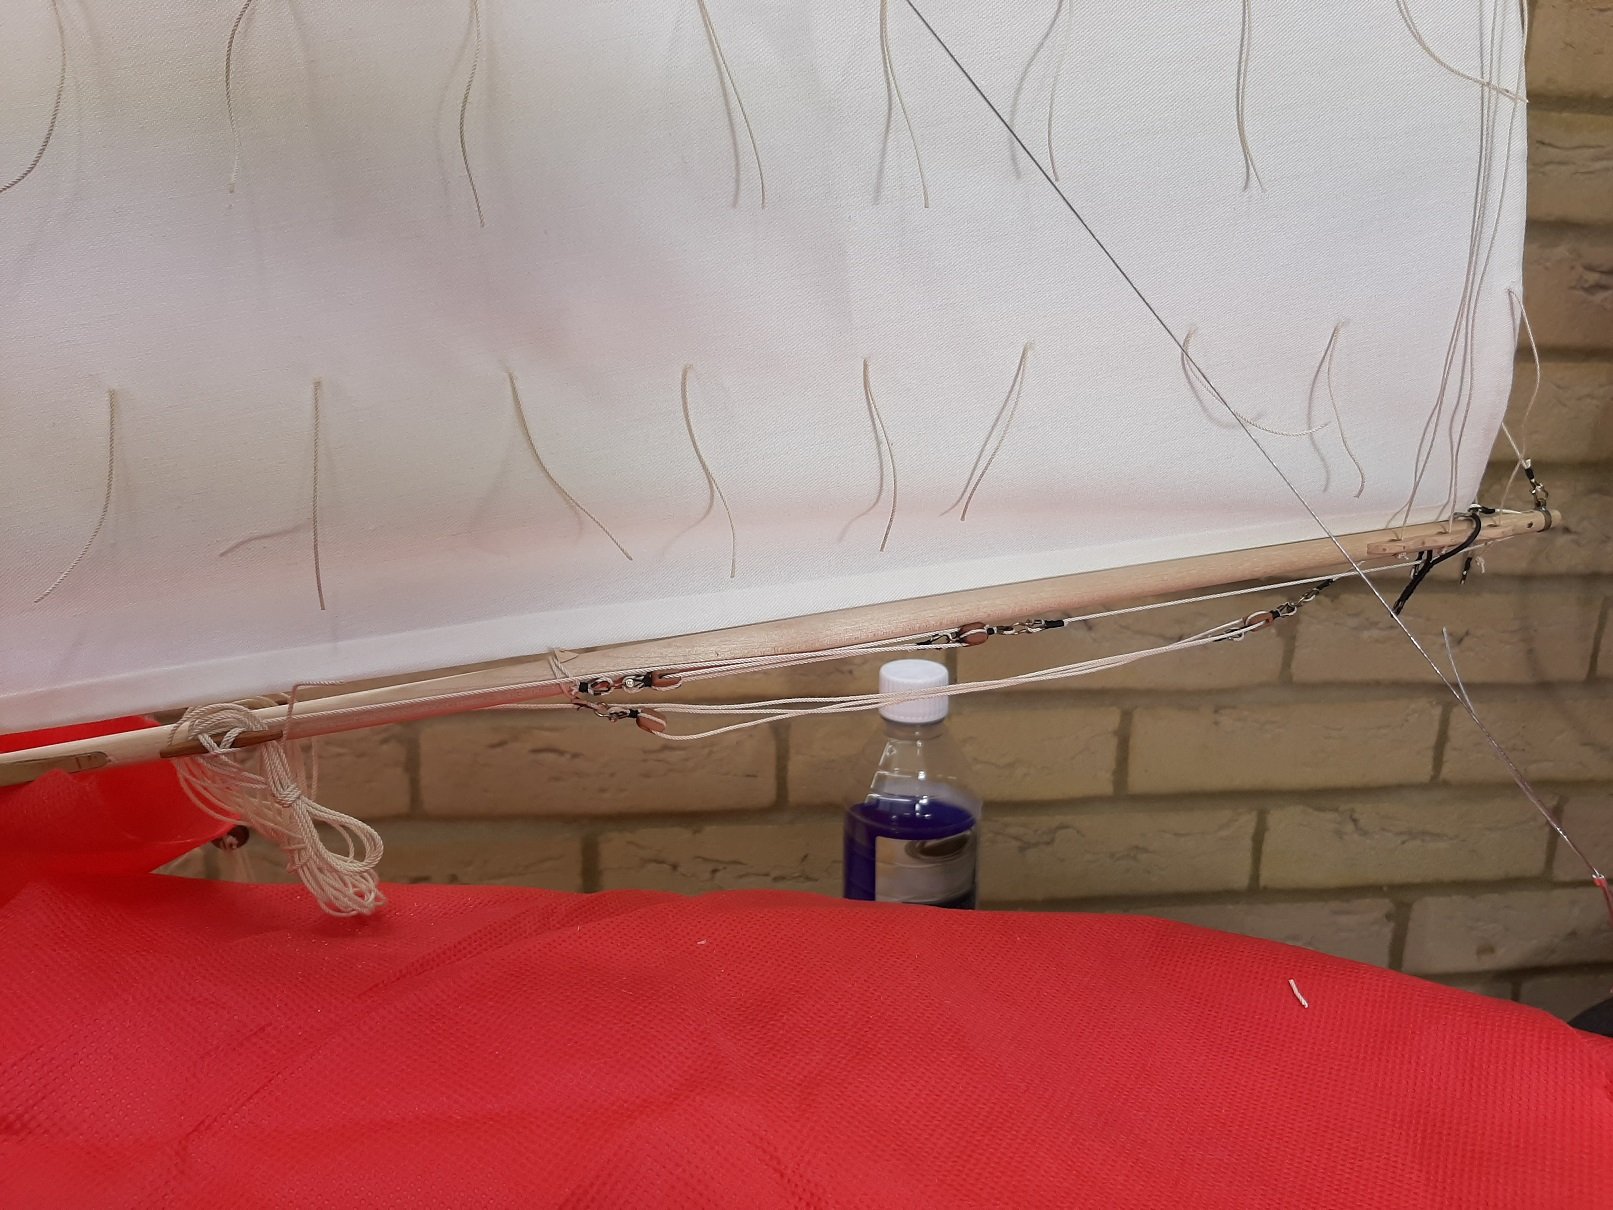
Slowly I am nibbling at the jobs left. Today I replaced the gaff traveller wire as the lacing went on the wrong side of it, much easier than to re-lace the sail. I also finished the remaining rigging for the boom, that is the clew outhaul and the reefing blocks. I installed two more cleats on the boom. I also rigged the sheets and blocks for the top and flying jibs.


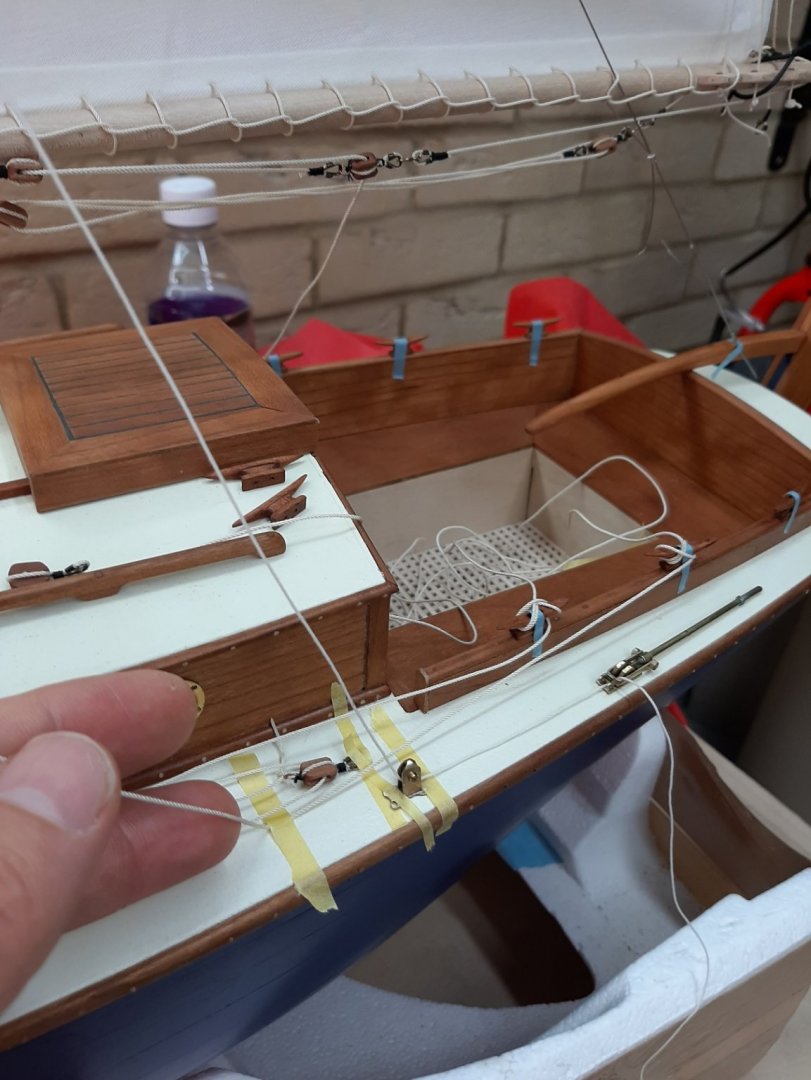
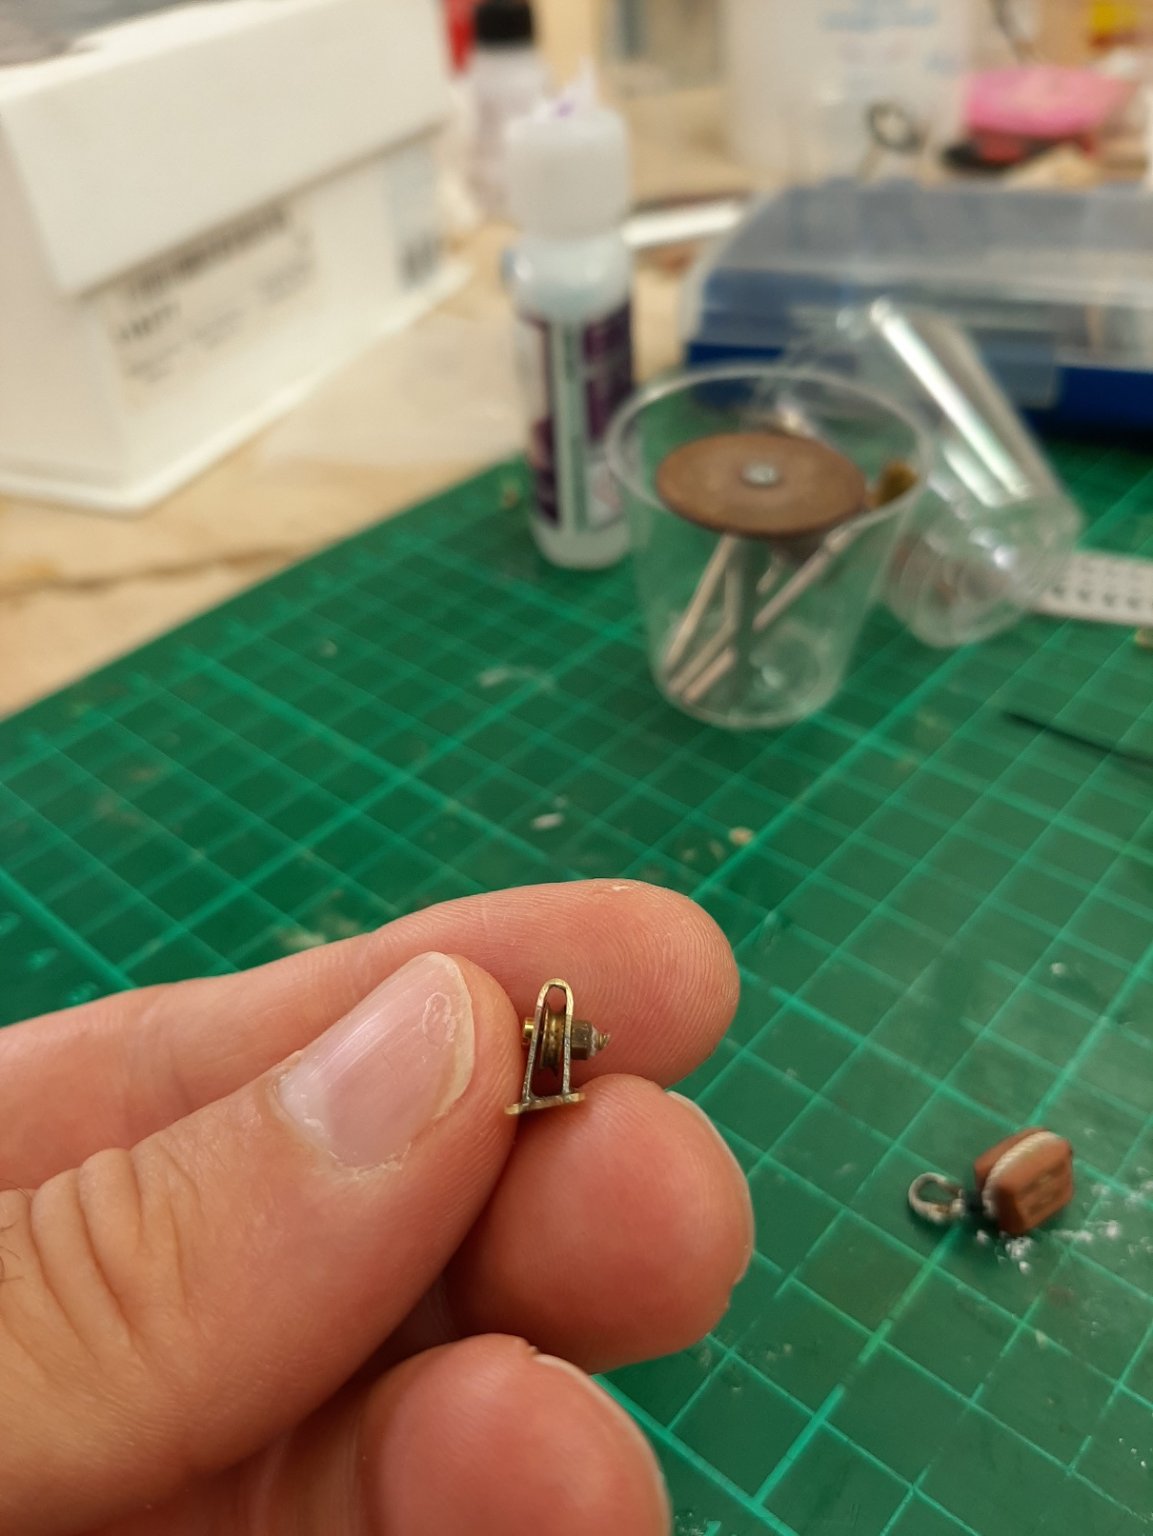
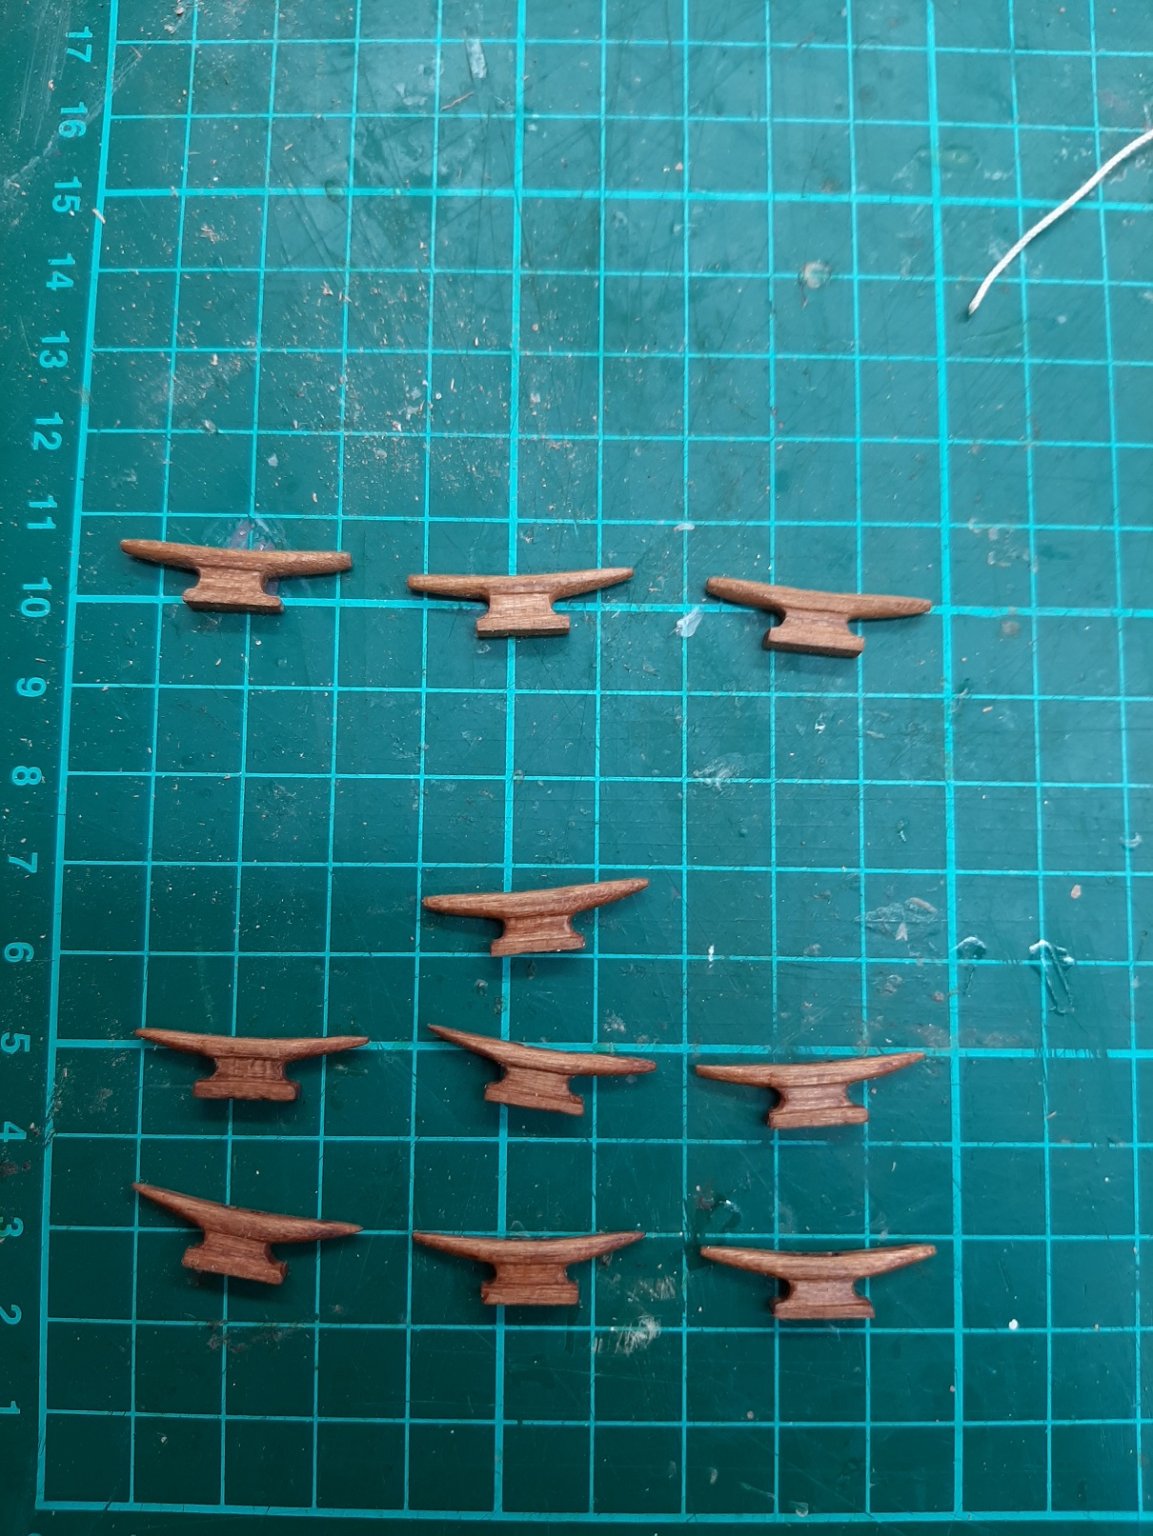
Next job was to make more cleats. I thought I had made enough but I ll need more, thankfully I had some blanks left, already drilled and counter-drilled.
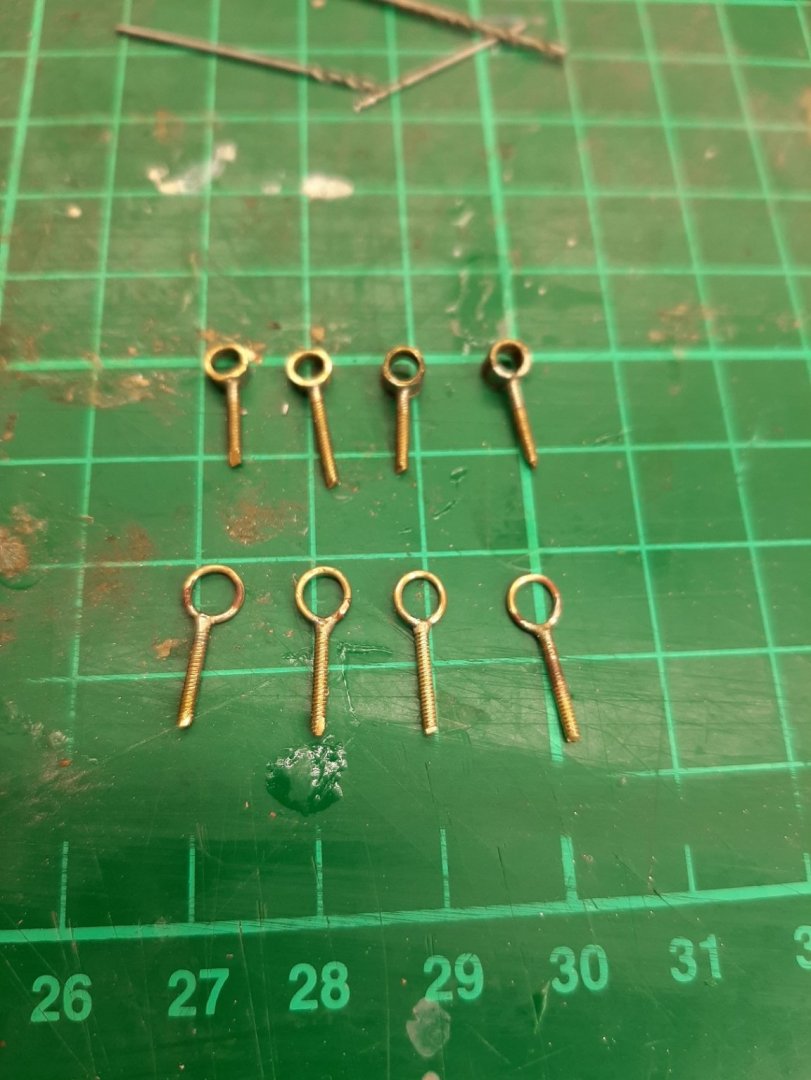
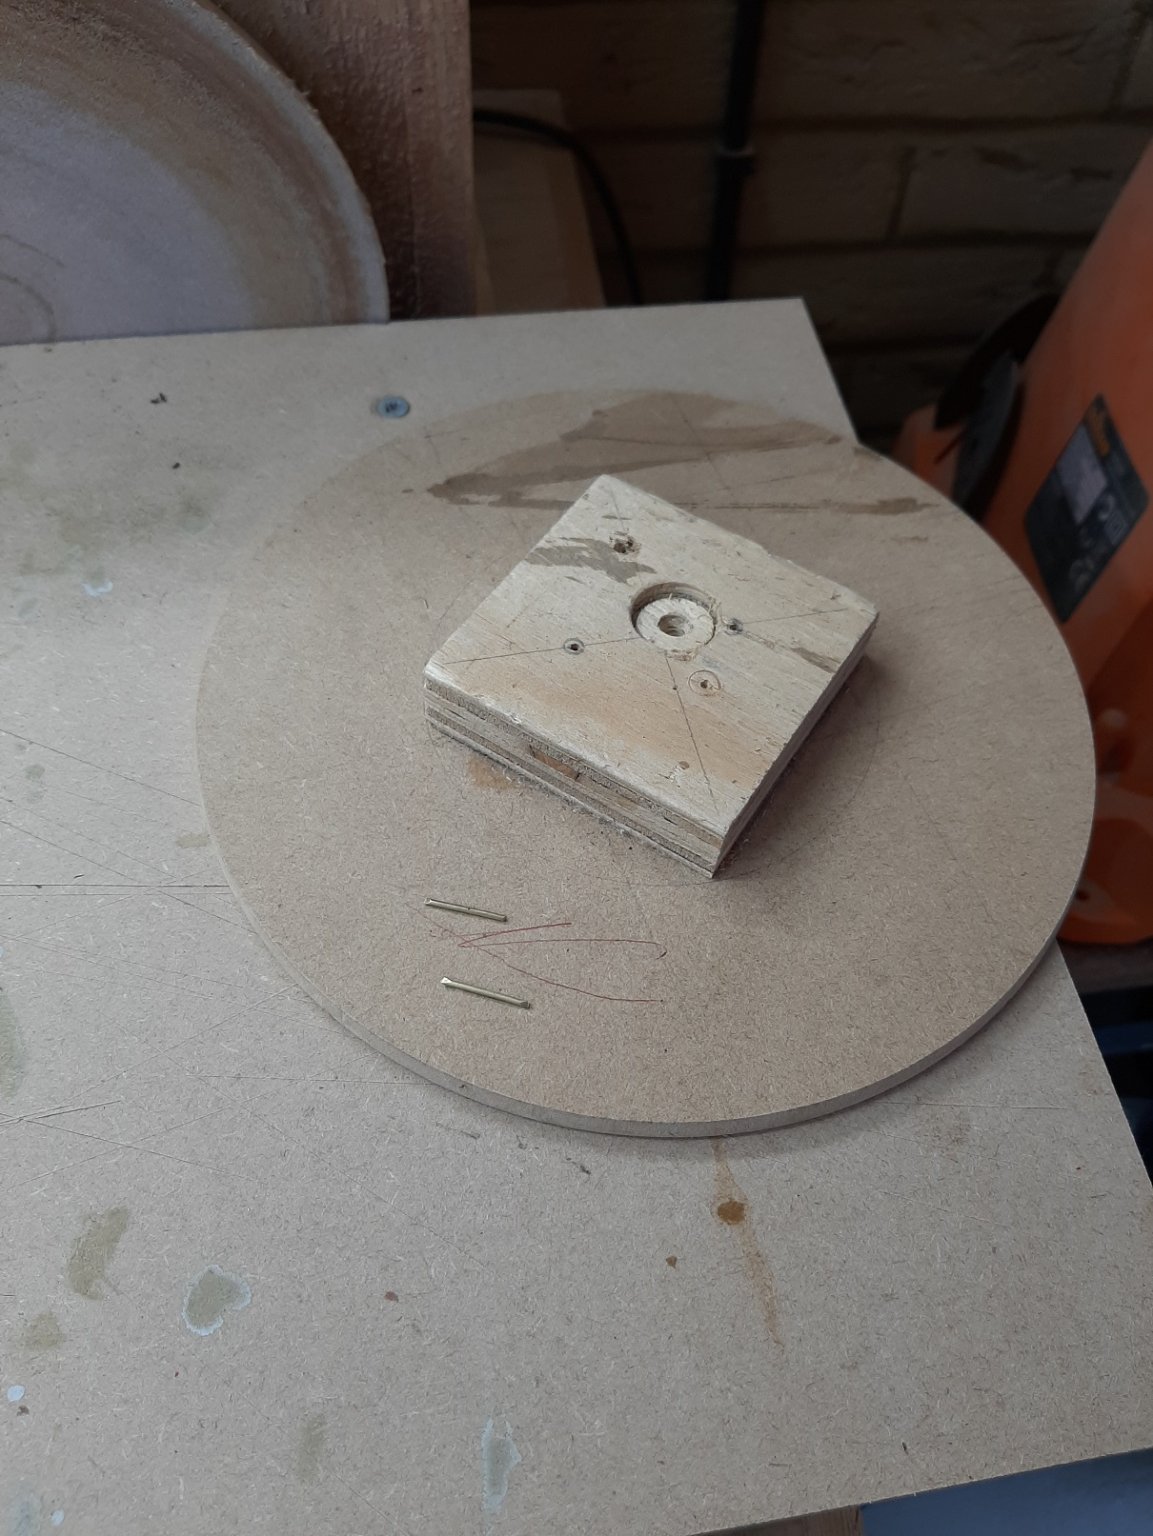
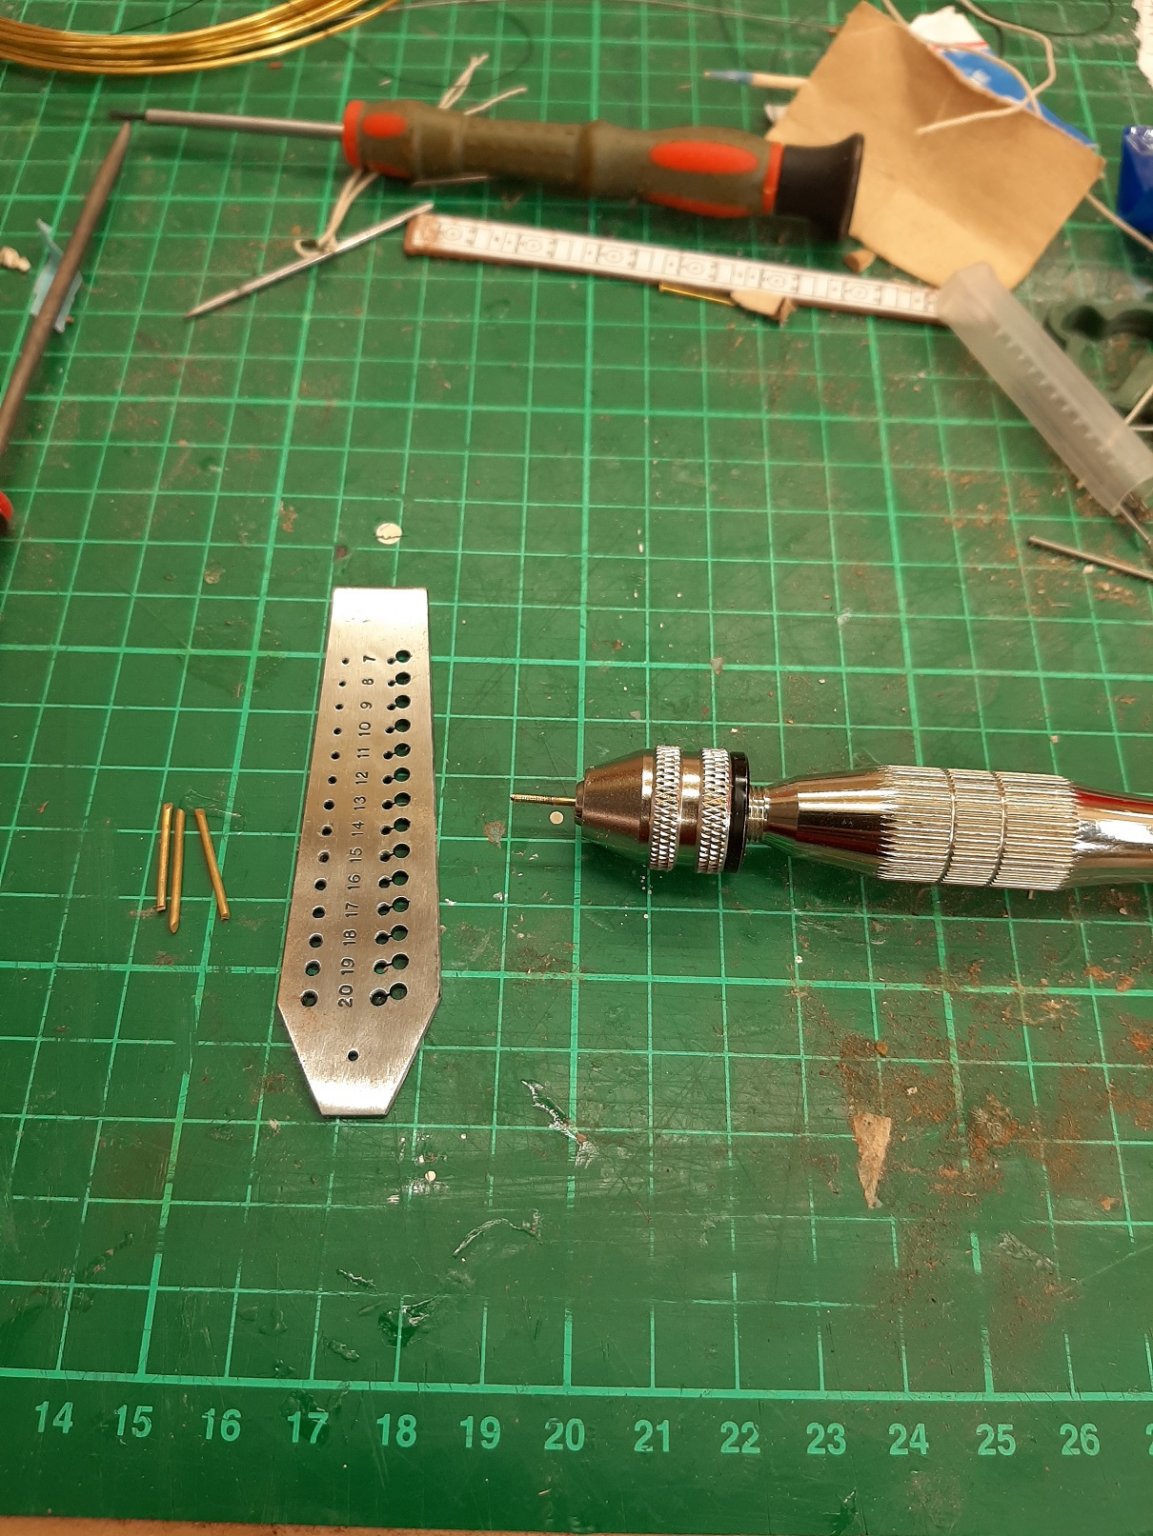
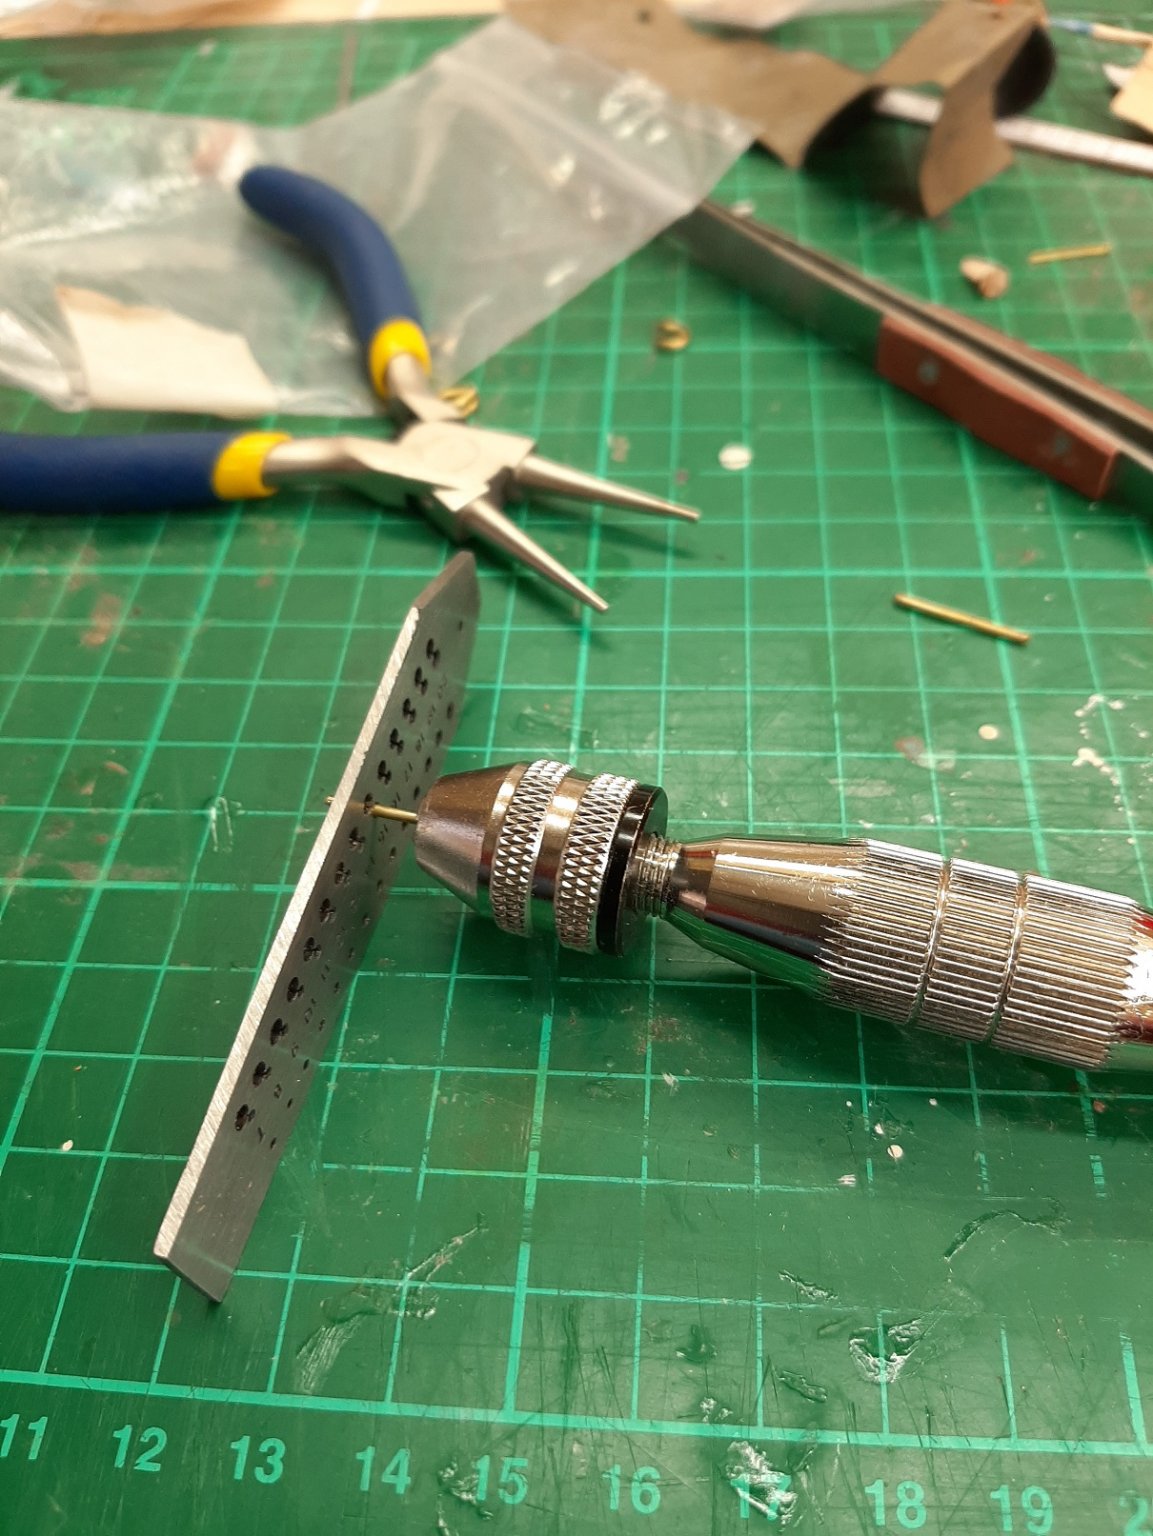
I am now thinking how to route the sheets from the fore sails to the cockpit. I will need some tethering points as well as some conduits. However, I recently got a new toy, a cheap micro tap and die set so I thought I ll give it a go.
I used 1.2 mm brass wire, first annealed by heating it red hot, then rolled between 2 flat MDF surfaces to straighten it. Then I secured it on a hand drill and cut the threads. I am not sure how this should be done, I just tried holes until I found the first one that the wire would not fit and used that one.


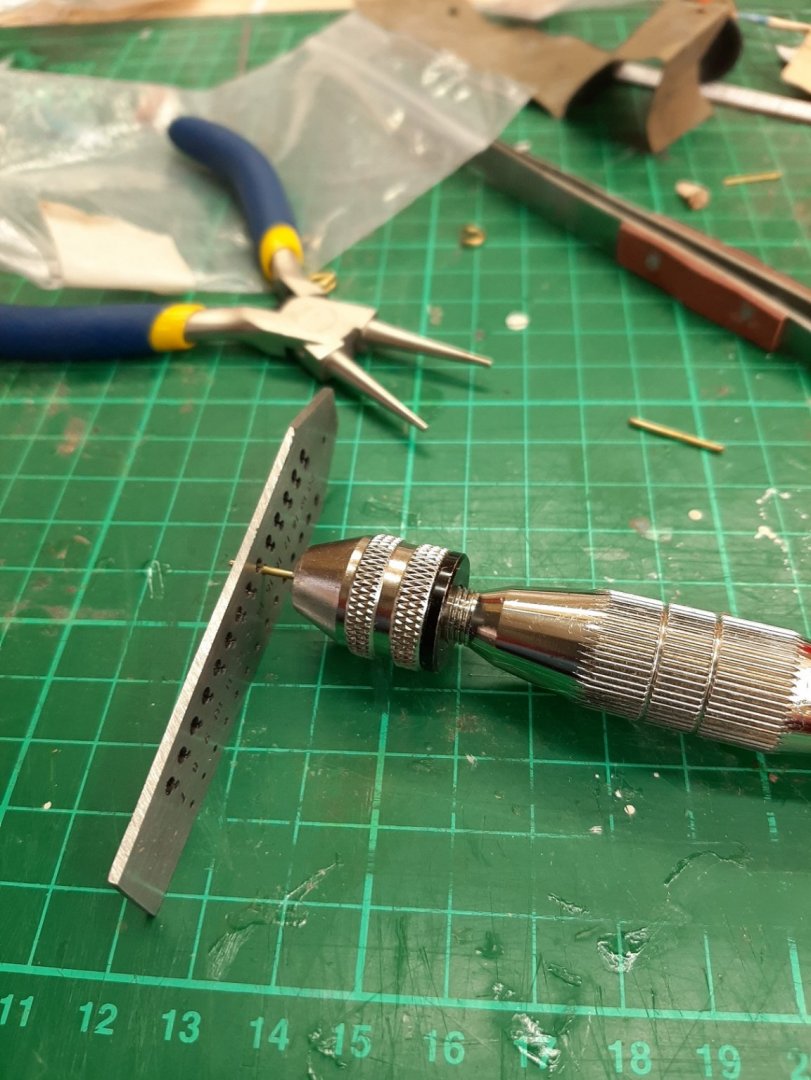
It was dead easy to cut the threads. The threaded wire now screws very easily in 1.1 mm hole and very securely, there will be no need to use any glue. I think this skill will be useful in the future.
I then made a few parts that I think will do the job. They still need to be polished and waxed.
I think next I should lace the sail to the boom, tedious task but must be done. Then I ll start bringing the sheets aft, I will not drill anything in place until everything is ready, my deck will for sure be very busy and crowded. I do have some concern that not everything will fit!
Regards
Vaddoc
- GrandpaPhil, VTHokiEE, G.L. and 8 others
-
11


Painting Sequence for a Hull with 3 Colors Using an Airbrush
in Painting, finishing and weathering products and techniques
Posted
Rod's advice above is good. If you look into my Deben log, you ll see all these steps-I hand brushed though.
I have the same issue with the raised edges. I just live with it. Apparently it is possible to wet sand the paint with 2000 grit or similar to get rid of these edges but it is too terrifying to do on a finished hull. I think this is something I should experiment with.
One think that needs attention, the paint will find its way to even the tiniest of creases. If you suspect the masking tape is not firmly stuck to the hull, start over. Also remember, any imperfection after painting will be much more visible.