

puckotred
-
Posts
430 -
Joined
-
Last visited
Content Type
Profiles
Forums
Gallery
Events
Posts posted by puckotred
-
-
Hello Morgan thanks for dropping by.
I would not start building the hull until issue 24. That would be shipment number 7. Then the main hull would be complete. even better would be to wait until issue 40, shipment 11. Then you'll have the false deck as well. But I understand that's unrealistic.
")
Just try and wait as long as you can.
(you can always PM me if you want to use Swedish)
-
-
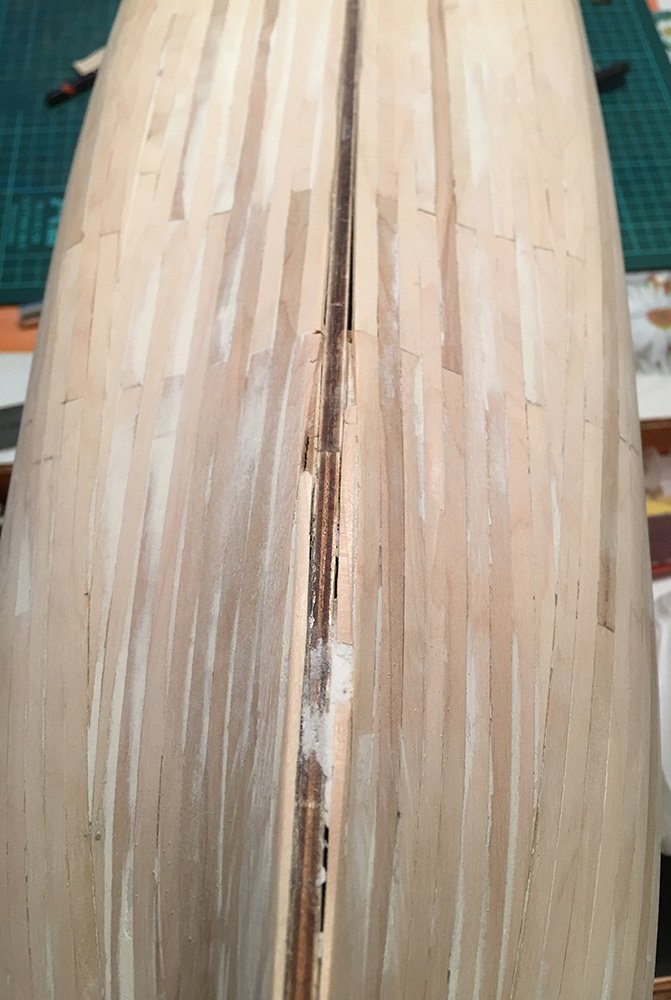
Hi Jan, Well, I don't know. But it might be the only way. I don't have any clamps that's big enough to go over the hull and if I use the planking screws the hull will be perforated.
maybe just use CA to pin them down?
Or ease up the curve a little and hope that it won't show after the hulls painted.
But the curve has to line up with the upper 7 planks aft wards that should be klinker laid.
- EJ_L, coxswain and BLACK VIKING
-
 3
3
-
hi Michael and Peter, Thanks for the input.
Here is the problem:
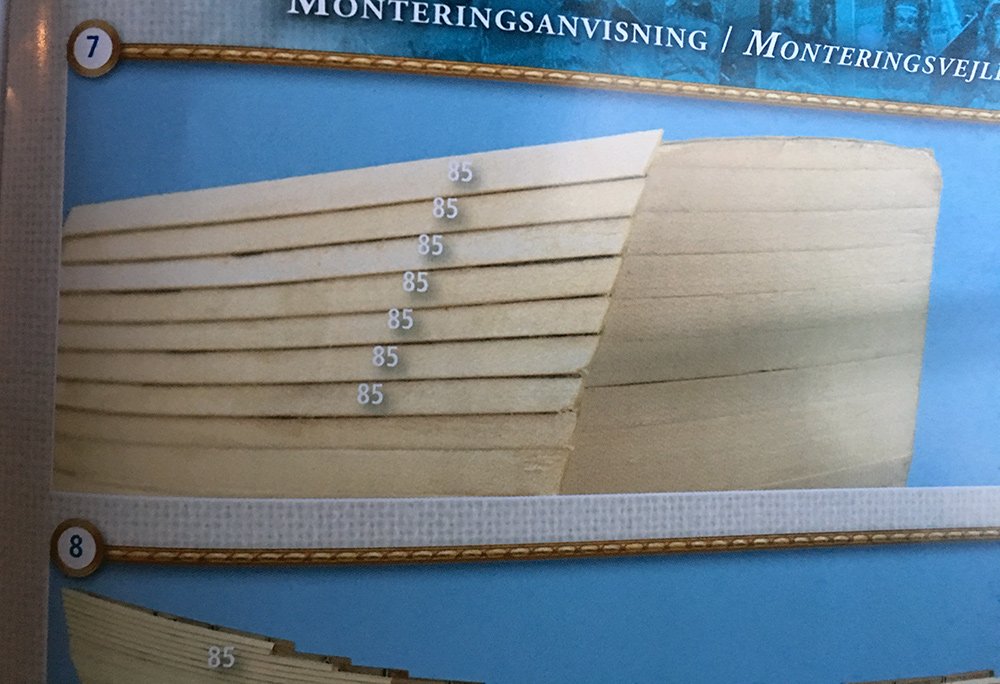
The line drawn is the curve that the planks should follow.
And this happens when I try to bend the thin strips "upwards"
With the thicker planks (2mm) this was no problem since I could use the heatbender across the plank and get that minimal curve. But not on the 0,5mm.
- EJ_L, BLACK VIKING and zoly99sask
-
3
-
Thanks Michael!
The photo will be helpful.
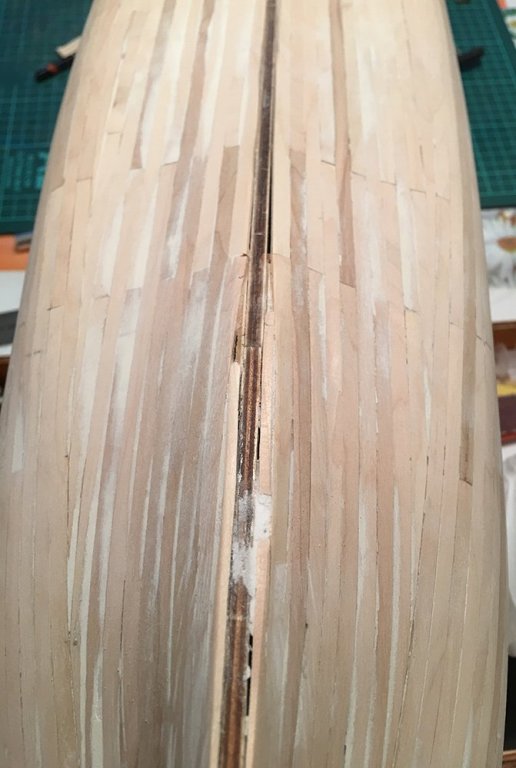
Now my main problem is that curve of the planks towards the aft of the hull. DeAgostinis second planking wood is 0,5X5mm and impossible to bend upwards without twisting. A real headscratcher for me now...
- EJ_L, zoly99sask and Brucealanevans
-
3
-
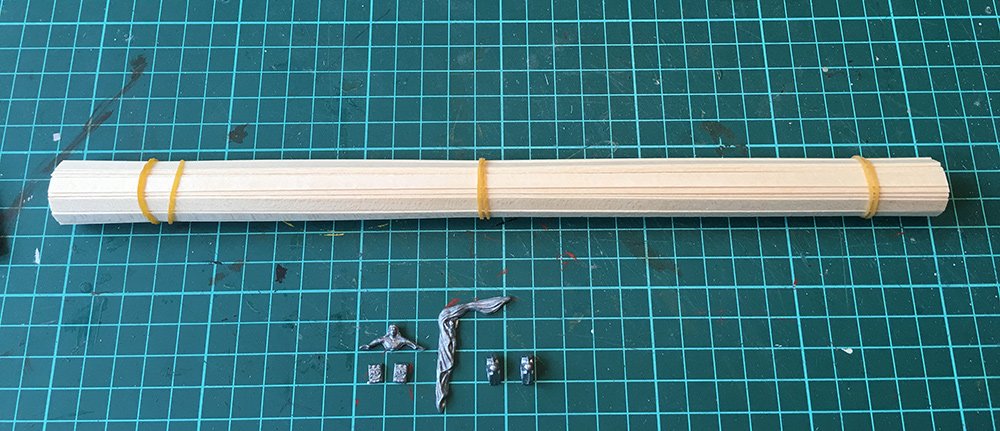
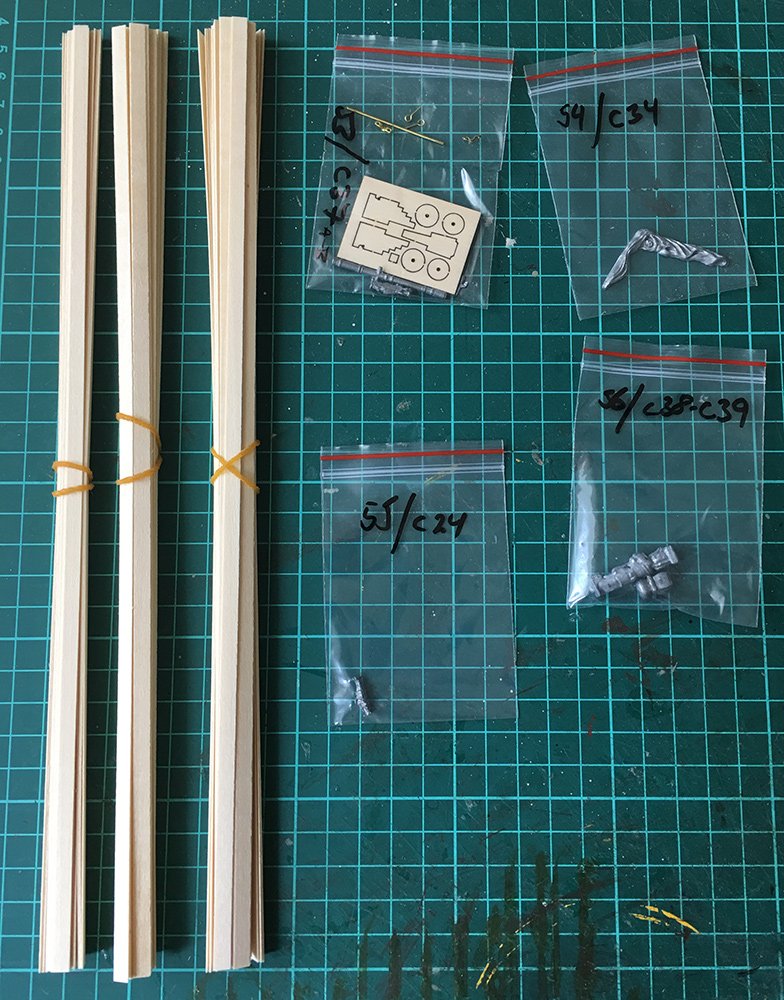
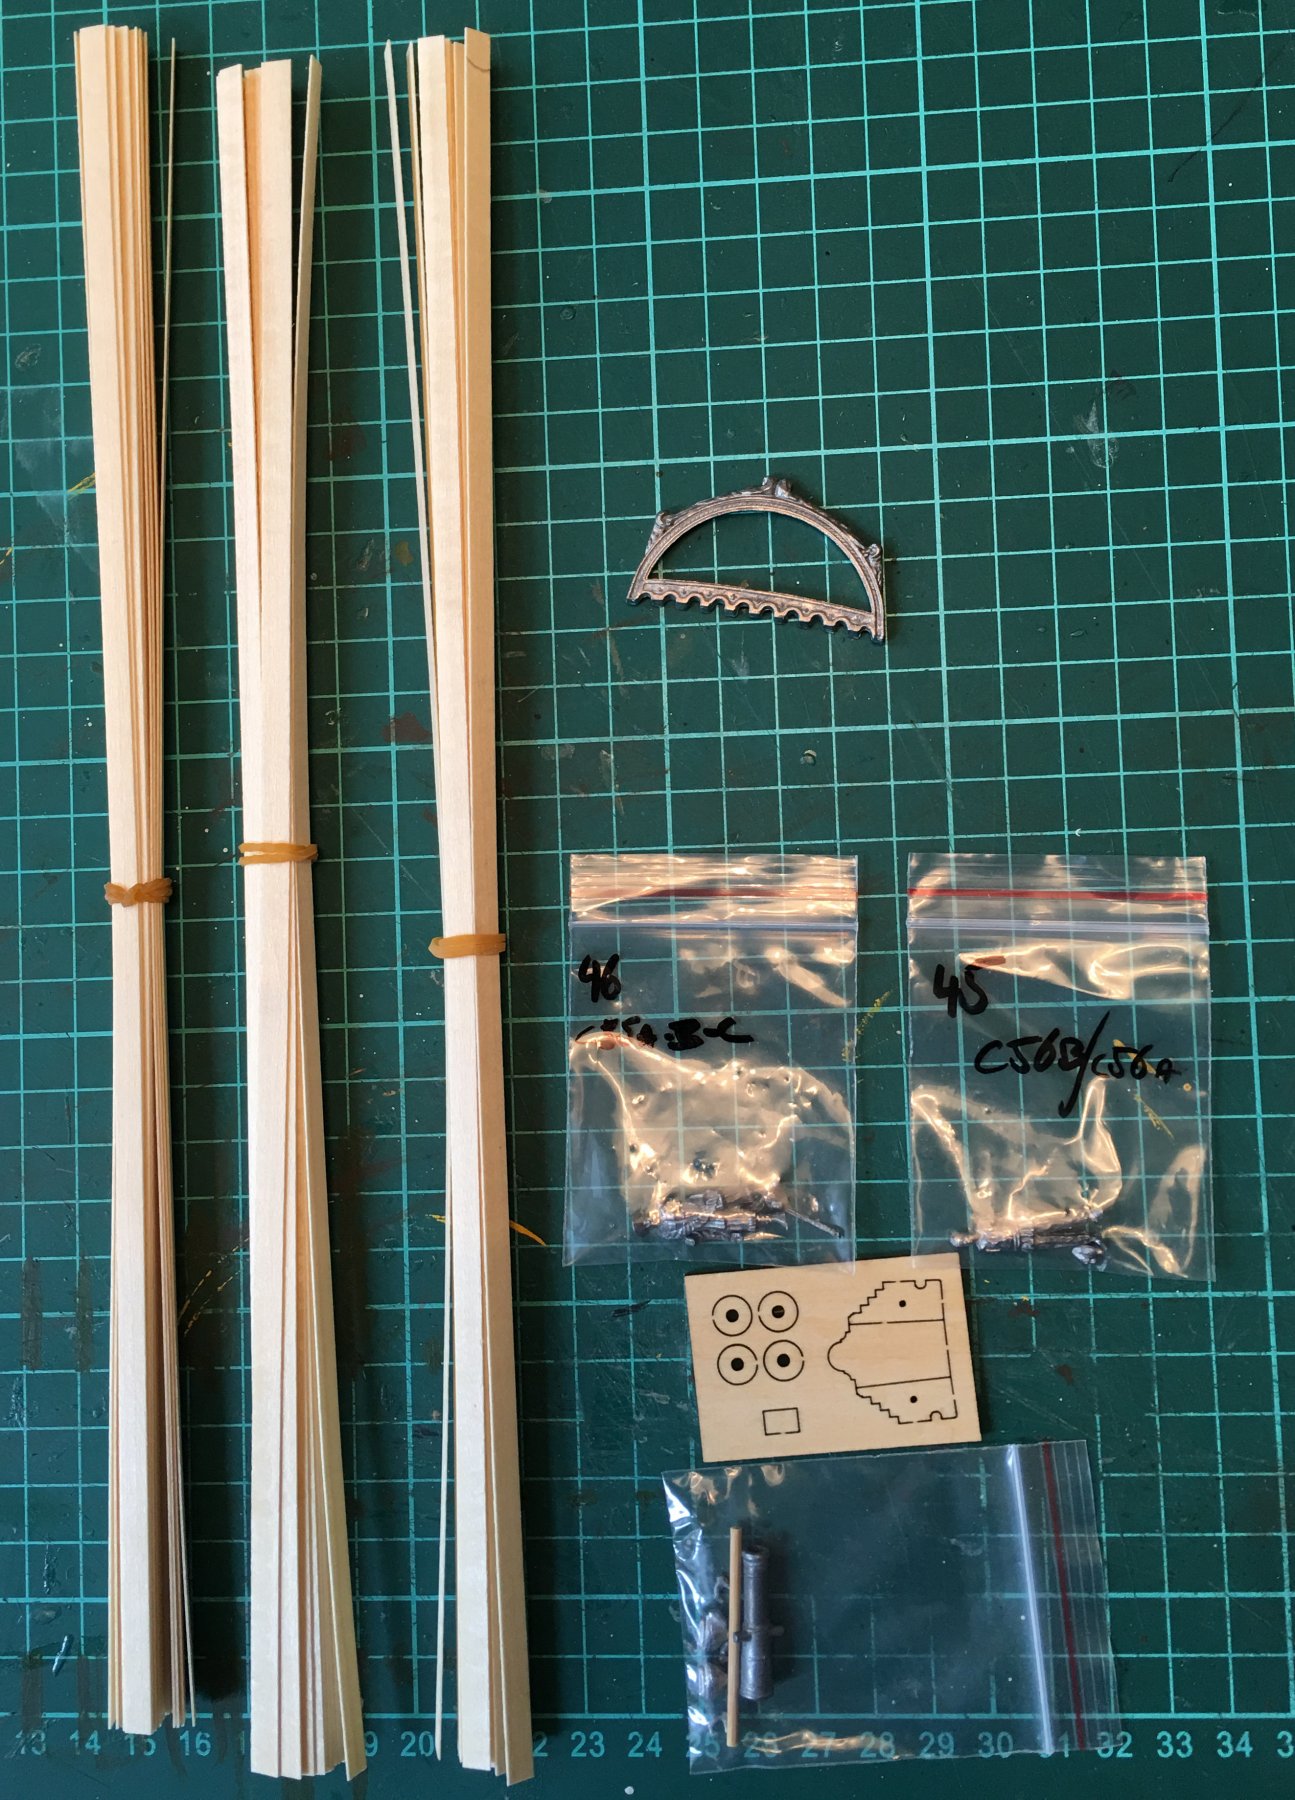
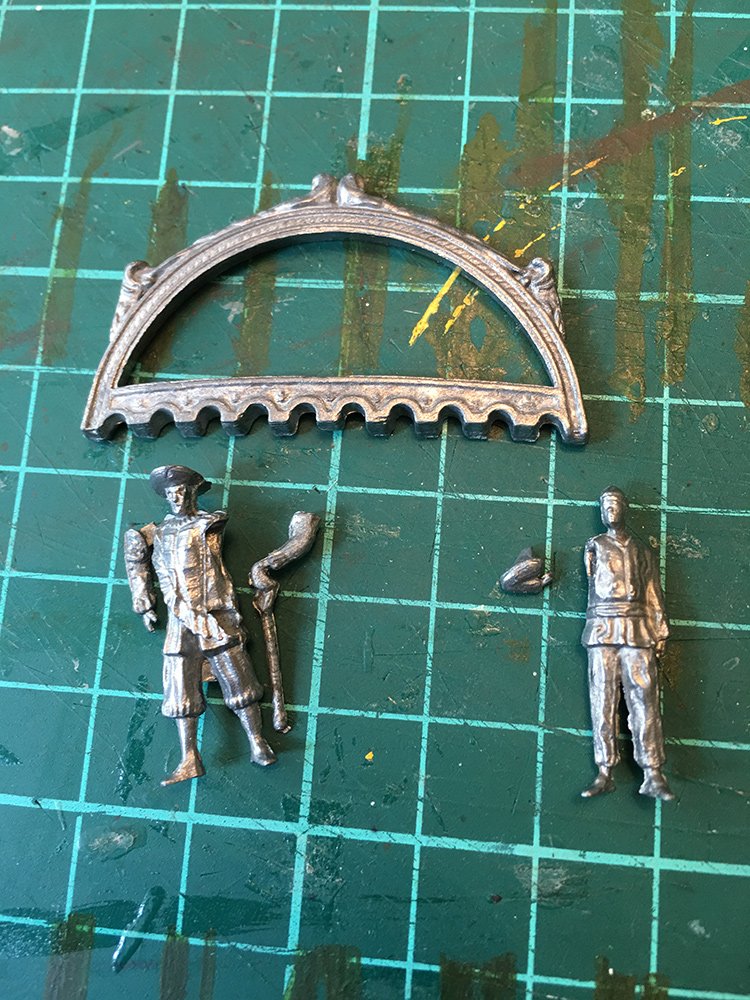
July's stuff came a little early.
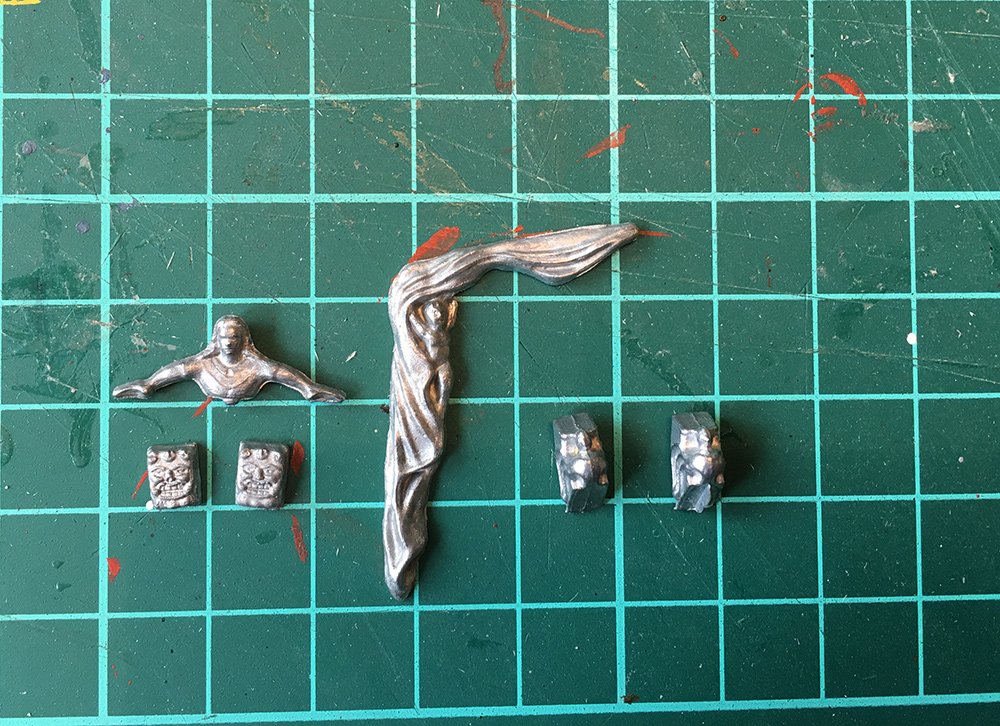
A bunch of 0.5x5mm strips, a cannon and decorations:
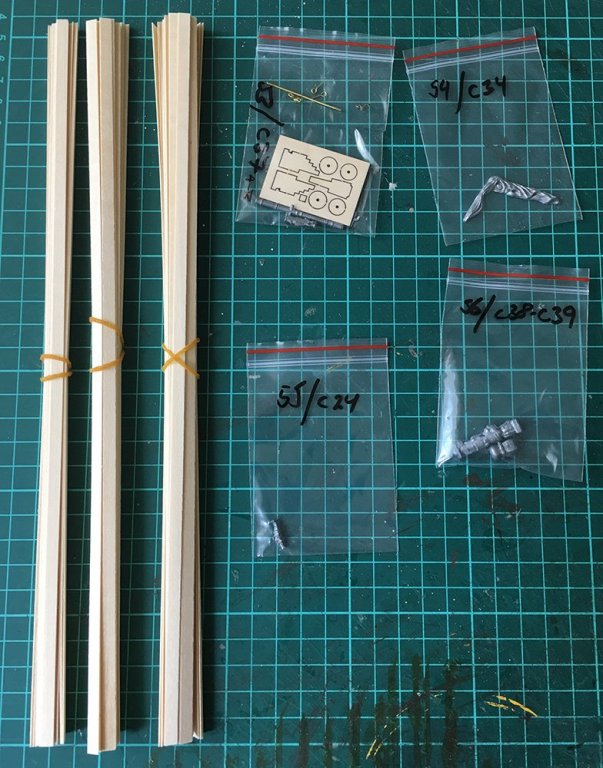
In detail:
And the planking of the stern continues:
- zoly99sask, BLACK VIKING, Jörgen and 6 others
-
9
-
-
Hello Jörgen, yes it's Postnord. And after reading complaints on their Facebook page all hope is gone that one will ever get service from them... You are right about waiting for the parts. But I can't wait...
 I have been thinking that I should just go full on and follow the instructions to 100%, see what happens and then get the complete kit when/if Artesania Latina issues it. By the way, also in the shipment the Postnord misplaced are these and these AND THESE
 So you can understand I'm really really mad
Thanks Peter, I'll try and keep all in mind.
Thank you Zoran, and thank you for visiting. If you are referring to the drawn line on the hull that is just a marking of the curve the final planking should have. I used it to get the angle of the gunports. Although the gunports where very low. She was never meant to sail the high seas, so they did not think this was too big a problem (Correct me if I'm wrong, but I have a vague memory that I read this somewhere.) Where DeAgostini will put the waterline I have no idea. If all turns out well they might even put it in the right place
but I wouldn't bet money on it...
- EJ_L, Nirvana, zoly99sask and 1 other
-
4
-
-
Oh you guys... ☺️
Thank you for the kind words....
- Canute, mtaylor, popeye the sailor and 1 other
-
4
-
-
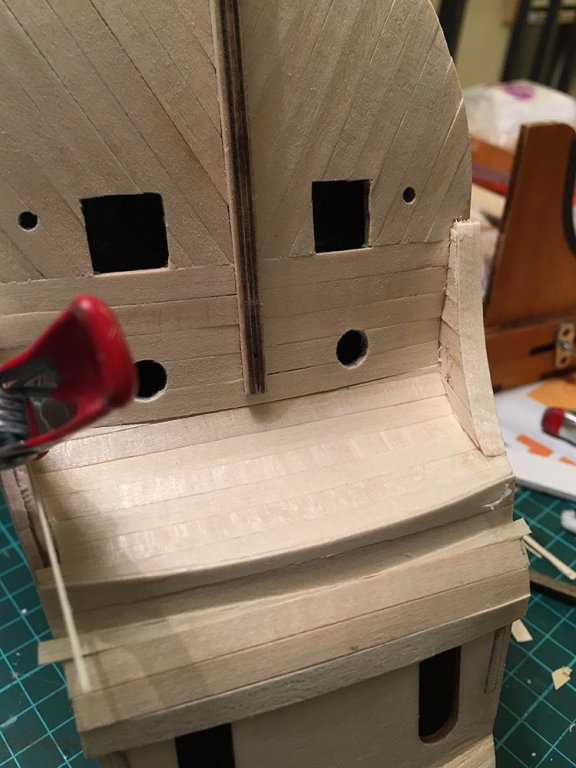
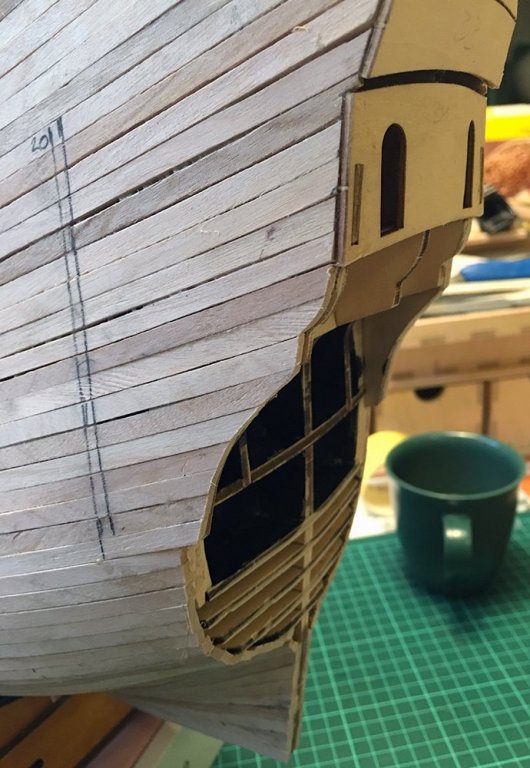
At last I got something done.
DeAgostinis approach when building the hull is to assemble the keel after you done the first hull planking.
Why I just don't know.
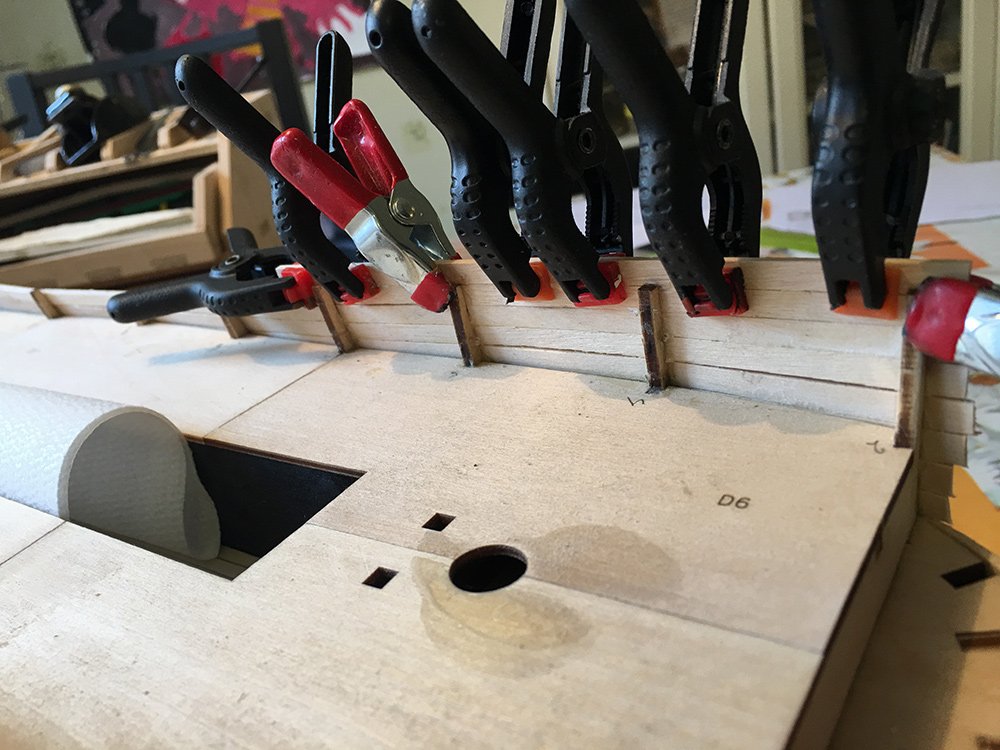
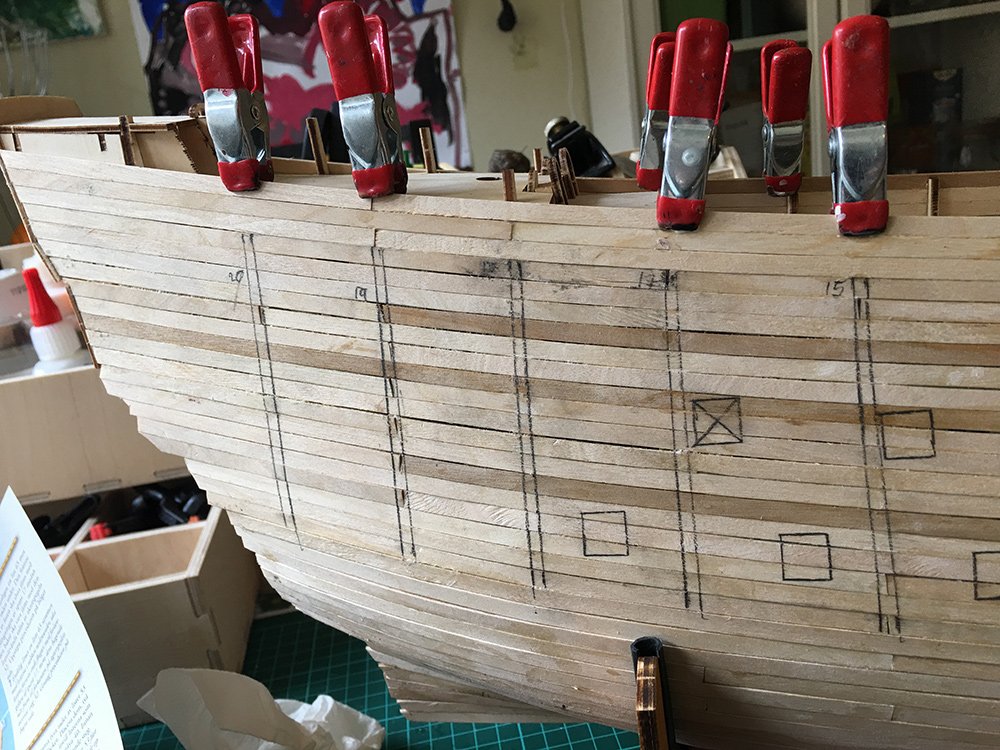
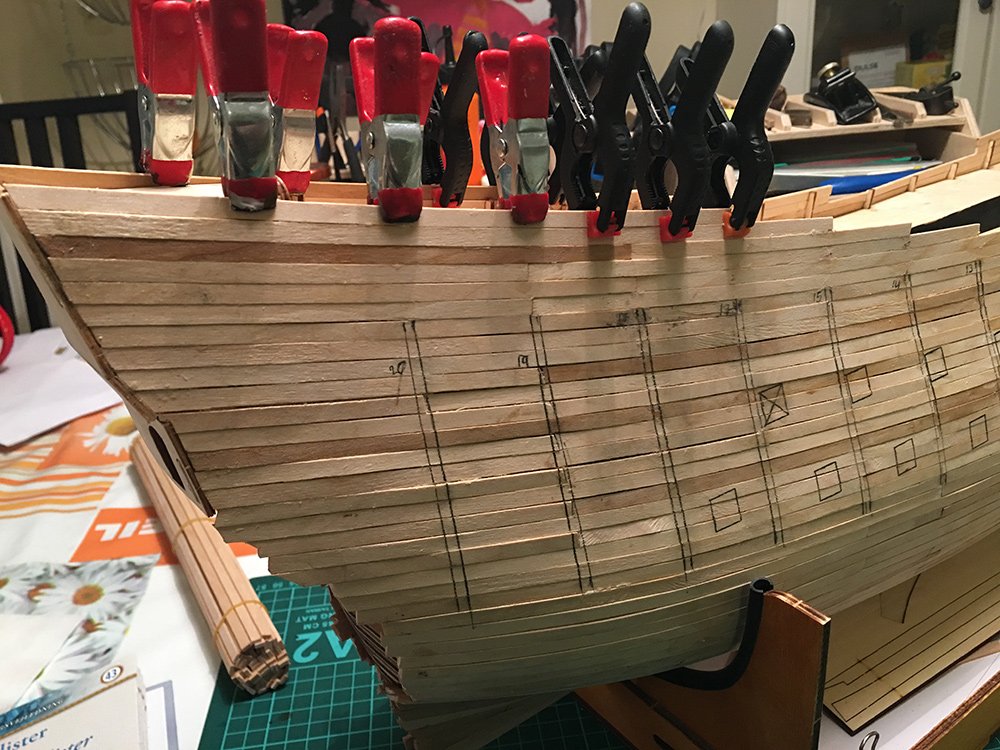
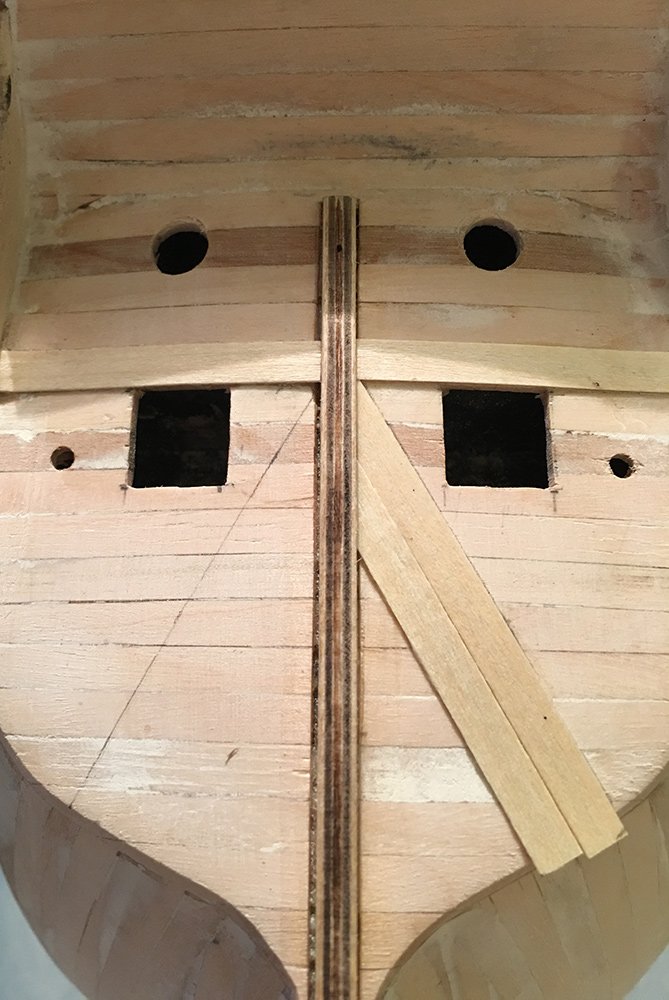
Had a really hard time cutting the 4mm trench along the whole hull:
This part was the easiest:

For some reason the bow part did not fit the false keel underneath. Unable to see exactly the point I had to fair away it took ages of hit and miss.
Doing this before the planking would have saved me a hour or so...
Again this was the easiest part. Good fit:

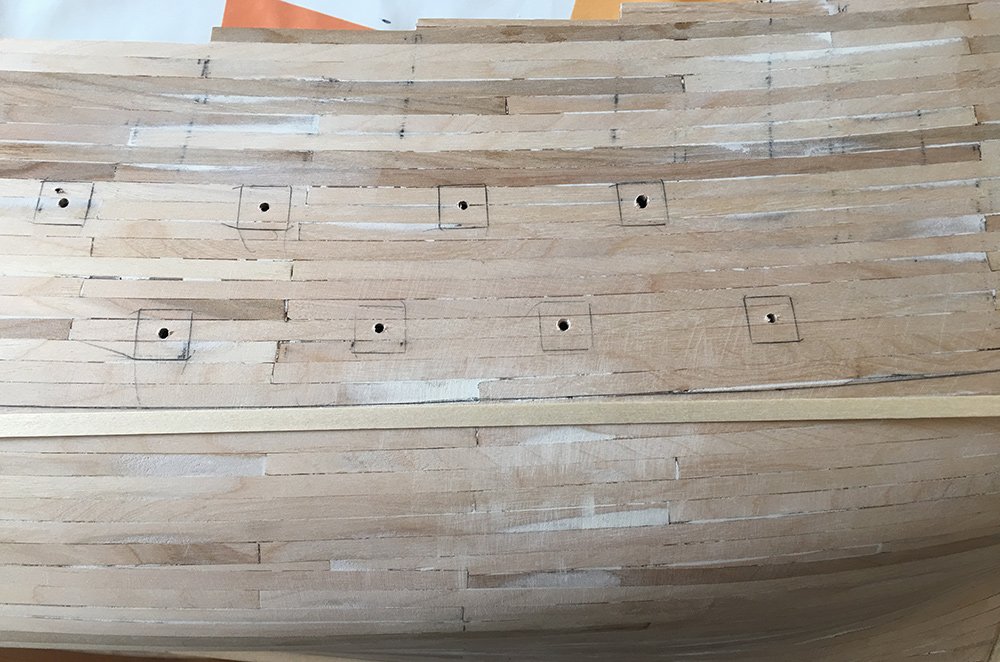
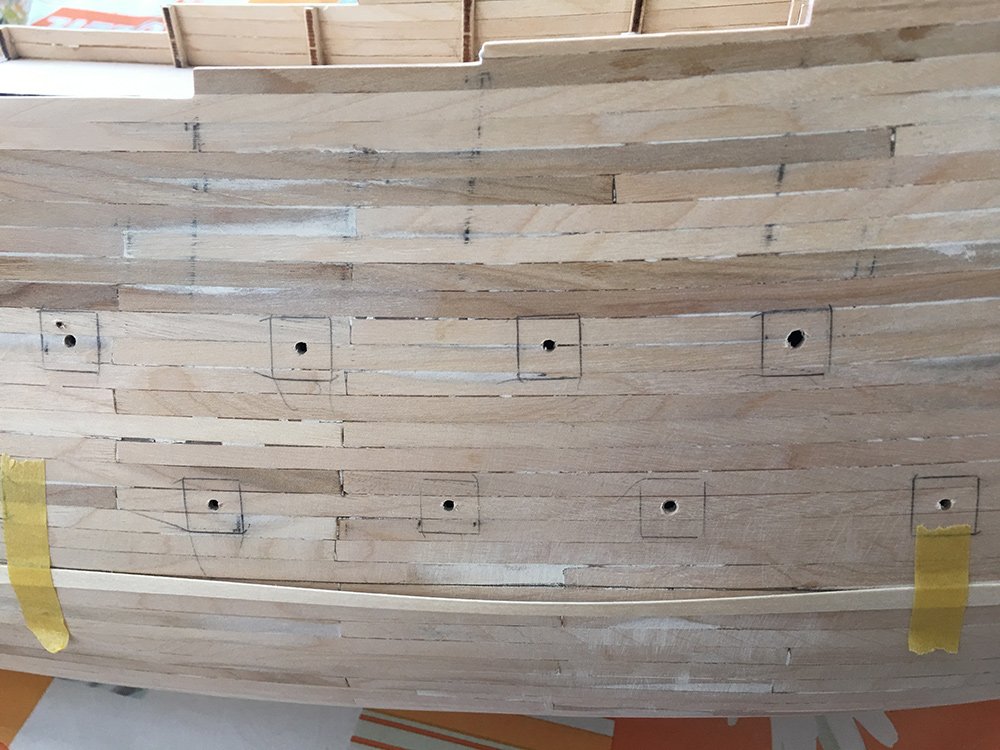
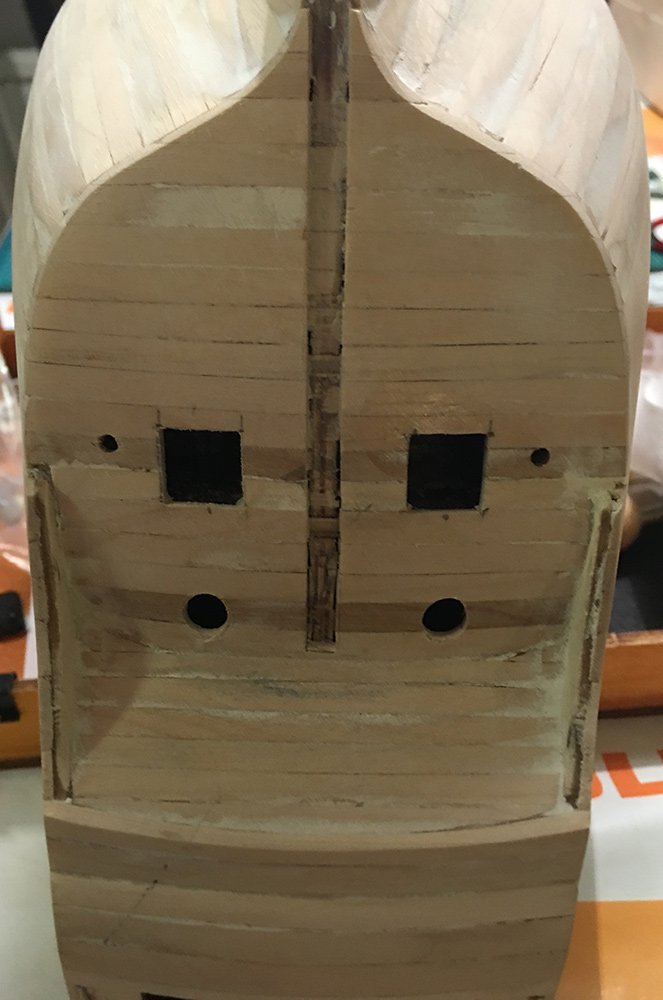
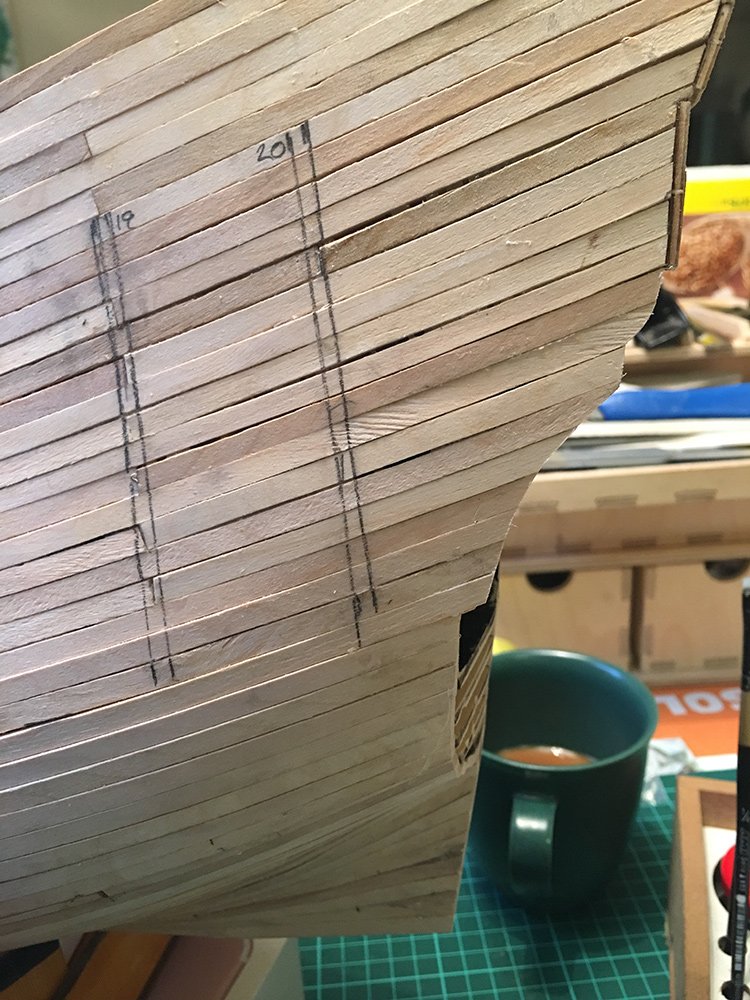
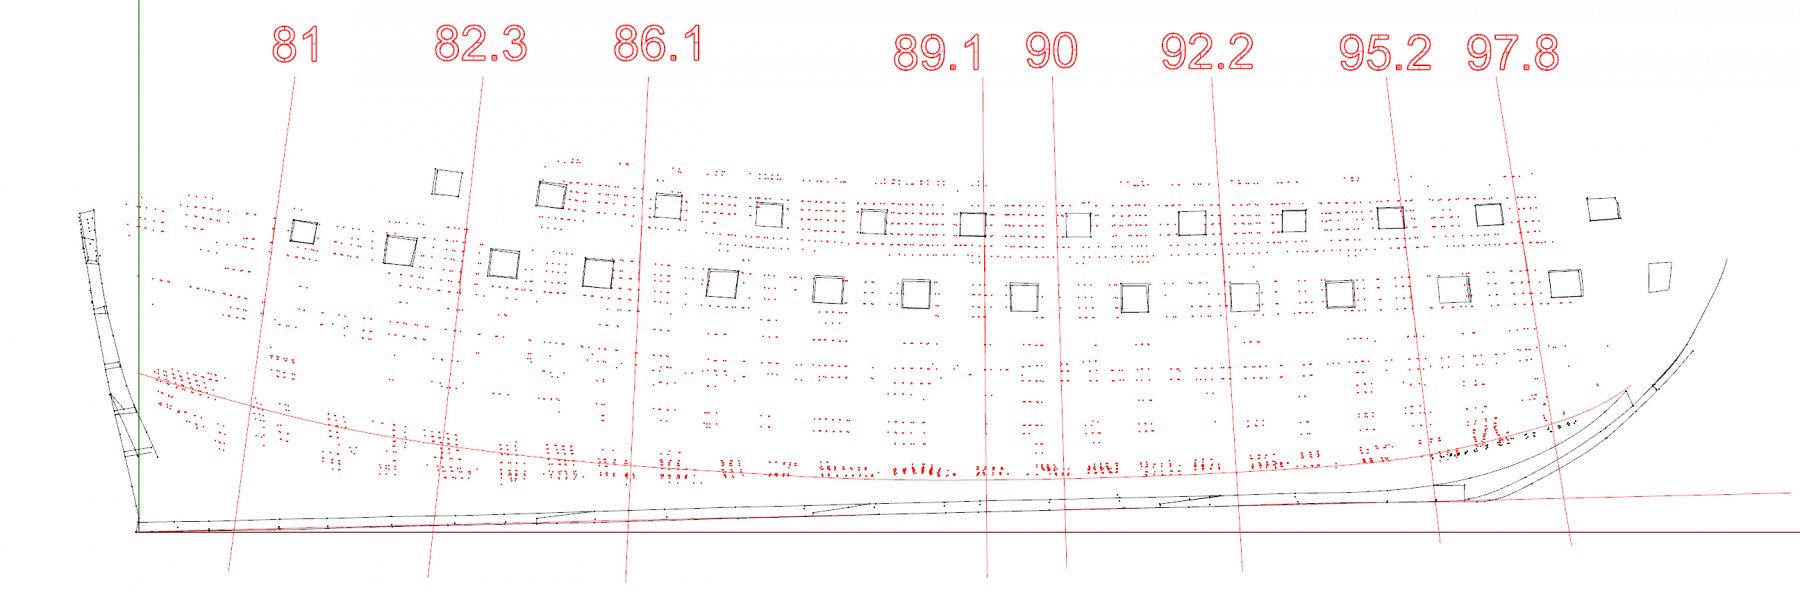
Gunports now following the curve of the (second) hull planking:
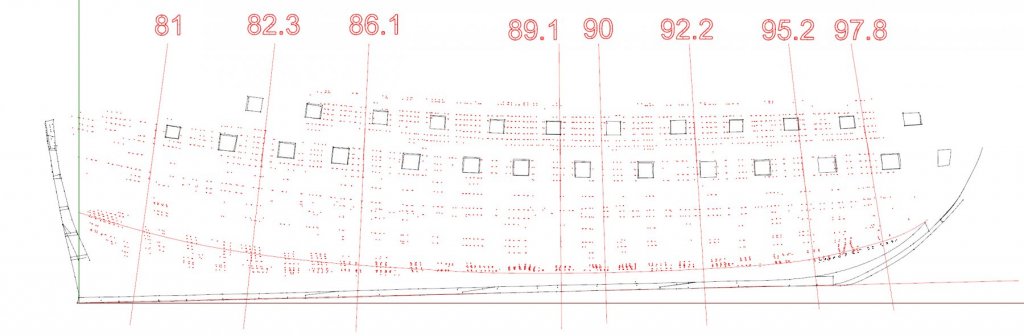
The line was determined by measuring from the gunports.
This is the curve the second planking will follow.
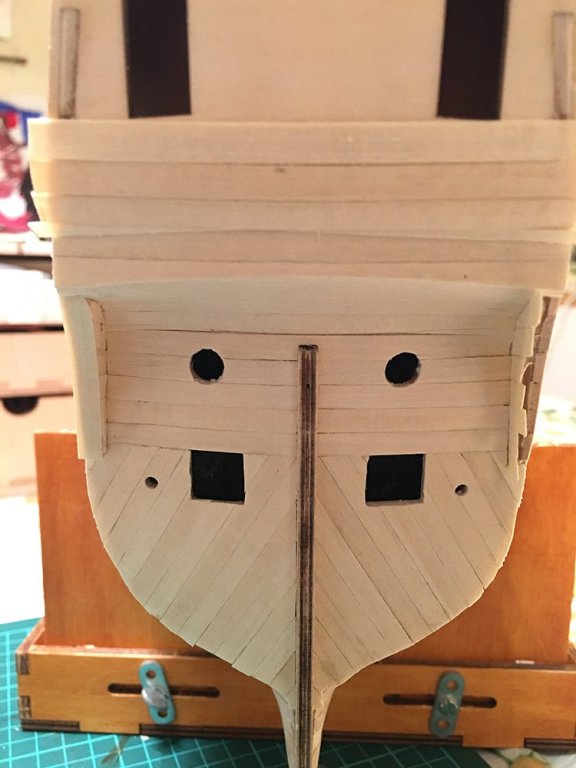
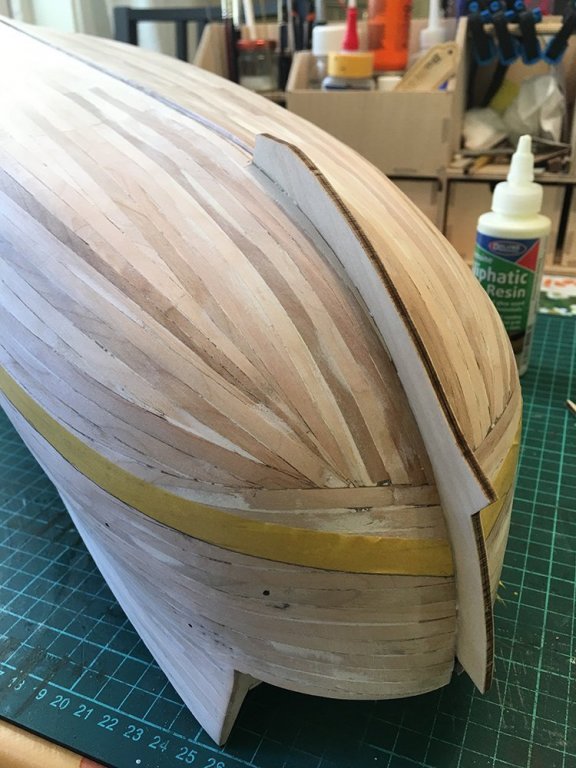
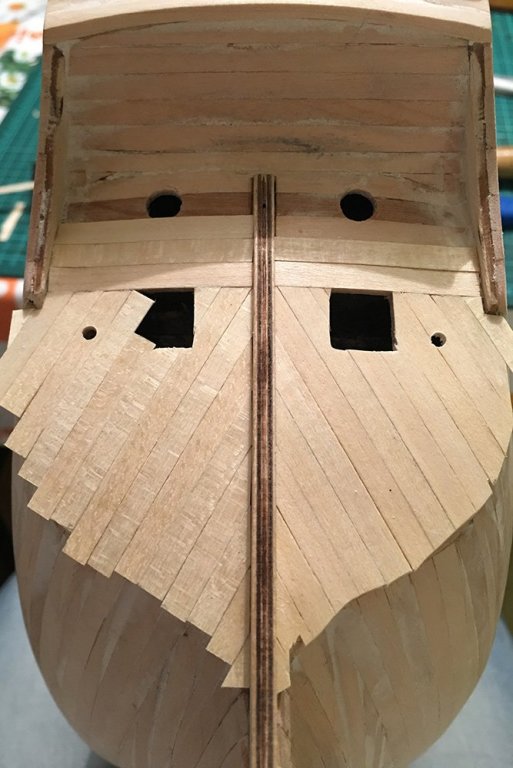
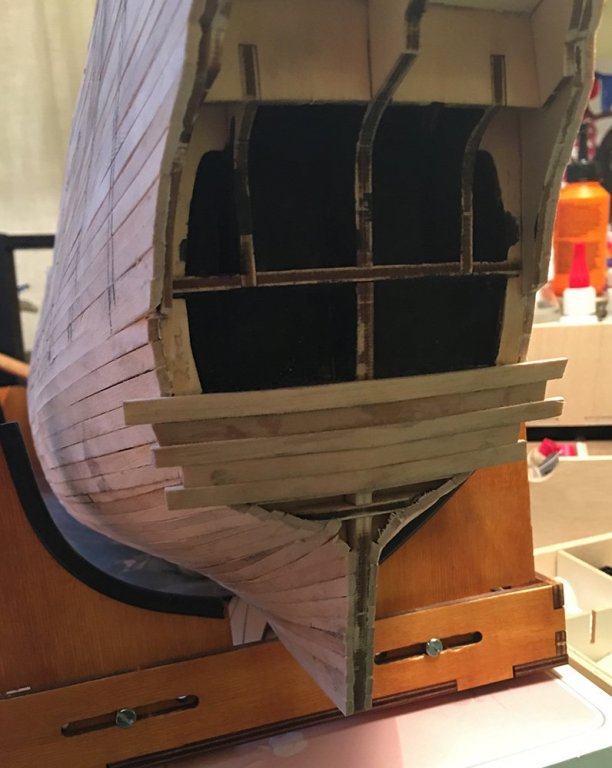
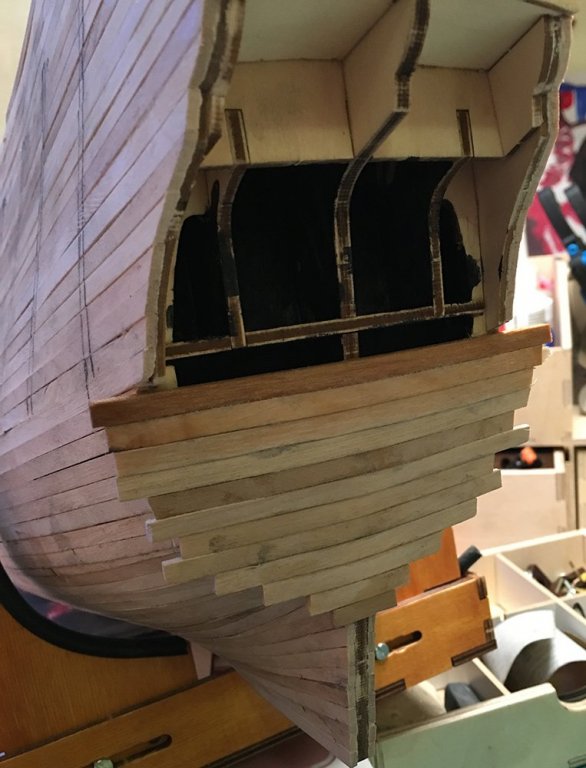
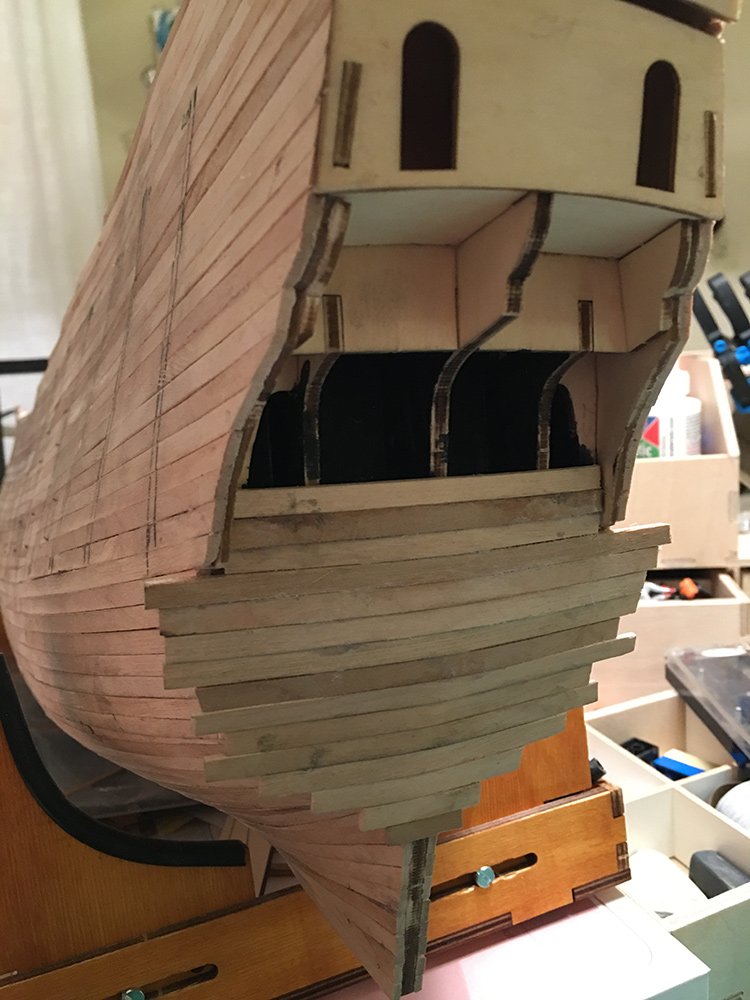
Started second planking of the stern:

I had ordered planking screws from Germany to aid me in this, but the Swedish post decided to misplace my shipment.
Seems as all they can do is do a search on the computer (as we do at home with a tracking number).
And when I asked when they would get someone to look for it they answered after a brief silence that they don't do that...(!?!)
Thats service!
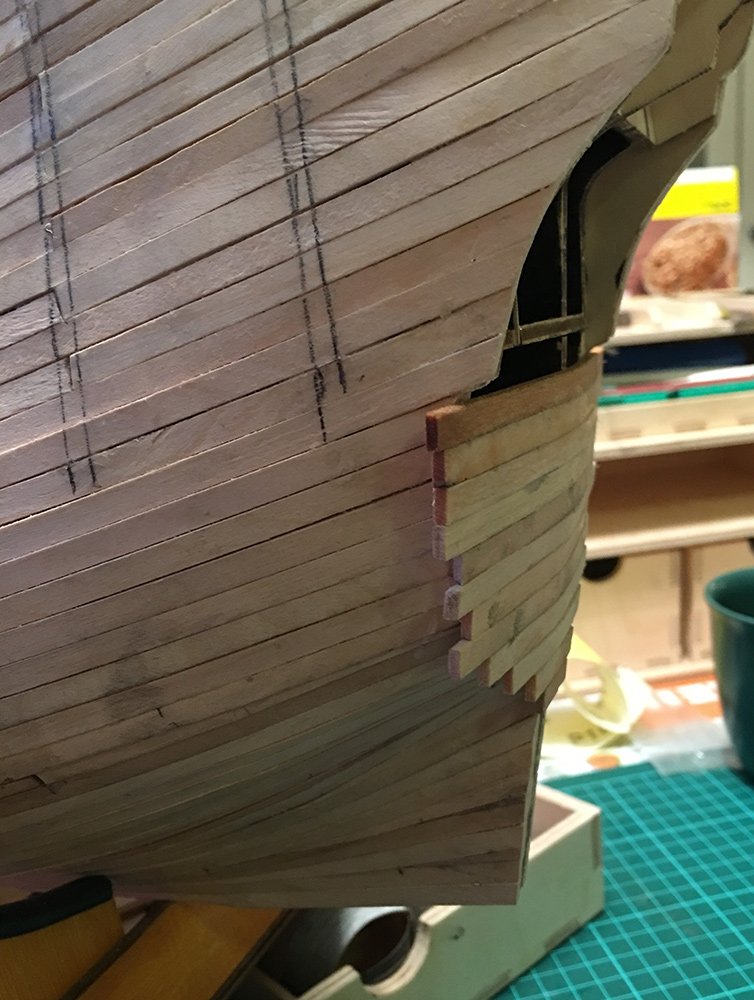
Anyway, a combination of CA and wood glue made the strips follow the curve of the stern:

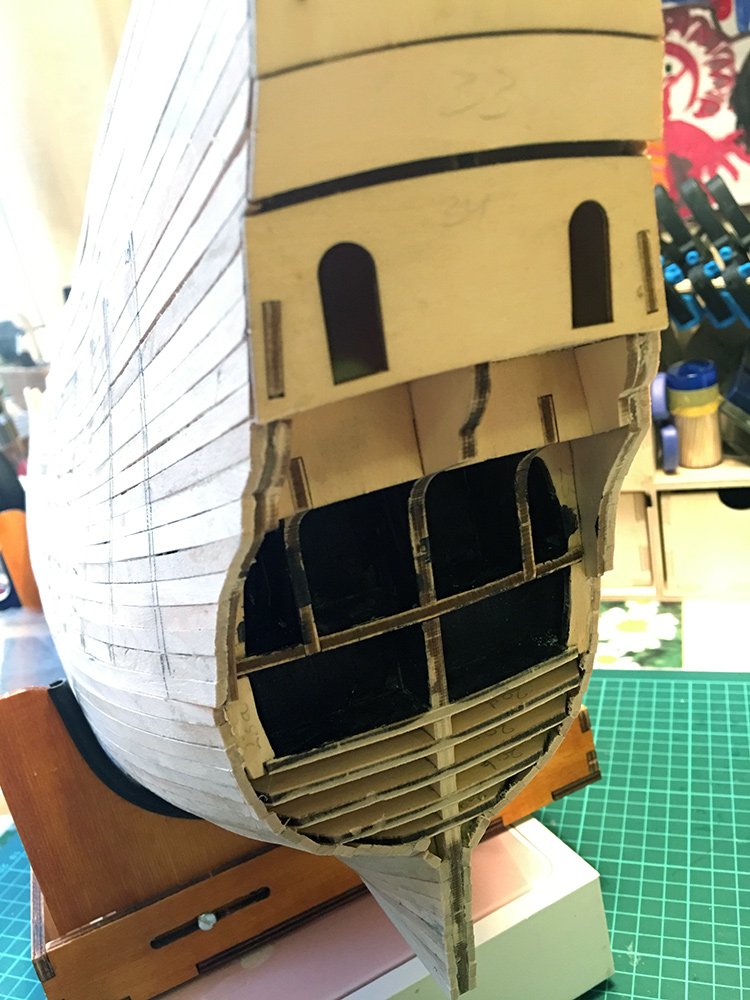
One side (almost) finished:
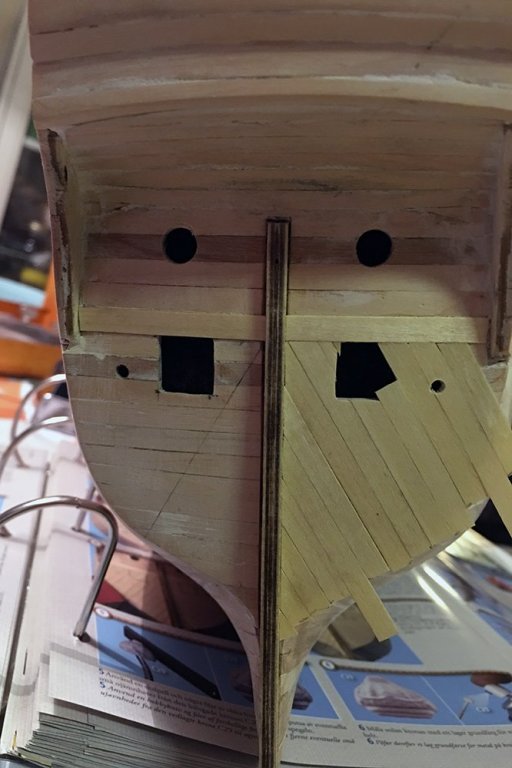
Gunports will have their finishing touch later on:

And lower part done:
Now I will work upwards to the top of the stern, and I have 50 gunports to open up

- md1400cs, marktiedens, EJ_L and 3 others
-
6
-
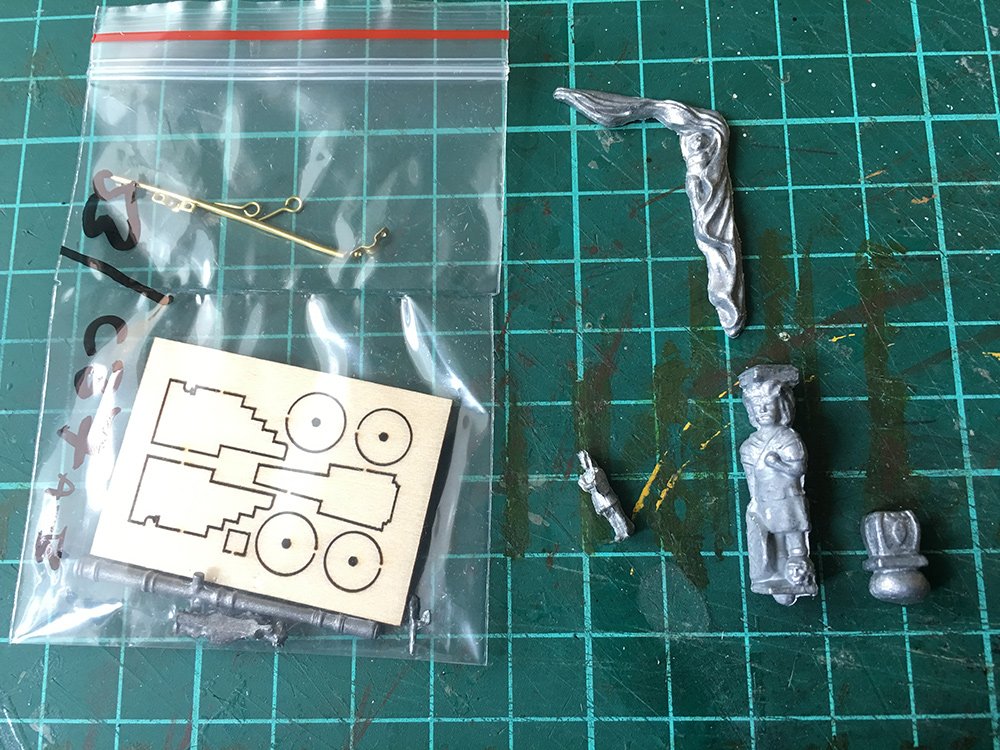
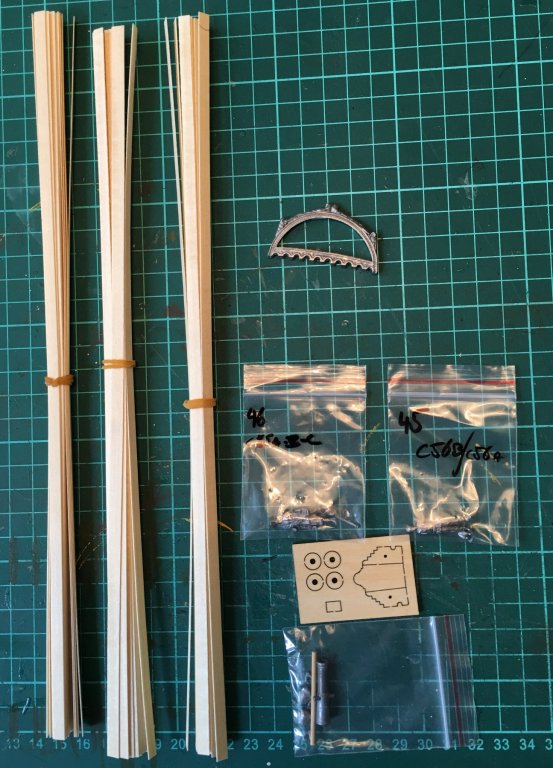
New Shipment!
A lot of second layer planks. (0,5X5mm) and more decorations
The 2 pieces on the right are swans
Also done lots of filling/sanding/filling and sanding again.
Getting there slowly. I would recommend to do the planking with something else than the supplied bamboo.
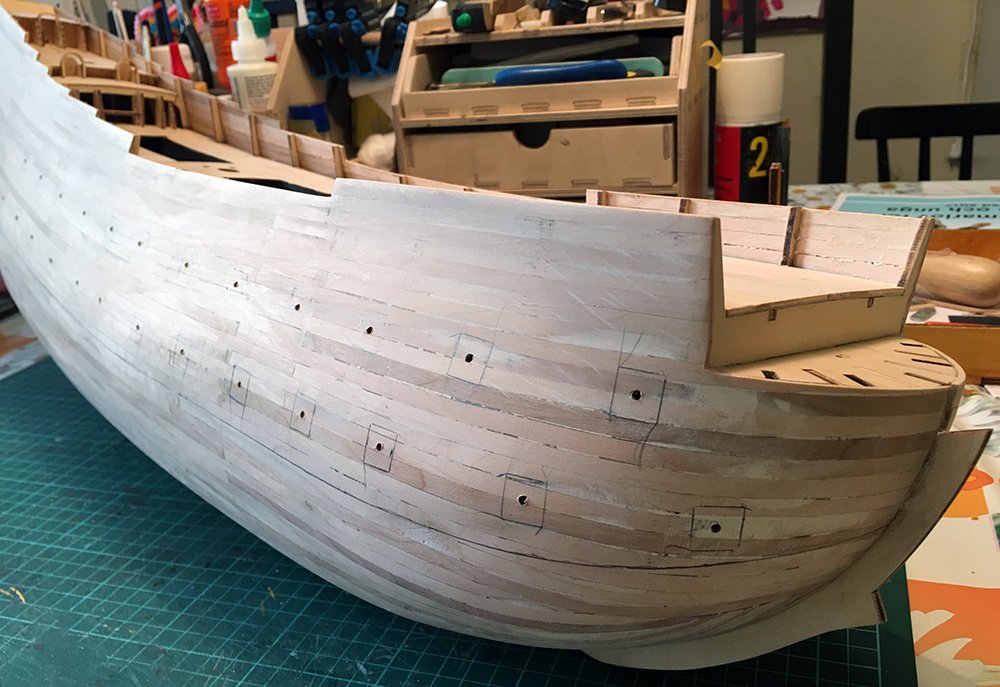
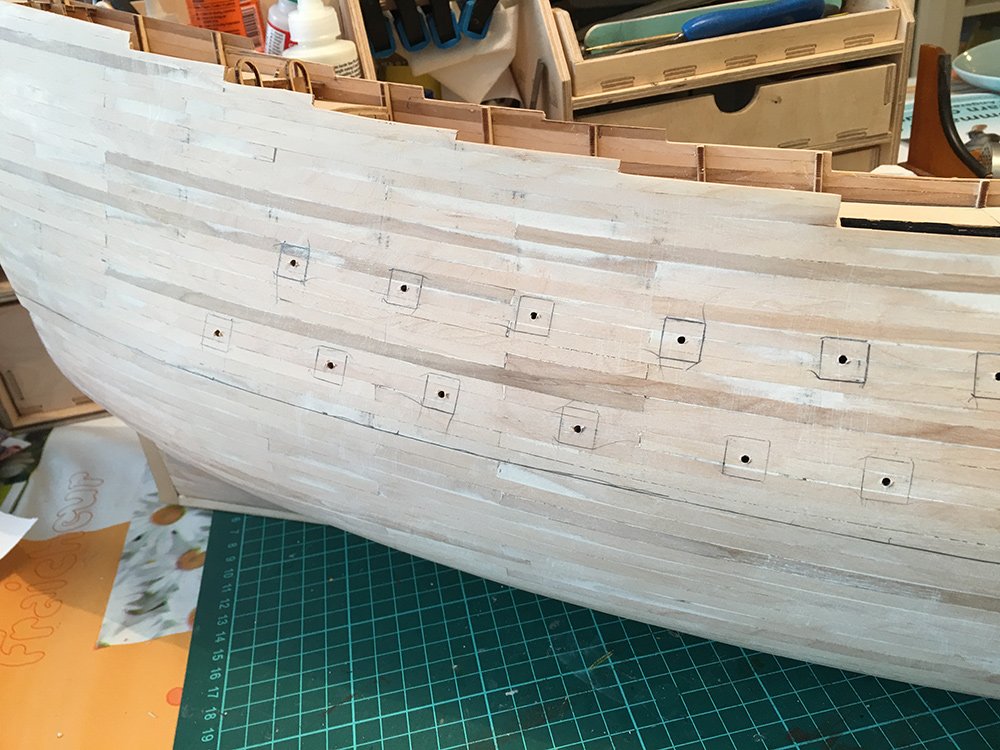
I decided to go along with the 12X12mm size of the gunports. The placing of them seems ok so I have drille the center hole and can rotate the gunports to follow the wale. DeAgostini gives the measurement where that wale should go by making a mark so and so many mm from the lowest ports. So that is what I will follow when sanding is done. Sorry for the delay but family and model building is not a good combination
- MarisStella.hr, zoly99sask, EJ_L and 2 others
-
5
-
Thank you Vivian ☺️
One of historys great fails. Sweden in a nutshell
- zoly99sask, EJ_L, Vivian Galad and 1 other
-
4
-
That time of the month again...
This time I got:
A bunch of 0.5x5mm planks, one "stormstycke" , a stern decoration and 2 little sailors:
The 2 sailors(Whatever they should be good for). I don't think I'll include them in the build.

Building is slow at the moment, life and stuff coming in the way.
Will update once something interesting happens...
- zoly99sask, EJ_L and Jörgen
-
3
-
I found some useful info on an Italian forum. A builder has measured the gunports from the museum plans and converted them to this models scale.
The placement of the ports is pretty accurate on the template at least... you only have to resize and rotate them.
-
I think it took almost 6 weeks before the first issue came. But after that it settled on every 4 weeks.
3 years is a long time to wait... but not a bad idea. I could never wait that long though... If you are patient starting the build when you have 40 issues is a good idea. It will spare you some problems with alignment of the frames.
You can still paint all those decorations....
Templates came with issue 41.
We'll see what more faults this model has, but luckily we are on a forum where other members are kind enough to guide us in the right direction.
Thank you for your kind words, and I will finish it...
-
Thanks Peter,
I'm not too worried about the accuracy of the model, as you said it's enough for my purpose. But the ports was way off,
No plans what so ever! Not even a picture of the finished model. That is the downside of this build... no chance to plan ahead. You don't even now what parts will come next month. I still have 2 strips from the first shipment that I have no idea what to do with. And the main halliard, I too wonder how they plan to do this... And no measurements. When placing the templates one is to count 17 planks down to mark the lower line of the template. If you didn't plank as the instructions you're in trouble.
-
If you soak the planks, don't glue them until they are 100% dry... The dark wood seems like it swells the most when wet.
- Jörgen, Tallshiptragic, WackoWolf and 2 others
-
5
-
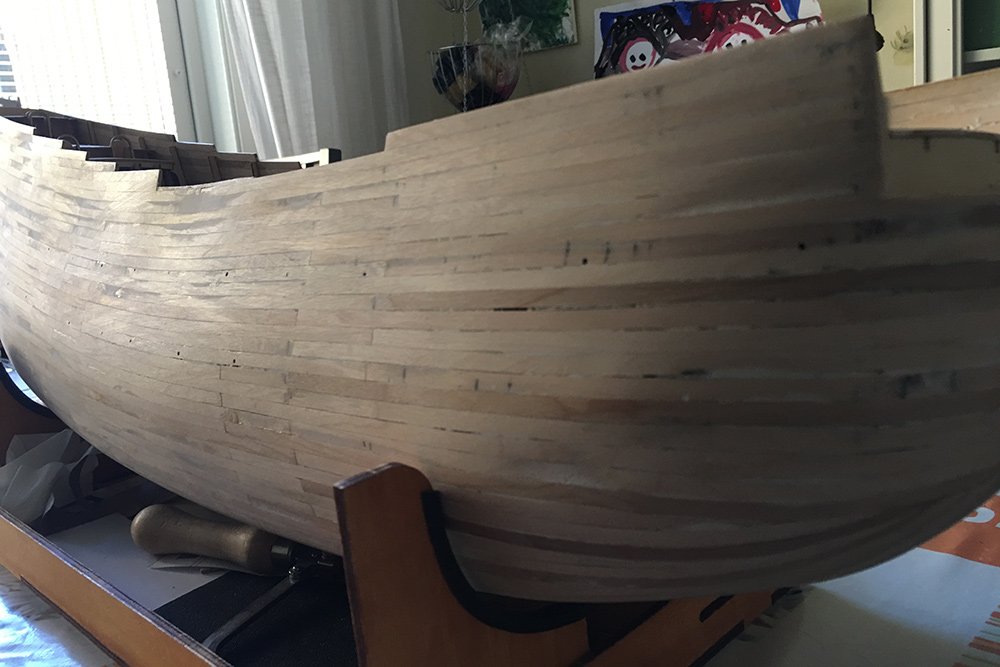
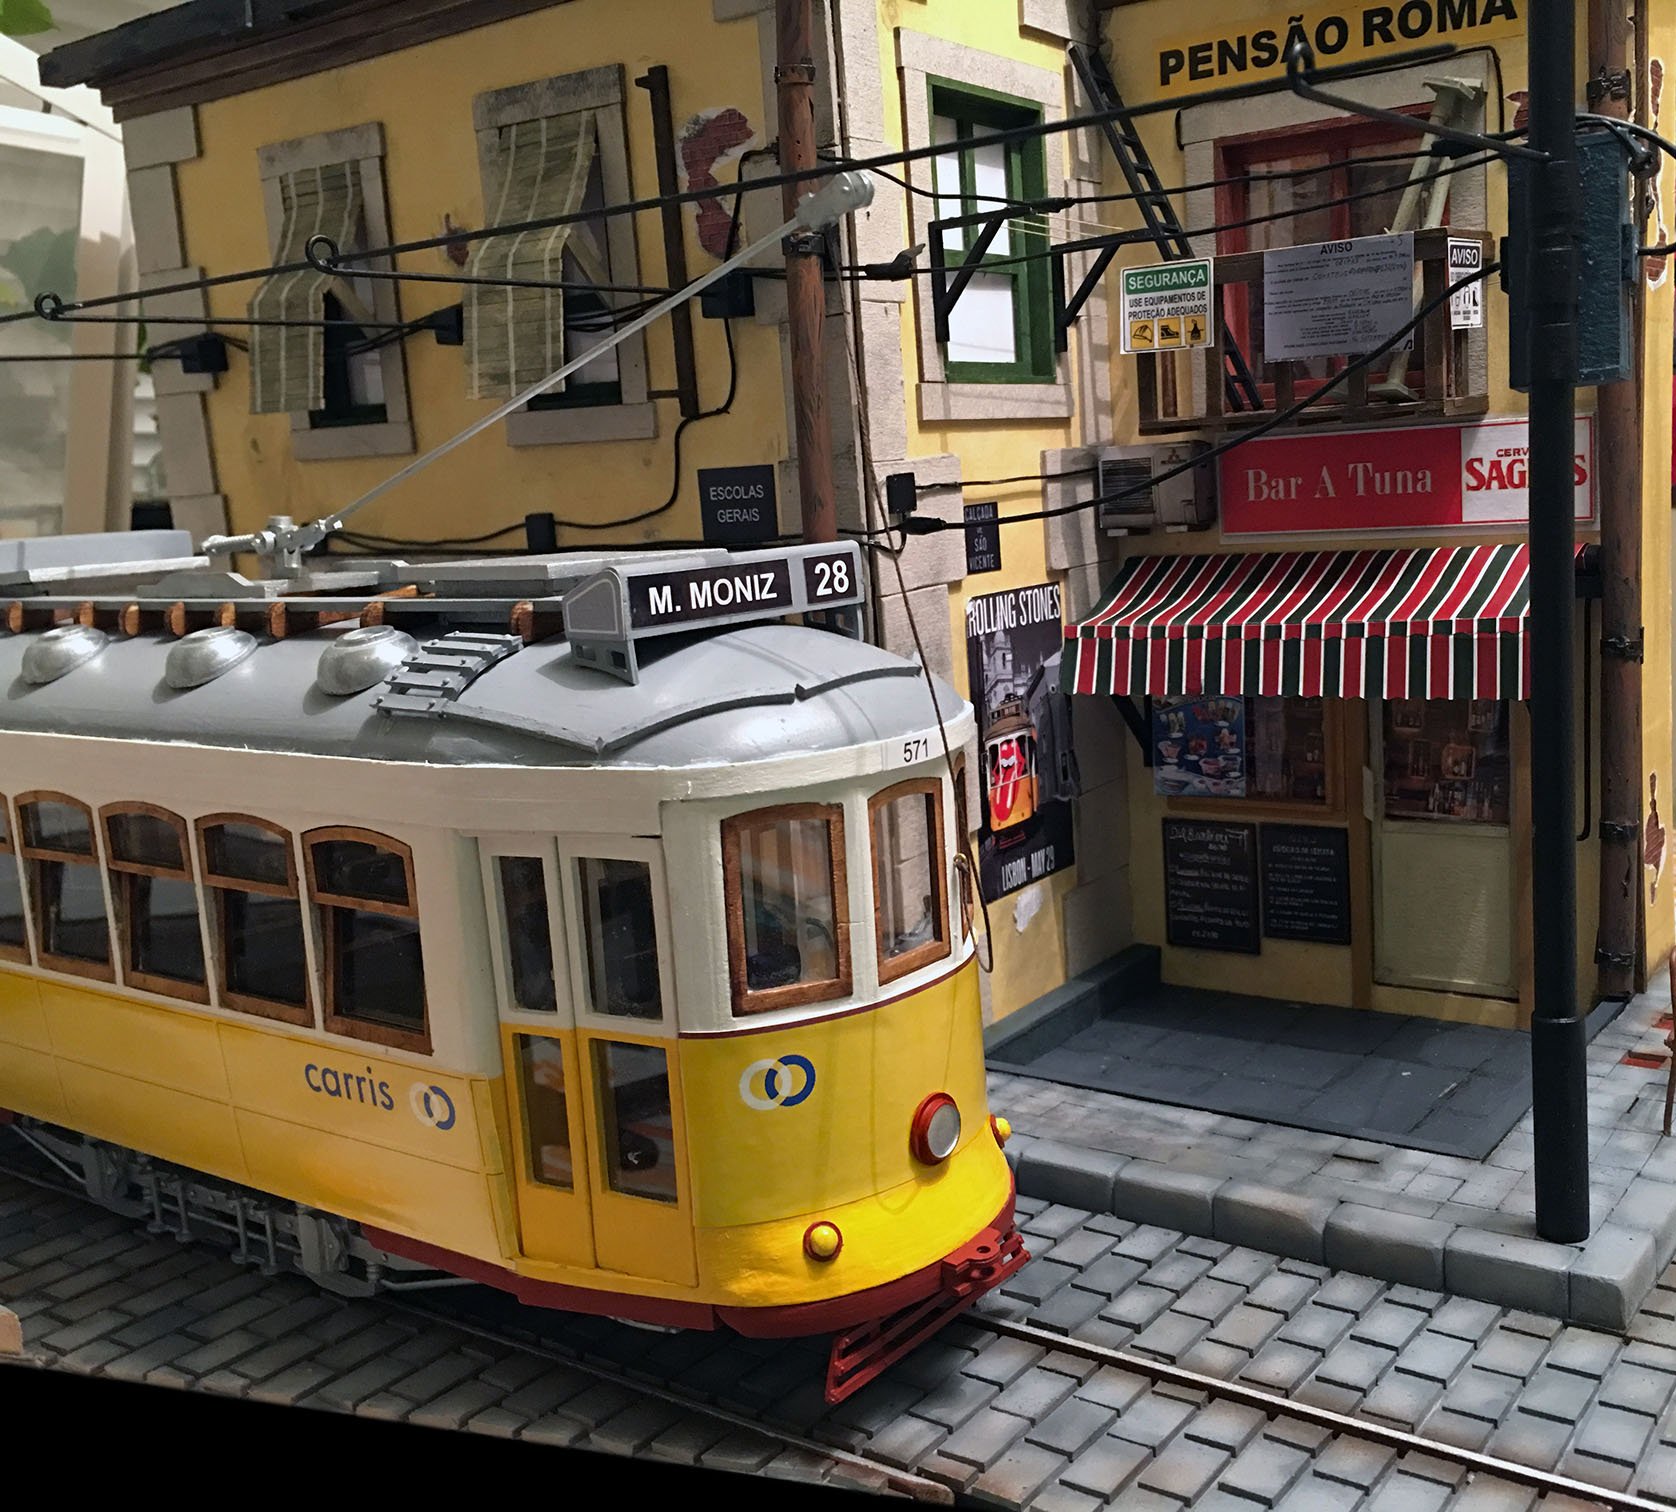
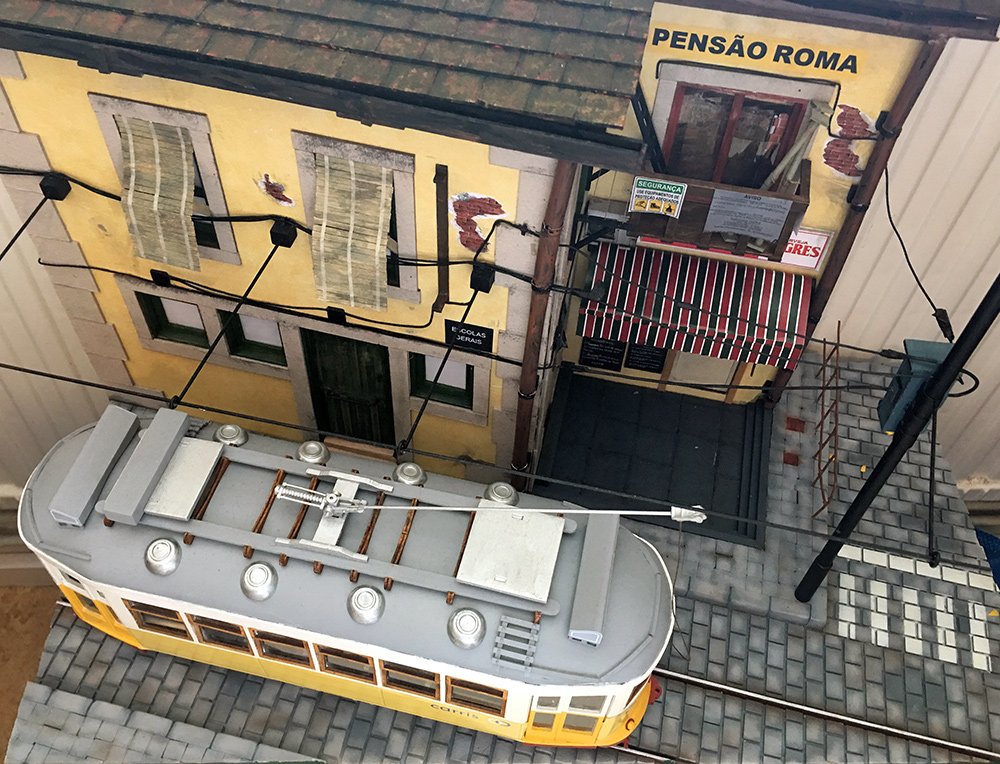
Planking of the stern underway.
First of all cleaning up the details:


And the first planks:


This is how far I got day before yesterday. When I was going to continue the next day the 2 dark strips you see had shrunk so much that there was a 1mm gap between them and the next planks. had to rip them out and start again.
This is my second try:
I discovered that you could use a bending iron without soaking the strips. At least with this small amount of bending.
The planks on the real ship are are angled Upwards quite sharply and hopefully there will be a second layer. I suspect there will be very thin strips... (0,5mm)
- Nirvana, Jörgen, Vivian Galad and 4 others
-
7
-
Thanks for the pic Michael. Looks like the distance between the ports are wrong as well...
That was a letdown. I'll let it be for now...
-
Mark: I thought they looked a little strange. On the 1:10 model from the museum they are a little offset from the wales but not as severe as the templates.
And Peter: There's even more variations on the port sizes:
So with all this in mind I thought I'd just let the port markings from the templates be as is for the time being. It's difficult to alter too much when one doesn't know what DeAgostini has planned.
Thank you guys for the head up on the issue. Easy for me to forget these details if you don't point them out.
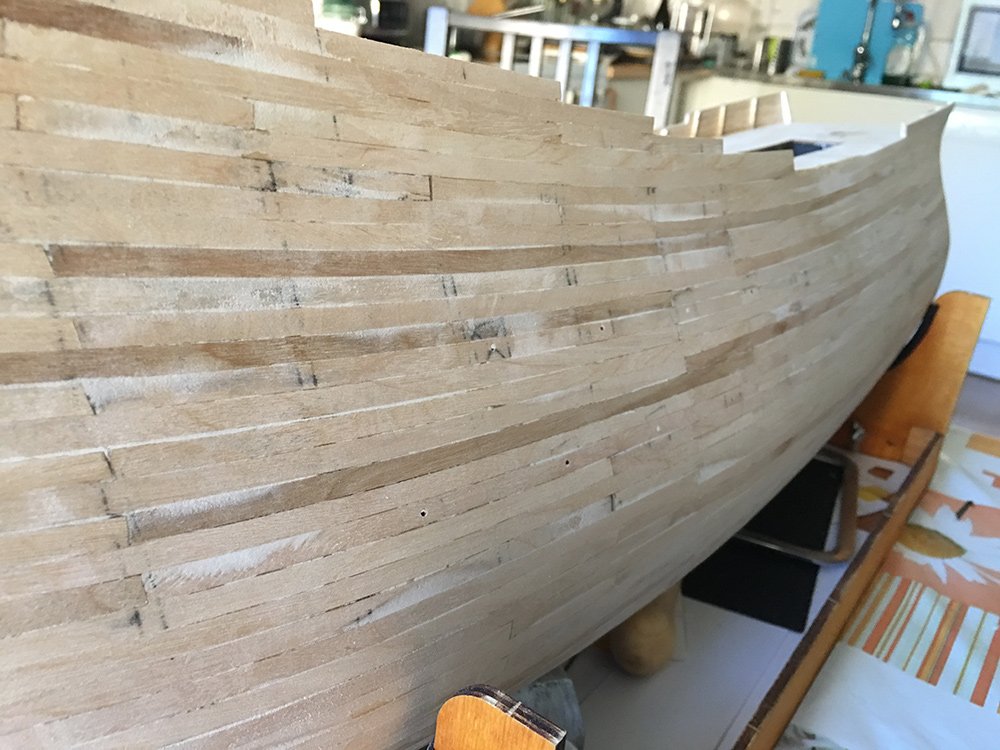
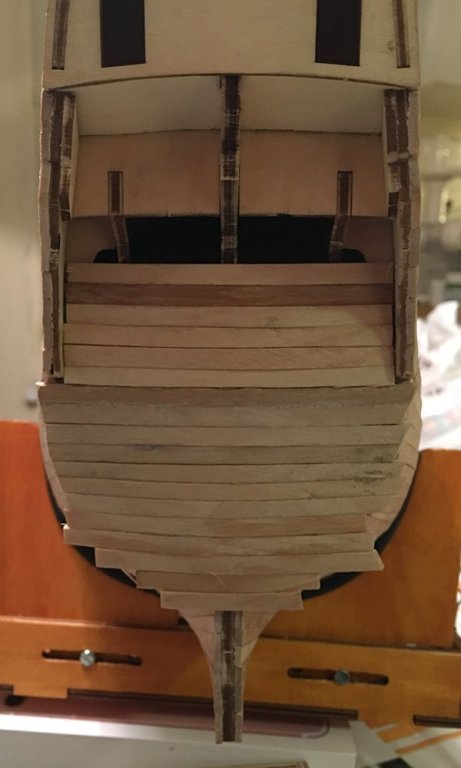
Finished this months planking.
Wonder why they couldn't made the frames just a little higher:
Getting there, she was one big wall of wood:
Even though the bamboo was not the best quality (thickness and width very uneven), and it swells a LOT when soaked, it's very easy to bend in all directions. And sanding is easy too, so I'm sure all those bumps and cracks will be gone after a kilo or two of filler and a couple of weeks sanding...
Now on to planking the stern...
-
-


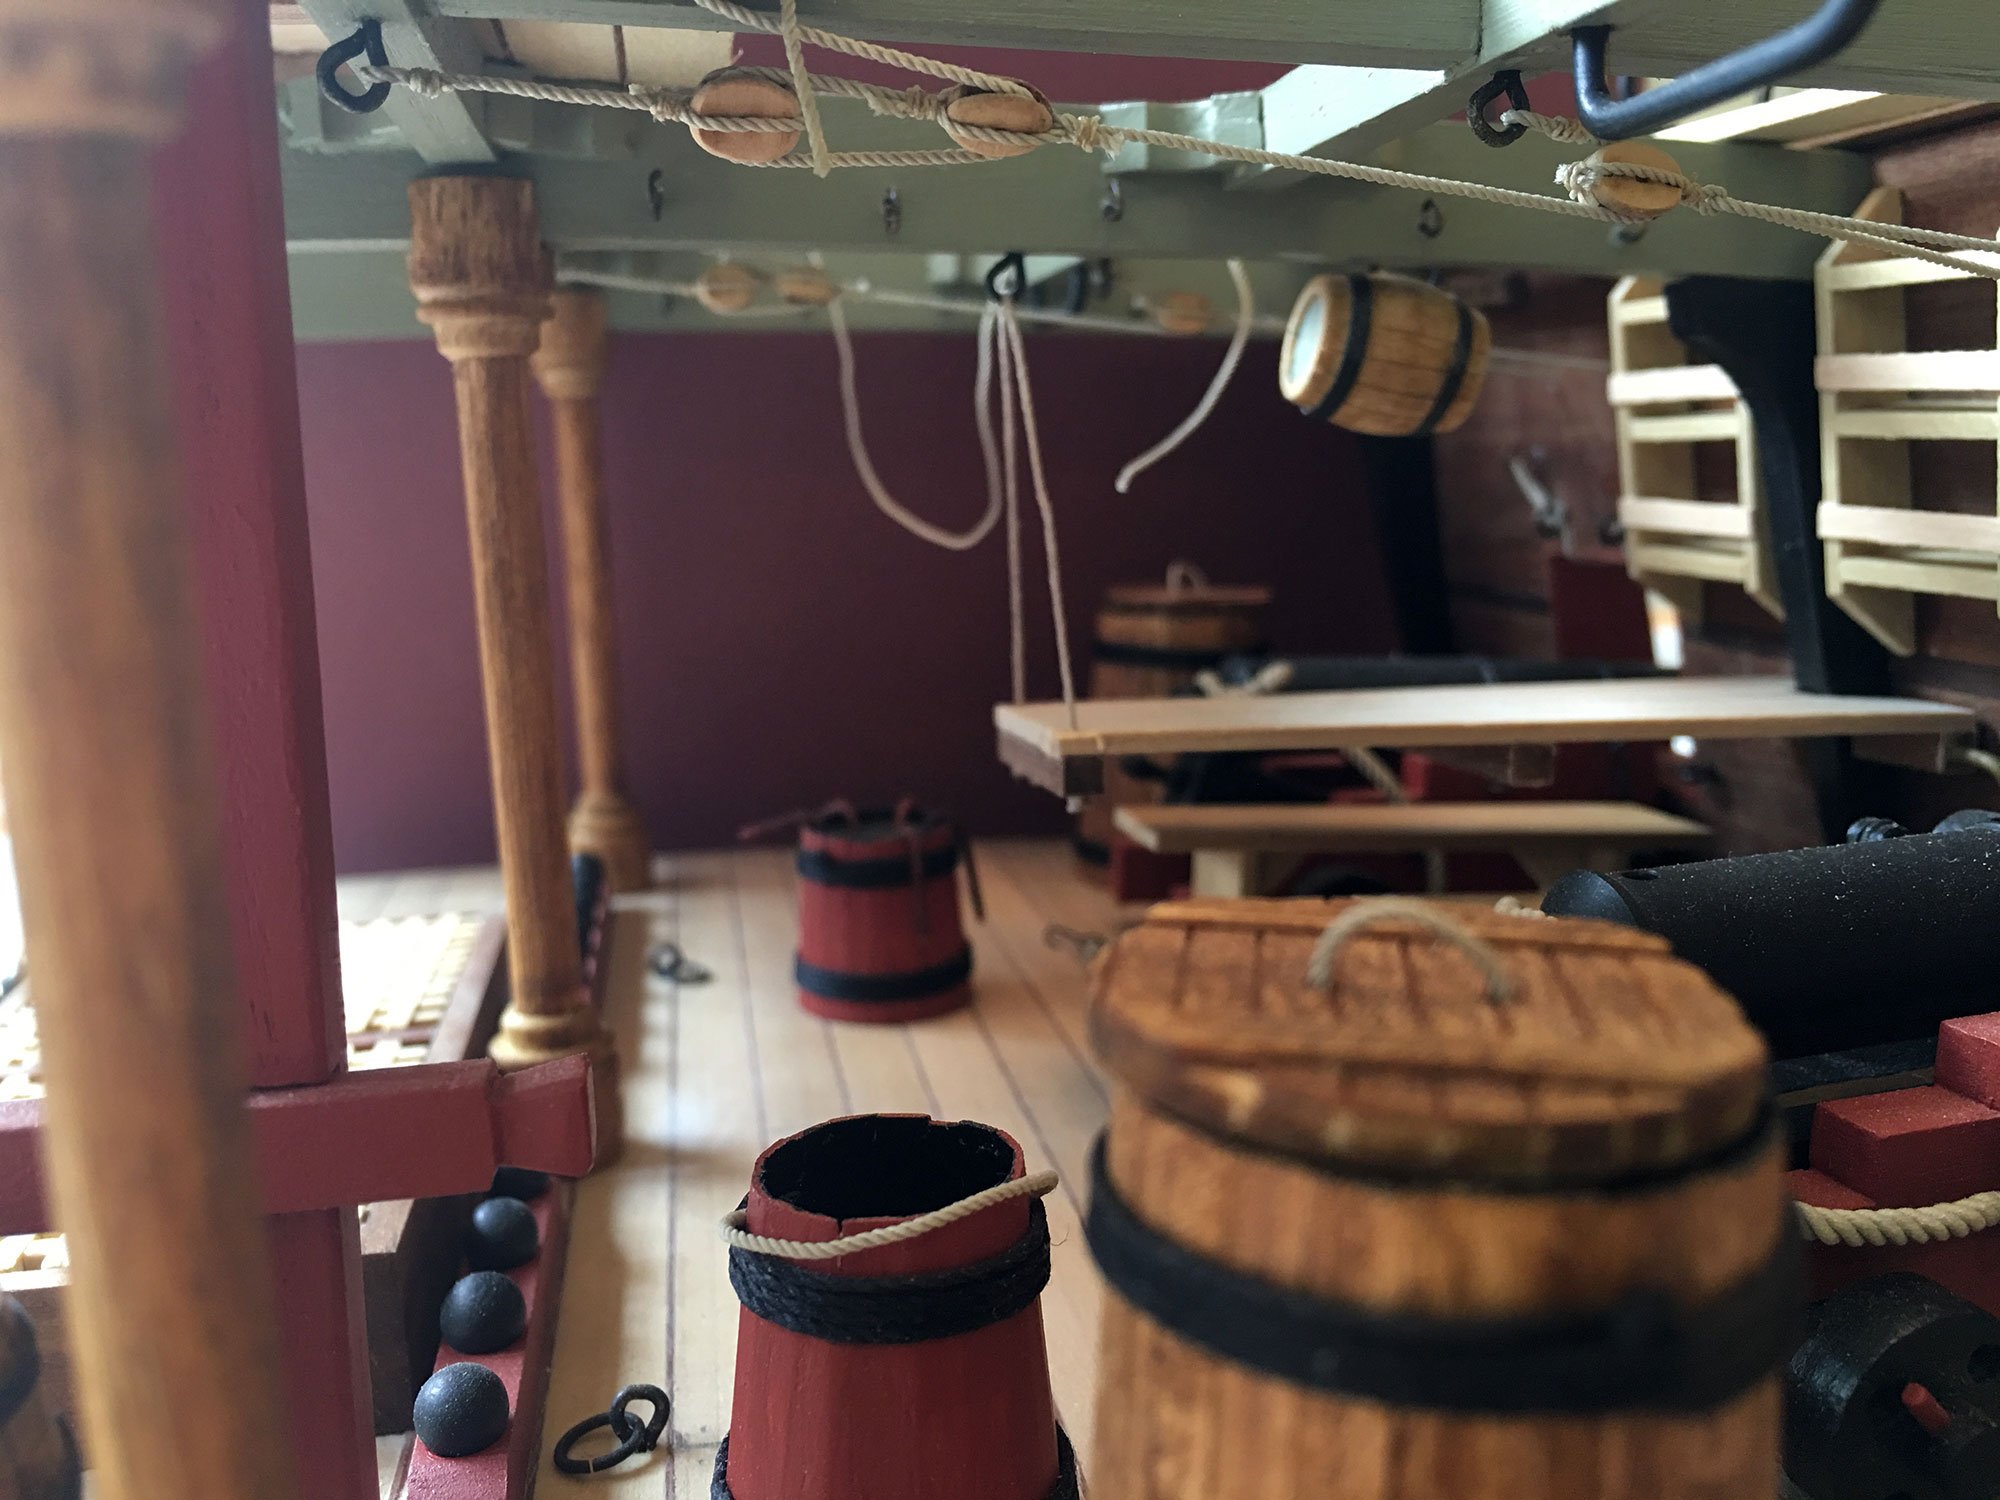
Xebec by puckotred - Amati - Scale 1:60
in - Kit build logs for subjects built from 1751 - 1800
Posted
A new build so I have something to do while waiting for Vasa parts.
I ordered this from Maristella and apart from the excellent service Mr. Pavlovich offers I believe that they offer the best prices in Europe.
My only regret is that I did not order one of Marisstellas own kits instead. But then again I have a reason saving up money for that in the future.
The Xebec is the smallest shipmodel I have had so far. But the rigging is something that I for some reason wanted to try out. And it will be like a practice before I go on with my Pinco Genovese that is more like a semi scratch build from Euromodel Como.
Here's the pics:
Stuff:
They updated the older kit from 1027 to 1427.
There are 4 sheets of plans. 3 and 4 are of the updates.
Instructions in Italian, but there is a paper included with the English translation.
Bits and pieces:
More:
Ships boat:
Wood, Looks like good quality.
And we're underway!!!