


mtaylor
-
Posts
26,273 -
Joined
-
Last visited
Content Type
Profiles
Forums
Gallery
Events
Everything posted by mtaylor
-
Looking good, Keith. I'm curious how this will come out. I've seen other methods but yours is just different enough due to the brass part to make me want to try it.
-
Thanks for the link, Jack. Interesting read.
- 250 replies
-
- 3
-

-
- willie l bennett
- model shipways
- (and 1 more)
-
I think we've all done that... it seems to go with the territory. I'm currently ripping up a deck and reworking it for that reason and it's the second iteration of the deck that's being re-worked.
-
As thin as the 2nd planking is, maybe it's better to not do it? I went the other way on my Wasa... added a second layer of paper thin planks. Unnoticeable.
-
I love her looks, Jack. I have no idea what you're talking about on the lazy jacks, but i'm assuming the rigging. Can't wait to see the sails.
- 250 replies
-
- 5
-
-
- willie l bennett
- model shipways
- (and 1 more)
-
Nice work, Maury. There's the disadvantage of power tools (lathes, mills, and laser cutters). They do the job very well, but the setup and teardown takes longer than the job itself.
- 525 replies
-
- 2
-
-
- anchor hoy
- hoy
- (and 1 more)
-
Filler for Natural Wood?
mtaylor replied to mikiek's topic in Building, Framing, Planking and plating a ships hull and deck
Put a coffee filter on the end of the hose from a vacuum cleaner using a rubber band. Preferably not a shop vac as it's too powerful. Fire up the vacuum (hoover to our Brit friends) and then sand while sucking up all the dust. It'll collect in the coffee filter. Turn off the vac and dump the collection into a small container. -
Capstan functions
mtaylor replied to MESSIS's topic in Discussion for a Ship's Deck Furniture, Guns, boats and other Fittings
The large one (on the gun deck) was for anchor handling and when set up with the proper blocks, could handle the heavier lines on the main mast including the braces that came in through the side of the ship. I'm also of the belief that it was also used in handling the ships boats. The "small one" was for handling lines on the foremast, possibly assisting with anchor and ship's boat handling as well as the loading of ship's stores. Just curious.. are you doing a build log of her? I'd like to see it. -
Filler for Natural Wood?
mtaylor replied to mikiek's topic in Building, Framing, Planking and plating a ships hull and deck
I use one of two things... either a 50/50 mix of water and white glue with sanding dust to make a slurry or final finish (Wipe On Poly) and sanding dust. Just put the mix in the gap and continue sanding. Seems to work for me. -
Sweet!!!!!!!!
-
Lovely work, Per.. and yes... more photos....!!!!!!
- 335 replies
-
- 5
-
-
- 18th century longboat
- Finished
- (and 1 more)
-
Drakar by cabrapente - FINISHED
mtaylor replied to cabrapente's topic in - Subjects built Up to and including 1500 AD
There's a lot of discussion on how to do these things here: -
Steve.... bummer on the no insert. Hopefully what I posted will help someone else.
-
Planking processes
mtaylor replied to MESSIS's topic in Building, Framing, Planking and plating a ships hull and deck
Model Expo used to sell that book, Cristos. I've also seen it on Amazon. Or go to the top of this planking forum and look at the pinned topics on planking. http://modelshipworld.com/index.php?/forum/14-building-framing-planking-and-plating-a-ships-hull-and-deck/ There's also a tutorial here: http://modelshipworldforum.com/ship-model-framing-and-planking-articles.php -
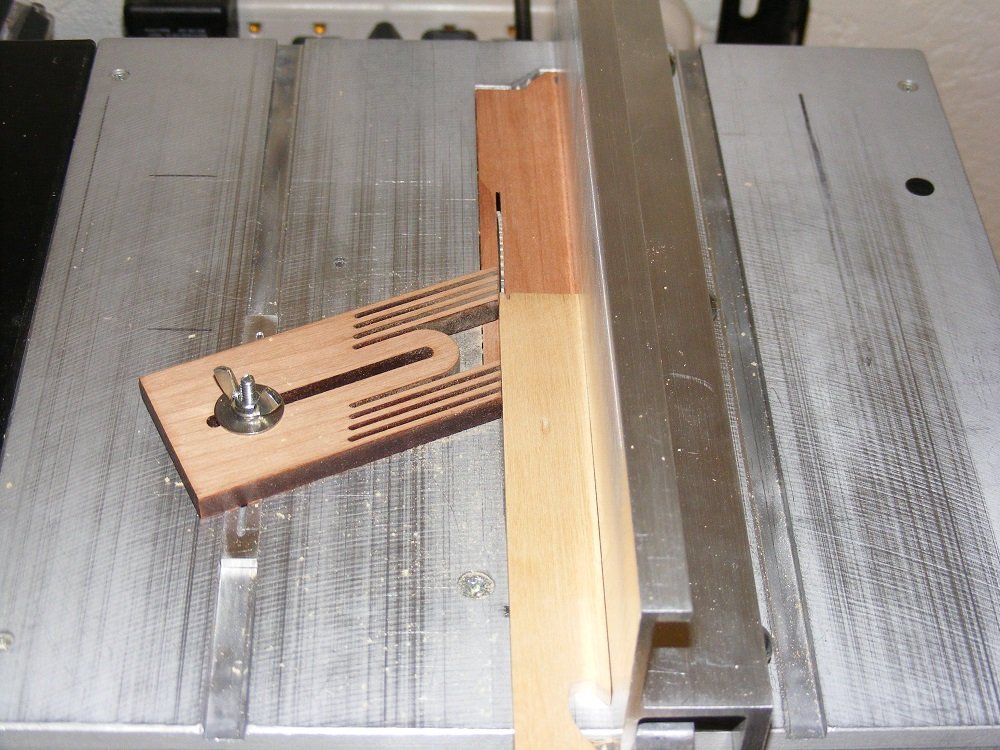
Steve, go the easy way... find a piece of wood or plastic (I have heard of someone using aluminum but not seen it) and make a zero-clearance insert. Cut to fit the blade opening and then just run the blade up through the wood. See picture. I've modified mine and currently it has numerous holes drilled in it. The new shop vac was sucking the insert into the saw and holes relieve the air pressure as well as providing additional dust removal.
-
Are you an NRG Member???
mtaylor replied to Chuck's topic in Using the MSW forum - **NO MODELING CONTENT IN THIS SUB-FORUM**
I'm curious... can the Journal be sent to members overseas as a PDF? Or even stateside? Maybe reduce the dues a bit? By PDF via email it would solve some the delivery problems we've read about like for some, it takes a couple of months to get it to them. -
Hello George,
-
Welcome back home, Michel. New paint, a bit of re-decorating here, but it's still home and glad to see you back.
-
Impressive build, and the lighting really makes the eyes "pop".
- 296 replies
-
- 5
-
-
- chaperon
- model shipways
- (and 1 more)
-
Holy cow.... mind-boggling to say the least. One never thinks of bigger models need a lot bigger wood...
-
It's great to see you back, Walter. You've been through hell, my friend, I hope things hit some normalcy now.
-
Allergies and wood seem to go together. The best advice was above: Wear a face mask to filter the dust (paraphrased). Ebony is nasty but boxwood has issues also. Dust by itself is bad for your lungs. If you've applied paint or a finish to the wood and then need to re-sand it.. definitely wear a mask. Also.. any nut wood can induce serious problems if you are allergic to nuts. Walnut comes to mind but there's others also.