


mtaylor
-
Posts
26,273 -
Joined
-
Last visited
Content Type
Profiles
Forums
Gallery
Events
Everything posted by mtaylor
-
Beautiful metalwork, Nils. The air horn looks like it would work.
- 2,625 replies
-
- 5
-

-
- kaiser wilhelm der grosse
- passenger steamer
- (and 1 more)
-
Piet, I can see all your logs.... http://modelshipworld.com/index.php?/profile/1399-dadodude/&do=content&type=forums_topic&change_section=1 I hope that helps. Yeah.. this is taking some getting used to. In the Question/Instructions area, there's more than a few posts on the upgrade and how to do some things. Read the one on Upgrade Status and then the others.
-
Model Shipway's Paints
mtaylor replied to Worldway's topic in Painting, finishing and weathering products and techniques
Nick.... Google is your friend. Heard of it? -
Rob, Have a look here. A nice jig for holding the shrouds in place while tying the ratlines:
-
Greg, looking at the drawing Gerard attached... yes, they did use variable lengths and next to each other. It appears they used the longest "suitable" planks. I taking that to mean that if they a 50 foot long plank and needed a 22 foot, they find a 22 foot rather than cut the 50 foot one. For strength, yes, longest available. I'm still sorting it out and re-examining the drawings I have for inspiration.
-
Well done on the boats, Bug. They do look great.
- 2,191 replies
-
- 5
-
-
- confederacy
- Model Shipways
- (and 1 more)
-
Well done, Mike. I'm expecting to see Kirk Douglas running fore and aft on the oars... * *I must be older than dirt to make that reference..... <sigh>
-
Amalio, You have done some beautiful joinery on this ship. I agree with everyone else about it being fantastic.
-
It's a brain strain, Greg. But it's also learning which is good. I think I got the random part figured out on the planking butts but we'll see. I'm also sorting out dropblanks and those hook scarfs at the bow (I think it's "hook scarfs") figured out No hands... maybe a battle axe might work. I think this is the right thing to do as I'm learning something new and new ways of doing things.
-
Congratulations Pat. You've made the big leagues as very few modelers ever get a model into a film.
- 517 replies
-
- 3
-
-
- Endeavour
- Artesania Latina
- (and 1 more)
-
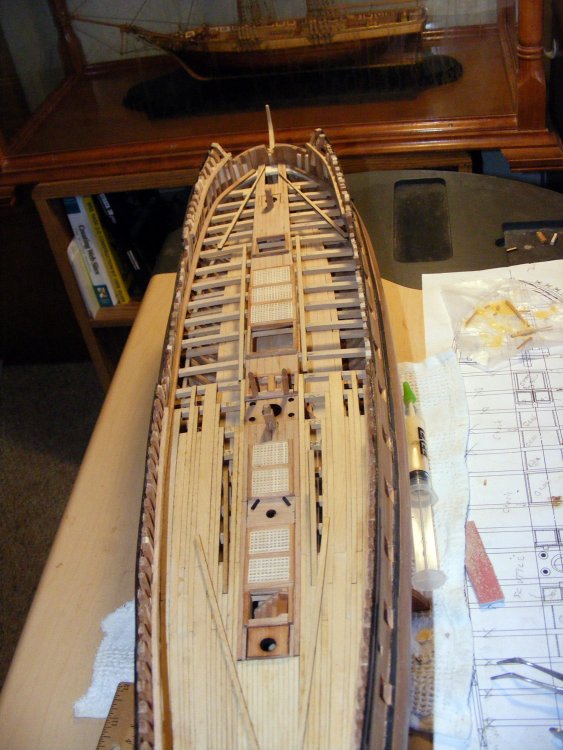
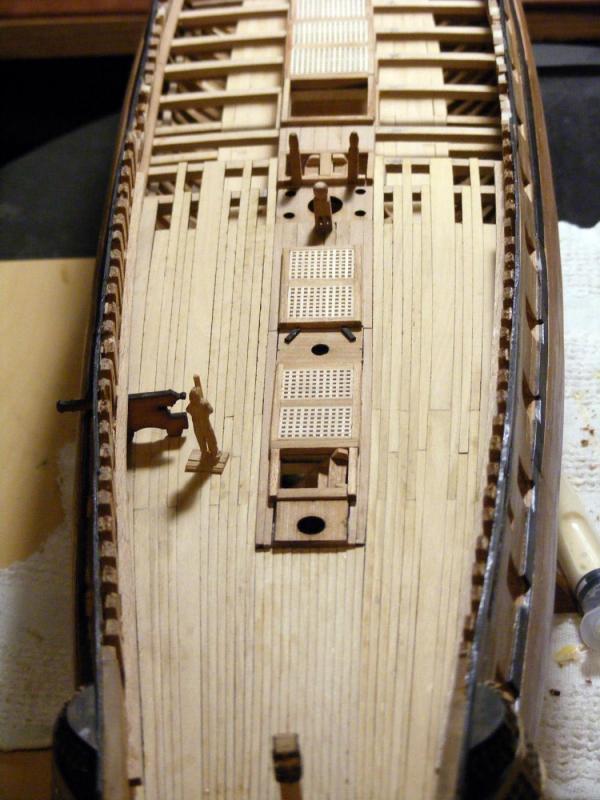
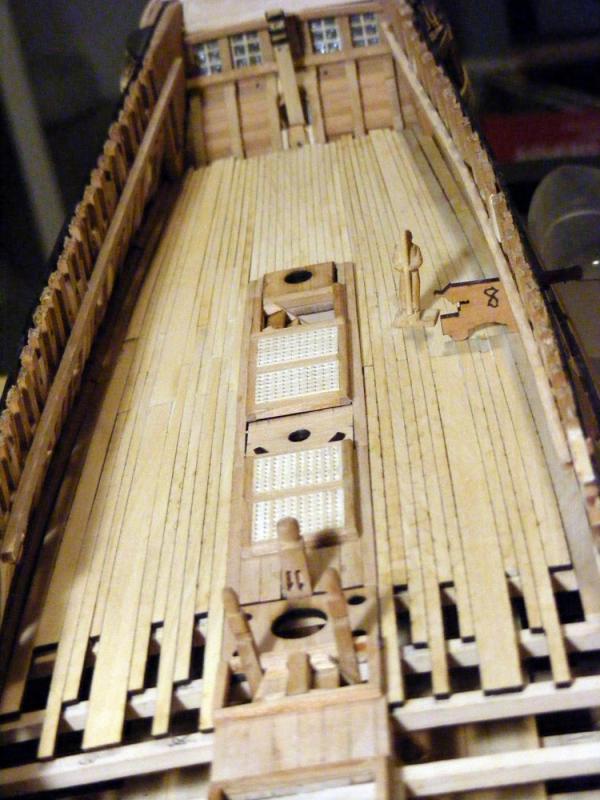
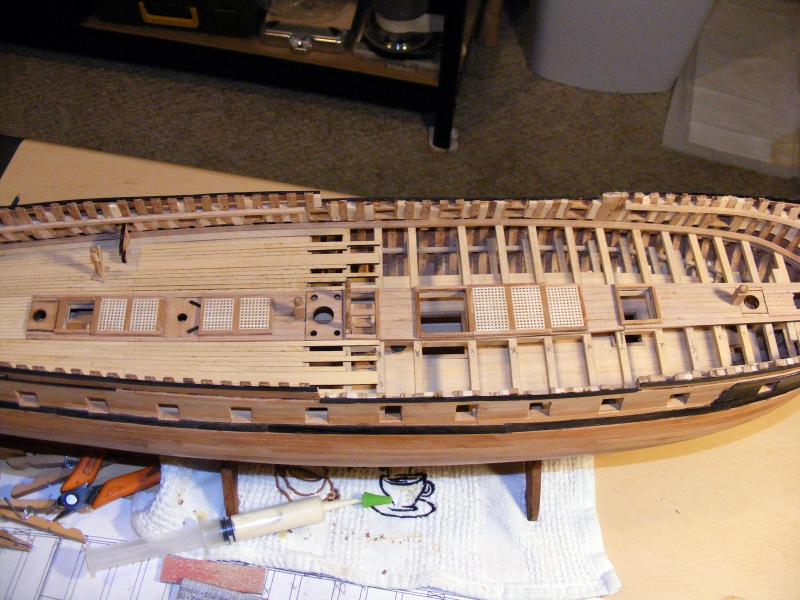
Thanks for the commets, the likes, and the ideas. After some thought, it's now deconstruction and construction time. I figure if I'm not going to do it right, then don't do it at all. In the first picture, you can see where I'm ripping up the deck back aways. There's also the most inboard strake laying on the beams forward. I'll redraw, re-cut, and install one strake at a time on each side and follow Gerard's drawing and attempt the "random" bits as to plank length. I think this will be the best way and definitely interesting from my point of view. Just for kicks and grins, here's the laser cutting those first planks. Feel free, as always, to jump in and point out errors or misconceptions. This is a journey...

-
Hi John, From the PNW, a bit south of you...
-
Max, Is there a website to go look at the products? I'm curious on these and might be interested as I've not found 90 degree cutters without having to pay an arm, a leg, and perhaps a small child.
-
Model Shipway's Paints
mtaylor replied to Worldway's topic in Painting, finishing and weathering products and techniques
I believe the ME paints are the MS paints (same company)... As for tossing them.. test some on the woods you're using. If all that needs to be done is thinning or some other trick of the painter's craft, use them. -
Ah... nope. The planks are glued into place and as each section is finished, I've been lightly sanding them to check the joints. That's true of the English ships for a given time period. American went a bit longer as I recall. The lengths on the French deck planking were a surprise to me as is the random placement. Back to thinking and pondering... and occasionally turning the air blue.....
-
Well, not everyone who looks has the answer. And being worldwide, it may take more than a couple of hours to get an answer. Even differences in timezones here in the States make a difference. Lastly, not everyone checks in everyday. The person with the answers may be offline for a bit. The watchword around here is: patience grasshopper. There's been several builds and they do make some interesting models. I did a quick search on topic titles and here's the result: http://modelshipworld.com/index.php?app=core&module=search§ion=search&do=search&fromsearch=1
-
I'm thinking that might work, Steve. I'll run some tests. If the existing butt joints can be minimized, that would be a solution.
-
"Well... this is a fine mess I've gotten myself into, Ollie..... " -Stan Laurel I finally got the pictures off the camera, sized. These are as she sits right now and for the last 2 days. The information from Gerard gives me pause and some deep thought. Right now, I'm wondering if I can "fix" this such that the planking butts are random without causing undo harm to the beams, my sanity, etc. The catch is the quarterdeck ends just after the main mast. I could random butt joint from here forward as the butt joints where the cannon and mastershipwright are would not be seen from above but the ones at the main mast area will be visible. Forward, the butt joints show up well before the forecastle so they'd be out in the open also. There are ladders, ship's boats, and cannon in the open area between quarter and foredeck but not enough "things" to hide the joints. I'm going to think this through and fiddle with the drawings and if I think I can pull this off (maybe strip back some of the planks) and make it "random" I will. i'll try to salvage as much of the planks as I can since I already have the rest of the gundeck planks cut and hate the idea of tossing them all out. If I can't.... I'll just have to go with what I have. Any thoughts, advice, etc. will be considered and appreciated. Anyway... pictures. The dummy cannon is being used to see if there's any problem with gunports and decking. So far, so good, or so I thought.
-
Ok.. you're right. I've run into that myself and ended up blaming tolerance buildup or tired eyes. Looks from here like a nice recovery.
- 714 replies
-
- 2
-
-
- lady nelson
- victory models
- (and 1 more)
-
You're probably right on loosening the forward shroud. I've read where it was standard procedure on the main shrouds (lowers) and extrapolated that it might work for the uppers also. I"m going back 10 and punt.
-
Bigger is indeed better, Gaetan.
-
Just magnificent work, Igor. I can only imagine trying that, but you do make it look easy.


