mtaylor
-
Posts
26,273 -
Joined
-
Last visited
Content Type
Profiles
Forums
Gallery
Events
Everything posted by mtaylor
-
Dupree, If you haven't yet, check each plan separately for proper scaling and printing size. Use your ruler (and scaling tables) and the scale on the plans. Don't ask how I know this.. but I will say, it was painful.
-
Congratulations on the promotion, Lextin. Well done. I hope you and your family have a very merry Christmas and a great new year.
-
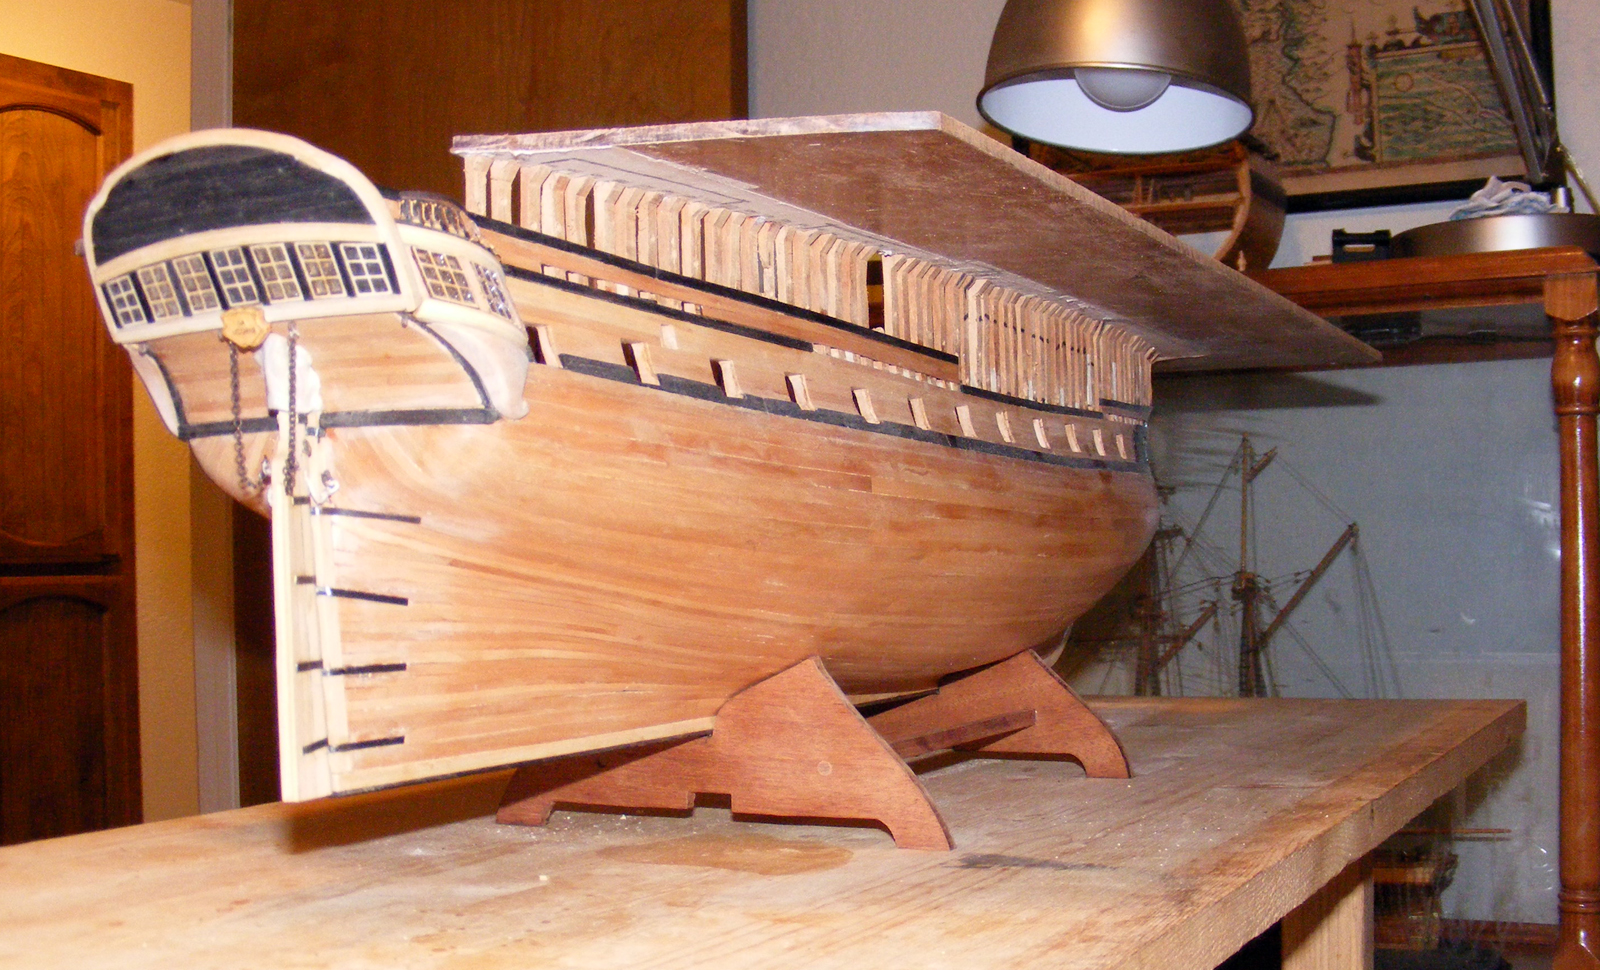
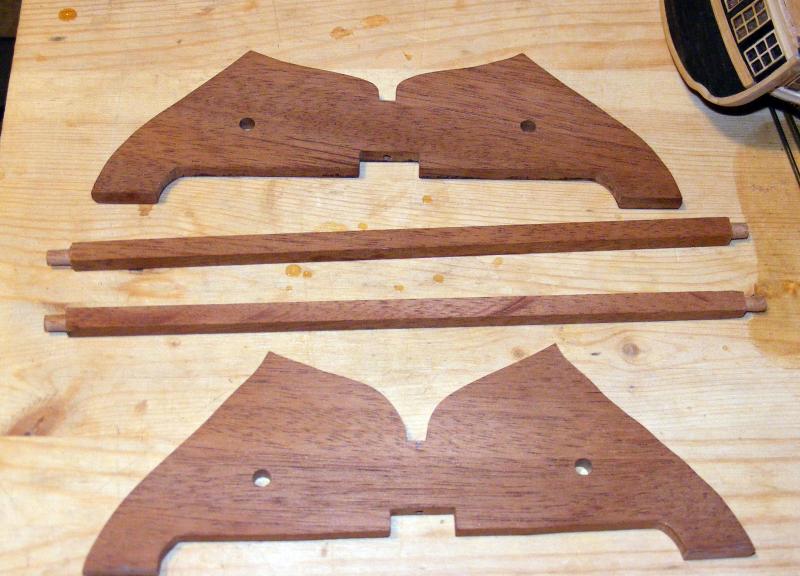
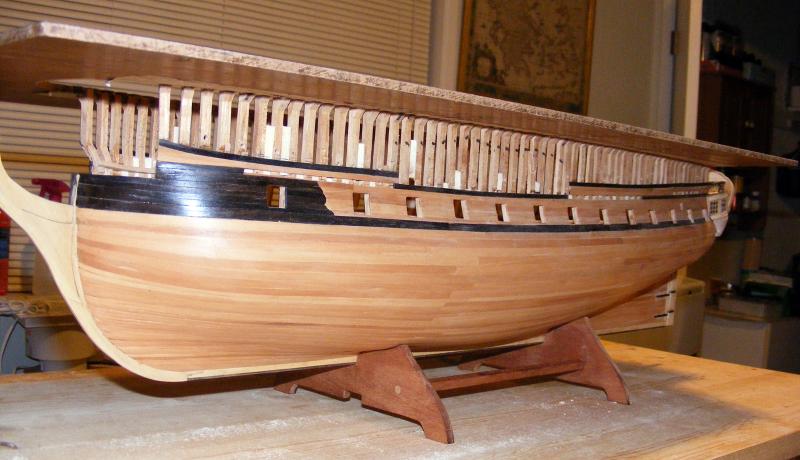
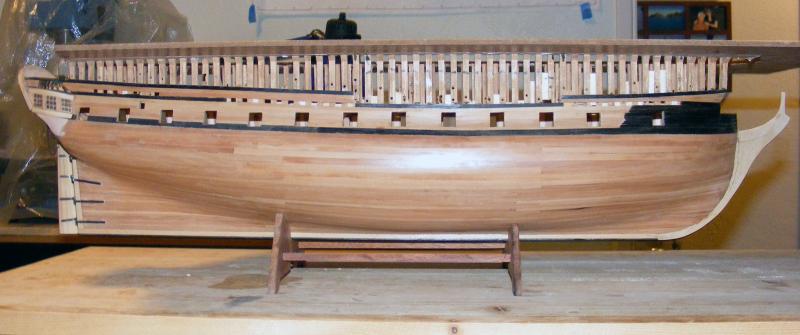
Been a bit since the last update. Thanks for following along on this journey of discovery and sawdust and for the likes and the comments. A bit of a minor/major milestone... the ship is in the cradle... YIPPEE!!!!! The next step is start removing the build board and trimming down the frames to the sheer strake(s). I considered pedestals versus a cradle as I didn't want to stress the keel, etc .nor did I want to attempt to put a large baseboard on at this point. The cradle just seems (to me) to be steadier and stronger. I noted that I do seem to get some wobble on my Constellation which is on pedestals. It could be my method of mounting is faulty or just the way it is with them. The cradle is 1/4" mahogany (see photo). After finessing it into position, assembling it and re-finessing, I drilled a 3/32" hole through the cradle and inserted a brass tube of the appropriate diameter. I mounted the cradle into position, and drilled (using the tubing as a drill guide) a 1/16" hole through the keel, frames and keelson. A brass rod was inserted with a light coating of epoxy. When set, the cradles were set into place with more epoxy on the brass rod and in two places on each end of the cradle. The structure seems sound and steady. I tried to design the cradle so as not to hide the lines of her and I think I pretty much succeeded. At some point, the hole where the crosspieces go through the cradle will be covered by a small carving on each. I'm leaning towards a fleur de lis. Anyway, here's the pictures.

-
Probably closer to the classic: "Oh fudge."?
- 962 replies
-
- 5
-

-
- sovereign of the seas
- ship of the line
- (and 1 more)
-
That was nice of Santa to deliver it early and even help with the unpacking. Looks like a good one too!!!!
- 962 replies
-
- 4
-
-
- sovereign of the seas
- ship of the line
- (and 1 more)
-
Copper coating on my ship
mtaylor replied to estay's topic in Building, Framing, Planking and plating a ships hull and deck
Hi Robert, I hope you will consider doing a build log of her. Any pictures from the past work would be welcome and then just continue from here. This looks like an interesting and unique model. -
Nice work, Sjors. The hammock nettings look perfect.
- 1,616 replies
-
- 6
-
-
- caldercraft
- agamemnon
- (and 1 more)
-
I don't mind, but it's Chuck's call. That's why I mentioned Shore Leave as an alternative. I'm just sucking up all the info I can.
-
How can one not be a wood junky, Mike? I've done some jewelry boxes also my Admiral... a few "big boy" tools are good to have. But not too many as they get in the way.
- 969 replies
-
- 4
-
-
- hahn
- oliver cromwell
- (and 1 more)
-
Jay, At least show the finished work.. if not here then in Shore Leave. Please?
-
Go watch Master and Commander (the battle sequences) for a good idea on how this was done. Jud, Russ. and Allan gave good info.
-
Just marvelous, Dave. I too have watched the progress and your work is incredible. Have two cold ones... one for me since I can't be there to raise one in your honor.
- 962 replies
-
- 4
-
-
- sovereign of the seas
- ship of the line
- (and 1 more)
-
Dion, Snoop around in the Tools area here: http://modelshipworld.com/index.php/forum/18-modeling-tools-and-workshop-equipment/ I've seen several home built table saws. If you don't find anything (use the search feature while in that forum) try posting the question there. I hope your health and that of your wife continues to improve.
-
Pete, Snoop around in the Scratch section also. Maybe a search for gunport and hinges while in that forum and another in the kit forum? I've seen quite a few very well done hinges there as well as in the kit logs.
-
I'll offer two links... The first has some articles on what to expect and how to select a kit: http://modelshipworldforum.com/ship-model-plans-and-research.php This second one has several articles on basic tools along with one article on tools not to bother with: http://modelshipworldforum.com/ship-model-materials-and-tools.php
-
Just a minor setback, Sam. The last of the parts needed will be in tomorrow and once it's back together, maybe I can find my way back to Licorne. She's in this mess somewhere.....
-
Hide wood
mtaylor replied to Don Quixote's topic in Building, Framing, Planking and plating a ships hull and deck
Brian, Carpenter's glue is usually the PVA that's yellow in the bottle. Hide glue is brown flakes and needs the double boiler setup like you described. -
Hide wood
mtaylor replied to Don Quixote's topic in Building, Framing, Planking and plating a ships hull and deck
Brian, Here's a starting post... http://modelshipworld.com/index.php/topic/14147-would-this-glue-serve-a-useful-purpose-in-model-building/ -
Kurt, I can't answer this, but if you don't get answer here, ask it here: http://modelshipworld.com/index.php/forum/14-building-framing-planking-and-plating-a-ships-hull-and-deck/
- 1 reply
-
- 2
-
-
Mike, I'm glad I was able to help...
-
If the second supplier is who I think it is, he believes we modelers wish to "finish" the wood to our own specs (sanding, final dimensions) using our own tools. He does do good work on the finishing (dimensions and sanding) if requested when the order is placed. Anyway, welcome to MSW and the Triton. It's a great project.
-
Bob, The shopvac is for dust in the shop and if needed, water spills. There's not an ember problem per se, but one does need to have a spray bottle of water and a good fire extinquisher handy as sometimes the wood being cut will catch fire. Rule of thumb.. never leave a laser cutter running and unattended. The GFI add-on is due to the water cooling. If there's a leak... all sorts of hell can break loose. We also put external grounding wires on these things. My latest fling with Mr. Murphey points out about being safe.... the water pump died in the middle of high power cut, this caused the tube to overheat and crack.. which between the tube coming apart and some water exiting the tube, took out the power supply and that arcing and sparking of 25kV (tube voltage) took out the controller board. The damage was to the equipment and not to me even though I was leaning on the laser at the time (both hands, watching the cut). Air filtration took care of the smoke that came out of the parts. After repairs are made, I'm adding a water flow/pressure sensor to the system... another hard lesson learned.