mtaylor
-
Posts
26,273 -
Joined
-
Last visited
Content Type
Profiles
Forums
Gallery
Events
Everything posted by mtaylor
-
Cutty Sark by NenadM
mtaylor replied to NenadM's topic in - Build logs for subjects built 1851 - 1900
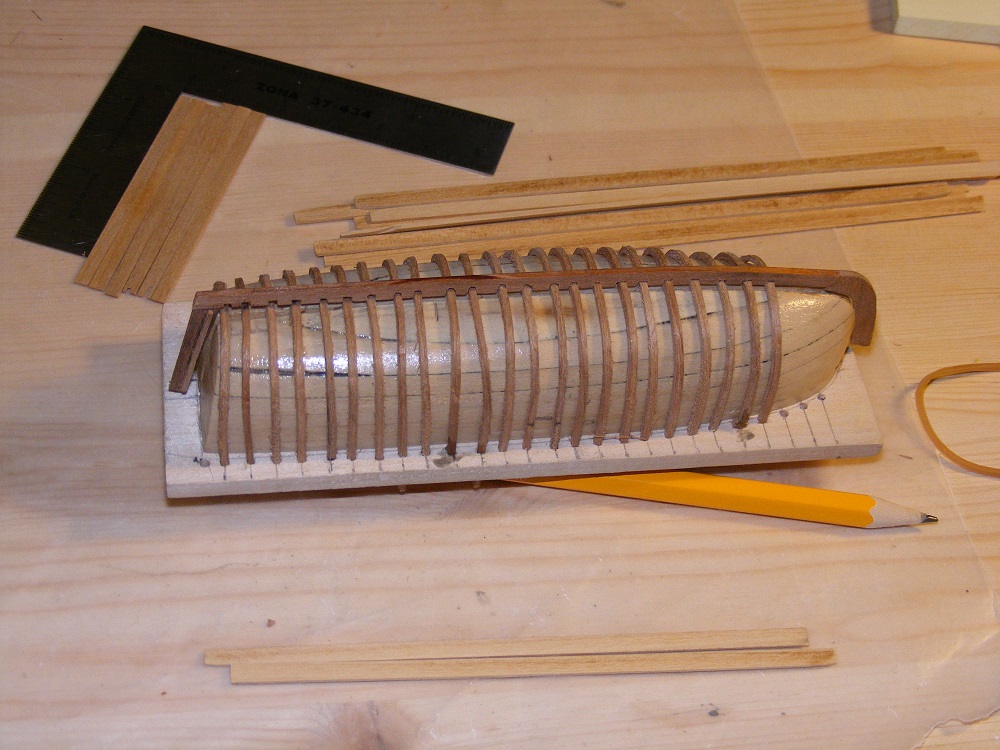
Nenad, Here's a plug with frames being installed. I hope this helps.
- 4,152 replies
-
- 12
-

-
- cutty sark
- tehnodidakta
- (and 1 more)
-
Welcome to MSW and Thanks for your support.
-
I note that wood is not listed on the cutable items... The other problem is water and wood. Watching the video shows a lot of water in the unit.
-
I'm just sittin' here shakin' my head and going "Wow"... Moving along nicely and looking great, Denis. I hope the crud leaves you soon.
-
Thanks for the likes and comments. Progress is still slow at the moment but steady. Simple not to tattoo yourself, John. Keep the lid closed when the power switch is on. I don't follow my own advice always, but luckily there's a safety switch to kill power to the laser tube if the lid is opened. I'm still learning this beast though I do admit I'm hooked and finding more uses every time I look at things to be done As much as I like that idea and have practiced it in the past... not so much these days. I find I'm more accident prone when there's a relaxing agent in my blood. The stairs? I made a jig which is a flat piece with 2 wood strips at right angles. I put the steps to the risers with glue and then finesse it in the jig with some brass clamps to secure them until dry. Everything, when I don't screw it up, comes out nice and square.
-
I'm hearing good things about Maristella and Dusek. Also any kit with a practicum that Chuck did, like Syren, Cheerful, even the longboats. Hopefully you get other answers as the only kits I've had hands on with were AL and Billings... both very bad for beginners.
-
Crude.. I and the others don't think so. And I thought I was harsh on myself.....
-
You might have a look here: http://modelshipworldforum.com/ship-model-rigging-and-sails.php The article by John Tilley. Some of the links are dead as it's an old article but still a very good one.
-
HMS Victory by willz
mtaylor replied to willz's topic in - Build logs for subjects built 1751 - 1800
Very ingenious method of making those pieces, William. -
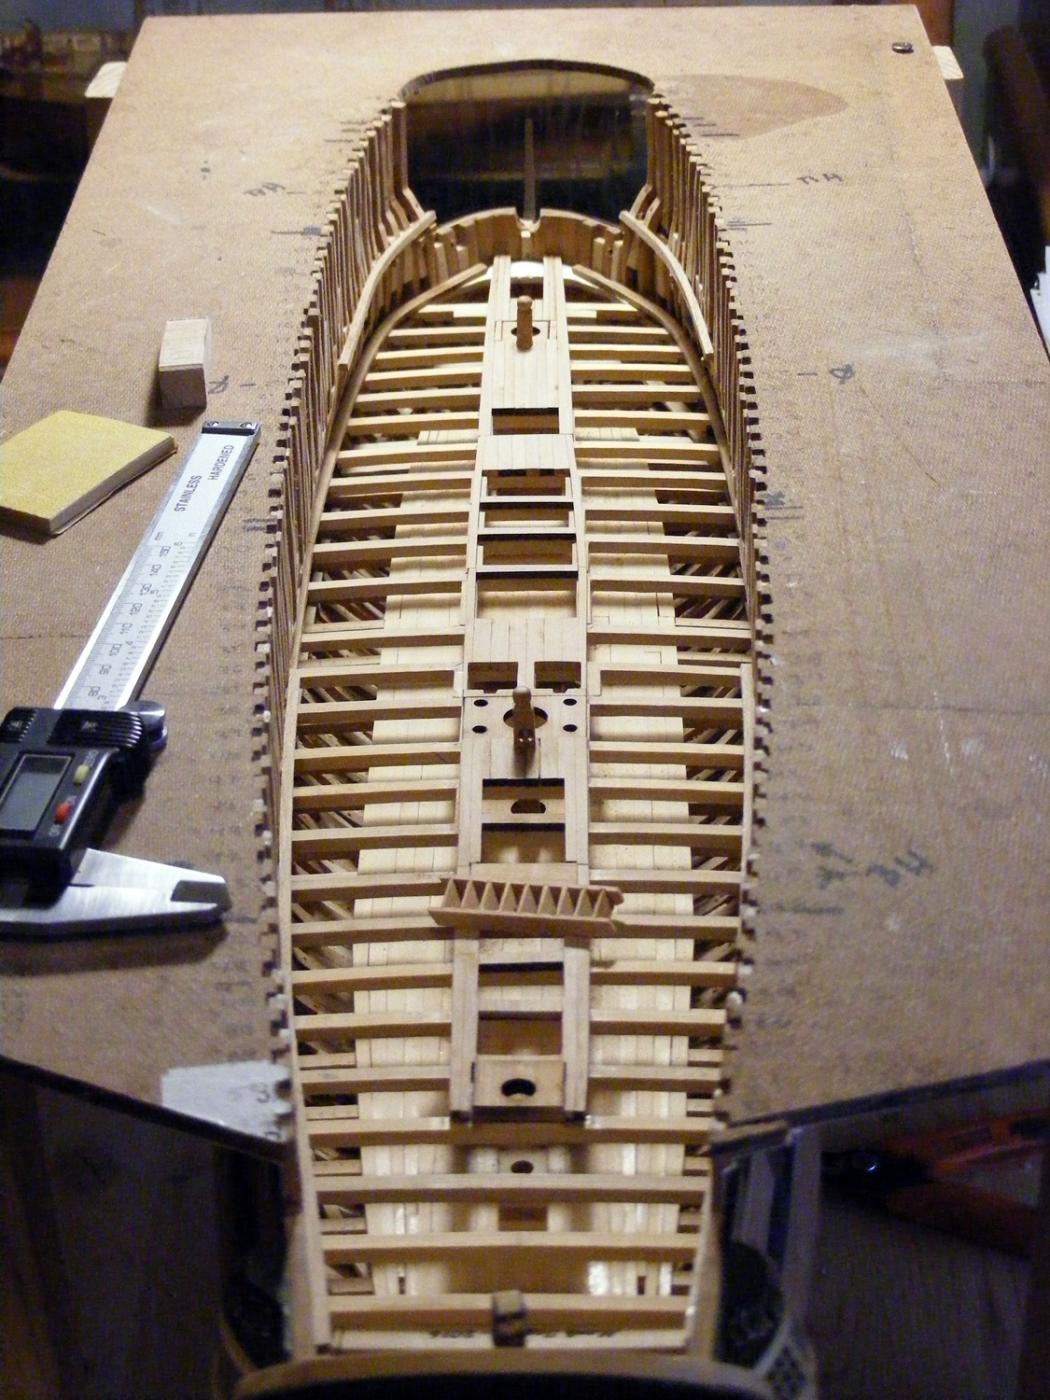
Thanks for the "likes" and comments. Pat... I don't think DARPA will care... they have bigger lasers... much bigger like mulit-MW. Here's the update.. Center line planking is finished and sanded. I've added the bitts that needed to be installed before the planking was done. I'm working on the three ladders going down to the lower deck while I still have access to that. I'd hate to drop one and then figure out how to fish it out. Seems Mr. Murphy has been running rampant around these parts lately. I'm also in the process of building the coamings and grates. I'm going to put blue tape over them before doing the rest of the planking and ceiling just to keep crap from dropping down into the interior. I'm still wanting to keep as much of the furniture out of the way as I can for the ceiling spalls so those other bits and pieces will have to wait. As a sidenote, I only sanded of the loose char and ash as ended up with a nice thin black line between planks for the caulking. Pressing on..... and as always, comments, critiques, better ideas, are always welcome.

-
Michael, I believe they still use lacquer on those, Michael. Is there a manufacturer's name available to you and/or the part number? Might be able to get a spec sheet off the web.
-
Beautiful work, Aydin. I'm looking forward to seeing her on the water like everyone else.
- 414 replies
-
- 5
-
-
- riva aquarama
- amati
- (and 2 more)
-
Congratulations on finishing this beautiful model, Pat. She looks a treat in her new home.
- 517 replies
-
- 3
-
-
- Endeavour
- Artesania Latina
- (and 1 more)
-
Ah.. the important things get in the way and that's great to see. Congratulations Grandpa on the Grandpa Duties.
-
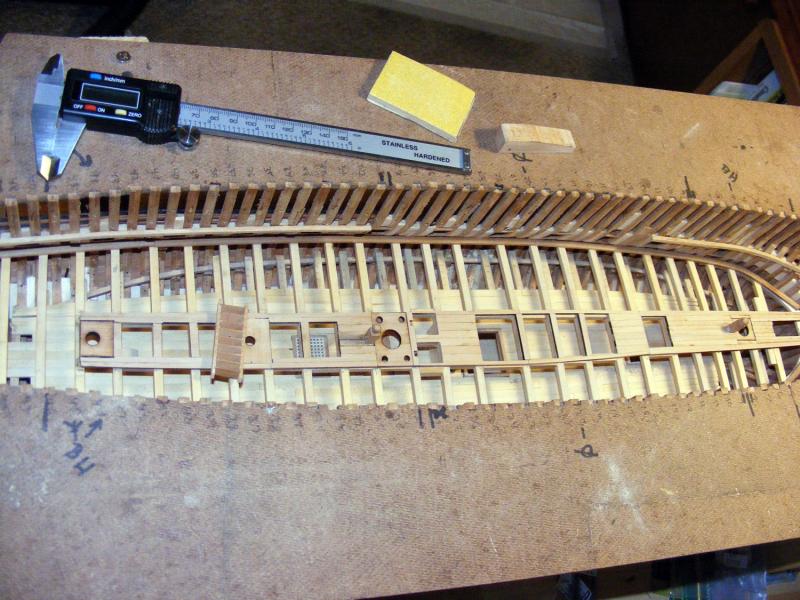
Yes. I'm using this for straight pieces and curved one for things like beams. The curved one is pretty custom since not all curves are the same. It dawned on my just now, I don't have a picture of the beam jig, just the straight one.
- 969 replies
-
- 2
-
-
- hahn
- oliver cromwell
- (and 1 more)
-
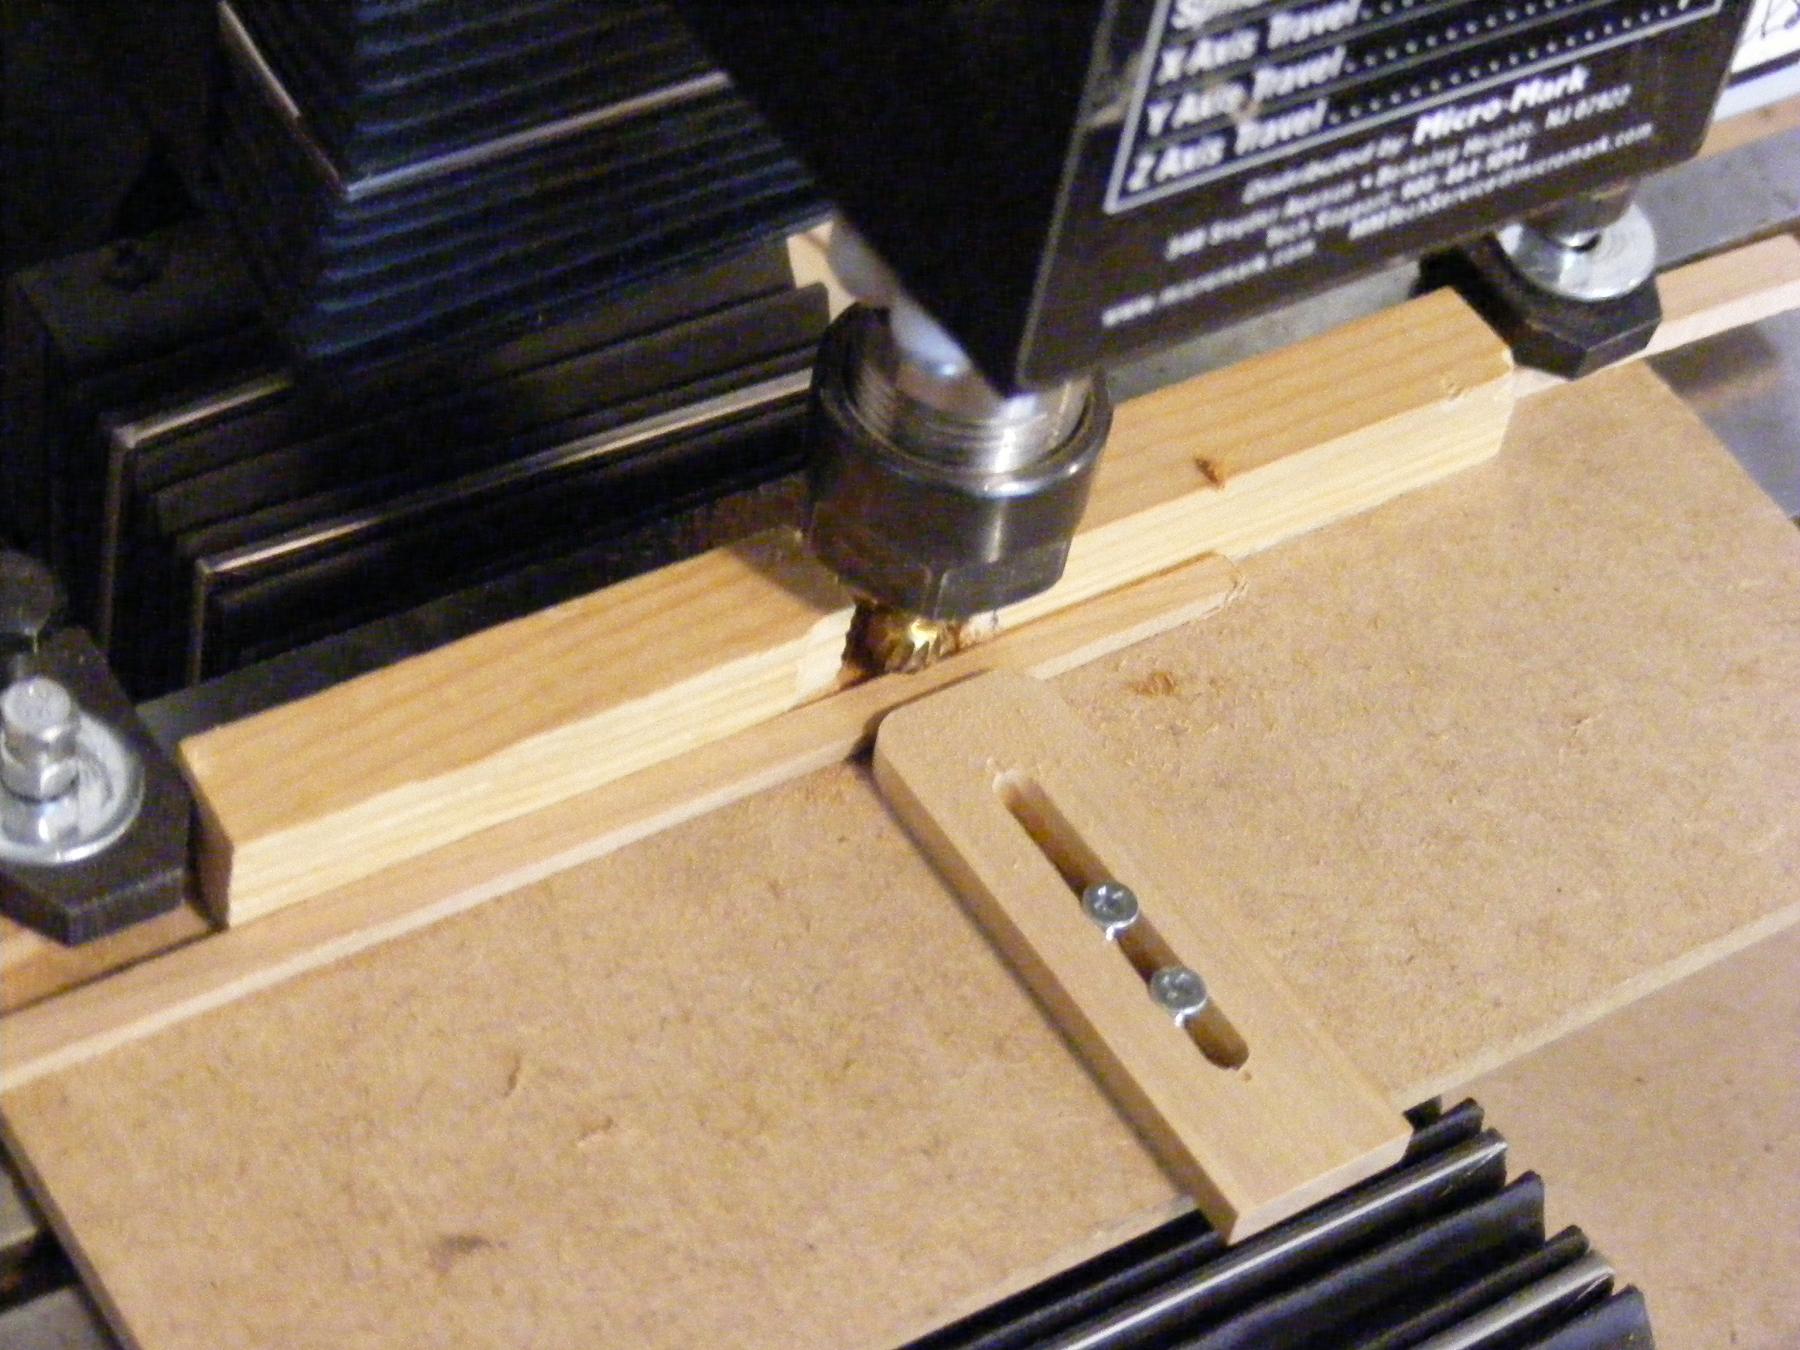
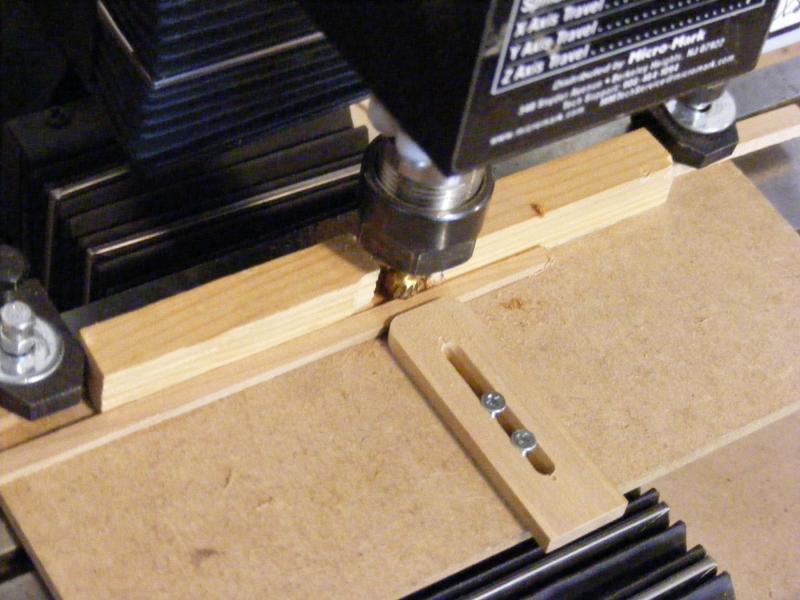
Mike, Have a look a this which I used for sanding the beams... Seemed to work pretty well. the center piece keeps the wood in place yet the beams can move as they need.
- 969 replies
-
- 3
-
-
- hahn
- oliver cromwell
- (and 1 more)
-
This so cool, Mike. I look forward to watching this build. Interesting kit and for the price, it looks like a great deal. I'm seeing more kits with pre-spiled planking...
-
Computer routers
mtaylor replied to Greg the peg leg sailor's topic in Modeling tools and Workshop Equipment
Anthony, Since you know someone who has one, will it machine brass? -
Fantastic details, Denis. Almost too many to absorb but keep 'em coming. She's looking a very workmanlike trawler.
-
Cutty Sark by NenadM
mtaylor replied to NenadM's topic in - Build logs for subjects built 1851 - 1900
Just wow, Nenad. Her majesty just keeps getting better and better.- 4,152 replies
-
- 1
-
-
- cutty sark
- tehnodidakta
- (and 1 more)
-
HMCSS Victoria 1855 by BANYAN - 1:72
mtaylor replied to BANYAN's topic in - Build logs for subjects built 1851 - 1900
Beautiful work to date, Pat, along with some very heavy research. It does seem almost a pity to paint and copper that hull though. She has some good looking lines.- 1,021 replies
-
- 7
-
-
- gun dispatch vessel
- victoria
- (and 2 more)
-
Thanks for the comments and the "likes". Things have been somewhat at a standstill while I test "feedtrough sheave" making... so far I'm not happy with the results. I'm also finishing up the thick stuff center planking of the gundeck and discovered a few challenges... like the plans seem to be distorted near the bow. The centerline veers to the starboard by a max of 1/16" which means much of my centerline planking is a tad off at the bow. I'm correcting this as I wish to cut the deck planks on the laser. Will it be easier than hand spiling? Probably not, but there's a lot of fun running the Deathstar and I'm pretty happy the way the thick center planking is coming out. Lastly, I'm waiting for a new lens for the Deathstar. Current lens is a 2.0" (50.8mm) focus length and the one on order is a 2.5" (63.5MM). What this should do is give me a better kerf with less of an angle (or wedge when viewed from the end of the cut) as the beam will be "thinner". There's a technical explanation but I'll keep it simple for now. I'm in the process of modifying the spacers that hold the table in place to adjust for this additional focal length. Just trying some different things.... I do hope to have a real update with pictures sometime this weekend.