mtaylor
-
Posts
26,273 -
Joined
-
Last visited
Content Type
Profiles
Forums
Gallery
Events
Everything posted by mtaylor
-
Amazing work, Daniel. Even more amazing when one thinks about the scale. Yikes..that's tiny.
-
Gerald, I'm enthralled with this build. As for the picture problem.. I think you're missing a step or two. Have a look here: http://modelshipworld.com/index.php/topic/540-how-to-add-pictures-in-your-posts-and-pms/
-
Thanks for the comments and the "likes". She'll be coming off the jig as soon as the last coaming is set into place and before the rest of the deck planking. I found some nice 1/4" mahogany and i"ll make a cradle that will hopefully do her justice and not hide her lines. I gave serious thought to pedestals but they just seem flimsy. i have one ship on pedestals and I get nervous anytime I have to move it. The longer I wait, the more problems I'll have once I begin removing the jig so time to bite the bullet and get her done. Bear with me on this....
-
Nice work, Pat. And have fun getting the hangover.
-
I just remembered... this: http://www.arsenal-modelist.com/index.php?page=accessories∂=37
-
Now that's a great tool, Micheal. I'm thinking it could also be made out of brass. Gotta' go dig out my brass rod and see if I have enough. Thanks for designing and building this and sharing the plans.
-
Dos Amigos by bigcreekdad
mtaylor replied to bigcreekdad's topic in - Kit build logs for subjects built from 1801 - 1850
I'd go with the Early American putty. Something that hints at the treenailling rather than jumping out at you. I've only treenailed one ship (my first one) and after that, came to the conclusion that anything 1:64 scale or smaller, treenails overpower things as even the tiniest are too big. But that's me. -
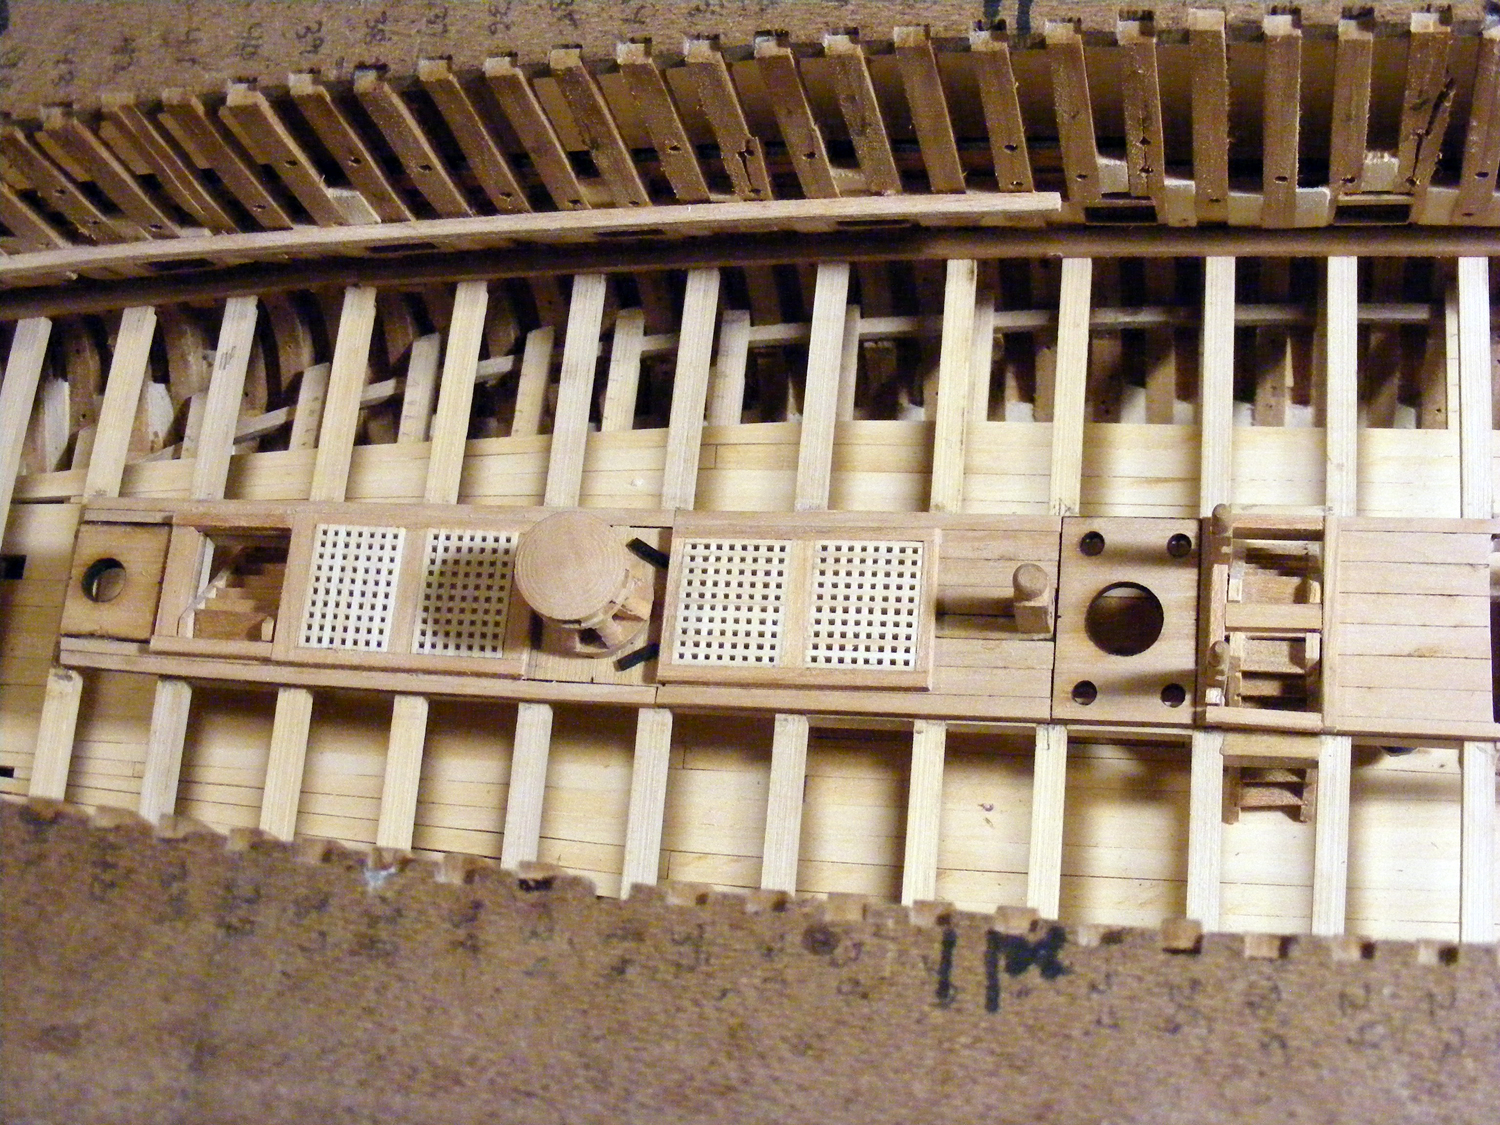
Thanks for the "likes", the comments, and the discussion. Things have been running, shall we say, dead dog slow here lately in the shipyard. I'm putting the hours in but seems like nothing gets finished. Probably normal then at this stage. The center line furniture aft of the main mast is done except for the pantry which is on hold. No point in blocking access at this point. Also the two crew ladderways forward of the main mast are done. The pic shows the capstan but it's only set into place at this point so it doesn't get misplaced or damaged. The crossbeam for the pinrail forward of the main mast has been safely tucked away so it doesn't get damaged. I'm moving forward on the deck to the remaining hatchways. After the planking the rest of the deck and doing the ceiling, I'll install what I have ready and make the pumps (do over!!!) and the fireplaces. Part of the bog that's slowing things down is taking measurements for the planking and transferring them to the drawings I'm making for the laser. I do find myself being happier with my output as I think I'm getting better at joinery and even more patient with fitting things than I was before. After a couple of "by your leave, sir" hassles, I found I need to measure 3 times before transferring any measurement to the wood. A bit of confidence here and there goes a long ways. Here's the pic and as always, comments, critiques, and discussion are welcome.

-
Chris, That will be a great shop when you're done. My shop is roughly 10X14 which is a spare bedroom next to the master bedroom. Keeping dust to a minumum in the rest of the house is a priority . Having said that... I use a heavy duty (somewhat) shop vac and it seems to work very well. When I use a machine, I move the vac to that machine. As space is a premium here, I can't put in a dedicated system with associated plumbing. I also run air purifier pretty much everyday and it also traps a lot of dus Here's the shop vac I use: https://www.lowes.com/pd/Shop-Vac-5-Gallon-5-5-Peak-HP-Shop-Vacuum/50159057 Here's the air filtration box I use: http://www.holmesproducts.com/deals/15-off-sale/holmes-allergen-remover-air-purifier-tower-with-true-hepa-filter/HAP716-NU.html#start=5 I hope this helps.
-
Gerhard, It's wonderful that you're back. I had to go Google the V8 solenoid engine. One impressive bit of hardware. I take it that these are all basically scratch-built? I noticed that they're producing some of the parts using a 3D printer.
- 72 replies
-
- 5
-

-
- bootlegger
- speedboat
- (and 1 more)
-
That's a tough one. I don't have an answer. See if this is any help as it's the only topic I could find where Apple isn't to blame. http://modelshipworld.com/index.php/topic/9689-photos-in-build-log-sideways If that one isn't a help, pop a post in the Site Suggestions and Problems forum. Or add on to the topic I found. Maybe the last post in this topic: http://modelshipworld.com/index.php/topic/12173-photos-upload-and-are-upside-down-how-to-fix
- 335 replies
-
- 2
-
-
- 18th century longboat
- Finished
- (and 1 more)
-
Per, Are you using an Apple product to take the pictures? If so, that seems to be common. Open the pictures first in Windows Photo Viewer (if using Windows to access MSW). You can rotate them within that.
- 335 replies
-
- 2
-
-
- 18th century longboat
- Finished
- (and 1 more)
-
If it's what I think it is, it was not uncommon back then, Dave. Another triple block would be below that hole. The lanyards went up to the triple which was seized to the lift harness of the main yard. Wasa has one for the main mast. But given the size of this beast, it may have had more.
- 962 replies
-
- 3
-
-
- sovereign of the seas
- ship of the line
- (and 1 more)
-
Computer routers
mtaylor replied to Greg the peg leg sailor's topic in Modeling tools and Workshop Equipment
That's really a laser cutter and not a router as such. I'd be very cautious using it as it's not enclosed. If it can cut wood, it can damage you. Also use it in a very well ventilated area as cutting some things, like mdf, releases toxic fumes. -
Have look here: http://modelshipworld.com/index.php/topic/11773-hobby-wood-pile/ for starters. and here: http://modelshipworld.com/index.php/topic/7789-strip-storage/ I hope this helps.
-
Also, have a look here: http://modelshipworld.com/index.php/topic/384-where-to-buy-wood/
-
I had to look twice, Patrick. She looks right at home in the water and to the unknowing, they might think the real thing.
-
I hope your voyages will be peaceful. Like who need excitement anymore? I like what your doing on Diana but I'll be patient.
-
The only one I've ever seen pictures of is in Frolich's The Art of Ship Modeling. It's of his scratchbuild of Belle Poule and he gives some good info on how he did it. There might be one here on MSW as I don't look at every log... just not enough hours in the day
-
ARGHH! Plans needed for Mortar Vessel Convulsion UPDATED
mtaylor replied to bigcreekdad's topic in Wood ship model kits
Do a search from the main page and see who is or has built it and contact them. It's possible they haven't seen this post. -
Food for thought, Charlie. Would they have been painted to look like privateers? A form of camouflage? Given the choices, I'd pick the one's that please you.
- 362 replies
-
- 2
-
-
- active
- revenue cutter
- (and 1 more)
-
Les, There's been a few topics on that that some searching should get you to. Basically, they used the main yards and the fore yards as booms with block and tackles. Pretty labor intensive work. Minor edit: Found one: http://modelshipworld.com/index.php/topic/2313-how-were-boats-launched-from-the-deck/?hl=%2Bship+%2Bboats+%2Blaunching#entry58384
-
That's great to hear, Buck. I'm looking forward to the double build.
- 515 replies
-
- 5
-
-
- artesania latina
- whaleboat
- (and 1 more)
-
Jaw-dropping beautiful, Liberto.