Beef Wellington
-
Posts
2,249 -
Joined
-
Last visited
Content Type
Profiles
Forums
Gallery
Events
Everything posted by Beef Wellington
-
 Thanks Ray I think your statement about this kit being more complex than it appears is spot on! I wasn't planning on installing these until the second planking is done as you say, but do want to ensure I don't set myself up for an unpleasant surprise. Maybe its because I don't have my planking on yet, but the side galleries and the stern windows extend above the upper deck which is what got me concerned in the first place with the alignment. I have my plan now so just need to execute!
 -
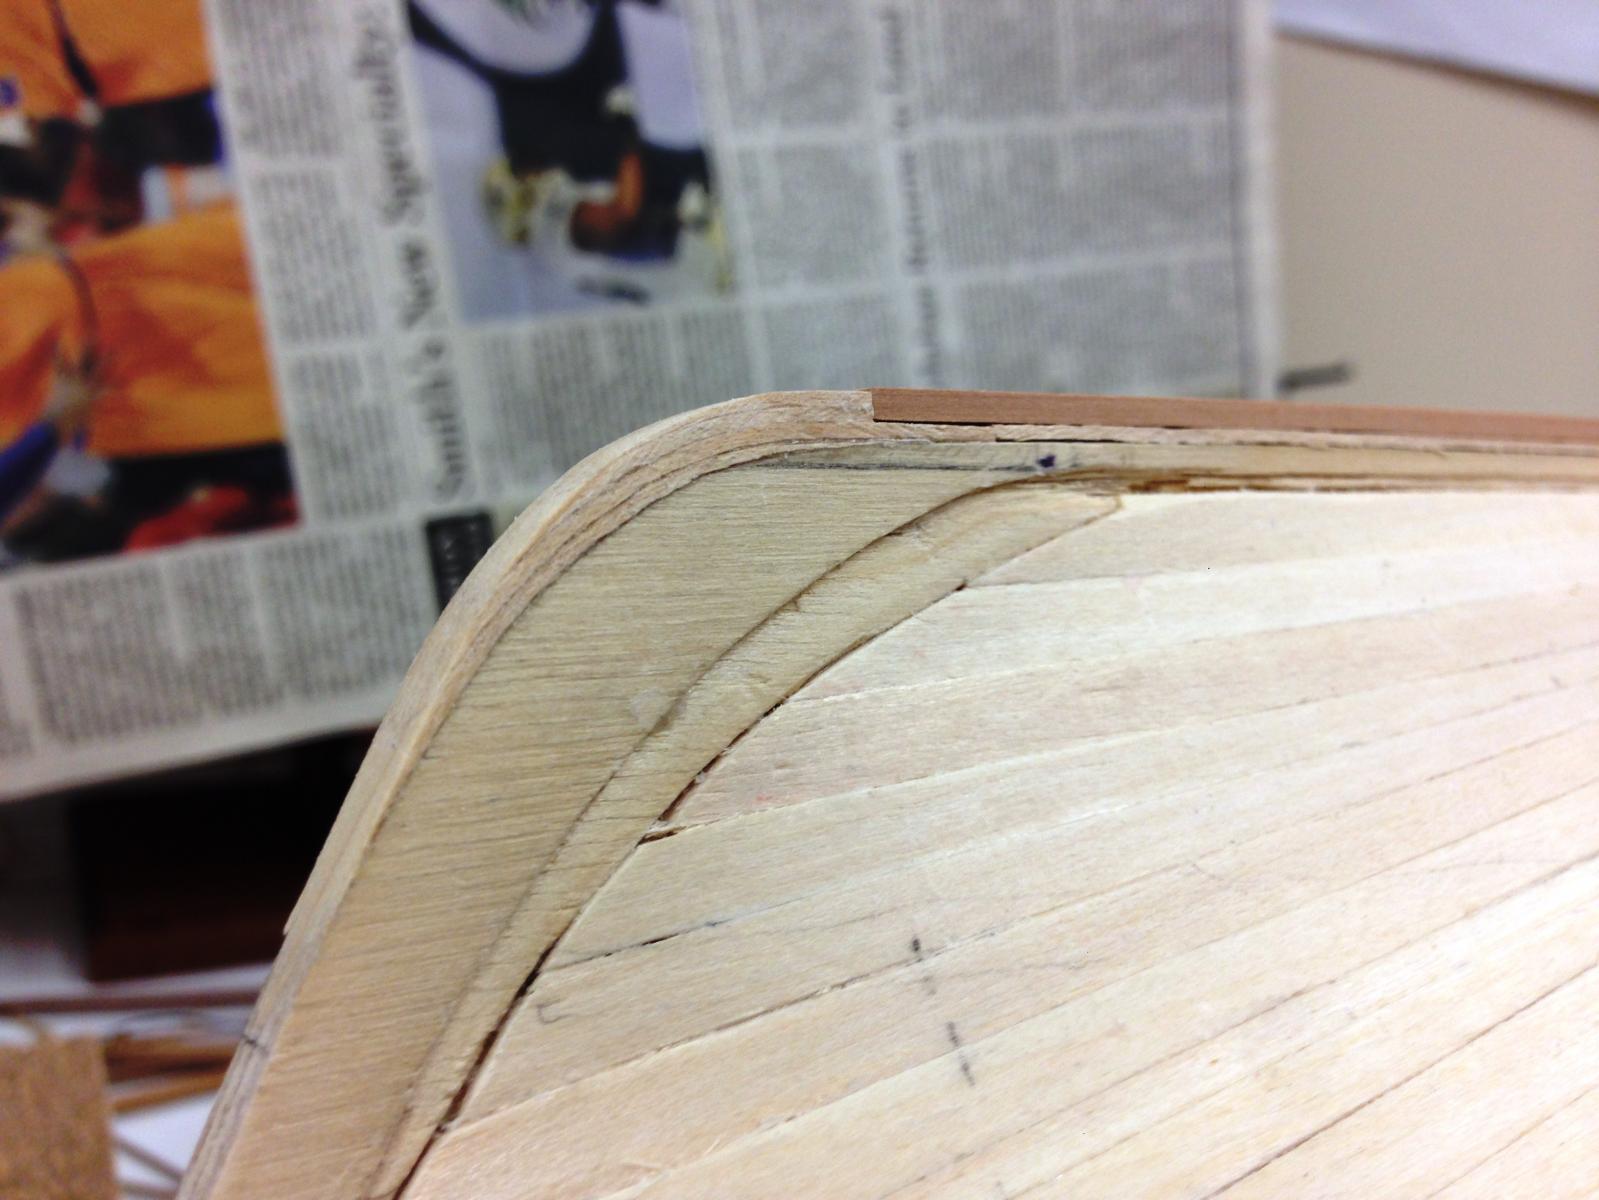
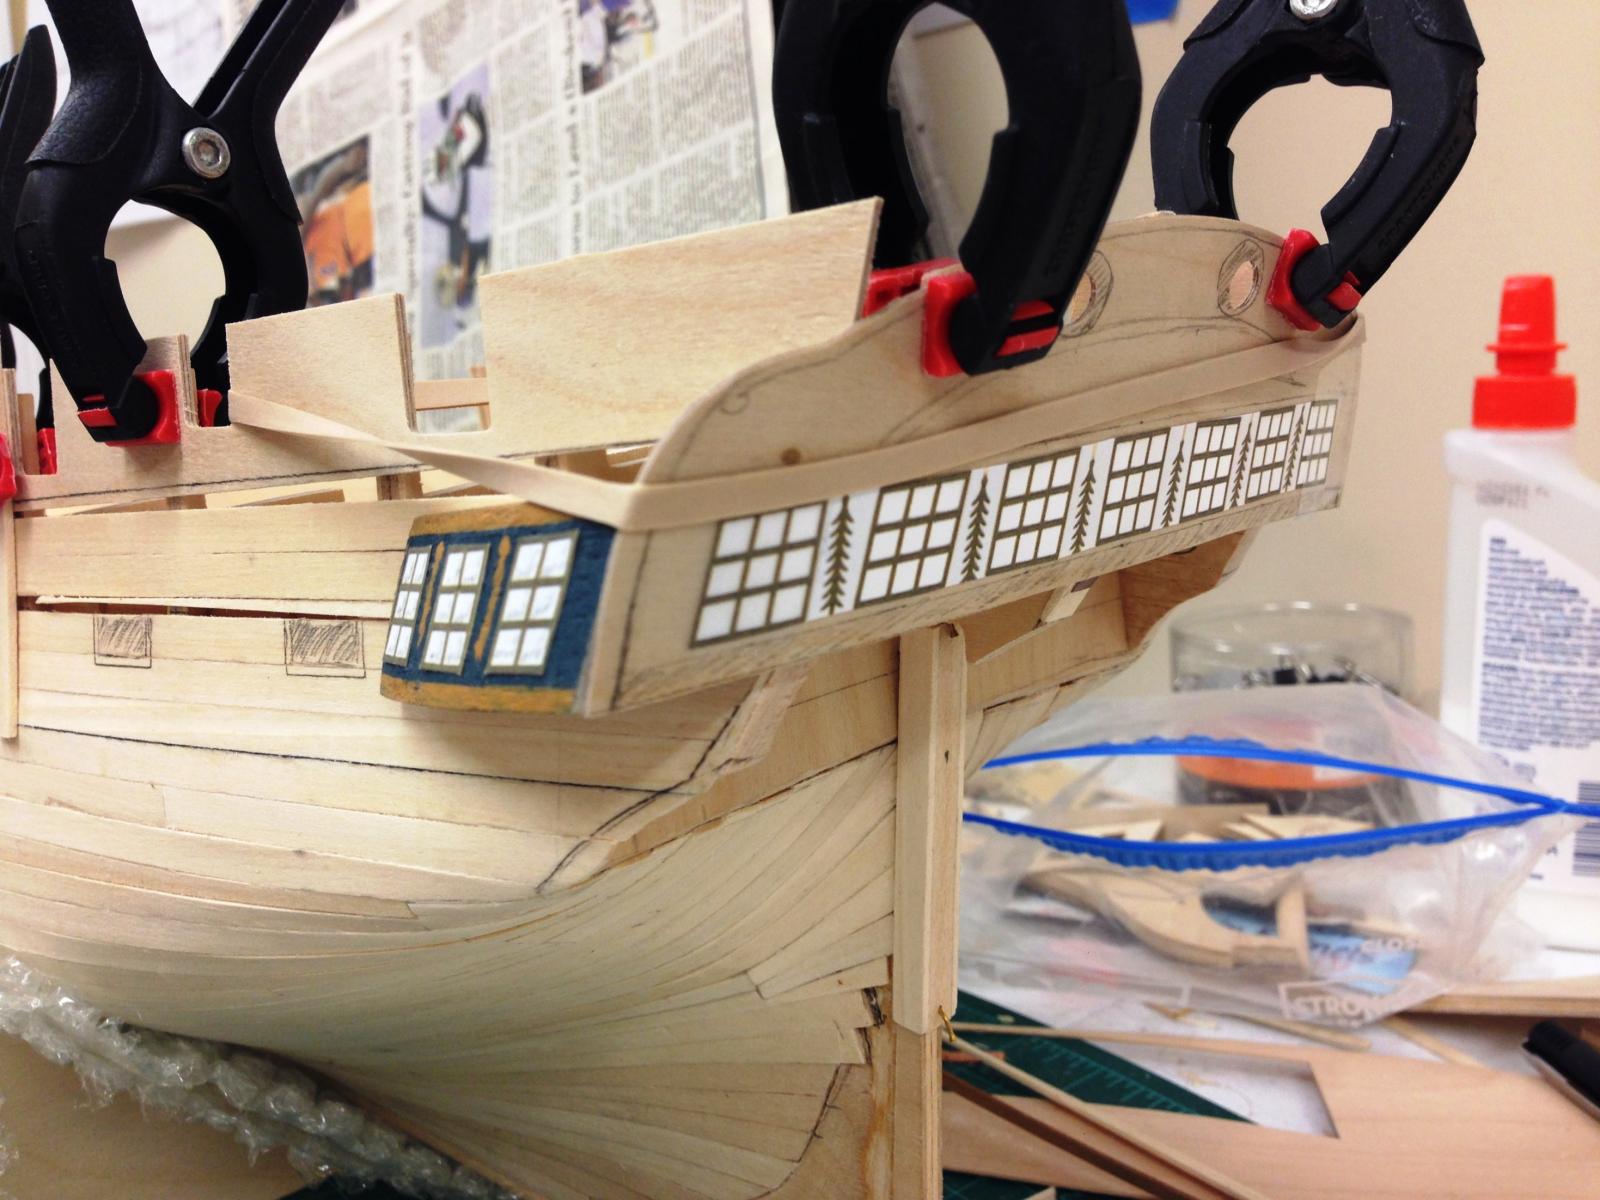
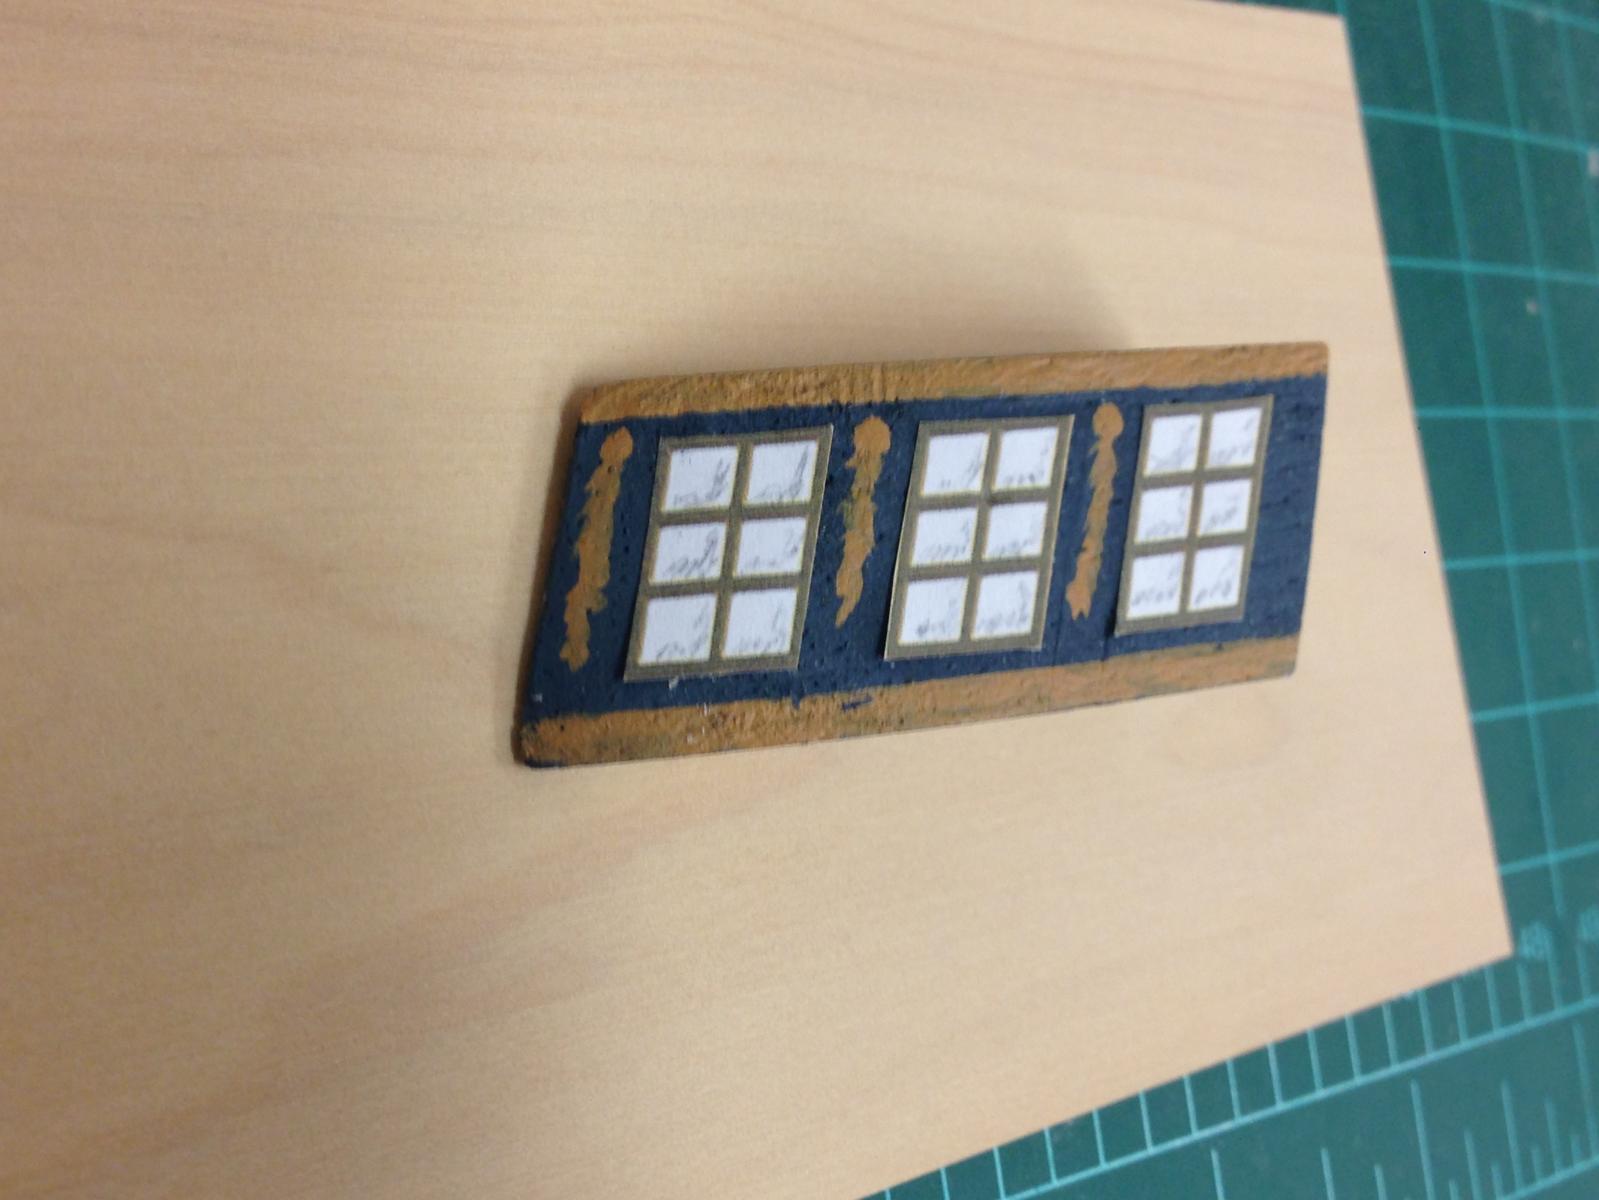
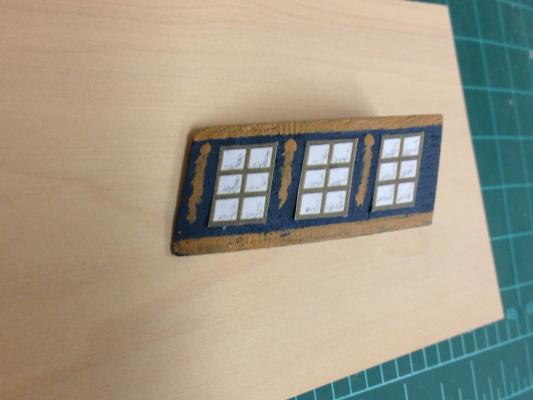
Time has flown by, maybe time to note down a few thoughts on my plan of attack. Its been a lot of fun spending lots of time tinkering with various bits so far, but I do want to make some concrete progress. None of the diagrams solve the aligment dilemmas, and I'm less than convinced that the placement/shape is correct on various supplied parts, and I really wanted to be comfortable that I wouldn't be setting myself for future frustration. My prediction of running out of lime strip did come to pass so I have some on order (some of the kit supplied 1.5mm lime strip was on the thin side (~1-1.25mm) so I didn't use it, and I want make sure I've got plenty of thickness here to sand back)Here's what I've concluded, and the alignment I'll proceed with...at least until I find a new problem. Stern fascia: The top of this should align with the top of the keel former at the stern. Looking at many contemporary models, the stern windows feel larger in proportion to the fascia itself, and the proportions overall shown on the box art art and instructions just don't look right. The former itself appears over-sized to me and will require trimming at the bottom and the sides to maintain what I see as the correct proportions. This will mean that I will probably need to figure out my own solution for decorations in place of the supplied PE, but that should be fun. The PE windows should definitely be useable as are the castings. The two holes (assuming chaser ports) will also be enlarged. This is all for down the road though. Side galleries: The stern fascia size/alignment needs to also consider the side galleries, which should align nicely with the lines of the stern fascia and also align with the line of the gunports. The low-res NMM plans show the gallery windows appearing slightly above the line of the gunports, however, every contemporary model I've seen seems to show these lining up exactly with the line of the gun ports, as does the AOTS book and plans. I'll try to follow the latter, and use the NMM plan as justification if I need to sneak them up a little. The supplied parts will need to be reshaped to get the correct proportion, this seems a common Caldercraft scenario. Photos below show a little trick I found useful. Knowing I'd be using the PE windows, I copied the sheet on my home printer and simulated final placement, also whittled up a balsa wood quarter gallery so I could visualize the alignment. The grey-blue I'm using will likely not show correctly, but its a Tamiya colour and I quite like it - seems to sit well with boxwood I plan to use... Keel former: Once the above alignment is determined, the positioning of the upper and lower counter are shown to be too high. No problem, will just require the various former peices (26 & 27) to be 'corrected'. The other item that I'll address is not in the instructions. The termination of the lower counter and the hull planking would be perpendicular to the keel if taken to the last frame, however, I believe this should also gradually curve forward as it curves down. I also laminated some maple strip at the base of the stem to better shape this allowing for the needed extra depth to the keel. I've positioned a few strips to show how I plan to include the false keel. Upper Counter: The kit supplies a poor representation of the shape of the upper counter and simply says the lower counter should be planked. I'll plan to shape my own out of some spare 1mm maple sheet, this requires the stern fascia positioning to be known first. Quarterdeck bulwark: Positioning this also is a challenge like all premade templates. These need to be aligned so that the bottom of the gun ports are a consistent distance from the upper deck (which of course is not yet permanently fitted). I may leave these off for now as they will be very delicate once installed, but I will need to know the lie of the planks below so I can install these.


-
Alexey, glad to see you modeling again, hope I didn't miss too much. Your old log here on MSW 1.0 was one of the first that I saw and was a big inspiration for me taking up the hobby. Really looking forward to seeing more progress. One question if I may, did you just use clear finish on the boxwood or any kind of stain?
-
Everyone has already said it, but beautiful work Alexander.
-
Very nice ratlines Nils! Love the last shot with the figure, puts everything into scale.
-
Love the way this is looking, the pear looks very nice. Love the idea to build up the PE part, was looking for an idea to do this and you just gave it to me. Would you mind sharing how you get the CA glue into a dental syringe, and where do you get them? I'll be following you from here on out.
-
Looks great Mike, onwards!
-
Chris are the rear bulkheads aligned with the cross section you are comparing to? Even for the ones not aligning, they look consistent with the shape of the hull, just in a different place
-
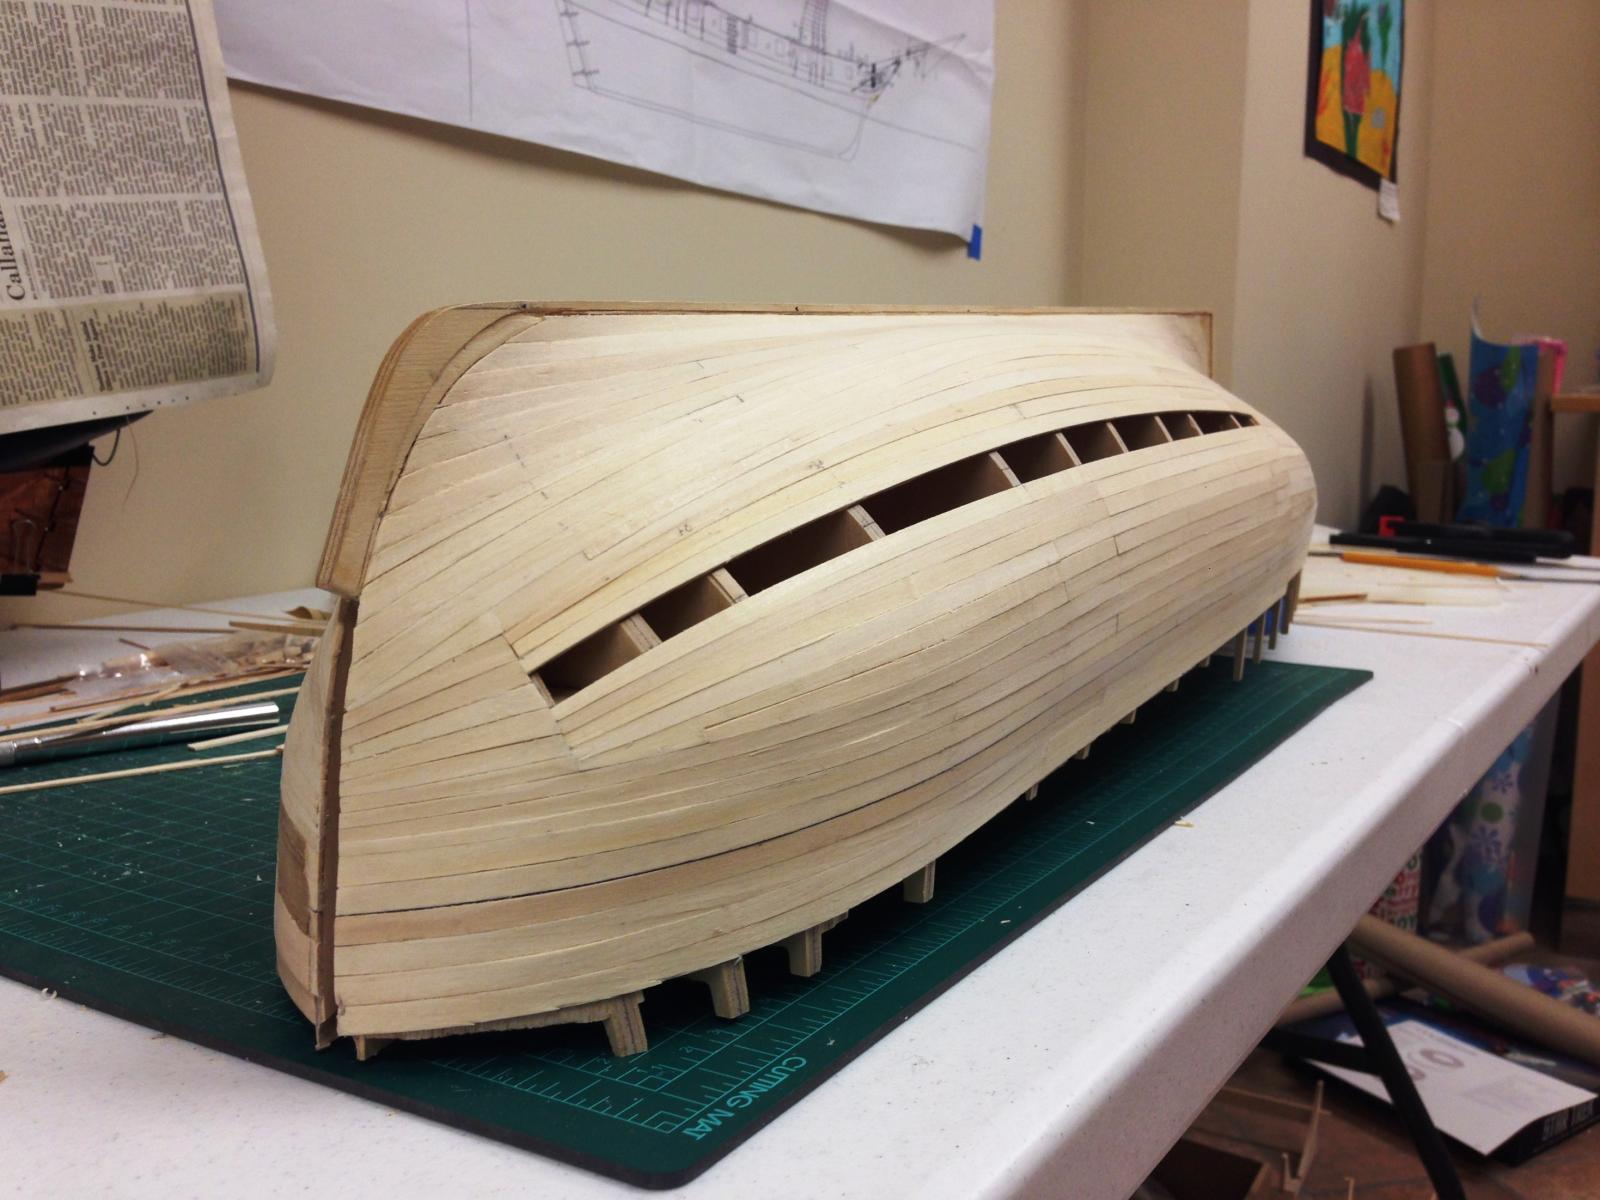
Cheers Brian, and thanks for stopping by. Jim - not really issues. I has set myself the (perhaps unrealistic) goal of trying to get the planks to lie as they would following planking principles and getting as tight a fit as possible. I think the reality is that its really only possible with spiling, even tapering the limewood planks its hard to get the planks to lie flush with the hull shape and avoid both clinkering and pointy plank ends (as per my first attempt on Snake). My limewood pile is getting quite low so fingers crossed I have enough to finish (the downside of tapering the planks is you go through more material). Spiling is something for the next build The reality is that none of this matters as it will be covered up, but just spending time on this has been good experience.
-
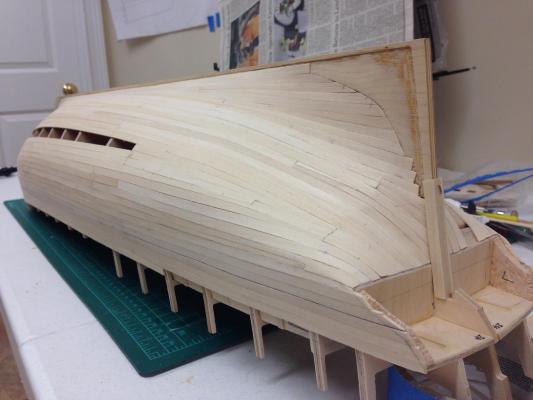
Jimz66 - welcome! I'm not too far from you, I'm in Simsbury. Well, I promised no more updates until I was done, but just couldn't wait. Nearly there, just a couple of planks to go on the starboard side, and a few more on the larboard. Shaping the planks is really essential to get any sort of flat lie which, edge bending is just won't work on this hull. You can see how I had initially misjudged the line of the planks at the bow, but was relatively easy to correct this one bulkhead back. The sharp curve at the stern wasn't easy, but not as bad as I thought it was going to be. You may also see a little protective case around the boxwood sternpost section! Like most, I'll be glad when this step is done. Once last planks are on it will be back over to Snake until the Spring weather allows some time outside so I can fill and sand.


-
See link here - you can trace the specific picture of the standard to the time period (assuming painting is accurate) http://modelshipworld.com/index.php/topic/9443-english-flags-on-a-launching/#entry279066
-
jbshan - where did your get that information on the Royal Standard? I think you may be confusing some different things here and I'm not sure how accurate that is. The Royal Standard has never been used as a command flag in the Navy and certainly never as a signalling device, and has always been used to indicate the personal body of the Sovereign.
-
Excerpt below from those that know (i.e. The Queen's official website) The Royal Standard is flown when The Queen is in residence in one of the Royal Palaces, on The Queen's car on official journeys and on aircraft (when on the ground). It may also be flown on any building, official or private (but not ecclesiastical buildings), during a visit by The Queen, if the owner or proprietor so requests. The Royal Standard also used to be flown on board the Royal Yacht, when it was in service and The Queen was on board. The Royal Standard is only flown when the Sovereign is present. I doubt that the protocol around usage has changed - i.e. the Royal Standard would only be flown if the monarch were present.
-
Very neat work Brian, well done. Looks to be coming along very nicely. AVS looks like a very nice kit, will be following to see how you progress.
- 831 replies
-
- 1
-

-
- Armed Virginia Sloop
- Model Shipways
- (and 1 more)
-
Chris - good to see another Diana build here, you look to have got off to a solid start...will be following closely as I'm not much ahead of you Nice approach to the bevelling, I found that on some of the frames they needed to be packed out a little with some strip to avoid low points (especially at the waist and stern), I wonder if this is just variability in the manufacturing or an issue for all of these kits.
-
Everything is coming together wonderfully, looking really really sharp! Catharpins look great and you got them to what looks like the perfect length, well done.
-
Look at this link - http://tmg110.tripod.com/royal_std.htm. Despite the number of different versions, they didn't change every monarch and changes tend to represent major event in the crowns history. The Georgian period did see an above average rate of change which probably represents the period most of interest to ship modelers, however that is unusual. Should also be noted that the monarch would fly a different standard in different parts of the realm (e.g. the monarch's standard in Scotland is different to that flown in England) Hopefully this allows you to pick the specific flag in effect at that time. What is much more complex is the inclusion of the royal standard iconography in various monarchs (and family's) coats of arms. Heraldry in the UK is incredibly complex, and that is a wholly separate topic!
-
Very impressive Jim, you should be very pleased. Love the look of the case, well worth the effort and the risk. Well done on your first completion, a milestone I have yet to reach...
- 226 replies
-
- 1
-
-
- ballahoo
- caldercraft
- (and 1 more)
-
Don't give up Sjors, for me at least, it just takes time to figure out what works (which is why I'm so slow ). Believe it was the inventor Edison who said that he didn't have 1000 failures, but he'd successfully figured out 1000 ways that didn't work. One thing I think I am finding out with my 'Jason' is that the larger more complex builds give you a little bit of practice time to figure this out as its easier to hide early attempts which is a nice luxury (even if its more work!). Link below is a simple method that worked well for me, not quick, but if I can do it I'm sure you can. http://modelshipworld.com/index.php/topic/509-hms-snake-by-beef-wellington-caldercraft-scale-1-64-first-wooden-ship-build/page-23#entry104015
- 1,616 replies
-
- 3
-
-
- caldercraft
- agamemnon
- (and 1 more)
-
Kevin - I used a simple exacto blade to do the rabbet which worked just fine and pretty easily into plywood. I found on my 'Jason' build that the plywood does not hold the shape anywhere near as well as using solid wood so that is probably a factor as well. I think unless you are doing a single planked admiralty model you'll do just fine doing something simple.
-
Take a look here Jim from Dafi's Victory build...shows it nice and clearly and I'm sure is spot on. http://modelshipworld.com/index.php/topic/76-hms-victory-by-dafi-to-victory-and-beyond/page-52#entry233564
- 226 replies
-
- 1
-
-
- ballahoo
- caldercraft
- (and 1 more)
-
Nice looking yards Timmo, very neat work - will be getting back to mine on Snake soon hopefully with your inspiration. I see you used black thread for the stirrups rather than usual natural thread, seems to give a little more muted result which I quite like. Very jealous of the gorgeous beach location! BTW - I'm disappointed to see what I thought to be purely an American affliction rearing its head in New Zealand, namely referring to His/Her Majesty's Ships as the THE HMS 'Such-and-such'....I always think of the restaurant in the movie "Mickey Blue Eyes" called "The La Trattoria"
- 366 replies
-
- 1
-
-
- granado
- caldercraft
- (and 1 more)
-
Fantastic as always Nigel, just wonderful. I'd never thought about LoS being used for this, but very interesting. Do you think that it could also be a solution to providing an aged patina to copper hull plates?