Beef Wellington
-
Posts
2,249 -
Joined
-
Last visited
Content Type
Profiles
Forums
Gallery
Events
Everything posted by Beef Wellington
-
 Mike - that really is some deck, very very impressive result, amazing how tightly you've fitted those awkward planks, really hope you're still going to be able to see most of the detail when everything else comes together.
 -
Mike - I took the easy approach, I bought some balsa blocks in varying in a couple of thicknesses and sandwiched together to get fill the gap as much as possible, I didn't worry about it making in meet the adjacent bulkead. I found them useful for really just visualizing the hull shape in tricky areas at bow and stern to all the bulkheads to be fared. Carl - I hear you, I also use soaking and steaming, as I say, its just the areas that are highly convexly curved and where the bulkheads are quite far apart that this is useful for. The supplied limewood is 1.5mm thick and I've found even with extensive soaking it can splinter. Eamonn, Alistair and everyone else, Merry Christmas!
-
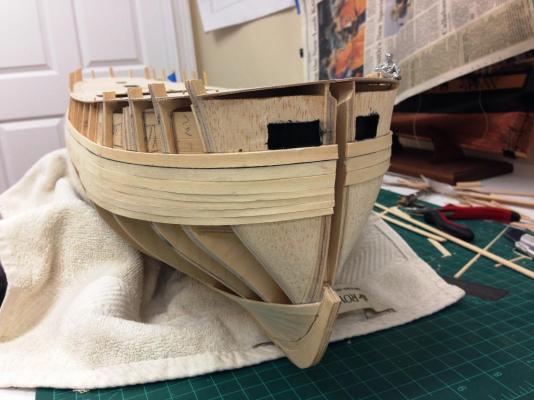
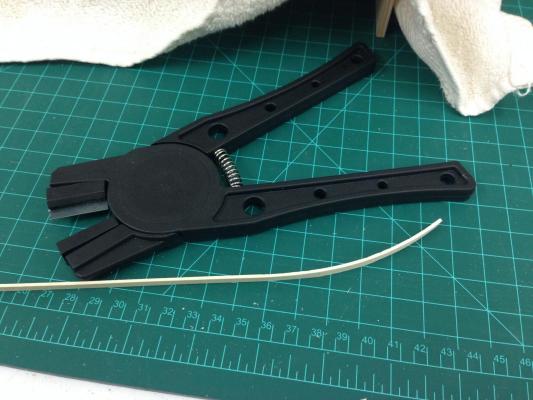
Well heres a final post of the planking in process, will not bother to post anymore until first planking is complete as theres not likely much else to really share. I'm deviating from the plans a little in the suggestion on planking, they indicate to start at the very top of the frames (I think), I've decided to lay a plank aligning with the main deck and then work up. This is hopefully to ensure a consistent height of the gun ports to the deck, as the top of the bulkheads does not seem to rise slightly toward the stern. The top edge of this plank was marked with a pen so hopefully will show up once all sanded, although it shouldn't be too hard to figure it out. Anyway, here's wishing everyone the best of the season. Merry Christmas everyone! Continuing planking upwards, starting to take shape... Cut out some sections in the balsa where the hawse holes will be, hopefully this will allow the holes to be open on the rear face rather going into balsa. Not sure exactly how this will work but it can't really introduce any fresh problems. Also wanted to call out a tool that I've quite taken to, although I think it did appear on the 'list of most useless tools' on MSW 1.0. I bought this when I started my 'Snake' and never really used it. However, I've found that this can really help give a better curve on the planks, otherwise with simple soaking and even with bulkheads appropriately fared, the planks tend to flatten in between the bulkheads as they are so far apart on this kit. Using this tool, which simply crimps the plank its possible to get a much better curve with a dry plank. This is proving especially helpful to get a nicer curve at the bow (In some places I think I had been a bit zealous with shaping the balsa a removed a little too much and had some flatter surfaces than I would have liked.
-
As Sjors said...WOW. I think your in the running for the words best model grating. Just amazing detail!
-
The black stripe
Beef Wellington replied to SaturnV's topic in Building, Framing, Planking and plating a ships hull and deck
The AOTS Pandora book specifically refers the the ship being painted black beneath the wales referencing the ships records (I'm assuming theres a entry to the effect "Tuesday, hands employed painting black below wales to the waterline" . It doesn't seem like that big of a deal and I'm sure varied on the same ship over its career. It seems sensivle that most ships would have been painted as it would offer a degree of protection a look a bit nicer when fresh. - I think we get used to assuming minimal paint from the the admiralty models. The wales are consistently painted black, although the 'black strake' seems to be painted as often as not (e.g. Admiralty models of Artois class have both painted and unpainted black strake) -
Boat looks fantastic, Nils. Seems you are continuing the trend of getting some super detailing on these small beauties. Well done.
-
Very nice Jim, where did you get the anchor rope? - looks awesome. One question I've got on the anchors which seem to be inconsistently shown in different references, some show it as you have, others show the sides of the stock tapered similar to the bottom so it has a square profile at the end, curious how you decided on your approach.
-
Jonny, I'm not a lawyer but I would assume the plans are in the public domain, the cost associated with buying them is I suspect related just to the cost of printing and probably a little subsidy for the service provided. I'm sure the purchased plans are much more detailed and appropriate to try and take accurate dimensions from. Nice little Convulsion build you have going on here, keep at it.
- 215 replies
-
- 1
-

-
- convulsion
- caldercraft
- (and 1 more)
-
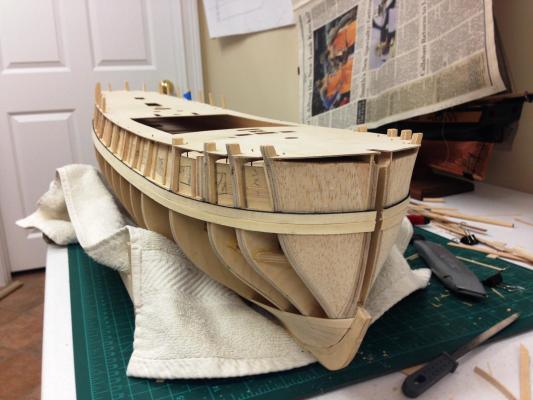
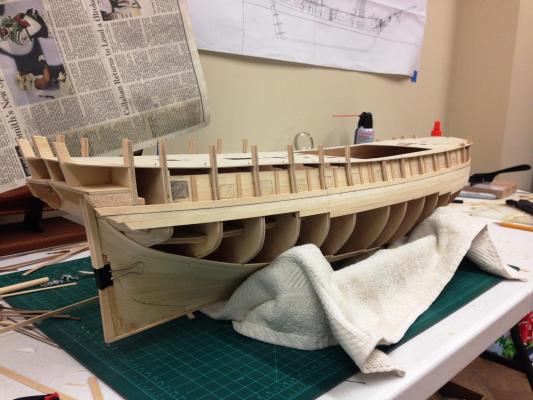
Nigel - cheers buddy, nothing compared to yours but I'm happy. Planking has proceeded at a snails pace, but after much deliberation I figured out the round stern, no-where near as neat as Ray's and keep reminding myself that this will all turn out fine with a little sandpaper and filler. My focus was primarily on ensuring that the planking terminated properly at the transom and sternpost. Rabbets were cut into the boxwood for first and placeholder for the 2nd planking. Man oh man!! - what an absolute pleasure working with boxwood is, so easy to cut and get nice clean edges. The plank next to the stern post was positioned first to lie correctly, then work downwards to the previously planked section which results in a few odd shaped planks and stealers. I can see how spiling would be a much more logical, though time consuming, approach. You can see an error not yet corrected where I thought I needed a stealer when in fact a full plank would have worked best, it was already glued so will be easier just to add a sliver. Also changed my plan for how the planks terminate so it looks a little odd right now, should be just fine once sanded to shape and hopefully will be a nice solid base for the second planking in this tricky area. Clearly I'm a bit of a slob when it comes to planking

-
Can't find the photo, but looking at the lines I'll open the bidding with HMS Warrior/Vernon III
-
Couldn't comment yesterday, looking seriously nice there Jim! So I have to ask, have you decided the next project?
-
Thats just beautiful Mike, deck is looking fantastic (envious!). Nice to see the contrast with the maple and pear as I'll be taking the same approach. Very nice work.
-
Love the stern shot, can't believe how fast you are moving!
- 1,616 replies
-
- 1
-
-
- caldercraft
- agamemnon
- (and 1 more)
-
Hi Rusty, lovely work. Did you make your own scraper or buy somewhere? Would love to try this myself in the future. I was going to ask Chuck if there is anyway to get some similar to those provided in the Confederacy kit.
-
Ray - thanks very much for the photos, very helpful, looks like you didn't use the triangular filler pieces at the stern and didn't cause you any issues. Mine are glued solidly on so will need to proceed with these. Hopefully I'll get some time tonight to look at this again. Carl - thanks, I'll check it out.
-
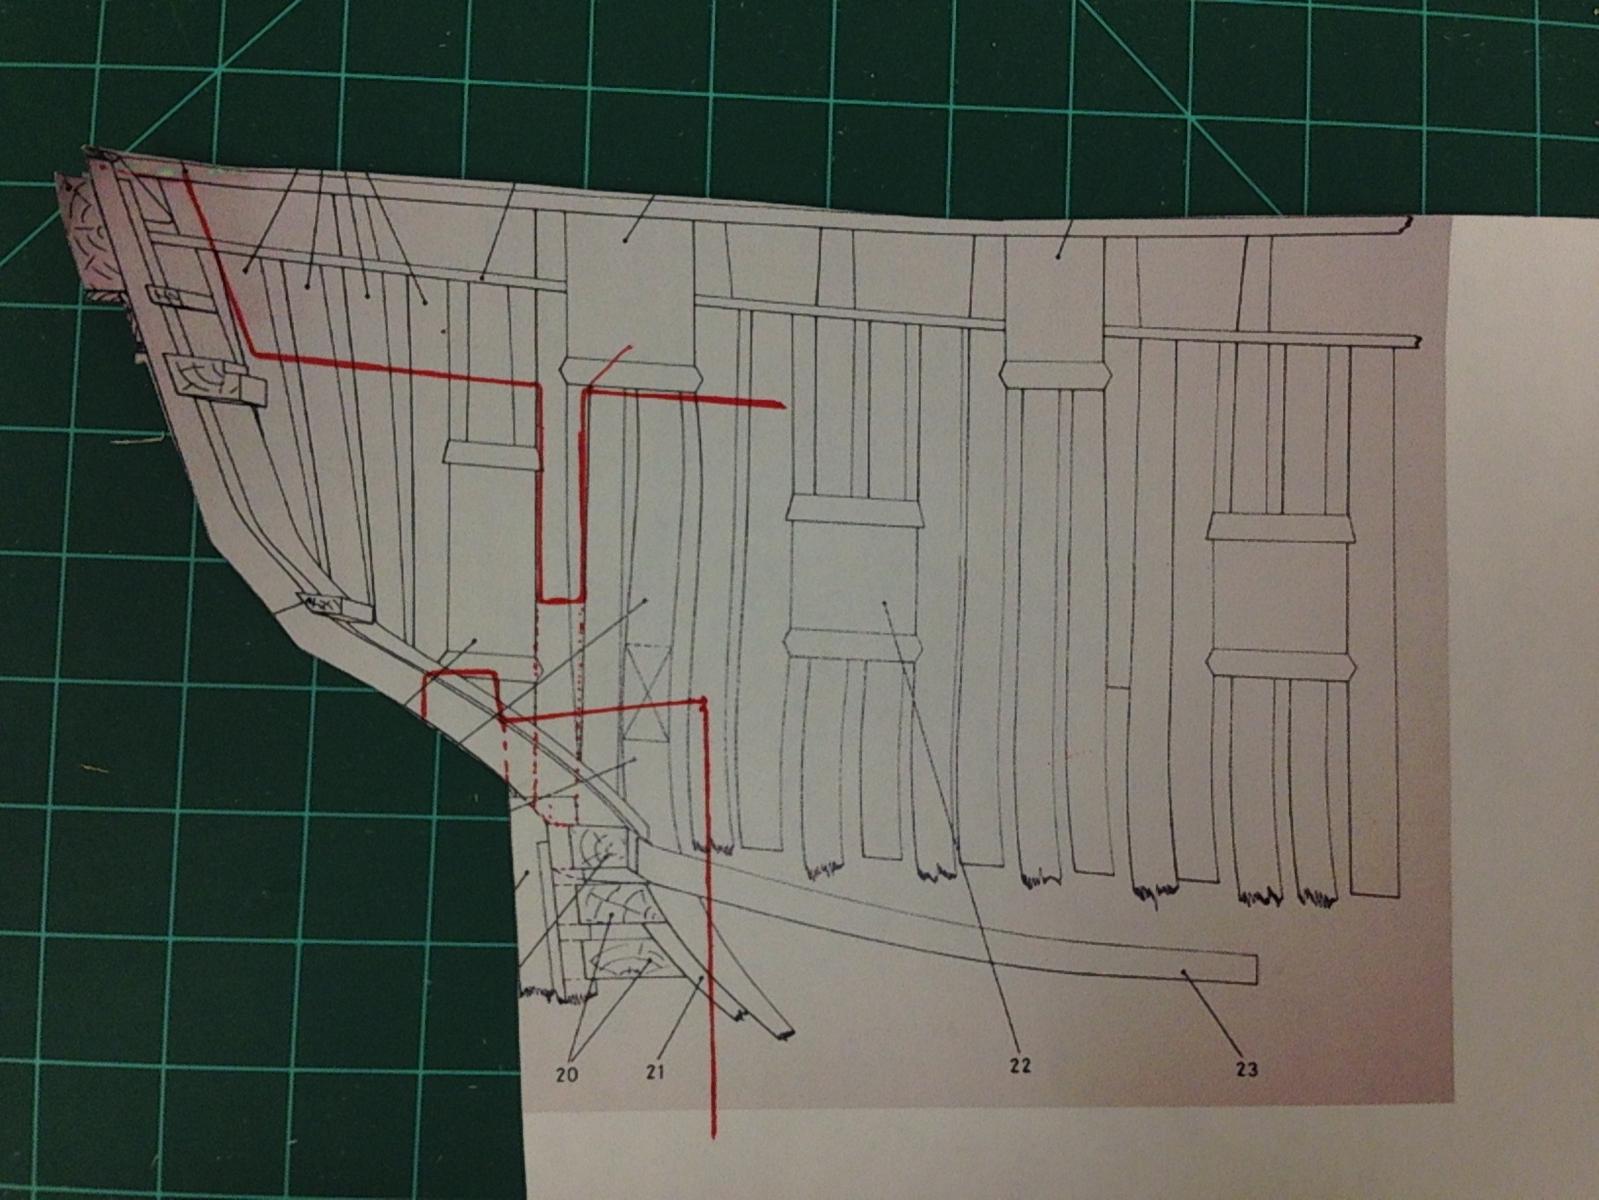
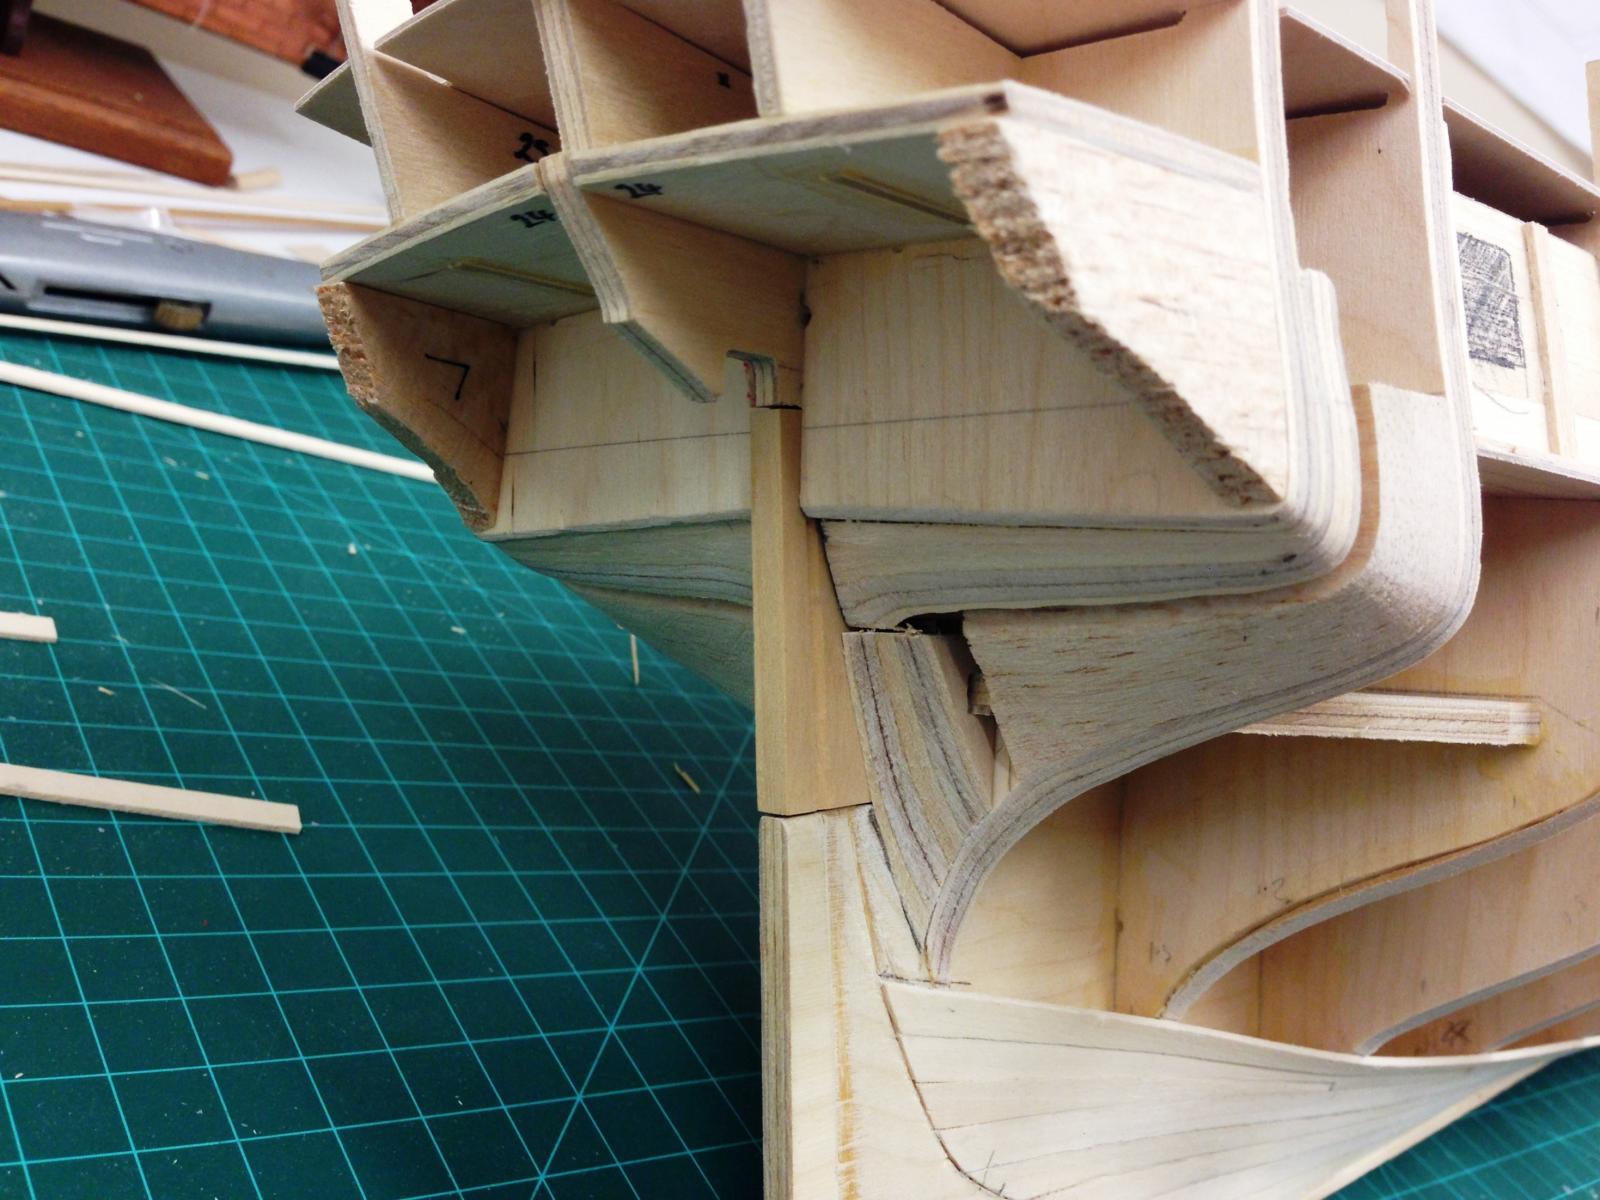
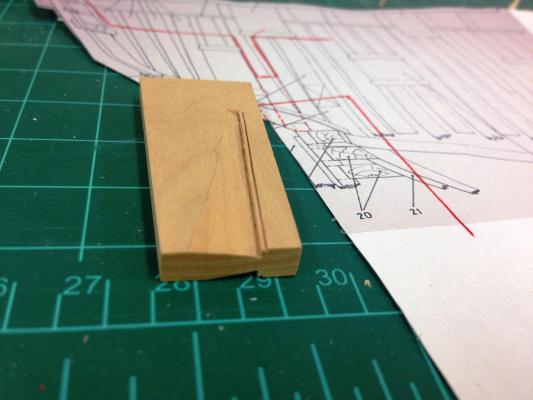
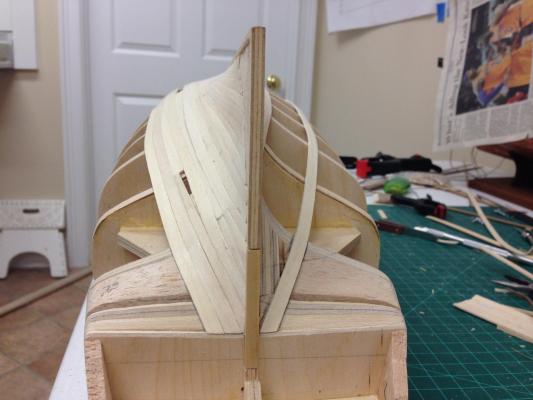
Cheers Joe, Mike, Sjors, Mobbsie and the 'likes'. Planking is going slowly, but actually quite pleasantly. On Snake, I used a combination of CA and PVA glue to secure planks, but wanted to just use PVA this time around. The kit supplies 6mmx1.5mm linewood planks which are pretty easy to work with but you really have to find the right lie of the plank to avoid excessive edge bending, meaning quite a few stealers. I have reached a bit of analysis paralysis at the stern so would appreciate any 'tips and tricks' anyone can share. The round stern is presenting me some challenges trying to figure out the appropriate shape, although I've tried to use some filler to get a better idea of the shape and provide a good base for glue. Main question: does it look like I've shaped this enough yet? I think I've got a good idea of the lay of the planks but the planking termination at the stern post and rearmost bulkhead is difficult to envisage - I've looked at multiple build logs for clues and photos all look great....'completed'. In photos below you can also see the the boxwood section that I'll be using above the waterline (not glued yet) and also some balsa transom terminations to avoid having planks float in thin air. I'm not comfortable fixing the transom shapers (parts 26 & 27) until I can get a better sense for positioning with a planked hull and the stern fascia. I can see why the stern of this ship causes so many challenges. (The uppermost plank looks very awkward in this picture for some reason...) Lower photo shows a copy from the AOTS book enlarged to 1:64 scale that was used to get a sense for where the various bulkheads align with respect to the actual framing. Mainly this was used to determine how the planking needs to terminate on the rearmost bulkhead, shape of the keel former in red pen and also shows section replaced with boxwood.


-
I think we need to remind folks that a key to the success, and rule, of this game is that the correct guesser posts a new ship. If you're not prepared to do that, don't guess.
-
Looking great, very interesting jig idea.
-
Looking good Sjors, its funny, the decoration on the bow looks very similar to the casting that goes on the stern of HMS Diana, seems CC reused that piece. I think the roundhouses were for the sick and the petty officers, outside for everyone else except the wardroom members who would have the luxurious side gallery.
- 1,616 replies
-
- 3
-
-
- caldercraft
- agamemnon
- (and 1 more)
-
Looking great Kester, very nice rigging indeed.
-
Those frames look fantastic, no gaps at all and beautifully shaped, can't imagine them coming out any better! Looks like you've been doing this for years.
- 255 replies
-
- 2
-
-
- granado
- bomb ketch
- (and 2 more)
-
Oh, , I think you need to use it before staining. Wonder if its worth trying sanded it a bit, using the sealer and then staining again.
- 1,039 replies
-
- 2
-
-
- ballahoo
- caldercraft
- (and 2 more)
-
Eamonn - haven't used it myself, but I've seen people use a 'sanding sealer' for just this problem.
- 1,039 replies
-
- 1
-
-
- ballahoo
- caldercraft
- (and 2 more)