Beef Wellington
-
Posts
2,249 -
Joined
-
Last visited
Content Type
Profiles
Forums
Gallery
Events
Everything posted by Beef Wellington
-
 Timmo - that seems to have been common practice. Only other thing to consider is the scale question, I've decided against serving anything .75mm and smaller thinking it looks too thick and out of scale, that's just my opinion though.
 -
Lovely work Lou, well done.
-
Planking has started, this will be a lengthy process.... I started at the keel to get going, will move up to the upper section and work down in due course. Even though I had shaped the bulkheads, I'm trying to fine tune as I go as it isn't until a few planks start going on that emphasize deviations, and the hull lines becomes much clearer to me as the surface grows.

-
Looking great Jim, the rope loop technique looks to work really well. Will add that to the filing cabinet.
- 226 replies
-
- 1
-

-
- ballahoo
- caldercraft
- (and 1 more)
-
Looking great Sjors, you can really see clearly through those lower windows. The officers have no privacy
-
Stergios - Yes, in reality they probably were served, I'm guessing like Eamonn, with the exception of the mizzen because there was no lower sail. However....you need to make a decision about how far you want to go with the serving. I didn't serve any of the shrouds that were .75mm diameter or smaller for two reasons, it gets to be a pain to serve properly on the smaller line, and the result (in my opinion) starts to look a little out scale as the line looks noticeably thicker (which it wouldn't at full scale) As always, the only clear thing is that there is no clear answer!
- 1,144 replies
-
- 2
-
-
- snake
- caldercraft
- (and 1 more)
-
Wonderful build Alex, just stunning attention to detail. Well done, looking forward to seeing more.
-
Mike - the deck is maple, the bulwarks use the kit supplied 'lime wood'. Its pretty nice to work with, think it is very similar to basswood but is a trifle 'yellower' but that doesn't really show in the photos (at least the stuff I got is). Sjors - the deck already has a single coat of polyurethane for protection, I'm waiting to get the other messy steps out of the way before coming back to put a few more coats on.
-
Stergios, I tried to document my approach here...http://modelshipworld.com/index.php/topic/509-hms-snake-by-beef-wellington-caldercraft-scale-1-64-first-wooden-ship-build/page-35#entry150463 The knots really hold everything together, the glue really just holds the final knot from coming undone so does not take any strain, the GS Hypo has worked just fine. It may not be the purists approach, but got the job done for me. Because each pair of shrouds sits on top of the previous one, the length needed to serve also gradually increases if you want to get a nice straight line across the shrouds. For example, if I was using 1mm thick line, I simply served an extra 2mm on each successive pair of shrouds. Its an approximation, but it works OK.
- 1,144 replies
-
- 2
-
-
- snake
- caldercraft
- (and 1 more)
-
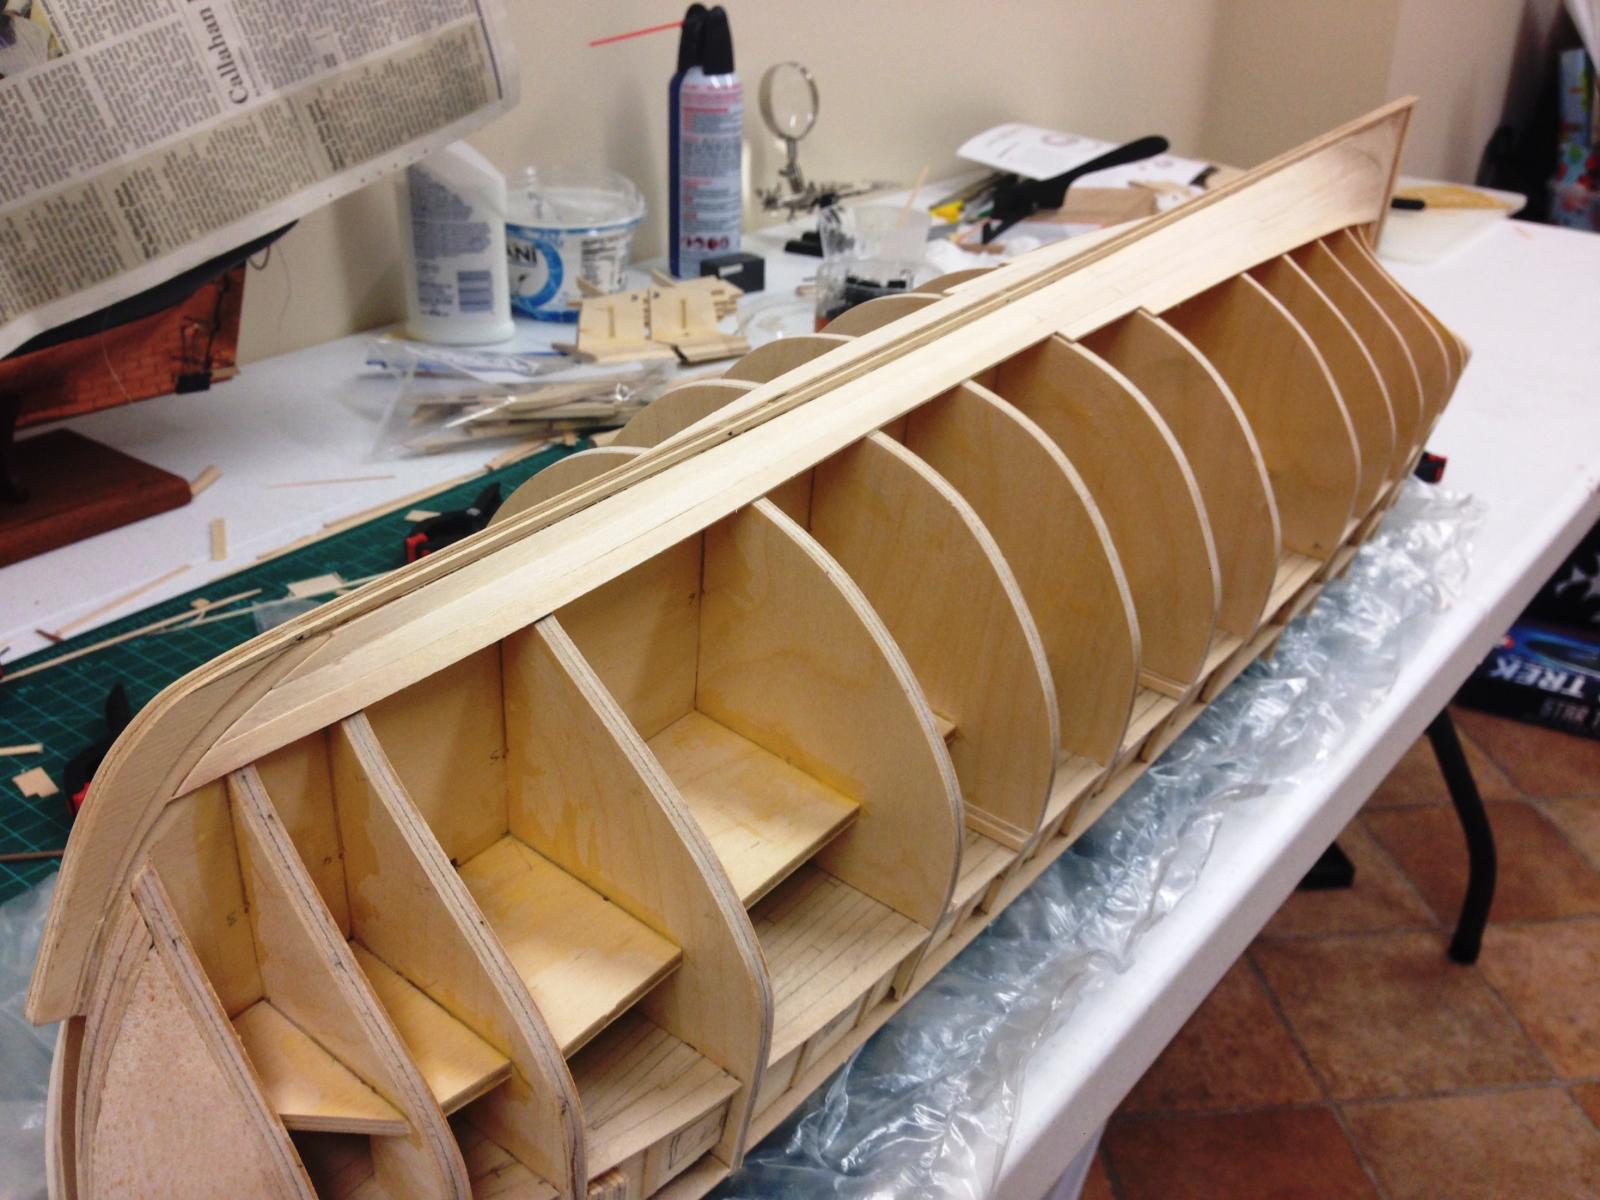
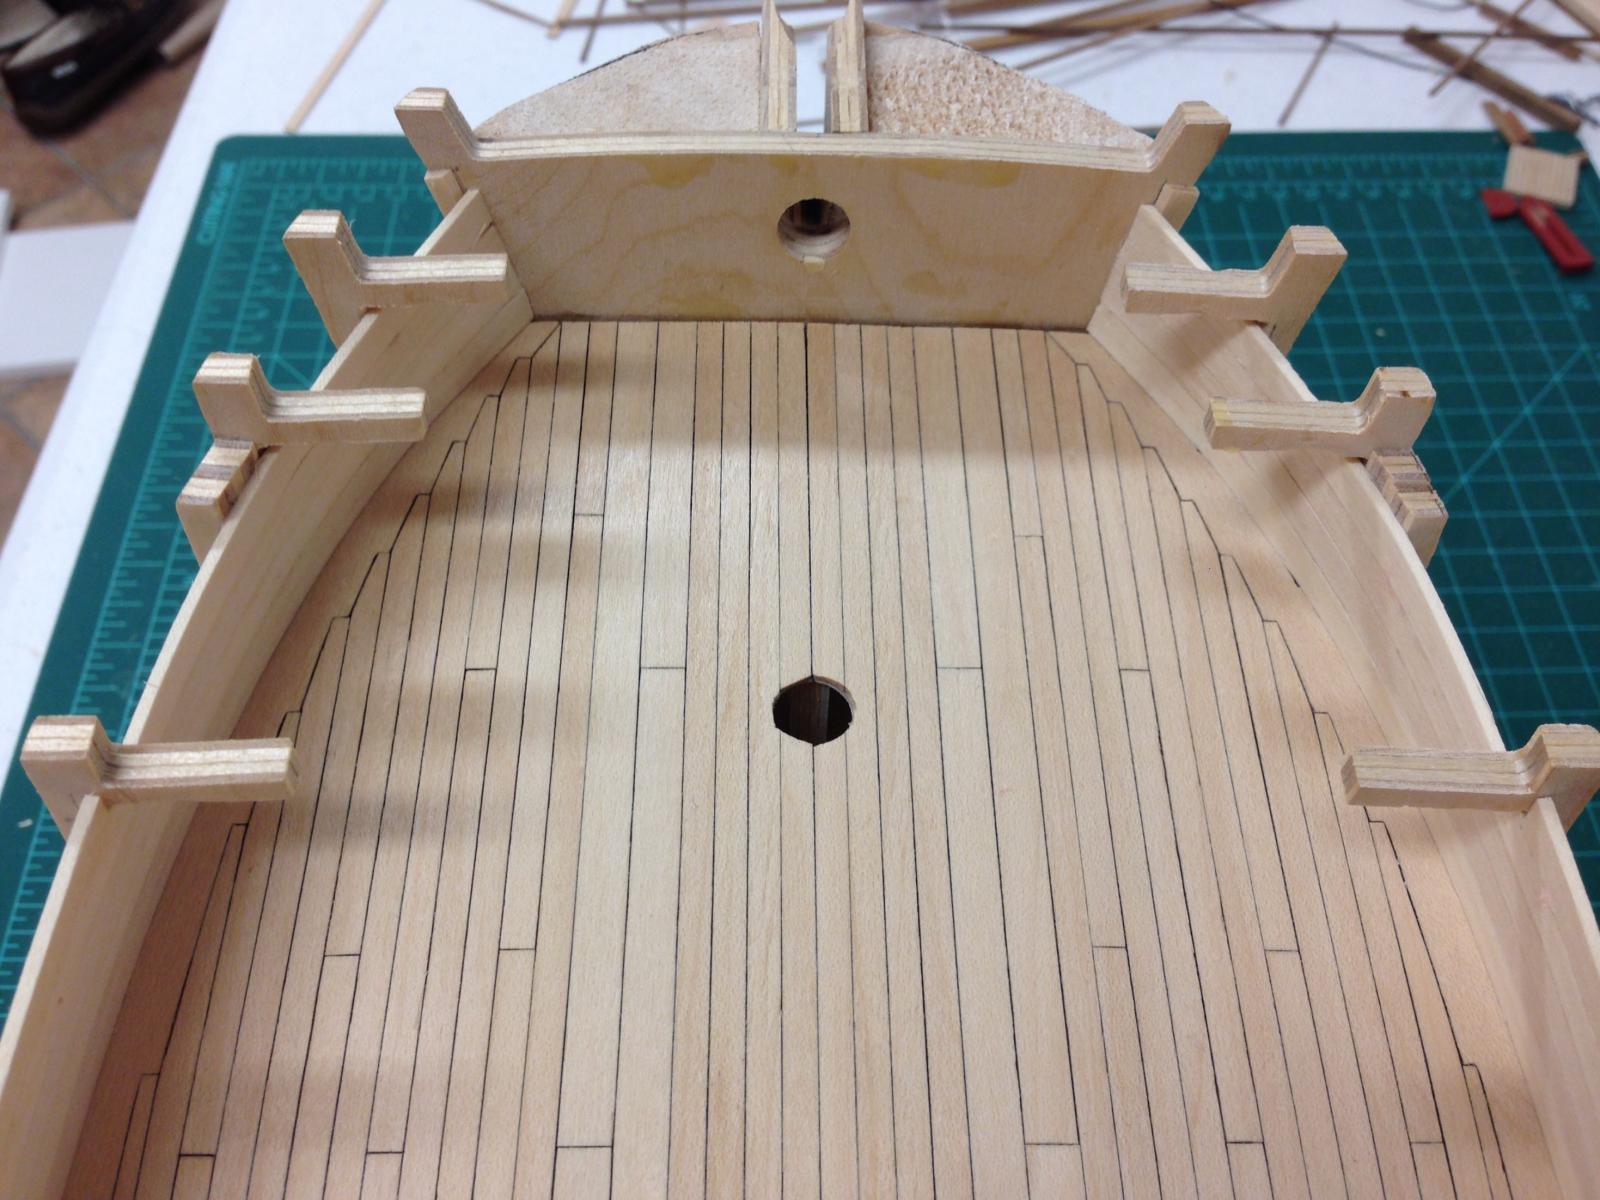
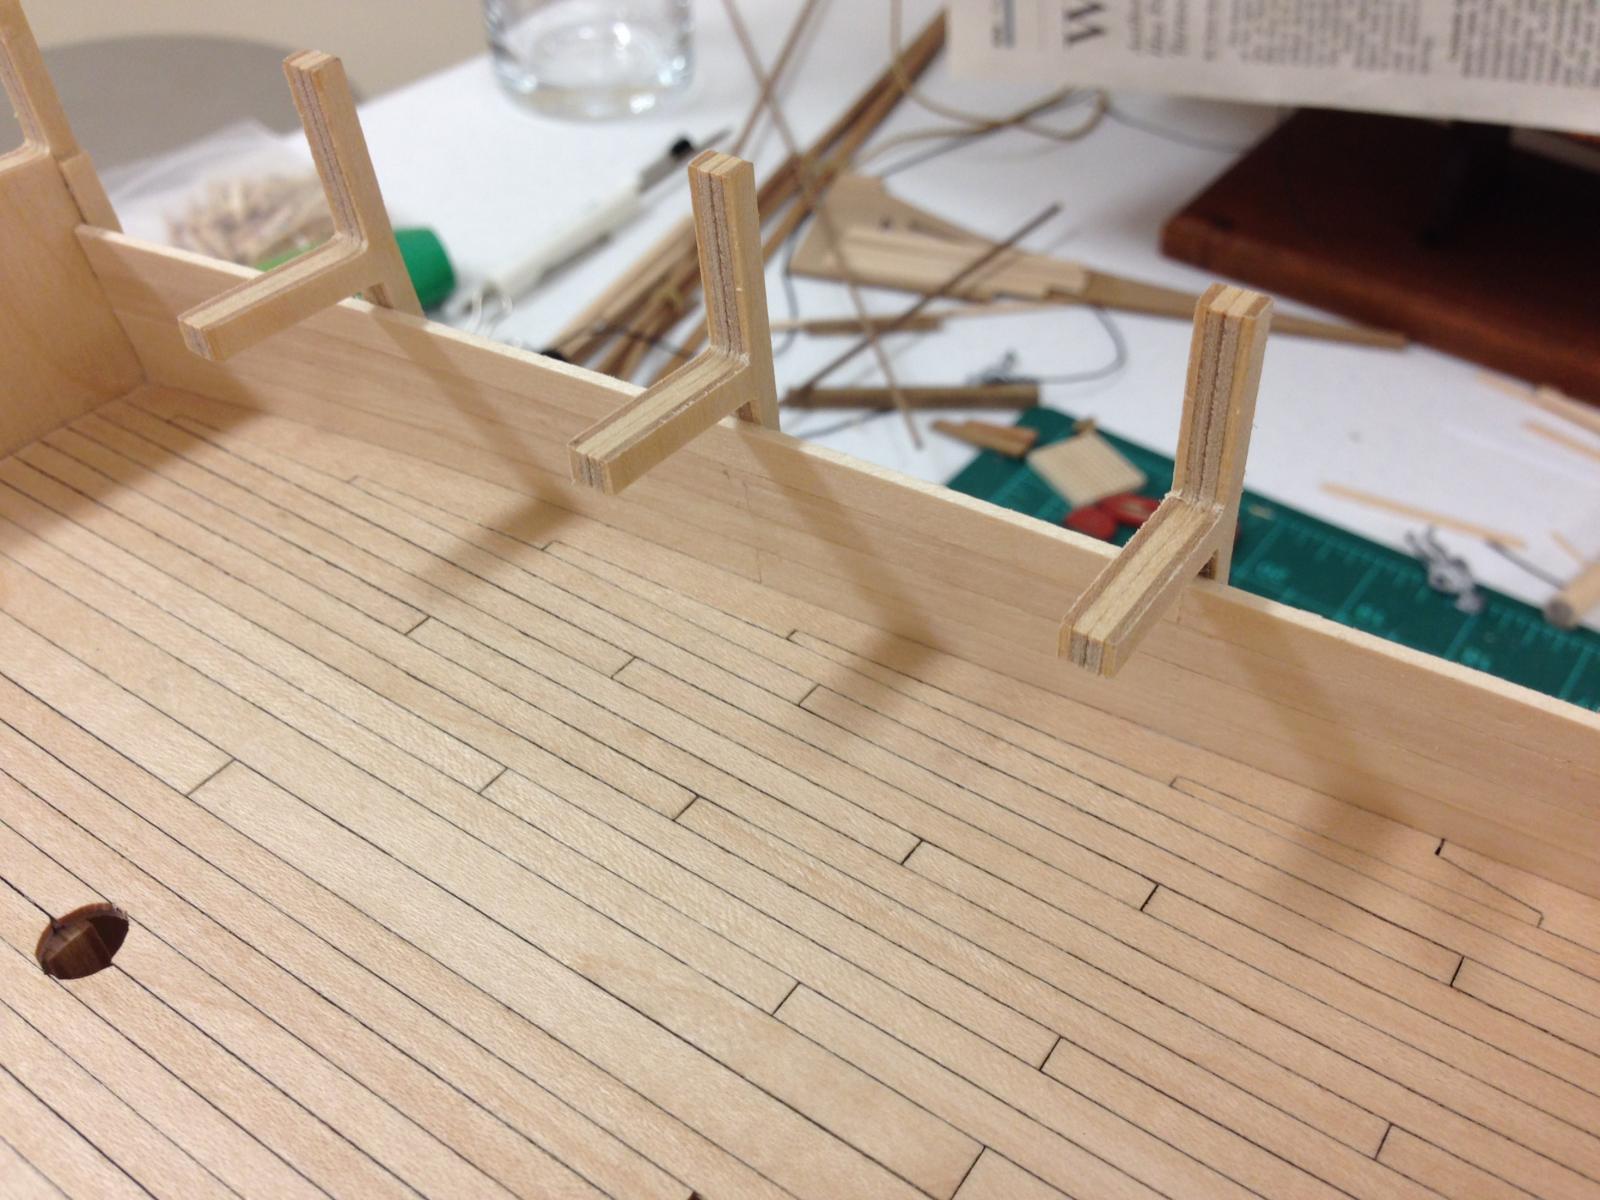
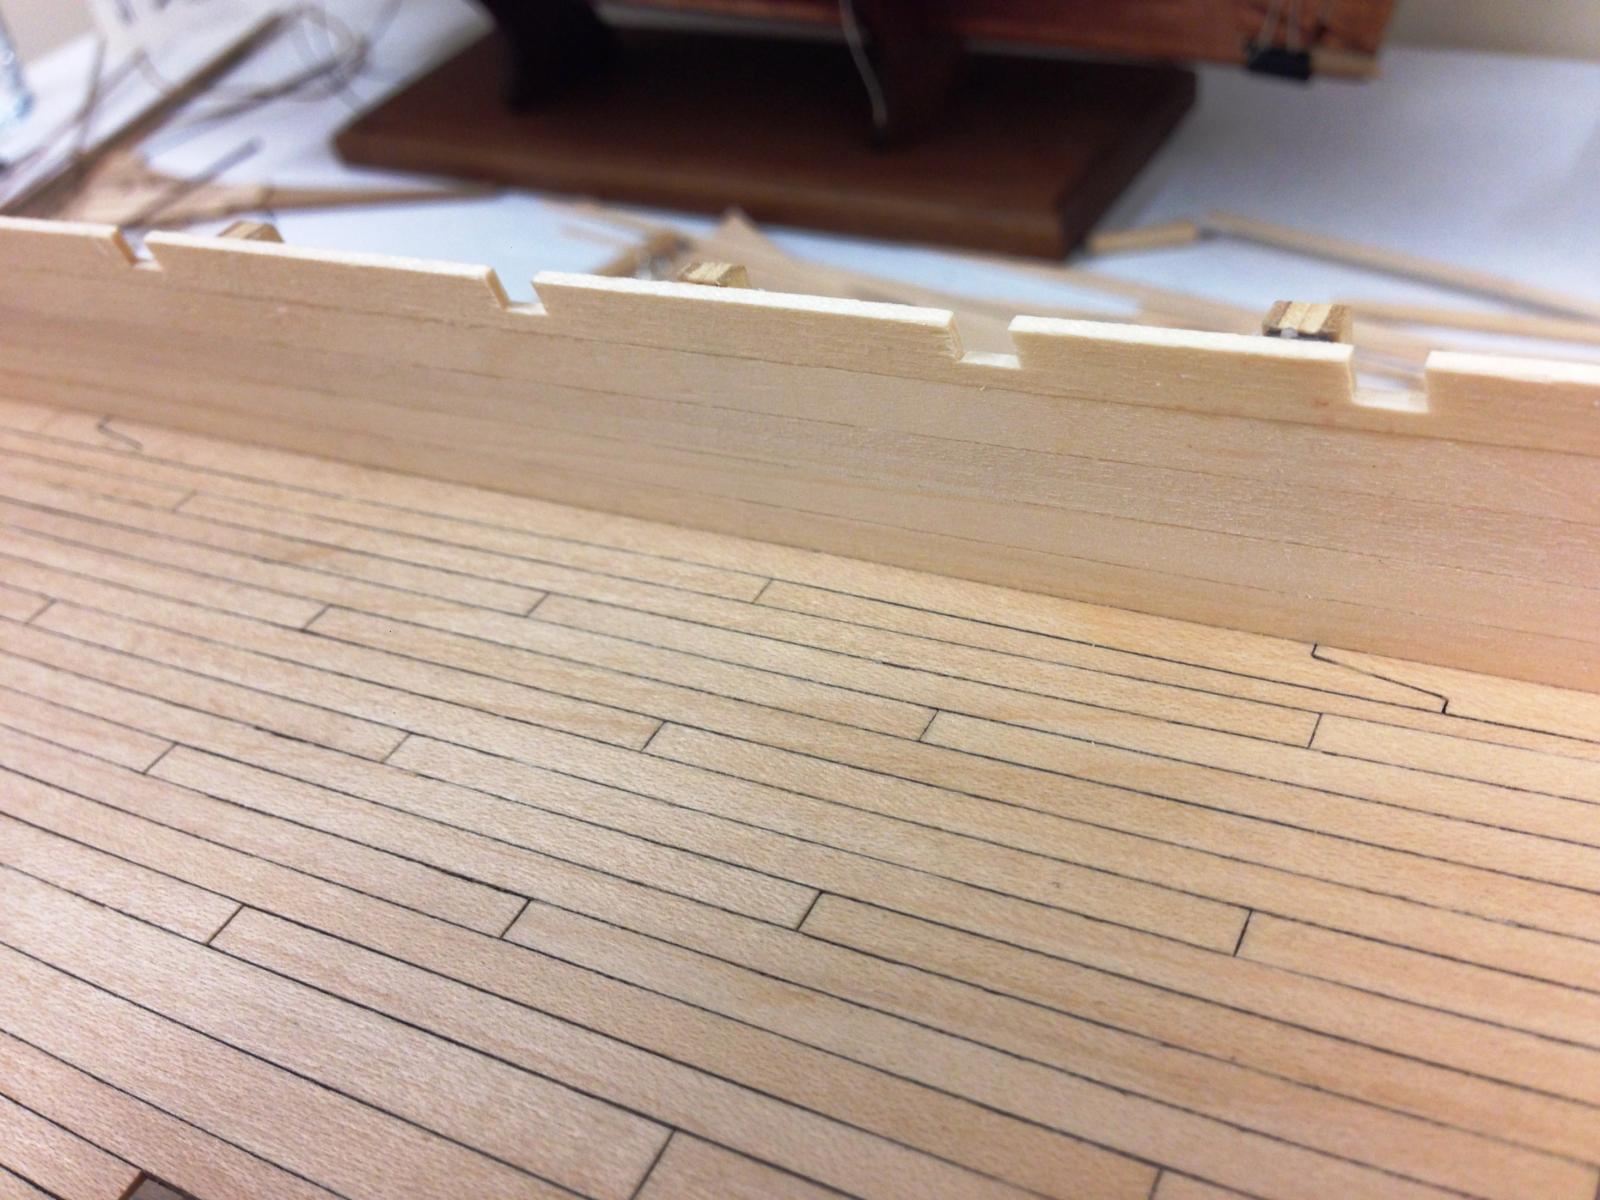
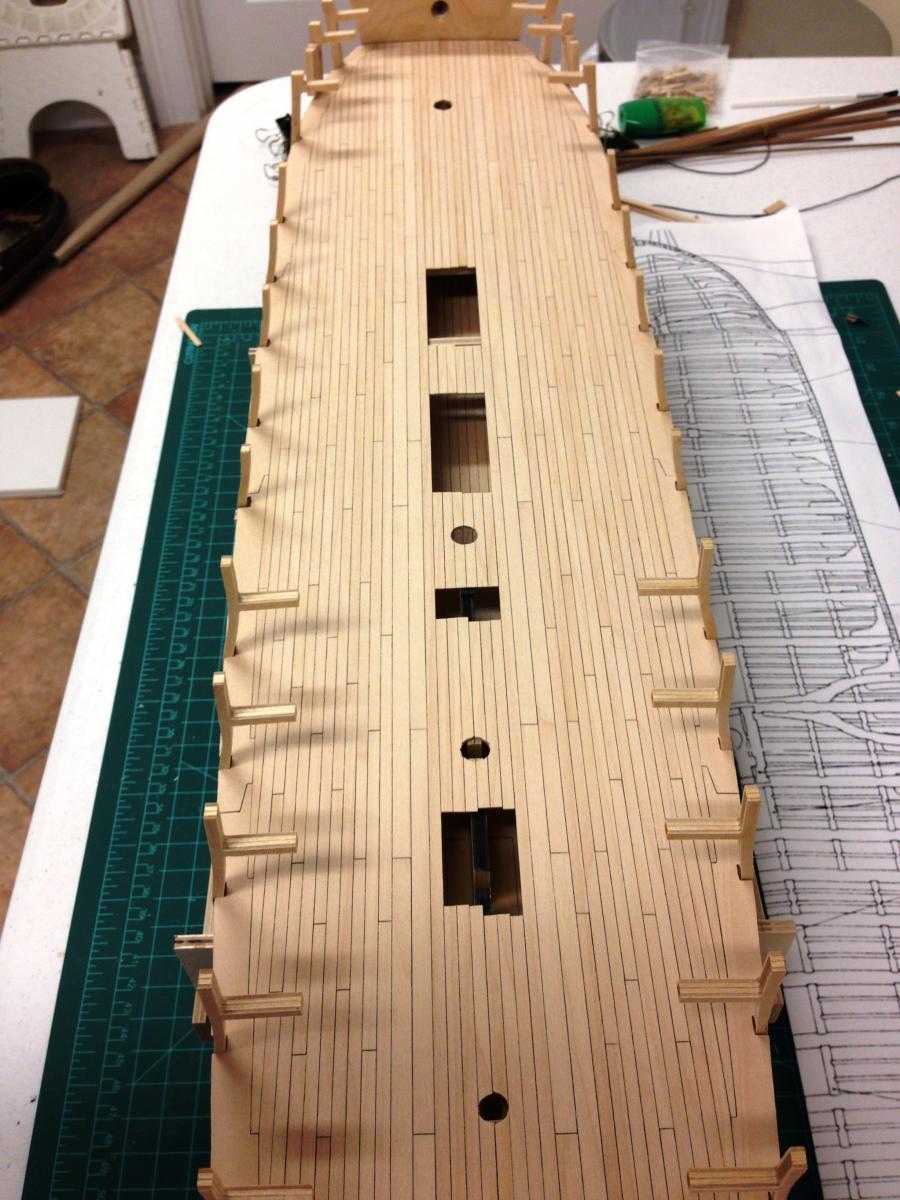
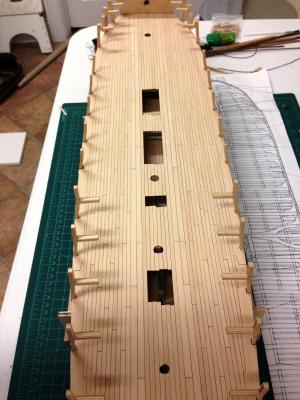
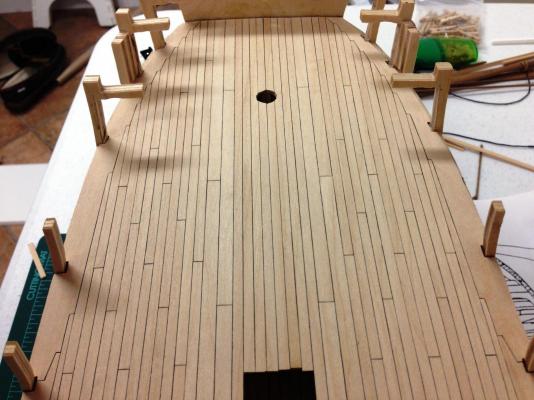
Cheers Eamonn, Jim, BE, Stergios and the 'likes' for the interest and kind words. I tried to superimpose 'Ballyhoo' on 'Jason' but couldn't figure out how to do it. Sjors - don't worry, there will be guns on this deck (eventually). But I believe the deck is more commonly referred to as the upper deck on a frigate (even though it has one above it...and also has guns!), although I do seem to recall seeing reference to a gun deck as well somewhere. Maybe someone else can speak definitively on this. Alistair - it did work out OK. I split the false deck down the center line first (the grain introduces a little error here), and then taped them back together on the back side. The 2 innermost planks were glued in place on each half and then separated so that I knew they would marry up properly during final assembly. An unexpected issue was that the deck did tend to cup a little, probably a combination of humidity changes here as well as the glue under the planks shrinking a little. It was easily manageable, but you can see a slightly larger gap at the extreme ends where there weren't any bulkheads under the deck to force the camber. As for treenails, I don't feel any compulsion to do them, but, I will have plenty of time to change my mind. Have managed to install the interior bulwarks this weekend, small 0.5mm slivers of scrap were used to build up some of the worst offending bulkheads to remove major waviness. These haven't been sanded yet but overall pretty pleased, any remaining small waviness should be pretty easy to sand out. The bow section seems to have come out OK with extending the planking past bulkhead 5. Most miraculously, the bulwarks do seem to follow the line of the margin planks, so a big 'phew' there. Although not entirely symetrical, this will not be seen once the foc'sle is on Also cut slots for the skid beams as it seems to be a lot easier to do now, these aren't mentioned until page 9 of the instructions. Now the interior bulwarks rare in place, the rest of the bulkheads can be faired as the extensions are much too thin and delicate to be able to shape without additional support.


-
Really looking the business Jim. Ratlines look great, as does everything.
-
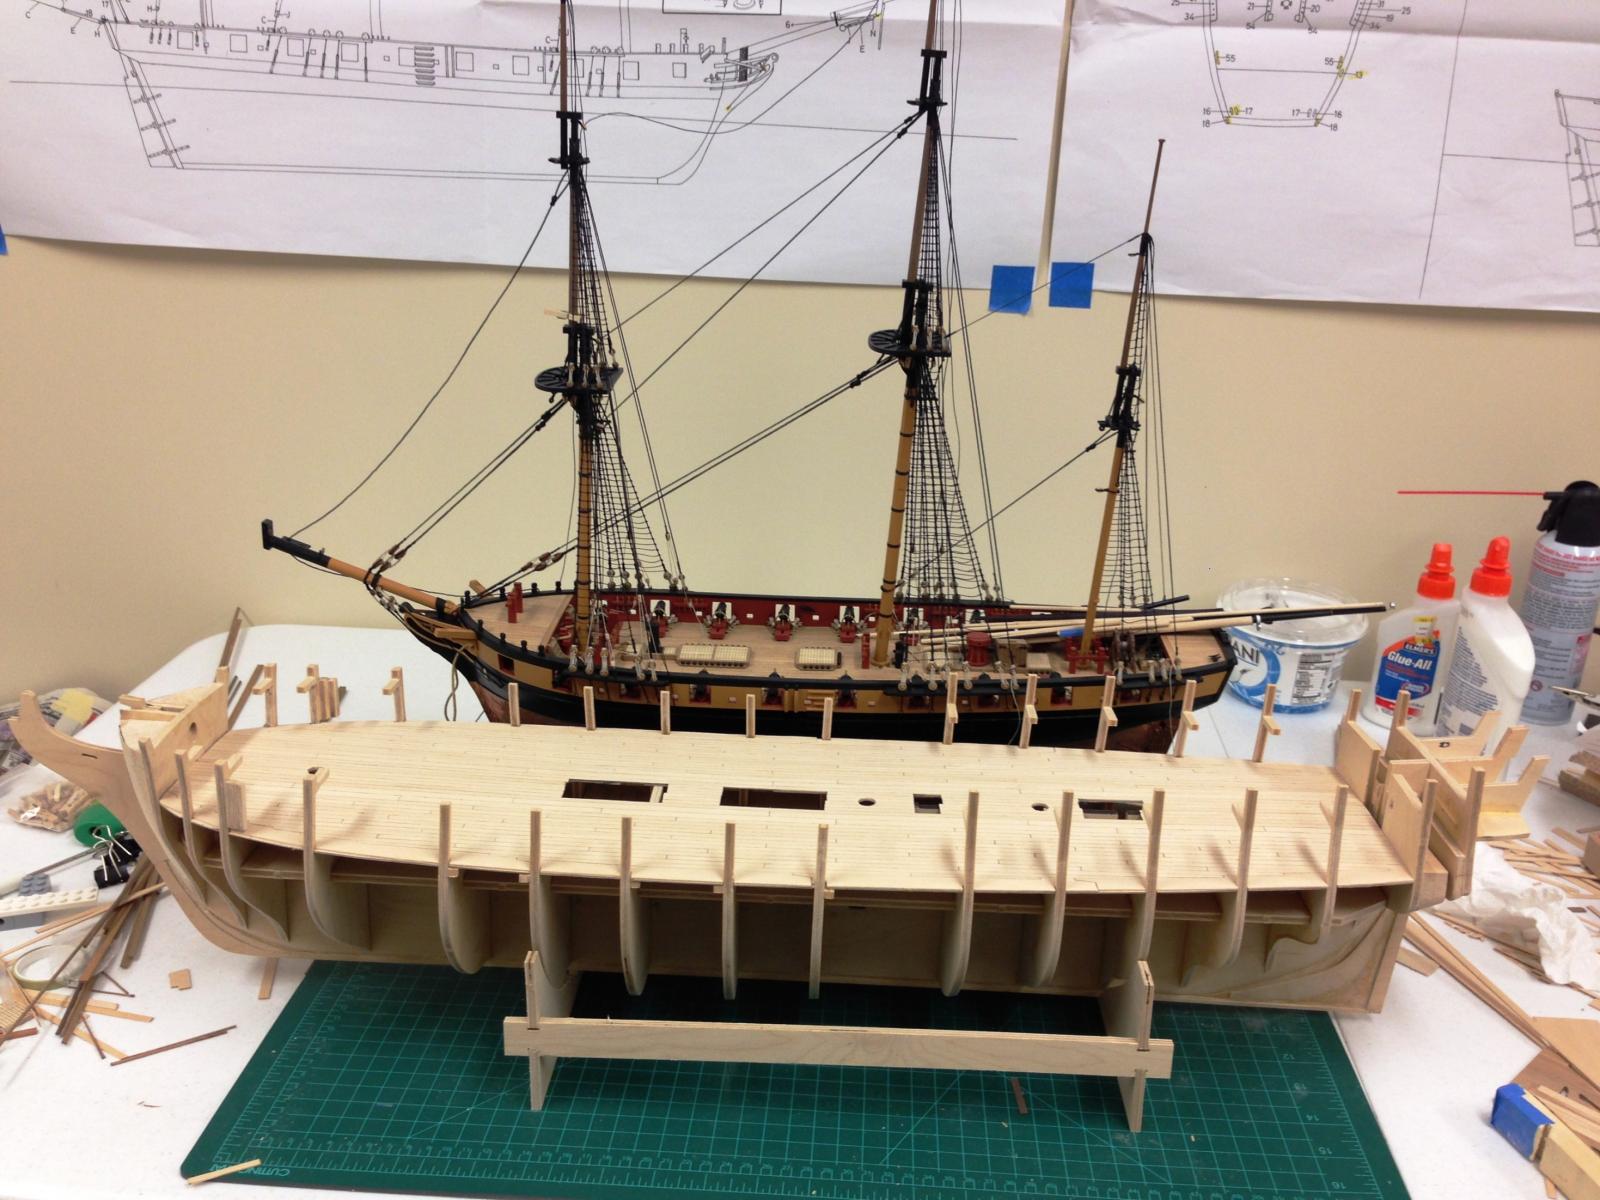
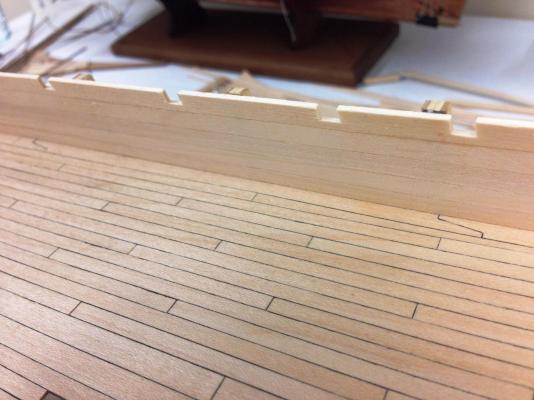
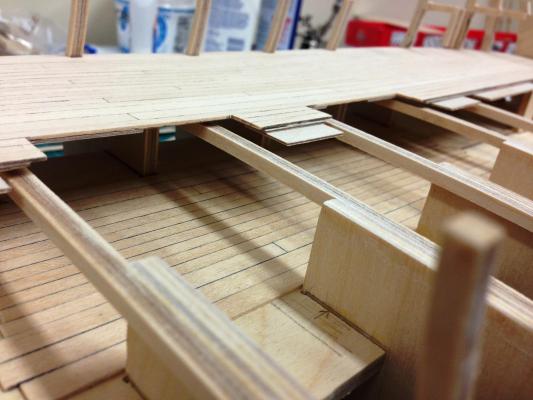
Nice hear from you John Mobbsie - cheers mate, though I think you're being a bit generous with the praise Well, bit of a milestone, the upper deck is finally completed and glued into position. Next step will be the interior bulwarks, will require some tweaking as a few test planks indicate that the bulwarks (even after shaping) still will be a bit wavy, I'll probably just add some thin scrap strips to the these to build them up, but more on that when its done. The instructions make no mention of some deck former beams that need to go on before the upper deck, the only reference is on the side plan - I nearly missed them. When in position there is clearly a problem because the beams will interfere with the open companions, once again the plans clearly show this issue. Simple to cut out the center section without any real structural implications, the ones remaining will be hidden by gratings. You can also see in the picture that I glued some thin beech off cuts where the two halves will join to provide some surface to mate the deck surfaces smoothly. Deck was glued in multiple stages, first half deck glued to center line, section half deck glued to center and mated, and then glued down to the bulkheads to give correct camber. Final result....completing the decking off the ship seems to have worked out just fine. Size comparison to Snake which is still laid up....Jason will be a big boy!

-
Congratulations Sjors, well done,they look beautiful together.
-
Nice update Nicholas, planking is tricky stage. Its hard to see from the photos so please forgive me if my comments are off base, but couple of things I'd suggest double checking: I wonder if some more fairing may be in order to help prevent the 'flat spots' between frames, sometimes this appears to be quite drastic. Great idea to use a shaper block at the bow, that should help a lot. The second frame looks like it might need to be built up a bit, or the first frame faired some more. That may be contributing to the need for the pointed planks, you probably want to try to avoid these where possible. If you haven't seen it already, I'd suggest checking out the great tutorial here http://modelshipworld.com/index.php/topic/439-planking-tutorials/ I suspect that the surface of the 2nd planking should terminate at the joint of the walnut stem (i.e. you shouldn't see any of the walnut ply) - looks like you have a slightly larger gap there Definitely worth taking time to get the hull shape right at this stage, so don't feel like you need to rush. Woops - looks like my comment posted at same time as Chris's...
-
Dave - any reason to use epoxy vs regular PVA glue? Would think the latter to be a little more user friendly. Good luck on the rest! Looks great.
-
Brian's post has it all with Gil's pictures, thats exactly what I'm describing
- 1,144 replies
-
- 1
-
-
- snake
- caldercraft
- (and 1 more)
-
Use one of the 'hooks' that come with the serving machine and place the loop over it. Using two hooks allows rigging with both ends looped to be served (e.g. catharpins, burton pendants)
- 1,144 replies
-
- 1
-
-
- snake
- caldercraft
- (and 1 more)
-
I'd agree with Brian, you definitely want the serving line to be thinner. There are a coupke of techniques that I've used, are you trying to have a single loop at the end of a rope? I think these would typically have been done with a splice, and thats the method that I try to use - you serve just enough line to make the loop, then create the false splice, and then serve from the neck of the loop as far as you need. That method removes the need for any seizing, in my virw gives a cleaner look and (I think) is more accurate. Where seizing is appropriate (for example, where the shrouds are seized to make a loop that goes round the mast, I typically just go with the thin thread used for the serving, and do 3 pairs of overhand knots (i.e. one at back, one at the front x3). That keeps things quite neat and unobtrusive.
- 1,144 replies
-
- 1
-
-
- snake
- caldercraft
- (and 1 more)
-
Wow, this log sneaked under my radar...looking very nice so far Mobbsie. How did you cut out the template, is there a plan for that?
- 255 replies
-
- 1
-
-
- granado
- bomb ketch
- (and 2 more)
-
Stergios, my only advice would be (and you know I'm not an expert) to expect to make mistakes, but know you'll get a great result in the end. It does require more thought/planning to make sure that you are serving the right length and its a good idea to mock up a piece to get the right dimensions. Serving takes a little getting used to, but like riding a bike, the technique is easy once you figure it out. You can only learn by doing (and if you're me, messing up a few times and learning from mistakes)! Best of luck, look forward to seeing how it works out.
- 1,144 replies
-
- 2
-
-
- snake
- caldercraft
- (and 1 more)
-
Very nice start Mike.