HOLIDAY DONATION DRIVE - SUPPORT MSW - DO YOUR PART TO KEEP THIS GREAT FORUM GOING! (Only 13 donations so far - C'mon guys!)
×


Beef Wellington
-
Posts
2,249 -
Joined
-
Last visited
Content Type
Profiles
Forums
Gallery
Events
Everything posted by Beef Wellington
-
 Per - nice start, will be following your progress. Even though I'm not building a Swan myself, I did just order a copy of TFFM Vol 2 after managing to find a cheap copy of Vol 1 in a book store - there is so much useful info that is applicable to other builds as well. The best price I could find was on Seawatch books, far from cheap but definitely better than the ridiculous $400 or more being asked on ebay/Amazon. http://www.seawatchbooks.com/109001
 -
Fantastic work Daniel, goes without saying. Are you sure you didn't miss anyone? Great stuff.
-
Mike, Joe - thanks for taking the time explain, very helpful indeed. I think I'm getting into some new 'lots of questions' territory. Nigel - likewise, happy you are "back" All the best.
- 800 replies
-
- 1
-

-
- snake
- caldercraft
- (and 1 more)
-
Clueline and Sheets
Beef Wellington replied to Beef Wellington's topic in Masting, rigging and sails
Nils, thank you! What I have just realized is that those diagrams also include the bolt-rope on the sail which caused my confusion. So it seems the situation is as follows, the Sheet terminates with a tack knot, and the knot is secured into a loop built into the stropping of the clue line block. This is illustrated on page 49 of Petersson. The situation for the top-gallant sheet and clue-line is not illustrated, but if the logic of the situation for the topsail sheet and clue continues, then the top-gallant sheet would also terminate in a tack knot, but this would be secured into a loop in the top-gallant clue line as it seems no block is used in this circumstance (extrapolated interpretation of Petersson page 50) -
Hope this isn't a silly question. Can anyone explain to me how the clueline and sheet are 'tied' together on topyard and topgallant when no sails are present?
-
Nice start Joe. Interesting to see the difference between basswood and the plywood keel formers, Can only imagine how much easier it is to work with.
-
Rudder straps look really great Dave. Have to agree with you on the steps, the ladders on my Snake are exactly the same but being taller the odd proportions are less noticeable. On my Jason build, I'm committing to make my own. Have you considered round off the top leading edge, that might make the proportions sit a little better without any packing. Just a thought.
-
Even though still plenty of work to do on spars,I've started thinking about the final rigging steps. I pulled together a list of the various rigging elements and tied the various Caldercraft rigging plans to Petersson's excellent Rigging period Ship models reference book which I find much easier to follow.... Of course, the proof of the pudding is in the eating, so won't see errors until the rigging is started. Errors are of course my fault, but please let me know so I can correct. I may also post this in the main forum section. Question - What are peoples recommendations on the order to add yards? I was going to start at the fore mast, then foretopsaill and fore topgallant, then the same for the main main and mizzen. Think adding Jib-boom, spritsail yard and the spanker/gaff makes most sense as these seem most susceptible to accidents. Caldercraft HMS Snake Rigging Chart.pdf
- 800 replies
-
- 2
-
-
- snake
- caldercraft
- (and 1 more)
-
Really nice work Brian, deck shots look fantastic and very neat rigging of the gun tackle blocks.
-
Hi Daniel, are you changing the shape/size of the bow? Fascinated to see your model of this develop. Looking at photos I always have mental image that the 1900s version is the 'real' version but after eating too many cookies
-
Nice start Bob, mistakes seem to be a part of this process for everyone, the important thing is to keep moving on and getting comfortable with 'fixes'. Best of luck, I'll be following along.
-
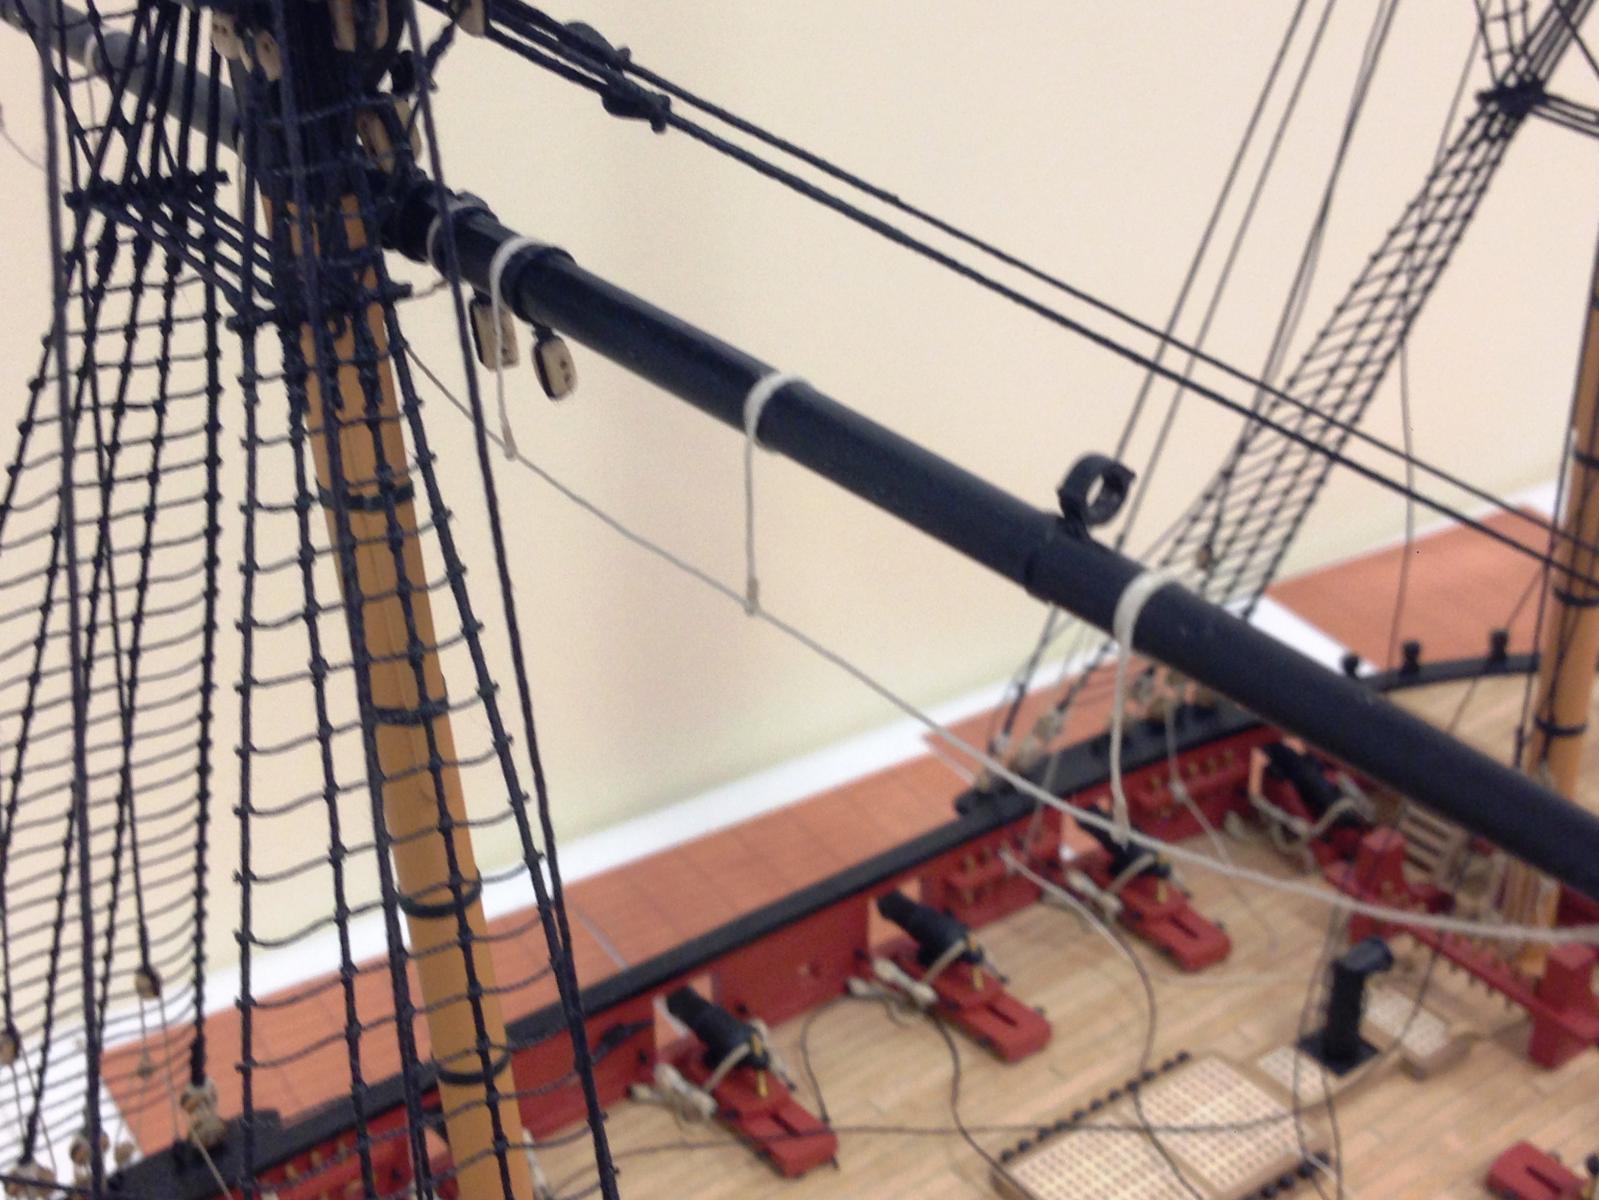
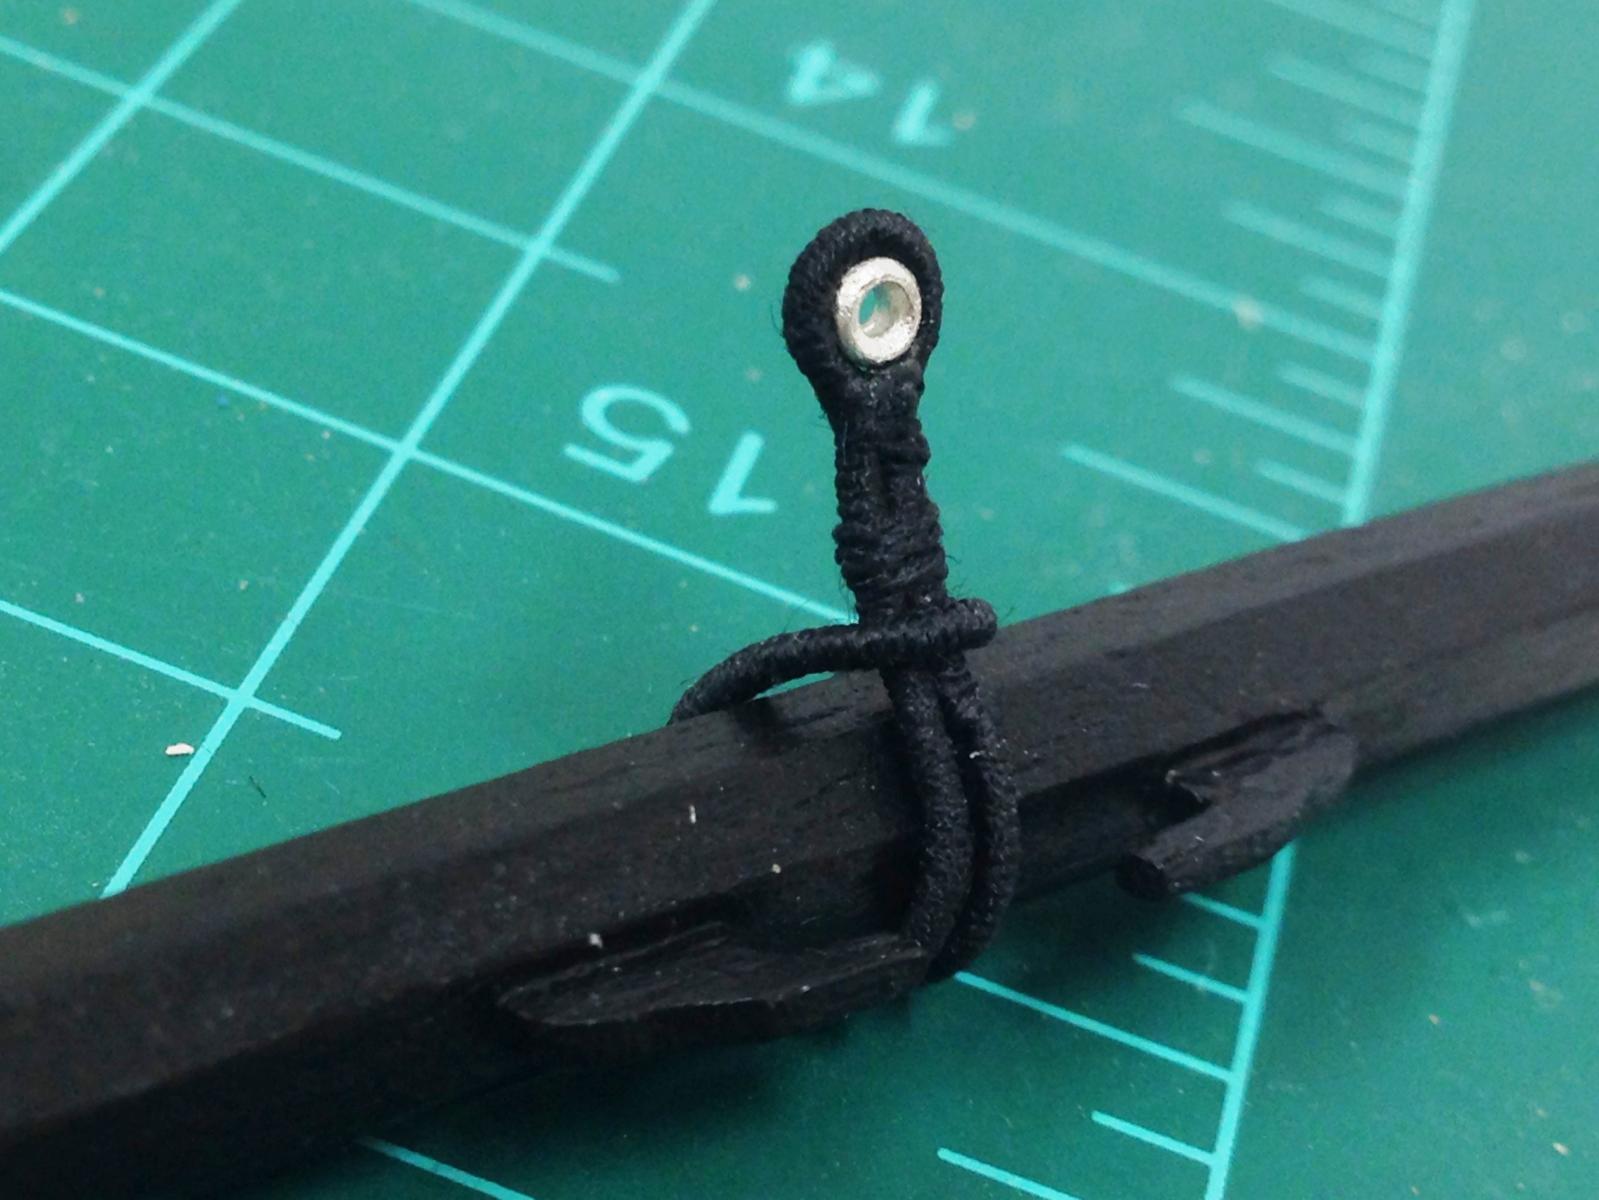
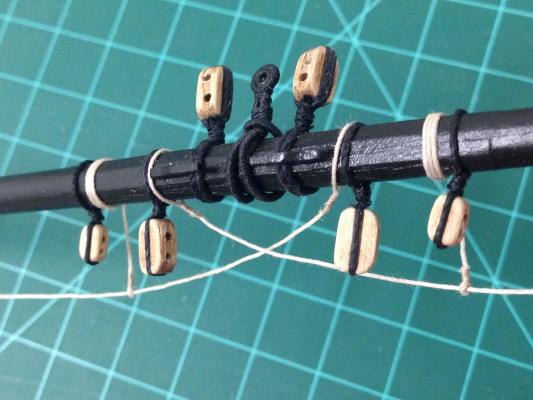
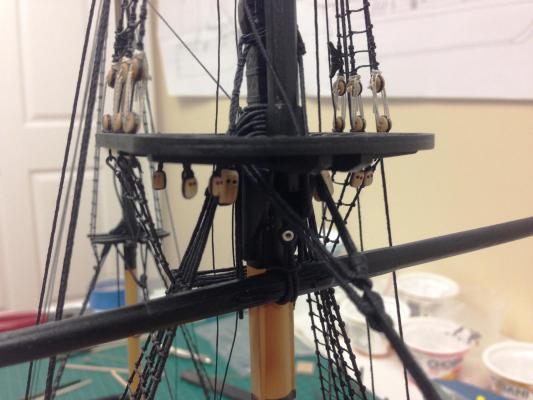
JesseLee, Mobbsie,Carl, and the likes - thanks for all the positive comments Continuing with the main yard: After adding a few of the requisite blocks, it was finally time to figure out how to tackle the stirrups and horses. The instructions indicate using wire, but I wanted something a little more realistic so tried making with 0.5mm line. Made the usual false splice into a length of line using an offcut of .75mm wire to get eye of appropriate size. These were then lashed around the yard in the appropriate places and diluted PVA applied to add some stiffness and secure in place. A length of wire was used to try to keep the eyes aligned and clamps provided a small amount of tension while glue dried. Instructions indicate the eye should be 15mm below the yard, I reduced this to 13mm as Ifelt it looked a little more to scale, and also seemed to match up better with diagrams in the AOTS series. I also decided to use 3 stirrups per side against the 2 indicated on the plans as the spacing looked too great to my eye. Horses were then added with yet more false splices around the center of the yard and around the cleats. The cleats were the smallest I could manage but seem to be what is required to keep to appropriate scale. The cleats are installed 1/20th of the length of the yard from the end. I had previously used paper to simulate the iron bands for the end boom iron. Yard dryfitted. Although the stirrups and horses will need a little bit of adjusting wjhen finally in position, I'm pretty happy with the result. Now need to replicate on the remaining yards now the plan of attack has been determined. Its amazing how congested things are getting, not sure how I'll manage to get the trusses on and the sling lashing when I get there, but thats a challenge for the future.


- 800 replies
-
- 16
-
-
- snake
- caldercraft
- (and 1 more)
-
Those props are amazing Nils, superb.
- 2,625 replies
-
- 2
-
-
- kaiser wilhelm der grosse
- passenger steamer
- (and 1 more)
-
Eric, the other solution is to ask for a new one from Caldercraft. They may hum and har a bit but will likely be willing to replace. The warp on the keel of my Diana/Jason kit was at the bottom (as painfully shown in my log), so glueing up the bulkheads/false deck would not solve the issue. I lost a good few months trying out different options, but very glad a replaced it in the end. Best of luck.
- 44 replies
-
- 1
-
-
- agamemnon
- caldercraft
- (and 1 more)
-
Correct - and I think you'll be just fine filing down a bit, not much of a lip is needed for the shrouds.
- 1,039 replies
-
- 2
-
-
- ballahoo
- caldercraft
- (and 2 more)
-
Eamonn, looking sharp! One question, can't quite tell from the light int he photos but it looks like your hounds are conically shaped (i.e. circular in cross section), think these should be octagonal. Of course, please ignore if I'm out of order...
- 1,039 replies
-
- 2
-
-
- ballahoo
- caldercraft
- (and 2 more)
-
Peter, missed the start of this as well, deck planking is looking great, very nicely done joggling.
- 293 replies
-
- 1
-
-
- pickle
- caldercraft
- (and 1 more)
-
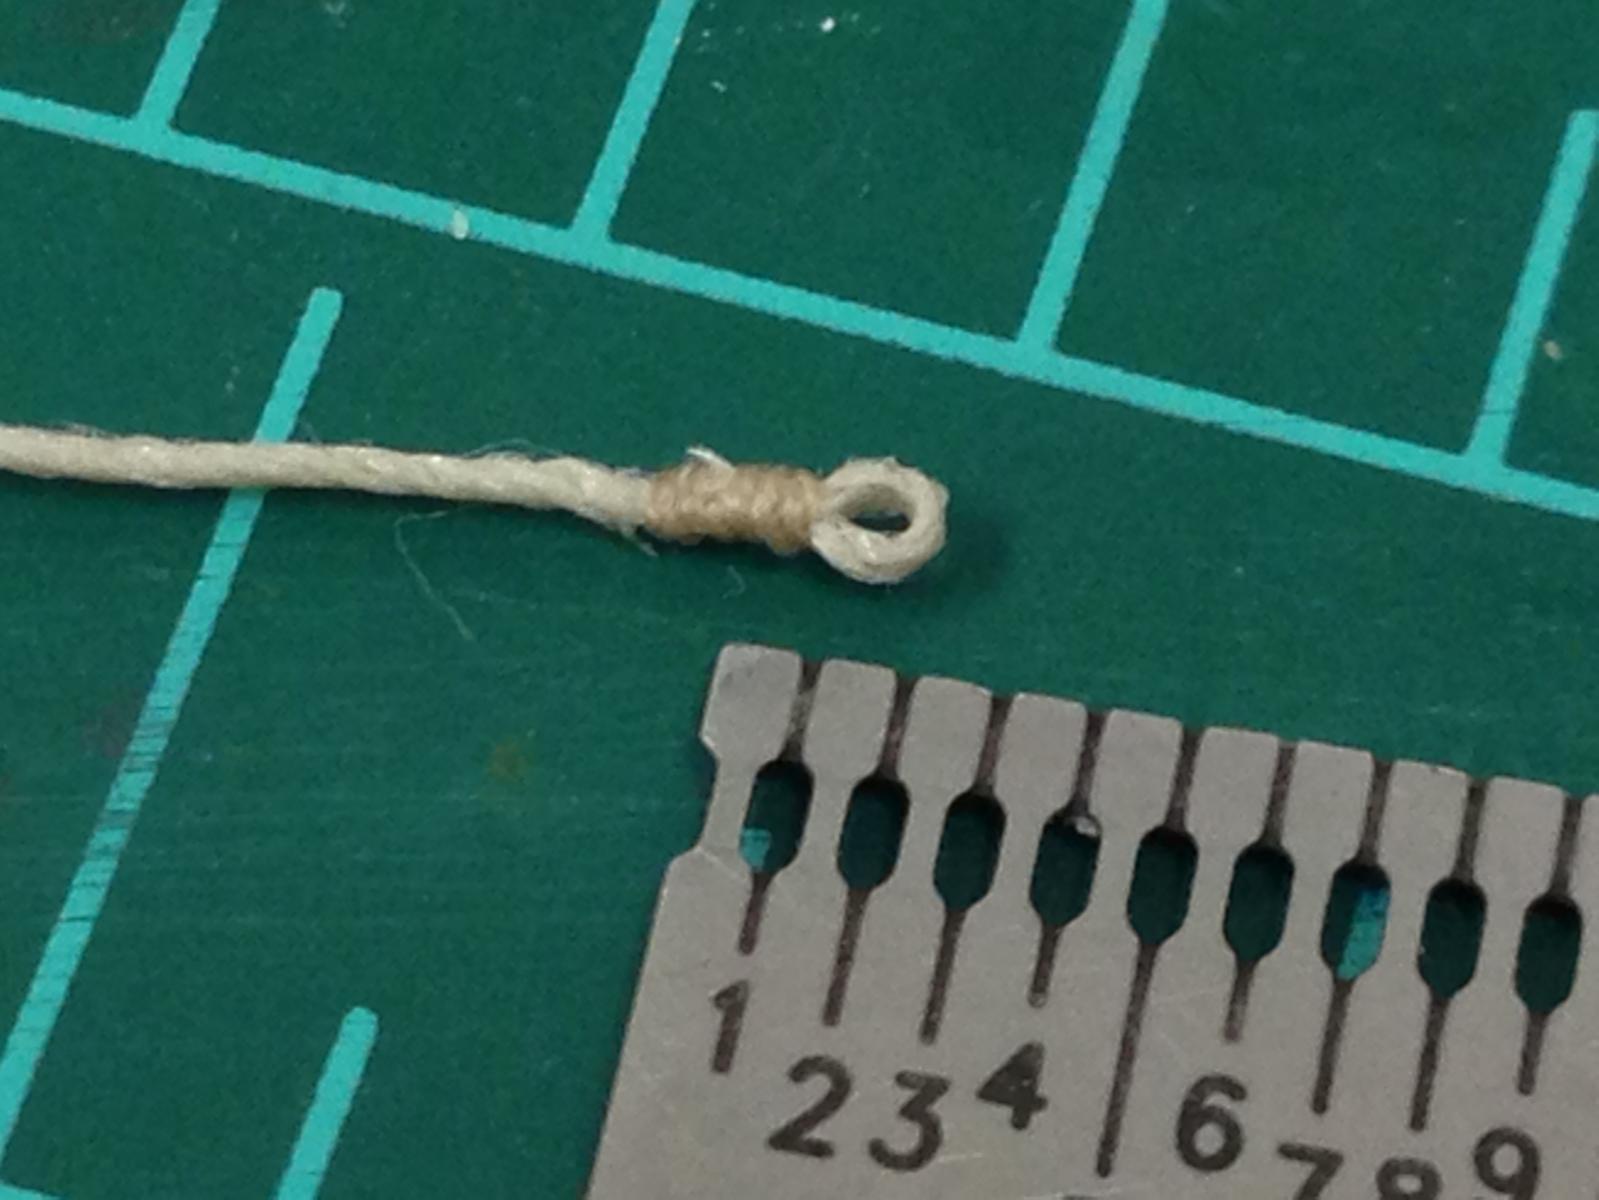
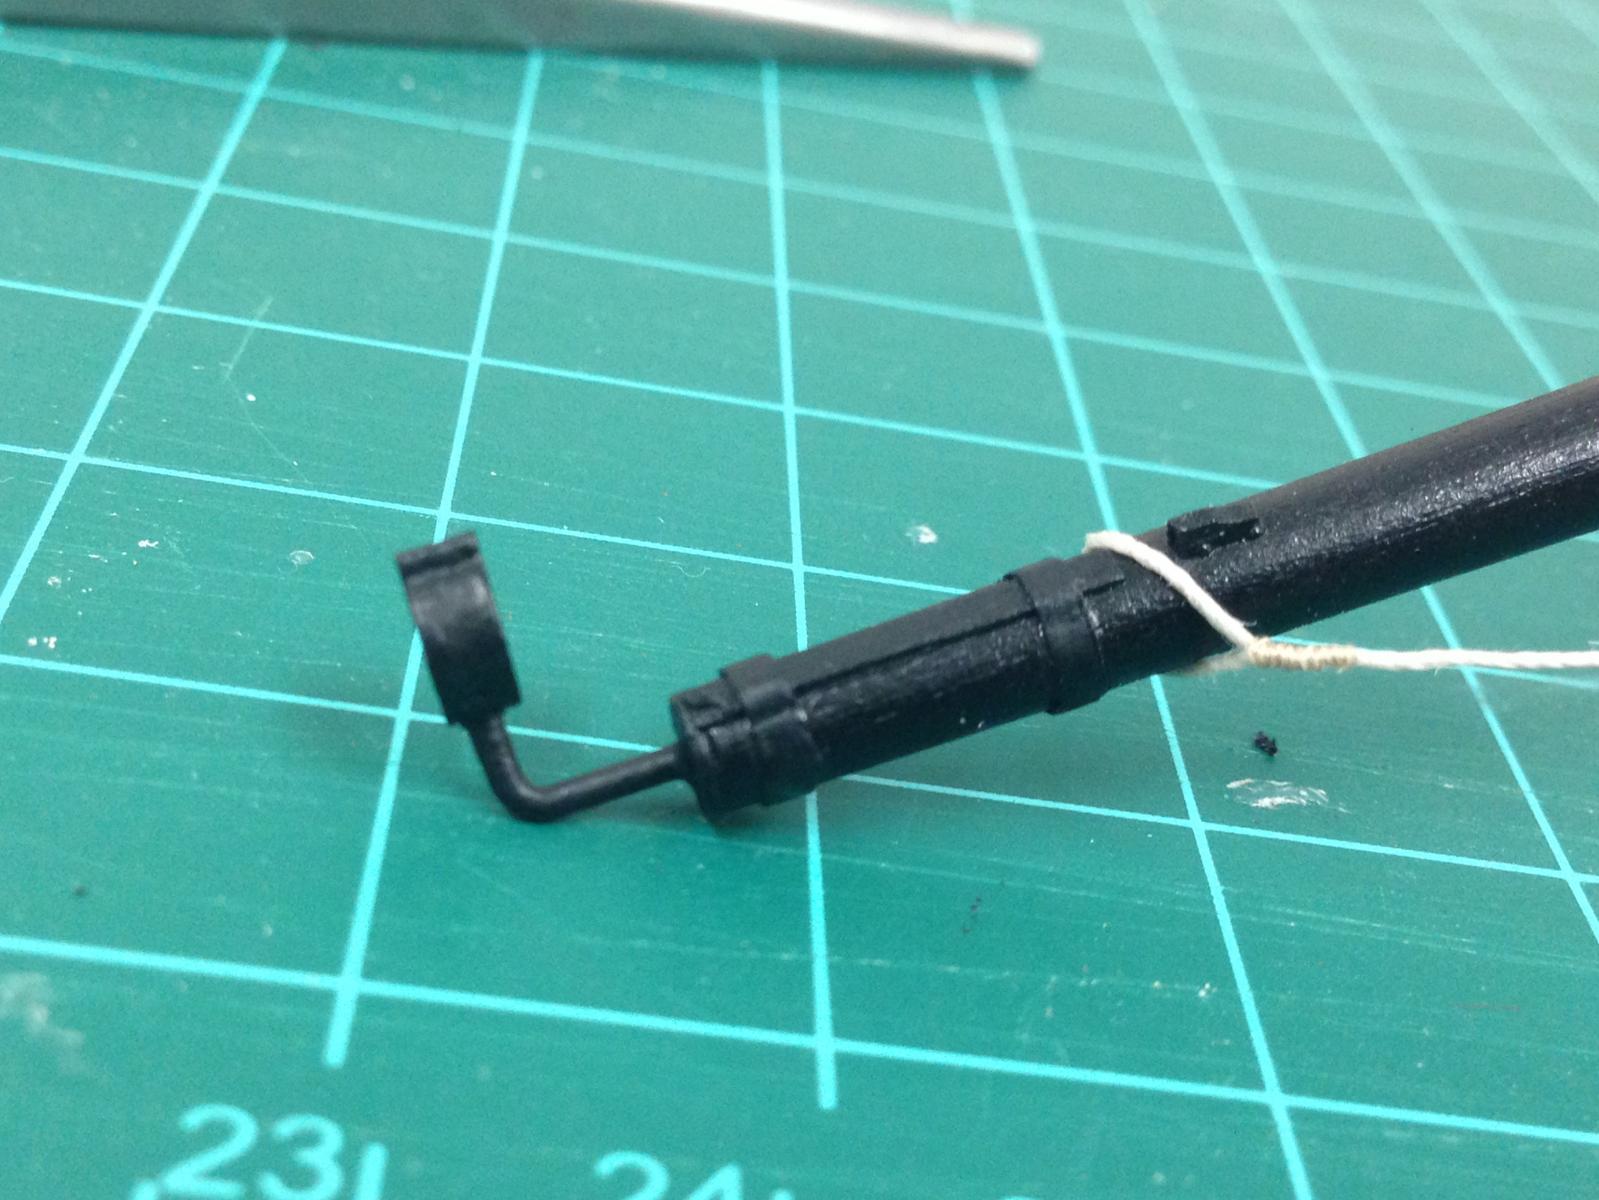
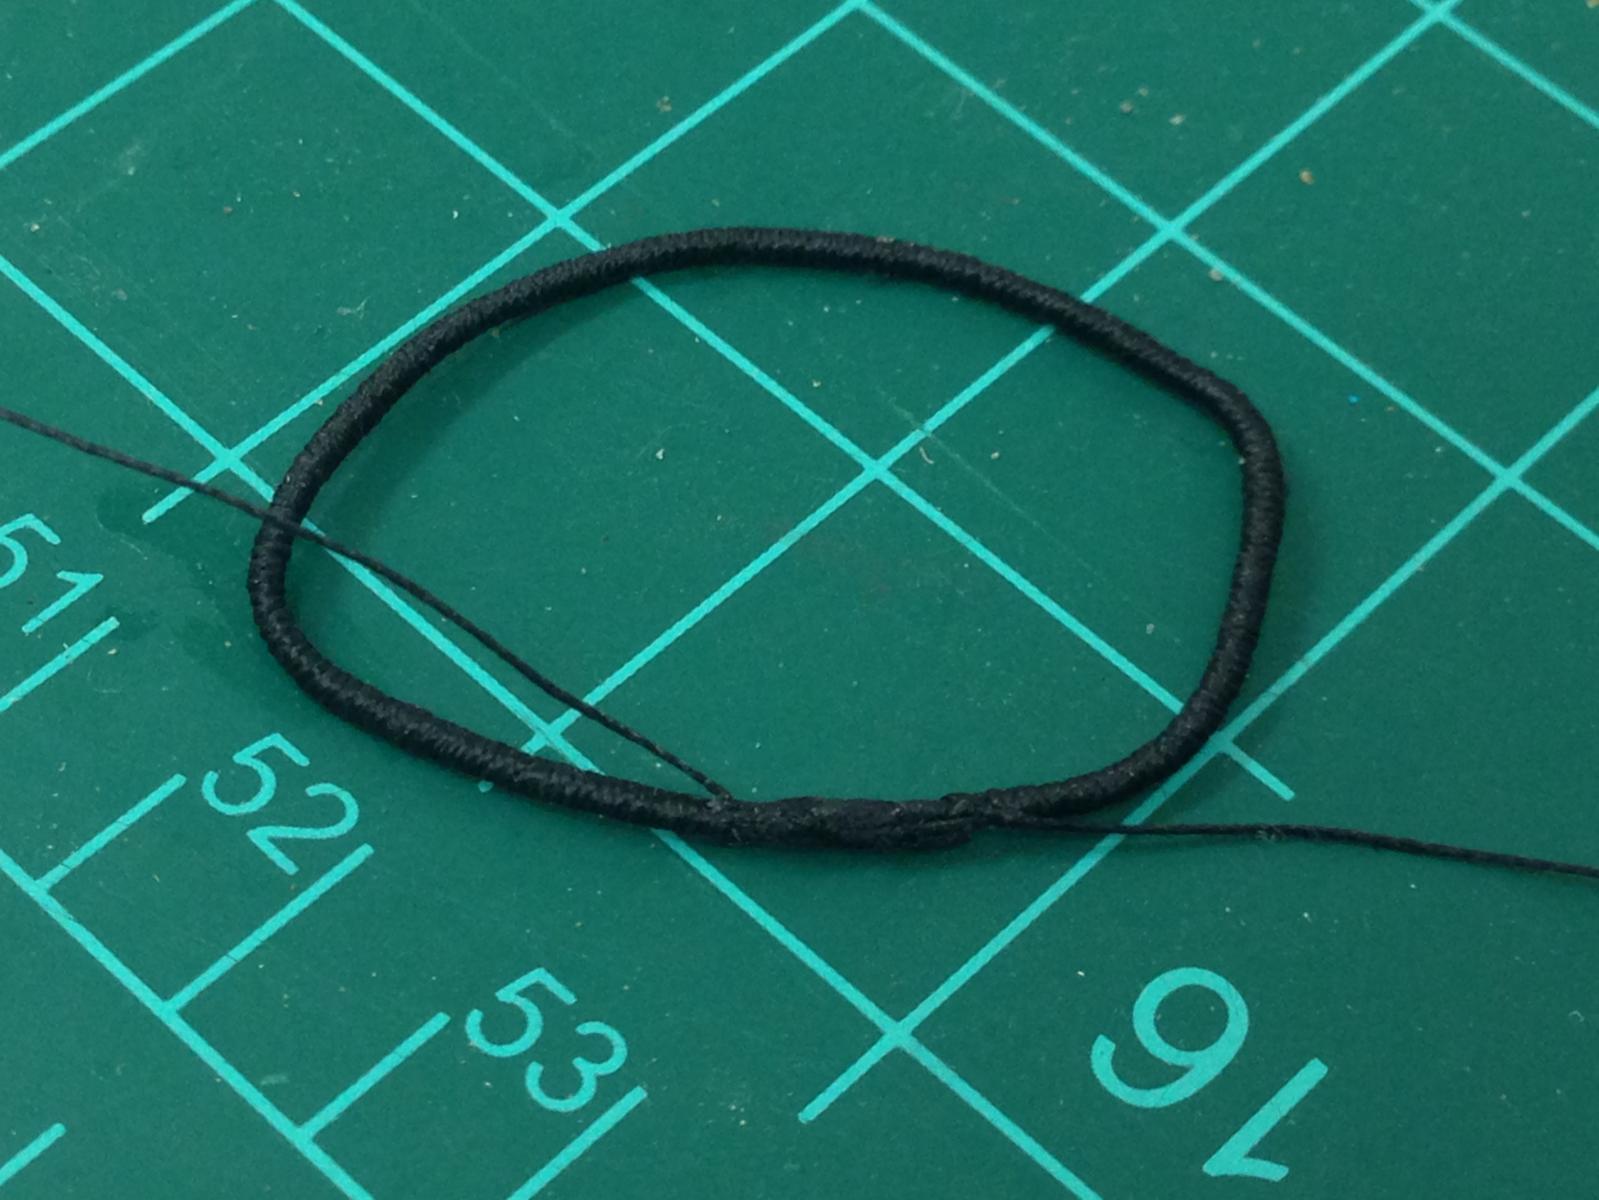
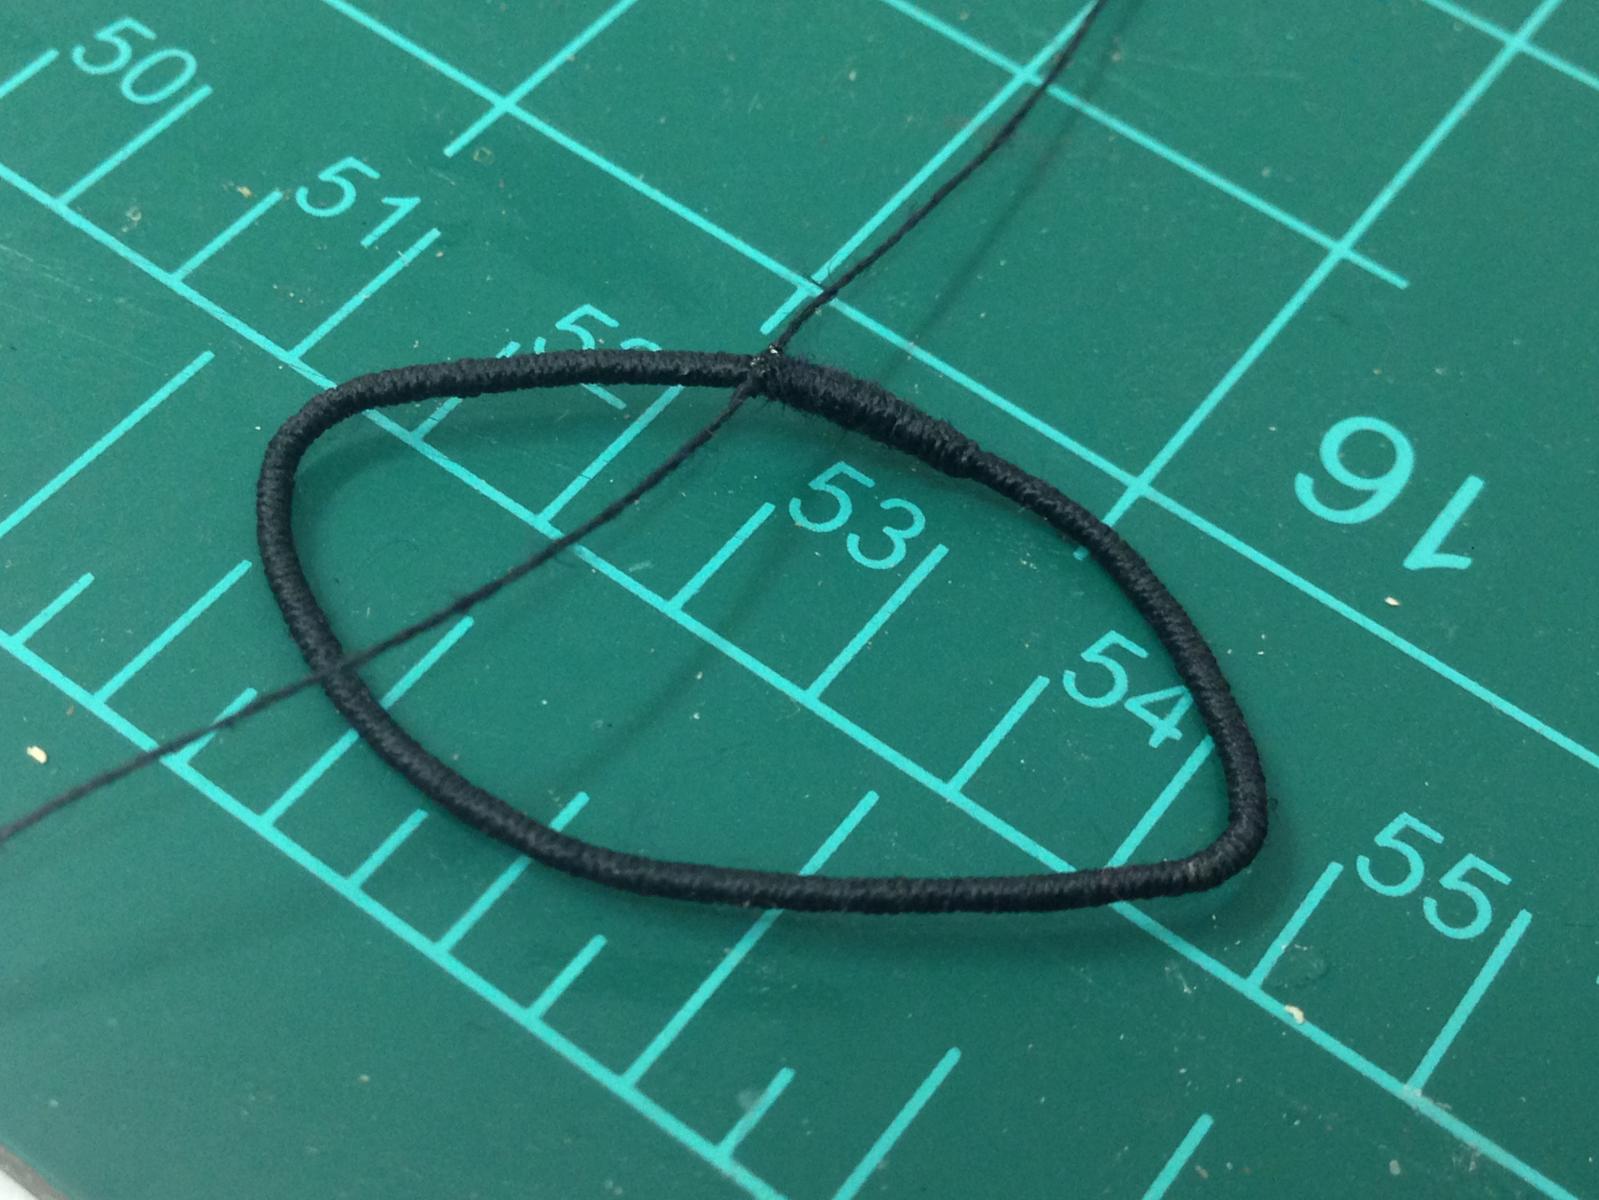
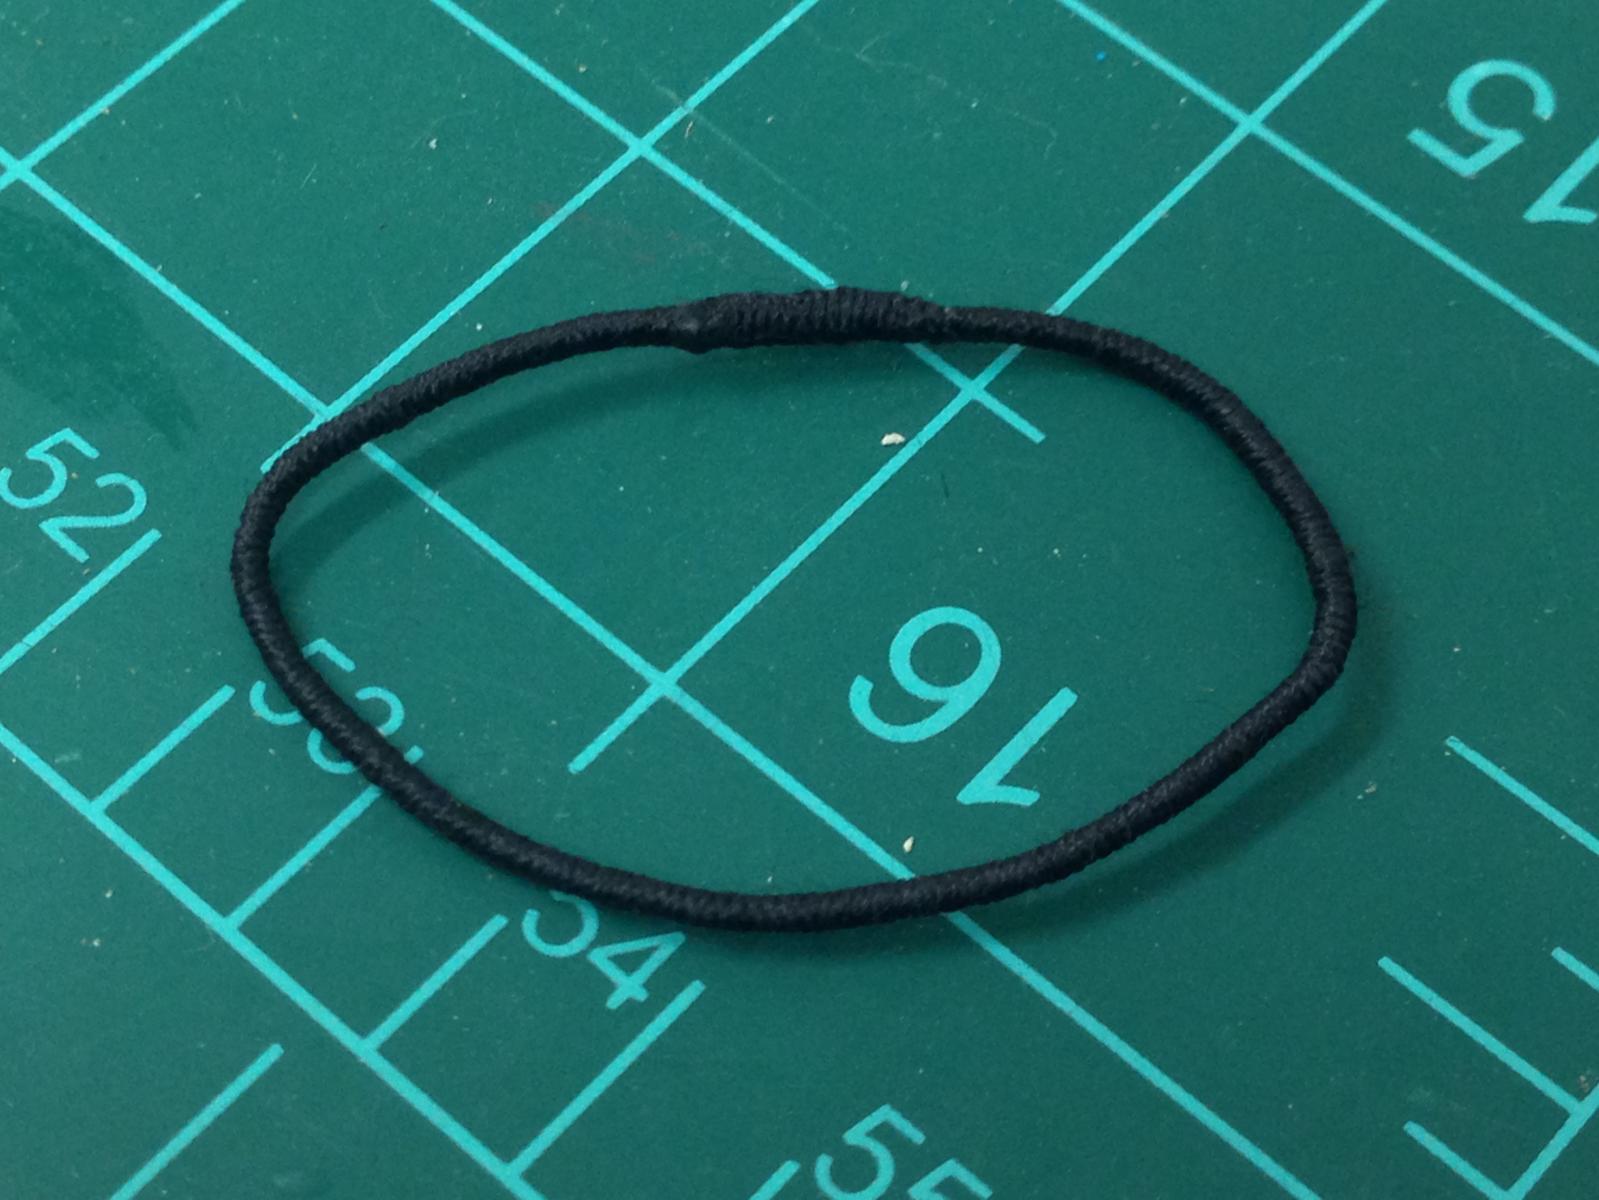
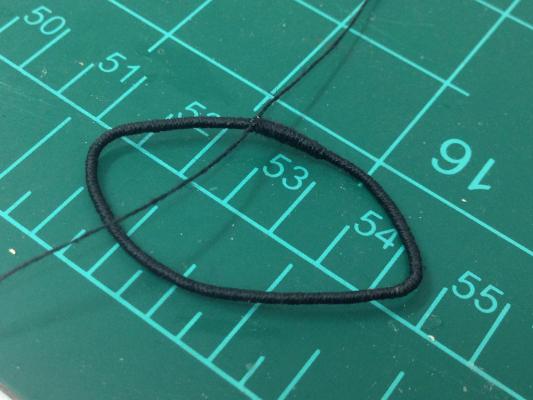
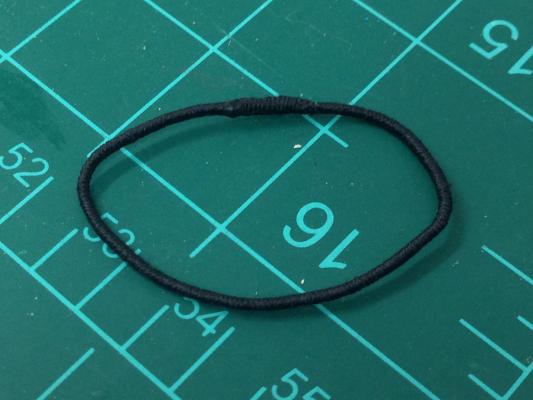
Carl, Jonny, Nils, Mort and Jim and the 'likes', thanks for the "welcome back"... Breaking up shaping the remaining yards with the first of what I suspect will be a lot of work on rigging the yards, the lower sling. Previously estimated length of line was served, and then fed through itself to make a loop. About 6mm was left to allow the end to be cut into a short taper. GS Hypo glue was then placed on the end and rolled between my fingers. The thin thread is the end of the serving line not yet trimmed) Thread was then used to cover the unserved join, I used consecutive overhand knots, alternating sides.... Maybe a little bulky, but once trimmed its a reasonable approximation to a spliced, served loop. Fitted to the main yard.... ....and length checked to confirm it is of correct length. Second time was a charm!


- 800 replies
-
- 16
-
-
- snake
- caldercraft
- (and 1 more)
-
Really looking forward to seeing this develop Nils, a beautiful ship.
- 2,625 replies
-
- 3
-
-
- kaiser wilhelm der grosse
- passenger steamer
- (and 1 more)
-
Jesse, a great question to which I also devoted a lot of time and energy on my 'Jason', but could never prove definitively. Looking at a variety of pictures as best I could, I came to the conclusion that there should be a smooth inflection at the transition from the planking of the hull to the lower counter on the 'faster' single decked ships - I'd lean more to the angle in the last picture than the first. The more vertical transition in your first picture seems to be more appropriate for ships of the line. Just my opinion from looking at lots of pictures and having to work through the same problem...I could be completely wrong!
- 1,306 replies
-
- 4
-
-
- syren
- model shipways
- (and 1 more)
-
Love your work Siggi, what I love about your work is that its impossible to tell the scale from the photos, everything looks as it you could be standing on the actual ship.
-
Very nice work Grant, way out of my league but you make it look easy.
- 456 replies
-
- 2
-
-
- finished
- bomb ketch
- (and 2 more)
-
Definitely interested in seeing these take shape Danny, the resin formers are a great idea. Shame its no longer available.
-
Best of luck Eric, just keep a positive mindset and all will be well. you'll get lots of help.
- 44 replies
-
- 1
-
-
- agamemnon
- caldercraft
- (and 1 more)
-
Dafi, you may have answered this elsewhere so I apologise if you have....but...what are you going to do when the lower deck is 'done'? Are you going to somehow keep the upper decks open so the detail can be see or will this be buried like the Pharaohs in the pyramids? Love your work, you should consider publishing book with your photos to bring the Georgian navy to life.